We may receive a commission when you use our affiliate links. However, this does not impact our recommendations.

Add a touch of color to your hallway.
Our front hall is usually a disorganized mess: coats on the floor, keys strewn here and there, and hats—well, I can never find them. I built this wall shelf to provide a place for everything and to display some decorative objects, too. When I was done, my wife thought it would be useful in the kitchen too. Now, I’m making a second one!
Most of the wall shelf is built from 3/4″ pine, which you can buy at a home center. Just be sure it’s flat and straight. I used some old wood from a house I was remodeling. The boards were mismatched in color and full of nail holes and other flaws, so I painted the wall shelf to blend the parts together. I used green because this color also symbolizes good stewardship of our resources, such as recycling this lumber.
The joinery is pretty simple. Most of the parts are just butted and nailed together. Biscuits reinforce these joints and align the parts, making assembly easier.
Green Wall Shelf Cut List
Overall Dimensions: 26″ H x 42″ L x 6-1/2″ D
|
Part |
Name |
Qty. |
Material |
Th x W x L |
|
A |
Side |
2 |
Reclaimed Pine |
3/4″ x 5-1/2″ x 25-1/4″ |
|
B |
Bottom shelf |
1 |
Reclaimed Pine |
3/4″ x 5-1/2″ x 39″ |
|
C |
Middle shelf |
1 |
Reclaimed Pine |
3/4″ x 5-1/8″ x 39″ |
|
D |
Divider |
3 |
Reclaimed Pine |
3/4″ x 5-1/8″ x 3-1/2″ |
|
E |
Top |
1 |
Reclaimed Pine |
3/4″ X 6-1/2″ x 42″ |
|
F |
Peg board |
1 |
Reclaimed Pine |
3/4″ x 3-3/4″ x 39″ |
|
G |
Wall cleat |
1 |
Reclaimed Pine |
3/4″ x 2″ x 39″ |
|
H |
Back board |
14 |
Pine bead board |
5/16″ x 3-1/16″ x 20-1/4″ |
|
J |
Drawer front |
4 |
Reclaimed Pine |
1/2″ x 3-7/16″ x 9-1/8″ |
|
K |
Drawer side |
8 |
Reclaimed Pine |
1/2″ x 3-7/16″ x 4-7/8″ |
|
L |
Drawer back |
4 |
Reclaimed Pine |
3/8″ x 3-1/16″ x 8-5/8″ |
|
M |
Drawer bottom |
4 |
Plywood |
1/4″ x 4-7/8″ x 8-5/8″ |
|
N |
Drawer knob |
4 |
||
|
P |
Peg |
5 |
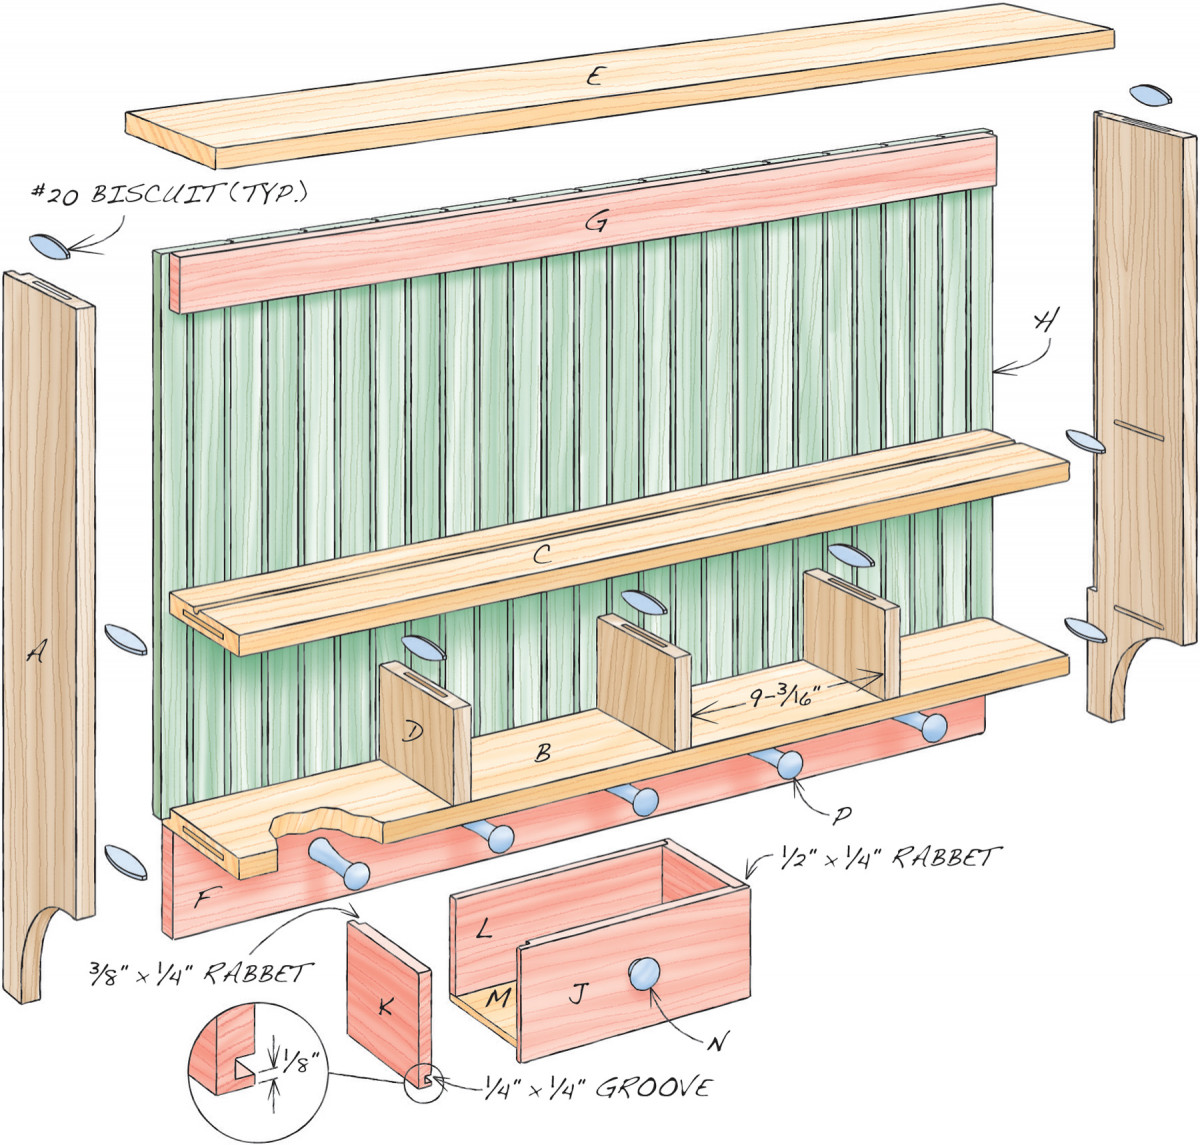
Fig. A) Exploded View
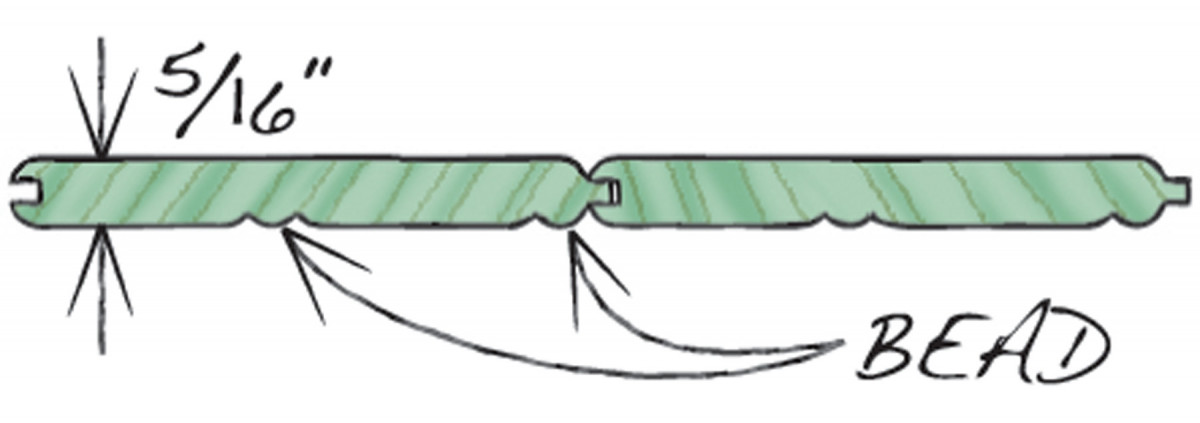
Fig. B) Back
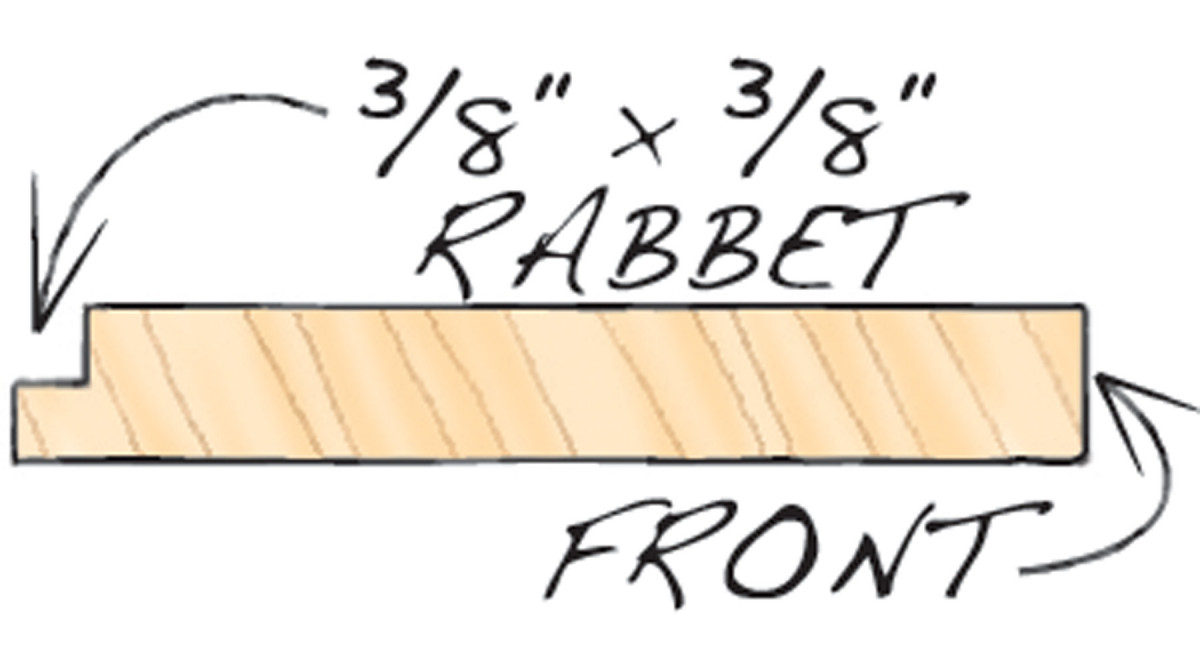
Fig. C) Bottom Shelf
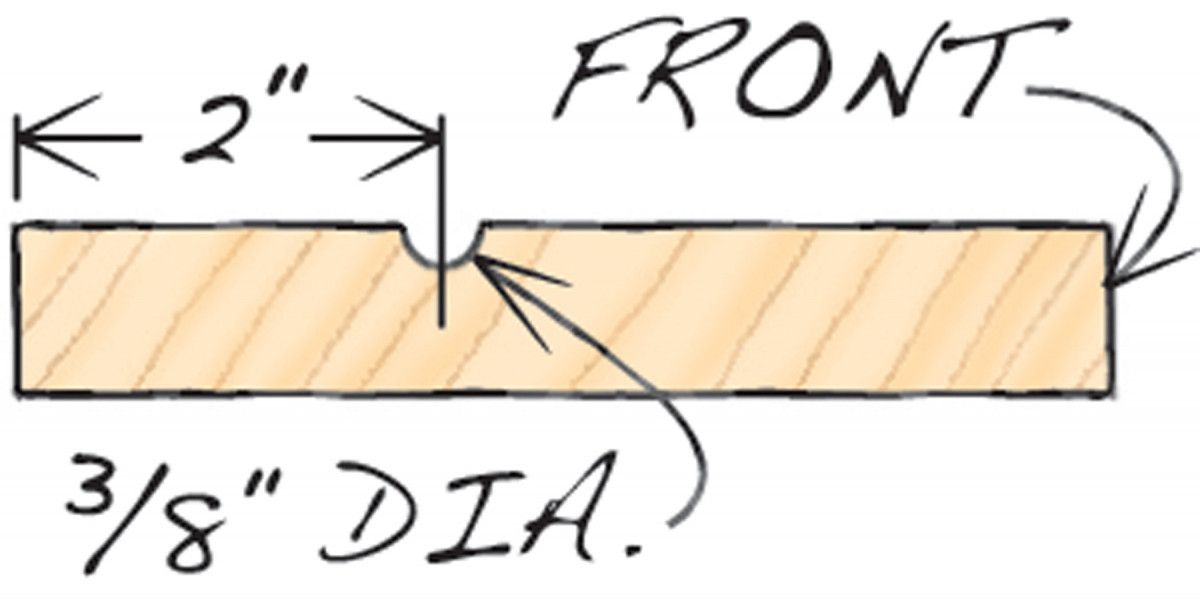
Fig. D) Middle Shelf

Fig. E) Side
Make the parts
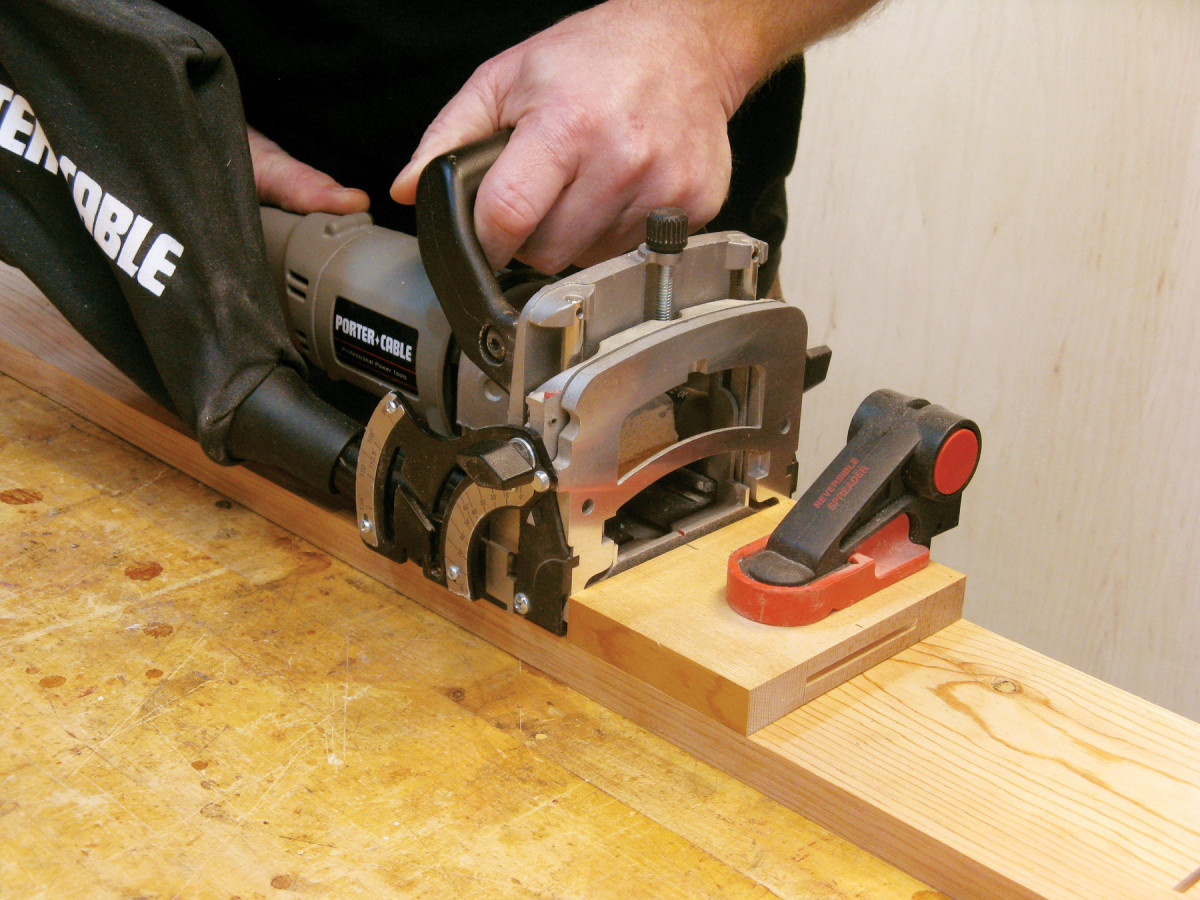
1. Cut biscuit joints in the drawer dividers.
1. Start by ripping the sides (A) and bottom shelf (B) to the same width. Also, rip the middle shelf (C) and dividers (D) to the same width. Rip the top (E), peg board (F) and wall cleat (G) to width. Trim all of these pieces to length. Note that the shelves, peg board and cleat are the same length.
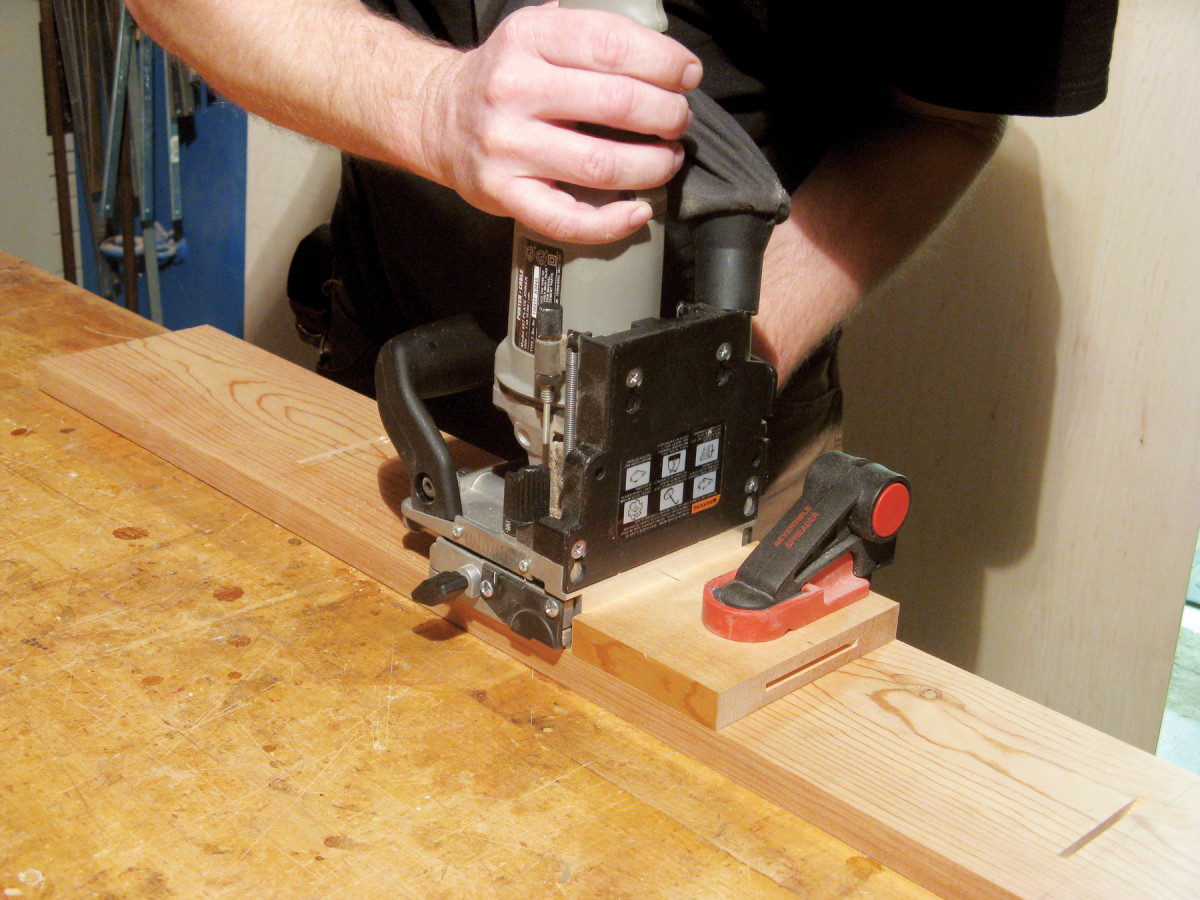
2. Cut mating joints in the shelves.
2. Lay out the spacing of the drawer dividers on the middle and lower shelves (Fig. A). Cut biscuit joints in the drawer dividers (Photo 1) and shelves (Photo 2).
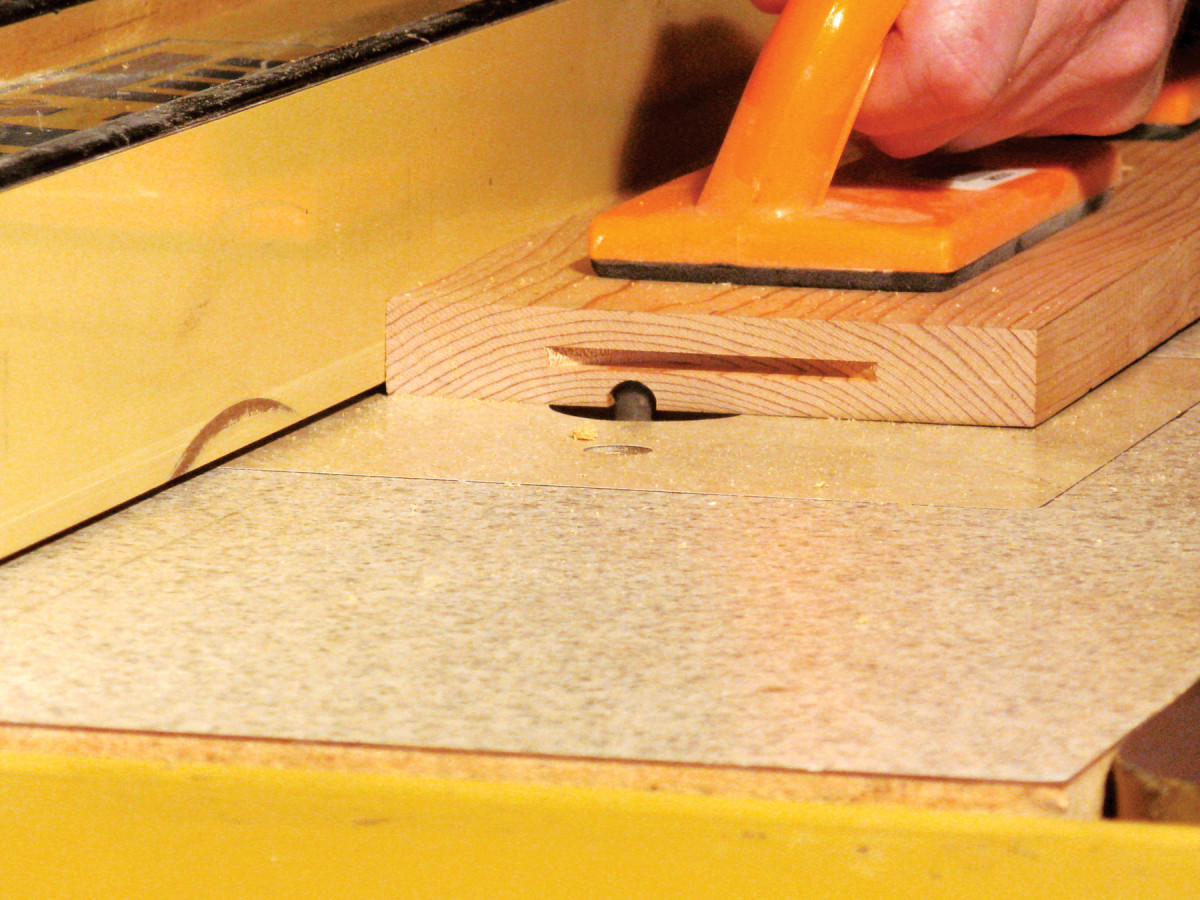
3. Rout a plate groove in the middle shelf using a core box bit.
3. Rout a plate groove in the middle shelf (Photo 3 and Fig. D). Dado or rout a rabbet in the back edge of the bottom shelf to receive the back boards (Fig. C).
4. Temporarily clamp together the two shelves and the drawer dividers. Stand this assembly on one of the sides, in the correct location (Fig. E), and draw lines around the ends of the shelves. Remove and unclamp the assembly. Butt the marked side to the unmarked side and transfer the layout lines. Cut biscuit joints in the sides and the ends of both shelves.
5. Cut and smooth arches in the bottom ends of the sides (Fig. E). Rout a rabbet on the sides for the back boards. Drill holes for the pegs (P) in the peg board.
Assembly
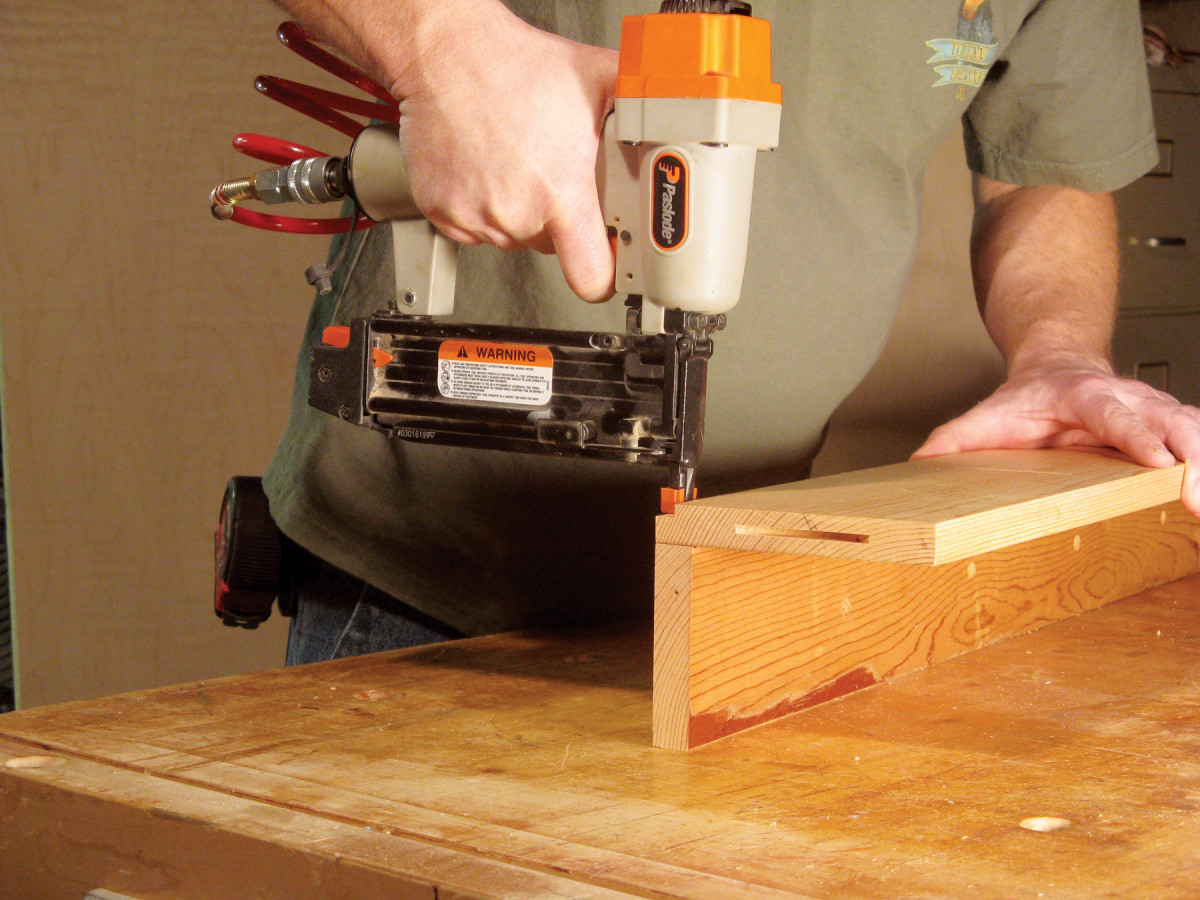
4. Fasten the bottom shelf to the peg board.
6. Glue and nail the bottom shelf to the peg board (Photo 4). Make sure the ends are flush. Add the drawer dividers and middle shelf (Photo 5). Make sure the fronts of these pieces are flush.
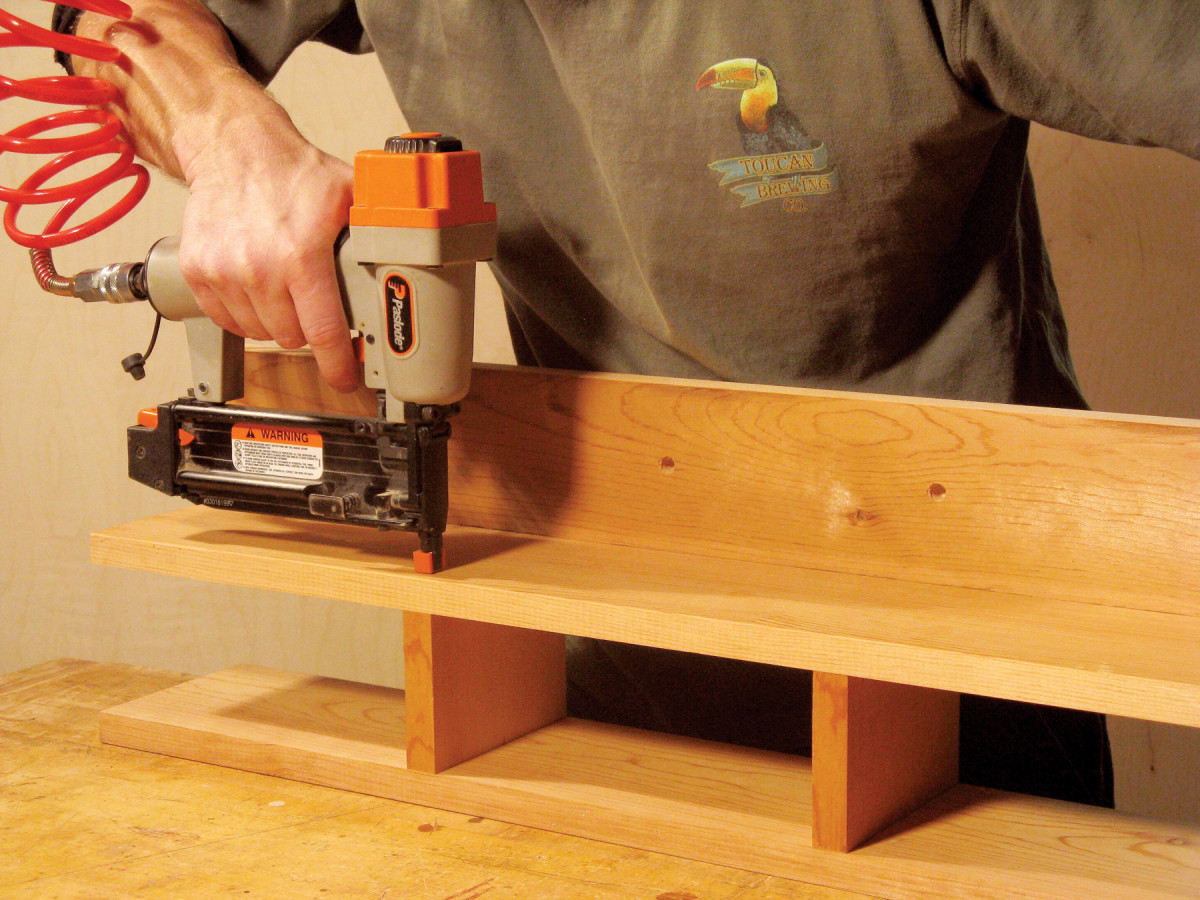
5. Fasten this assembly to the drawer dividers and middle shelf, using biscuits and nails.
7. Add the sides (Photo 6). Clamp these joints, too.
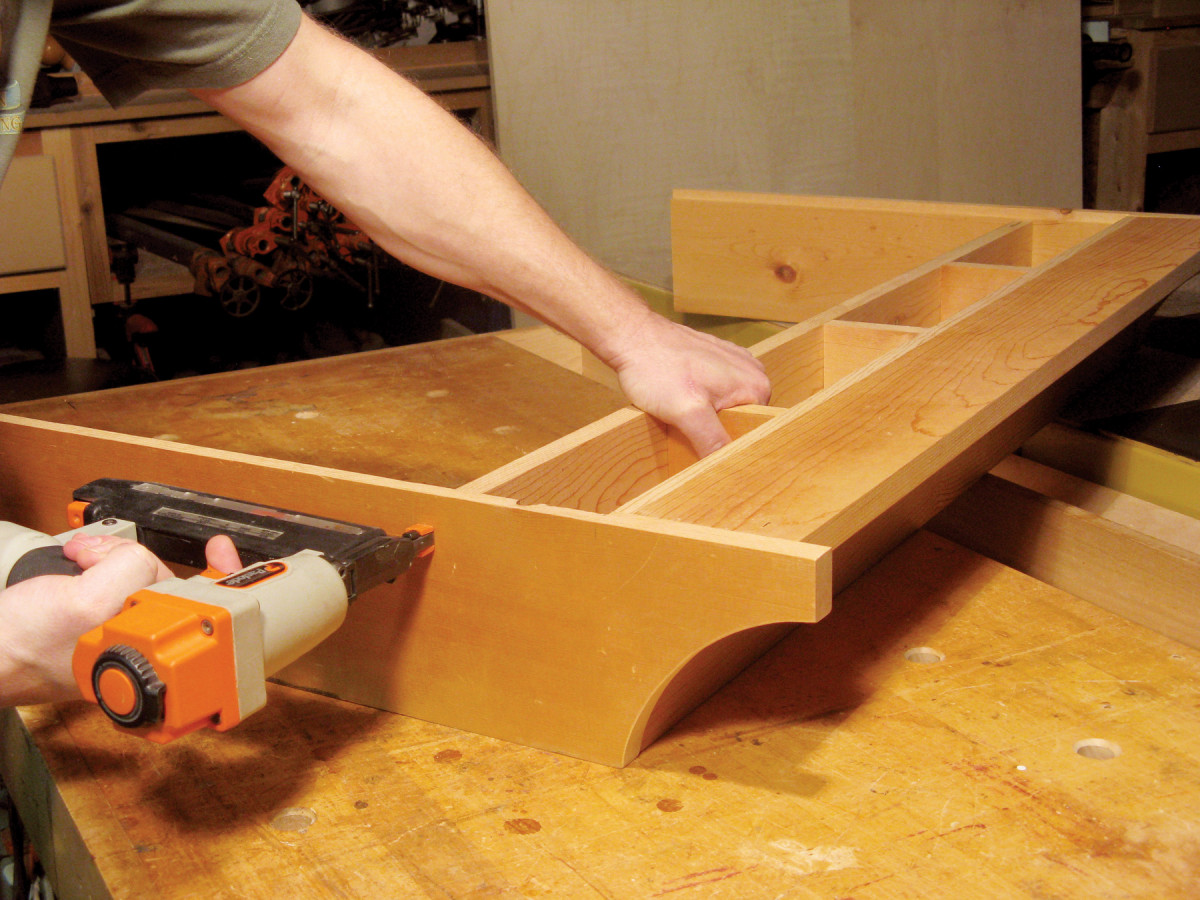
6. Fasten the sides. They’re joined to the shelves with biscuits, too.
8. Once the glue is dry, stand this assembly upside down on the top piece. Mark around the sides on the top, then cut biscuit slots in the top and ends of the sides. Glue the top to the assembly (Photo 7).
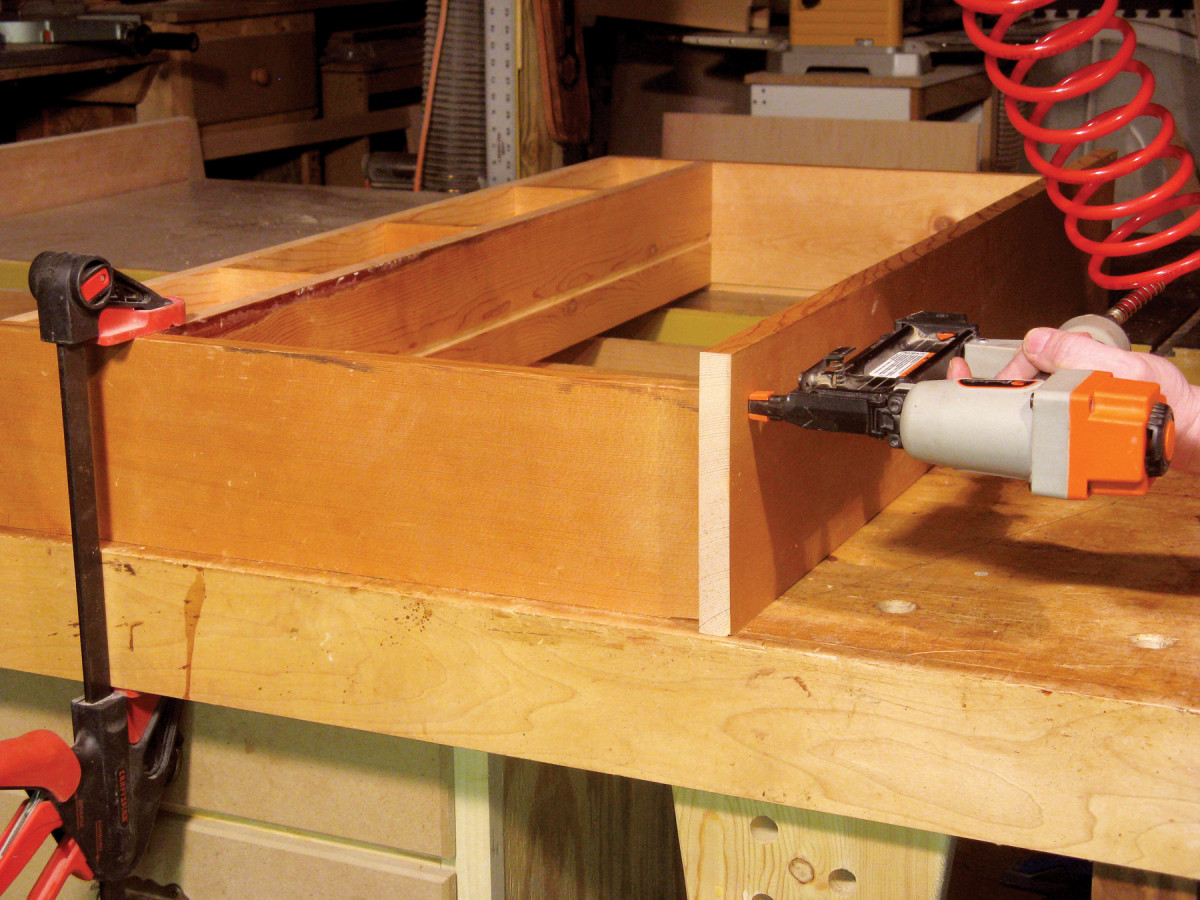
7. Add the top. Using a nail gun makes assembly go fast.
9. Glue the wall cleat to the underside of the top. Then add the back boards (Photo 8 and H). I purchased this material, ready to go, at a home center, but you could make your own. When you install these pieces, leave at least a 1/16″ gap between each tongue and the bottom of each groove. This space is necessary to allow these pieces to expand when the humidity is high. Each piece won’t move much, but taken as a whole, the width of all the back boards could increase by as much as 1/2″.
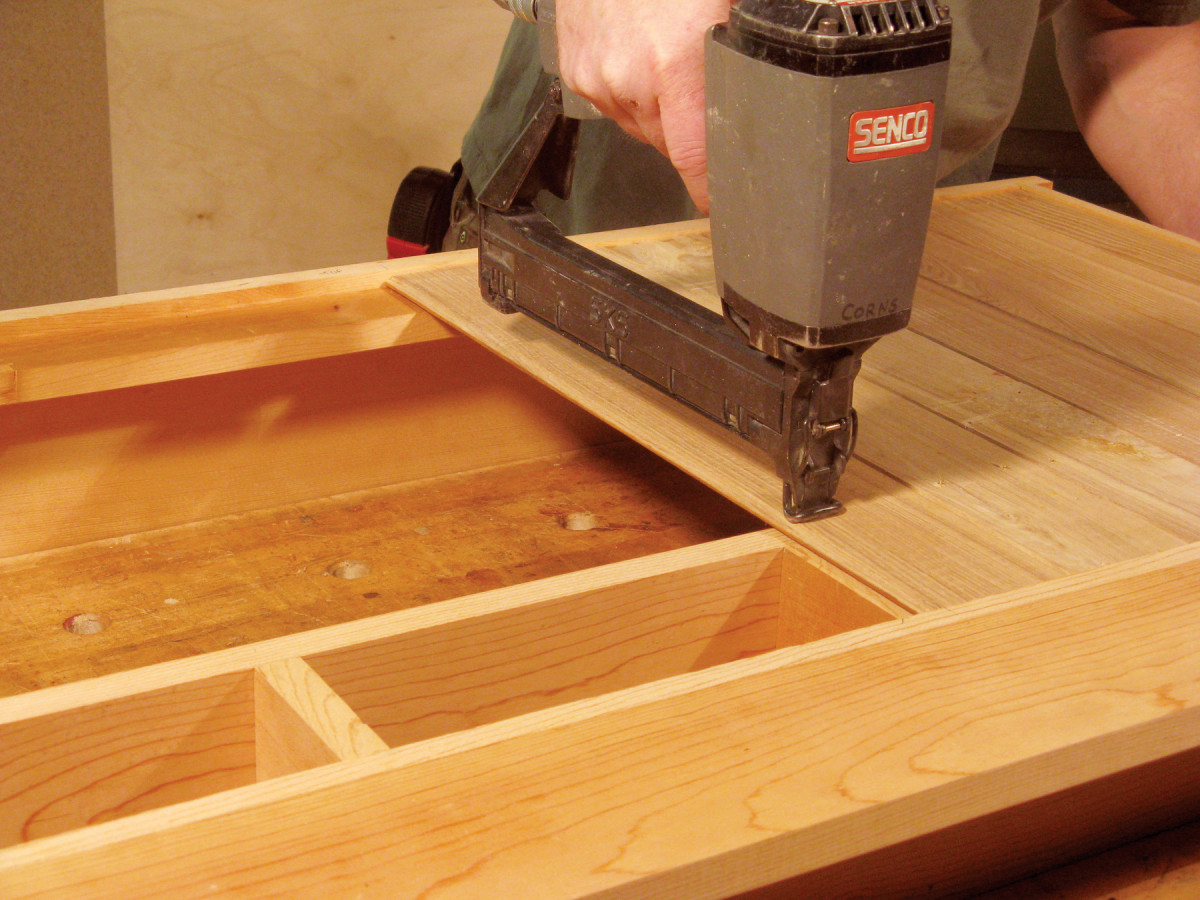
8. Attach the back boards, which are thin pieces of tongue-and-groove paneling.
Build the drawers
10. Rip stock for the drawer fronts (J) and sides (K). Rip stock for the backs (L), which are 3/8″ narrower. Trim the fronts to length, about 1/16″ less than the actual drawer openings. Trim the backs 1/2″ shorter than the fronts.
11. Cut grooves in the drawer fronts and sides for the drawer bottoms (M, Fig. A). Cut rabbets in the drawer fronts and sides. Drill holes for knobs (N) in the drawer fronts.
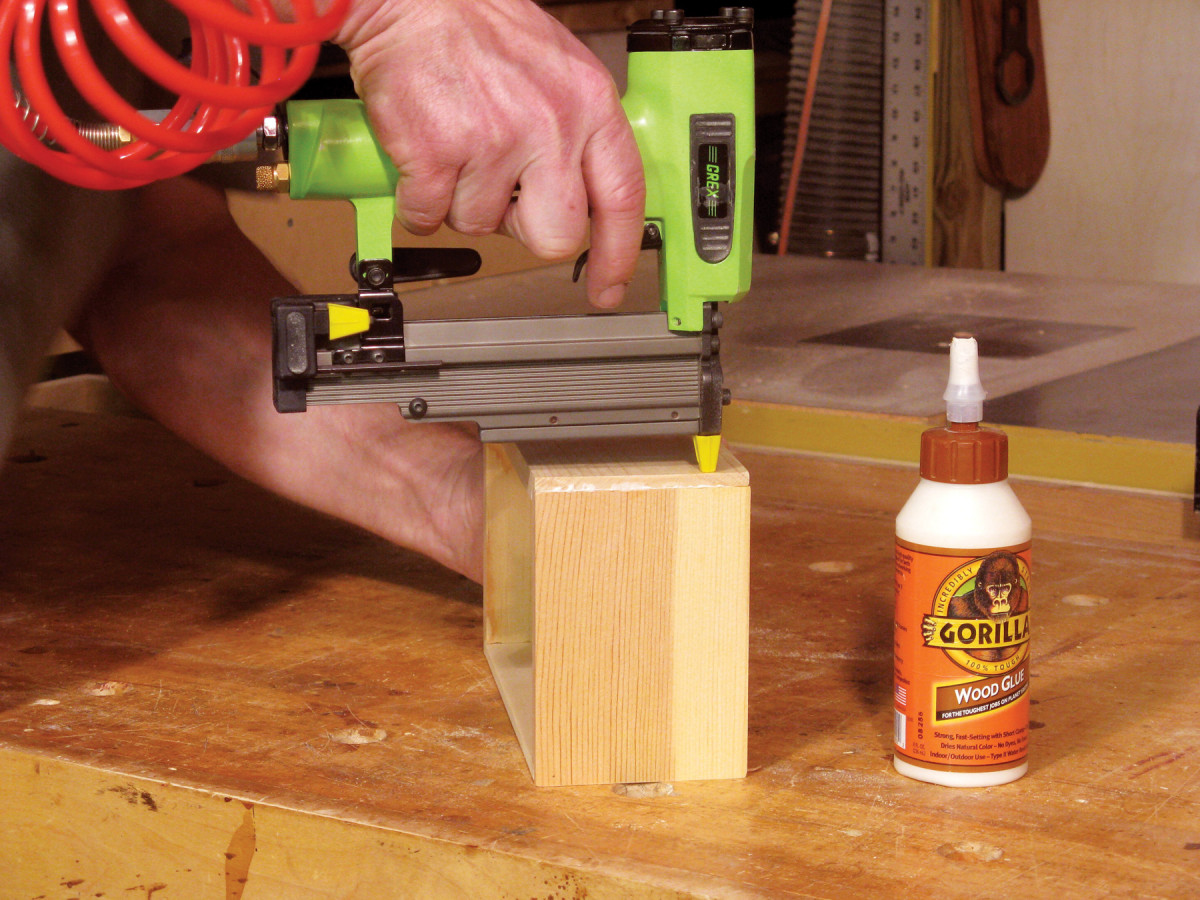
9. Nail the drawers. The sides are rabbeted into the front and back pieces.
12. Temporarily clamp the drawers together and cut bottoms to fit. Glue and nail the drawers together (Photo 9). As you assemble each drawer, insert the bottom to keep the drawer square.
13. Glue knobs [Purchase Here] in the drawers and pegs [Purchase Here] in the peg board.
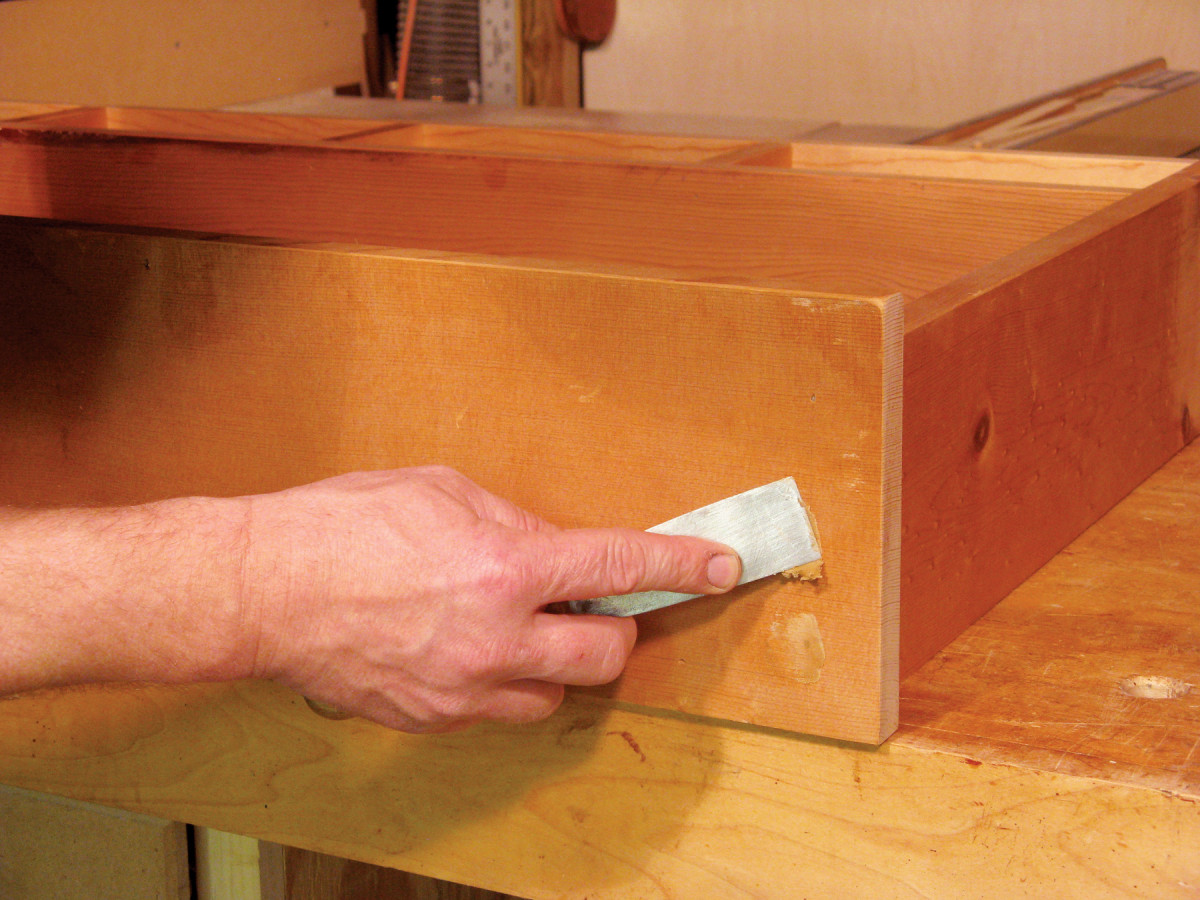
10. Putty the nail holes, and you’re ready to paint!
14. Fill the nail holes with putty (Photo 10), and you’re ready to paint.
Finishing
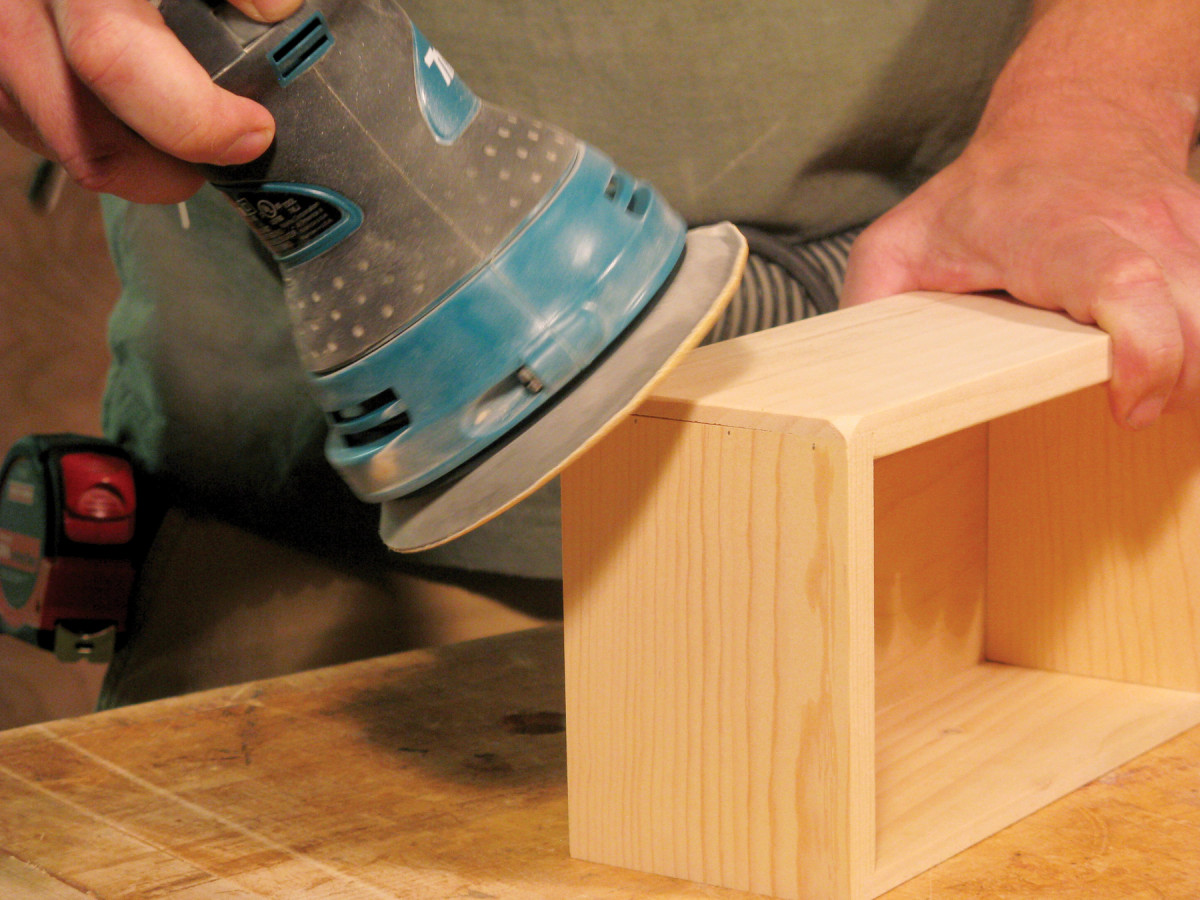
11. Soften all edges and corners with a power sander and by hand sanding.
15. Begin by softening every edge, as if it’s been handled for years (Photo 11). Then roughen up exposed surfaces a bit with a classic faker’s tool: a bunch of keys and other hardware attached to a chain (Photo 12).
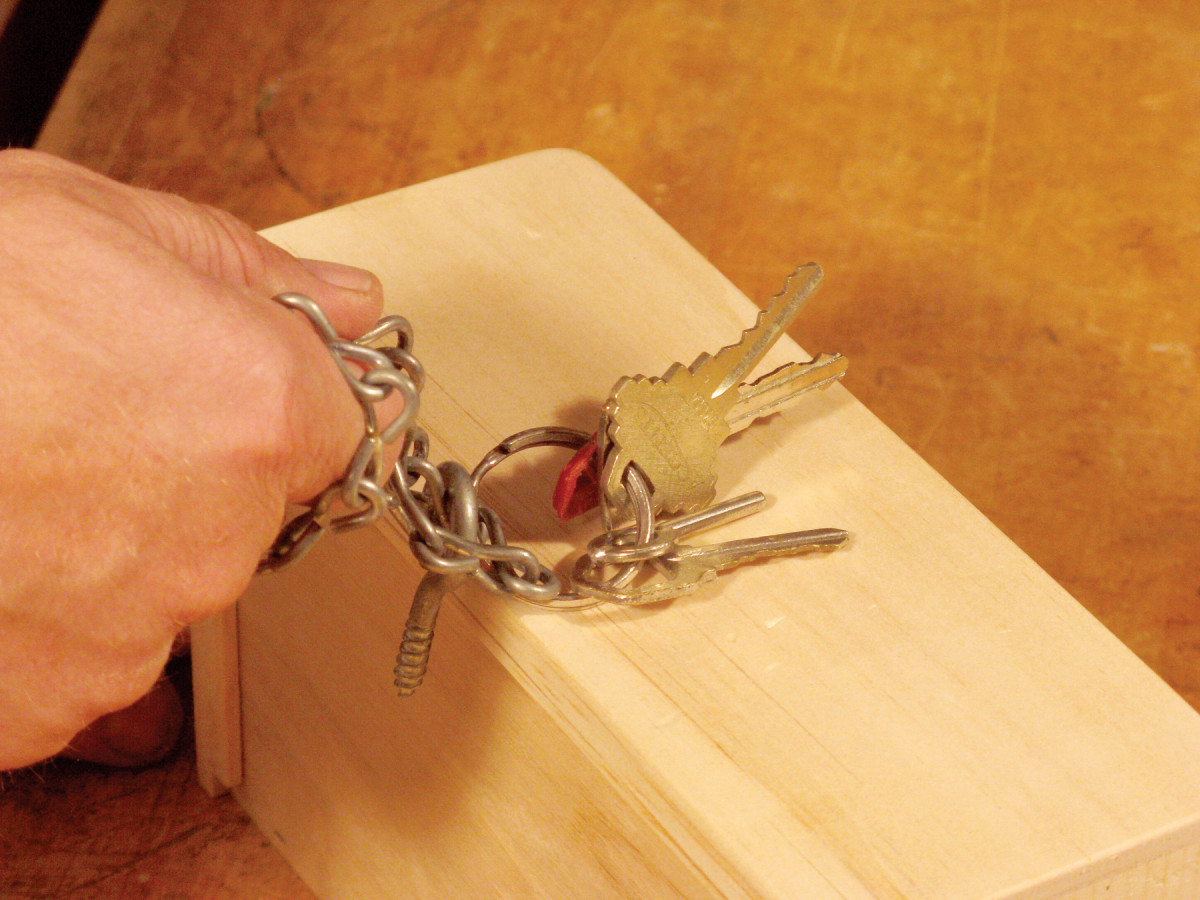
12. Imitate nicks and bruises by banging on the wood with a set of keys on a chain.
16. To simulate years of grit, apply an acrylic texturing compound (Photo 13 and Sources, at bottom). You can leave it thick or smooth it out with the sponge.
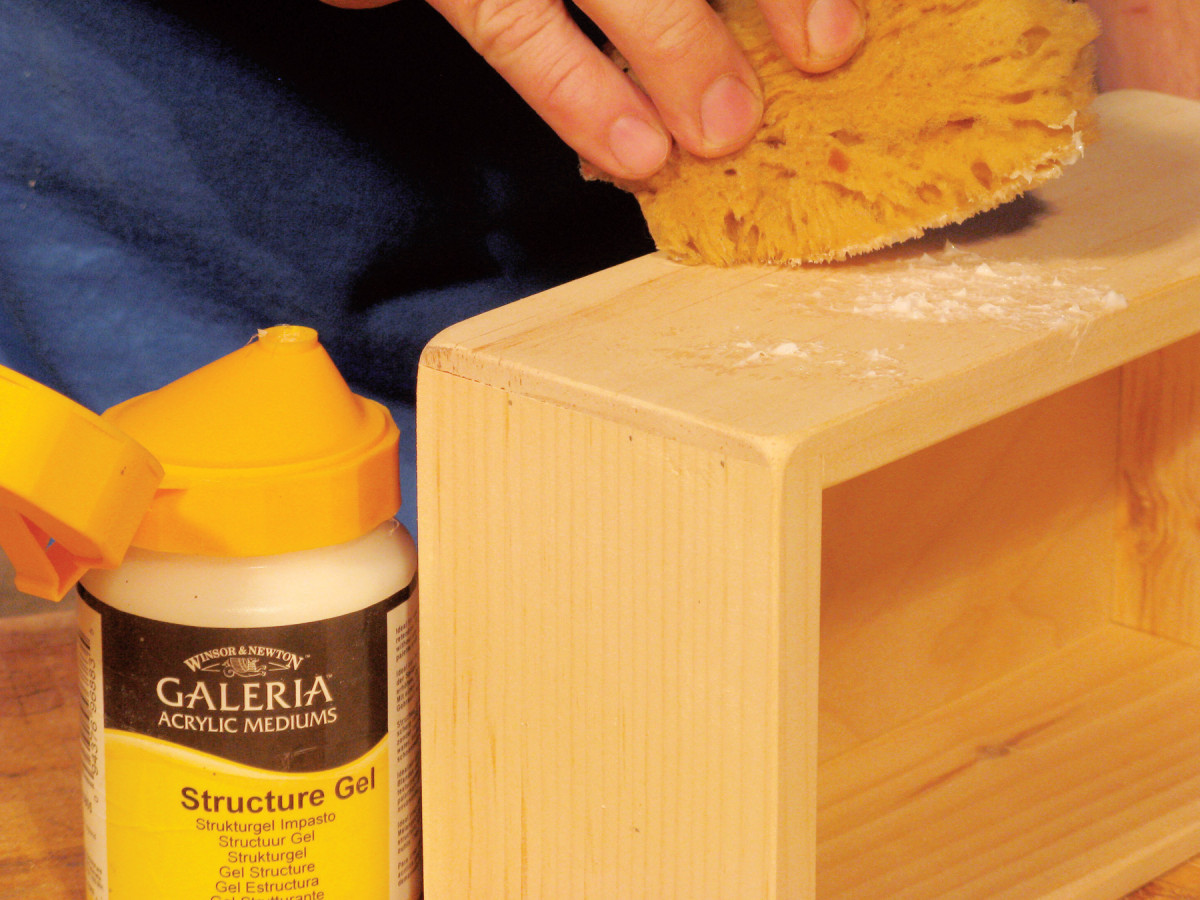
13. Sponge on a texturing compound to create a slightly rough surface.
17. Apply your favorite paint (Photo 14).
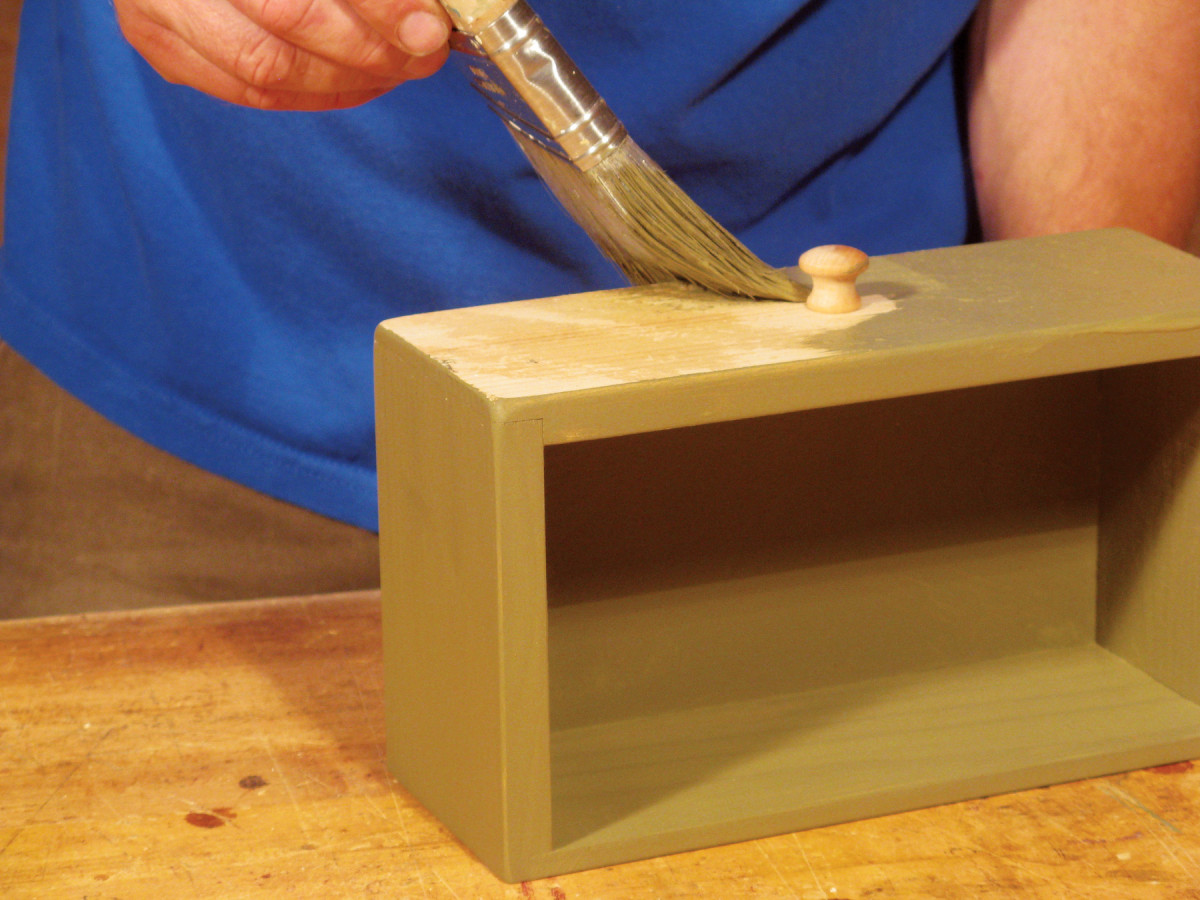
14. Paint over the texturing compound after the compound dries.
18. Mute the paint’s color and add some grime by applying a glaze (Photo 15 and Sources). Use your brush to work the glaze around until your project looks natural and well-loved.
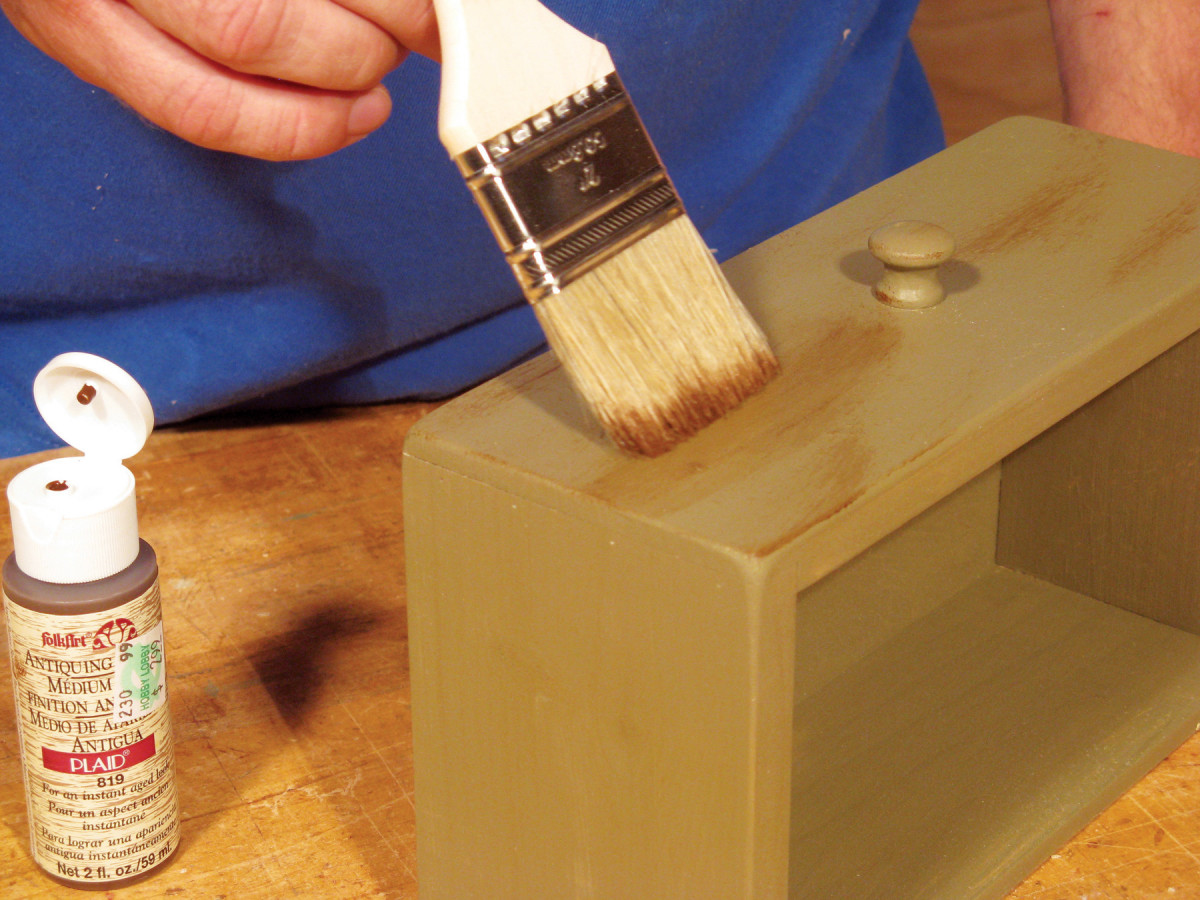
15. Add brown glaze to imitate wear and handling.
Installation
19. The wall shelf should be flush to the wall and secured to studs. There are lots of ways to hang it. I used keyhole slots cut in the back of the wall cleat and hung the cabinet on long pan head screws driven into the studs. That’s fussy work, though. It would be easier to just drive screws right through the face of the wall cleat and into the studs
SOURCES
• Folk Art Antiquing Medium (glaze), #819, Apple Butter Brown, 2 oz.
•Winsor & Newton Structure Gel (texturing compound), #02006-2105, 250 ml
Here are some supplies and tools we find essential in our everyday work around the shop. We may receive a commission from sales referred by our links; however, we have carefully selected these products for their usefulness and quality.


