We may receive a commission when you use our affiliate links. However, this does not impact our recommendations.
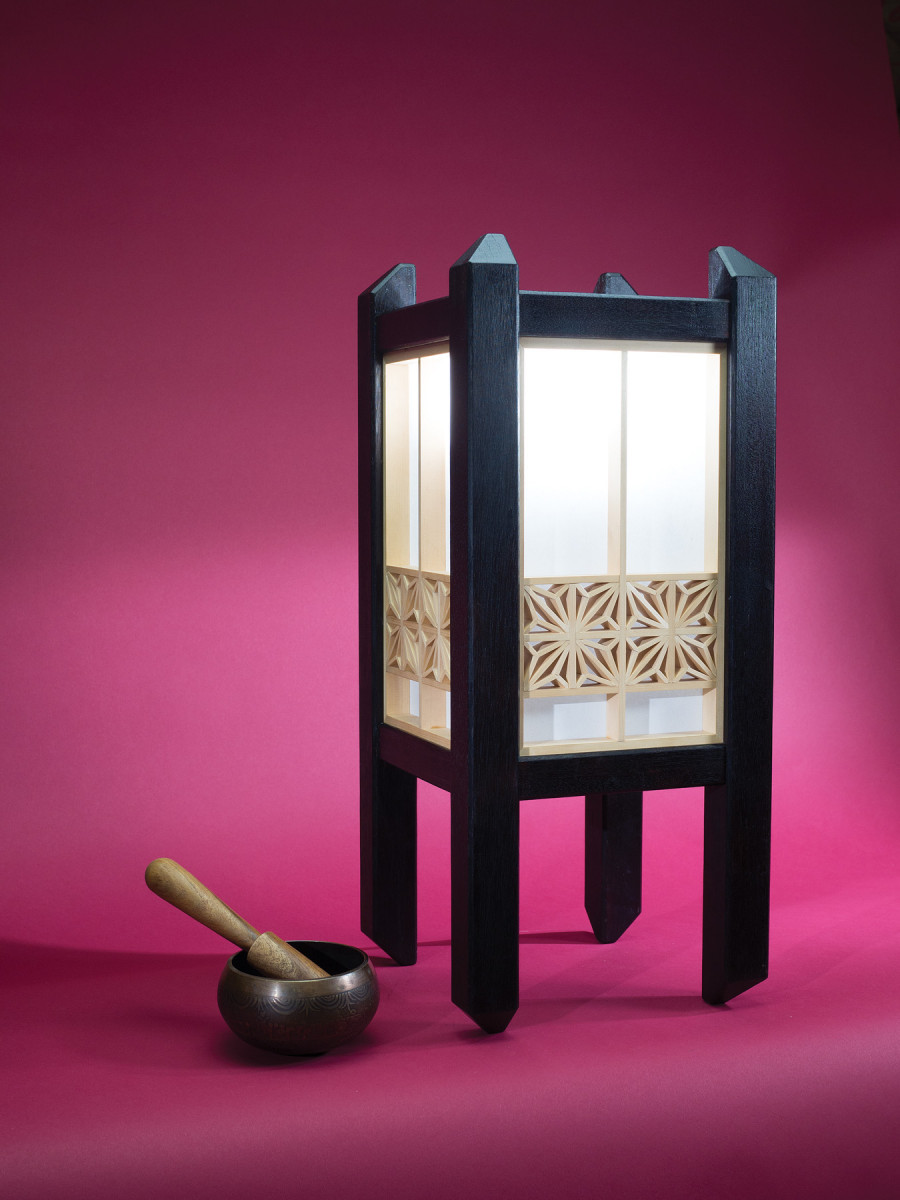
The road to enlightenment is paved with lots of little strips of wood.
I am not by nature organized or detail-oriented. When I was young, I was the guy with the punk rock blaring and the messed-up clothes; the dog often ate my homework. Even as an adult, attention to detail is not my strong suit.
So it used to puzzle me why, as a craftsman, I’m attracted to detailed, obsessive and small-scale work. You’d think I’d have made a better chainsaw sculptor than infill planemaker.
I now realize my shortcomings are why I gravitate to things that seem out of character – because while I’m making tools and furniture I’m also working on myself. With each project, I improve my patience, my focus and my appreciation for details. And, in the end, making what’s difficult is infinitely more satisfying than making what comes easily.
Though I’m still the unkempt guy with the music loud, work like this has made me a better craftsman.
Whether you’re looking for spiritual attainment, are interested in taking your hand skills to the next level of precision or need an excuse to use a blowtorch, this Japanese-influenced Andon-style lamp is worth the effort. It combines basic hand and power tools with a few purpose-made jigs – and a lot of attention to detail – to produce a beautiful reminder that patience is the key to wisdom.
Plus, you get to set it on fire. Sweet.
Materials
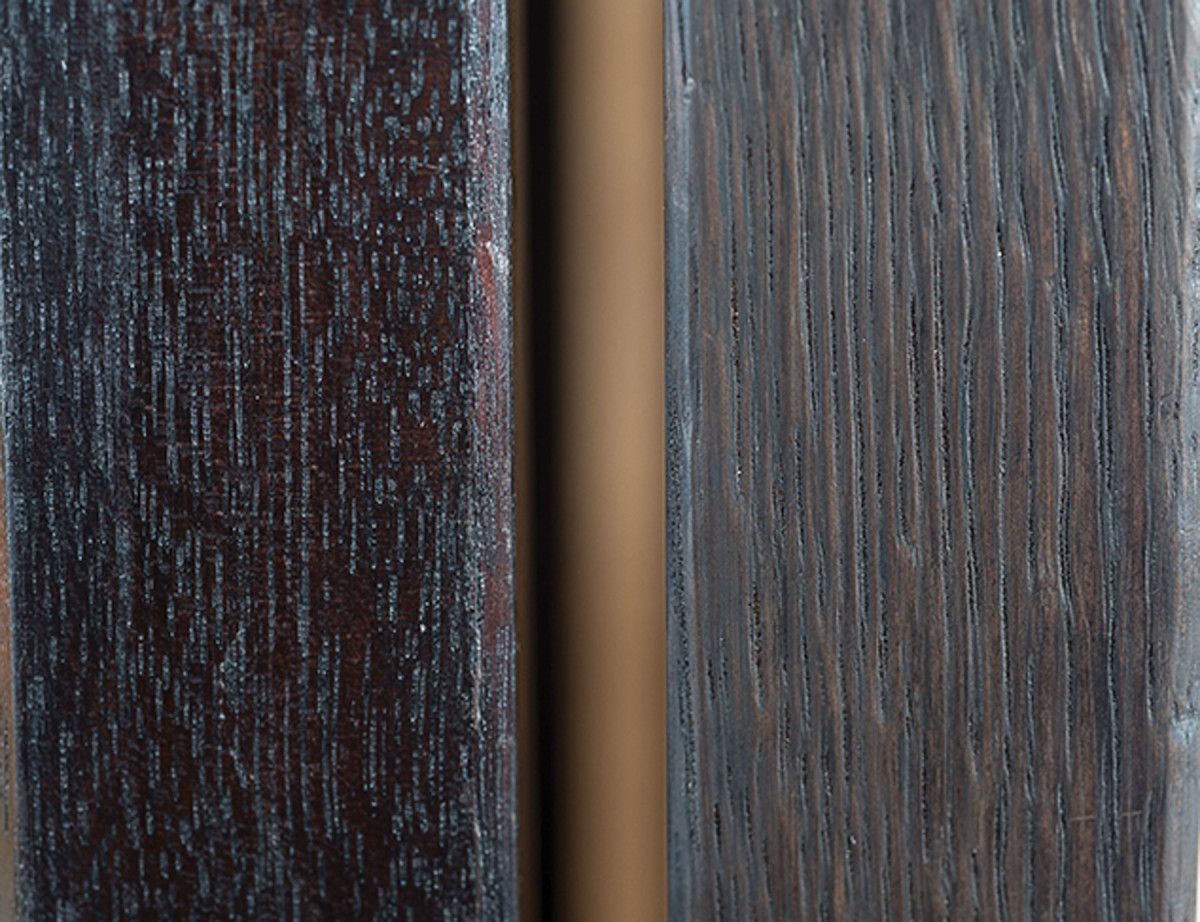
Charred. Diffuse-porous mahogany (left) keeps some of its color and chatoyance, thanks to a film coat of shellac. Ring-porous woods such as oak (right) develop great texture as earlywood burns off.
The lamp is basically a four-sided frame and panel, with an outer structure of flame-charred hardwood and interior panels of softwood lattice.
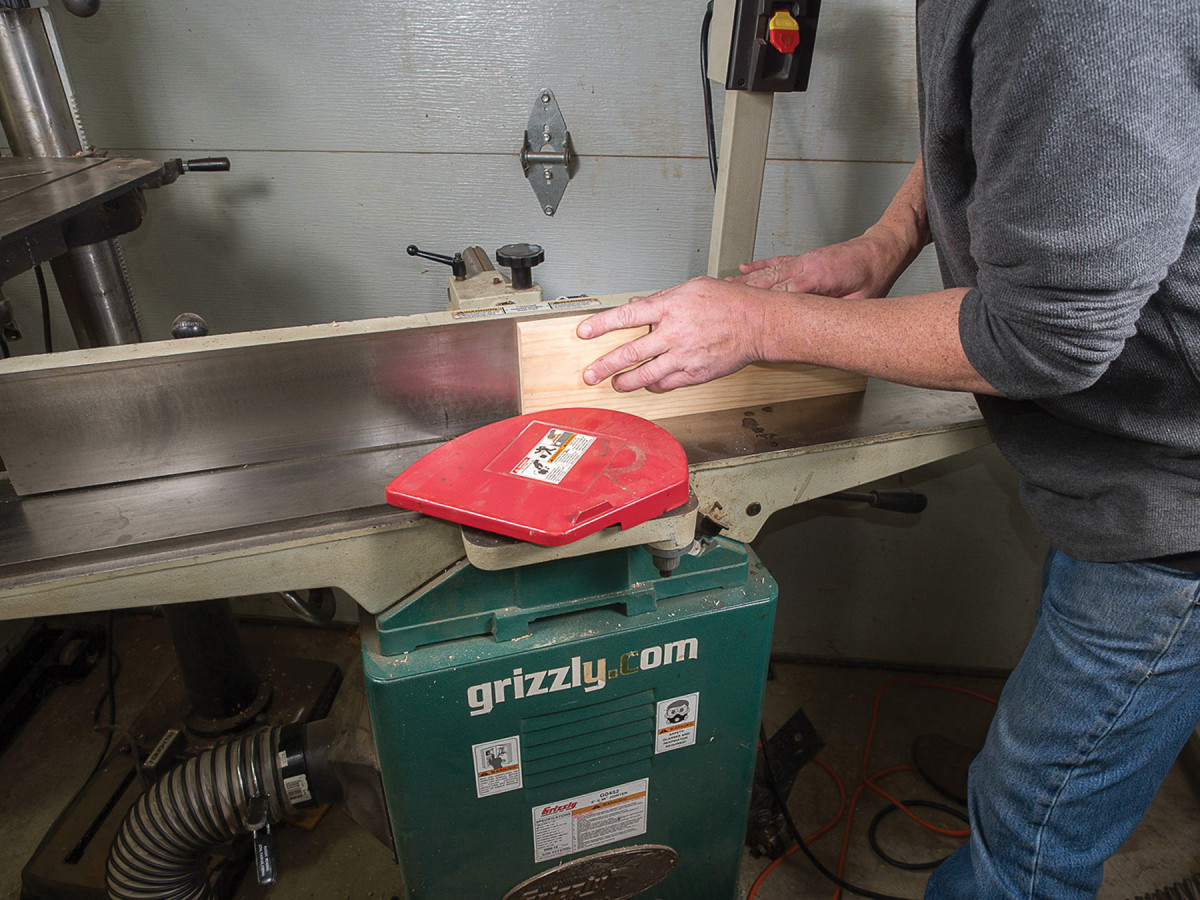
Kumiko stock prep. Start with finish-planed 3⁄4″-thick boards. Joint both edges flat.
For the outer structure (the legs), oak, ash and hickory look great with a heavy char, while mahogany and walnut look best with a lighter char to retain chatoyance and color.
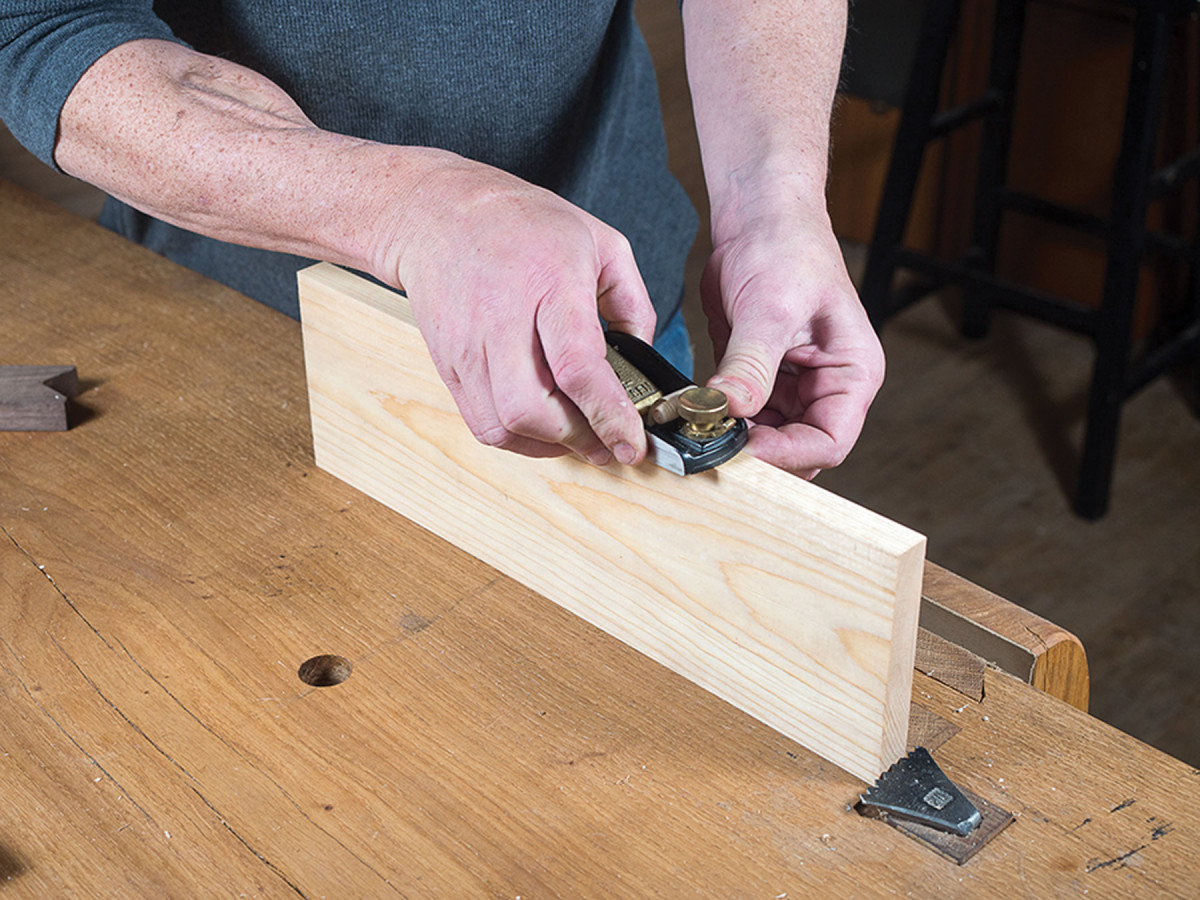
Then finish plane before band-sawing strips a bit thick.
For the lattice components, straight-grained softwoods work best. “Kumiko” is the general term for the strips of wood that go into the lattice, as well as for the work itself. Traditionally, Japanese hinoki cypress is the wood of choice for kumiko. In North America, both Alaskan yellow and Port Orford cedars are similar to hinoki, and both finish beautifully. If you can’t find these, white pine and basswood also work, though the results are not as crisp.
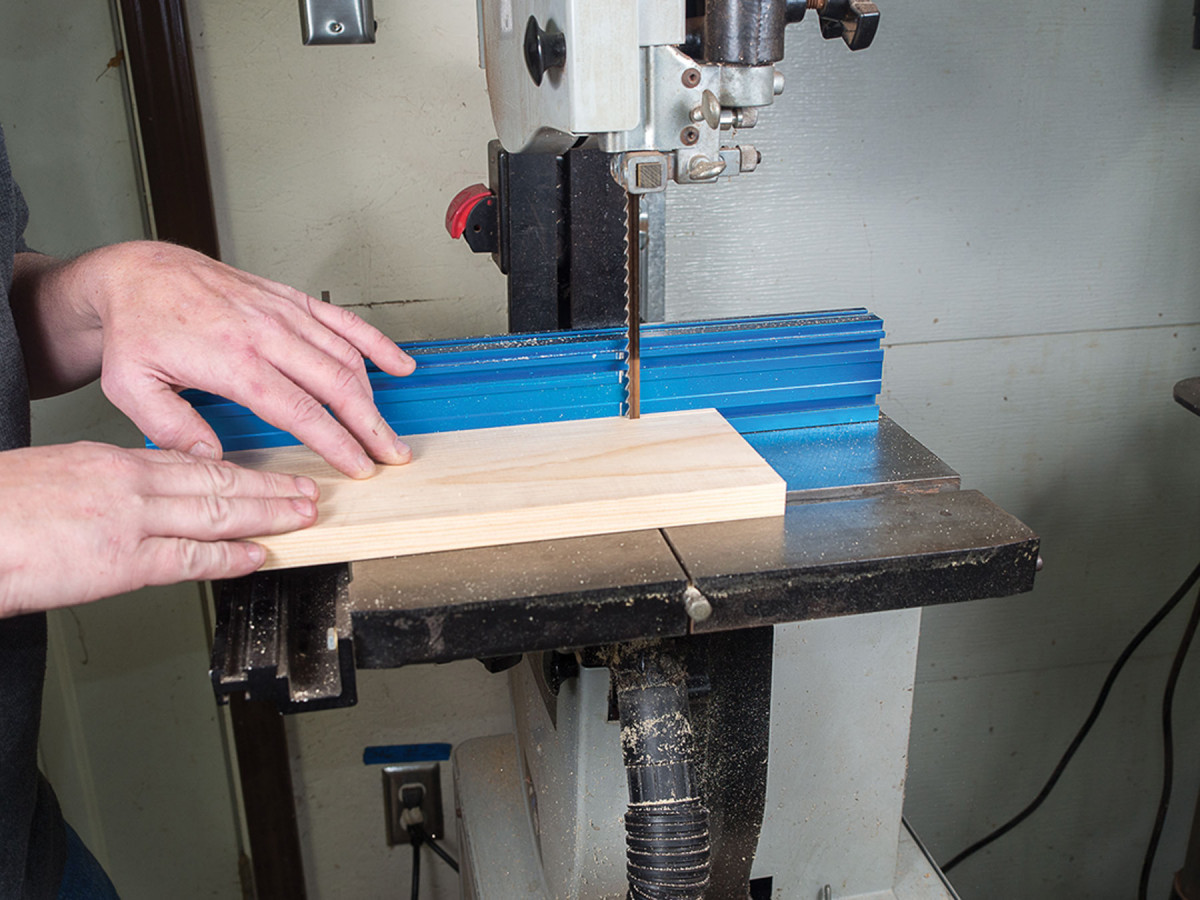
This leaves just one surface to finish-plane after the pieces are cut.
I made a pair of these lamps, one with oak and pine and the other with mahogany and Alaskan yellow cedar.
Kumiko Panels
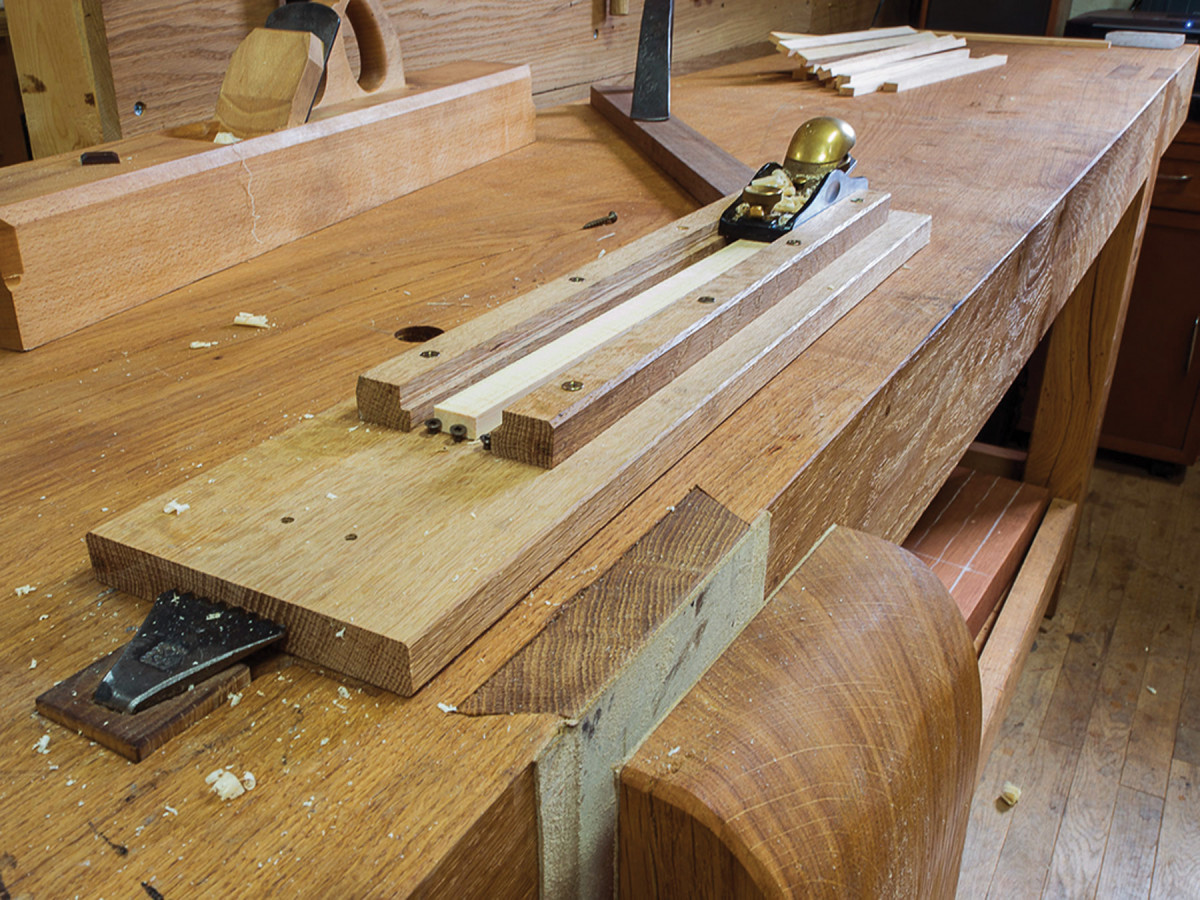
Manual planer. The final side of the kumiko is finish-planed as it’s thicknessed.
I like to save the fun part (the fire charring) for later, so I start with the kumiko frames. All the kumiko are left unfinished, so the surfaces should be planed clean with a sharp blade. The procedure I use to dimension the stock also leaves the pieces with a beautiful surface and an extremely consistent thickness.
Starting with boards milled and planed to 3⁄4” thick x 8″ wide x 14″ long, joint both edges square and flat. Then take one or two passes with a sharp plane over the jointed edges to finish this surface before sawing.
At the band saw, rip the panel-frame strips first, sawing 1⁄16” over the required 3⁄8” to leave enough material to thickness them later. Set the strips aside and take the board back to the jointer, and repeat the steps until you’ve got all your frame stock. Now rip the 3⁄16“, then the 1⁄8” kumiko stock using the same procedure.
Kumiko Lamp Cut List
No.ItemDimensions (inches)MaterialComments
t w l
Outer frame
❏ 4 Legs 1 1⁄2 x 1 1⁄2 x 21 1⁄2 Mahogany
❏ 8 Rails 1 1⁄4 x 1 1⁄4 x 8 5⁄16 Mahogany 1″ TBE*
❏ 1 Cross support 1⁄2 x 1 1⁄2 x 7 9⁄16 Mahogany 1⁄2” TBE*
kumiko panels, outer frames
❏ 8 Rails 3⁄8 x 3⁄4 x 6 9⁄16 Yellow cedar
❏ 8 Stiles 3⁄8 x 3⁄4 x 11 1⁄4 Yellow cedar
kumiko panels, Grid
❏ 4 Long verticals 3⁄16 x 3⁄4 x 10 3⁄4 Yellow cedar 1⁄8” TBE*
❏ 8 Short verticals 3⁄16 x 3⁄4 x 21 3⁄16 Yellow cedar
❏ 12 Horizontals 3⁄16 x 3⁄4 x 6 1⁄16 Yellow cedar 1⁄8” TBE*
kumiko panels, inserts
❏ 32 Diagonals 1⁄8 x 3⁄4 x 1 7⁄8 Yellow cedar
❏ 64 Hinged pieces 1⁄8 x 3⁄4 x 11 3⁄16 Yellow cedar
❏ 64 Keys 1⁄8 x 3⁄4 x 5⁄8 Yellow cedar
*TBE = Tenon both ends
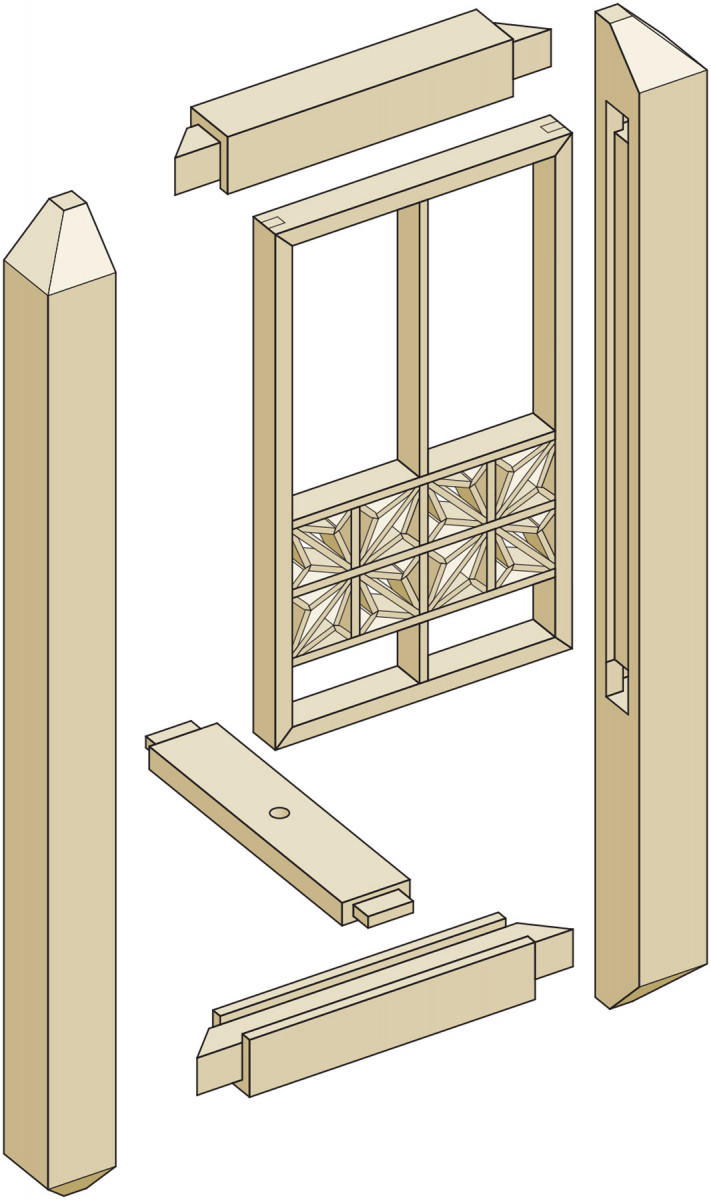
Exploded View – Single Panel & Cross Support
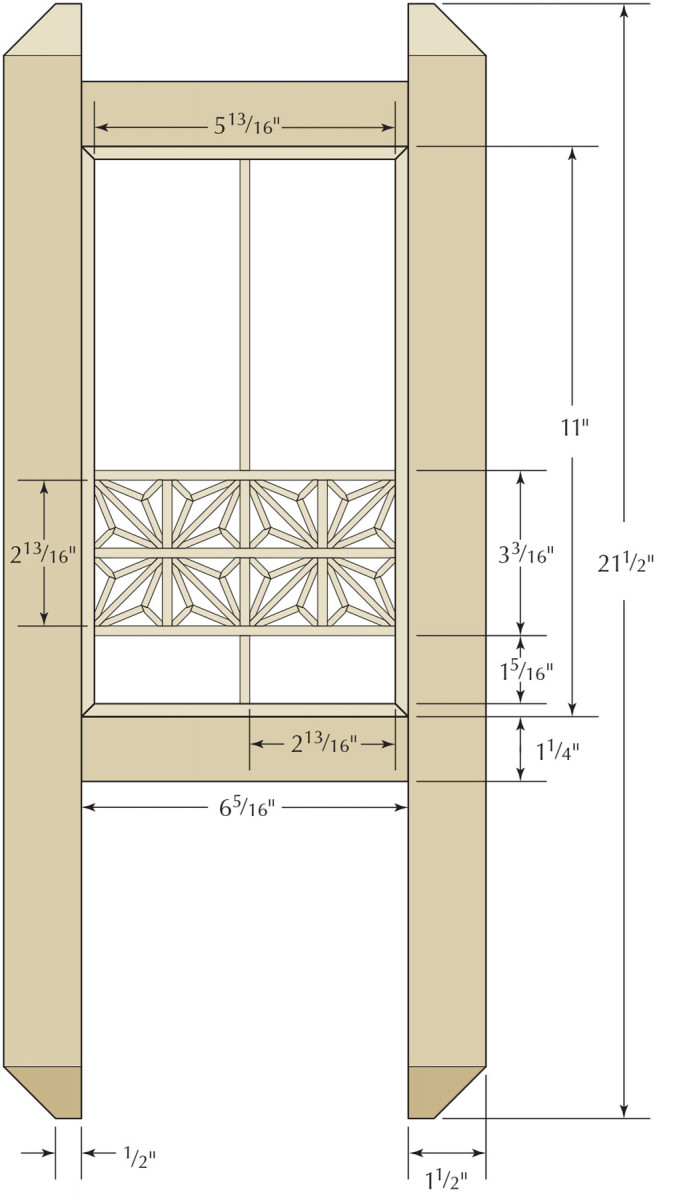
Elevation
Miter Jigs
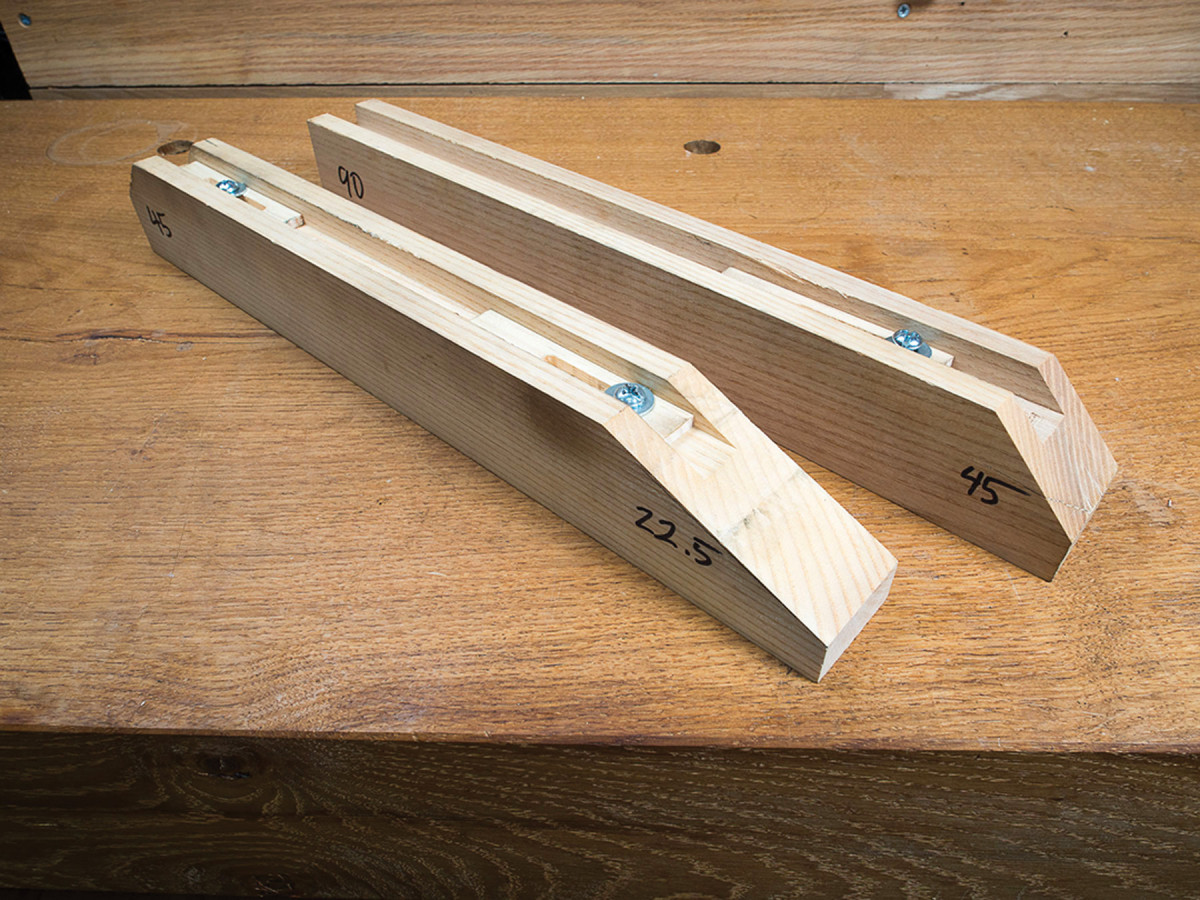
Miter jigs. Nearly all the joinery and cutting of the kumiko happens in these two mitering jigs. Rip a groove about 3⁄4″ wide x 1⁄2″ deep in 8/4 stock. For this piece, 16″ jigs will let you use both ends for different angles. You need, at minimum, one 90° end, one 45° end and one 22.5° end.
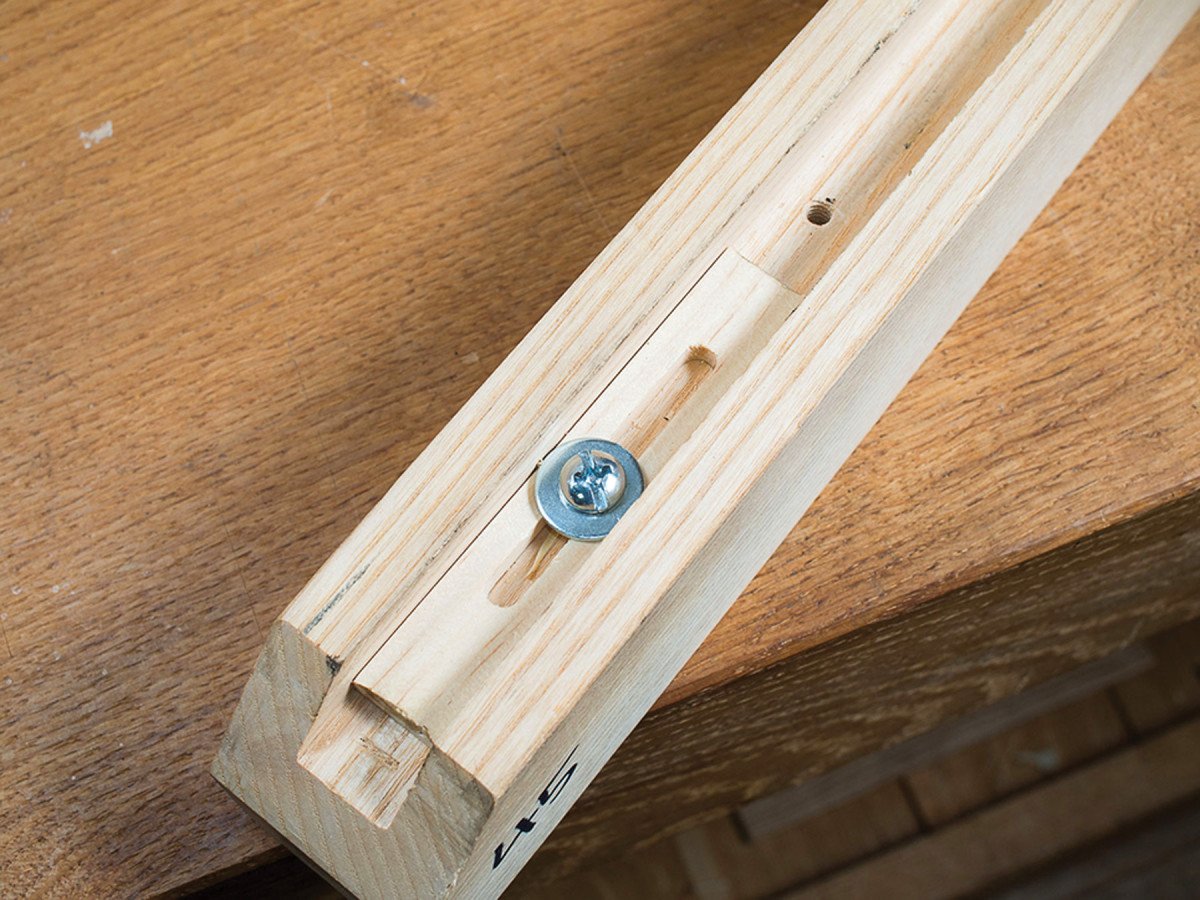
Adjustable stop. Take an offcut from a kumiko and cut a 5⁄16″ slot in it for use as a stop in the jig. The stop needs to be about 4″ long – you can drill several holes to mount it at different parts of the jig for different purposes. You can use pan-head wood screws, but I recommend drilling and tapping for 1⁄4″-20 machine screws instead.
Thicknessing Jig
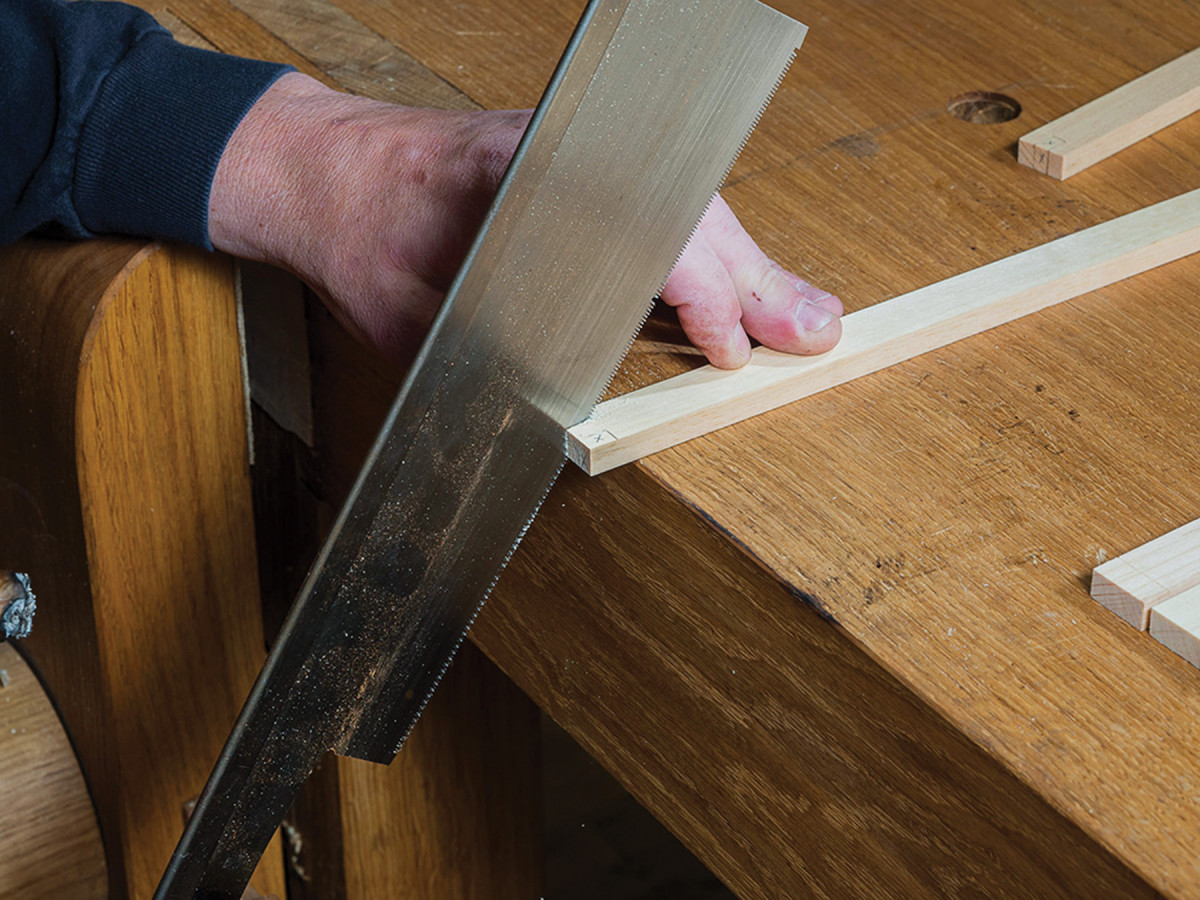
Mitered cheeks. Rip cut at 45° for the tenon cheeks.
For these short lengths of kumiko, a simple handplane fixture does a fine job getting consistent thickness. To make the fixture, rabbet three pairs of interchangeable tracks (3⁄8“, 3⁄16” and 1⁄8“), then tune them with a shoulder plane for exact consistency.
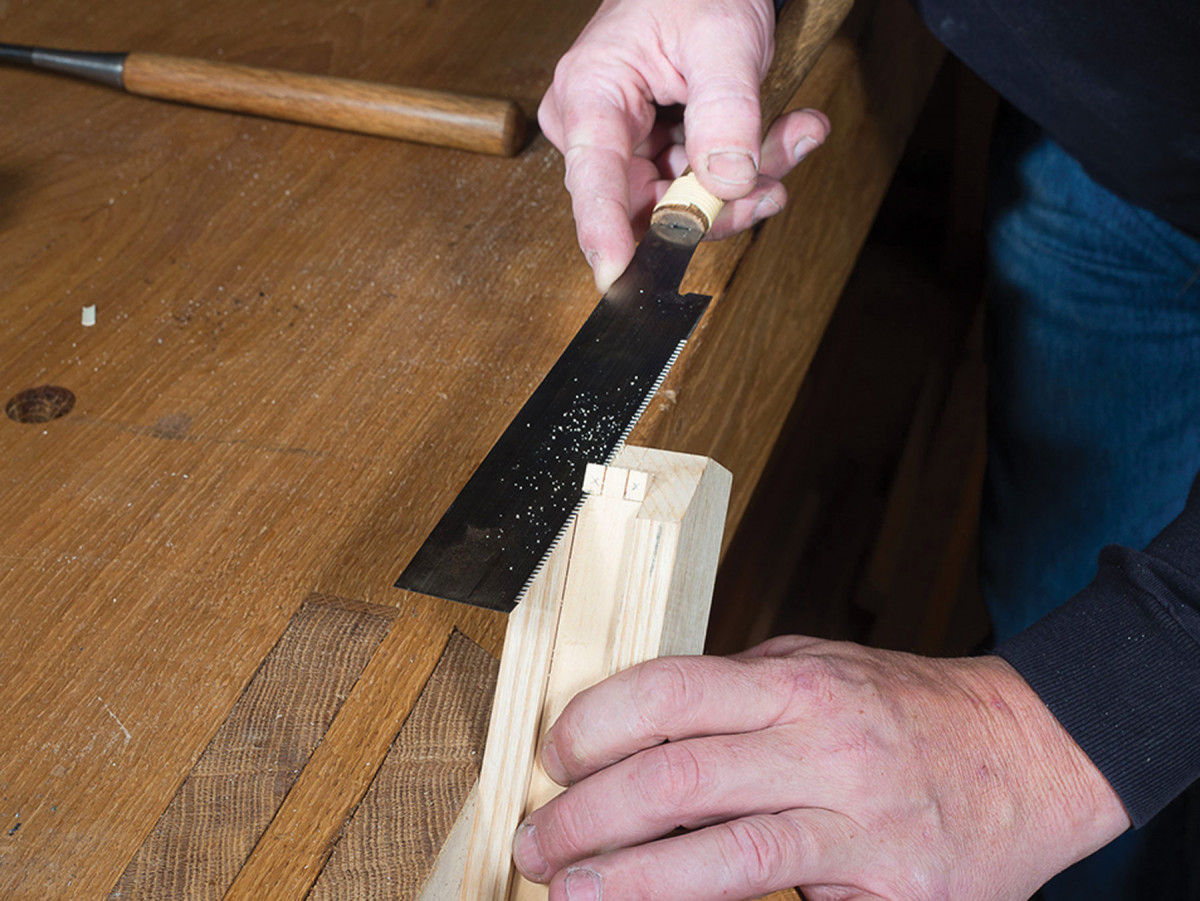
Trim the shoulders. A zero-set flush-cut saw rough-cuts the cheeks and removes the waste.
The tracks are mounted to a dead flat, quartersawn board, plus a few #6 wood screws that serve as stops. Thickness all the 3⁄8” kumiko strips, then change tracks for the other thicknesses.
The inner frame of the panel, called a “tsukeko,” is made from the 3⁄8” kumiko. I cut the mitered-tenon joinery by hand with my thinnest dozuki, but a good dovetail saw will suffice. (The tenons are 1⁄4” x 1⁄8” x 1⁄8“.)
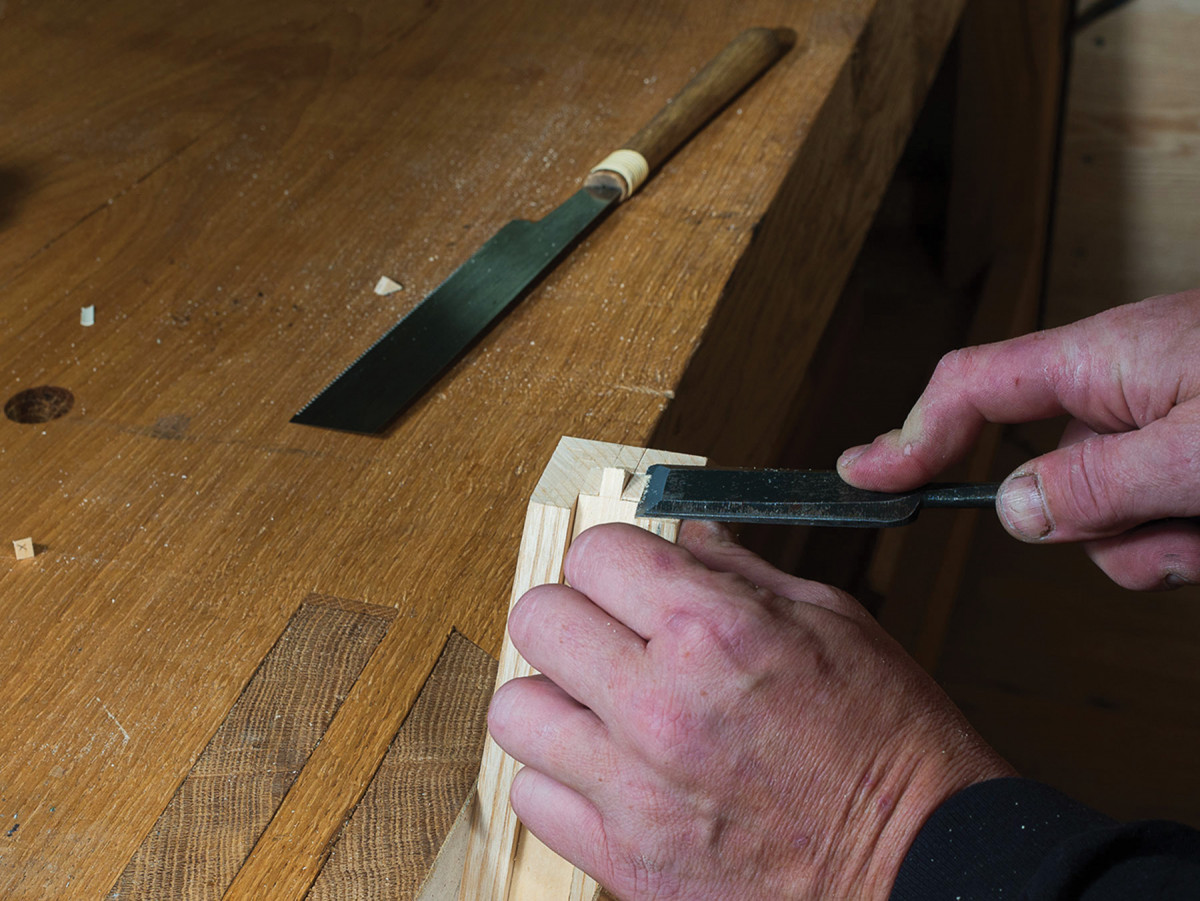
Pare to fit. Then pare the cheeks with a sharp paring chisel.
For the mortised stiles, I follow the same process shown above but rip cutting at 90°.
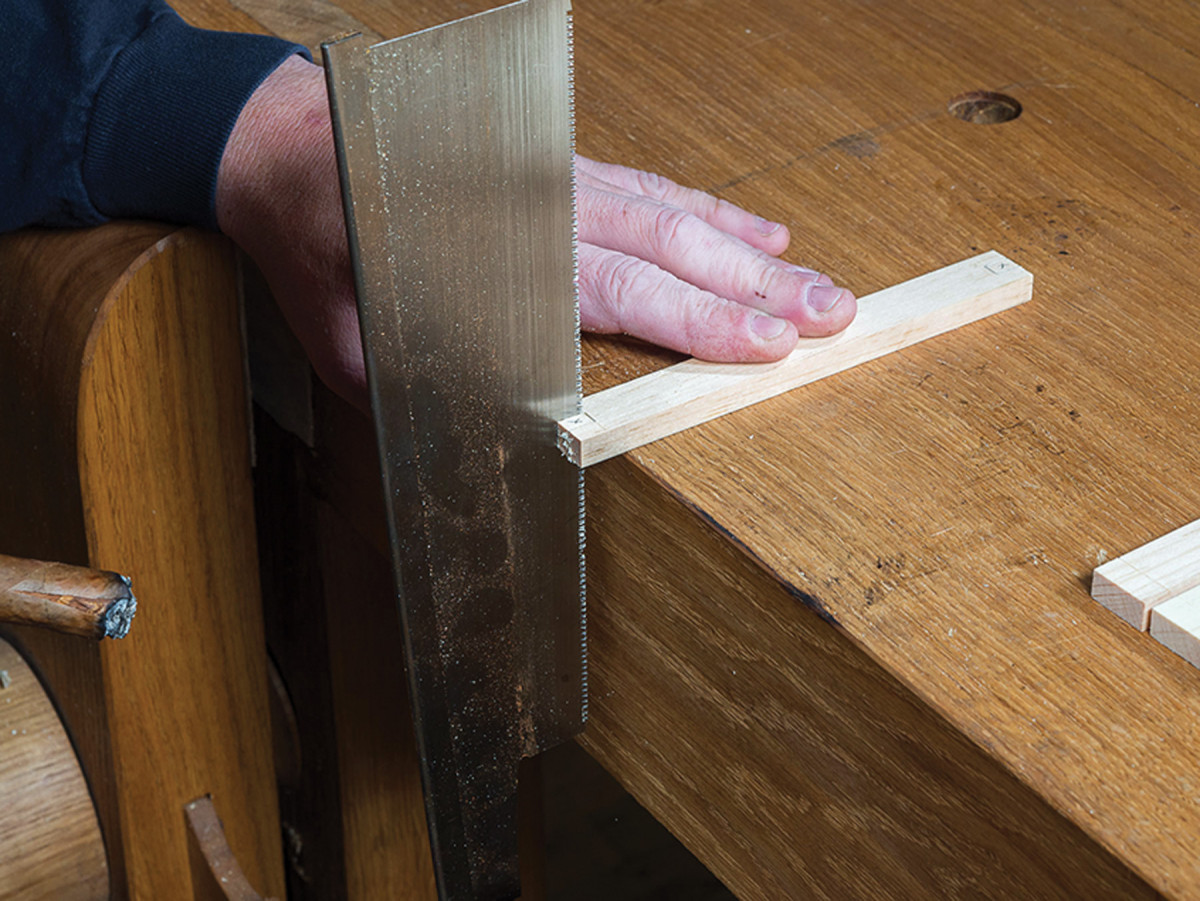
Square cheeks. Rip at 90° for the mortised stile cheeks.
Most of the joinery for the inner frame is done using purpose-made mitering jigs. Set the length with the fence piece, and the jig ensures exact consistency on all the pieces.
Lattice
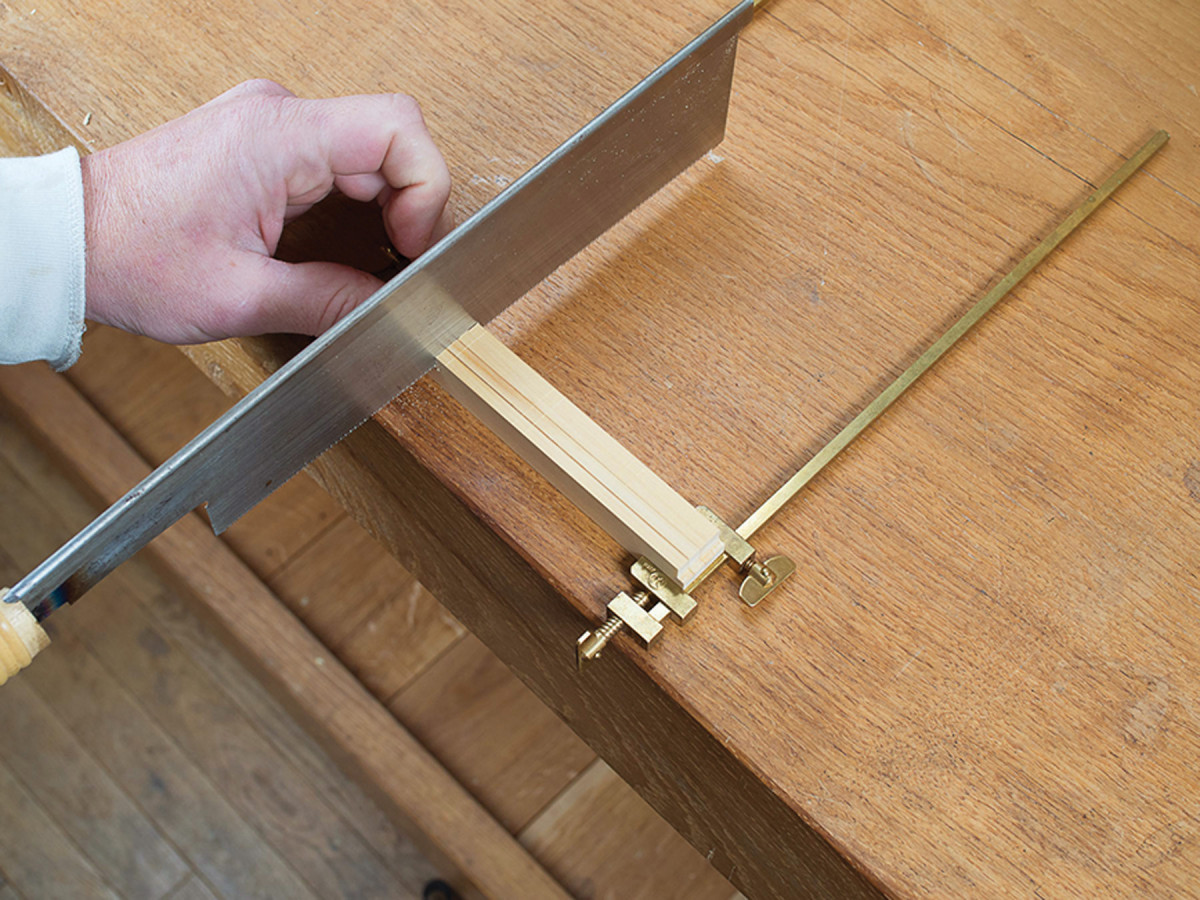
Gang-cut. Mark and cut the central horizontal kumiko carefully; they will be the template for all the other lap joints (as shown at right) as well as for the frame’s mortises.
Now on to the 3⁄16” inner latticework. On each frame, there are three horizontal pieces and a single central vertical, all joined by half-lap joints. The two additional vertical dividers are not full-length, and they’ll be added once the frames are assembled.
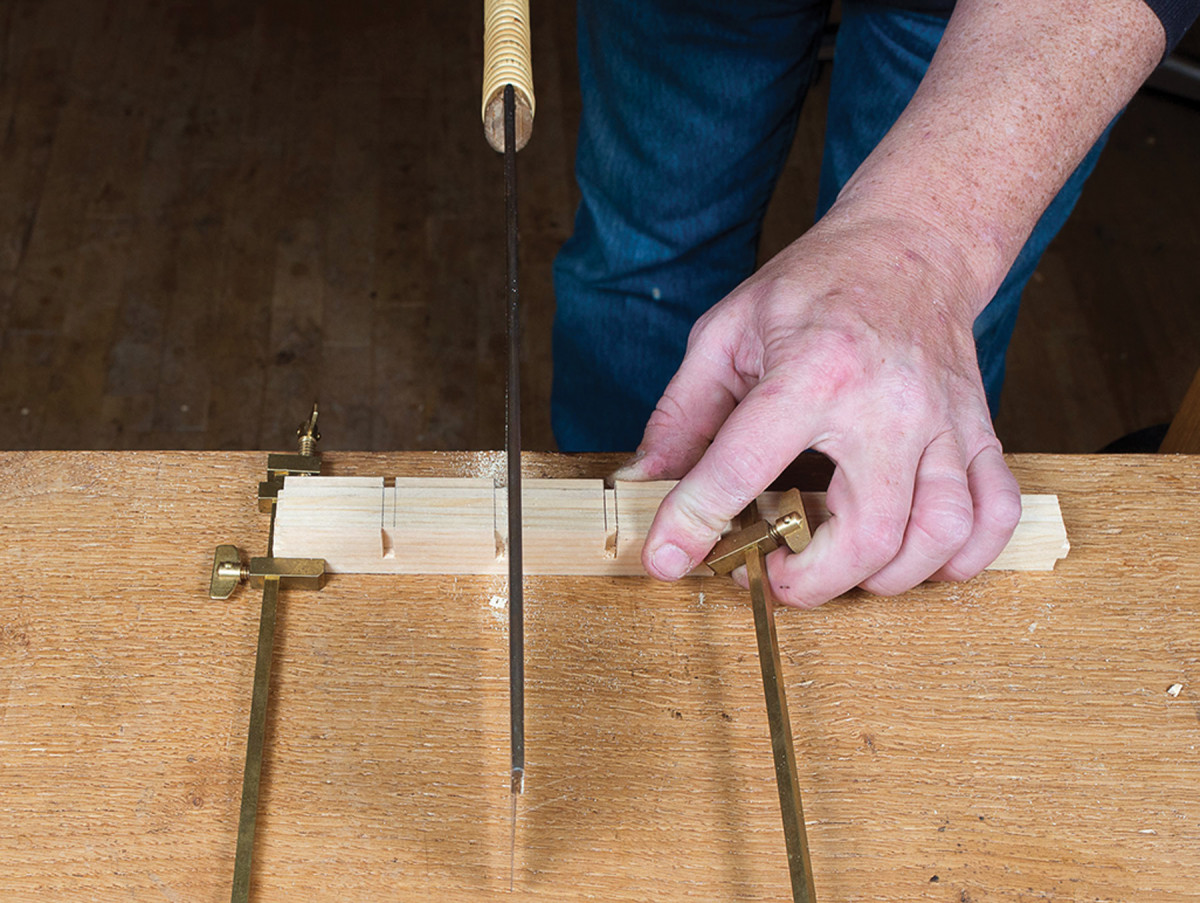
Half-lap lattice joints. Start with the center horizontal pieces, which have three evenly spaced laps; you’ll lay out the vertical laps from this piece to ensure consistency. Layout is simple if you’ve been precise – set a pair of dividers for 1 1⁄2″ and mark off three lengths from either side.
Cut the shoulders for the tenon centered on the end of all pieces. Pop the waste off with a chisel.
Lay out and cut the vertical piece by aligning the already-cut horizontal kumiko with its lower edge.
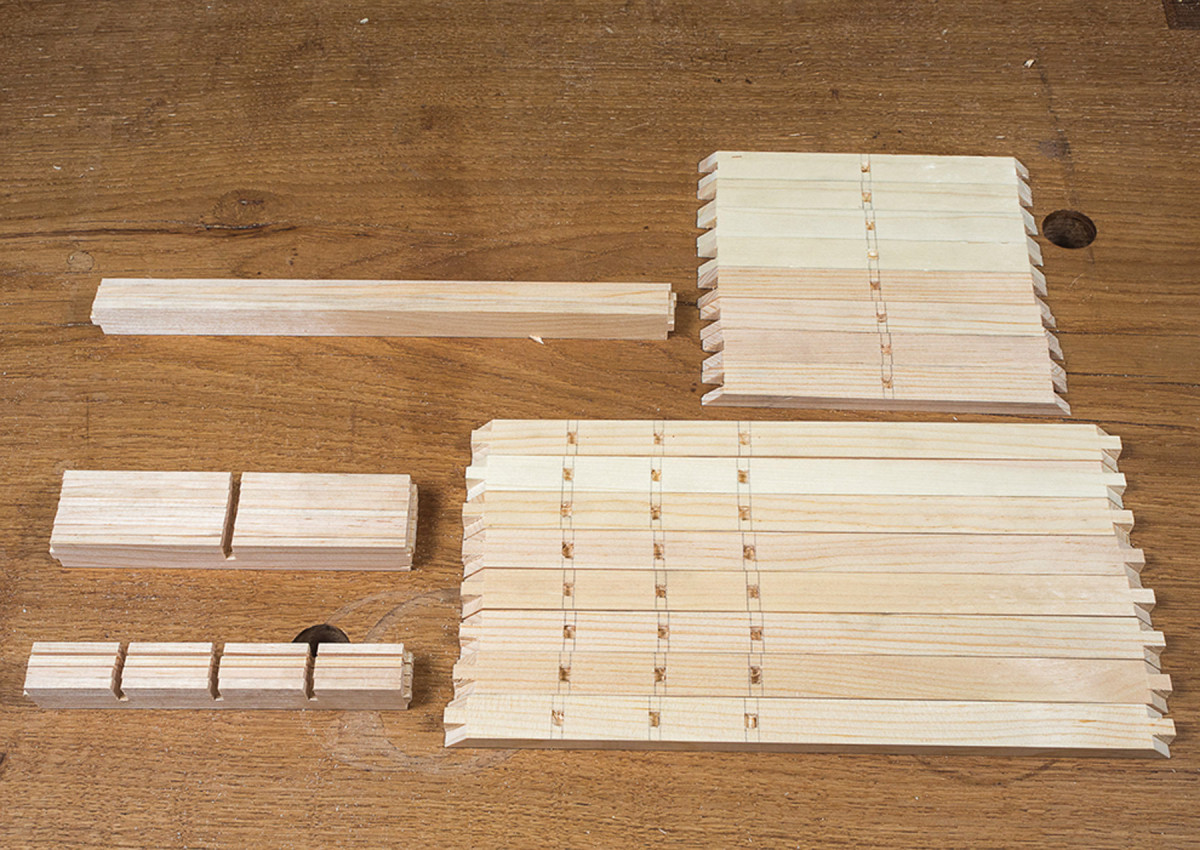
Ready for assembly. Here you can see the joinery on all the pieces that go together to form the inner structure.
Next, use a pair of the middle pieces to mark the central half-lap on the remaining eight horizontals. Use the same middle pieces aligned with the bottom of the vertical lattices to mark them off; the spacing from the bottom is identical.
Finally, lay out the mortises in the outer frames using one of the vertical pieces and one of the outer horizontals. The mortises should be just more than 1⁄8” in depth – the wood in the mortise tends to compress significantly, so be sure to remove enough material that spring-back won’t force the pieces out of their mortises.
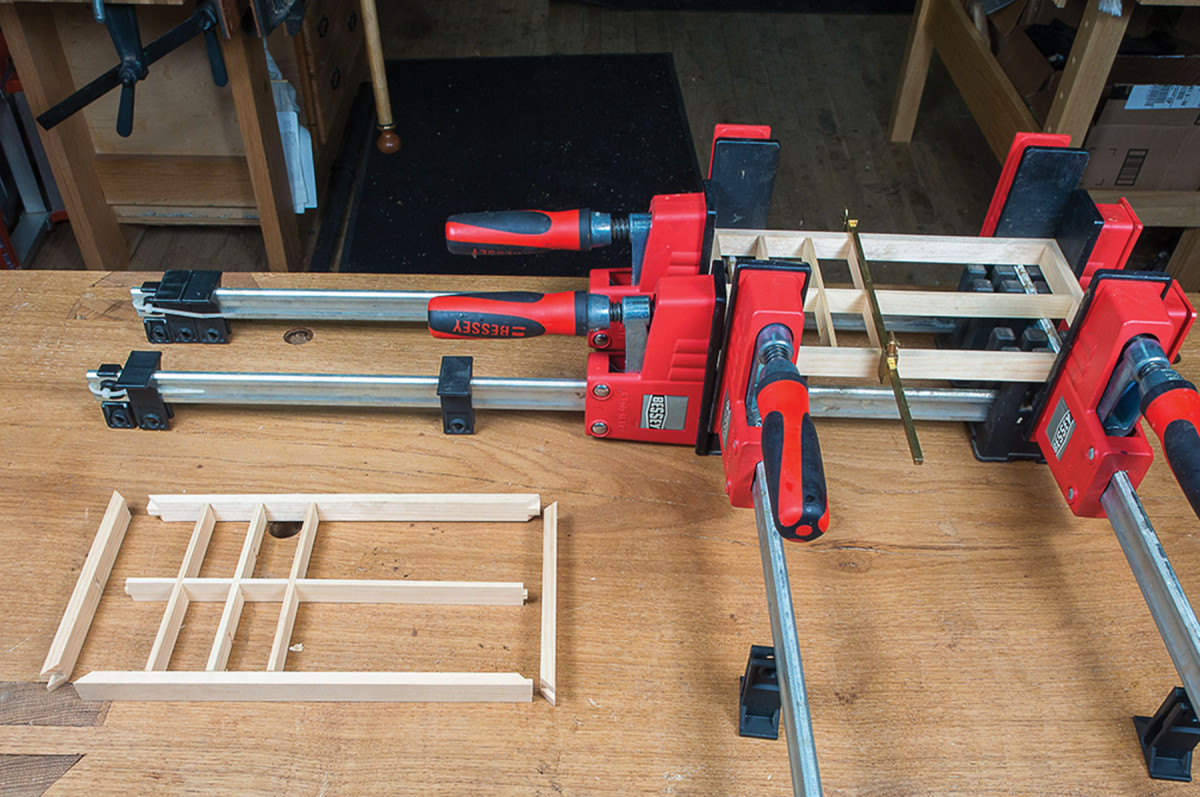
Clamp both ways. While the glue cures, I work on the outer structure.
I don’t usually glue the half-lap joints, which are tightly press-fit. I use a dab of glue in each mortise, and I glue the four corners as well. Though the frames are tight fits, I leave them in clamps for several hours to ensure a good bond.
Support Group
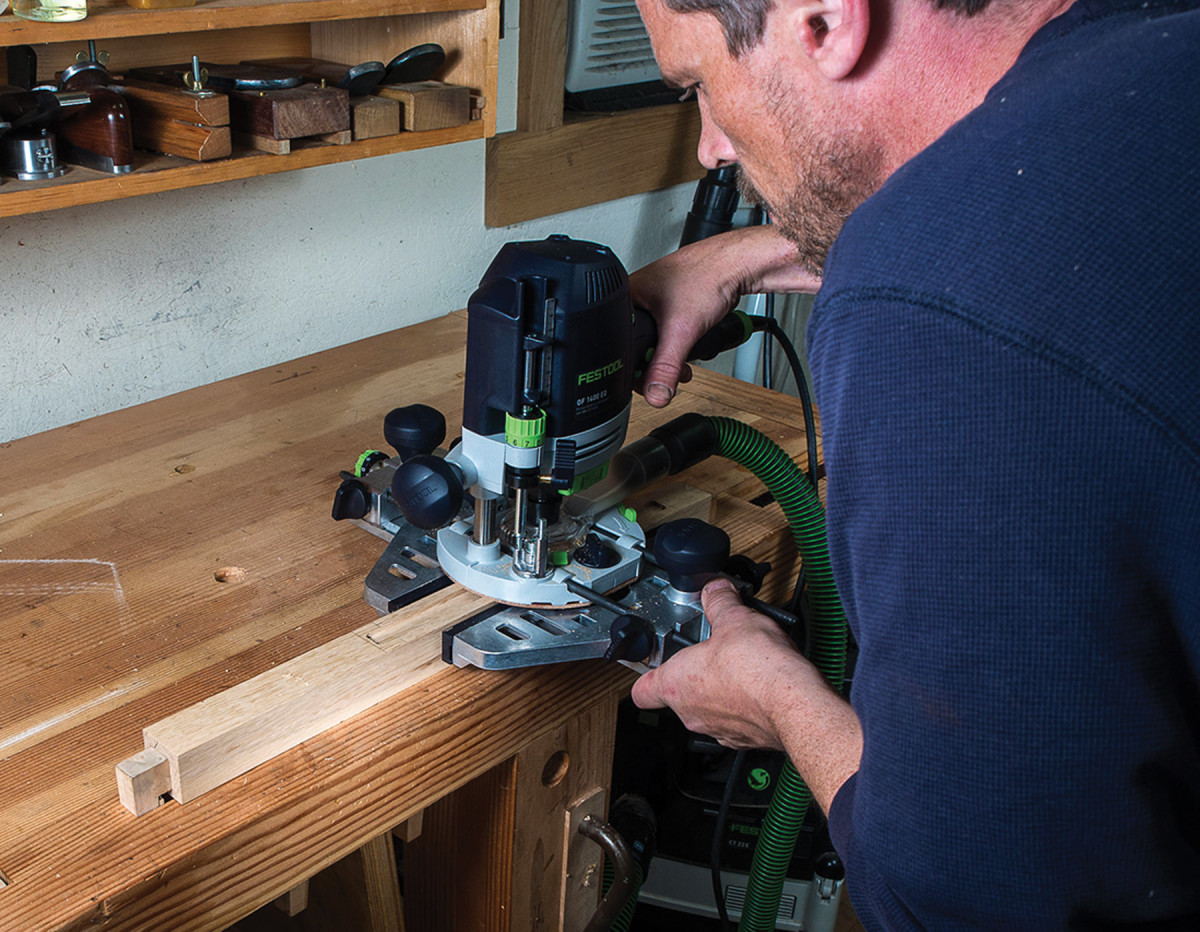
Stopped grooves. I know of no good way to cut these grooves by hand, or I would. Routers were made for this.
The outer frame is straightforward. The four legs are mortised to receive 3⁄4“-square, 1”-long tenons, and both the legs and the rails are grooved to house the kumiko panels. The rail tenons are mitered to prevent meeting. That reduces the glue surface, so pay attention to the fit of the mortises, particularly at the small inner edge.
One pair of bottom stiles gets centered 1⁄4“-thick x 1”-wide x 1⁄2“-deep mortises for a cross support that will house the lamp cord and threaded pipe. Cut the lamp support and fit its tenons, then drill dead center for the 3⁄8” threaded lamp pipe.
For the legs, mark the mortises and grooves for the kumiko frames, and cut the 3⁄16“-deep grooves with a router.
Then drill and chop the mortises, paying close attention to getting the long-grain faces square and smooth. Once done with the joinery, cut the large chamfered faces at the top and bottom of each leg. Pay close attention to the orientation of the pieces – only the outer faces of the leg are chamfered – and leave about 1⁄2” of flat area at both top and bottom.
Light ‘em Up
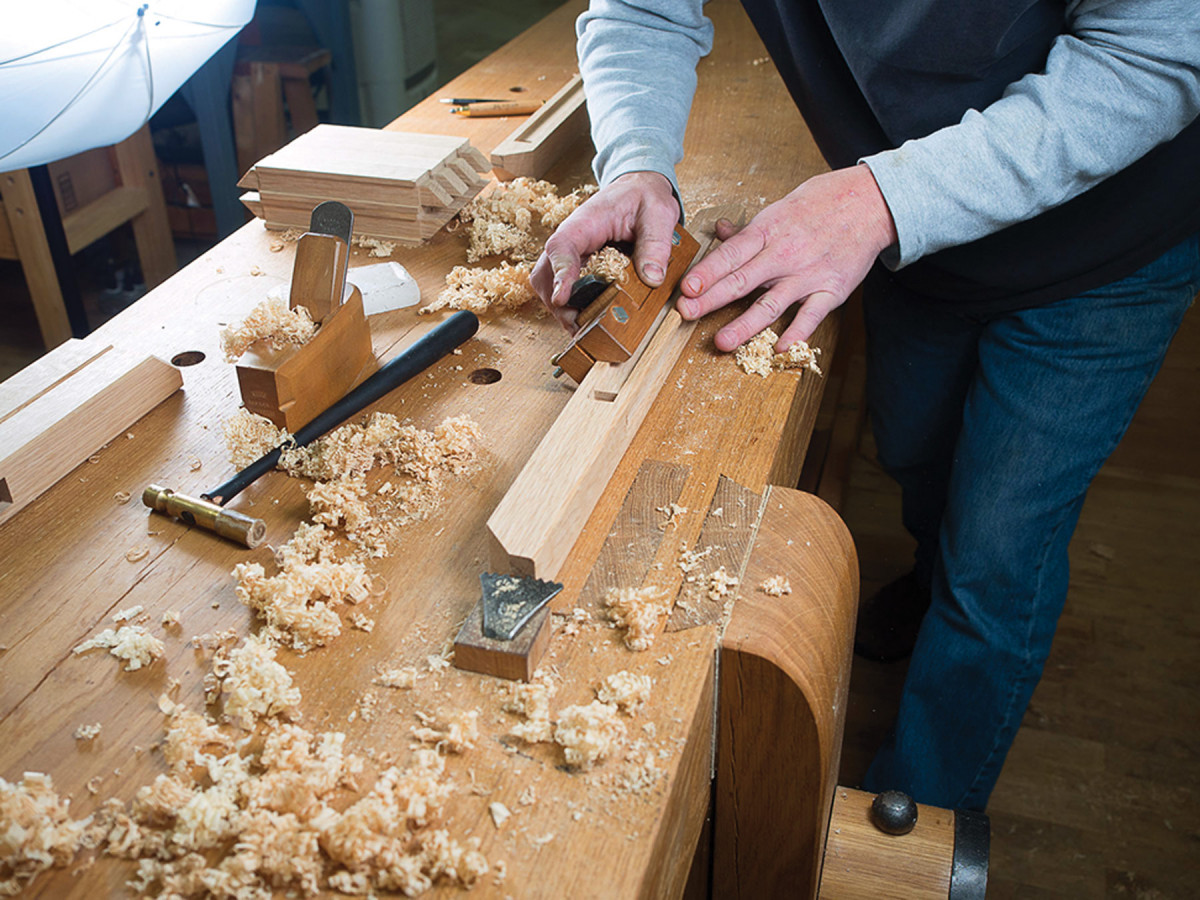
Final shaping. Before lighting them on fire, finish-plane all the outer frame components and put a large chamfer on the long edges. I use a Japanese chamfering plane, which does a spectacular job of making consistent chamfers, but a block plane and some close attention does just as well.
The charred finish on the lantern’s outer skeleton is done with a propane or MAPP torch. It’s a lot like airbrushing, but with much hotter (and cooler) pigment. Once the pieces are cool enough to touch, buff the wax with a lint-free cloth or finish with a few coats of padded shellac to enhance the depth.
Chop Micro-Mortises
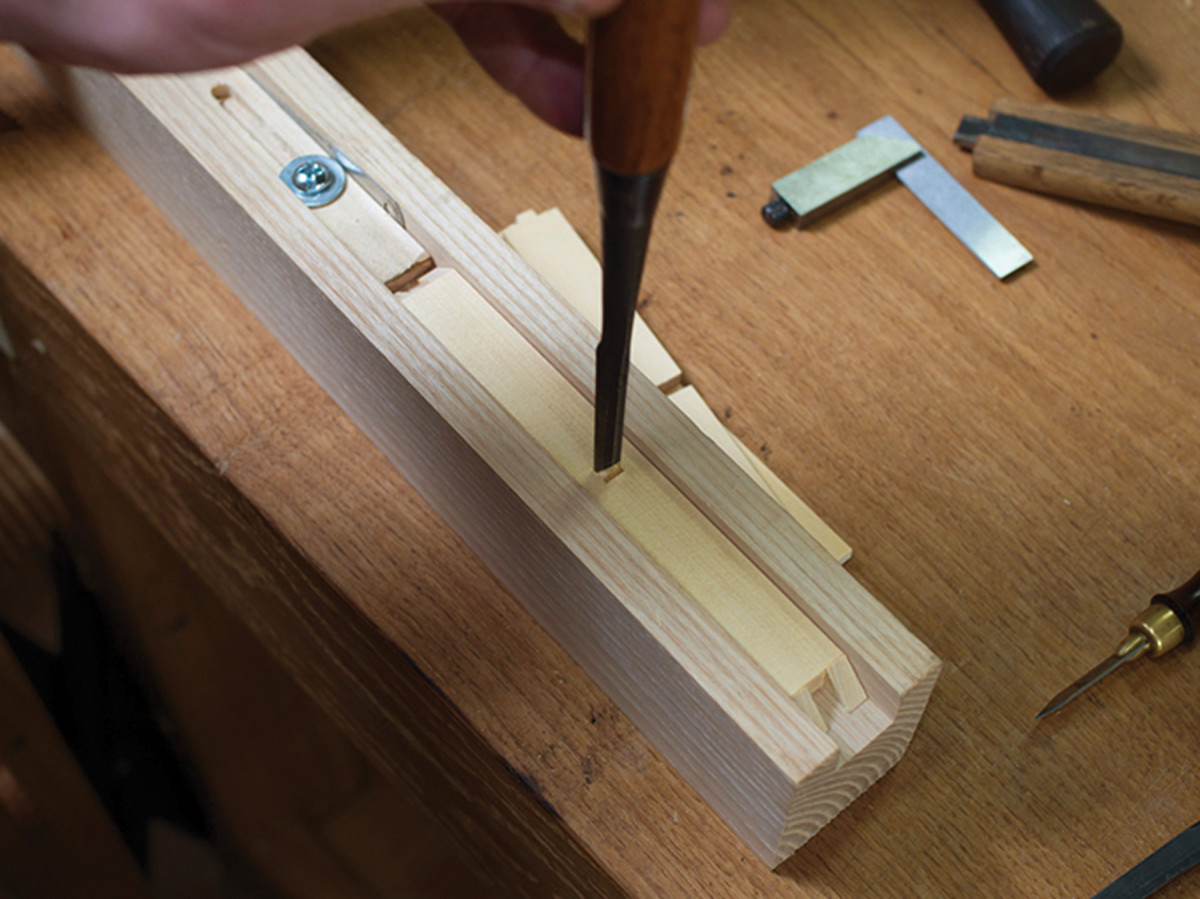
Tiny holes. Cutting such small mortises requires more finesse than most mortising. A single sharp blow with a 1⁄4″ chisel defines the longer edges and severs the end-grain fibers.
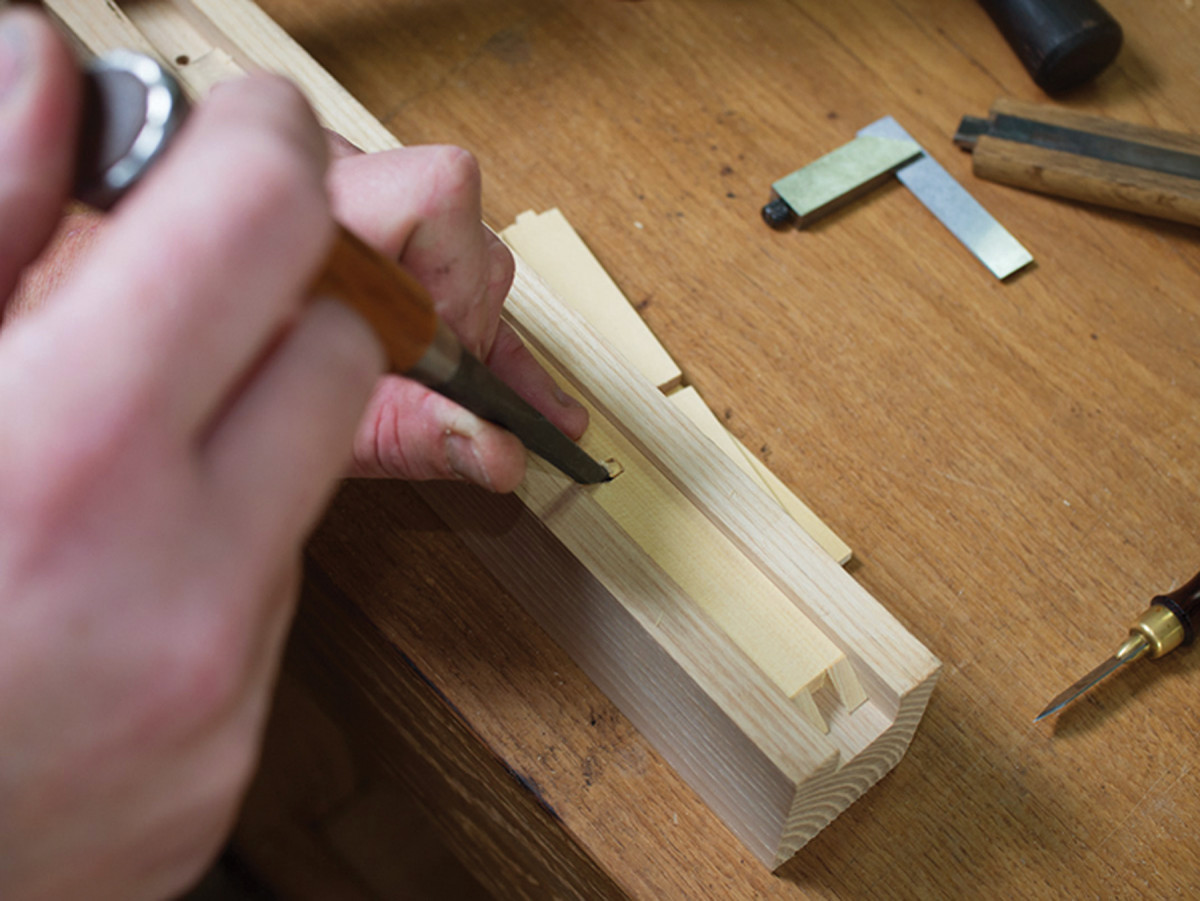
Hide the evidence. Use a 1⁄8″ chisel to pop waste from top and bottom, so that any compression marks will be hidden by the kumiko shoulders when installed.
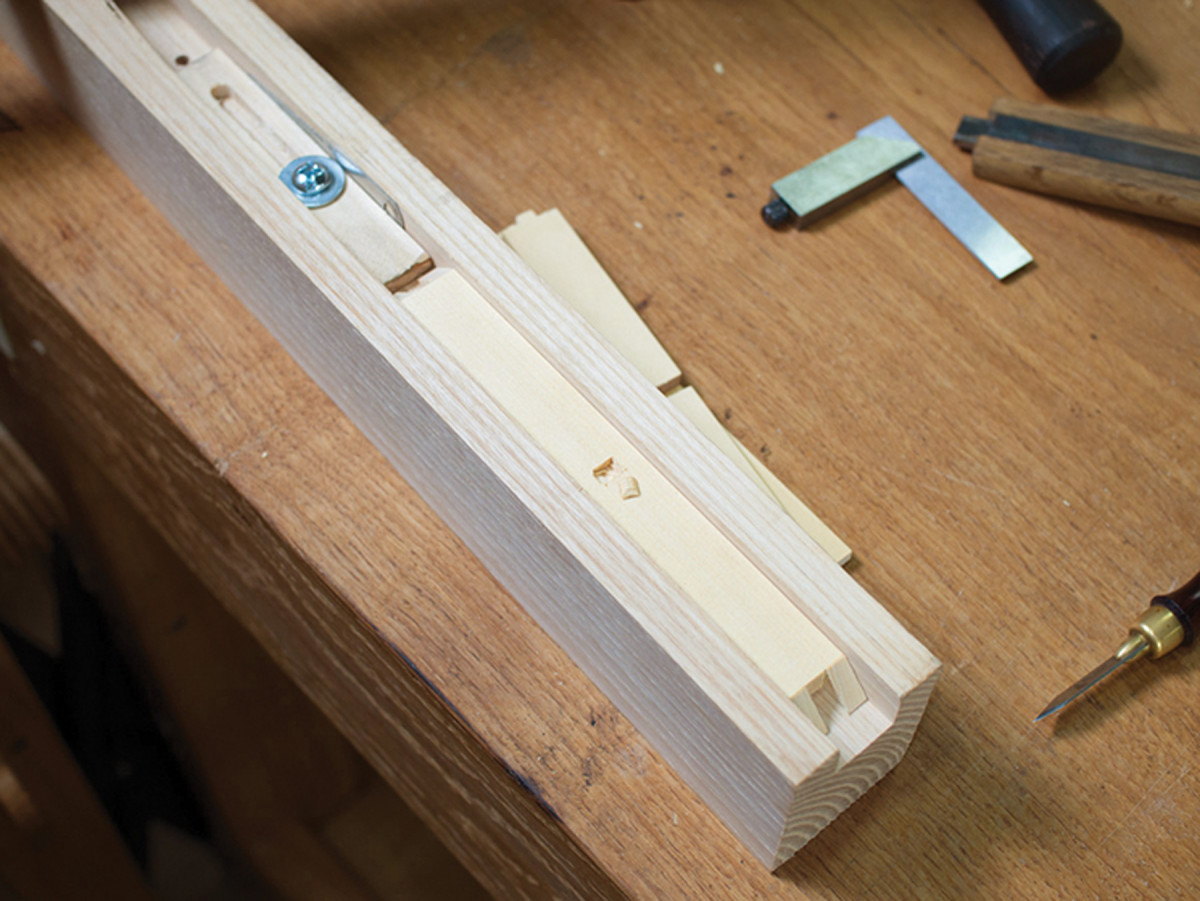
The perfect pop. Waste should pop out like a little spiritual biscuit.
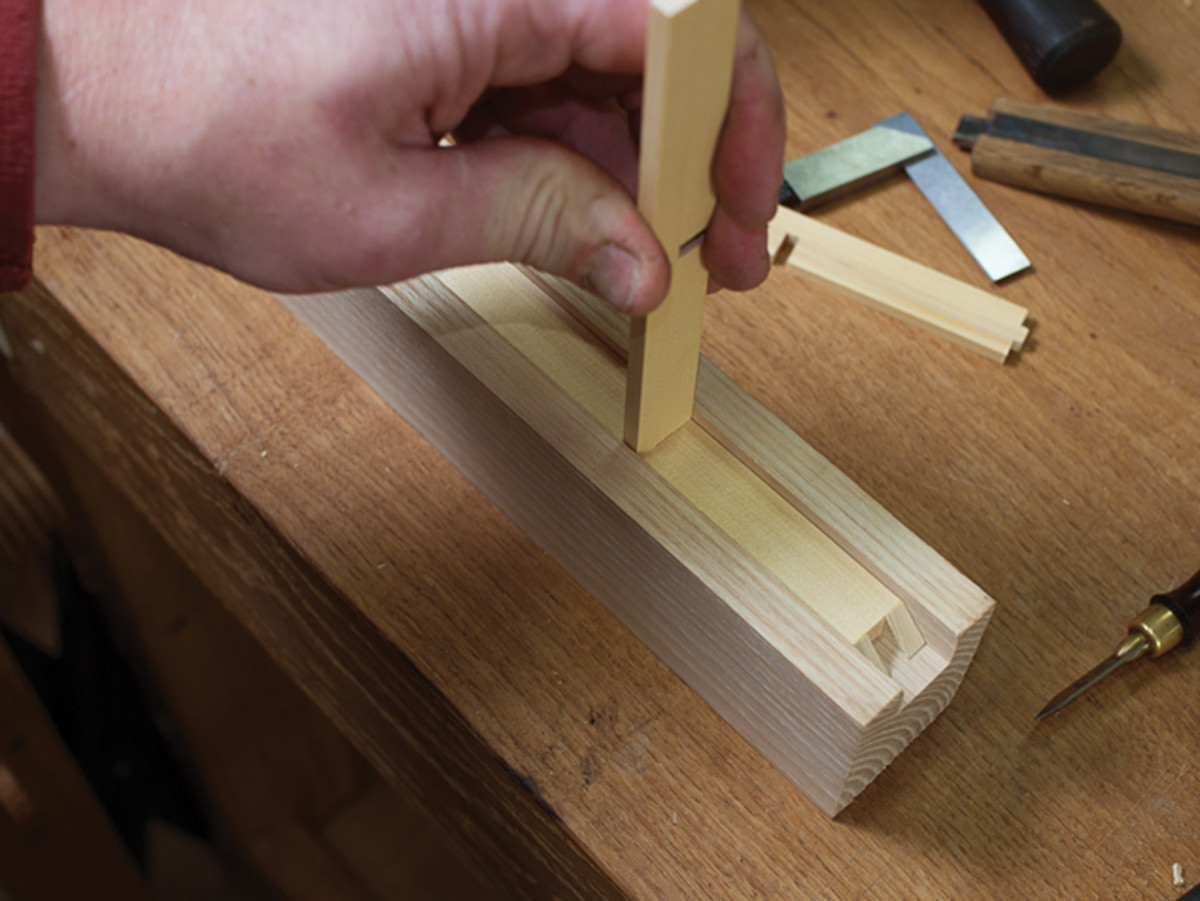
And insert. Check your fit and repeat the initial steps as necessary. With practice, I can get to sufficient depth with a single “pass” of my chisels.
Fill in the Blanks
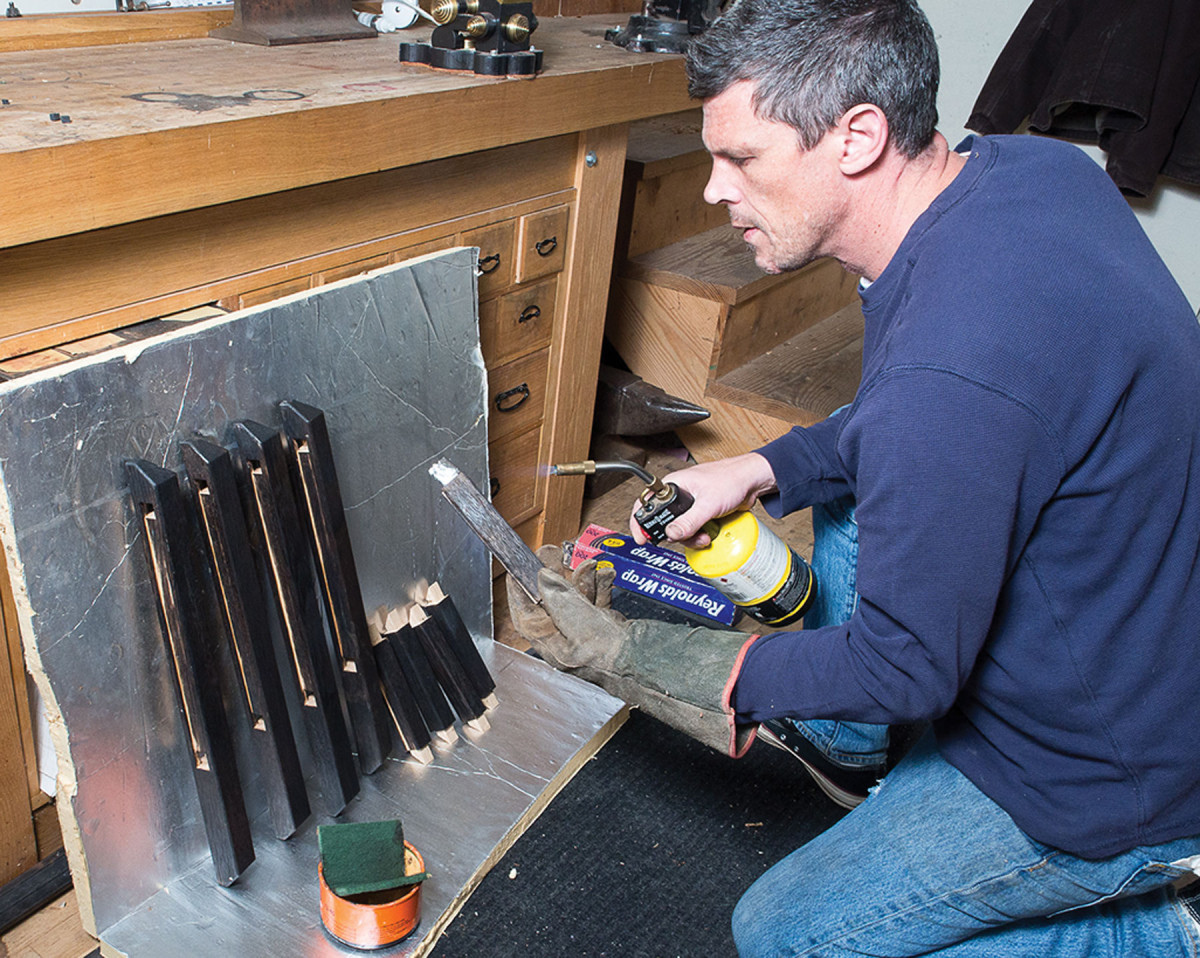
Burnt is the new black. I use a MAPP torch, held dead perpendicular to the surface, about 4″-5″ away to char the wood. Once the color develops, while each piece is still warm, rub with burlap or a Scotch-Brite pad and paste wax to even out the color.
By now the inner frames should be ready for the insert work. First, cut and install the two remaining 3⁄16” vertical kumiko in each panel. These should be cut to a length of 21 3⁄16“, with a single, centered half-lap joint in each. This can be marked off with dividers just as the lattices were.
Some words about fitting: Even if you’ve been painstaking, there will be small variations in length of the pieces, so the miter shooting jigs you made for the tsukeko will be in constant use.
The best approach when fitting a set of pieces is to fit to the largest gap first, then systematically shorten the setting of the jig’s fence with hammer taps to fit each joint in order of size.
In this way, when you shoot a piece that is too large for any of the remaining openings, those few hammer taps will adjust the jig’s fence length and allow you to re-shoot it for a perfect fit in the next-largest slot. Continue this process until you’ve finished all the installations.
Diagonal Fret Work
After installing the small vertical dividers, fit in the diagonals for each panel. Set the 45° jig fence to 17⁄8” (just a bit larger than necessary). It’s important to shoot both faces of one end before flipping the piece end for end, or the length will not work out correctly. Check the fit. Hopefully it’s just a bit too large for all the openings, so tap the fence on the jig and re-shoot one end.
Continue until you have the piece fit to the largest opening, then shoot another piece to the same size and check its fit in all the remaining slots. If it fits any of them – great. Shoot another piece. Once a piece is too large for all the remaining openings, tap the fence closed a few thou and continue the process.
A Dash of Magic
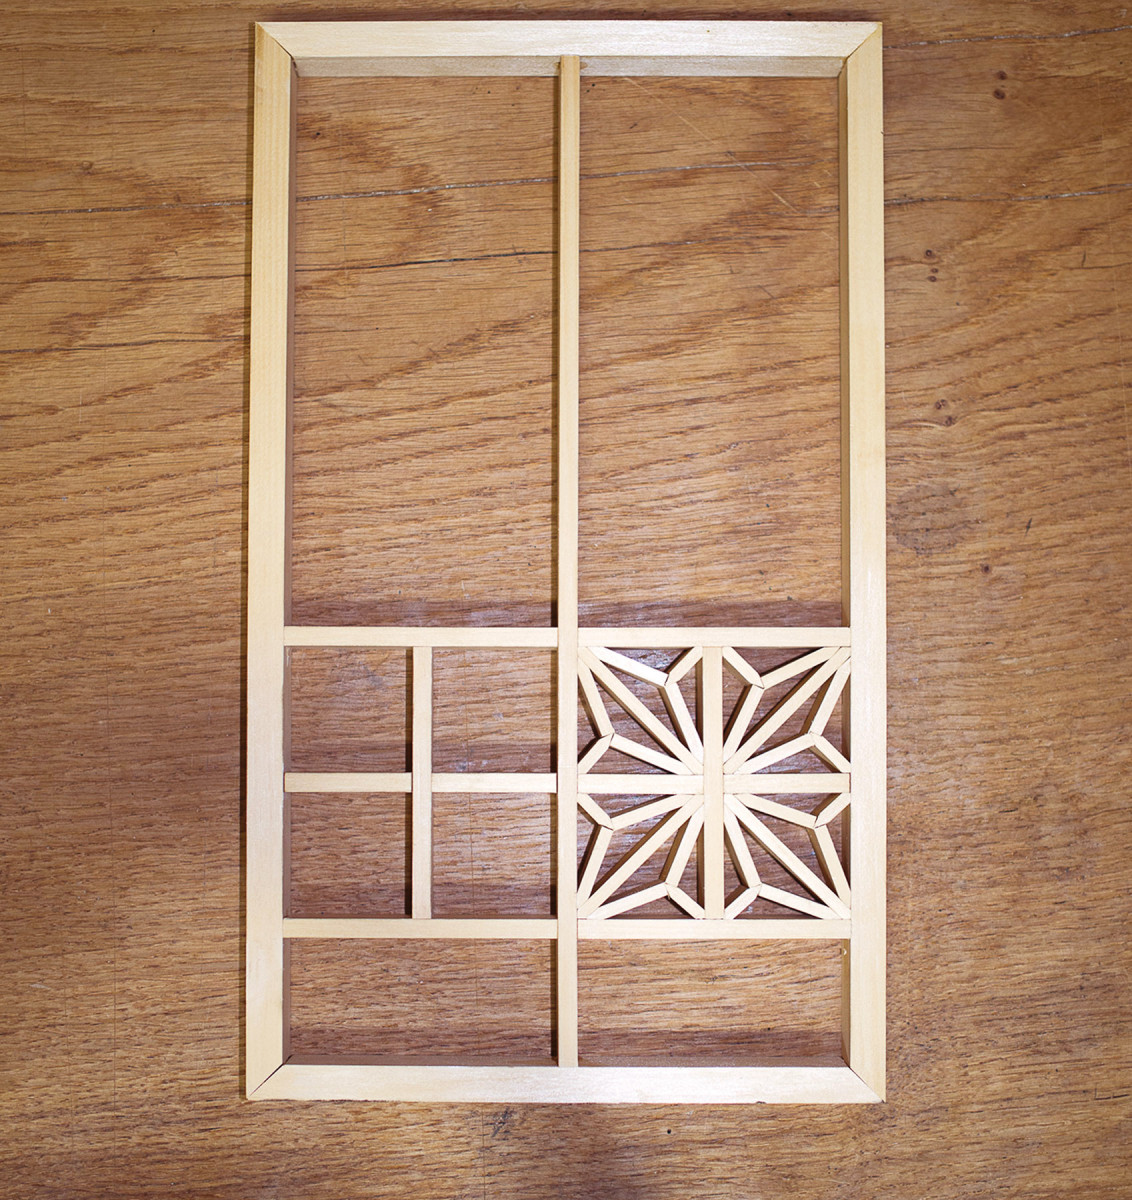
Taking shape. First install the short vertical dividers.
While you might not realize it from looking at the opening photo, the outside-angled pieces of each quartered section are “hinged” – that is, the wood isn’t cut all the way through where it bends.
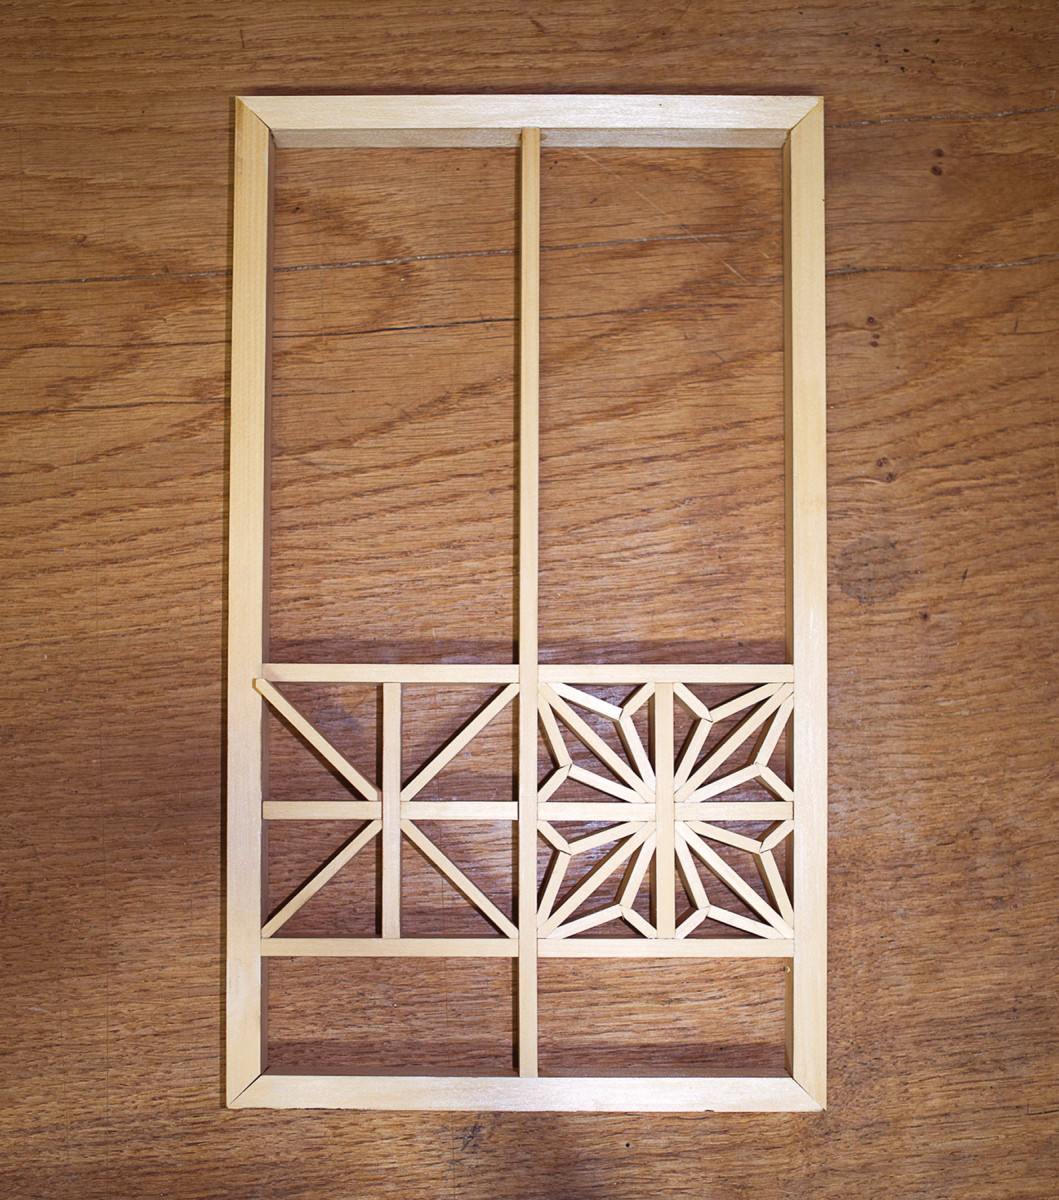
Diagonals in place. Next, cut and install the diagonal inset pieces.
Sizing the “hinged” pieces is trial and error, but the same length as the diagonal in the last step is a good place to start. Cut and shoot a 17⁄8” kumiko strip as with the diagonals, but this time use the 22.5° shooting jig for an included angle on each end of 45°. Use a marking gauge to mark a crosscut line at dead center for sawing.
You’re going to saw this piece almost all the way through, but stop just a few thousandths of an inch short to leave a hinge that allows the piece to be folded for installation. This sounds impossible, but it’s actually not hard if you work smart. The simplest and best solution is to use a sharp raking light that will let you see how close the saw teeth are to the bottom.
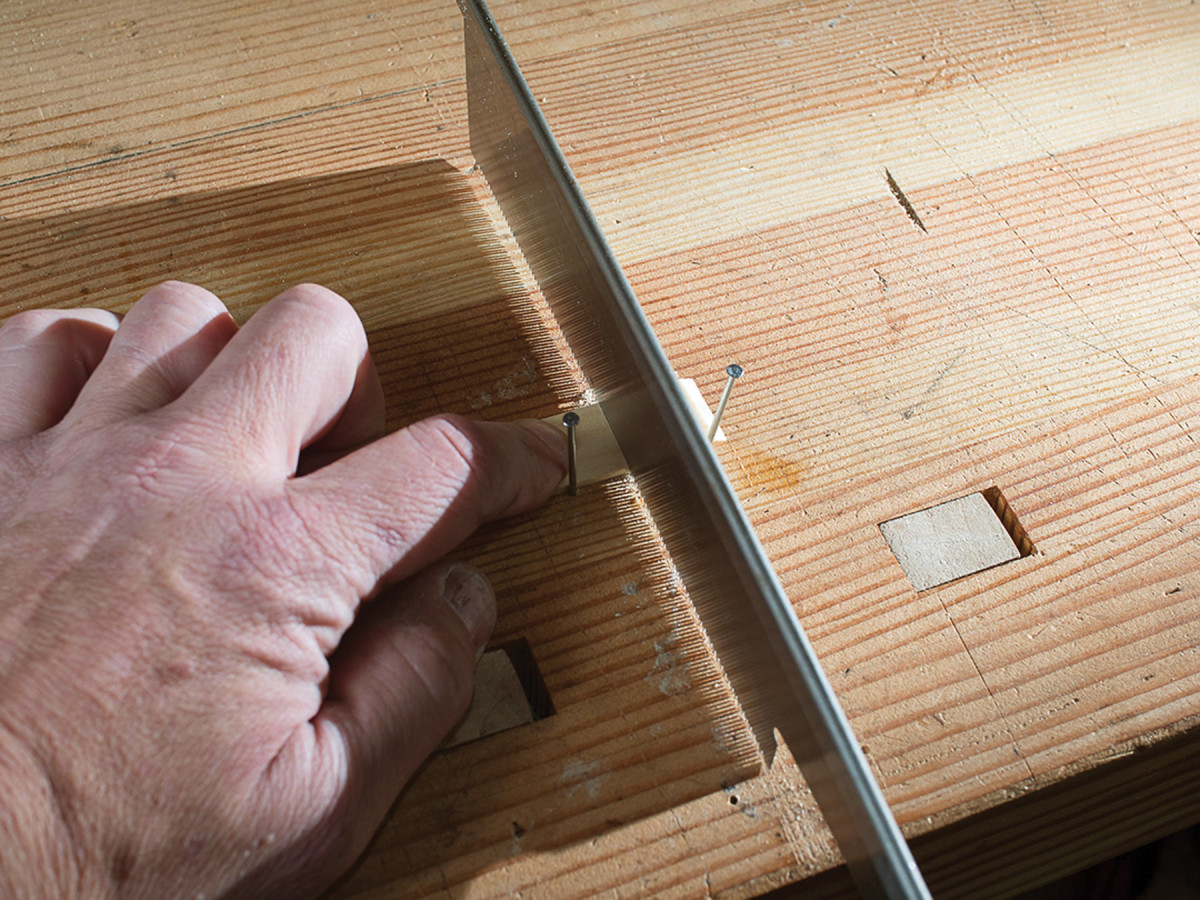
See & saw. A utility lamp, shining into the work at bench level, makes it possible to gauge by eye the depth at which to stop sawing.
A dab of water on the bottom of the piece will help the hinge pop open cleanly; it should fold with nearly no force and remain intact. Install the piece in one of the panels and check its size. When pressed firmly into the corners, each leg of the hinge should just about bisect the corners. If it is too long, start over with a slightly shorter hinge piece. A bad fit will look sloppy, so try to get a good length worked out. Cut all the hinge pieces to the same length and install them in the panels.
The Keys
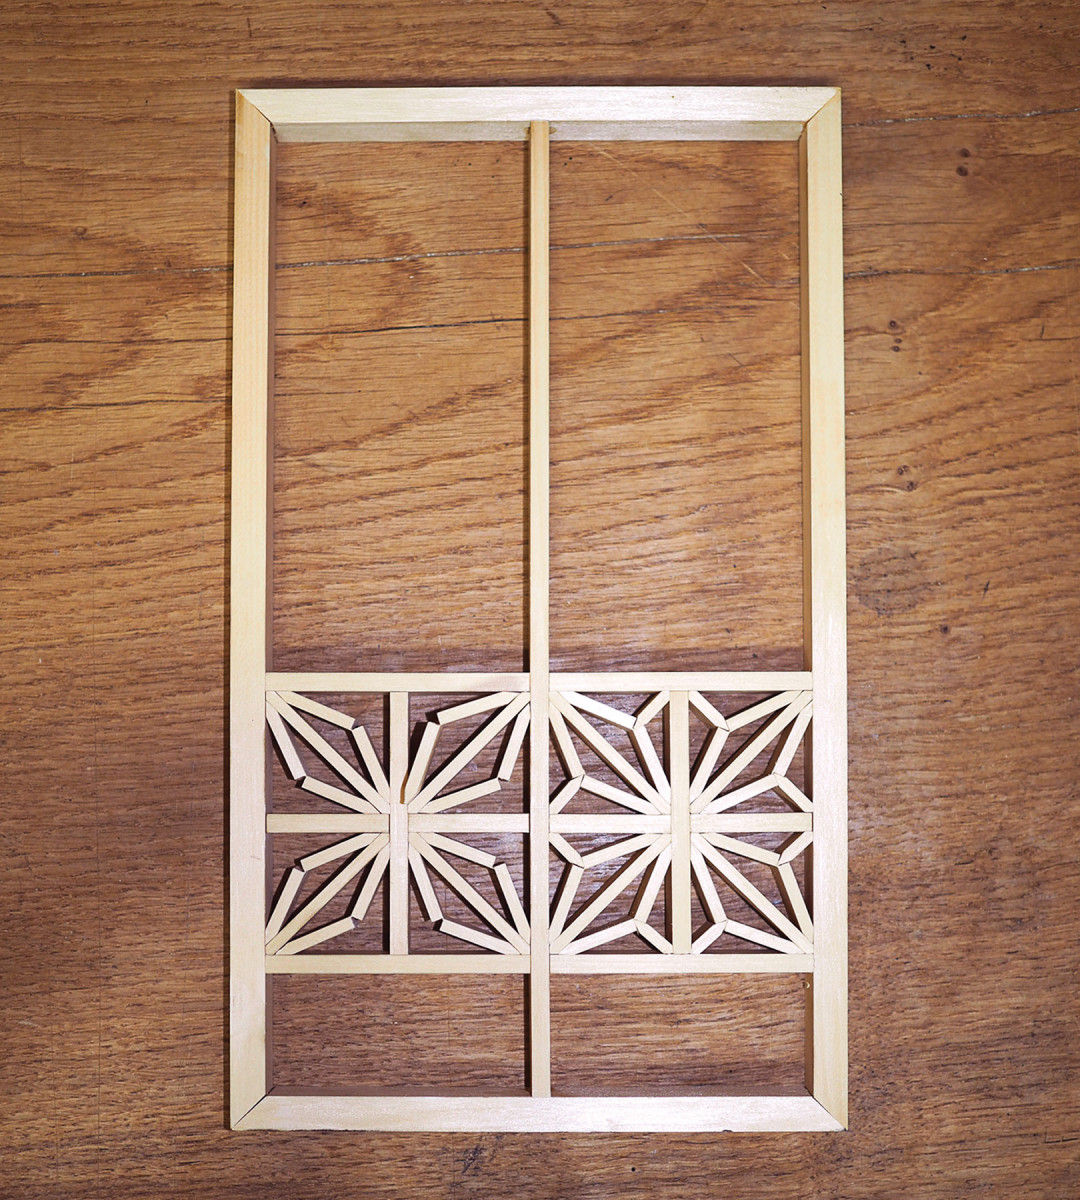
Folded wood. The “magic” hinges are a result of careful and controlled sawing.
And now for the final pieces: the keys that lock the hinges and make the pattern complete. Each key is quite small, and you’ll have to do the same sort of large-to-small sizing as you did for the diagonals.
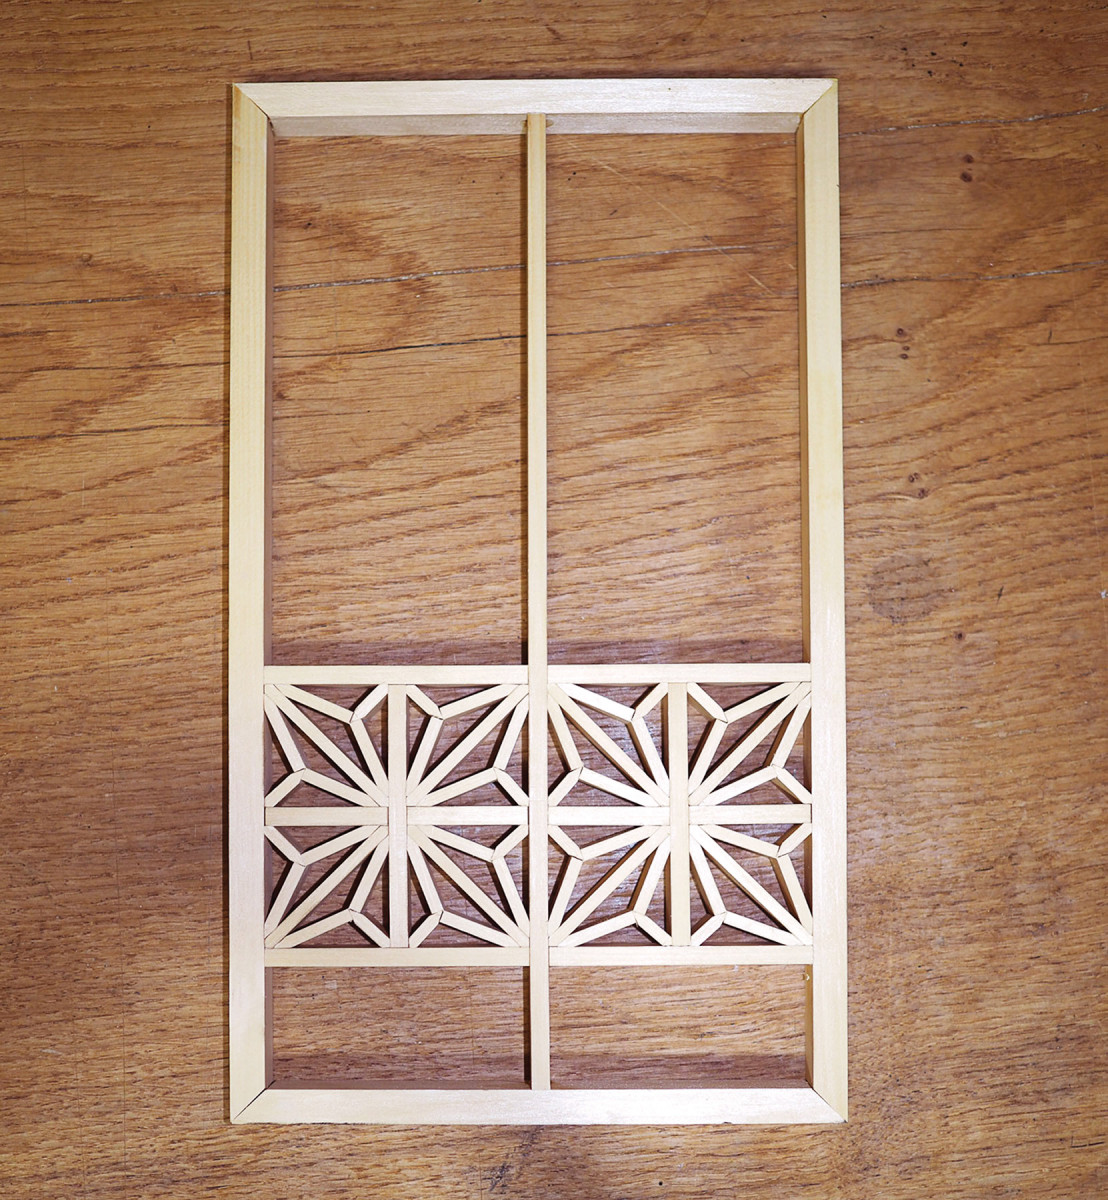
Keyed up. Lock everything in place with the keys and take a deep breath.
Start by crosscutting all the keys from 1⁄8” stock at 5⁄8“, which should be oversized. Shoot both faces of one end on the 22.5° jig. Then shoot the opposite end on the 45° jig and check the fit, resetting the fence and re-shooting as required. The piece should just slide in place with light force, locking the entire pattern solidly in place. If there is any wiggle, the key is too small. Don’t force a piece, though, because this will distort (or break) the lattice. Again, work from largest opening to the smallest.
Shoji Paper
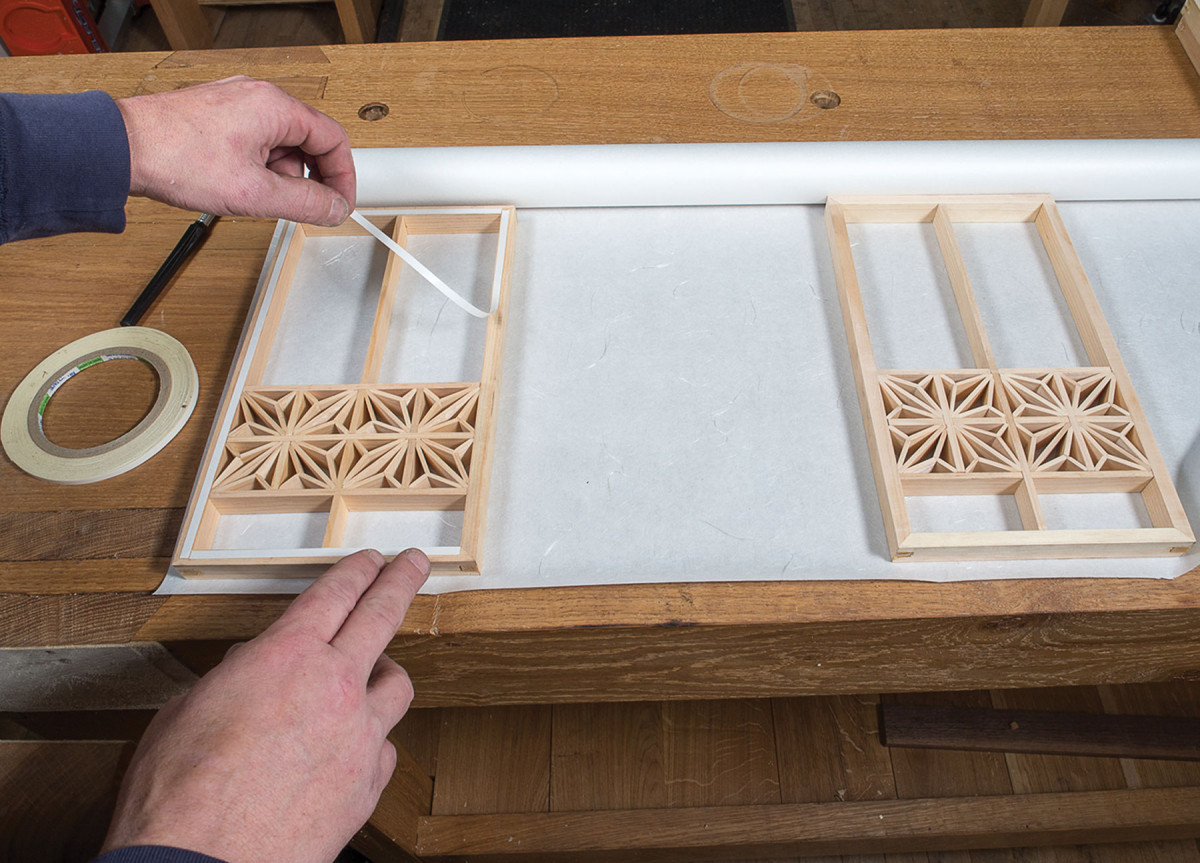
Stick ’em up. Double-sided tape beats traditional rice glue on all counts.
The last step before assembly is to install paper on the inside of each panel. Traditionally, this was done with rice glue, but I find modern shoji tape simpler to install and repair. Put the tape around the perimeter of the tsukeko frame and remove the backing. With your shoji paper flat and face up on the bench, put the frame on the paper and press gently to adhere the paper. Trim the edges to the frame with an X-Acto blade.
To get the paper drum-taut, spritz it lightly from the rear with water. This will make the paper sag slightly, but once it dries (20 minutes) it will be tight and seamless.
Wrap it Up & Turn it On
The glue-up is best done in two stages. Glue the front and rear sections first, then install the lighting hardware in the cross support. I used a lamp kit from my local big box store. I recommend an inline cord switch over a socket-mounted one to keep from having to reach in to turn the switch.
Once the front and rear panels are dry, install the remaining panels and stiles, and do the final glue-up. After the glue dries, power up your new lamp and enjoy some good punk rock (loud, of course) and a beverage while you bask in the glow.
Here are some supplies and tools we find essential in our everyday work around the shop. We may receive a commission from sales referred by our links; however, we have carefully selected these products for their usefulness and quality.


