We may receive a commission when you use our affiliate links. However, this does not impact our recommendations.
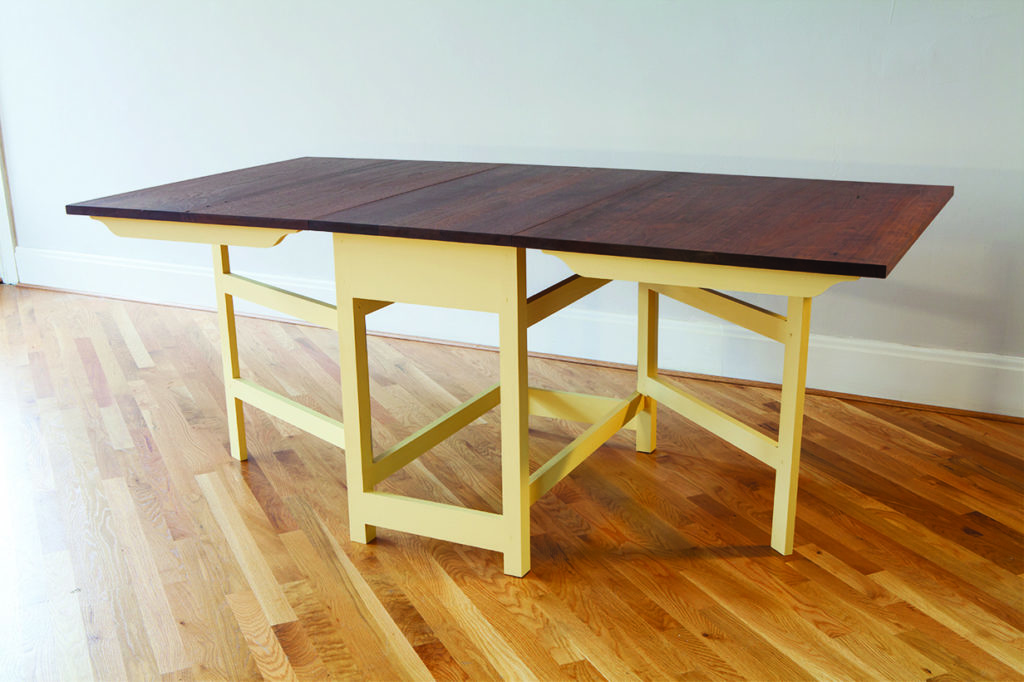
A contemporary-looking design that’s really from the 18th century.
by Christopher Schwarz
Pages 28 – 34
October 2017
Buy the issue here.
If you’ve ever been dragged to Ikea by your spouse (few woodworkers go willingly – except to eat meatballs), you’ve probably seen a table similar to this gateleg one. It’s been a staple of the contemporary furniture company’s line-up for many years. One Saturday five years ago, my family dragged me there to buy lamps and rugs. While they shopped, I fiddled with the table mechanism and wondered: Where did this clever idea come from?
After some research I was surprised to find this table in the furniture record all the way back to the 1700s. While some of the old gateleg tables I found featured carving and highly shaped components, the vernacular forms of the table looked just like the ones you see in Ikea.
I became charmed by the Swedish versions, many of which were painted bright colors. My version is based on several examples (culled from auction catalogs) that were dated to the late 18th or early 19th century.
Construction of the table is simple: The only joinery is mortise-and-tenon and screws. But getting all the components to nest together and move smoothly requires careful measuring and marking, so I’ll point out the tricky bits in the text.
How a Gateleg Table Works
The central base is essentially a mortise-and-tenon box. The base has two end assemblies that are joined together with four long stretchers. This particular table has two “gates,” which are mortise-and-tenon frames. The gates nest inside the long stretchers. The gates are hinged to the legs so they can swing out and support the dropleafs when in use.
The two dropleafs are hinged to the top of the base with strap hinges. Battens screwed to the underside of each dropleaf keep the dropleafs flat and rigid.
You’ll be surprised how little wood is required to make the base and the gates – my lumber bill was about $65 for the 30 board feet of poplar required. Because there is so little wood in the base, the joinery has to be quite good. That’s why I opted for drawbored mortise-and-tenon joints, which are difficult to beat.
Layout & Tenons
Prepare the stock for the base and the two gates. Because there were so many joints, I decided to cut the mortises with a hollow-chisel mortiser and the tenons with a dado stack in my table saw.
When I do this, I cut the tenons first and use them to mark out the locations of the mortises. This reduces both measuring and errors. While I know that my mortise machine makes a mortise that is exactly 3⁄8” wide, I always make a sample mortise in scrap to test each tenon as it comes off the saw. This saves fussing and fitting later.
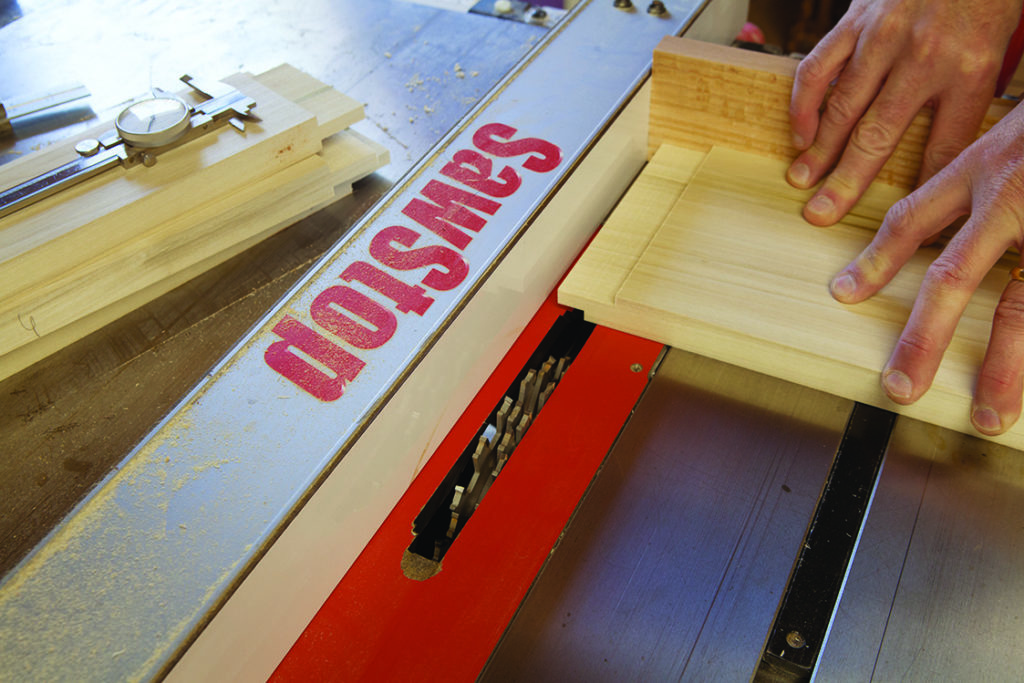
It’s safe. Because there is no wood trapped between the saw blades and the rip fence, it’s OK to use your miter gauge with this operation. Consistent downward pressure creates consistent tenons.
To make the 3⁄8“-thick x 1 1⁄4“-long tenons, put your dado stack in your saw and raise the teeth so they are 1⁄4” above the saw’s table. Set the fence so there is 1 1⁄4” between the left side of the sawplate and the saw’s rip fence. Make a sample tenon and test its fit.
Once you have the proper blade and fence settings dialed in, cut all the face cheeks for all the tenons in the base and the gates. But don’t cut the edge cheeks and shoulders yet because their dimensions vary based on the part. Narrow parts need small edge shoulders to maximize the size of the tenon, whereas bigger parts can have bigger edge shoulders.
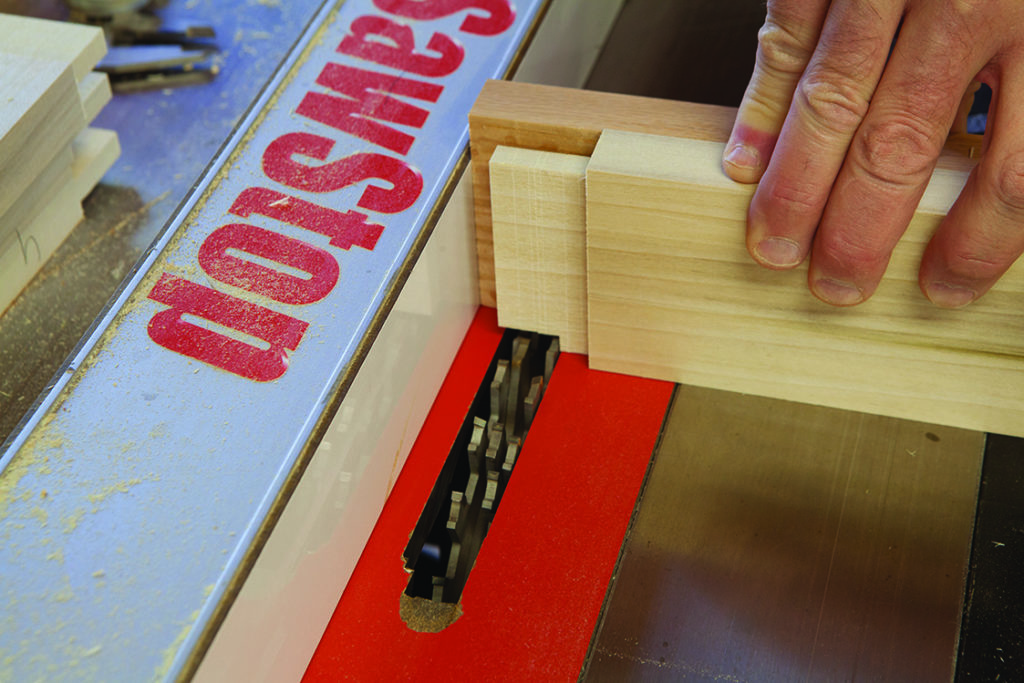
Edge shoulders & cheeks. Here I’m cutting the 3⁄8″-wide edge shoulders on one of the 3″-wide end stretchers.
With the face cheeks cut, reset the dado stack so it’s 3⁄8” above the saw’s table. Cut the edge cheeks for the 6″-wide aprons and 3″-wide end stretchers for the end assemblies. Then lower the dado stack so it’s 1⁄16” above the saw’s table and cut the edge cheeks for all the remaining components.
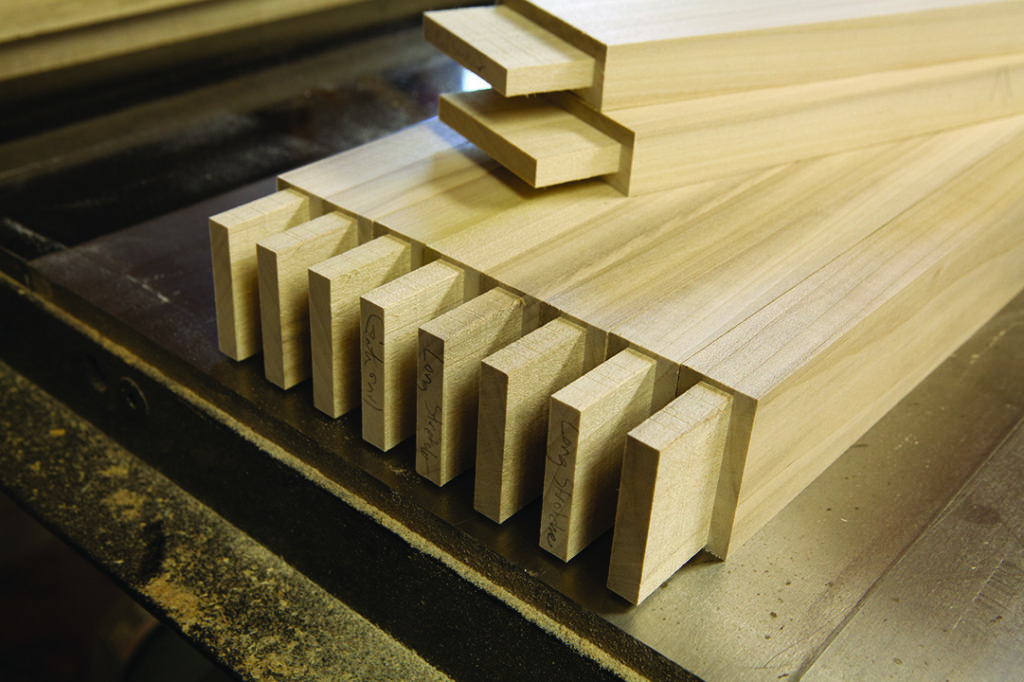
Tiny shoulders. Here are all the 2″-wide components for the gates and the long stretchers that run between the end assemblies. Note the narrow edge shoulders; these improve the strength of each tenon.
Marking & Mortising
With all the tenons cut you can lay out the mortises on the legs of the base and gate components. Use the construction drawings to identify where each stretcher, apron and rail should go. Then show each tenon to the area where it should go and use the tenon like a ruler to mark out the exact location of each mortise. This technique reduces measuring and mistakes.
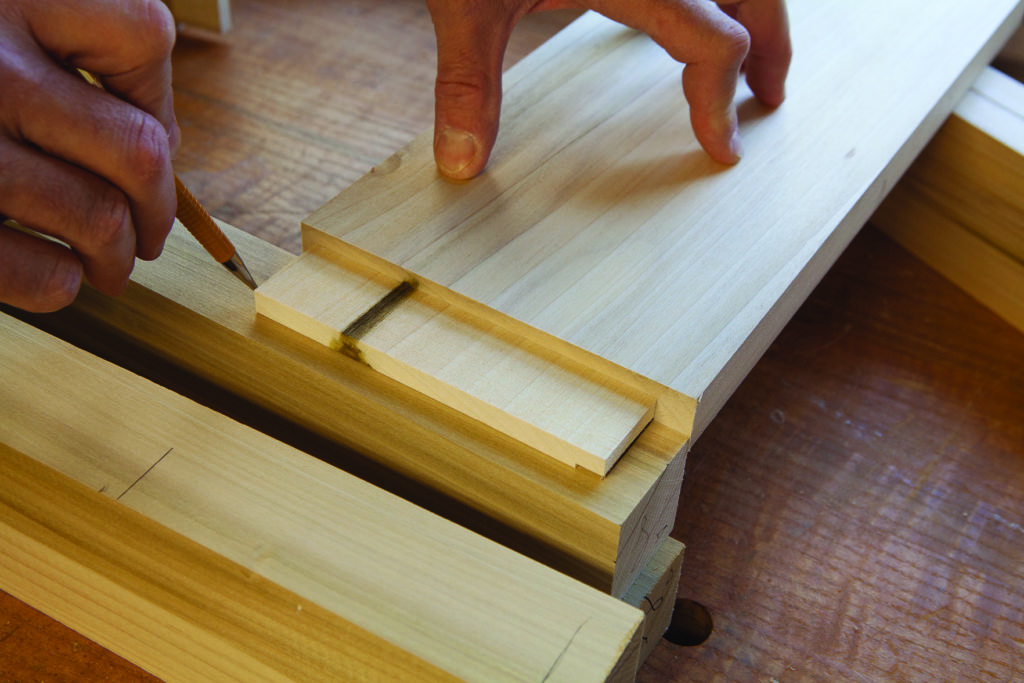
Tenon, meet your new home. Use the tenons to lay out where their mortises stop and start. This method prevents math errors and cancels out any small irregularities in the widths of your tenons.
With all the mortises marked, set up your hollow-chisel mortiser to cut a 3⁄8“-wide mortise that is 1⁄4” from the machine’s rear fence. Make some test mortises to confirm the setting of your machine and tooling. Then set the machine’s depth stop to make a mortise that is about 1 3⁄8” deep. The extra depth allows any surplus glue or connected debris to dwell there instead of fouling the joint’s fit.
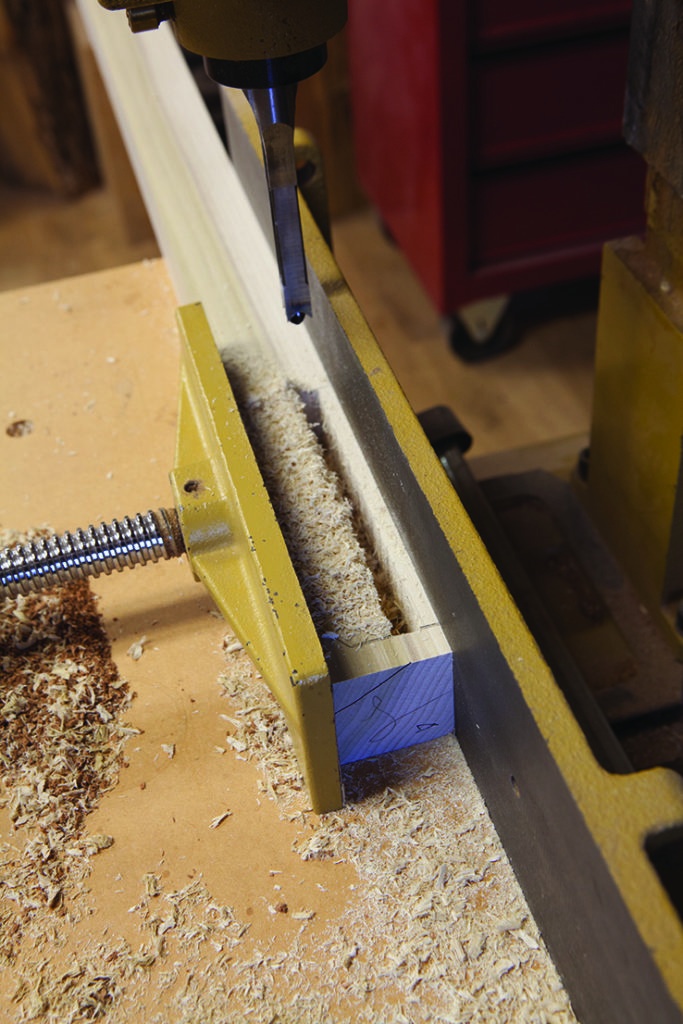
Mortises all around. Careful marking will ensure you don’t poke a hole where it shouldn’t be. Because there are so many mortises, it pays to double-check your layout before committing to it.
Cut all the mortises, clean out the debris and check each joint’s fit in case the mortise needs to be lengthened (or deepened).
Before you jump into assembling things, plow the groove in the top aprons that will accept “buttons” (more on those to come) that hold the top to the base. The groove should be 3⁄8” wide x 3⁄8” deep and start 1⁄2” from the top edge of the apron.
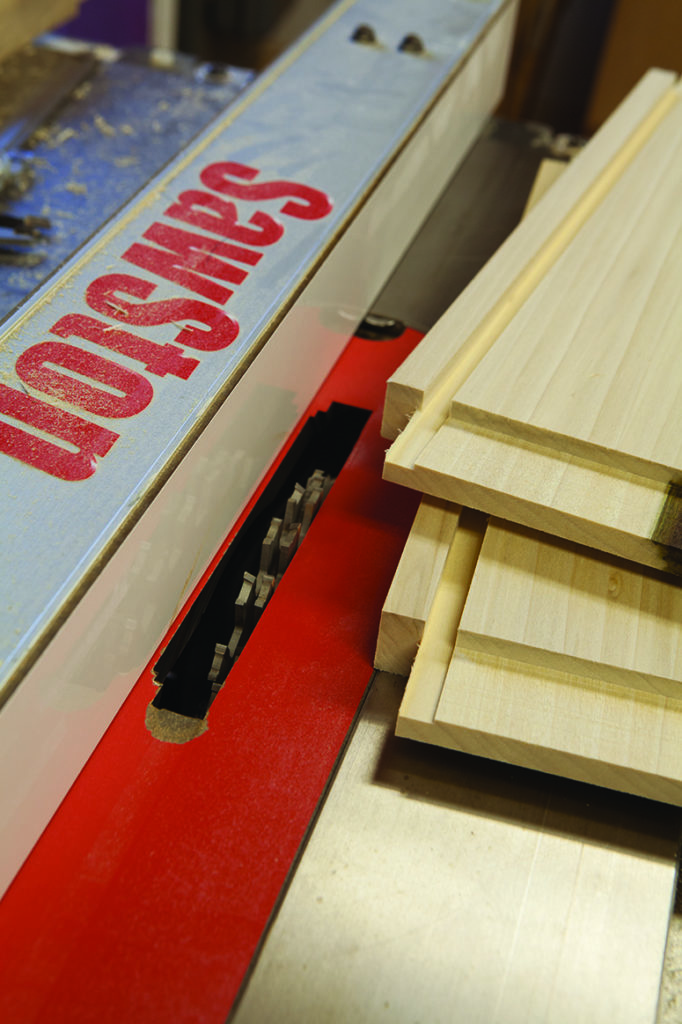
A groove for later. The groove in the top of the apron will hold the “buttons” that you’ll screw to the underside of the base’s top.
Clean-up & Drawboring
Because all the joints are drawbored, it’s smart to first drill the holes through each mortise before cleaning up your parts (a drill bit can make a mess of things). I used 3⁄8“-diameter oak pegs to drawbore the joints, so I drilled holes through the mortises using a bit that was 1⁄64” undersized of 3⁄8” to ensure smaller gaps around the pegs.
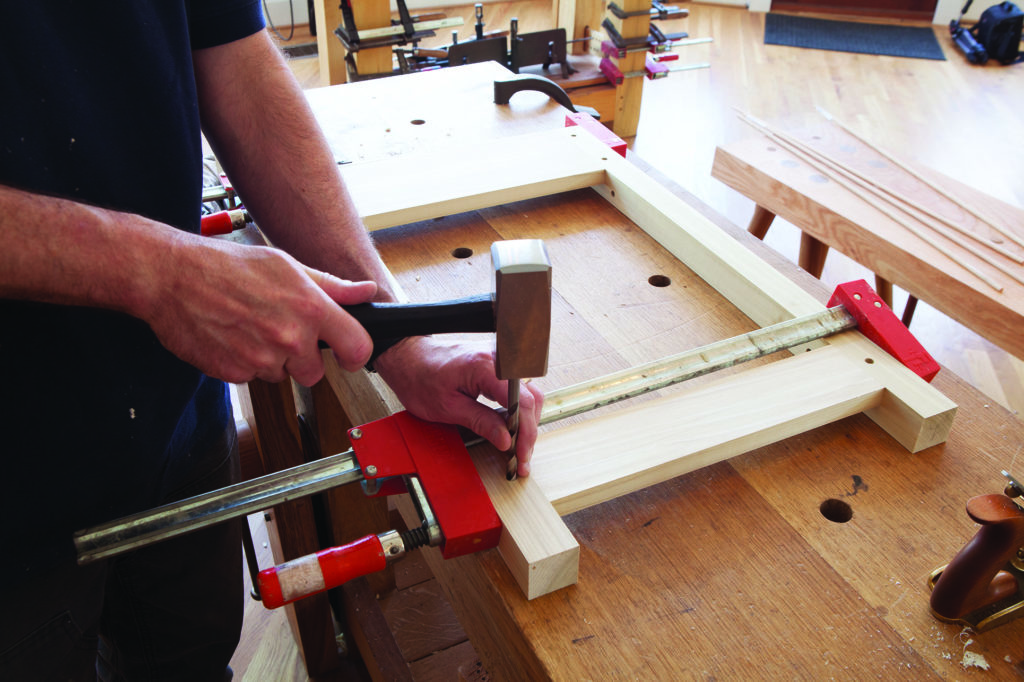
Mark the bore. Use the drill bit as a punch to transfer the position of the bore onto the cheek of the tenon. The clamps keep everything tight during this operation.
The center points of these holes are located 1⁄2” from the edge of the component. Except for the top apron, the holes are centered on the length of the mortise. The top apron gets two holes through each mortise.
Now remove all the machine marks from the parts for the base and the gates using handplanes or sandpaper.
If you’ve never drawbored a joint, here’s a primer. You drill a hole through the mortise. Then you insert its tenon and mark the center point of the bore through the mortise on the tenon cheek. Take the joint apart and move that center point toward the tenon shoulder by about 1⁄16“. This dimension is called the “offset.” Small offsets (such as 1⁄16“) are for casework. Larger offsets are for building benches or timber frames.
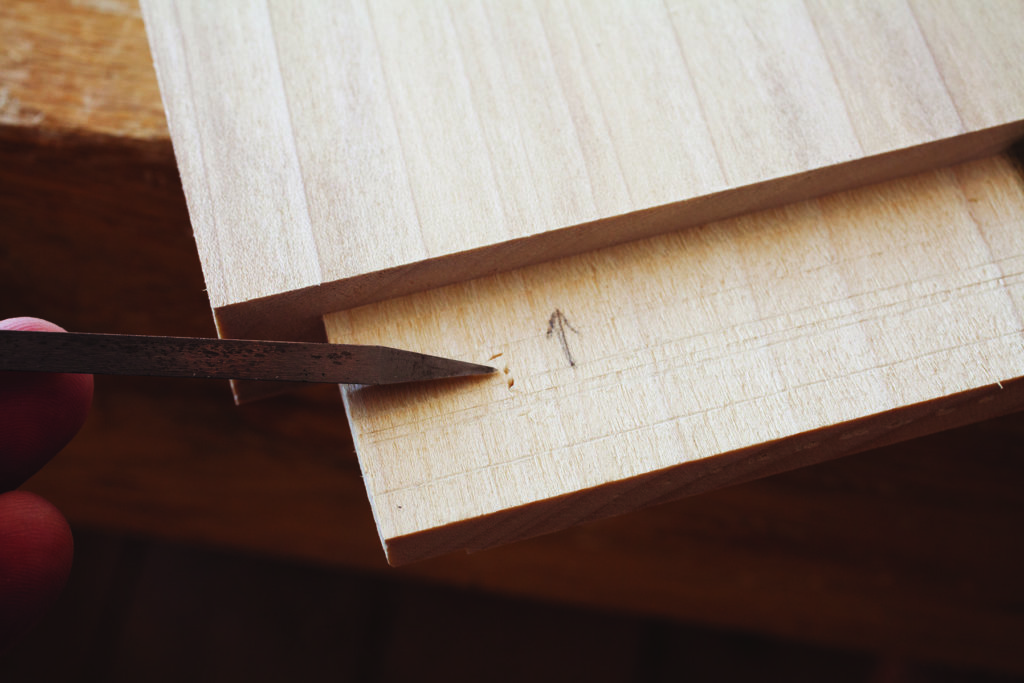
Here, not here. I moved the center point of the bore 1⁄16″ toward the tenon shoulder and marked it with an awl.
Bore the hole though the tenon in the new location. Reassemble the joint and you’ll see a crescent moon when you look through the two bores. When you drive a peg through those two “bores” it will “draw” them together. This creates a mechanical lock that doesn’t rely on glue or clamps.
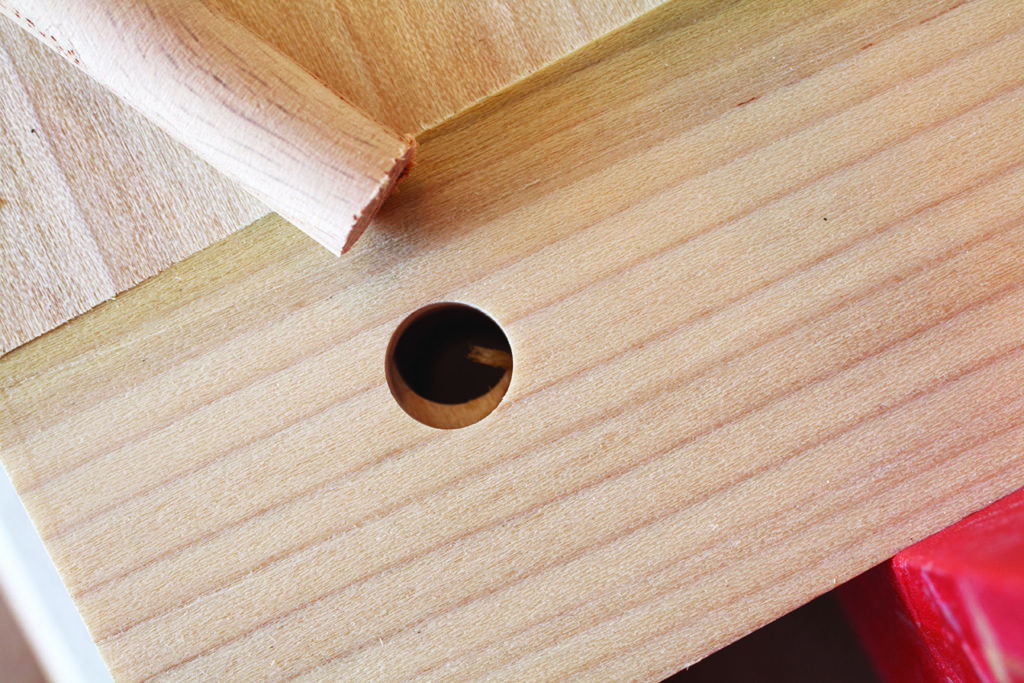
Before the banging begins. This is what the assembled joint should look like before driving the peg in. If the crescent moon is on the other side of the hole, you did it wrong.
Because I have clamps and reliable hide glue, here is how I assemble the joint: I paint glue in each mortise, insert the tenons and clamp up the assembly. Then I take my 3⁄8“-diameter peg and sharpen it with a pencil sharpener. I wax each peg with paraffin (a timber framer’s trick) to help slide the peg in place without it seizing.
Drive each peg in. After all the pegs are in, remove the clamps and move to the next assembly.
First drawbore the two end assemblies. Then join the end assemblies with the four long stretchers to complete the base.
Make the Gates
Before assembling the gates, make sure the gates’ stiles fit between the long stretchers of the base. Shoot the ends of the stiles until you have a 1⁄32” gap at the top and bottom. Any rubbing needs to be remedied.
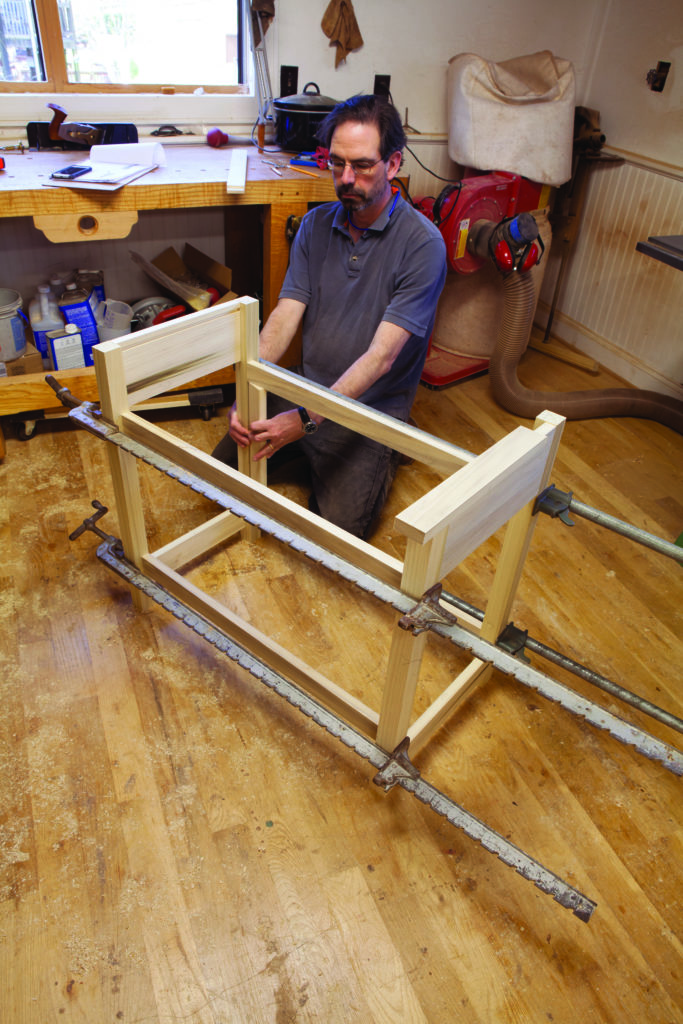
Like a door stile. If the stile is too long it won’t fit in the table base. Cut it to a perfect fit before assembling the gate.
Just like with the base, bore the holes for the pegs in the mortises and clean up all the machine marks. Then drawbore all the joints together with oak pegs, just like with the base.
With all the joinery complete for the base and the gates, trim all the oak pegs flush and clean up any denting or glue drips.
The next step is installing the hinges between the base and the gates. This is when things get tricky.
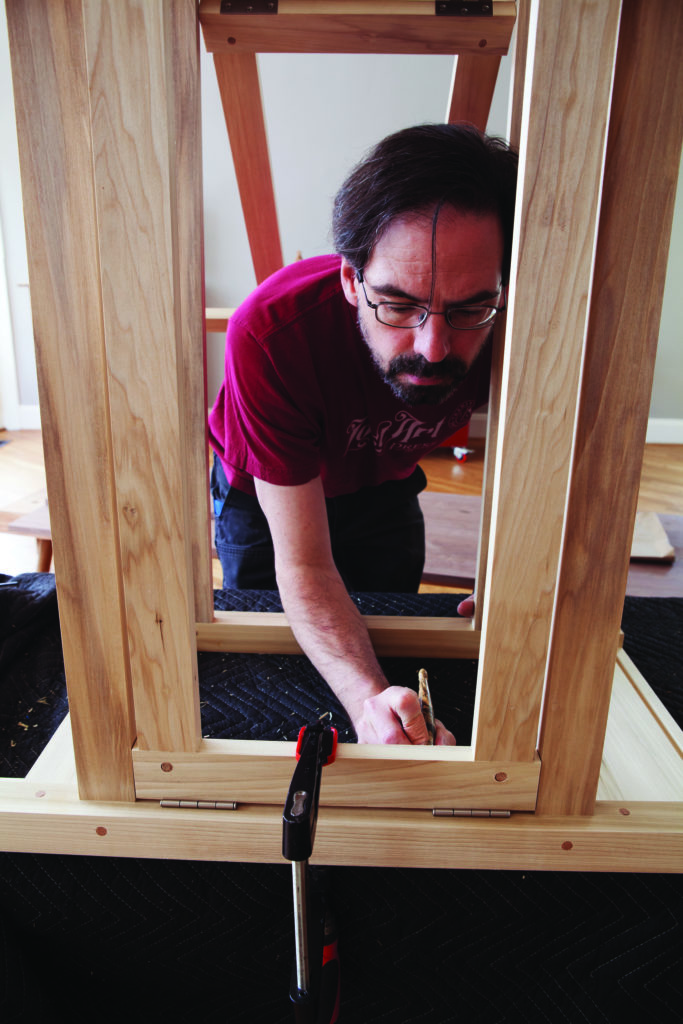
Clamp & knife. Put the gate in place and knife the location of the hinges on the leg.
Here’s the best way to proceed: First install the hinges on the stile of each gate, then clamp the gate in place on the base and carefully knife where the hinges should go on each leg.
To install the hinges on the gate, it’s just like installing hinges on a door. Cut the hinge mortises with a chisel and router plane. Screw the hinges in place.
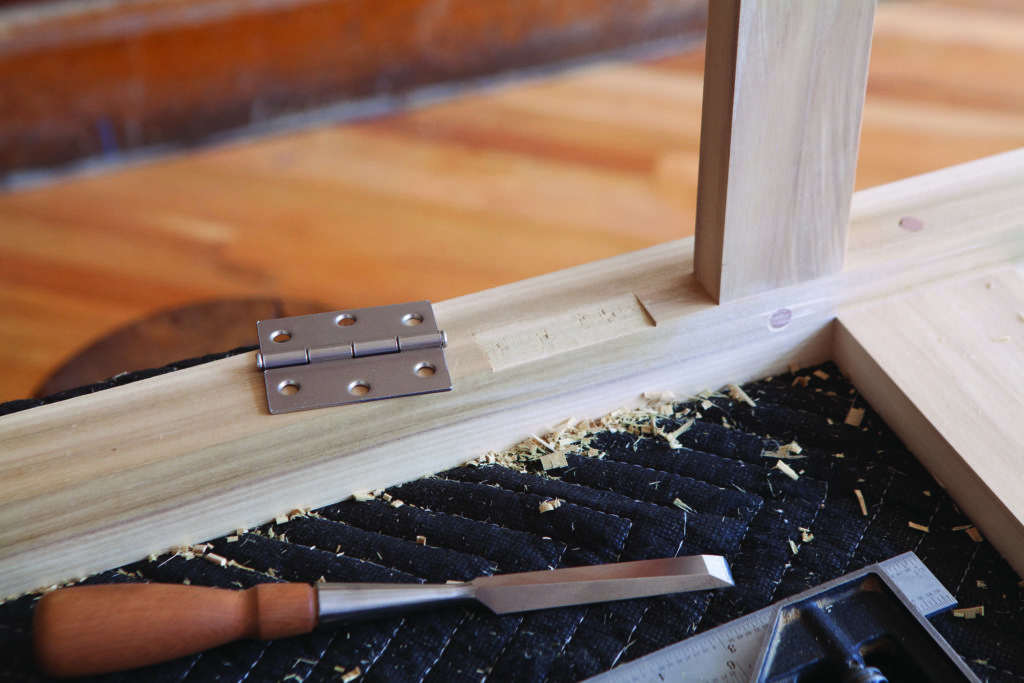
Ramped mortise. You can see how the mortise goes from full depth to nothing at the barrel of the hinge. This mortise isn’t difficult to cut. Just mark the lines and chisel to the lines.
Clamp a gate in place against the leg. Make sure the gate is centered in its opening and the hinges press evenly against the leg. Take your marking knife and score the leg where each hinge mortise should go.
The mortises on the leg are a bit unusual. They are ramped. This means that they are full depth at one edge of the leaf and ramp to nothing at the barrel of the hinge. Why are they ramped? You don’t want to have to bury the hinge barrel in a mortise in the leg. That would be unnecessary work and would likely be unsightly.
So why not simply surface-mount the hinges on the leg – dispensing with the mortise altogether? There are many little reasons, but the best reason is that a hinge in a mortise is a stronger hinge.
Once you get the gates hinged to the base, test how they swing and make sure you don’t have anything binding. If you do, investigate whether your hinges are installed properly.
Install the Top for the Base
When making the tops, begin with the top for the base. It needs to be centered on the base and installed with table buttons – shop-made bits of wood that join the base and top but allow wood movement.
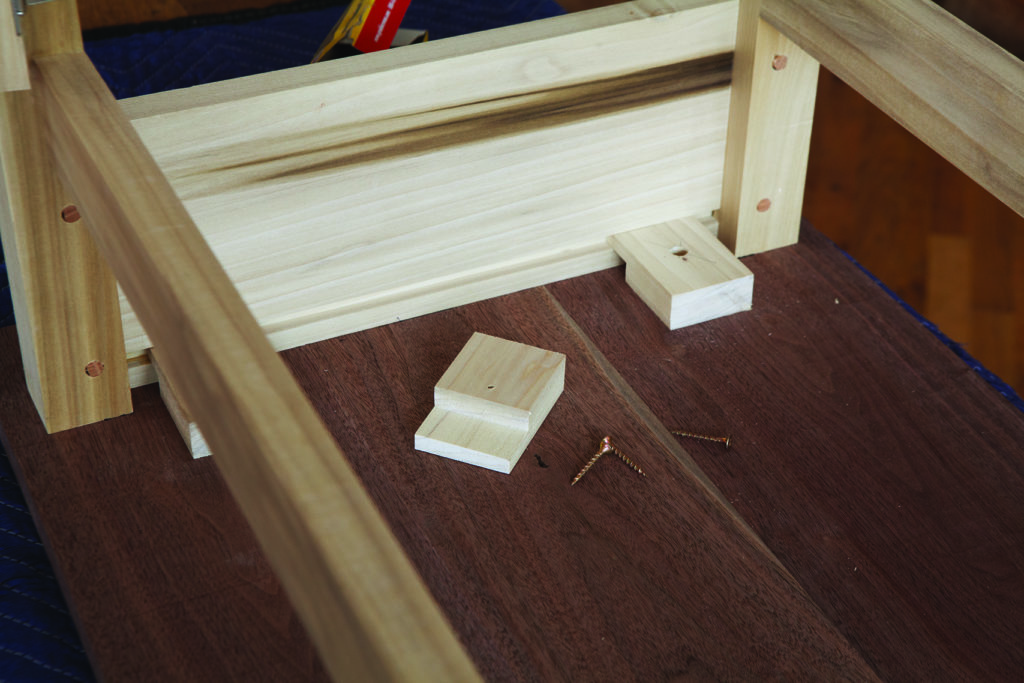
Table buttons. This traditional method of joining a base and a top allows the top to move but allows the top to be removed easily for finishing (or refinishing).
I make buttons using the same tooling setup for making tenons – a dado stack in a table saw with a miter gauge. The tongue of the buttons should slide into the groove in the aprons.
I made six table buttons and screwed them to the underside of the top with No. 8 x 11⁄4” steel screws. To attach the fixed top and dropleafs, first put a blanket on your benchtop and flip the base upside down on your benchtop.
Add the Dropleafs & Battens
After you glue up your dropleafs, cut them to final size then show them to the upside-down base on your bench. It’s best to clamp the seams between the tops to hold things in place during the next steps.
You want to install the strap hinges that join the tops so that the swinging gates don’t run into the hinge leaves. Position the strap hinges, check your work then screw the strap hinges down. Note that you will find it easier to do this if you temporarily remove the base.
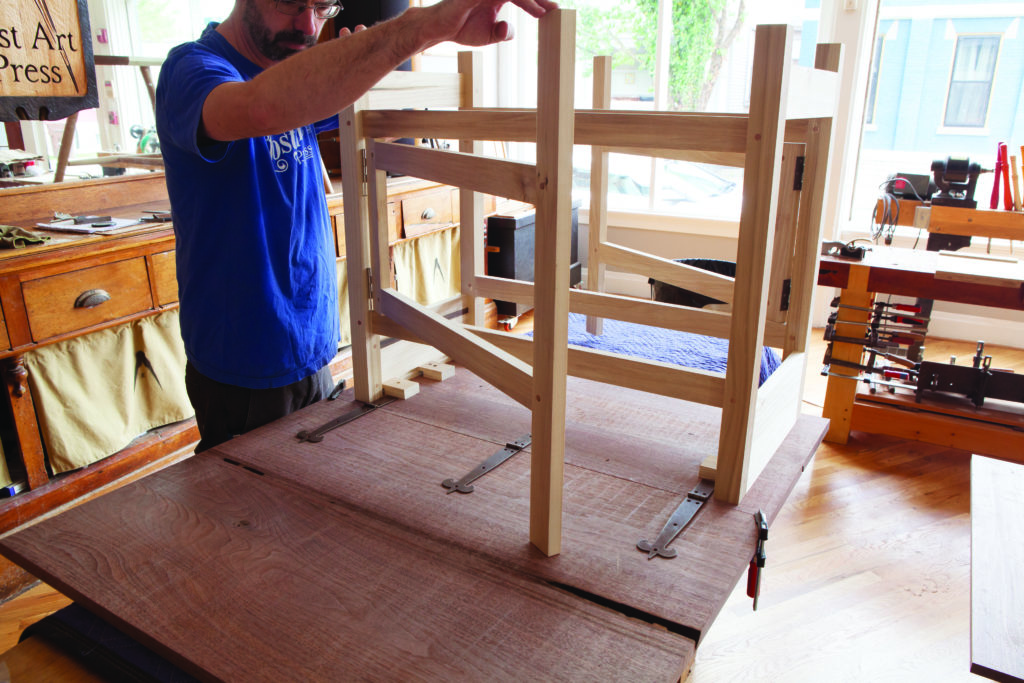
Play nice. Here I’ve positioned the hinges so the gateleg will swing freely. Note that these hinges are simply surface-mounted. Mortising them would be a monumental task (and not get you much joy in this case).
With the hinges screwed down, reinstall the base and make the battens for the dropleafs. The battens serve two purposes: They keep the dropleafs from cupping and make each dropleaf rigid. Think about it: Each dropleaf is supported from below by no more than a single stick. The battens make a big difference.
I cut an ogee shape on the end of each batten. It’s really the only ornament on this otherwise Spartan project. So go nuts. Attach the battens with #10 x 2″ steel screws. After drilling each clearance hole for a screw, ream it out a little to let the top move through the seasons.
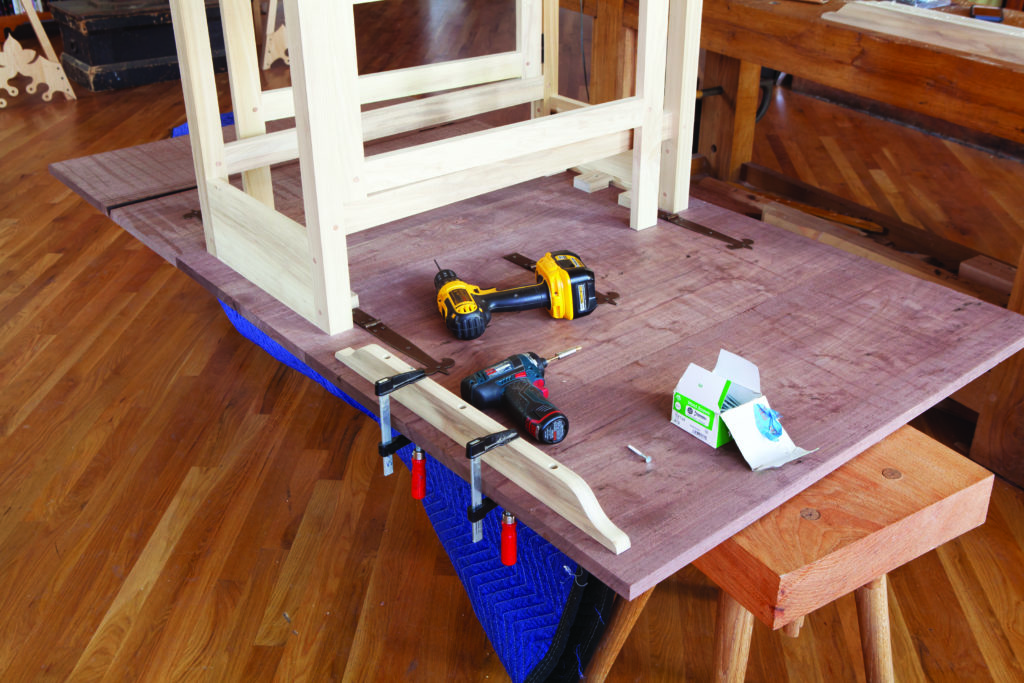
Stay flat. The battens keep your dropleafs stiff and flat. Be sure to ream out the screws’ clearance holes to allow the top to move.
Finishing
The base and gates are painted using General Finishes Milk Paint (buttermilk color). Note that this paint seems to be an acrylic, not an actual casein-based paint. But it looks great. Apply it with a brush and sand between coats with the finest-grit sanding sponge available.
The tops are finished first with shellac. I used Tiger Flakes Garnet Shellac (from toolsforworkingwood.com). I hate to sound like a tool, but I have yet to find better shellac flakes. They dissolve rapidly and have no bug parts to filter out. I used a 2 lb. cut and applied four thin coats, sanding between coats with my sanding sponge.
After the shellac, I applied a blend of linseed oil and beeswax using a 3M Scotch-Brite grey pad. You can easily make your own oil/wax blend (see the links at the end of the story) or buy the concoction from Swede Paint (swede paint.ca). This process effectively rubs out the finish. The 3M pad smooths the nibs and roughness. The oil and wax reduce the aggressiveness of the pad. The resulting slurry fills the wood’s pores and leaves a smooth surface behind.
After rubbing on the oil and wax, let it set up for 30 minutes. Then buff the surface with a rag. Let the surface set up overnight and use a clean cloth to buff off any uncured oil and wax.
When you are finished, take a minute to fiddle with the mechanism. It’s remarkable. When folded up, this table is only 21″ x 38″ – it’s but a sofa table, really. Unfolded, it offers a tabletop that is 38″ x almost 75″ long.
You can keep one leaf up for you and your spouse to eat breakfast, then open the other leaf when you make some friends. Or build two of these tables and have enough room for the entire Vienna Boy’s Choir to stop by for Swedish meatballs. PWM
Download the PDF below for the cutlist and illustrations.
Gateleg Table PDF
Christopher is the editor of Lost Art Press and is exactly 0 percent Swedish.
Online Extras
Blog: Make your own oil/wax finish.
Blog: Tips on smoothing milk paint.
Web: Learn more about drawboring.
To buy: “Build a Hand-Crafted Bookcase” video, by Christopher Schwarz.
 Popular Woodworking Magazine
October 2017
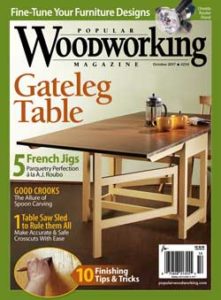
The cover story for our October 2017 issue is Christopher Schwarz’s Gateleg Table – it might look like something out of a contemporary furniture store, but the form has been around since at least the 18th century; his version features a painted poplar base and a stunning wide-board walnut top and leaves.
James Hamilton shares step-by-step instruction for his MegaSled – a crosscut table saw sled that handles almost any typical task, plus – with the addition of a handful of clever accessories (coming in the November 2017 issue), it does just about everything except vacuum the shop.
Learn all about André Jacob-Roubo’s Parquetry Jigs in an article from Don Williams, and how these period hand-tool appliances can help you create top-notch parquetry in your shop.
Build a Charles Rennie Mackintosh tea table that bridges Arts & Crafts and Art Nouveau with the help of Michael Crow.
And, find out what woodworking books have inspired 10 of today’s up-and-coming craftspeople.
Plus, we take a look at Oneida’s Dust-Free Router hood, Kreg’s Accu-Cut circular saw attachment and Corradi Rasps in Tool Test; in Letters, our editor shows you how she sharpens smooth plane irons with a slight camber using only stones; George Walker shares how small design changes make a big impact in furniture design in his Design Matter column; in Arts & Mysteries, Peter Follansbee writes about the tools you need for spoon carving; Bob Flexner shares 10 fixes for common finishing problems in Flexner on Finishing; and in End Grain, Jonas Jensen shares how to be an excellent builder…in your imagination.
Here are some supplies and tools we find essential in our everyday work around the shop. We may receive a commission from sales referred by our links; however, we have carefully selected these products for their usefulness and quality.


