We may receive a commission when you use our affiliate links. However, this does not impact our recommendations.
A new method for making an old moulding, and techniques for making multiples quickly.
by Robert W. Lang
Pages 18-20
From the Summer 2009 issue of Woodworking Magazine, issue 14
Buy this issue now
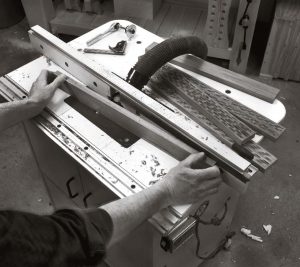
These intricate-appearing mouldings were made with common tools and aligned by eye to a marked layout. A complicated jig could have been made to space the cuts precisely, but that would have taken several times longer and destroyed the random character of the moulding.
Wave-form mouldings look like a product of the machine age, but this decorative style goes back much further. Joseph Moxon describes a “waving engine” in his “Mechanick Exercises,” a device that required one worker to pull the moulding through a device dozens of times to scrape the profile to its finished shape.
I wanted to replicate the look with contemporary tools, and while the results aren’t quite as intricate as some historic examples, I was able to use my router table to generate some interesting patterns in what was otherwise some bland-looking wood.
The patterns are a combination of clean and precise cuts made repeatedly in the face of the material. There is a randomness present that is a key part of the finished piece. This variation in the spacing of the cuts keeps the finished moulding from appearing too mechanical.
I prepared several more pieces of stock than I needed to allow for some experimentation with my setups and processes. If you follow my process, I would recommend preparing twice as much stock as you think you’ll need. This type of moulding is typically used in small pieces, such as frames or boxes, so it’s is a great way to use small pieces and stuff with not-so-attractive grain.
Running the modern-day “waving engine” is a basic process with several steps. None of the steps is very demanding, but a momentary lapse can mean starting over unless you have some extra pieces to use. After selecting a cutter and determining the spacing, the face of the stock is pushed into a spinning cutter at the router table, then moved off the cutter.
Two sets of guide lines are made on the router table fence and with each cut, the end of the board is moved down one mark. The hard part is remembering which set of marks to use. If you look at the pictures, you will find that each row of cuts is offset from its neighbor by about half the length of the individual cut. The effect is a pattern that is reminiscent of brickwork or basket weaving, and this semi-regular irregularity makes producing these mouldings more art than science.
Cutters for Scooping
I used router bits that are typically used for cutting slots. The square-ended cuts were made with a 1⁄4″-wide slot-cutter. These are available from most suppliers in diameters of 1-1/2″-1-7/8″. In addition to the width I used, similar cutters are available in a number of sizes. These could be used to make the finished surface more varied, and there are also cutters available that stack or adjust to make varied widths.
The round-ended slots were made with one half of a set that is normally used to make matching hollow and round edges for strip-built canoes. Of course, both the square and round-edge cuts could be combined, as can cuts of different widths, if you’re willing to change bits in the midst of production.
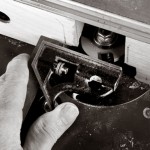
The easy way to set the depth of cut is with a combination square. Set the blade at the desired increment and when the bit kisses the blade, it’s right.
For your first attempt, I recommend keeping things simple by making all the cuts the same width until you are familiar with the process.
After deciding on a router bit and the width of cut to make, the depth and length of the cut are determined. Each of these dimensions is a function of the other. I decided on a depth of about 1/4″, and after setting the fence of the router table to achieve that depth, I measured the length of the cut with dividers.
On a project such as this, numbers become a cumbersome and time-consuming method of measuring. Setting the dividers by eye and stepping off increments is far faster. Each cut is separated from the next by a flat space of about 1/4″ long. This dimension is, of course, a matter of taste, so decide what looks right and set the dividers to the actual length of cut, plus the amount of space in between cuts.
I placed a strip of painter’s tape on the fence to protect the surface, and rotated the cutter until the edge of the bit was in line with the fence. I then placed the dividers with one point on the end of the cutter, and drew a mark where the other leg met the fence.
I continued marking along the fence until I reached the end. Make at least one mark on the fence on the other side of the bit, working from the point where the face of the fence aligns with the edge of the bit as before. I made a second set of marks working from the middle of the first set. I made the first set of marks in pencil and the second set with a red pen so that it would be easy to differentiate between the two.
Built for Speed
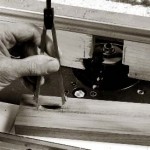
Dividers make measuring and marking numberless. Set the points to what looks right and step off the spaces.
If the moulding is designed with an even number of rows, pairs of rows can be milled with the same height setting of the cutter. An odd number of rows can be used, but one row will need to be perfectly centered in the width of the stock.
Cut your stock to a width that allows for all the rows, and the spaces in between. There is nothing wrong with non-uniform spacing between the rows, but leave enough room for at least a heavy 1/16″ between them. Anything less than that will likely be too fragile.
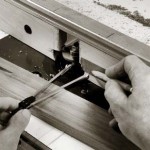
The first mark is made from the point in the cutting arc that intersects with the plane of the fence.
After routing one complete row, the board is flipped end for end, and the matching row is cut. These cuts will come close to lining up provided that the overall length of the workpiece is an increment of the distance between the pencil marks on the fence.
You can measure the distance and multiply if you are a glutton for numbers, but it is far easier to use a stick, hold it to the fence and mark the length directly. Cut several pieces to that length, and you are ready to begin milling. Choose your ugliest piece of material for the first cuts. It will take a try or two to develop a feel for the technique.
Practice the motion you will make before turning on the router. Line up the far end of a board with the last mark on the fence. Place the fingers of your right hand around the end of the board to keep it from moving laterally to the right. With your other hand, swing the board into the fence. When you do this for real, stop briefly when the face of the board meets the face of the fence, then swing it back.
It may seem strange to be working with the board on its edge, but the cut being made is very light, and it’s easy to maintain control. But if this makes you nervous in any way, you can temporarily attach a couple thick blocks of wood to the back of the workpiece. This will give you a surer grip and will prevent the piece from tipping back on edge, but it will slow down the process considerably. If you have a variable-speed router, throttle back the speed about halfway. This will reduce any burning and the chance of losing control of the work.

Cuts are made by swinging the work into the fence; gripping the wood to prevent lateral movement gives good control.
Get Rhythm
As you near the end of the first row of cuts, change your end reference to the left-hand end of the board, and use the marks on the left-hand fence. The motion will be the reverse of the cuts made so far. Place the left end of the board against the fence and swing the right end in and out. Keep your fingers a safe distance from the spinning cutter at all times.
Cut one row, flip the board end for end to cut the second row and repeat this process for all of the pieces being milled at one time. I found it helpful to stack uncut material on one side of the table, and place it in a stack on the other side as the cuts were completed. When both rows of slots have been milled in the entire stack, it’s time to adjust the height setting of the router bit for the next run of cuts.
Bear in mind that the cutter needs to travel vertically the width of the cutter, plus the width of the desired gap, to change height settings for the next row. It is helpful to draw the row layout somewhere before you start, and compare that to the cutter height as you change settings. Mis-setting the cutter will have dire consequences; the risk is wiping out the space between rows of cuts or at the edge of the material.

Complete the cut by swinging the other end gently against the fence. Swing it back out and move to the next mark.
After making a few rows of cuts, you’ll likely establish a rhythm of cutting. This helps to speed the work, but it also can be hypnotic. Focus on where your hands are at all times and pay attention to make certain you haven’t left a piece out or missed a cut within a row. It is possible, but not easy, to go back and correct missed cuts. At the end of each round of cuts, check your work. Going back and resetting the height adjustment of the bit is time-consuming.
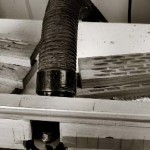
Keep track of where you are by using two stacks of material as you work through the progression of cuts.
The condition of the bit is crucial to the quality of cuts. If you are using a bit that has some miles on it, clean off the crud and touch up the face of the carbide with a diamond hone, making an equal number of strokes on each cutter. If you experience any burning, speed needs to be adjusted somewhere in the process – either the rotation speed of the bit or the speed at which you move the material.
Some species of wood may be prone to tear-out as half the cut is made with the bit entering the wood, and the other half with the bit exiting. And within a given species, tight, straight-grained wood will work the best. For this article, I used walnut, and with sharp bits and moderate rpms, tear-out was insignificant.
I used this material to make the picture frames for the article on the following pages. Because I knew there would be some sanding after assembly, I didn’t do anything to the surface until then. When I did sand, I found that hand sanding with a sanding sponge worked well both for smoothing the flat areas between the cuts, and for breaking the edges at the perimeter of the cuts. For the areas below the surface, I decided to leave well enough alone. WM
To download a PDF of this story, click here: Wave-form Mouldings
Here are some supplies and tools we find essential in our everyday work around the shop. We may receive a commission from sales referred by our links; however, we have carefully selected these products for their usefulness and quality.


