We may receive a commission when you use our affiliate links. However, this does not impact our recommendations.
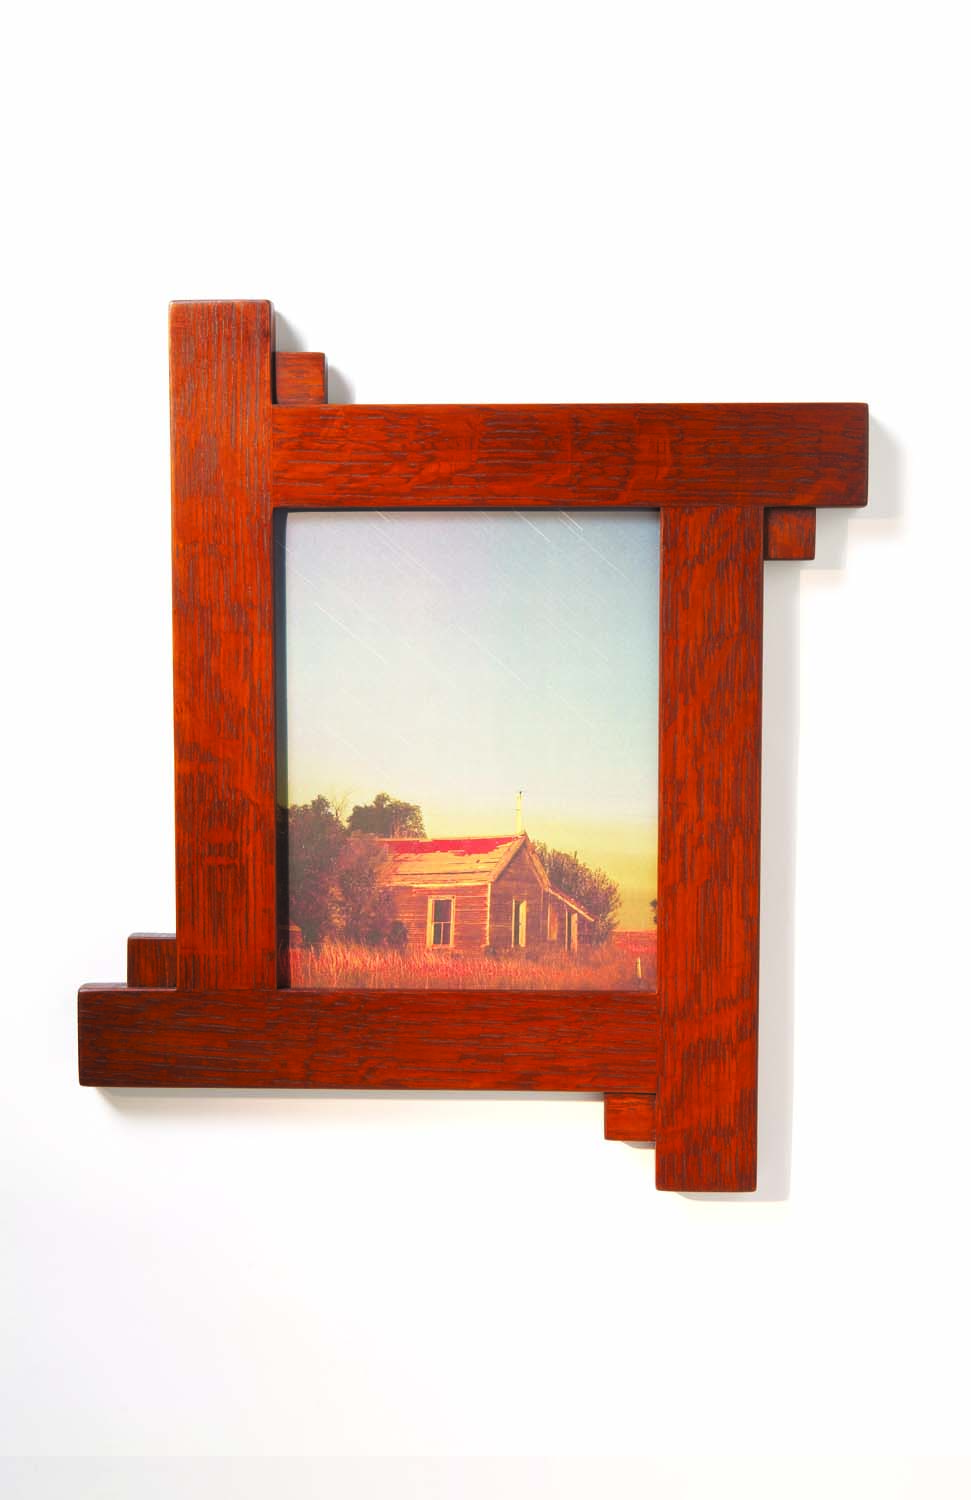
Both of the prints I planned to frame included a windmill as a minor detail. Thinking, “what if?” I grabbed four pieces of scrap wood, made a pinwheel, and thought, “not bad!” Adding the faux wedges—just to see what they would look like—turned out to be the perfect finishing touch for one of my most popular designs.
Make the pinwheel
Quarter-sawn white oak is appropriate, as this frame channels the Arts and Crafts era.
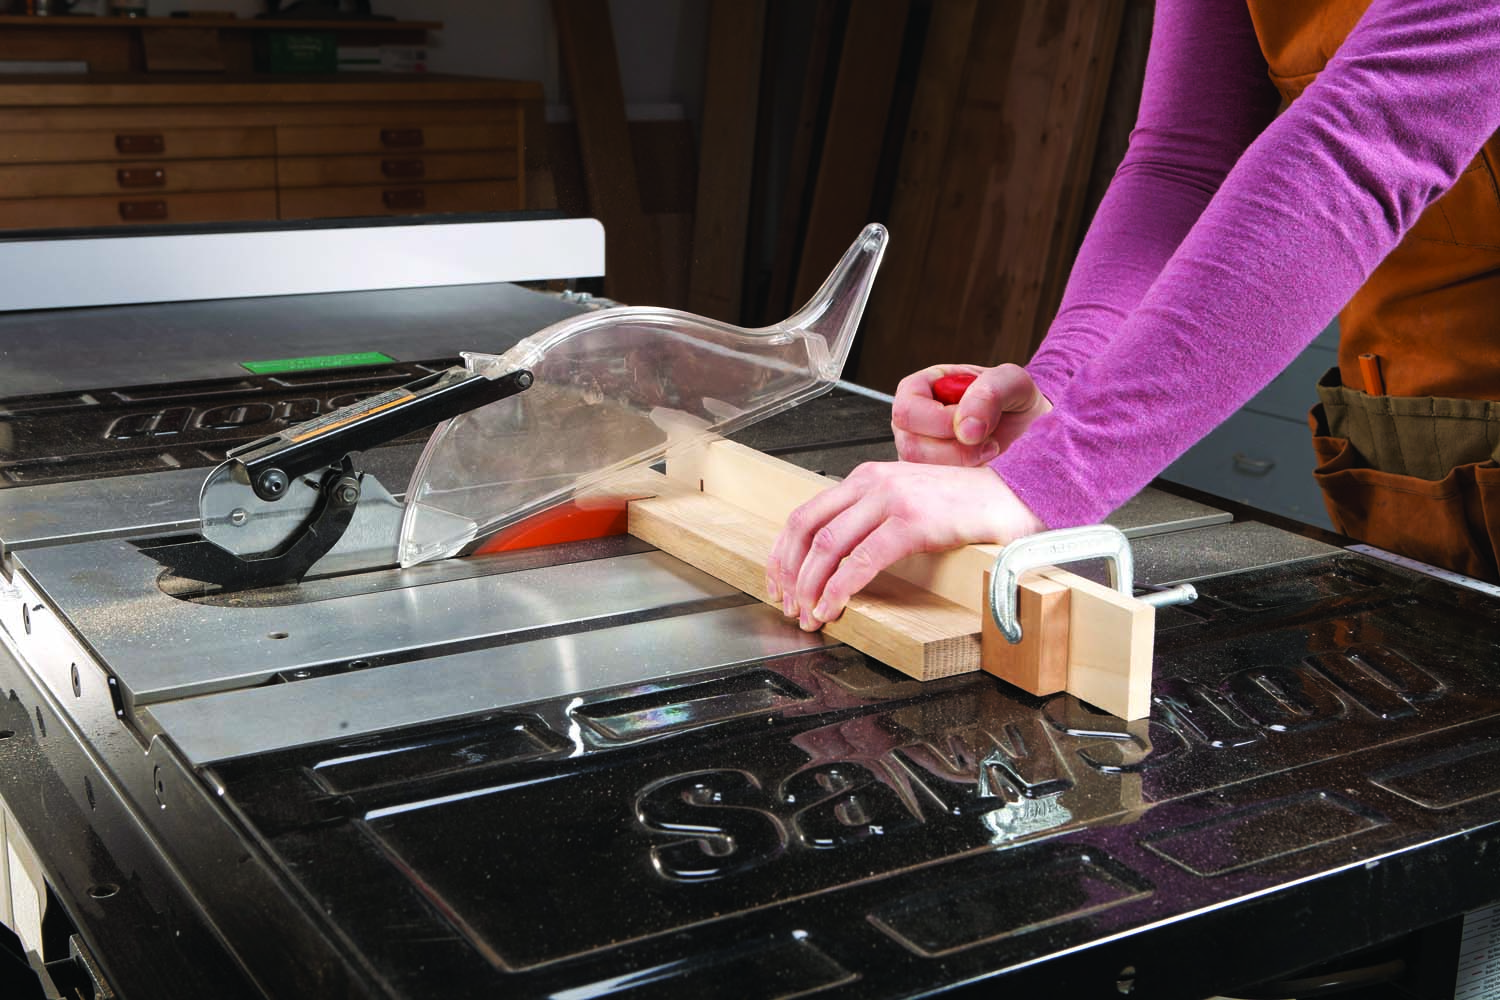
Photo 1. Cut the frame sides to length, using a miter gauge equipped with a fence and a stop block
Mill the stock to 3/4″ thickness and joint one edge. Rip the vertical and horizontal frame parts (A, B, Fig. A and Cutting List) slightly oversize and then joint them to final 2″ width. Attach a fence to your miter gauge and square one end of each part. Then use a clamped-on stop to cut them to final length (Photo 1).
Lay out the pinwheel and mark the parts on the end and side for the #0 biscuit slots. (The first time I made this frame I used mortises and loose tenons. Trust me: Biscuit joinery saves a substantial amount of time!)
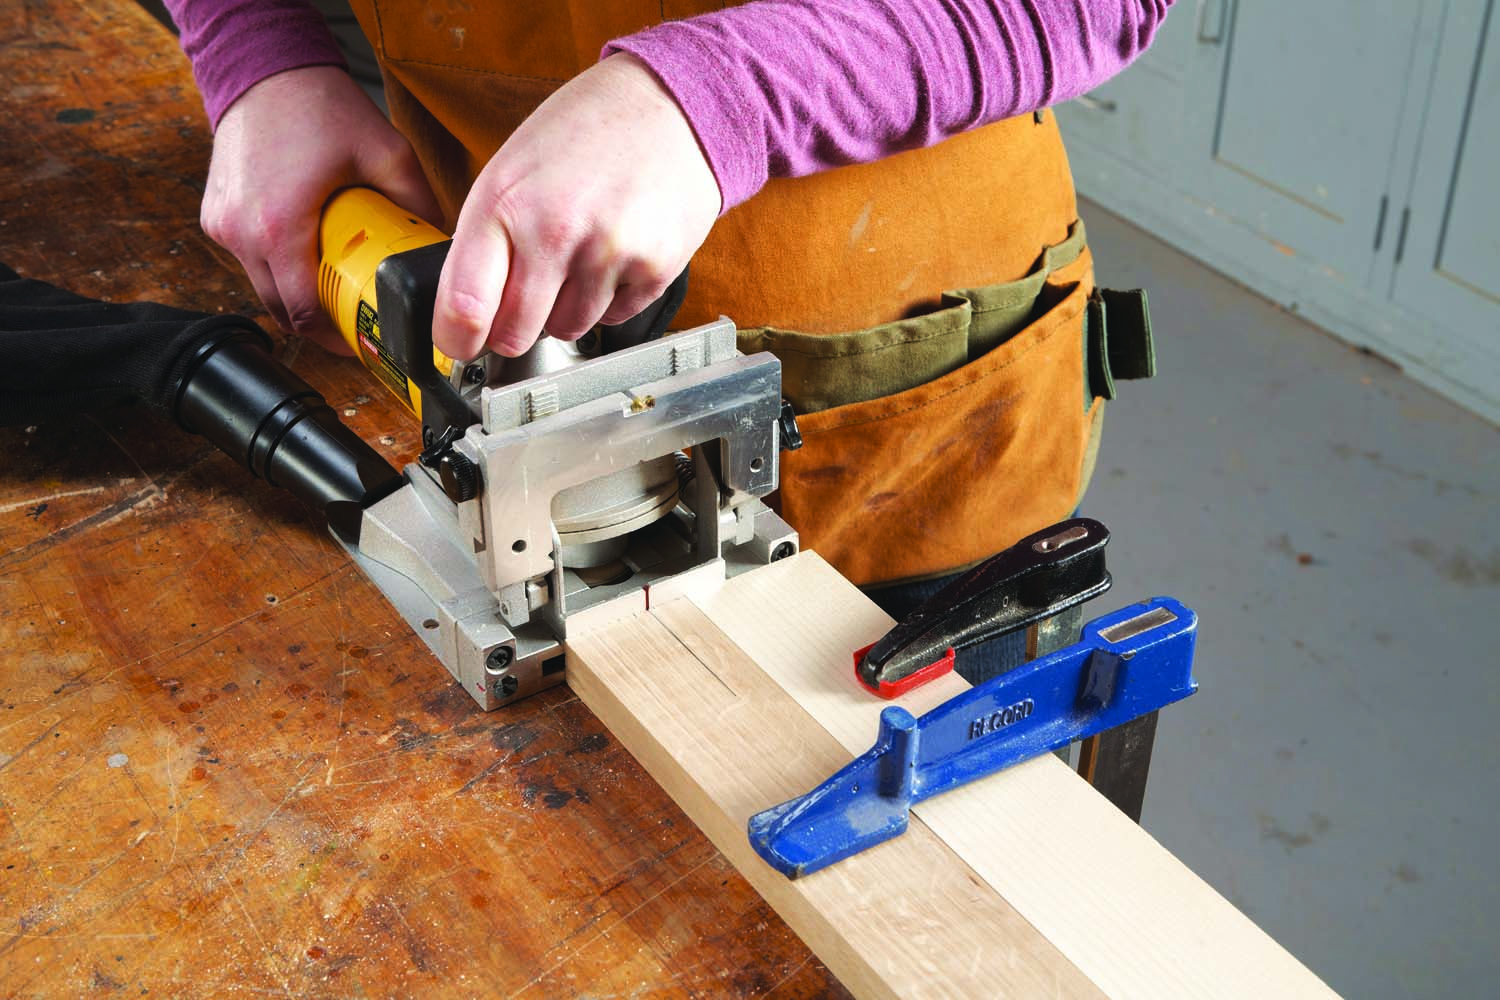
Photo 2. Cut an offset biscuit slot in one end of each frame side. Clamp a support block flush at the end to securely position the biscuit joiner, so it doesn’t move while cutting.
The slots are wider than the frame parts, so the slots cut in the ends have to be offset towards the outside of the frame. Don’t worry. The corner details will hide the exposed slots. Mark the end of each part 5/8″ from its outside edge to register the biscuit joiner. Clamp each part next to a support block to cut the slot (Photo 2).
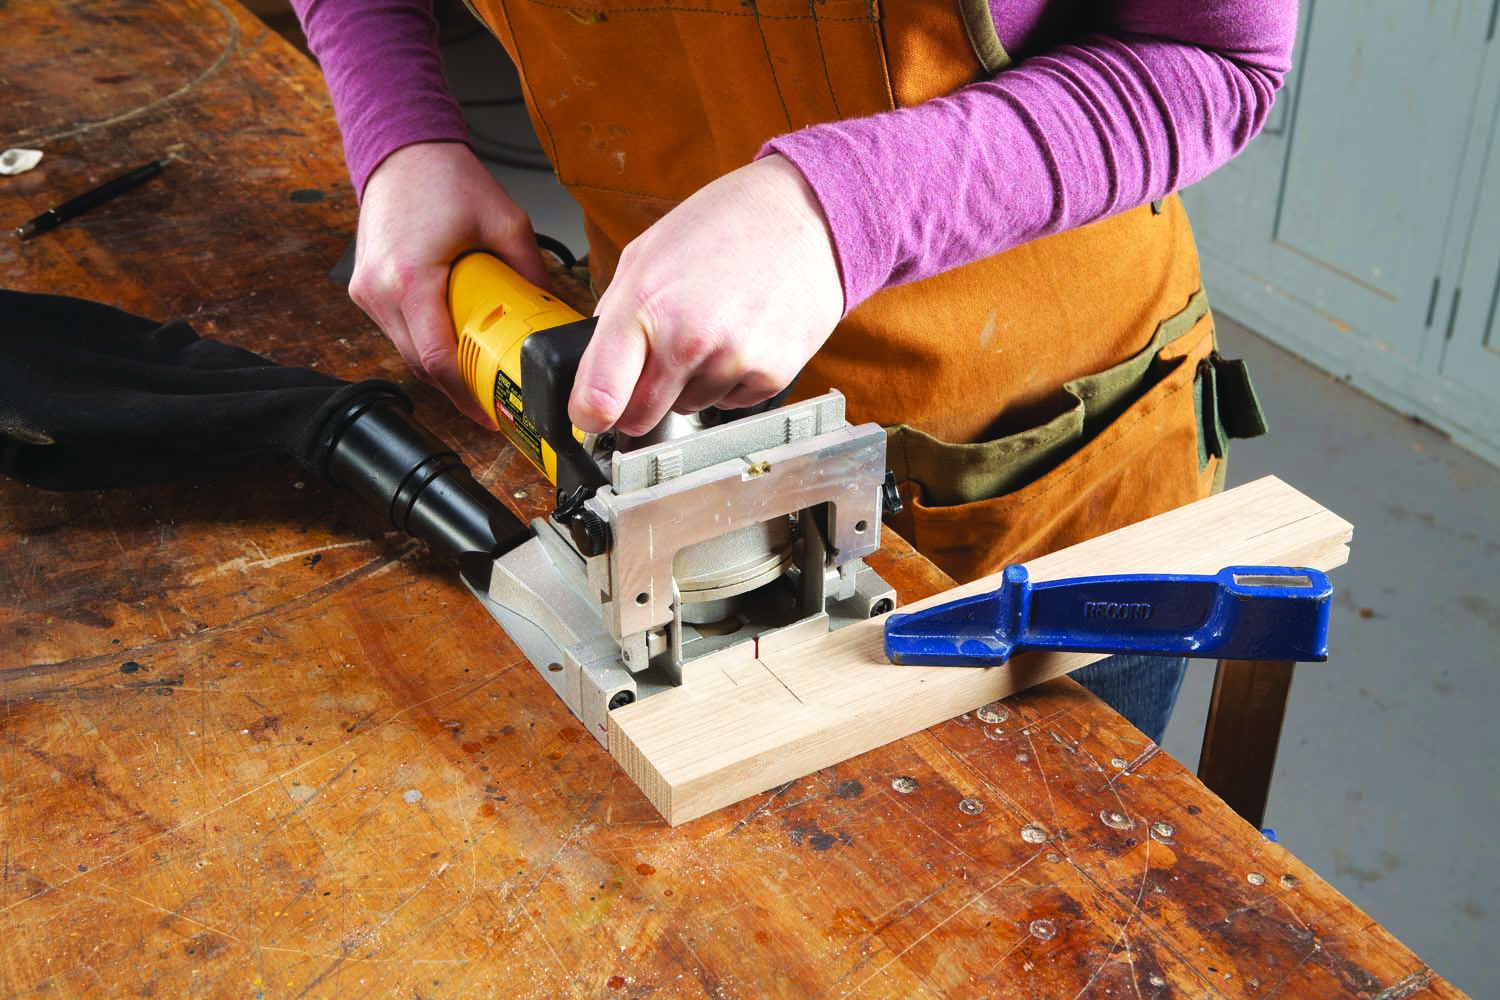
Photo 3. Cut a slot in one edge of each frame side, located to align with the slot in the end of the other frame side that forms the butt joint.
Clamp the frame together and extend the marks to the adjacent parts. Use these marks to cut the slots in the edges (Photo 3).
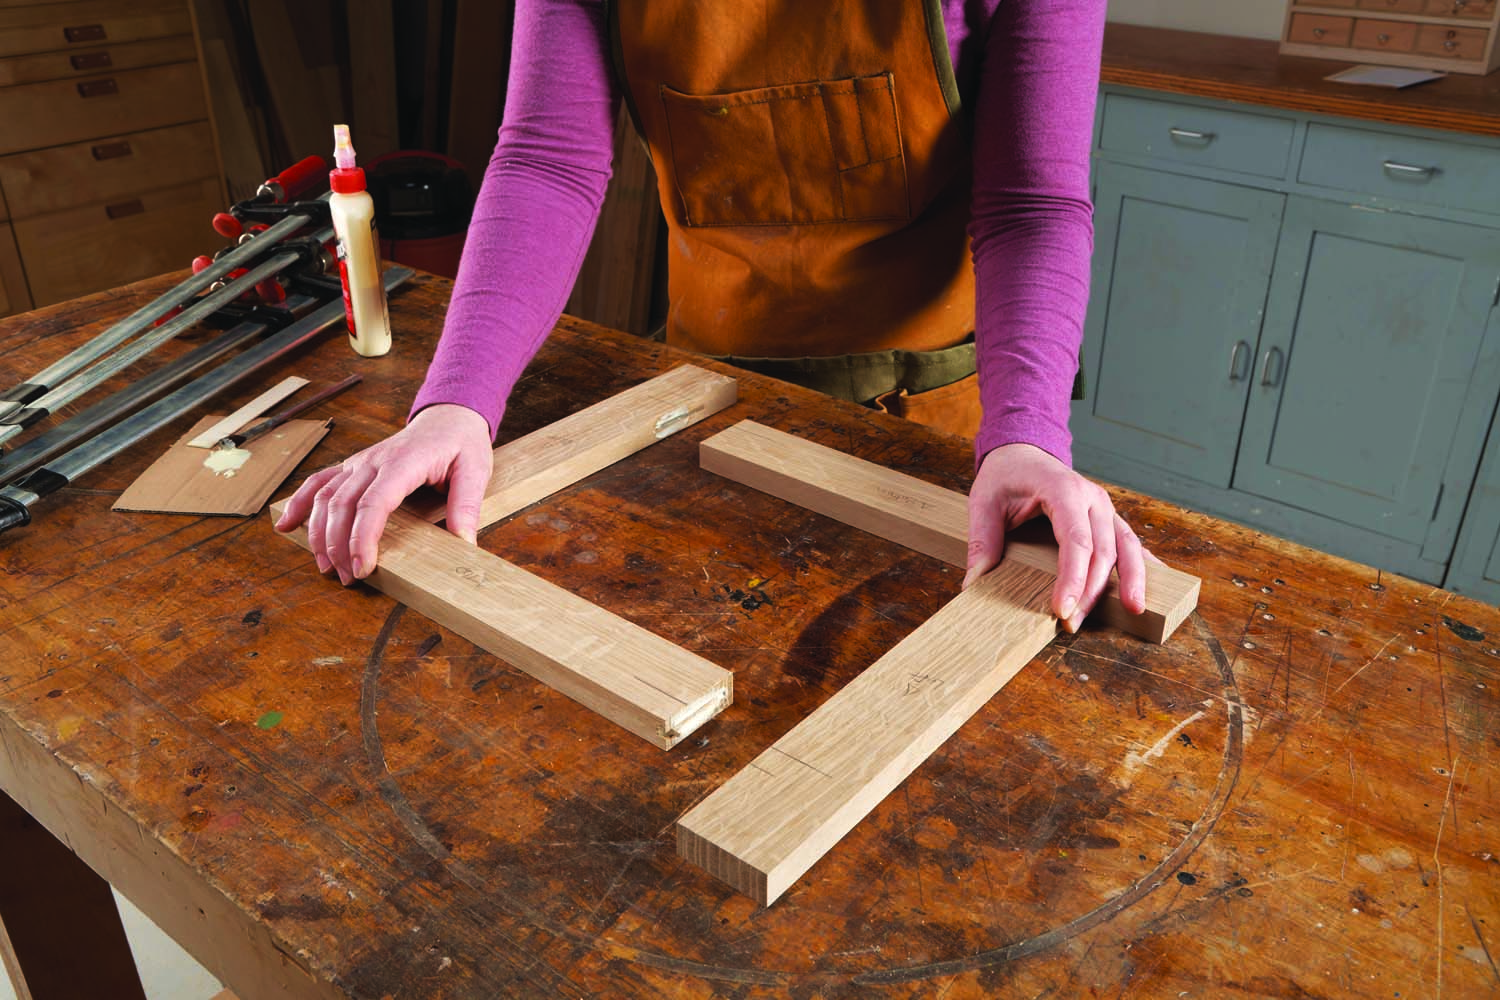
Photo 4. Glue the frame together after shortening the biscuits to fit inside the joints. Assemble the opposite corners first. Then slide the two halves together.
Shorten the biscuits so they won’t protrude beyond the assembled joint. Apply glue in each slot, install biscuits in the end parts and then assemble the frame in stages. (Photo 4). Since this frame has no miters, it’s easy to clamp!
Process the back
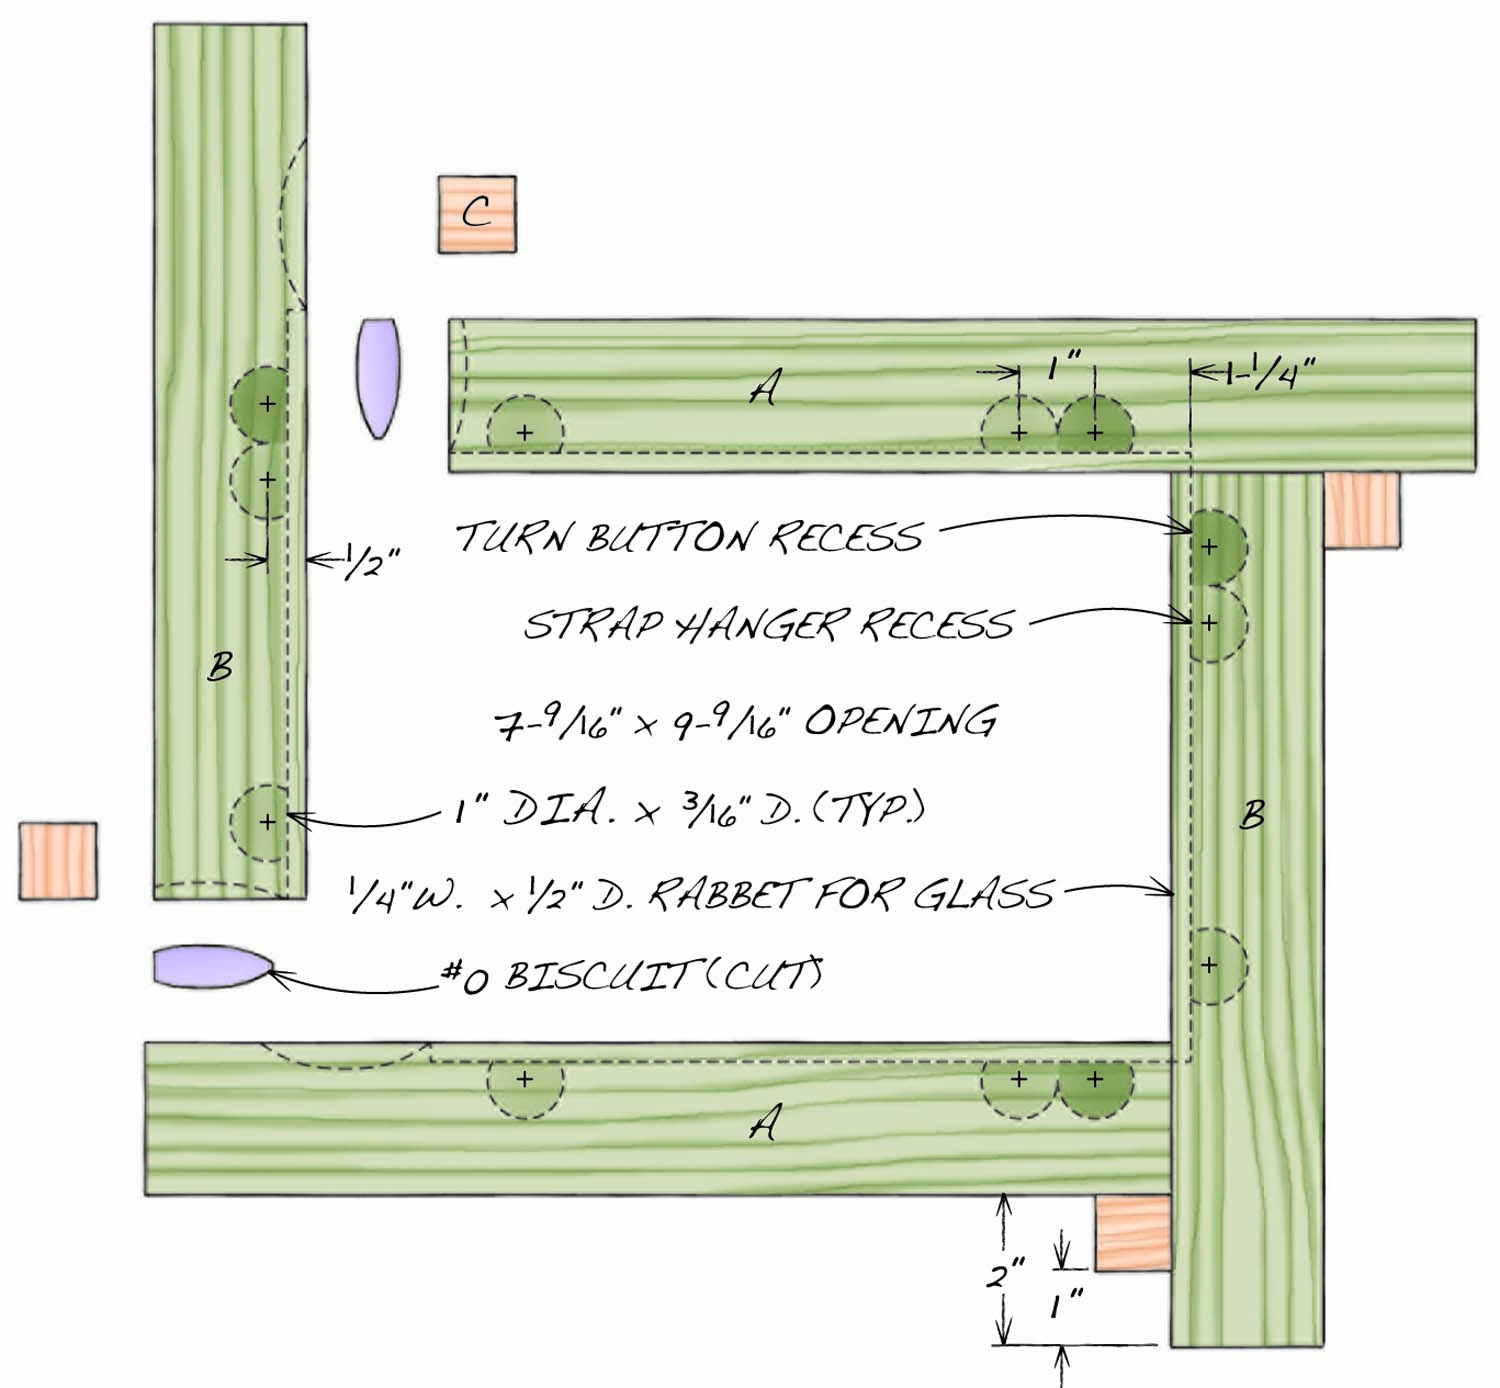
Fig. A. Exploded View
Sand the frame on both sides to make sure all the joints are flush. Then mark the back, so you don’t mistakenly rout the 1/4″ wide x 1/2″ deep rabbet for the glass on the front.
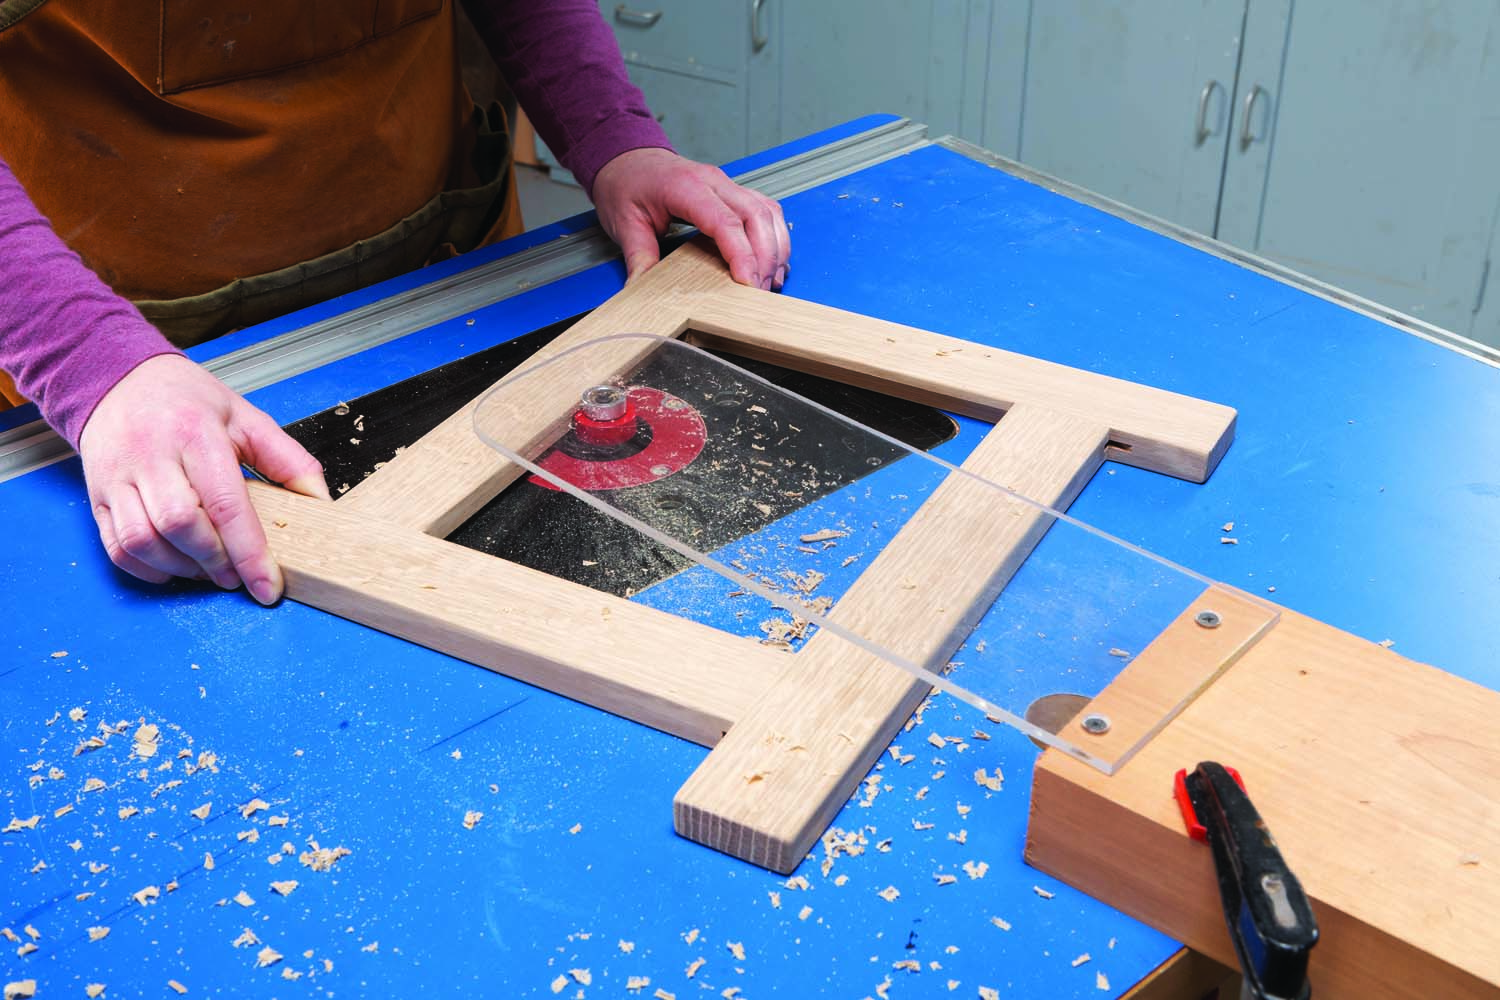
Photo 5. Rout a rabbet on the back of the opening for the glass. Complete the rabbet by making several passes and raising the bit with each pass. Square the corners with a chisel.
Rout the rabbet by making successive passes and incrementally raising the bit (Photo 5). Start with the bit set 1/8″ above the table and position the frame before you start the router. Carefully move the frame forward into the bit and then rout the rabbet by moving the frame clockwise, against the bit’s rotation. Turn off the router between passes and wait for the bit to stop rotating before removing the frame and raising the bit.
Square the rounded corners left by the router by hand, using a chisel.
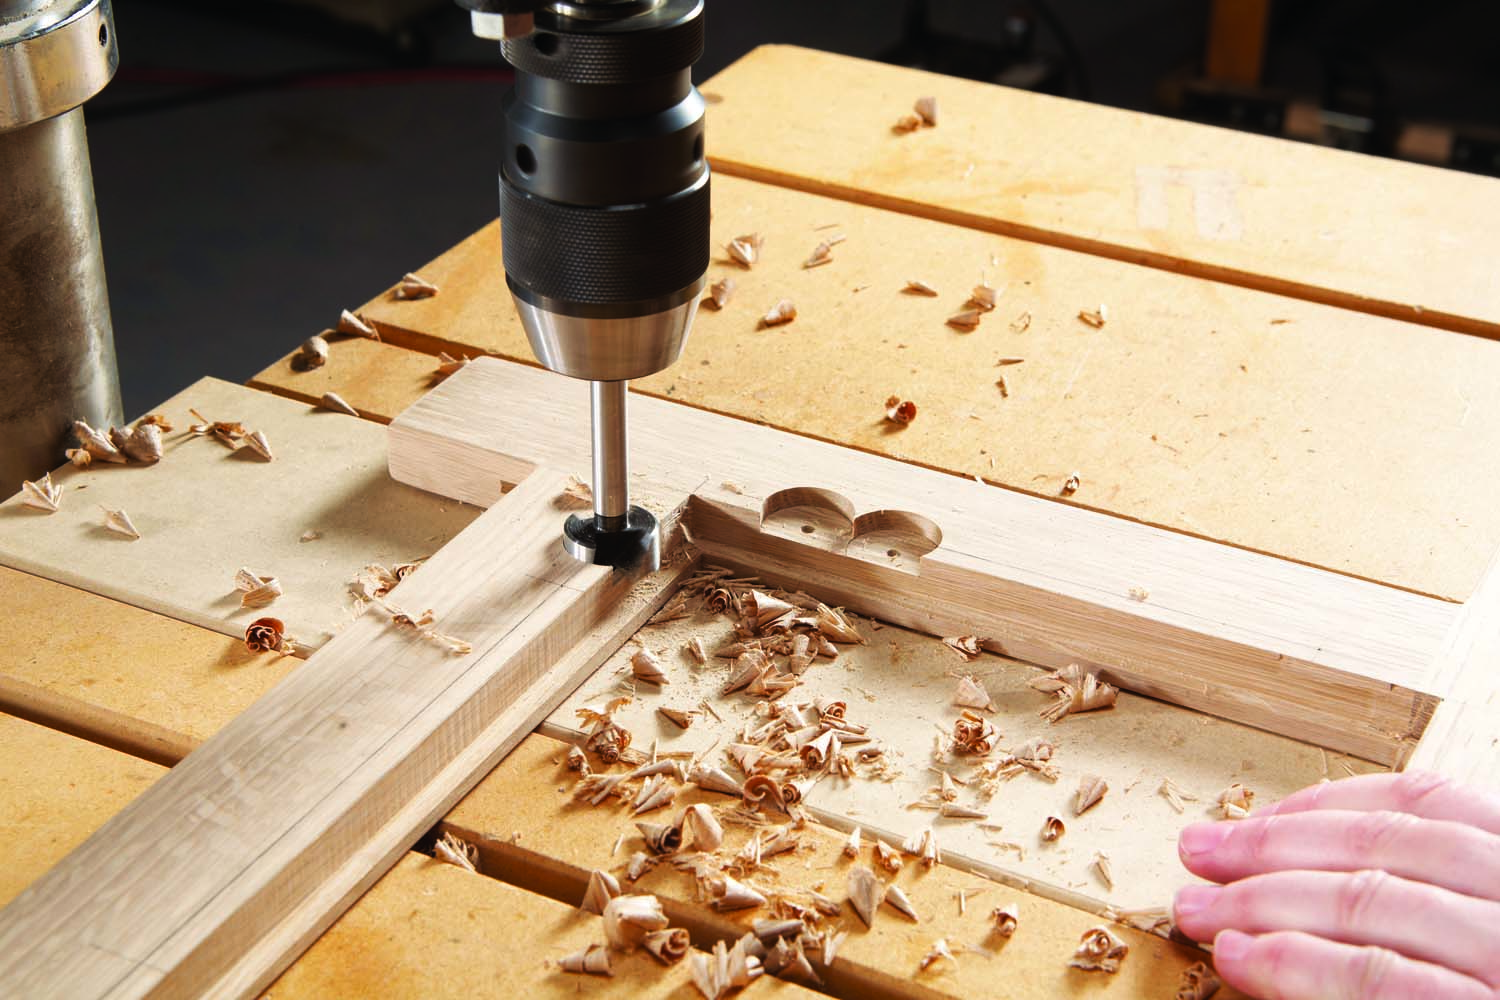
Photo 6. Drill pockets to house the turn buttons and strap hangers using a Forstner bit.
It’s easy to make the frame hang flush against the wall. Just recess the all the mounting hardware. Install a 1″ dia. Forstner bit in the drill press and drill holes in the back, centered 1/2″ from the inside edge (Photo 6; Fig A). To determine the holes’ depth, subtract the thickness the glass, image, mat and backing from the 1/2″ depth of the rabbet. For example, to mount a piece of 3/32″ glass, a 1/16″ mat, a 1/32″ image and 1/8″ foam backing, drill 3/16″ deep holes. The turn buttons go on all four sides in the holes nearest the corners. The strap hangers mount in the adjacent holes, one hanger per side. I drill an extra pair of strap hanger holes, so the frame can be mounted horizontally or vertically.
Add the Faux Wedges
Cut the 1″ square faux wedges (C) from a blank milled 1/2″ thick x 1″ wide x 12″ long (the minimum length for safely working with a piece of word). For small parts like these, I like to use a mini miter box dedicated to a pull saw (Photo 7).
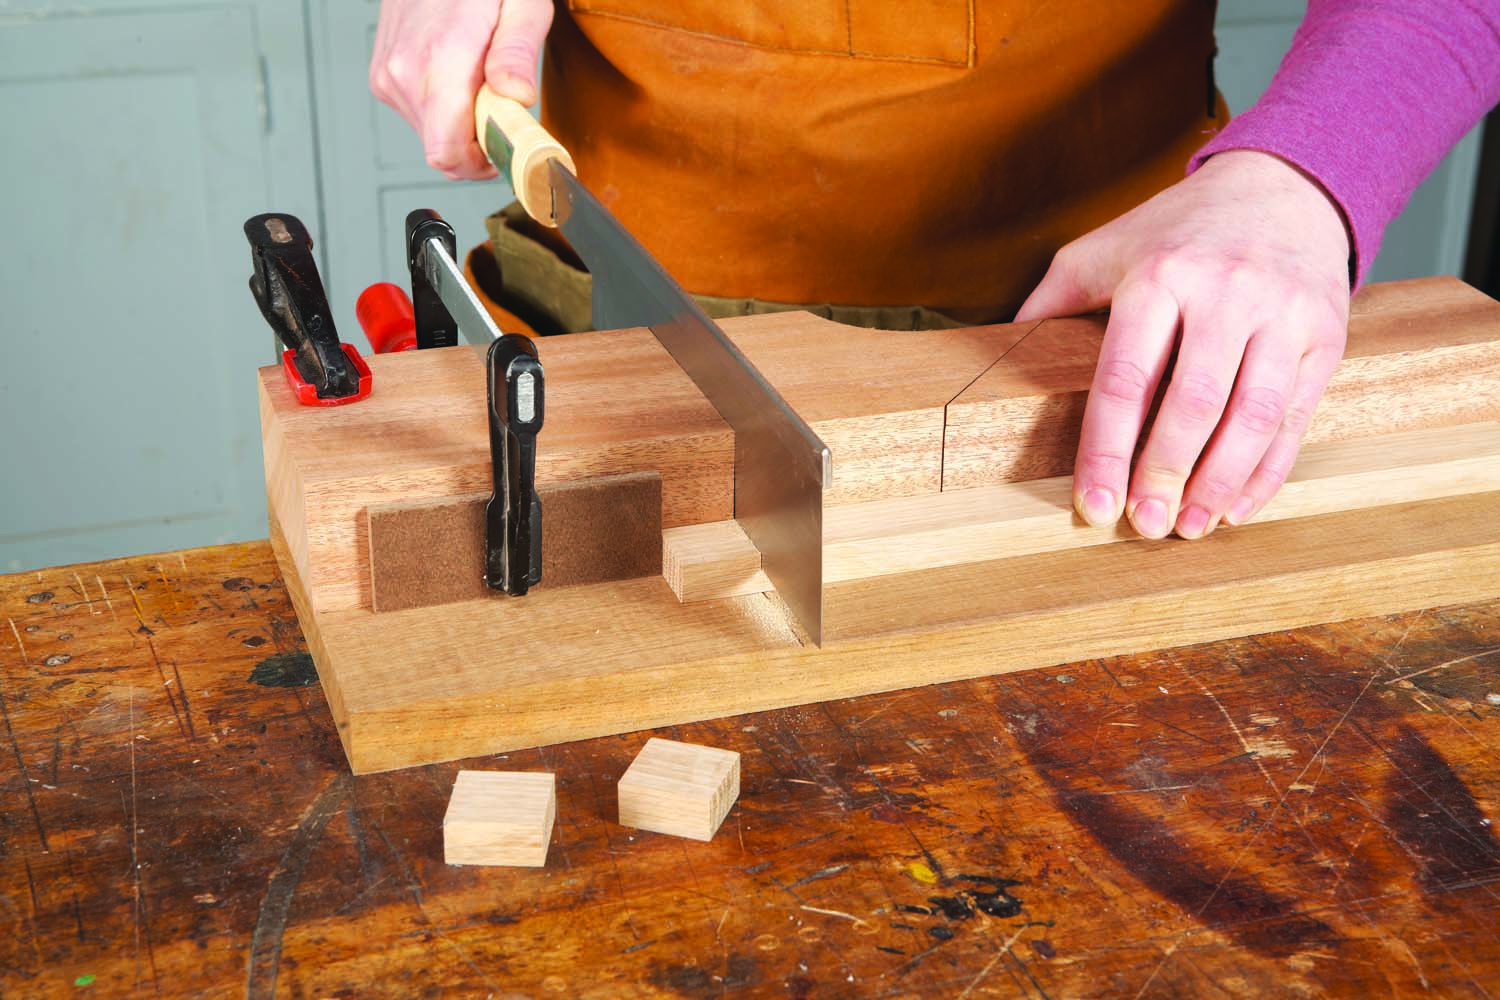
Photo 7. Cut the faux wedges using a pull saw and a mini miter box.
Finish-sand the both frame and the faux wedges before gluing them on. It’s easier to sand the corners and ease the edges when the parts are separate. Mark the inside corner of each faux wedge and make sure to keep it square.
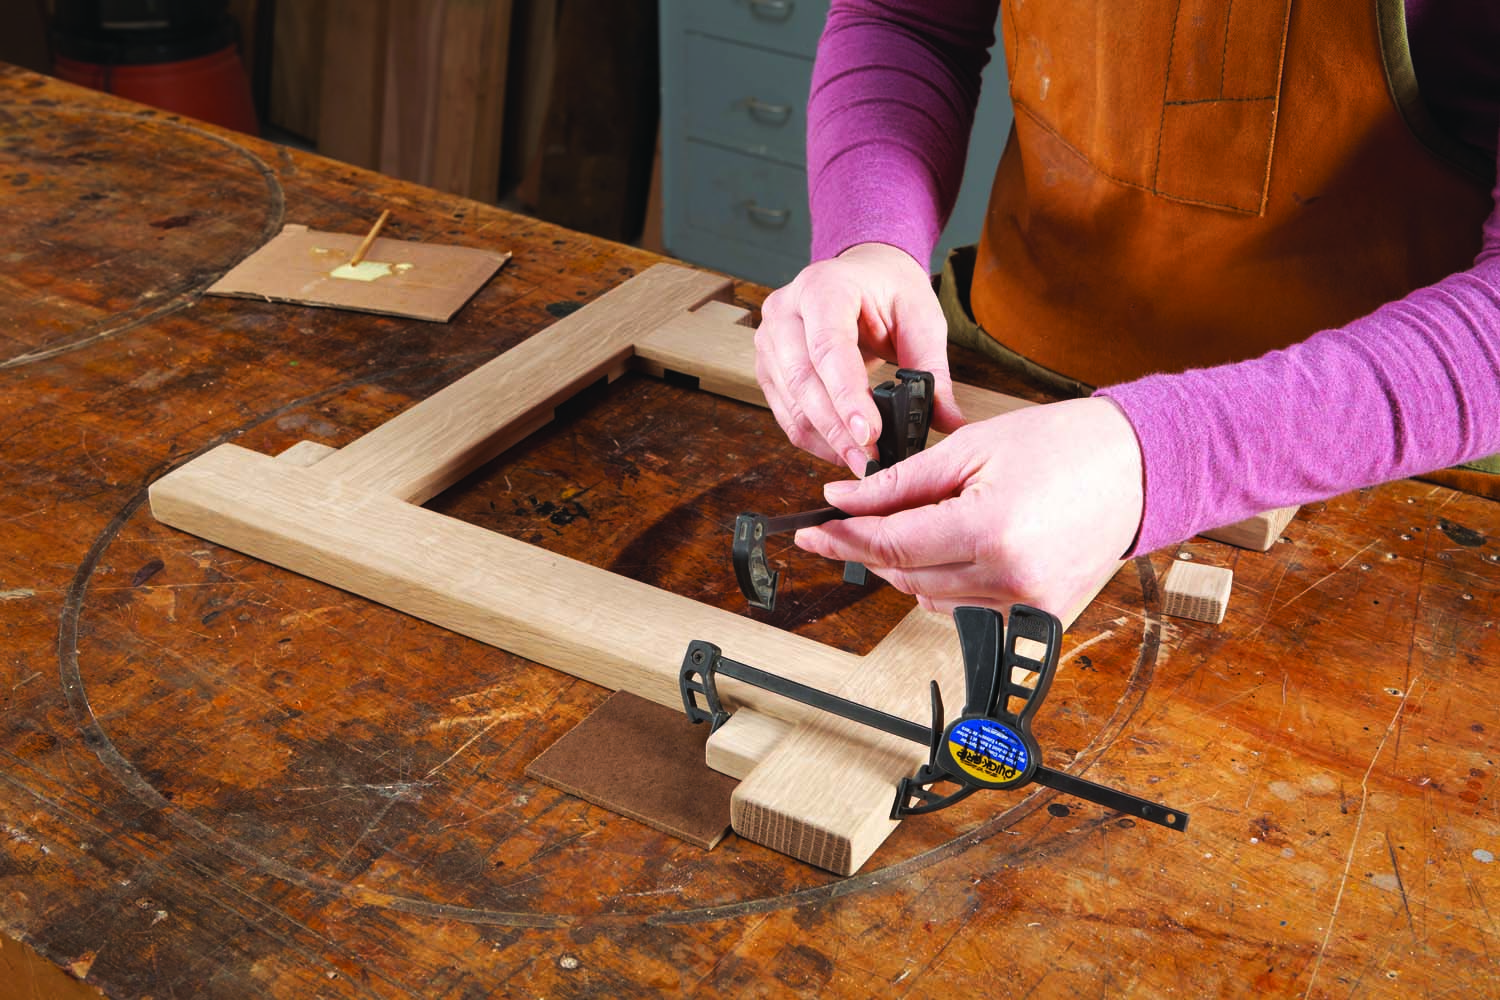
Photo 8. Glue on the faux wedges to cover the visible slots, using a 1/8″ hardboard shim to center the wedge on the edge of the frame.
Orient the grain on each faux wedge to match the grain on the butted frame side next to it. Test-fit each wedge and sand its inside corner to correct any misalignment. When you glue on each faux wedge, insert a 1/8″ spacer underneath to center the wedge on the frame’s edge. This creates an attractive setback at the front and a shadow line the back. Glue both inside edges and clamp each faux wedge in place (Photo 8).
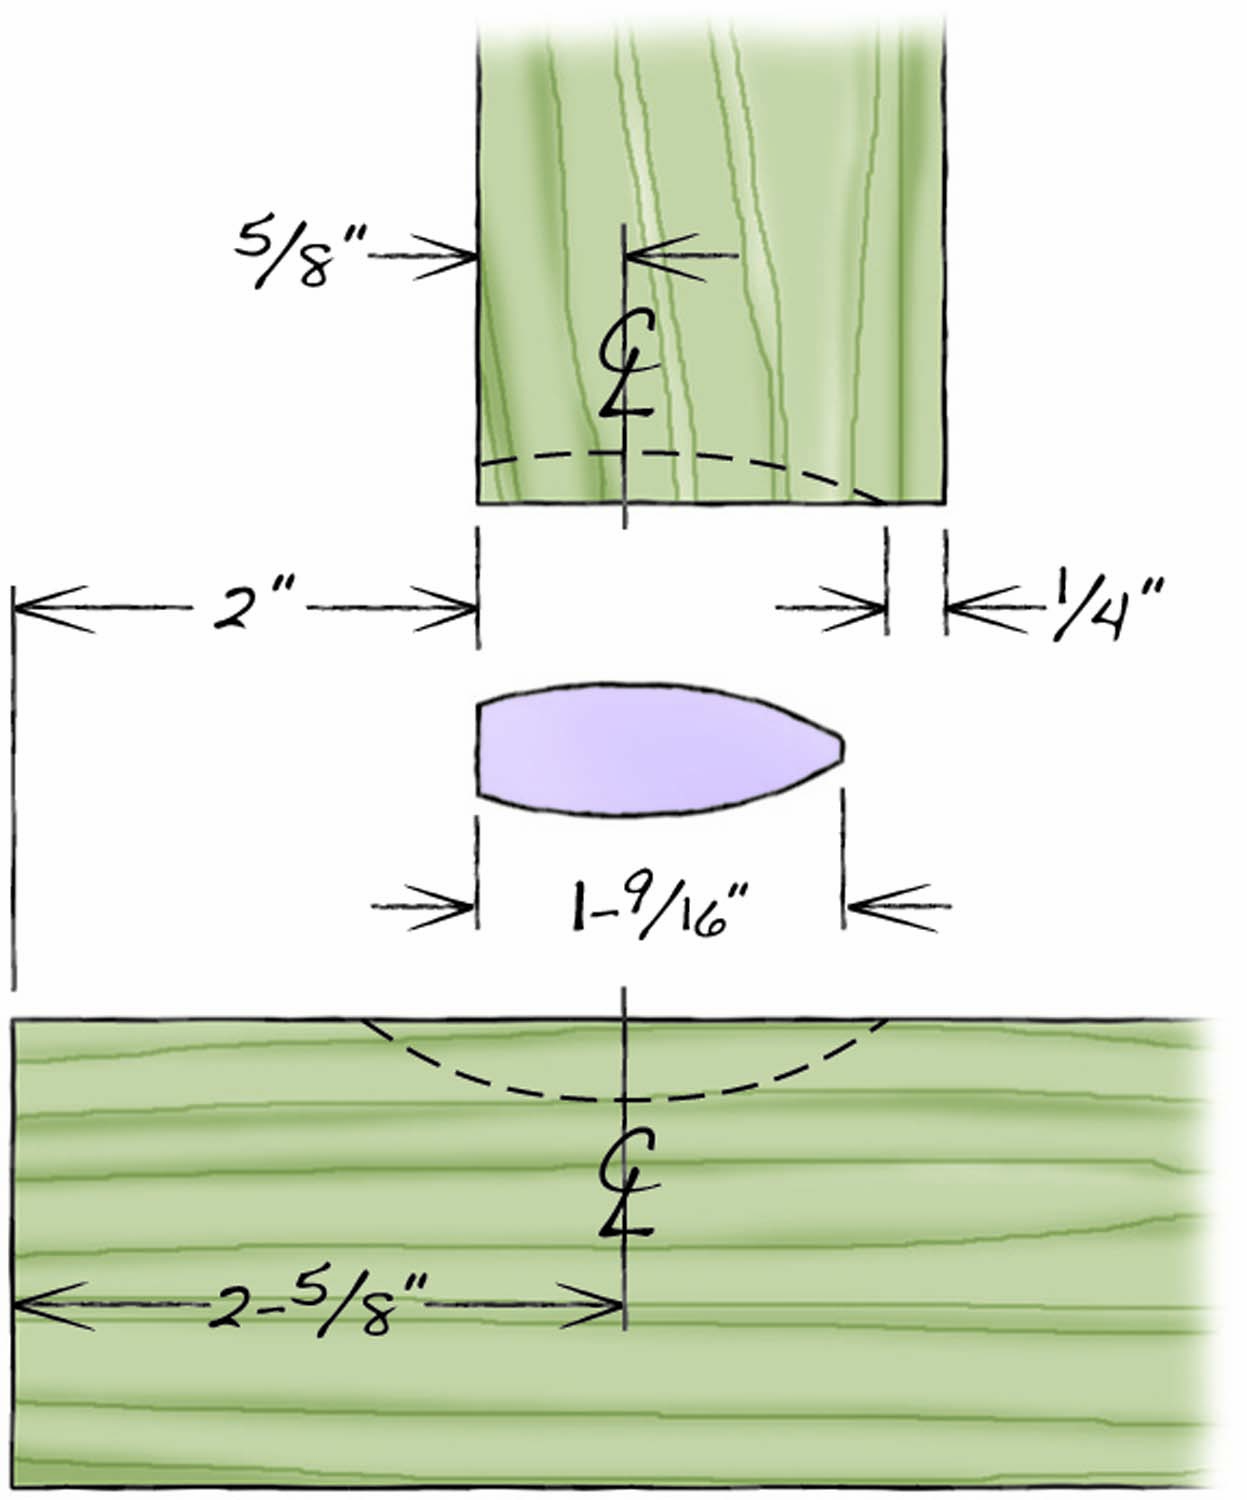
Fig. B. Joinery Details
Cutting List

Layer the Finish
To create an authentic Arts-and-Crafts look, apply a layered finish using both water-based dye and oil-based stain. Don’t roll your eyes: this finish is very easy to apply and the results are well worth the effort.
Bio
Laurie McKichan designs furniture to be “simple, honest and direct.” You can see more of her work at lauriemckichan.com.
Here are some supplies and tools we find essential in our everyday work around the shop. We may receive a commission from sales referred by our links; however, we have carefully selected these products for their usefulness and quality.


