We may receive a commission when you use our affiliate links. However, this does not impact our recommendations.
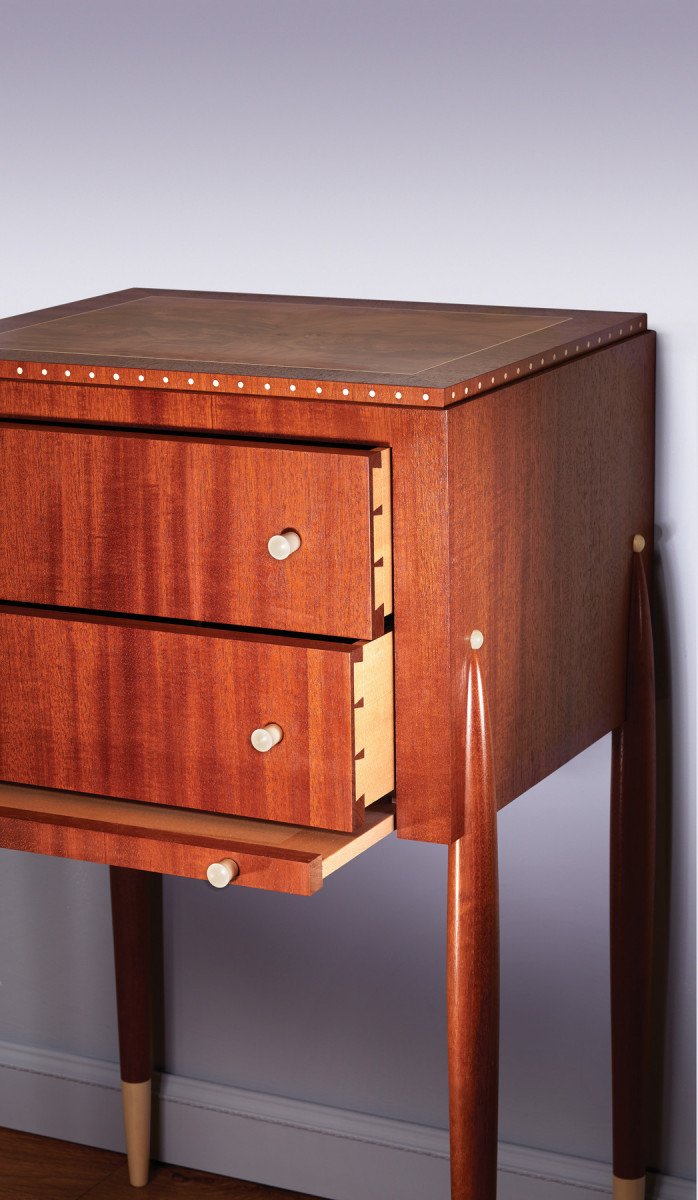
Create sultry sophistication with Art Deco details.
Émile-Jacques Ruhlmann (1879-1933) is considered by craftspeople, collectors and designers to be the premier Art Deco furniture maker; he was called “Art Deco’s greatest artist” by The New York Times in 2009. All the fuss is for good reason.
This French designer’s work is characterized by the skillful use of luxurious and exotic materials, including ebony, kingwood, ivory, amaranth, Indian rosewood, sharkskin and tortoiseshell. What really set his work apart was how he perfected a purity of line – lithe sinuous curves melding perfectly with sharp, disciplined and crisp rectangles and straight edges.
Ruhlmann insisted on uncompromising quality, and as a result, his pieces consistently lost money, sometimes as much as 20 to 30 percent. For example, it typically took more than 50 hours to create a single leg for a piece. The exquisite workmanship invested into his pieces is immediately obvious to any viewer.
My original design is strongly influenced by Ruhlmann’s collective work and employs a number of details he often used on his amazing furniture. These include the inlaid dot border, contrasting accents, vertically oriented veneer work and slender tapering legs on this piece.
The design is called a tabouret, or work table. Set alongside a desk or drawing board, it would store and organize frequently used tools and materials. But its small size (about 19″ wide x 15″ deep x 31″ high) makes it a piece that can be placed anywhere – in an entryway, at the end of a sofa or next to a bed.
Carcase & Web Frames
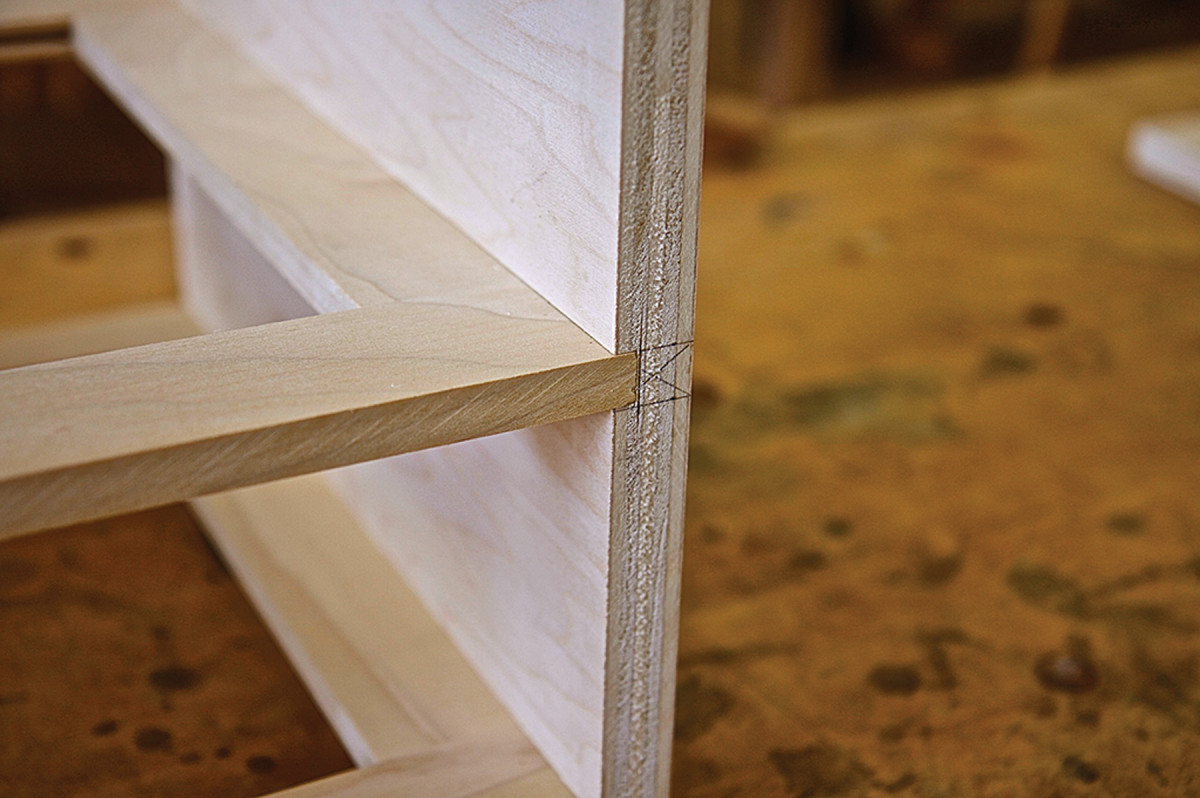
Solid. Web frames add rigidity to the case and provide surfaces on which the drawers ride. They are housed in 1⁄2″-wide dados in the case sides.
The carcase sides and back are made of 3⁄4” shop-grade plywood. After cutting the parts to size, I cut 1⁄2“-deep x 3⁄4“-wide rabbets on the back edges of the side panels to receive the 3⁄4“-thick back, and across the top ends of the side panels for the upper drawer web frame. Next, I cut 3⁄16“-deep x 1⁄2“-wide dados into the sides for the other drawer web frames.
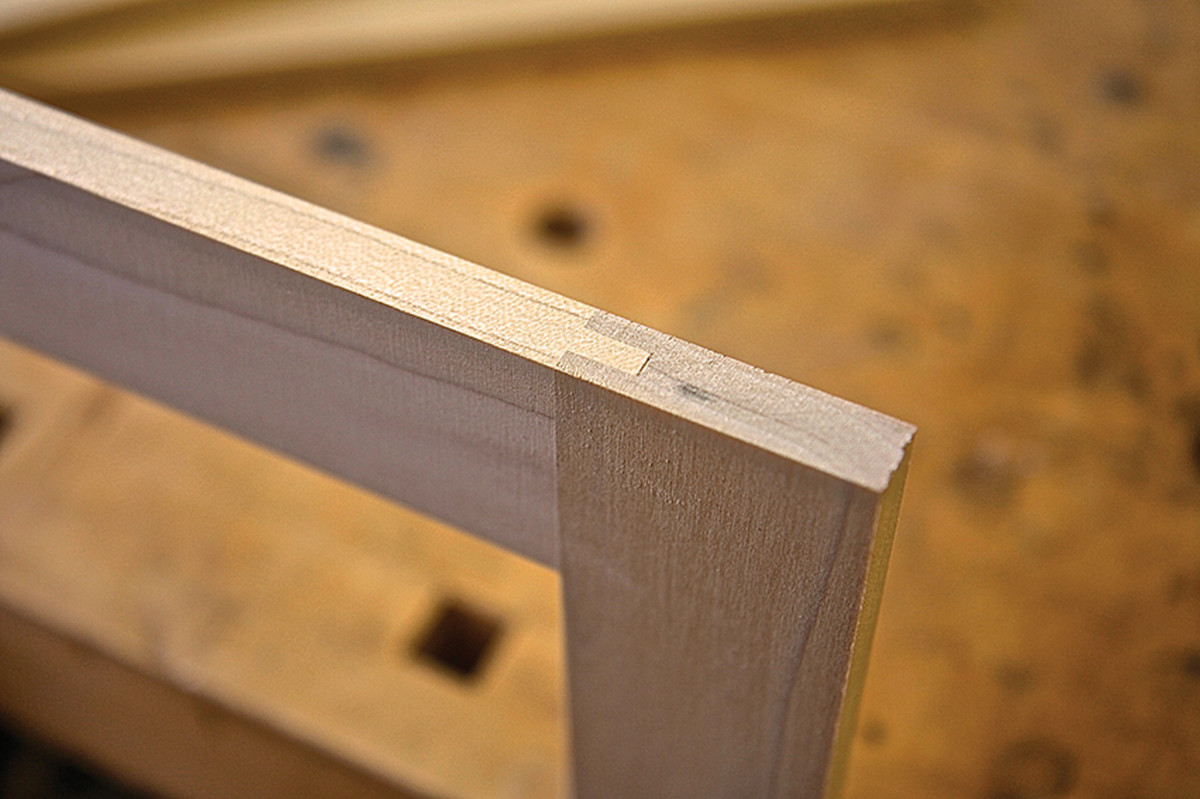
Stubby but strong (enough). Stub tenons are a quick and sturdy solution for frames that don’t support a lot of weight.
The frames are made of 1⁄2” poplar and are joined with stub tenons set into a lengthwise groove. Once glued up, they are cut square and to final size. And because the 3⁄4” plywood cabinet sides and back are assembled around these three poplar frames, they must be perfectly square and dead flat.
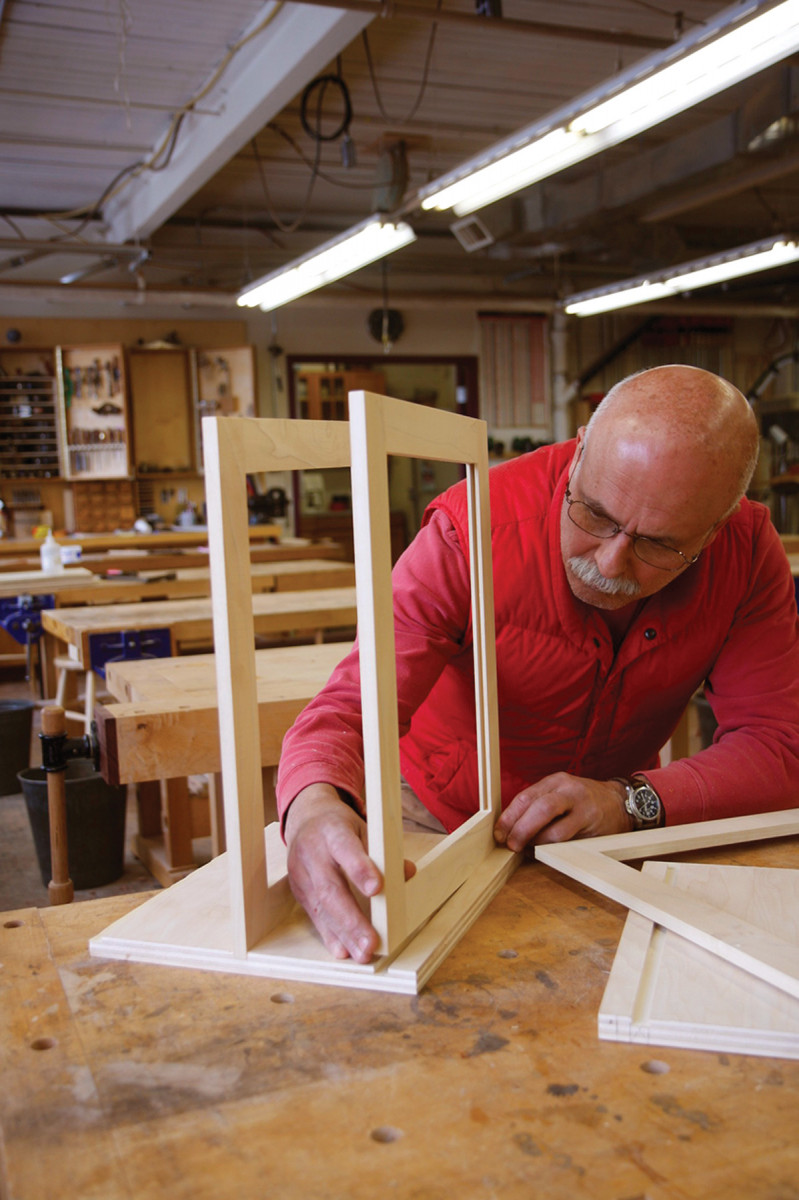
Innards first. The carcase is assembled around the web frames, then the back drops into rabbets in the sides.
 In addition to holding the sides and back of the carcase together, the frames support and guide the smooth operation of the two dovetailed drawers.
Top it Off
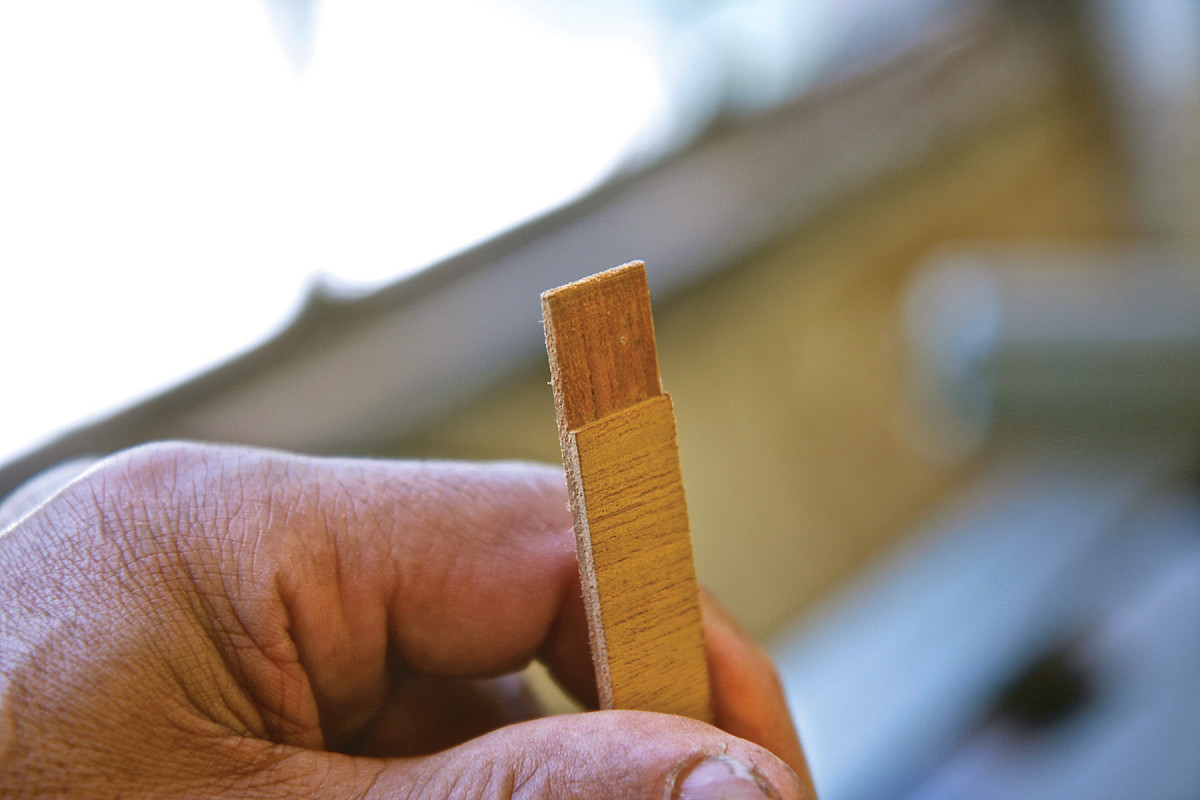
Composite edging. To add some strength to the top’s edges, I laminate the cross-grain veneer to a strip of long-grain veneer.
For the top’s substrate, I used 1⁄2“-thick birch plywood.
I’m always aware of how delicate and vulnerable a veneered surface is and that any light blow could damage the surface and reveal the substrate below and destroy the illusion. So to provide more protection to the edge, I laminated 1⁄16” shop-sawn cross-grain mahogany veneer to a foundation strip of 1⁄16” long-grain veneer.
This makes handling the cross-grain banding easier and also provides critical thickness to the edge as protection against future accidents (as well as against sanding through the veneer during construction).
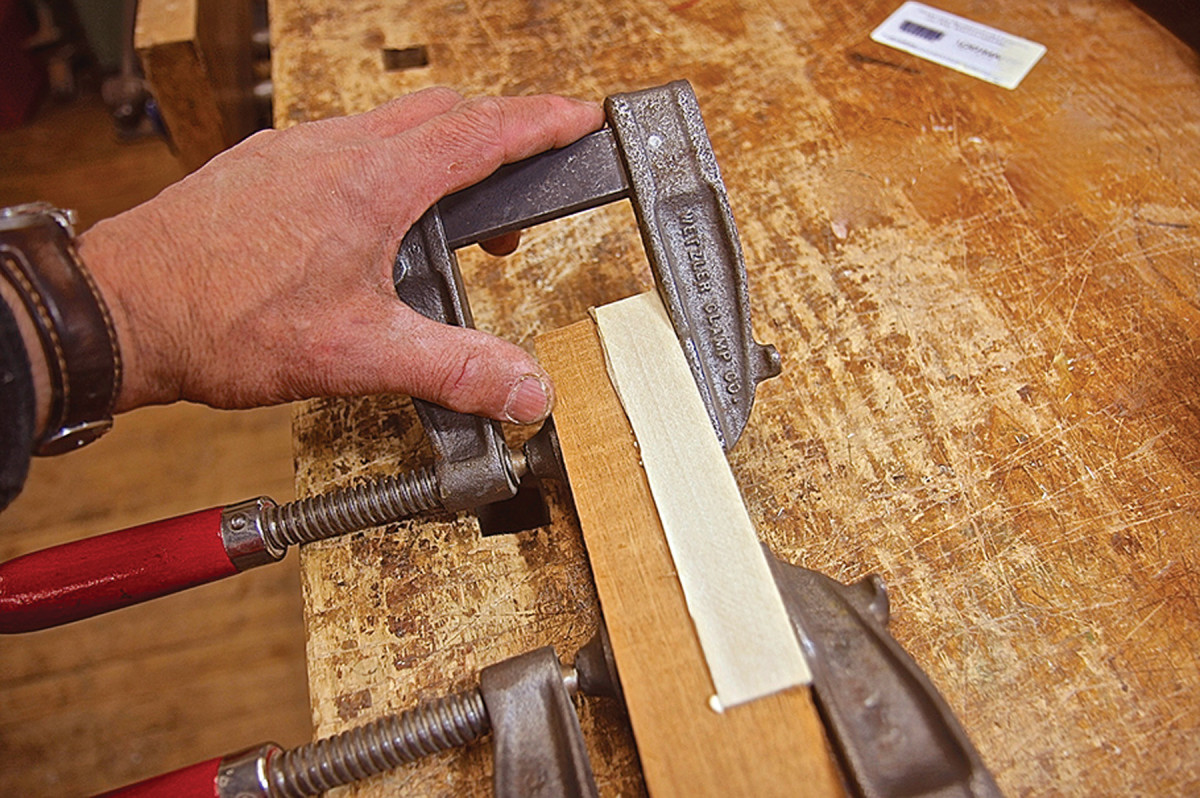
Glue the edging and hold it in place with luthier’s tape. After it’s dry, plane and sand the edging flush with the top’s surface.
Ruhlmann Tabouret Cut List
No. Item Dimensions (inches) Material Comments
t w l
❏ 1 Top 1⁄2 x 14 1⁄8 x 17 1⁄8 Plywood Veneer*
❏ 2 Sides 3⁄4 x 11 1⁄2 x 14 Plywood Veneer after assembly*
❏ 1 Back 3⁄4 x 11 1⁄2 x 17 3⁄8 Plywood Veneer after assembly*
❏ 6 Web frame rails 1⁄2 x 1 7⁄8 x 10 1⁄2 Poplar
❏ 6 Web frame stiles 1⁄2 x 1 7⁄8 x 16 3⁄4 Poplar
❏ 1 Face frame rail 3⁄4 x 1 1⁄8 x 15 5⁄8 Mahogany Veneer after assembly*
❏ 2 Face frame stiles 3⁄4 x 1 1⁄2 x 11 1⁄2 Mahogany Veneer after assembly*
❏ 4 Legs 1 1⁄2 x 1 1⁄2 x 21 Mahogany Oversized for turning*
❏ 4 Feet 1 1⁄4 x 1 1⁄4 x 4 1⁄2 Holly
❏ 2 Drawer fronts 3⁄4 x 4 3⁄4 x 14 7⁄8 Mahogany Veneer*
❏ 4 Drawer sides 5⁄16 x 4 1⁄4 x 13 1⁄2 Spruce
❏ 2 Drawer backs 1⁄2 x 3 3⁄4 x 14 7⁄8 Spruce
❏ 2 Drawer bottoms 3⁄16 x 13 x 3⁄8 x 14 1⁄2 Spruce
❏ 1 Staging panel 1⁄2 x 12 1⁄2 x 13 1⁄2 Spruce **
❏ 2 Breadboard ends 1⁄2 x 1 5⁄8 x 13 1⁄2 Spruce
❏ 1 Staging panel front 3⁄4 x 7⁄8 x 14 7⁄8 Mahogany Veneer*
❏ 4 Drawer guides 7⁄8 x 7⁄8 x 11 Maple
❏ 2 Panel guides 7⁄8 x 1 1⁄4 x 13 3⁄4 Maple
❏ 6 Knobs 1 1⁄4 x 1 1⁄4 x 2Holly
❏ 2 Leg-dot balls 5⁄8 x 5⁄8 x 1 1⁄2 Holly
*Veneer: Crotch mahogany for center field, straight-grained mahogany for the balance, plus holly stringing for the top. **Includes stub tenon both ends
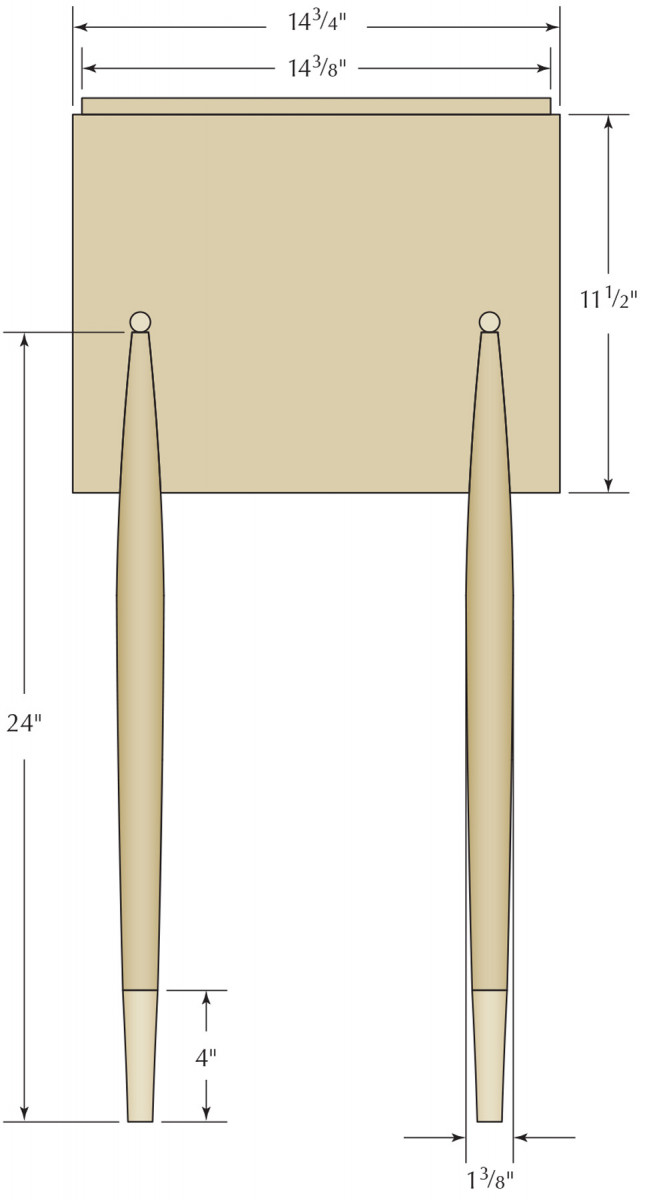
Profile
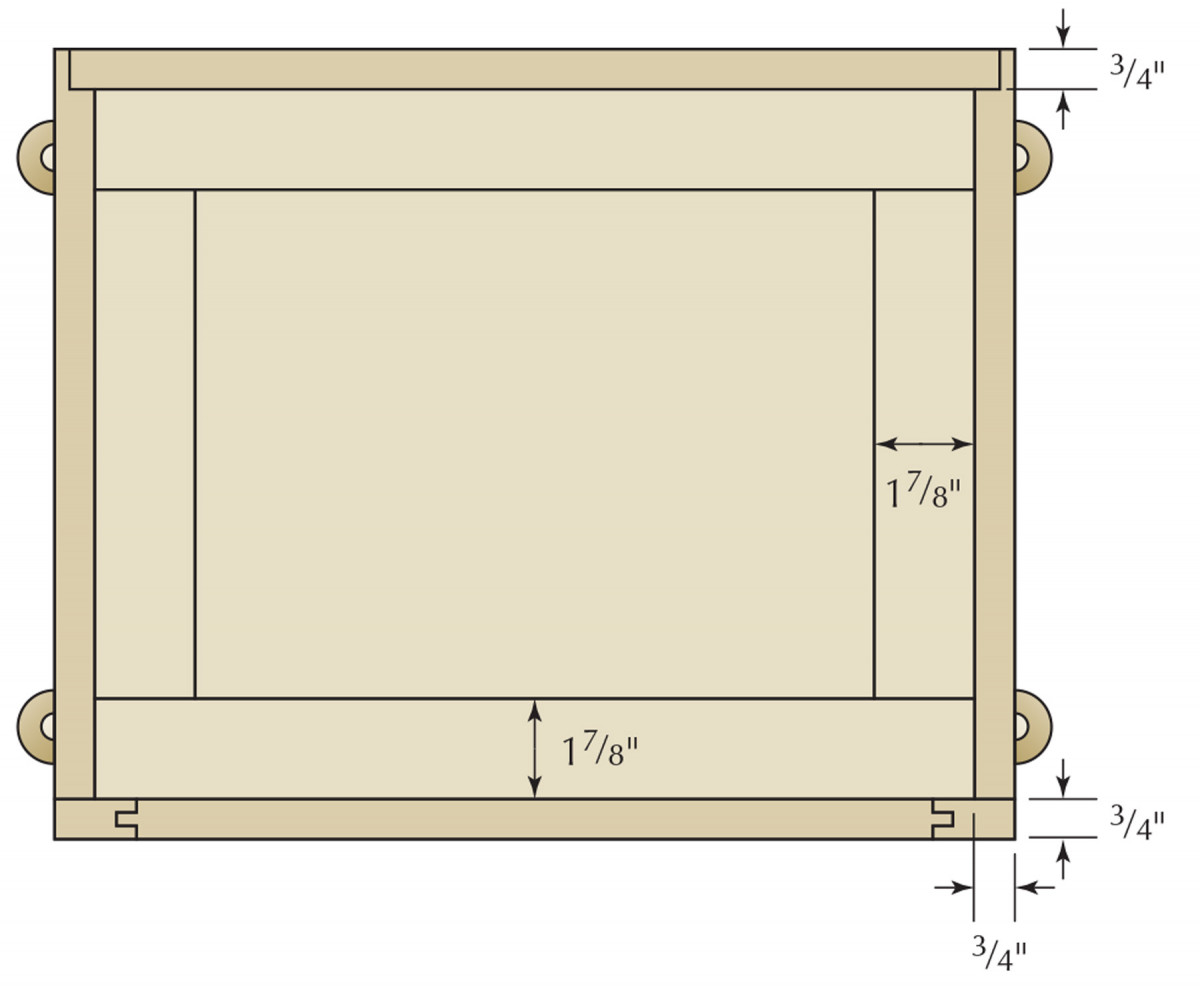
Plan Section
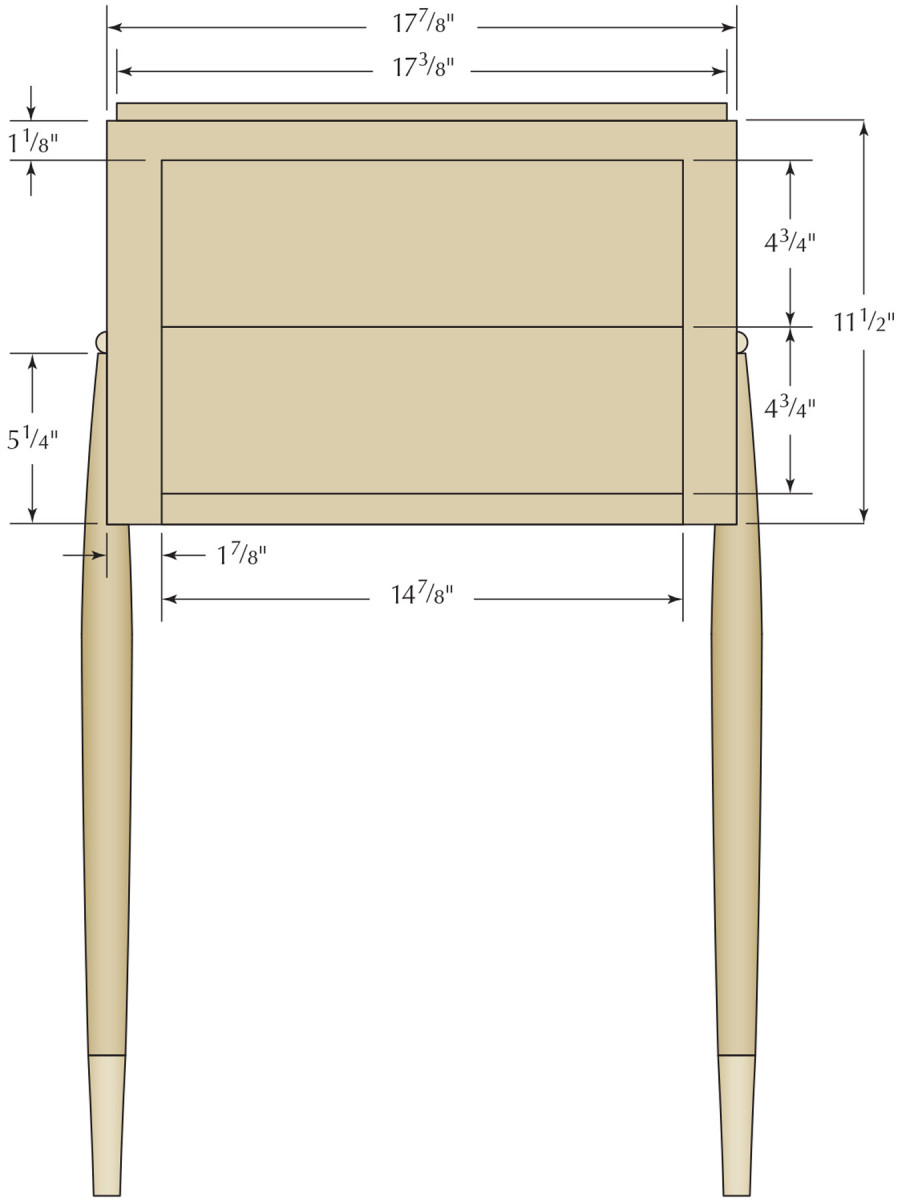
Elevation
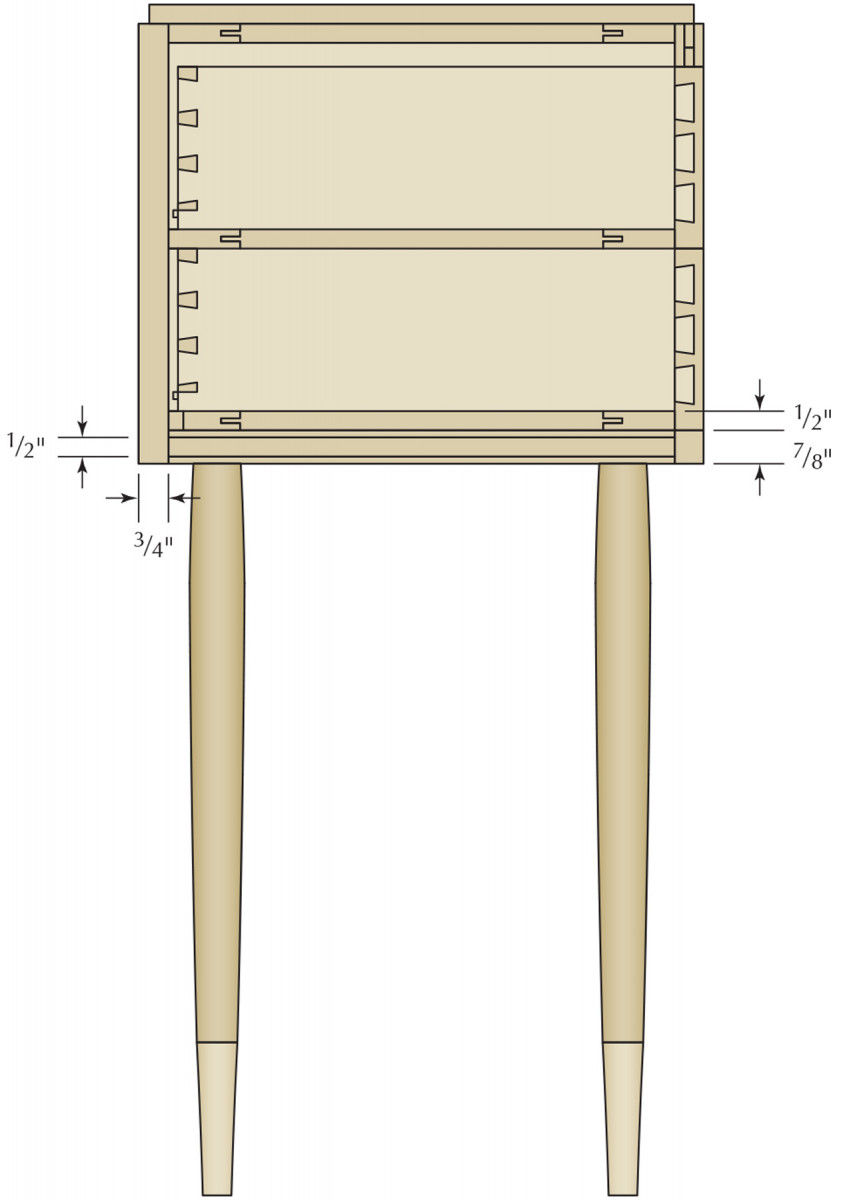
Profile Section
Bookmatched Center Field
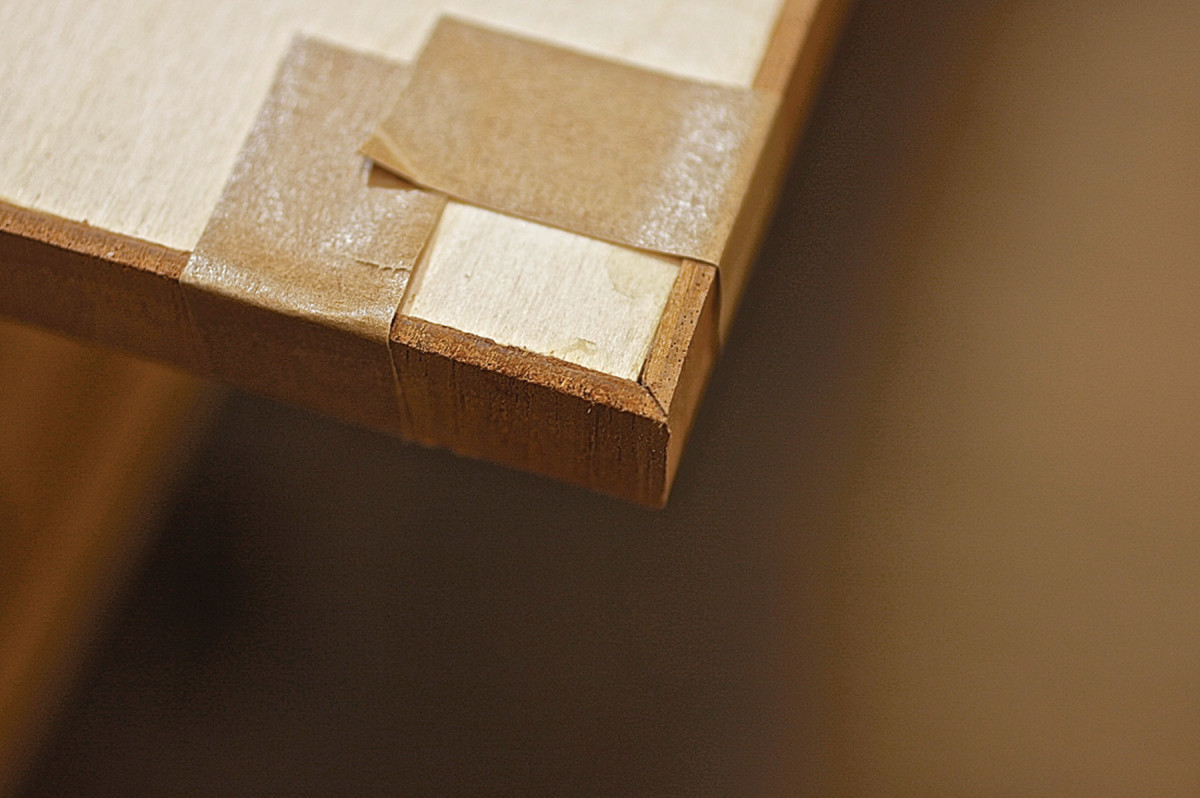
Sticky solution. After applying glue to the edge, hold it in place with luthier’s tape until the glue sets.
After pressing the bookmatched leaves flat, shoot the edges with a block plane to ensure they are straight and matched, and tape them together. Glue them to the substrate panel using cold fish glue; set the work in a giant manual screw press overnight. Then carefully trim the veneer 1 5⁄8” back from the panel edges.
I cut the cross-grain borders 13⁄4” wide and pre-cut the miters for a precise fit at the corners. The extra 1⁄8” in width allows me to make last-minute adjustments necessary for perfect, tight-fitting miters.
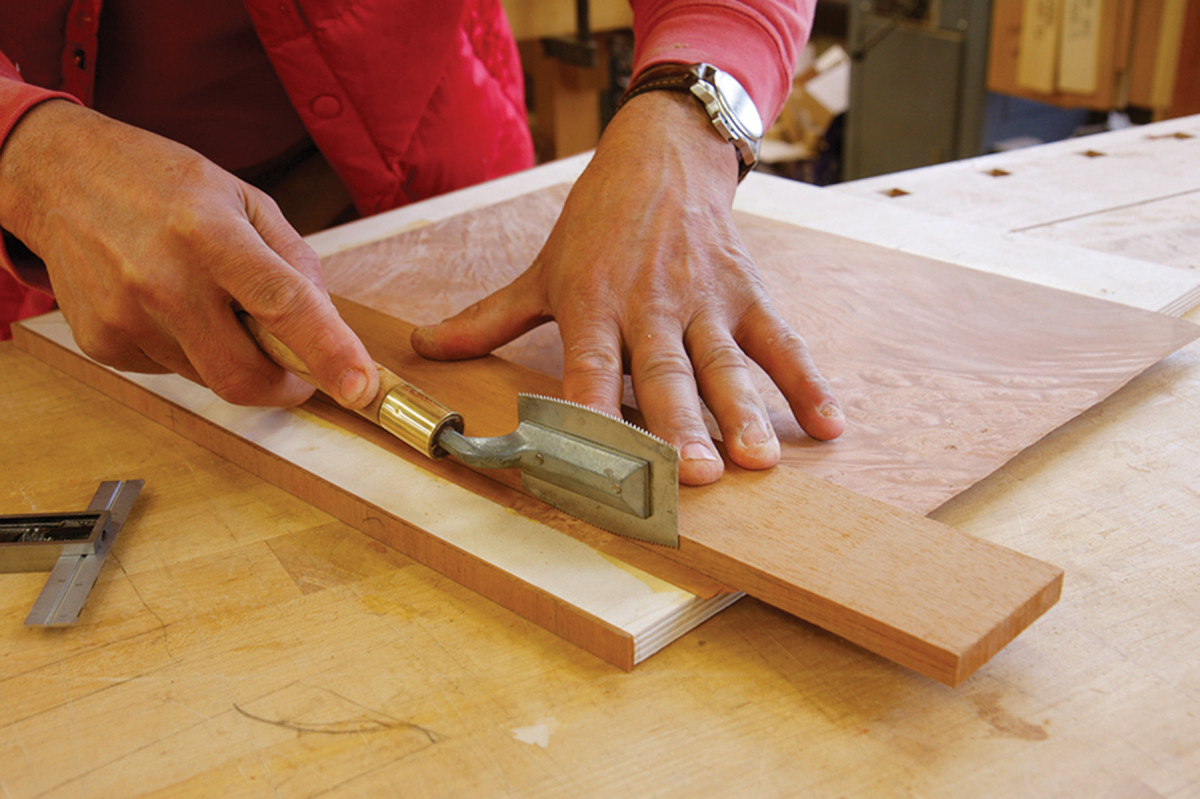
Center field. After the glue sets up overnight in the press, trim the edges of the field 15⁄8″ back from the substrate’s edges.
Glue down the border, one piece at a time, using yellow glue and clamping cauls (cover the cauls with any non-stick tape). As I unclamp one segment, I set the next in place, taping across the miters to ensure the joint won’t open up later or shift while it’s clamped. After just a couple of hours of drying time, trim everything flush using a sharp veneer saw. Remember how the grain of the overhanging veneer is oriented and trim it with great care.
String the Panel
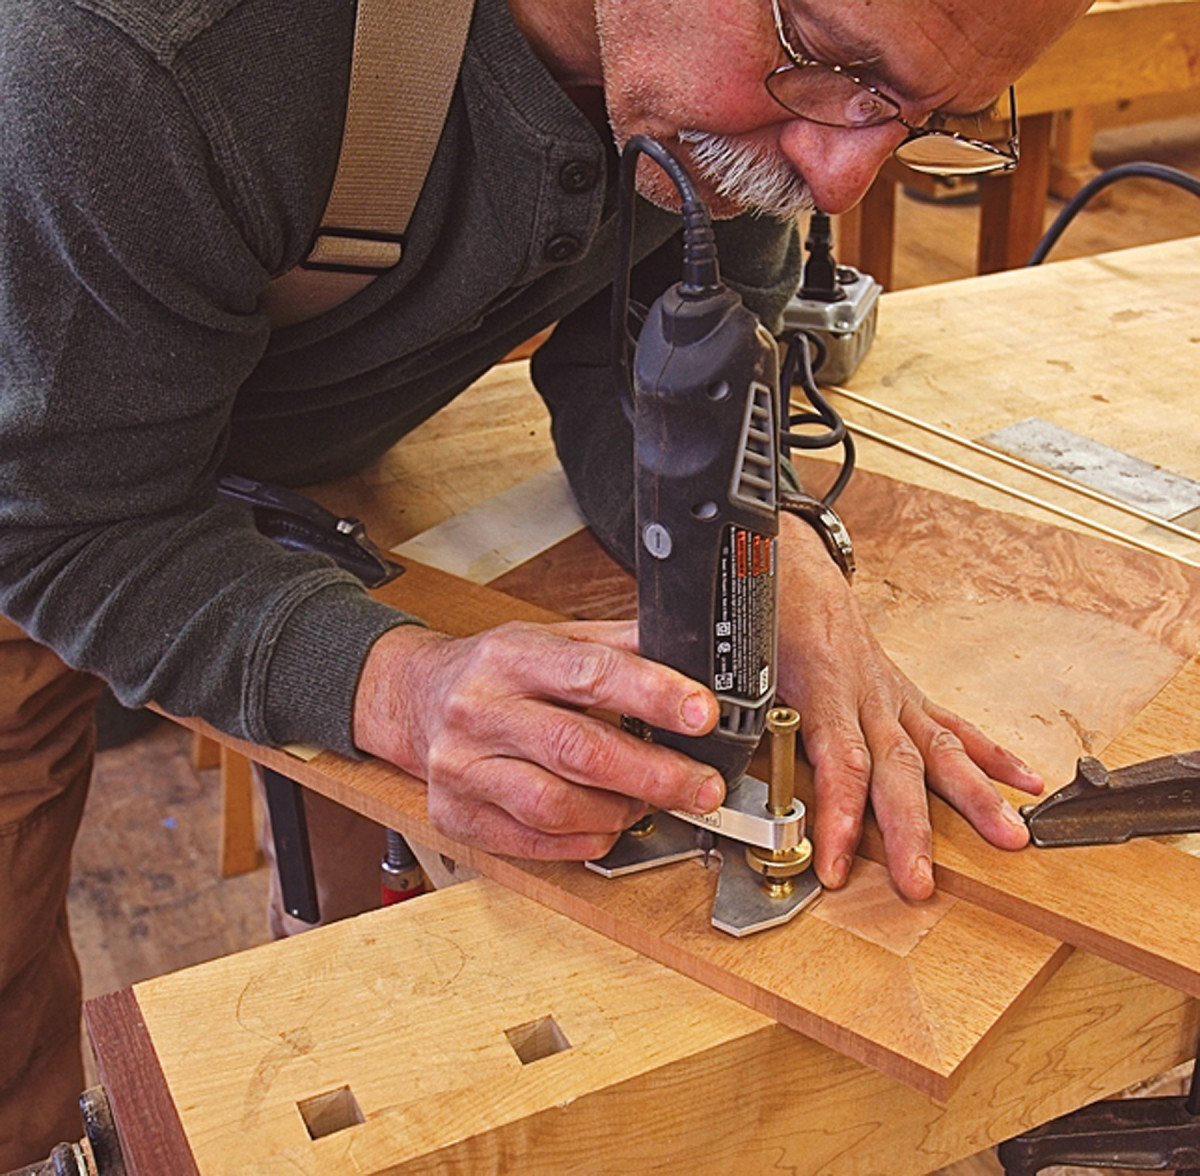
Straight & true. To cut grooves for the stringing, I use a Dremel in a router base. Notice the clamped straightedge that guides the tool.
I use a Dremel with a 1⁄16” milling bit, attached to a router base, to cut a 1⁄8“-deep x 1⁄16“-wide channel for the 1⁄16” holly stringing that is installed all around the center bookmatched panel. (Clamp a straightedge to the top to guide the router base.)
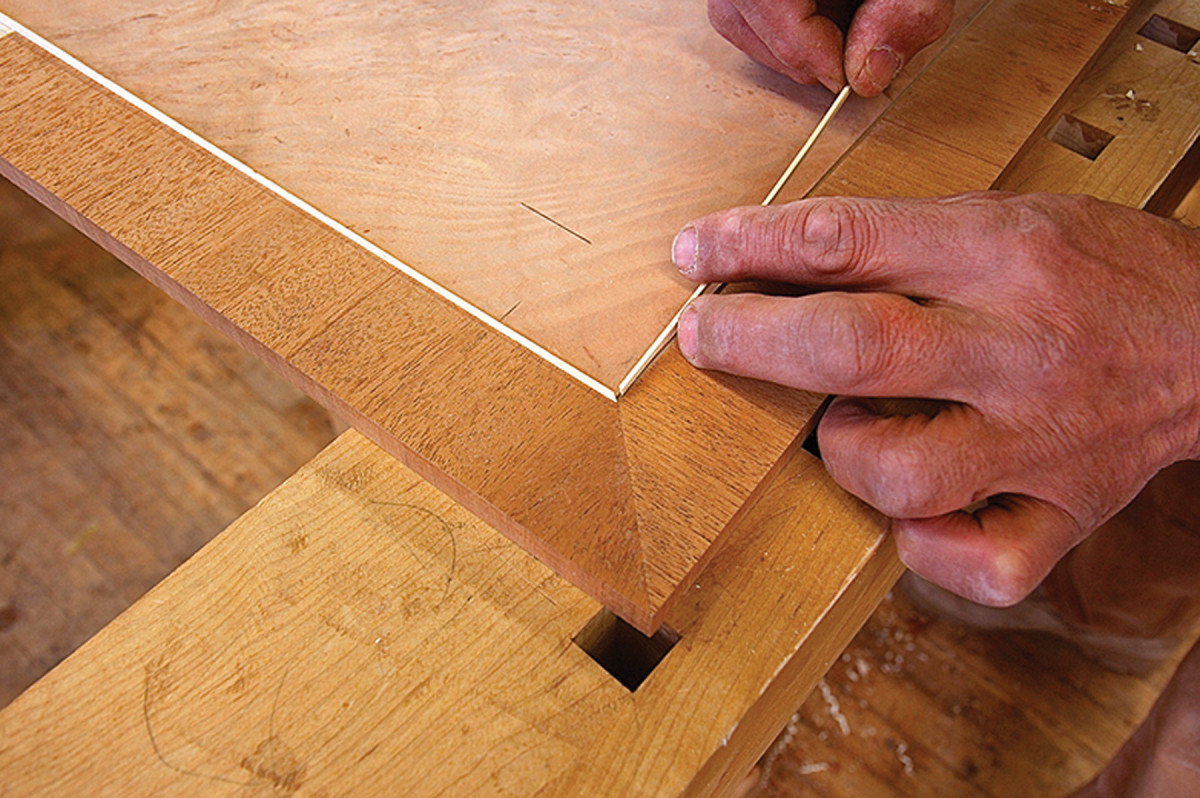
Get into the groove. After mitering the corners, glue the holly inlay strips in place.
Using a thin-kerf 10″ table saw blade and a zero-clearance insert, carefully rip the 1⁄16“-thick stringing; then use the band saw to rip those wider strips into 1⁄4” stringing material.
After mitering the ends with a chisel and a miter block, I fit the stringing into the grooves, then glue it in place with the rough edge up.
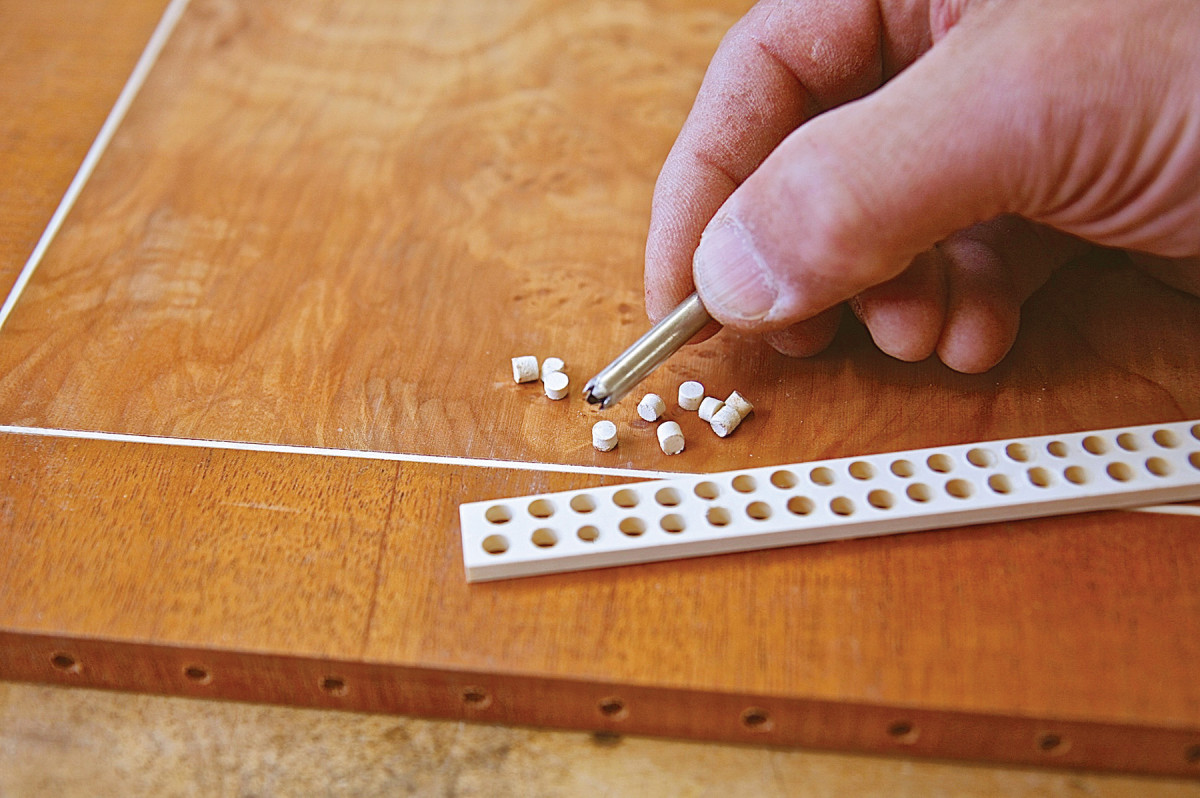
Dots. You’ll need 80 holly dots (plus a few extras for insurance). Note the “saw teeth” on the punch.
Later, it’s planed and sanded flush (when you do that, be careful not to cut through the veneer).
Dotted Edge
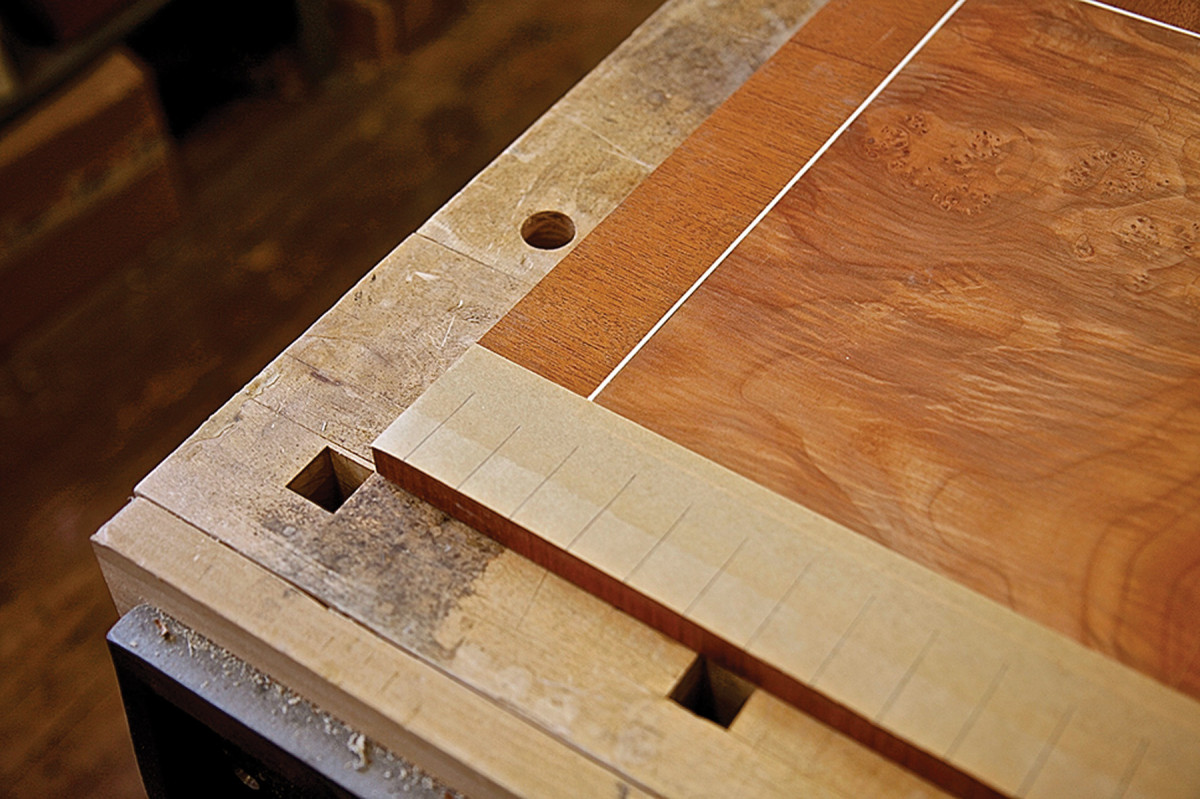
Tape in place. Lay out the dot locations on a piece of tape, bringing the lines to the table edge.
A bright staccato band of dots that neatly punctuates the slender top to give it a little “pop” is a Ruhlmann trademark.
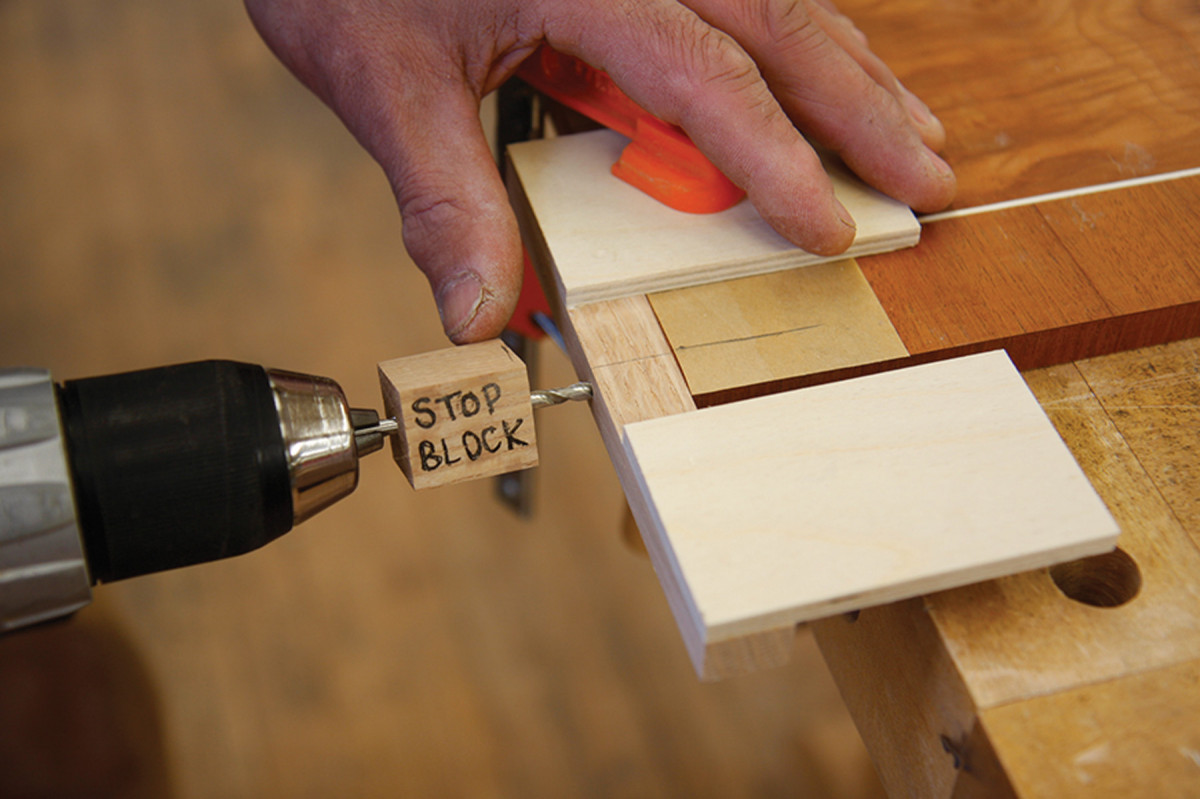
A simple jig helps to align your drill bit and keep it straight; a stop-block on the bit keeps you from drilling too deep.
These 1⁄8“-diameter dots are cut using a punch made from a 21⁄2“-long piece of 1⁄8” inside-diameter stainless steel tubing with “saw teeth” cut into one end. Use a 4″ XX tapered slim saw file to cut the teeth and to slightly taper the outside diameter.
With the punch chucked into a drill press, lower it slowly (and at a slow speed) into a slice of 3⁄16“-thick holly. After punching out three dots, remove the tube from the drill press and push out the dots before proceeding. Attempting more dots at one time clogs the tubing and crushes or “burns” the dots. Any damaged or discolored dots will show badly, so cut extras and discard those that are less than perfect. You’ll need 80 good ones…and a few extras for insurance.
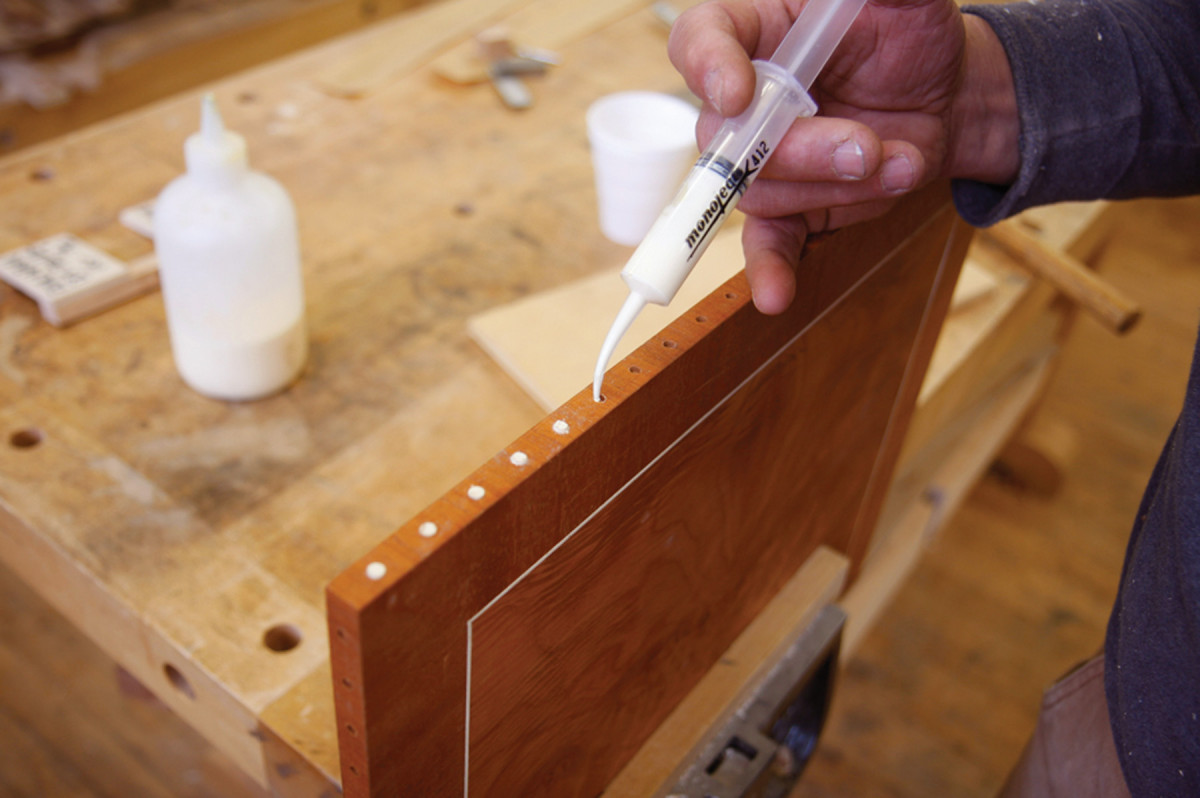
Dotted line. Use a syringe to inject glue into the holes, then insert the dots all along the edges.
To position and drill the holes into the edge of the top, make a simple drilling jig. Lay out the exact position of each dot on strips of tape laid onto the top, then clamp the jig to the top, drill a hole, and move the jig to your next mark.
Inject a small amount of glue into each hole (I use a Monoject #412 plastic syringe) and gently tap the dots into place, leaving each slightly proud.
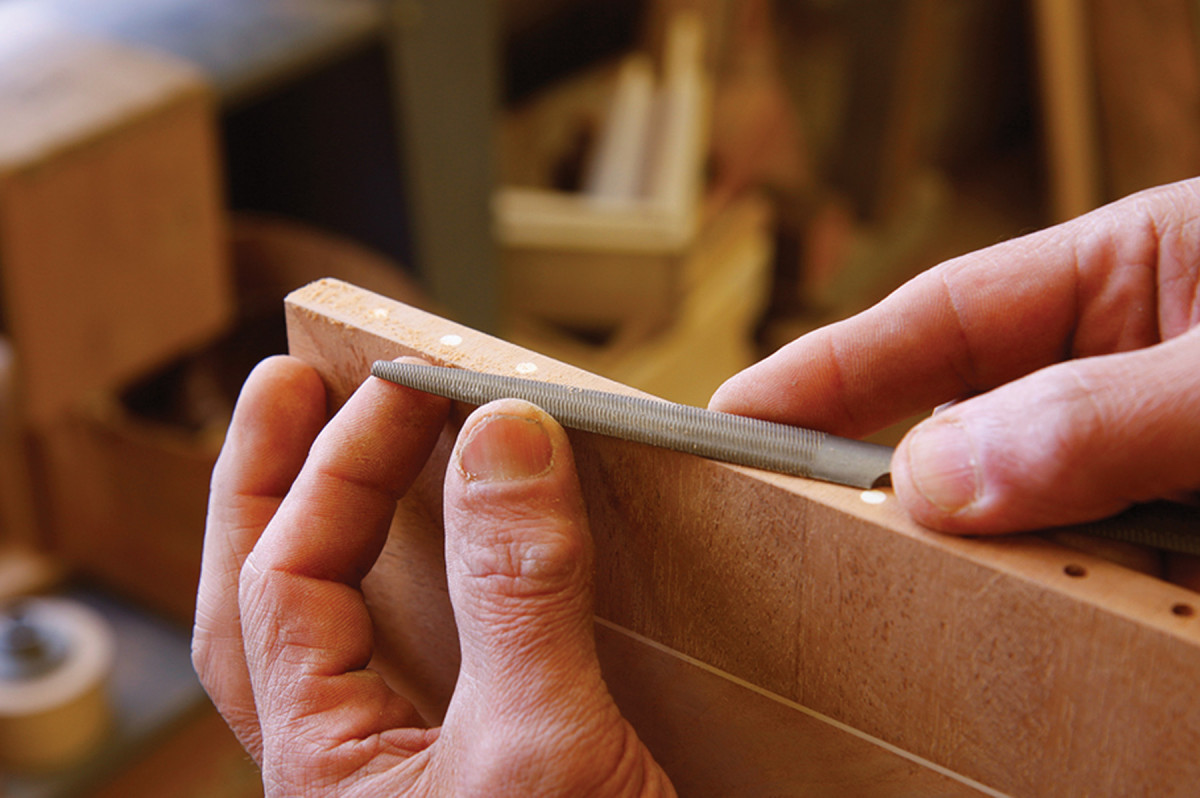
When the glue is dry, file the dots flush, then sand.
After the glue dries, work each dot flush using a detail file, then sand the entire edge smooth with #220-grit sandpaper.
U-shaped Face Frame
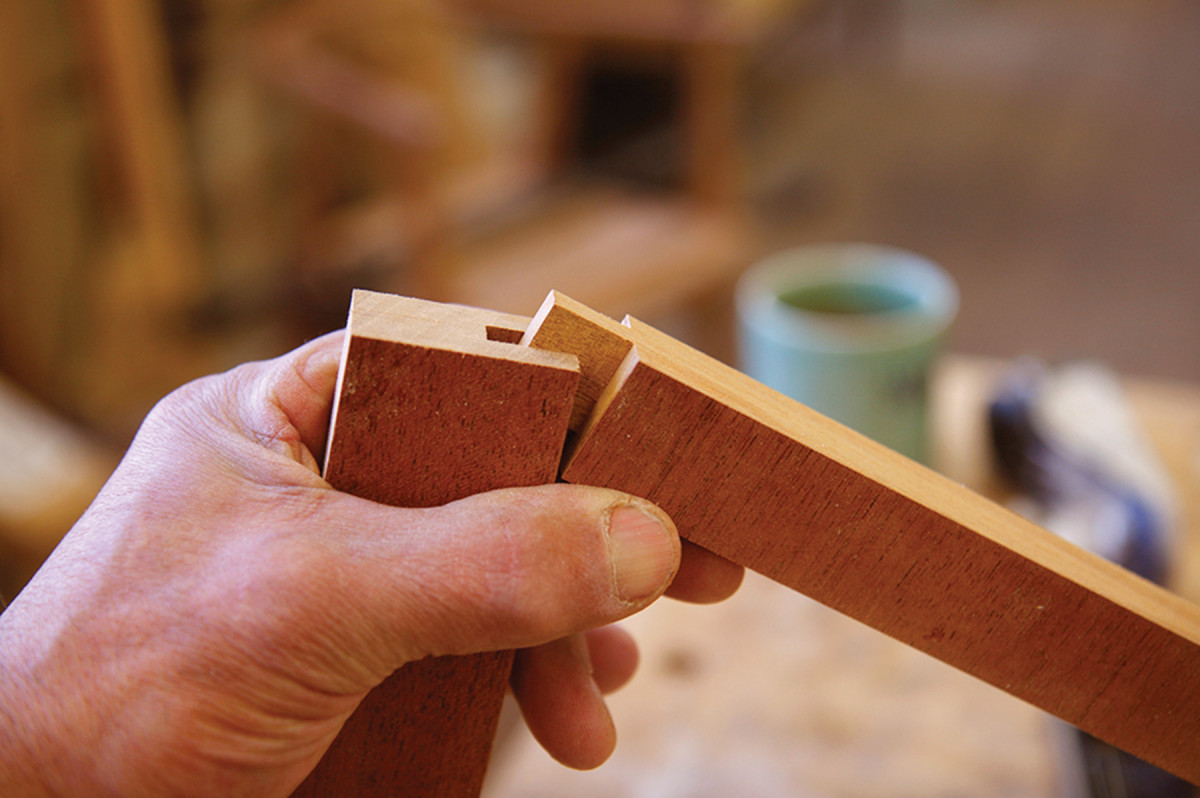
Face front. The face frame is joined with open mortise-and-tenon (stub tenon) joints; make sure everything is square before you glue up.
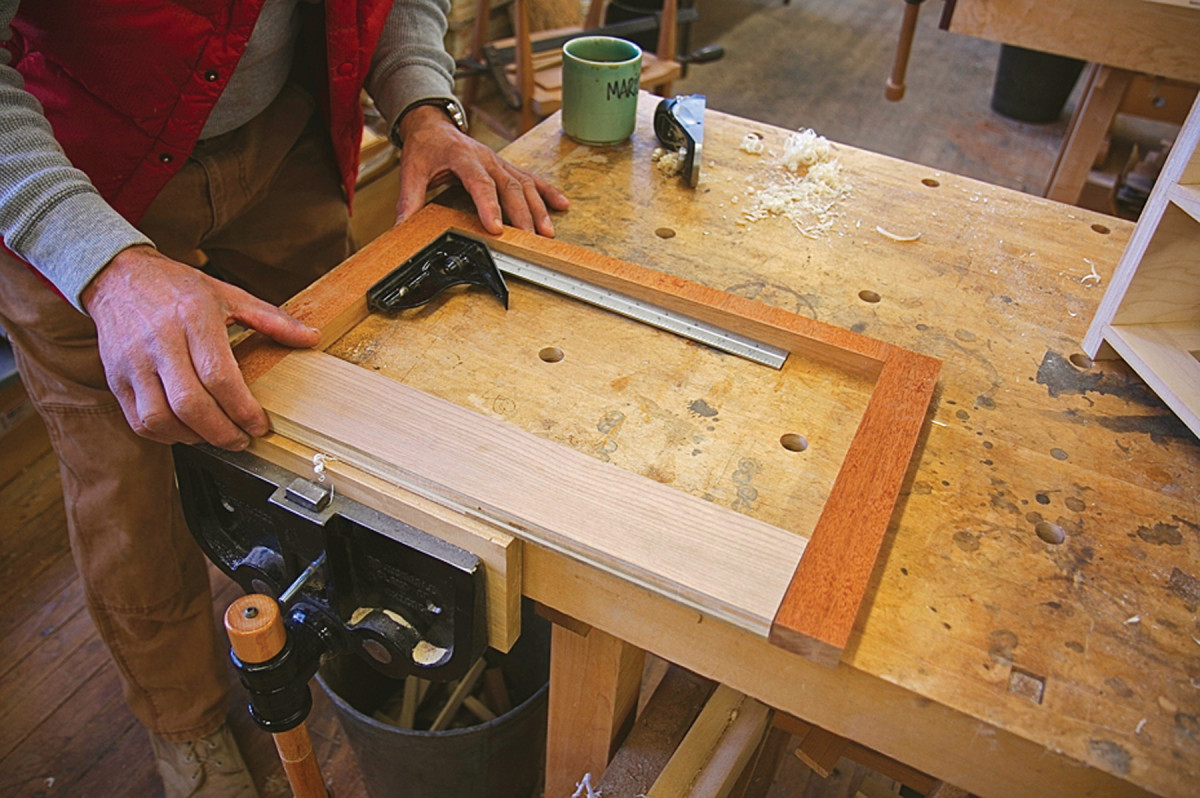 I attached an open U-shaped face frame to the cabinet to strengthen the carcase. The frame also visually alters the piece, giving the cabinet a more tailored and formal look, and it reduces the drawer opening.
The frame is made up of three mahogany pieces joined with stub-tenon and open-mortise joinery, with the grain running in the conventional direction.
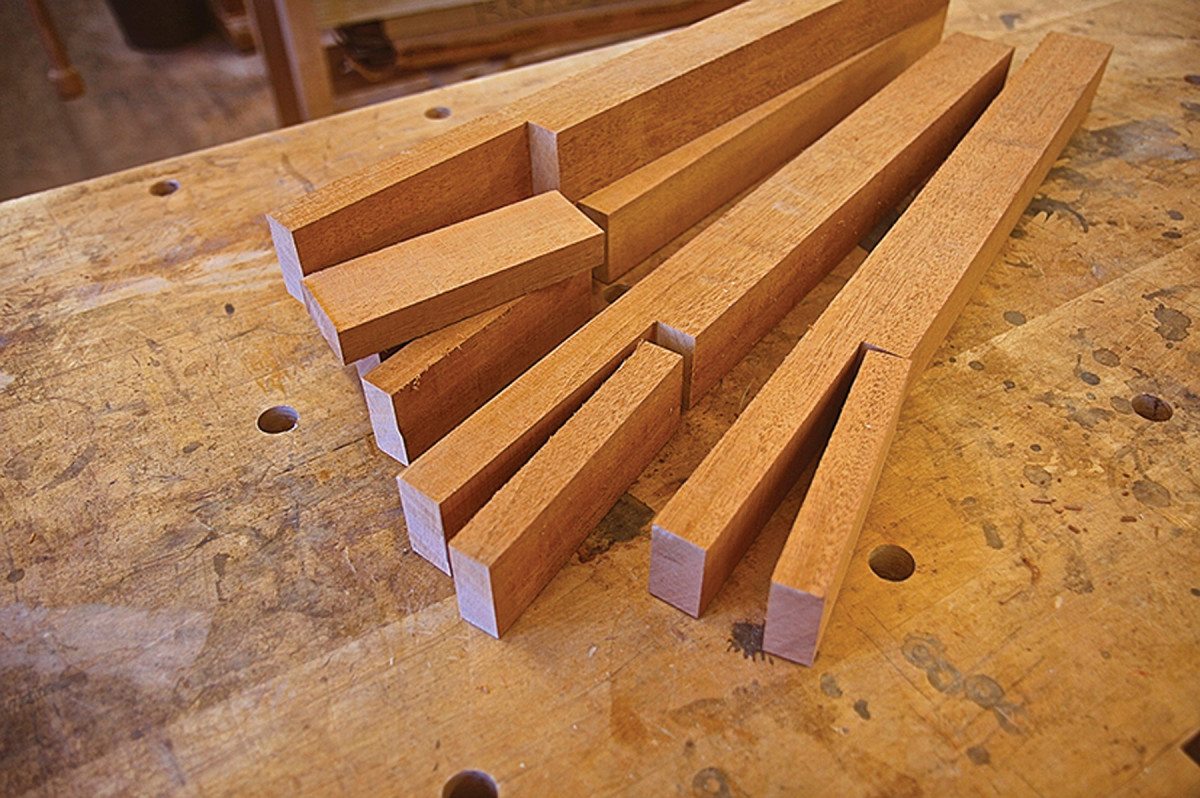
Leg prep. Before turning the legs, cut out a 3⁄4″ x 51⁄4″ section from the mahogany and glue in a piece of poplar, with heavy brown paper between the two species.
 The pieces are veneered with the same mahogany veneer that covers the carcase (see below) to maintain a neat and uniform appearance. The grain of the veneer on the face frame rail is oriented vertically. Because of the narrow size, I veneered the frame-face parts using yellow glue and clamping cauls.
Once the face frame parts are veneered and the joinery is complete, glue up the frame. (I used a spacer along the open bottom of the frame to maintain critical dimensions and to ensure squareness.)
Veneer the Carcase
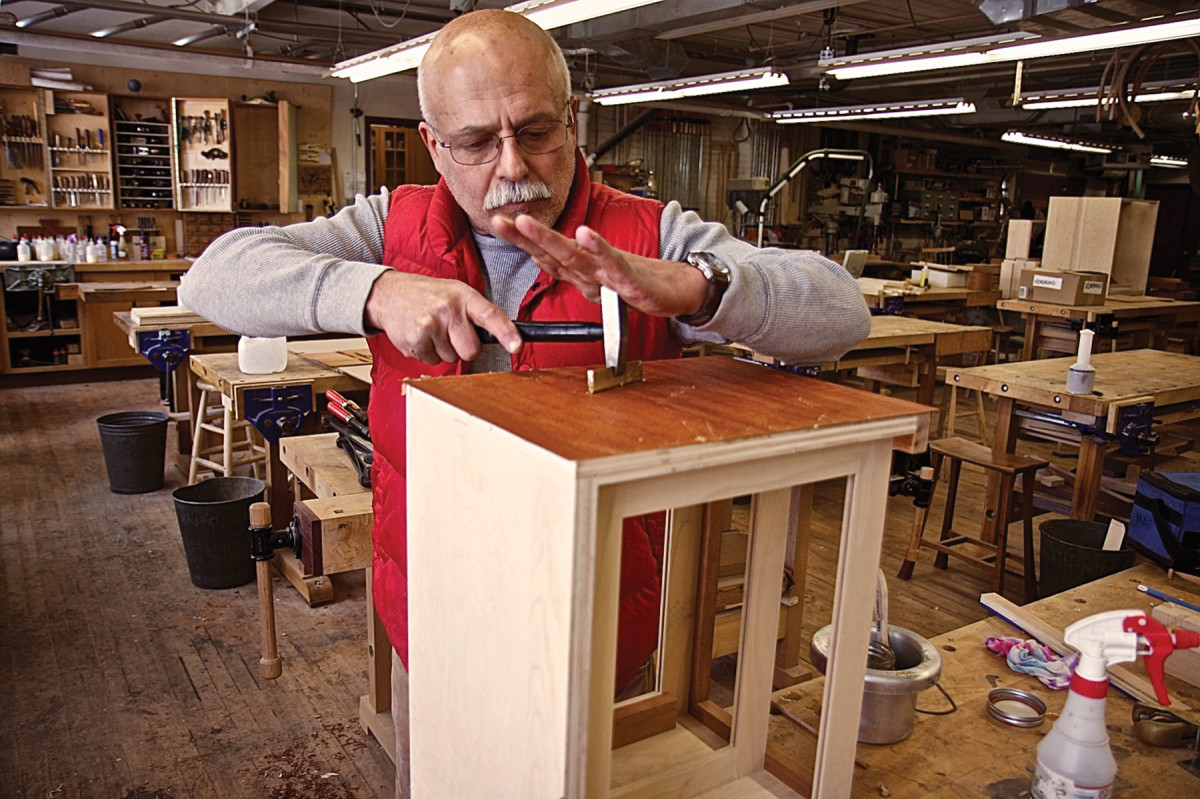
Hot hide. The carcase is veneered in the traditional manner, using hot hide glue and a veneer hammer. It’s not difficult, but you must work quickly.
For the plywood carcase, I chose straight-grained mahogany for its warm, even color and absence of figure. Because the case was already assembled, I employed the traditional method of using hot hide glue and a veneer hammer to lay down the veneer.
After brushing warm glue onto the cabinet, place the veneer face down onto the wet glue and apply glue to the backside of the veneer. While it’s still wet (and warm), flip the veneer face up and quickly began to press it down with the hammer, squeezing out the excess as you carefully work toward the edges before the glue cools.
After thoroughly pressing down the veneer, I check for any stubborn, unglued edges and bubbles. These can be reheated and eliminated with the application of more glue (or heat from an iron) and additional focused pressure until a good bond is achieved. Later, trim the excess with a veneer saw, then plane and scrape the seams smooth before sanding with #220 grit. Add cross-grain veneer to the reveal on the carcase top.
Time for Shapely Legs
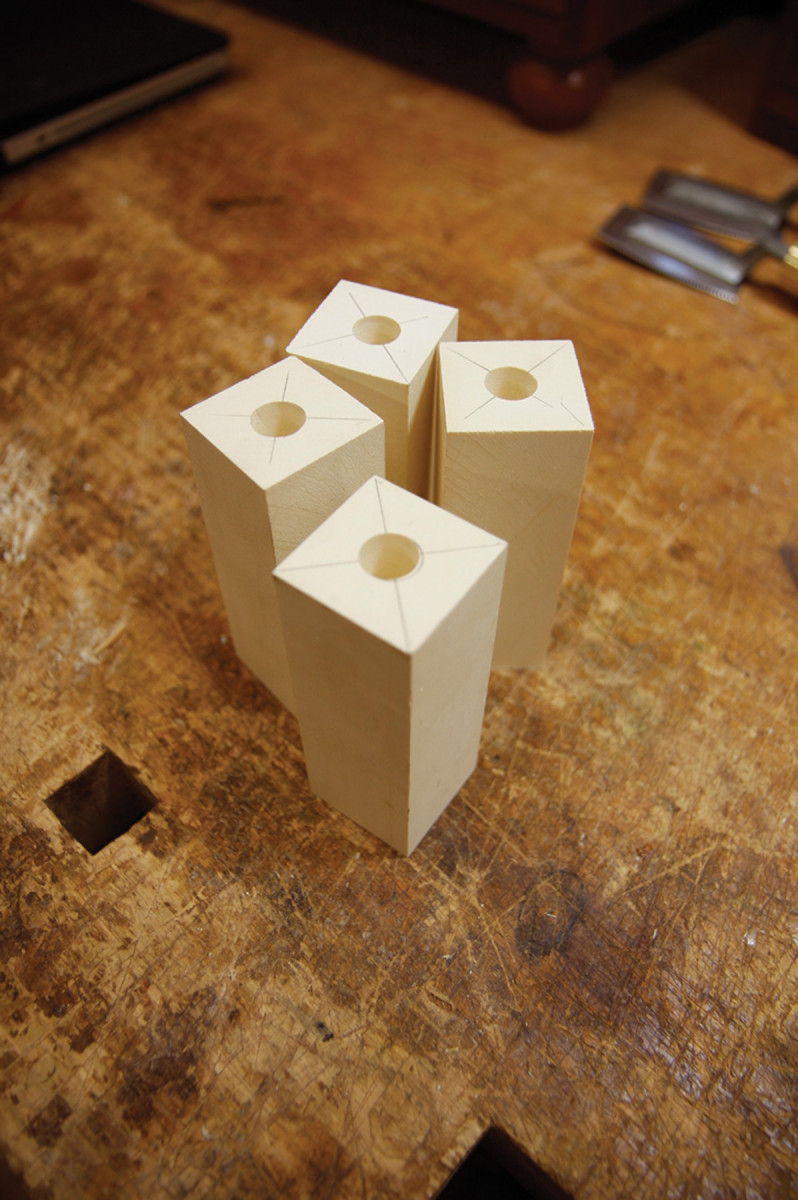
The drill. Prep, then drill the holly foot blanks to slip over the mahogany leg tenons.
I mill my leg stock 1 1⁄2“ square x 21″ long, then cut out a 3⁄4” x 5 1⁄4” section at the top of each leg. This cut-out section is replaced with a piece of poplar glued in with a slip of heavy brown paper placed between the poplar and the leg blank. This allows easy removal of the poplar once the leg is turned.
 Next, turn a 1⁄2“-diameter x 1”-long tenon on the bottom of each leg.
For the feet, I prep 1 1⁄4” x 1 1⁄4” x 4 1⁄2” holly blanks, then drill a 1⁄2“-diameter hole into one end and glue them to the tenons on the bottom of the mahogany leg blanks.
Holly is a hard, tight-grained wood that can be turned to a smooth, ivory-like surface. It is the perfect choice for the feet, knobs and other light-colored accents on this piece.
I describe the leg as a “torpedo” shape, tapering to 1⁄2” at the top and 3⁄4” at the foot, with a 1 3⁄8” swell at the thickest point.
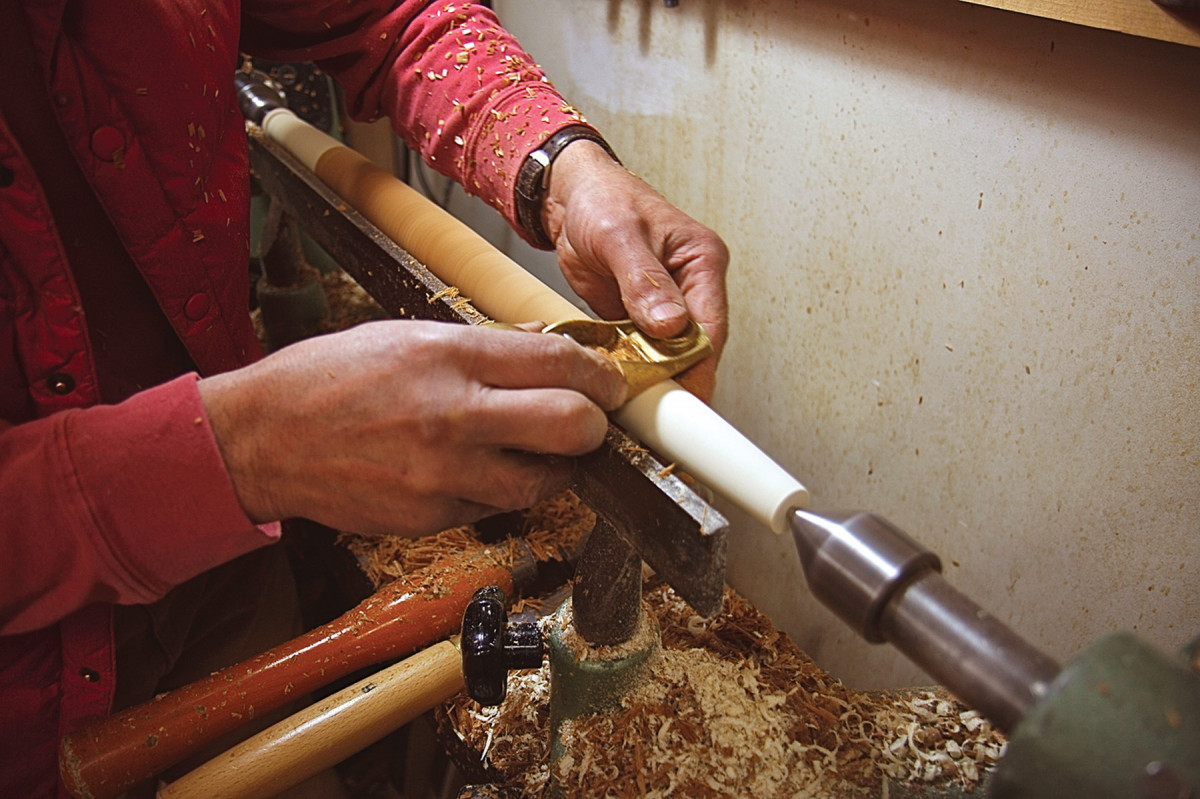
Foot joint. Use a small block plane to smooth the transition from holly to mahogany (mine is a Lie-Nielsen No. 102).
After turning the legs to a rough shape with a roughing gouge, I clean and smooth the taper starting with my Ashley Isles “3-1” gouge (Item #IT-MARIO125 at Tools for Working Wood), then switch to a 11⁄2” skew gouge. I finish up with a block plane.
After turning the legs to their final shape and removing them from the lathe, remove the glued-on poplar section by gently guiding a chisel into the seam between the two woods. This leaves a clean-cut ledge on the mahogany leg, which will eventually fit against the side of the carcase.
Staging Panel & Drawers
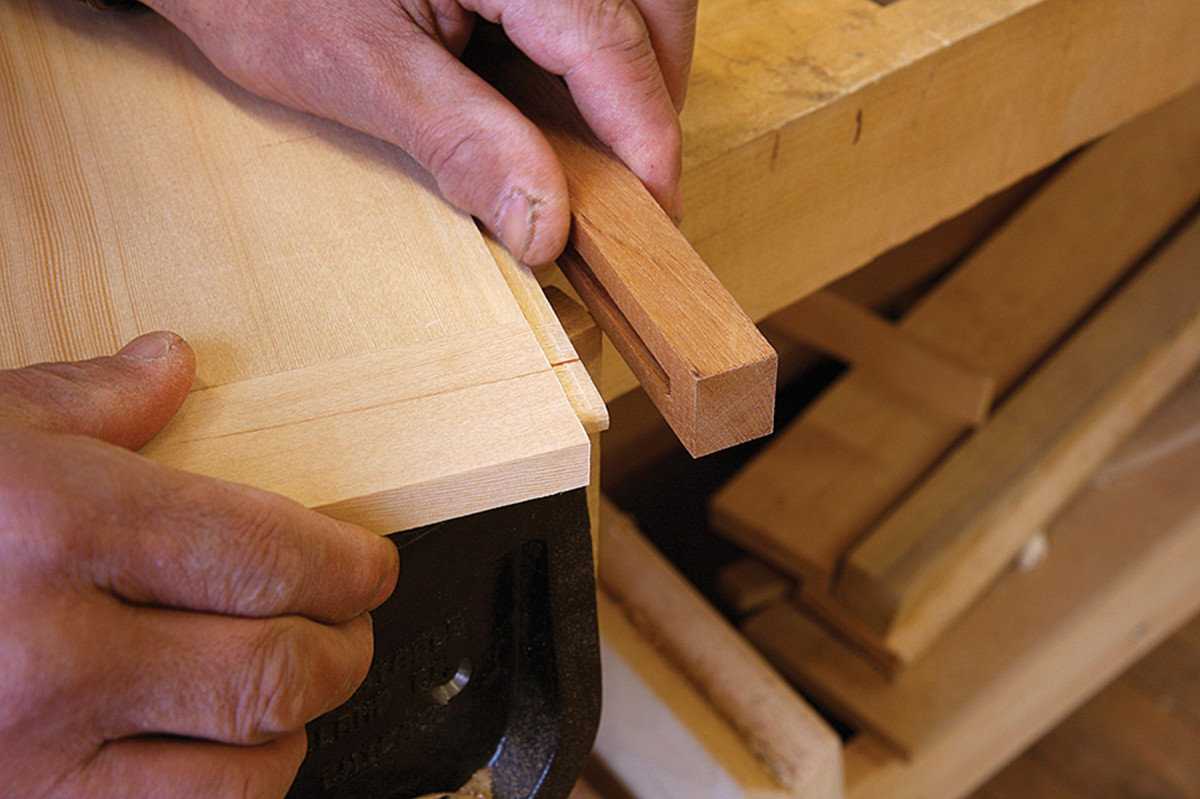
Staging strip. The front of the staging panel is attached with a stub tenon that stops just short of either end.
The slender panel that slides out from beneath the drawers at the bottom of the carcase is used to briefly support, display or organize tools and materials.
I made up a 1⁄2“-thick panel with breadboard ends and joined the front of the panel to a strip of mahogany (that will line up with the drawer fronts) with a short, continuous tenon. This strip is veneered with the same vertical-grain mahogany as the drawer fronts and face frame for a pleasing waterfall effect.
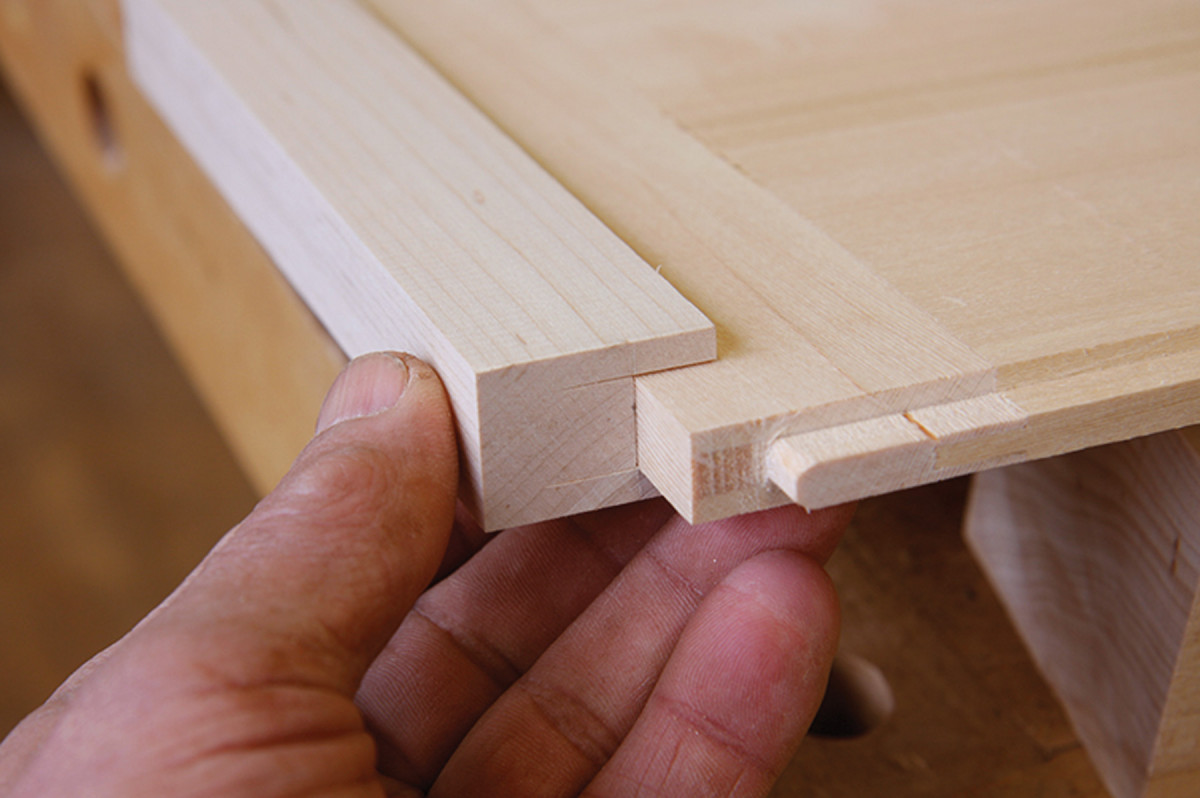
“U” for underhung? The staging panel rides in U-shaped guides attached to the underside of the bottom drawer’s web frame.
The staging panel hangs in a pair of U-shaped guides, which are screwed to the underside of the bottom web frame. By screwing the guides in place, I can adjust their positions to provide smooth and easy travel for the staging panel.
I cut the drawer fronts to their exact size and veneer the fronts with vertical-grain mahogany. As I did with the carcase face frame, I veneered the fronts with fish glue in a cold press.
The drawer sides, backs and bottoms are made of quartersawn sitka spruce (leftovers from a guitarmaker). This stuff has a beautiful, straight grain and a creamy color well-suited to this piece. It’s also surprisingly strong, enabling me to mill the stock down to 5⁄16” for the sides. The backs are 1⁄2“-thick; the bottoms are 3⁄16” thick.
The drawer sides are joined to the fronts with hand-cut half-blind dovetails, and to the back with through dovetails.
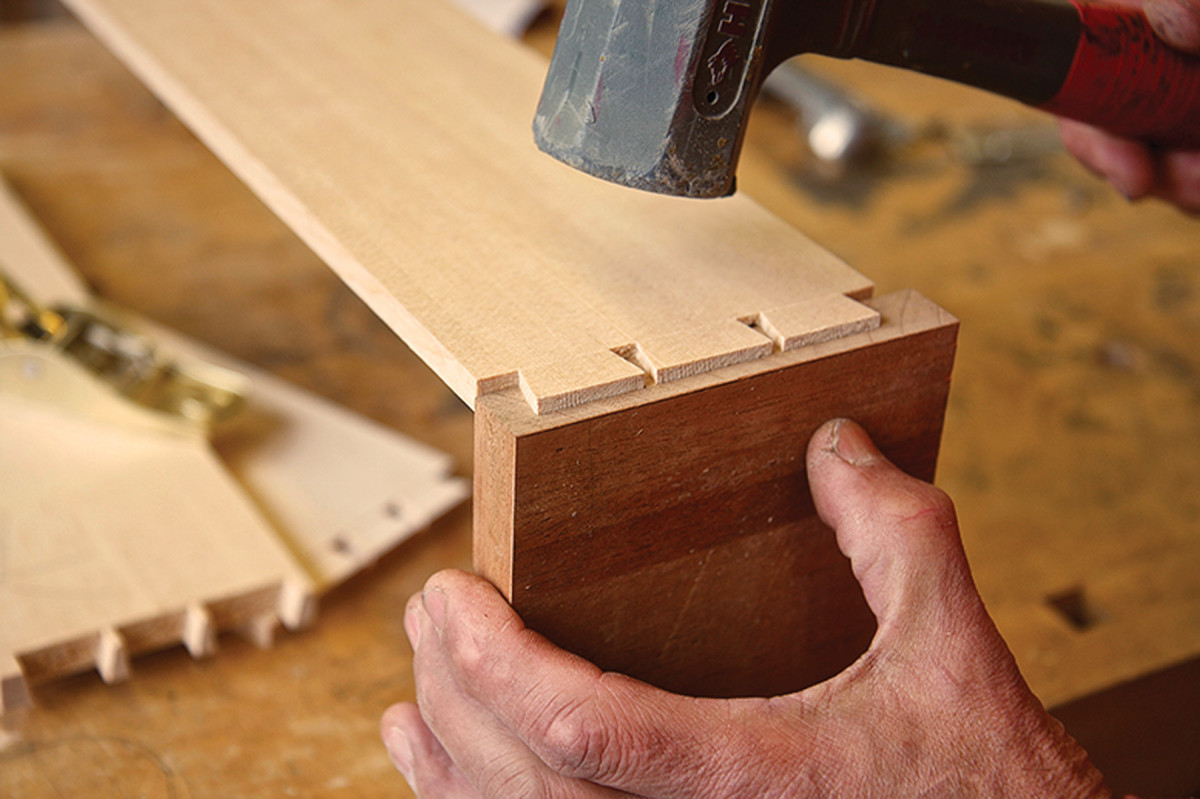
Half-blind. At the front, the drawers are joined with half-blind dovetails (through-dovetails are used at the back).
The drawer bottoms are inserted with the grain running side-to-side; that way any wood movement is directed toward the back of the drawer. To accommodate that movement, I insert a screw and washer through open slots cut into the back of the drawer bottom.
I build drawer boxes slightly larger than the opening, which allows me to plane them down for a perfect fit, one stroke at a time.
Before fitting the drawers, glue wood drawer guides onto the drawer webs. These guides take up the space between the carcase interior and the face frame. By handplaning them, I can tweak them to provide smooth travel for the drawer boxes and create even spacing of the drawer fronts.
Turn the Knobs
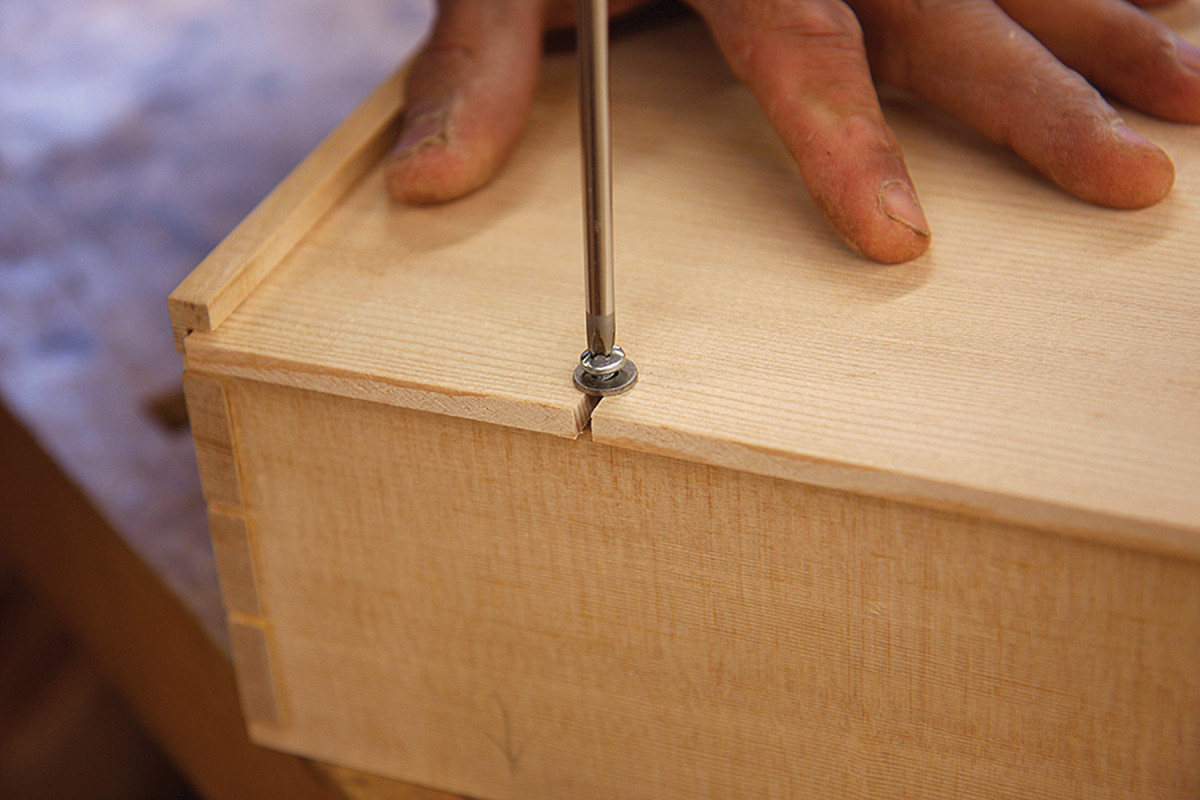
Allowance. Hold the drawer bottom in place with a washer and screw in a slot to allow for seasonal wood movement.
For the holly knobs, prep several blanks to 11⁄4” square by about 2″ long.
Once they are turned round to 3⁄4” diameter, I put them in a collet chuck. This allows me to turn a tenon (3⁄8“-diameter) and knob without having to remove and re-chuck the blank.
Once the shape is complete, I sand and burnish each knob to a super- smooth finish while it’s spinning on the lathe.
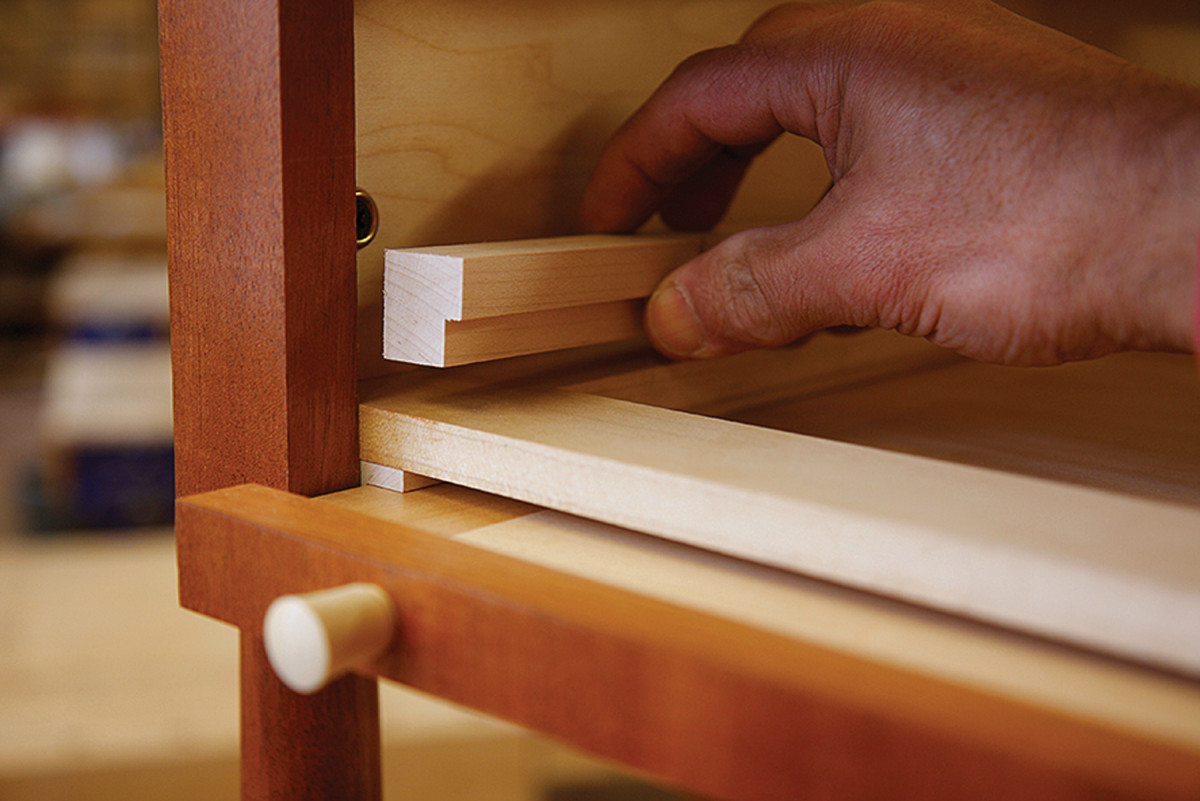
Guides. Drawer guides should be fairly tight to the drawer sides to keep things from binding. Fit them by hand for smooth travel.
The tenons are inserted in holes drilled on the drawer and staging panel fronts. Turn the tenons for a tight fit so they won’t loosen over time. Setting them is a small challenge. To embed the knobs gently, I use a wooden handscrew to press them into place (rather than knocking the crown).
Leg Punctuation
At the top of the legs are 1⁄2“-diameter round dots. As with the knobs, I turn these on the collet chuck, leaving a generous tenon.
After turning and sanding the two small balls, I stick the tenon into a block for support and saw the balls down the middle on the band saw. Then, saw the two halves free from the tenon.
Legs, Meet Carcase
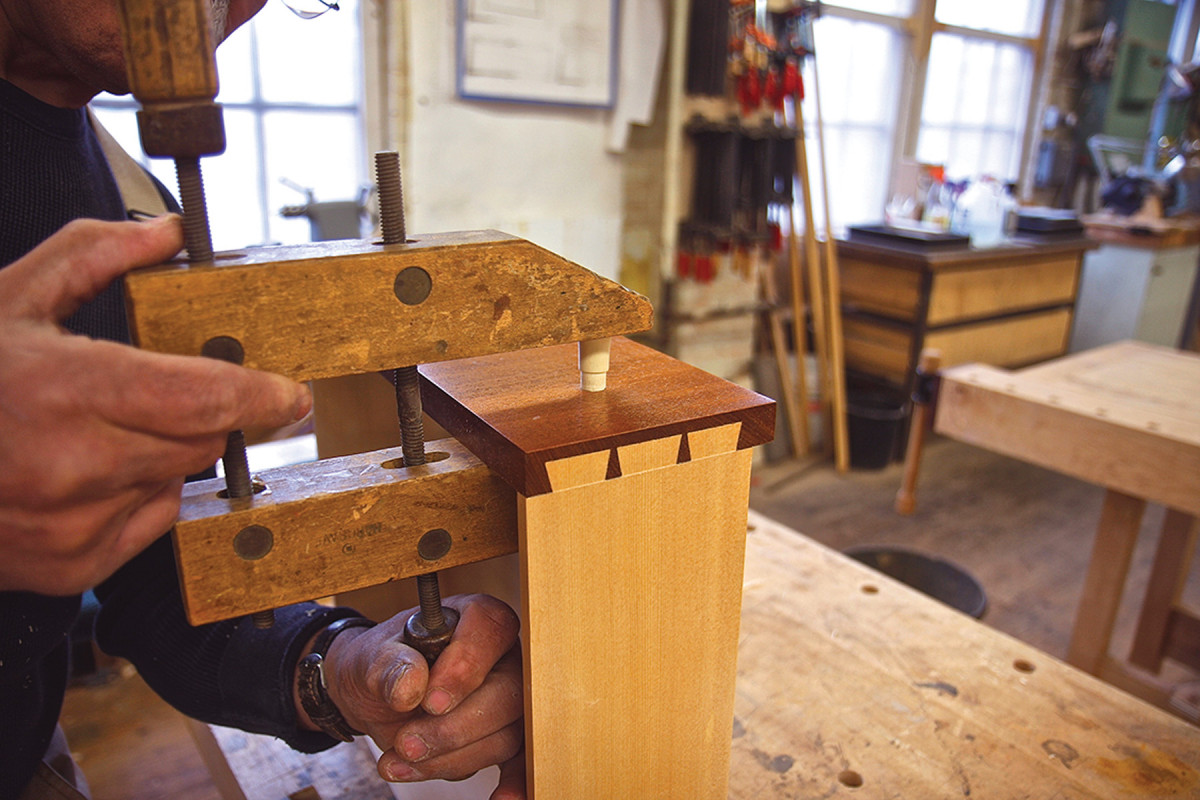
Gently, now. A wooden handscrew provides sufficient pressure to push the knob tenons in place without damaging the faces.
The torpedo-shaped legs are attached to the case with sliding dovetails. This is a perfect way to set the cut-away surface tight to the sides of the cabinet and produce a strong joint. Another benefit of this method is that any error in placing the legs is easily corrected.
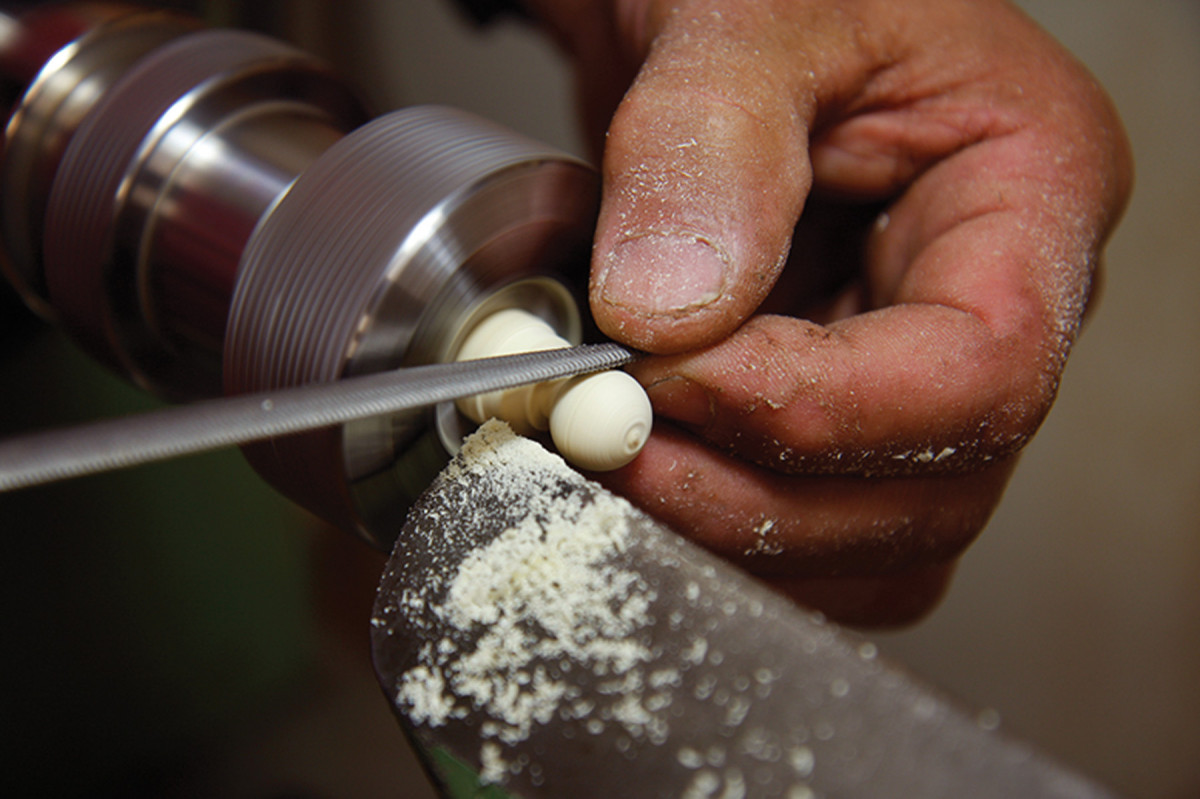
Tiny turnings. The leg punctuation dots are held in a collet chuck and turned to shape using a file.
I begin by milling 3⁄4” wide, 8° dovetail slots in the carcase with my router, a 3⁄4” dovetail bit and a 3⁄4” outside-diameter rub collar. A template guides the rub collar and sets both the position and length of the dovetail slot. With the template clamped to the case, I can cut the slots in a single pass.
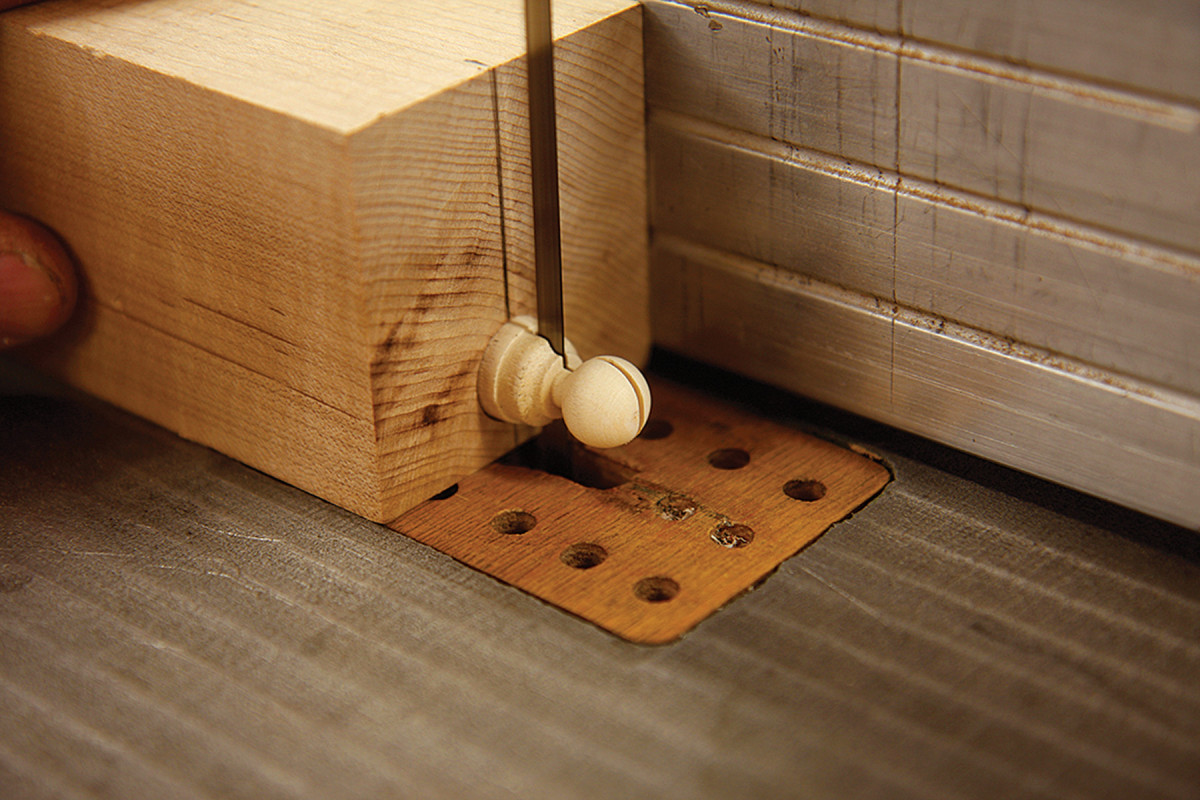
Safe cut. Use the tenon on the end of the ball to secure it in some sacrificial wood. Then cut each ball in half at the band saw.
Now mill some mahogany scrap to 13⁄16” thick, tilt your table saw blade, and cut both edges to 8° to match the slots. After testing the fit of the dovetail key into the slot, cut the keys free. With a few passes of a block plane, trim the keys to a precise fit, then cut them to length.
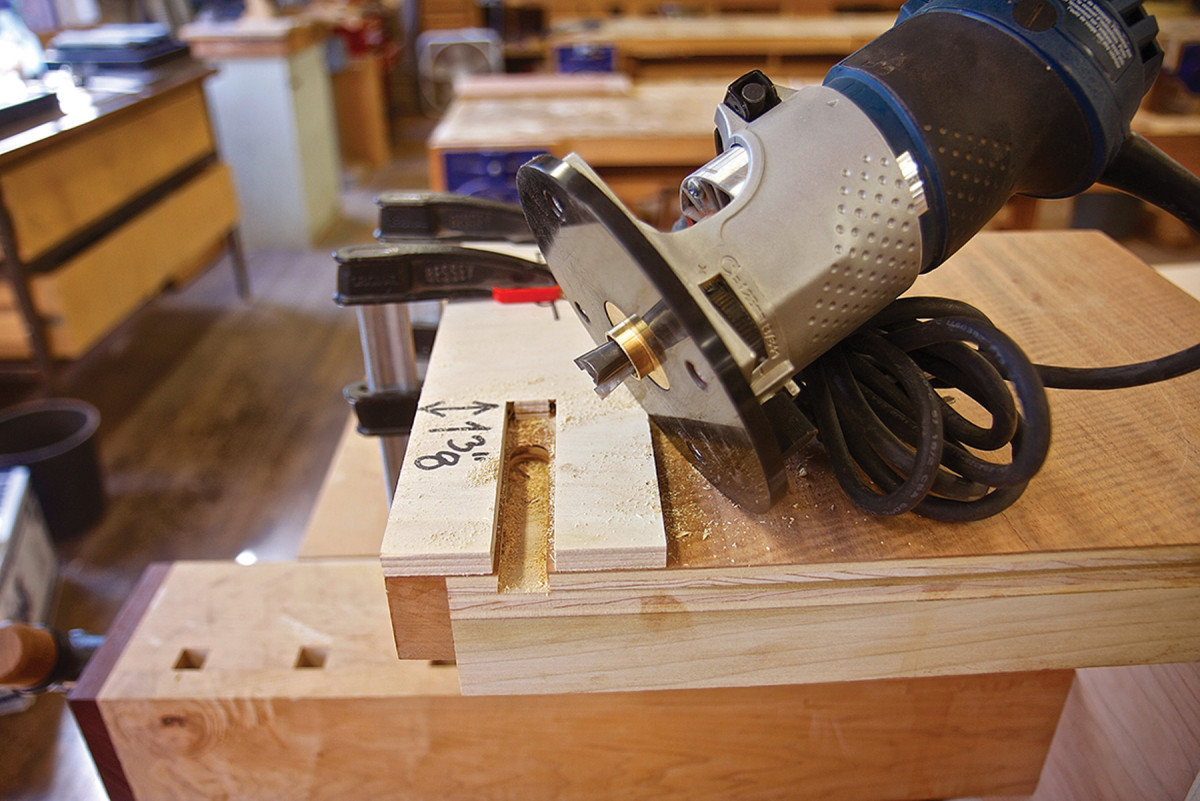
Quick slots. A simple jig of 3⁄4″ plywood guides the router’s rub collar to make quick work of the leg dovetail slots.
Drill a pair of countersink holes into each key, then screw the keys to the legs using 3⁄4“-long #6 wood screws. Check the fit and registration of each leg. Once you’re satisfied with the fit and appearance, dismantle everything, apply glue, then reattach the legs.
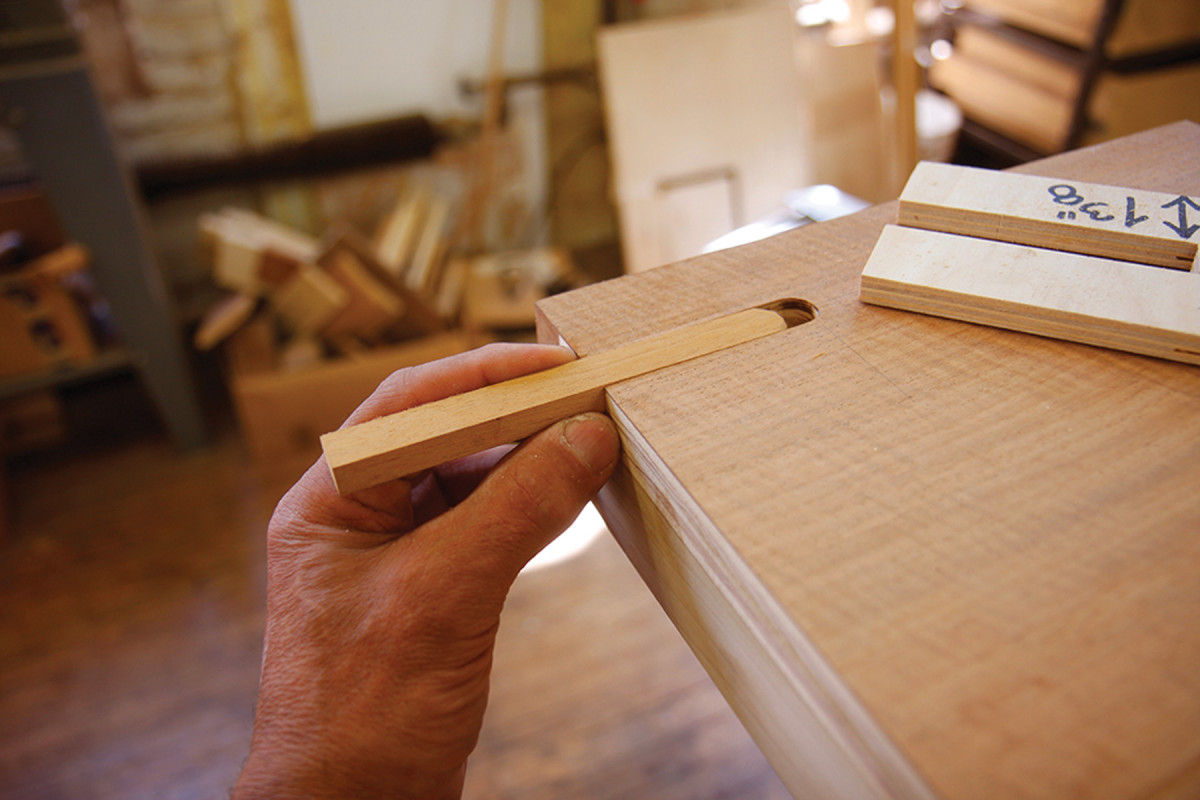
Keys. Use mahogany scrap to make the keys at your table saw, then plane them for a precise fit before cutting them to length.
With the legs glued to the carcase, glue the leg dots at the ends and tape them in place until the glue dries.
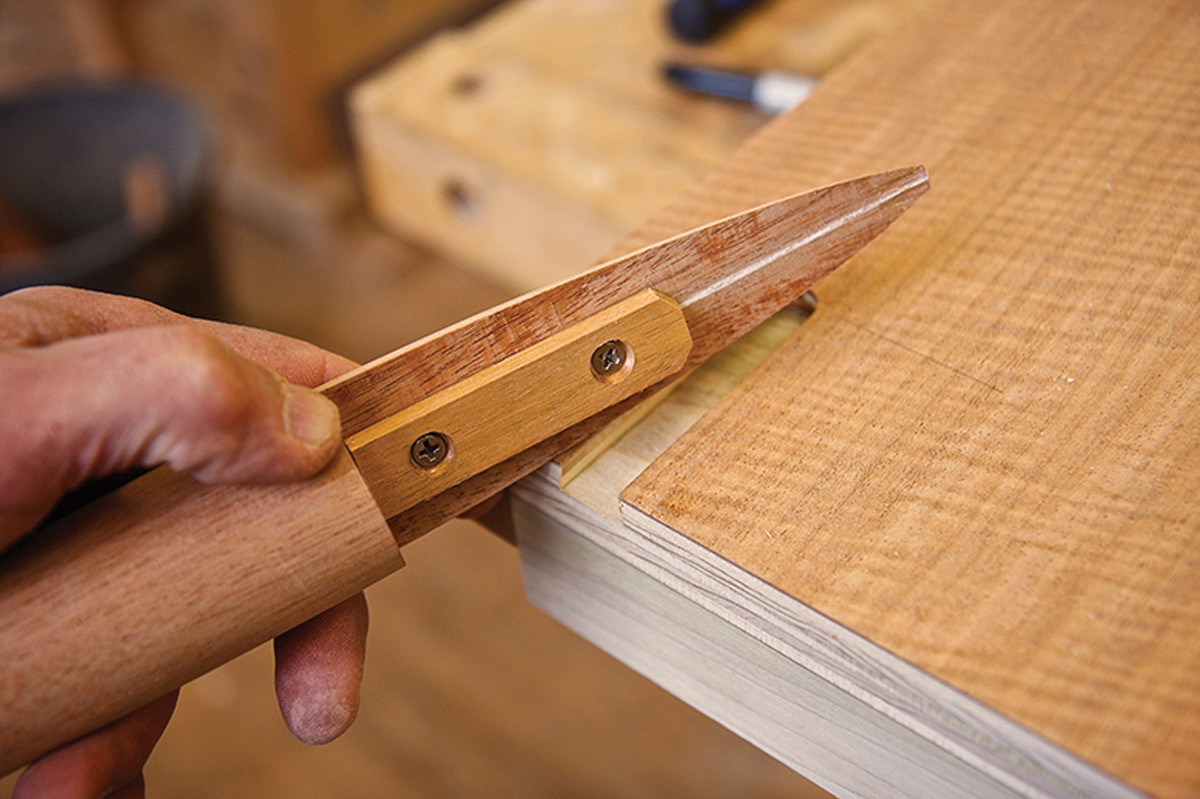
Applied keys. Screws hold the dovetail keys in place on the back of the legs.
Then sand all surfaces to #220 grit (be careful not to cut through any veneer). If you have spray equipment, use it to apply at least two coats of satin lacquer. I’ve also experimented with General Finishes’ High Performance Polyurethane Water Based Top Coat, which imparts a nice, protective sheen. (And of course, feel free to experiment with other finishes on scrap.)
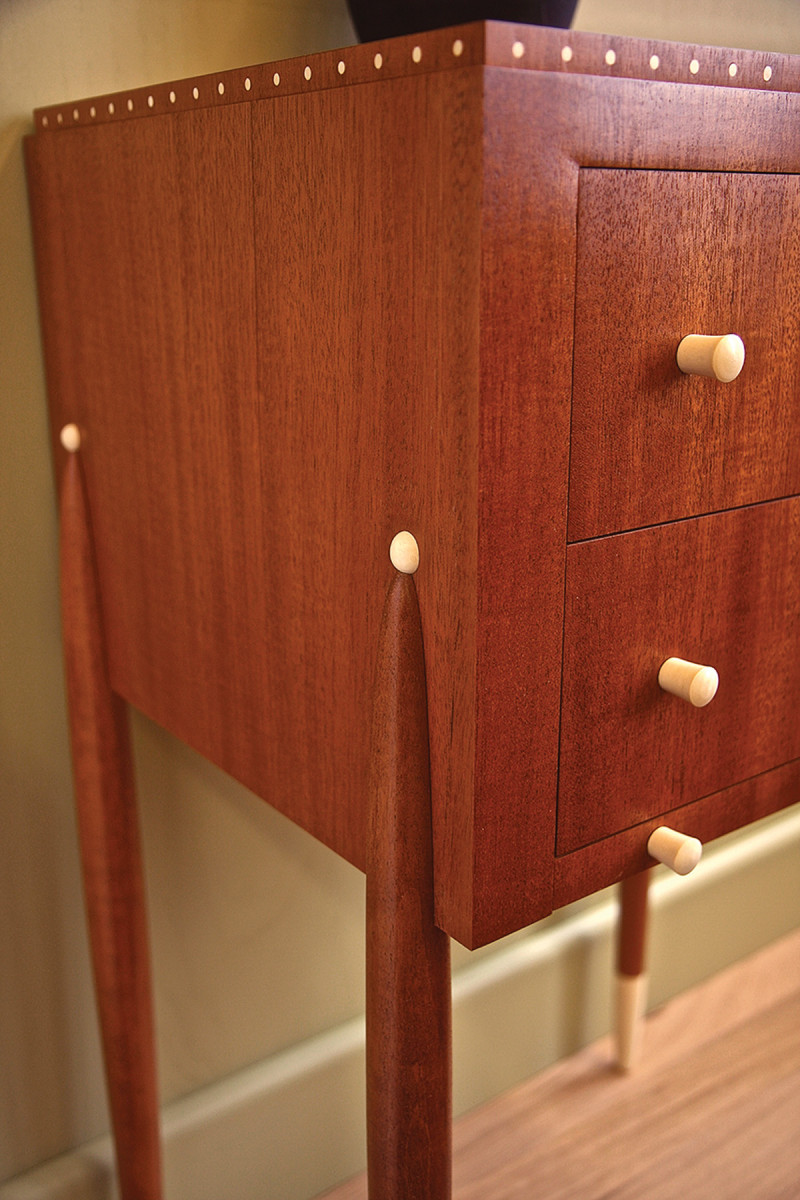
Finishing touch. The dots atop each leg provide the final punctuation.
Now all that’s left to do is decide where in your home to display your elegant Ruhlmann-inspired work.
Here are some supplies and tools we find essential in our everyday work around the shop. We may receive a commission from sales referred by our links; however, we have carefully selected these products for their usefulness and quality.


