We may receive a commission when you use our affiliate links. However, this does not impact our recommendations.
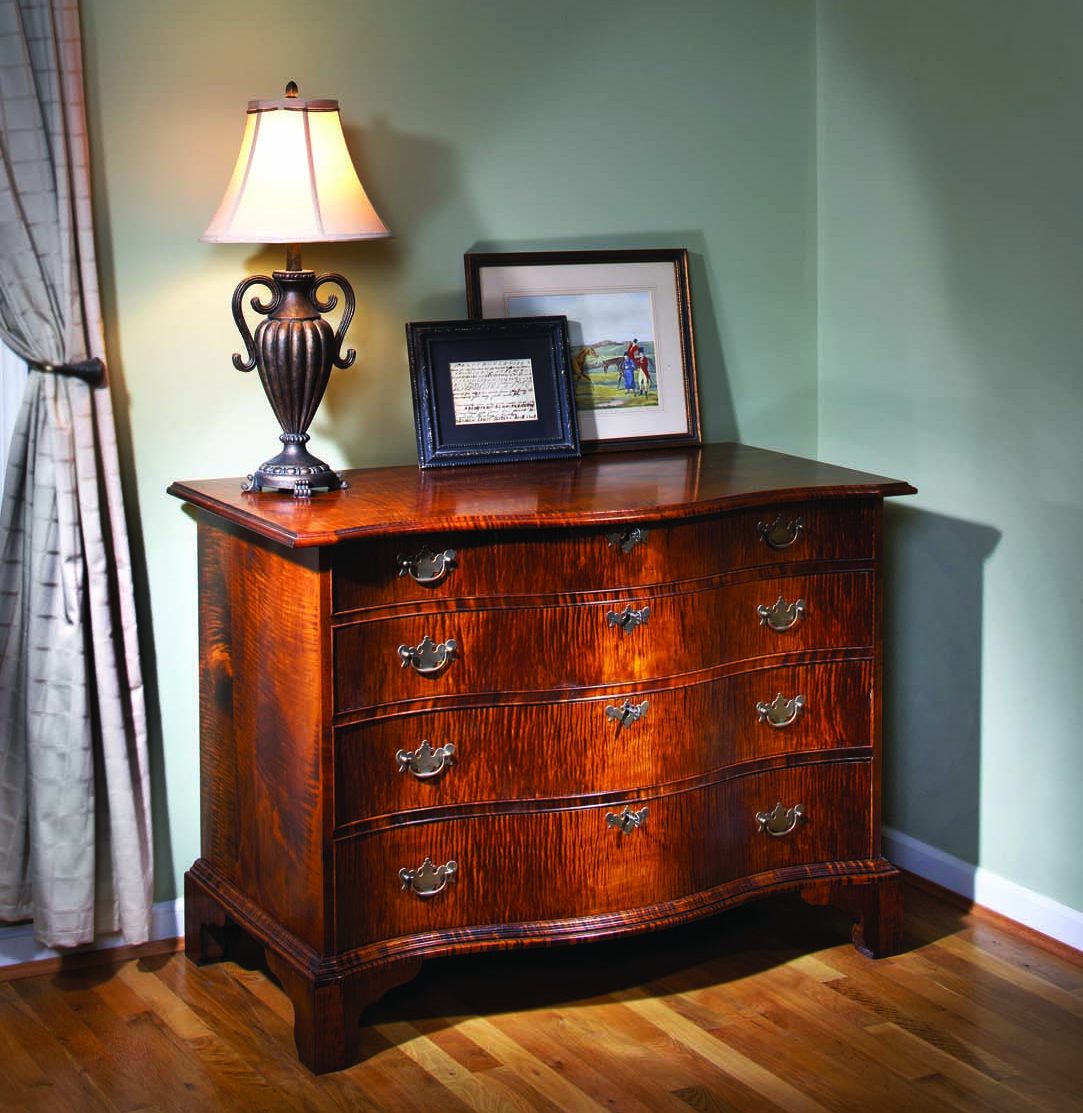
Expand your casework repertoire with a curvaceous front.
One of the most interesting aspects of a serpentine chest, with its front concave at the ends and convex in the center, is how the wood grain changes as the curves undulate across the front. A drawer front that begins as a piece of flat stock presents three distinct areas after shaping. The grain in the concave sections displays an “X” pattern, while the grain in the center section forms a circle. The patterns highlight the curved front to give the chest a more distinctive appearance.
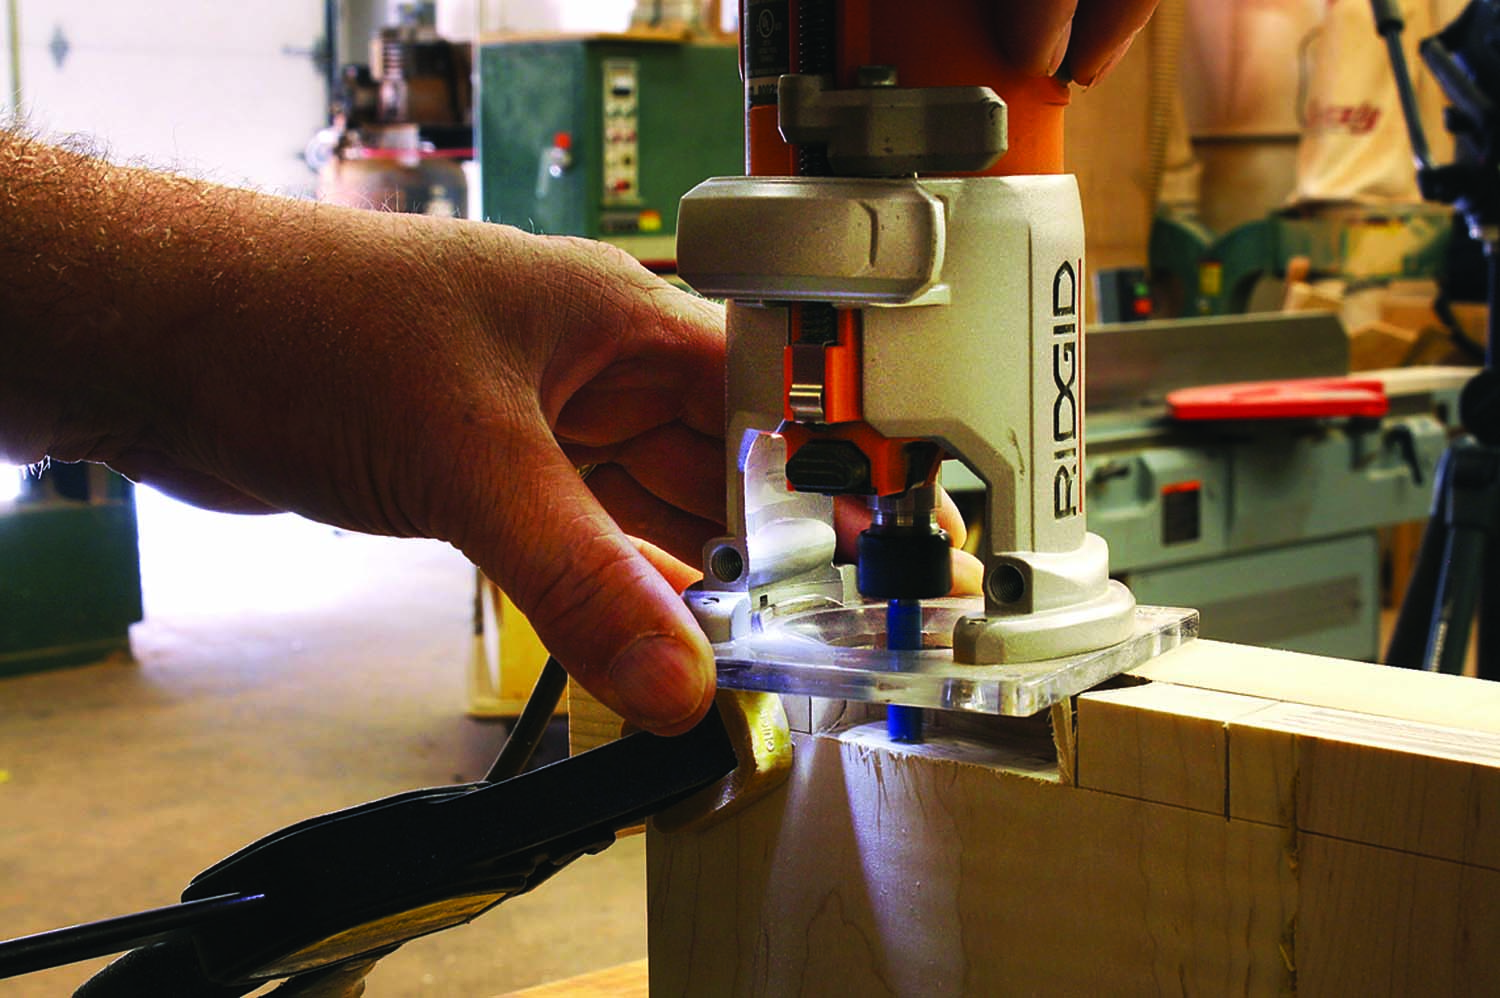
Waste removal. Socket waste is quickly removed with a router. I get added support using thick stock clamped to the work. Rout close to your lines then use a flush-cut saw to remove the last slivers of waste.
Serpentine chests first appeared in the Chippendale era around 1765. These chests could be considered a fraternal twin of the oxbow chest – also known as a reverse serpentine – which is convex at the ends and concave in the middle. These two styles are related to block-front chests in that all have shaped fronts fitted to a basic chest carcase.
Structurally Sound
This chest is based on a mid- to late-18th-century design from Massachusetts. The carcase construction is basic and the joinery is completely hidden. The sides are dovetailed to the bottom with the pins on the sides and the tails on the bottom. Because these structural dovetails will be hidden, you can use large pins and tails.
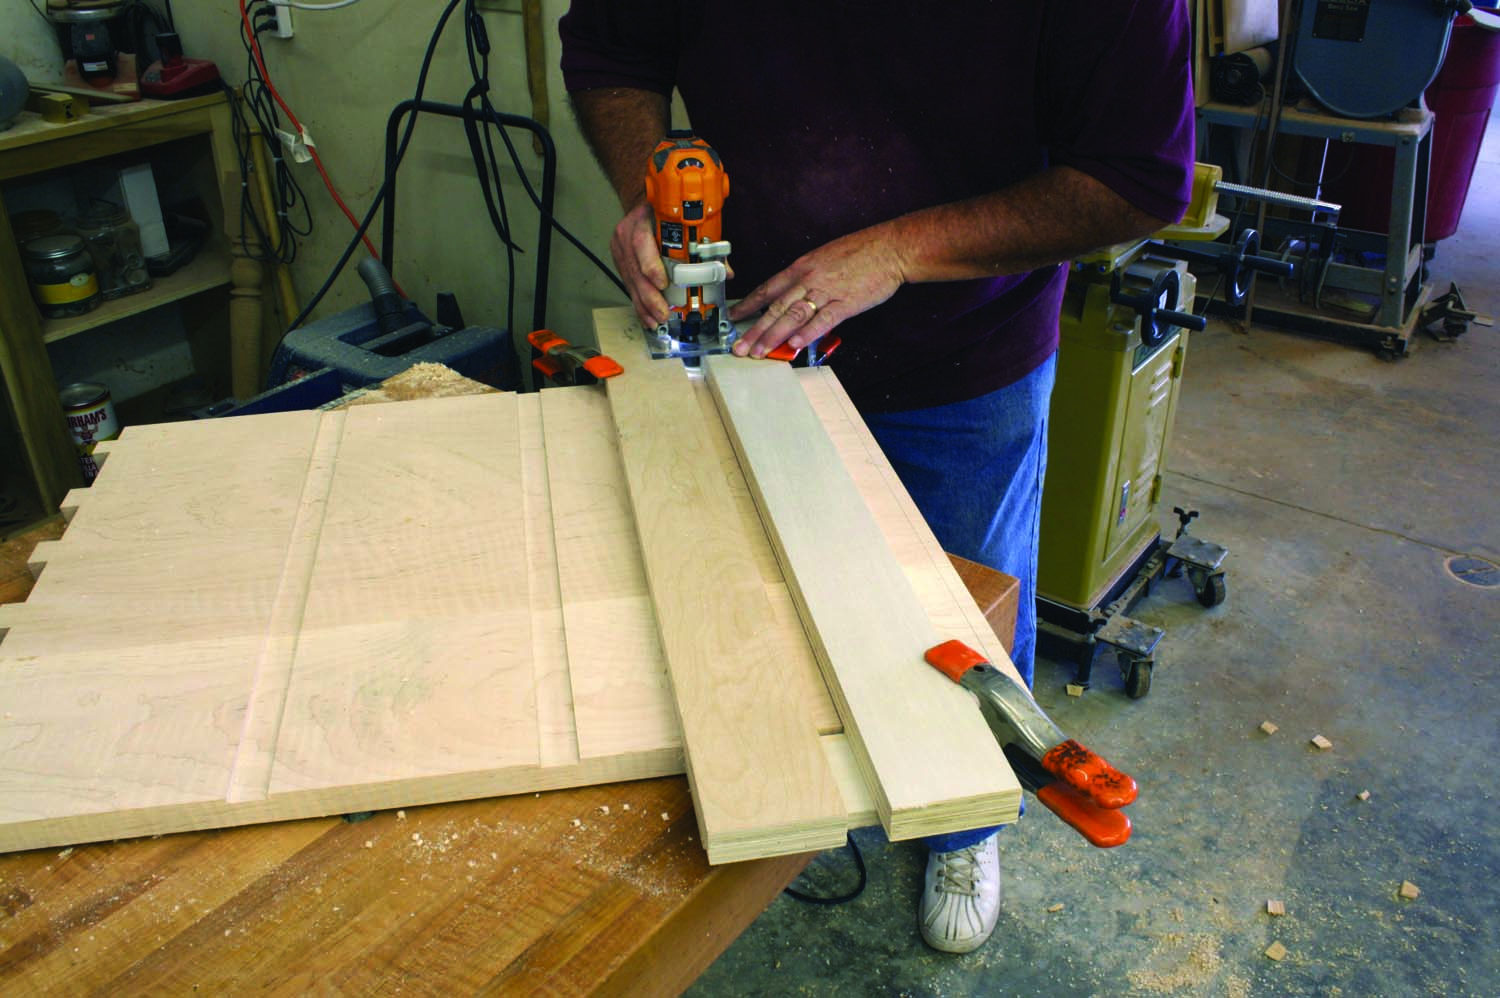
Shop-made jig. Make drawer runner dados easily and quickly with a simple jig built out of plywood.
Begin with the 20 3⁄4” pin board, or case side. Set your marking gauge to 5⁄8“, even though the thickness of the bottom is 3⁄4“. (The 19 5⁄8“-wide bottom has a rabbet at both ends to hide the joinery and create a shoulder to locate the side panels and help square the case.)
On your sides, draw a line from the back that matches the width of the bottom then square that line to your scribe line. Next, lay out the dovetail sockets. I used only six full pins and a half-tail at the side’s rear. Saw to your pin and tail lines.
For this project I removed the socket waste with a router and a small straight bit. For support I clamp a piece of thick stock flush with the case side. Adjust the depth of cut to just reach the scribe line. Remove as much waste as possible without nicking the sides of the pins. Remove the remaining waste with a flush-cut saw.
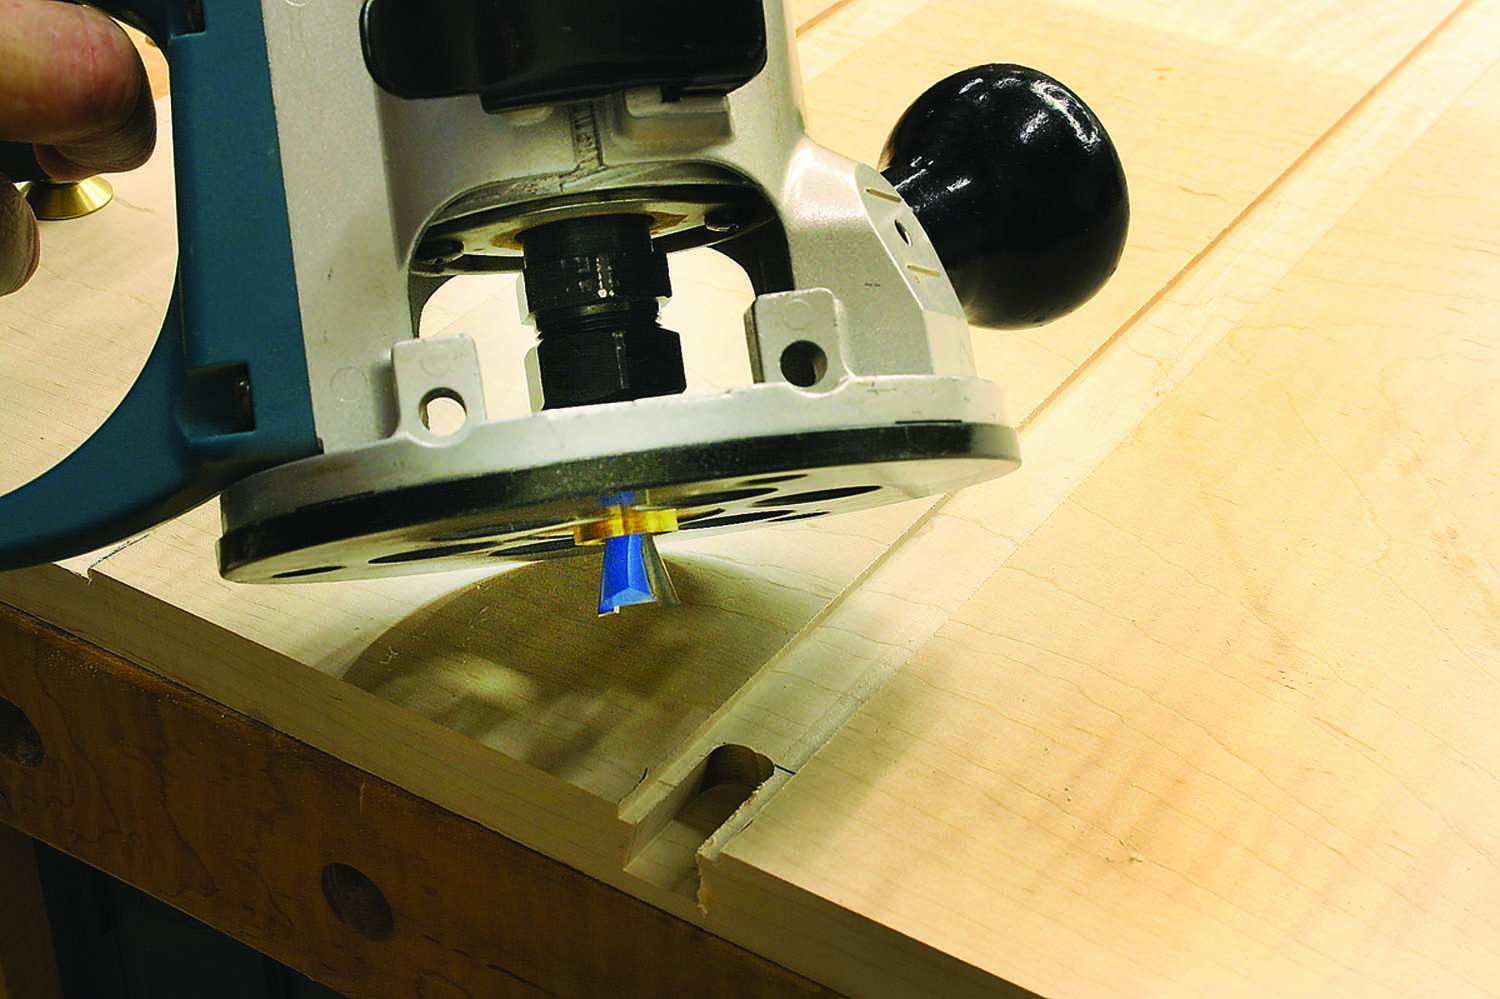
Great combination. A bushing rubs the walls of the dado as a dovetail bit cuts a sliding socket located within the side walls.
The tails are next. Begin by cutting a rabbet at both ends on the interior face of the bottom panel, and along its back edge. The key is to leave slightly less than 5⁄8“ thickness at the rabbets to accommodate the pins and a width to match the thickness of the case side.
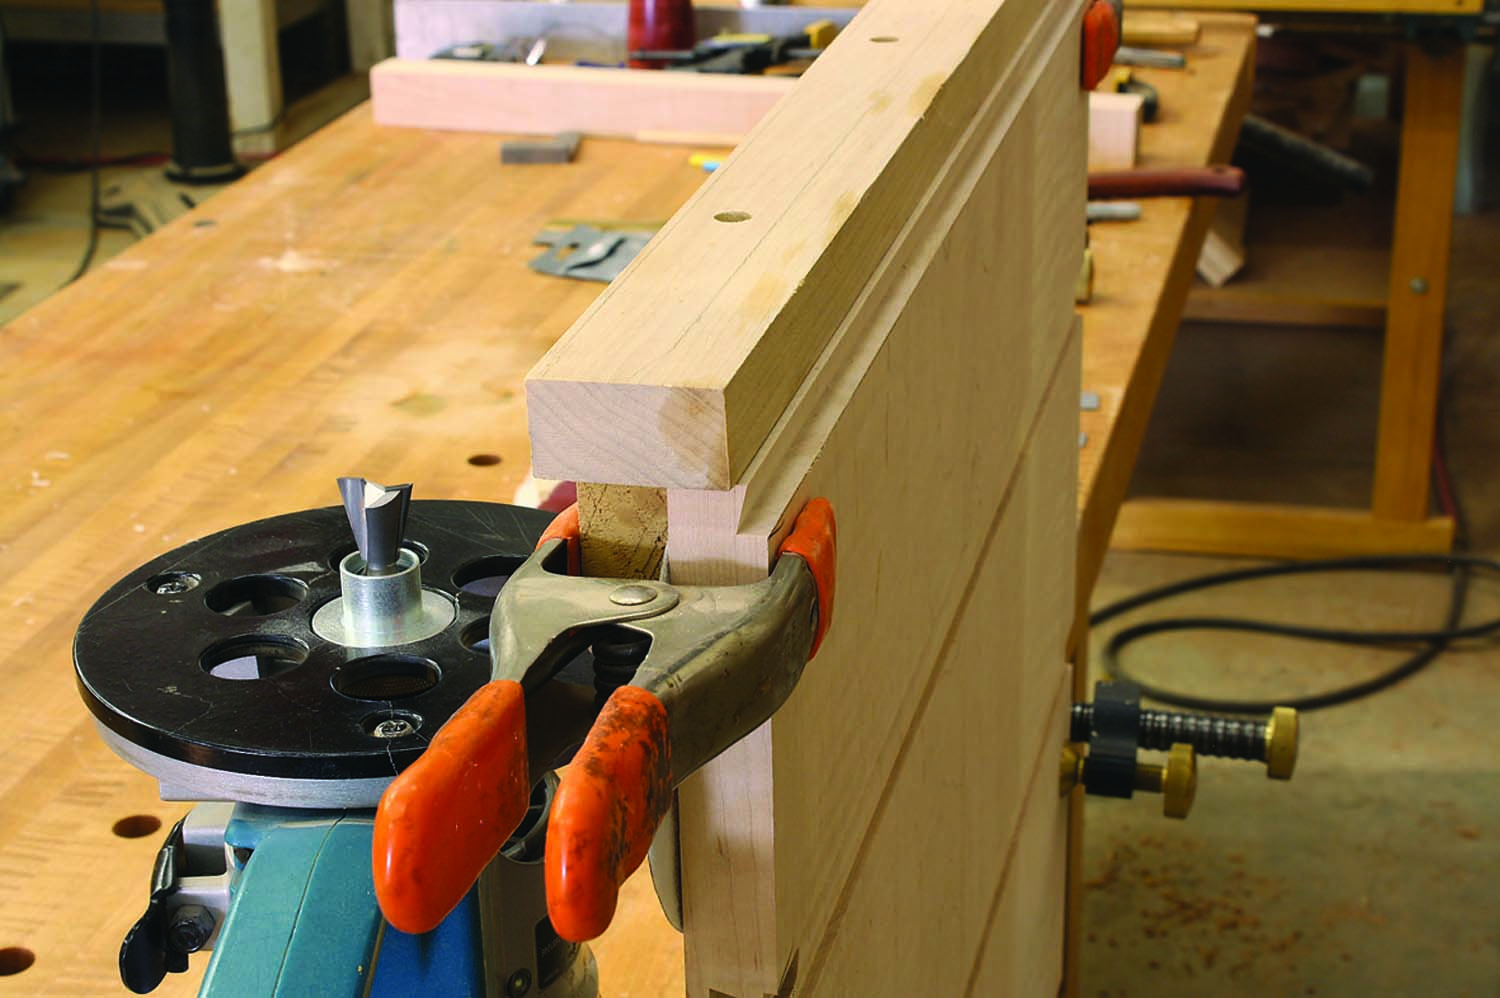
Another simple jig. To make my sliding dovetail jig, assemble a T shape then trim one arm so the resulting cut from the router setup leaves exactly 3⁄4″ to match the top’s groove that will be cut later in the process.
Set a side in its rabbet and align it with the case bottom. Hold the rear edges flush – the front edge of the bottom should also be flush with the square cut of the pin board – then transfer the pins to your tail board. Saw and remove the waste to complete the joint.
Next, lay out the drawer locations on the front of one of your sides; accuracy is a must. Also, mark a line 1⁄2” down from the top of your sides for the joints between the sides and top. When done, transfer your layout lines to the other side to minimize layout deviations.
Make a simple jig to cut the 7⁄8“-wide dados for the drawer runners. Put 7⁄8” spacers between two long rails then attach a piece at both ends of the jig to hold the rails in place. Use a router and pattern bit set to cut to 1⁄8” deep. Align the jig with your layout marks, clamp the jig and cut all the dados.
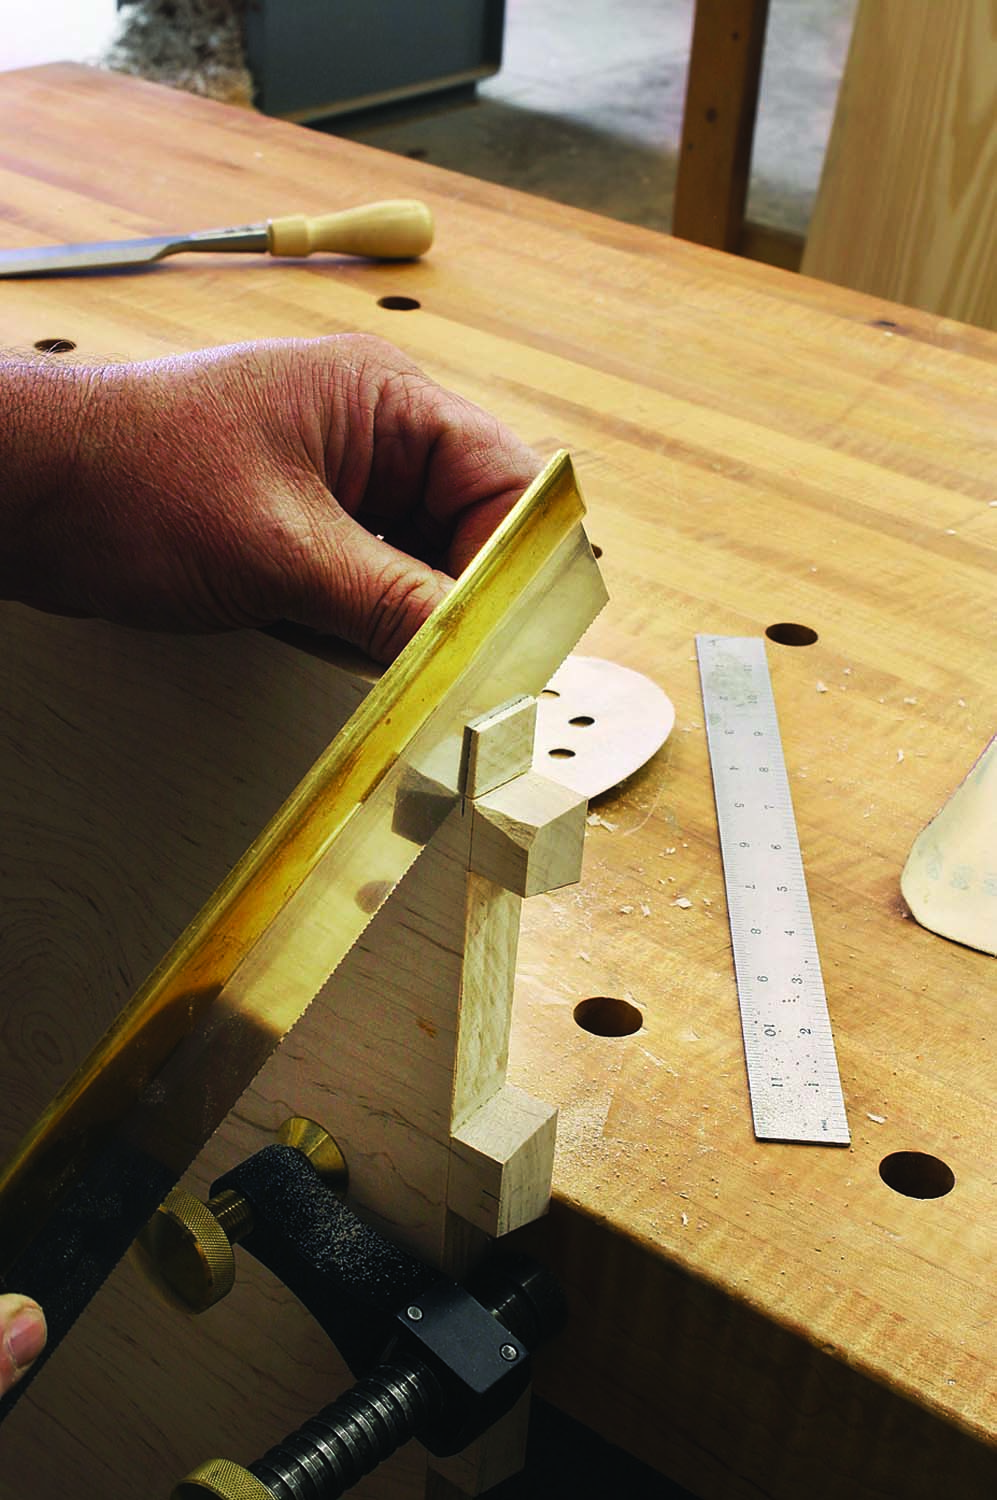
Watch the thickness. To allow room for the moulded edge below the bottom drawer, trim 1⁄8″ off the lower front corner of the side panel.
The drawer blades attach to the sides with sliding dovetails. I use a dovetail bit and a bushing to cut the socket. Use a 5⁄8“-diameter dovetail bit and a 3⁄4” bushing in the 7⁄8“-wide dado to keep the dovetail away from the edges. Set the depth of cut to 1⁄2” into the dado then cut a 11⁄8“-long socket at each drawer location.
The top-to-side joinery is a modified sliding dovetail. For this step, you need a slightly tapered dovetail so the joint tightens as it’s assembled. I use another simple jig and 3⁄4“-diameter dovetail bit and a like-sized bushing. To make sure your taper is correct, add a spacer between your jig and the front edge of the workpiece (I use a sanding disc). Run one side only, then trim 1“ from the dovetail’s front edge on each side panel to keep the socket area from showing. The mating joint in the case top is made later in the process.
 Work on the sides wraps up with a 7⁄16” x 3⁄4” rabbet for the backboards. Also, slice 1⁄8” off the lower front corner of the side front to allow for the 3⁄4“-thick curved front piece that will be applied later. Slip the bottom and sides together, clamp them in position, but do not glue.
It’s All About Curves
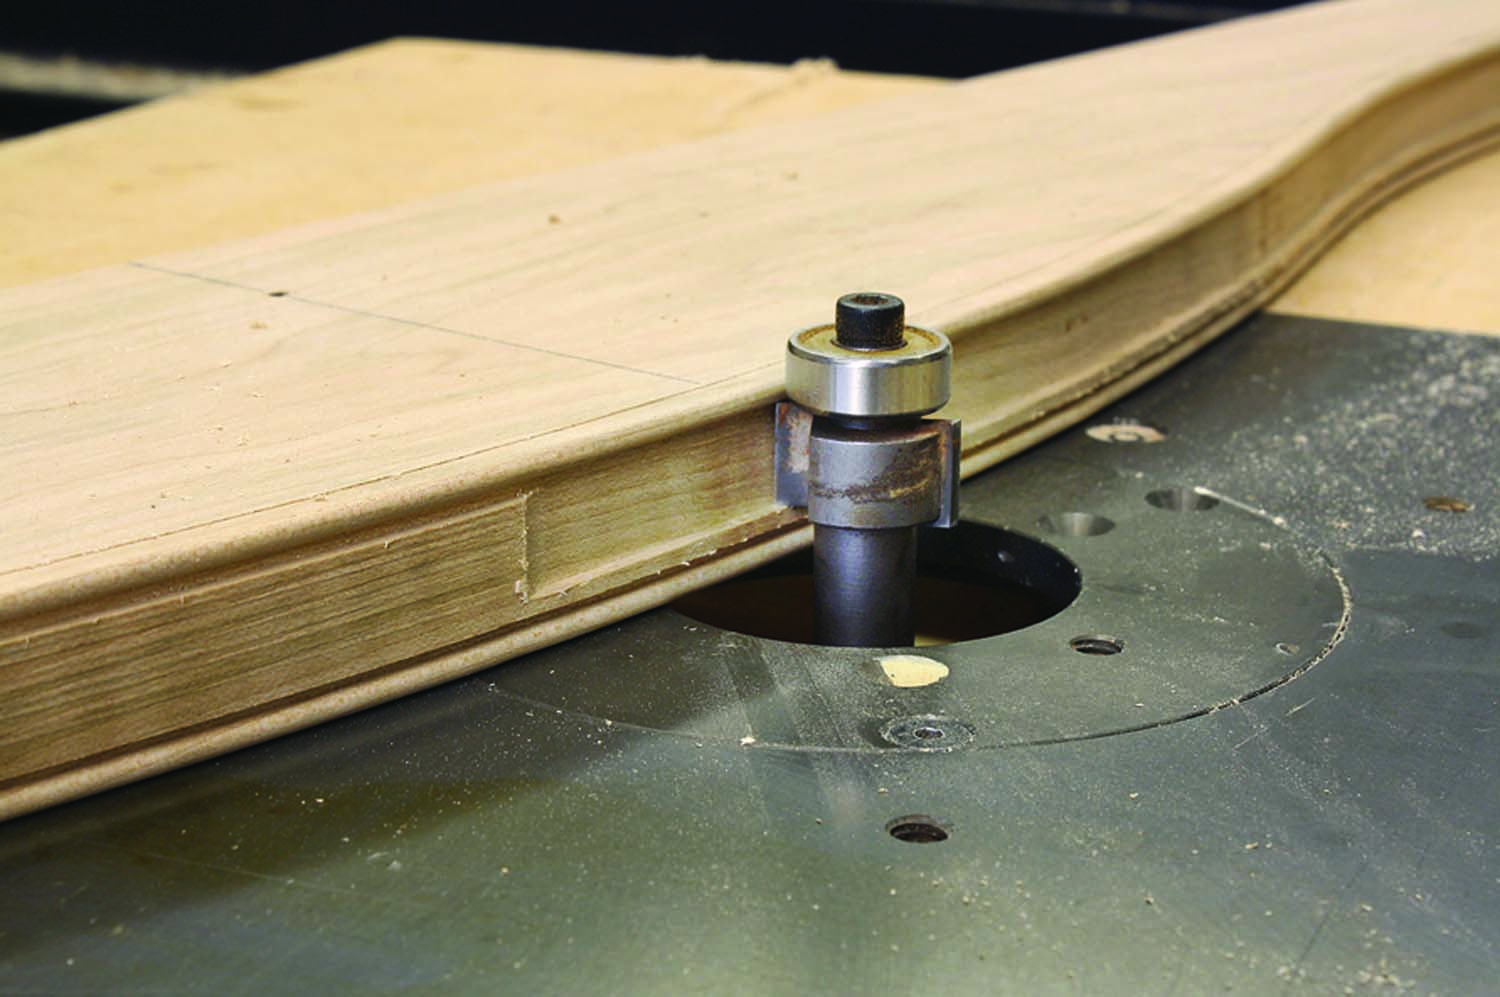
Stand-out detail. The bead detail is an important part of the drawer blade’s edge profile. Router bits are a quick way to both cut the bead and raise it from the surface.
Up until now, this casework uses standard methods. Now, the serpentine or curved work begins. This all starts with a pattern of the curved drawer blade layout. Copy the pattern for the drawer blades from the plan to a piece of 1⁄2“-thick plywood.
Work from a centerline and transfer then cut and shape your pattern. The drawer-blade profile is used to lay out all the other shaped pieces including the top and drawer fronts. If your pattern has a bump or bulge, your finished chest will, too.
Mark the top and center of the overly long drawer-blade parts before attaching the pattern on top of a blank. Secure the patern with screws. With a bottom-bearing pattern bit in your router table, profile the shape after trimming away excess waste material. (Save the offcuts to aid in the setup of the router table to create the sliding dovetails.) Shape the three drawer blades using your prepared stock.
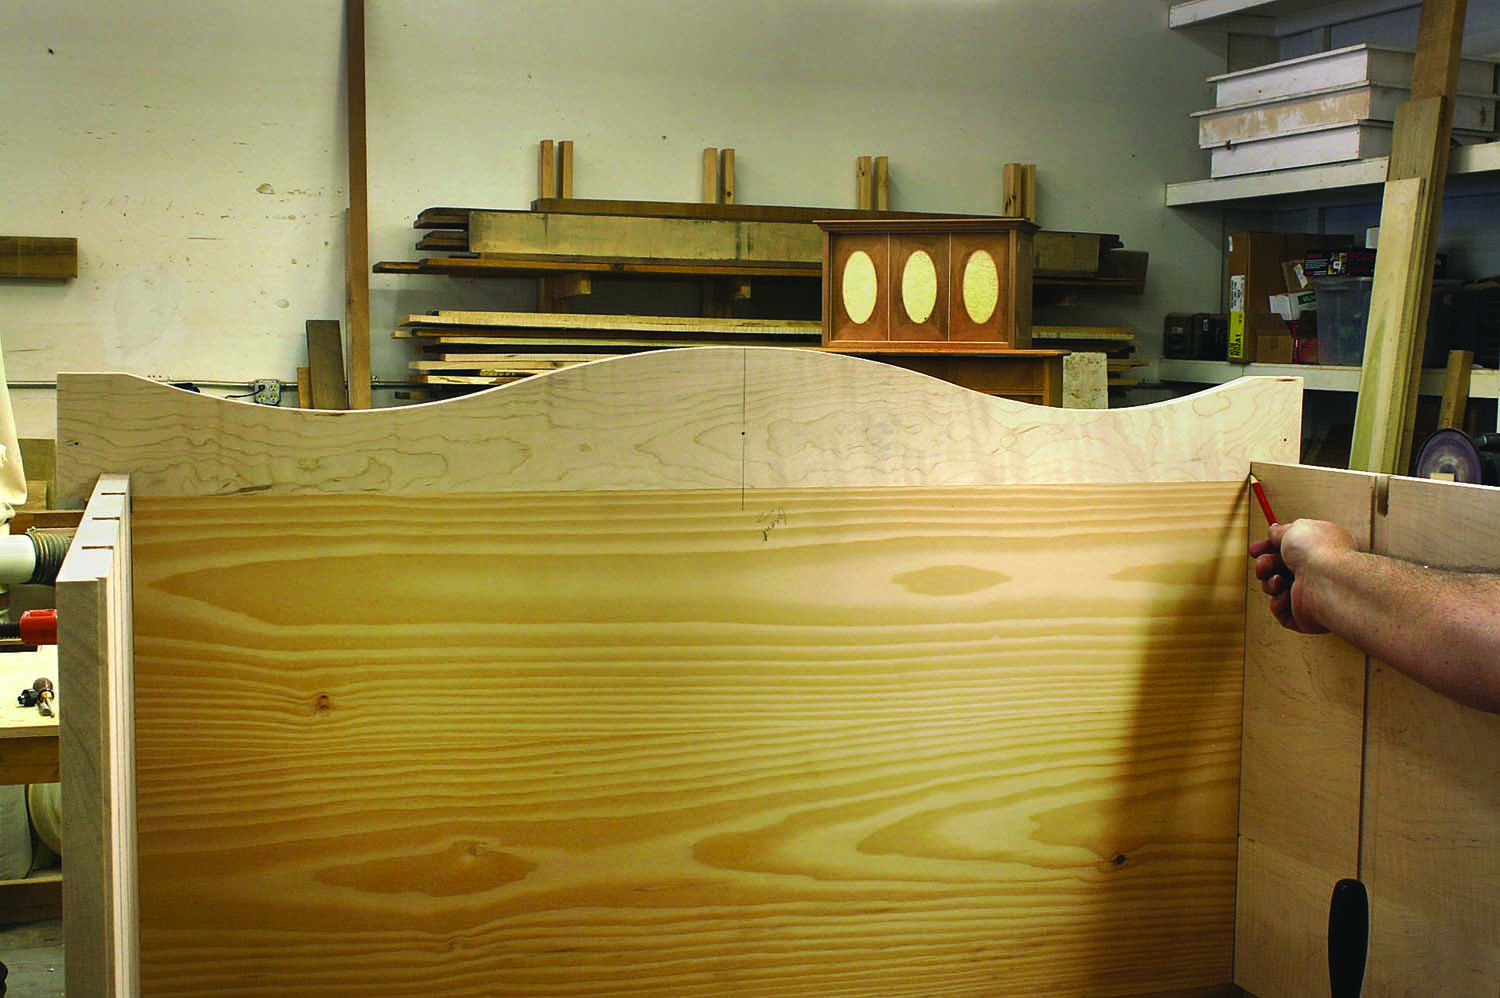
Sizing the drawer-blades. Align the centerline of the drawer blade with the centerline of the bottom. Mark the location where the blade meets the inside of the case sides.
Install a 1⁄8“ bead router bit and set the bit to cut just at the edge of the blade. Run a bead profile on both the top and bottom edge of each blade before switching to a rabbeting bit to cut the recess between the beads.
Using the centerline of the now-profiled drawer blade, lay out and mark the finished length by taking exact measurements from the semi-assembled chest. Align each blade to a centerline mark on the chest bottom, then mark the inside edge of the case sides. Add the 5⁄8” socket depth to each end and cut each blade to length.
At your router table, install the same dovetail router bit you used for the sockets in the case sides. After you have a good fit with a practice sliding dovetail, run both ends on all three blades.
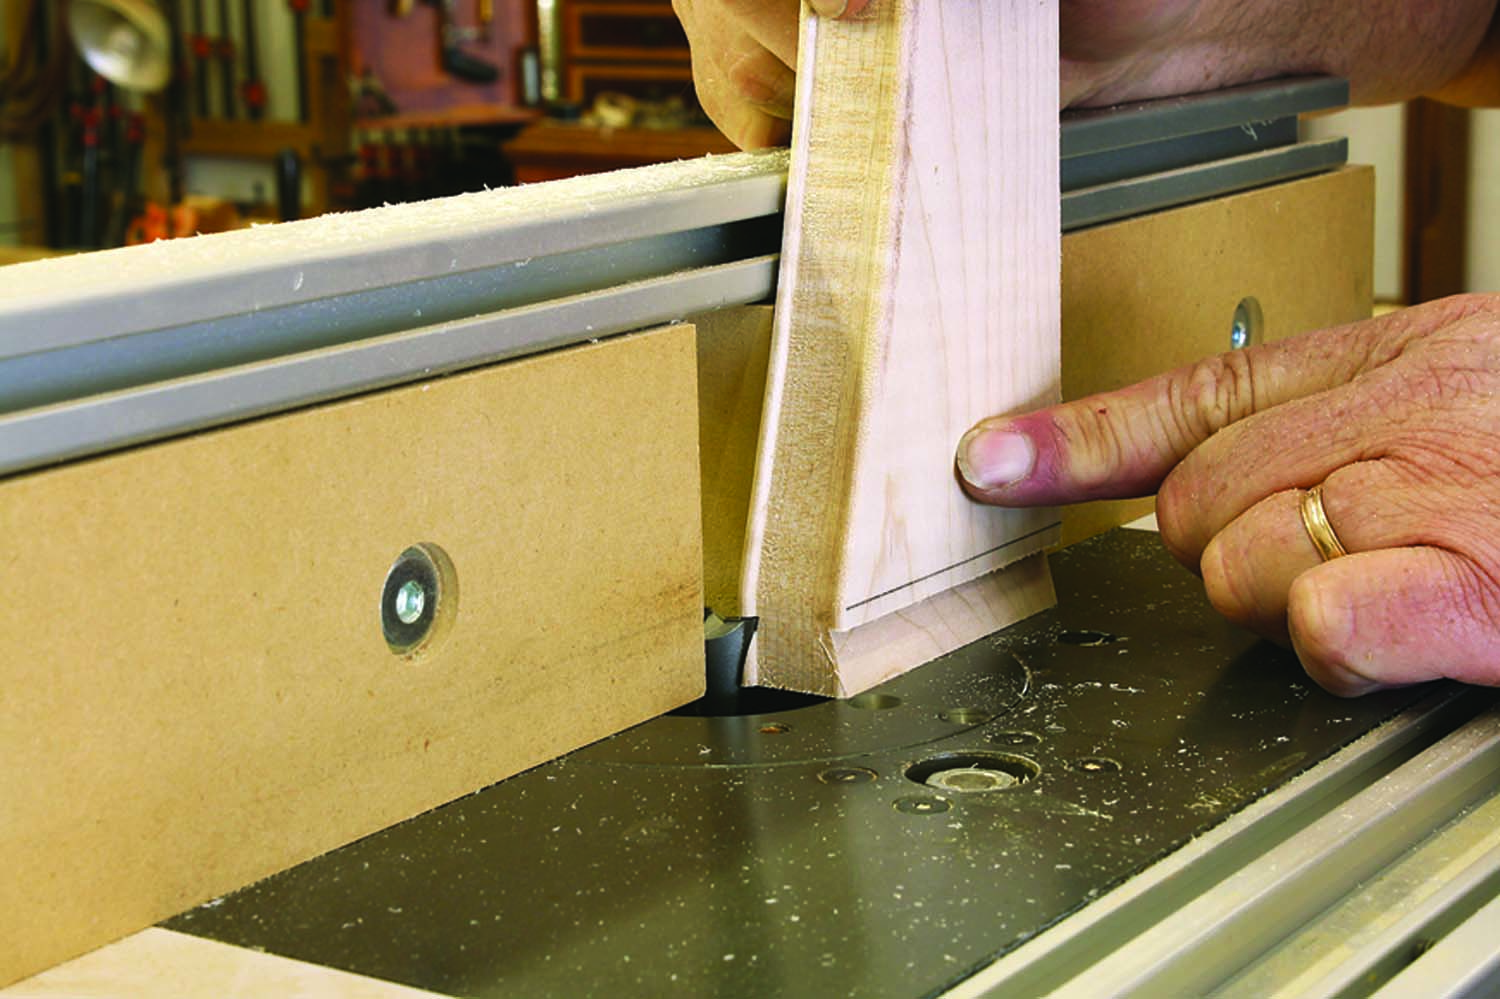
Finger-pressure tight. To set up the sliding dovetail cut, use drawer-blade offcuts. Set the height of the sliding dovetail before adjusting the width of your cut.
The drawer blades extend beyond the front of the case sides, so trim the sliding dovetail back 1⁄2” from the front edge, leaving a 1“-long dovetail. Mark and remove the waste flush with the shoulder.
Glue and assemble the sides to the bottom, glue the sliding dovetails and sockets, then slip the joints together. The front edge of the dovetail should sit flush with the case side. Clamp the side-to-bottom joints until the glue dries.
Work on the drawer blades is complete when you pare a 45º bevel at each end of the drawer blades for the 1⁄8” bead moulding miter.
Dress the Bottom, Outfit the Case
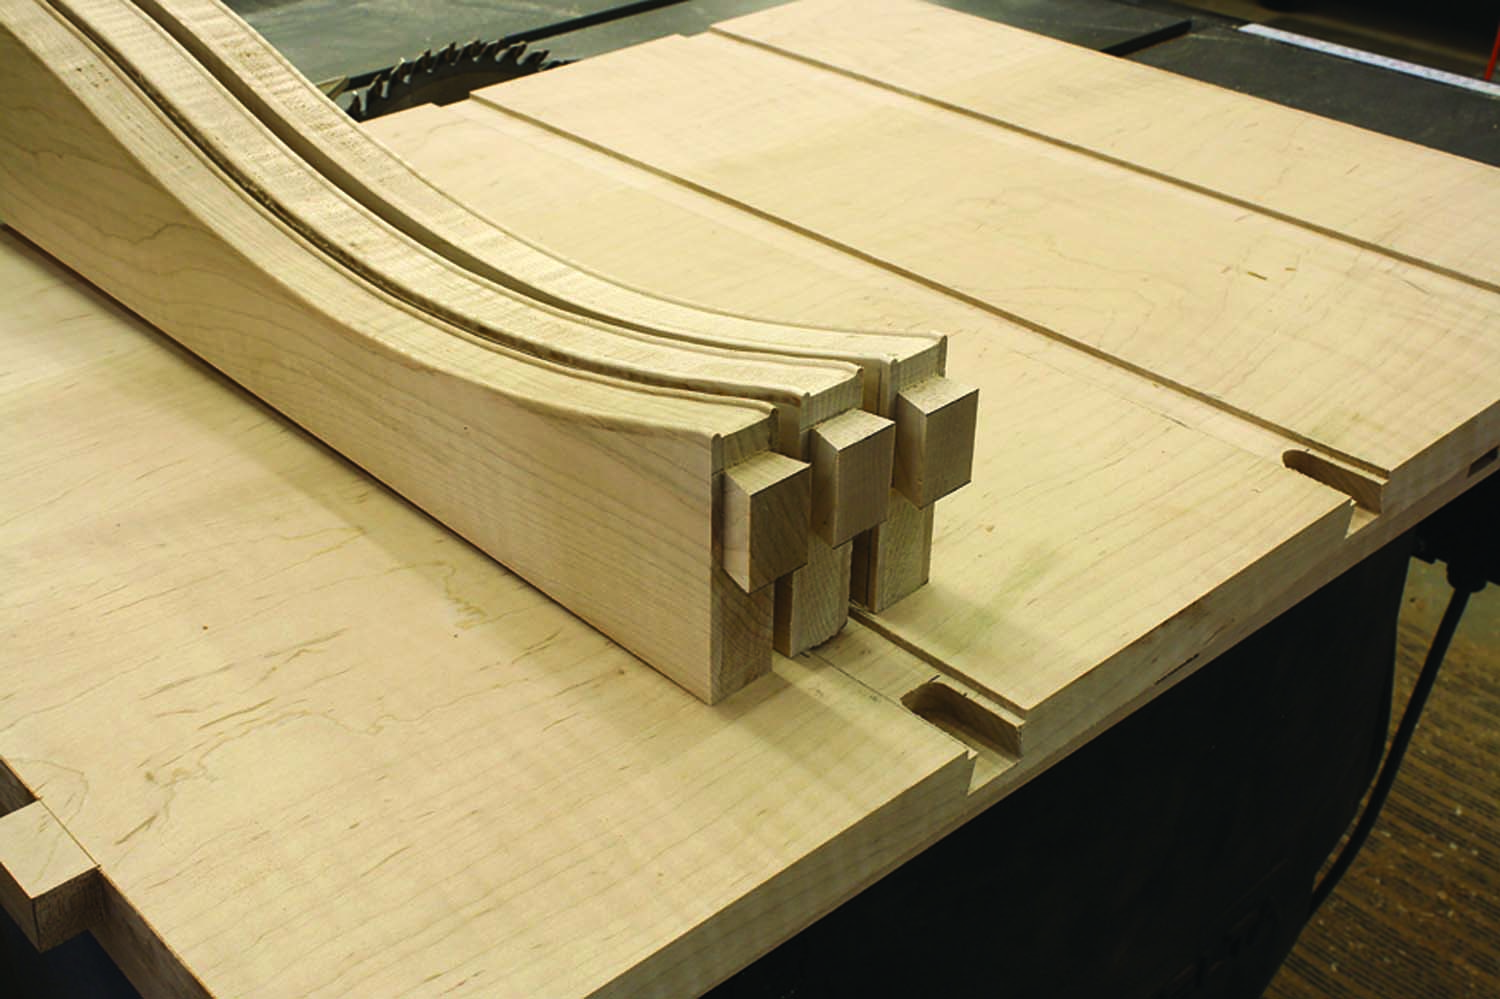
Don’t fret it. As with the earlier dovetails, the drawer-blade joinery is concealed in later steps, so you could add wedges to tighten any problem spots.
The front edge of the chest bottom is fitted with a curved piece of primary wood; the shape is pulled from the plywood pattern, but this piece extends 3⁄4” farther out than the drawer blades. I use a small plywood disk or appropriately sized washer to accurately draw the 3⁄4” cut line for the chest’s bottom front. Place a pencil in the center hole then roll the disk along the edge of your pattern, as in the photo on page 32. (This technique is also used to extend the pattern for the front edge of the base frame later on.)
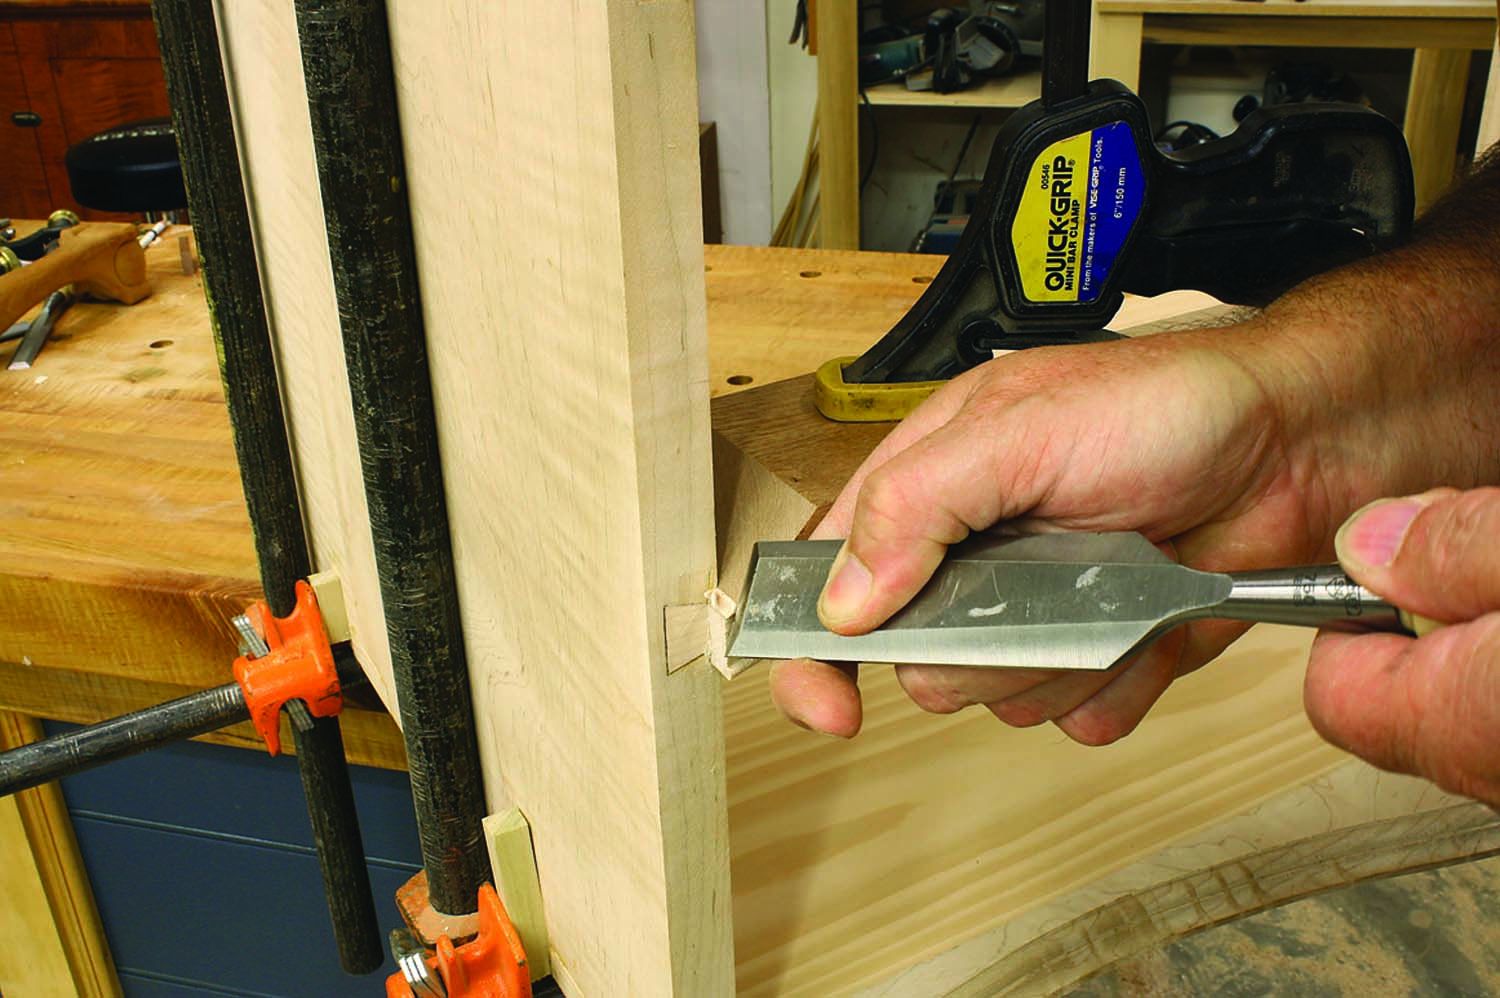
Miter your bead. The best way to miter the small ends of the drawer-blade bead is to use a mitered scrap to guide a chisel as you pare.
Cut to the layout line then clean and smooth the piece. When done, profile the front with your favorite router bit profile. While you’re routing the front bottom, also add the same profile to the stock for the return moulding that will cover the case’s dovetails.
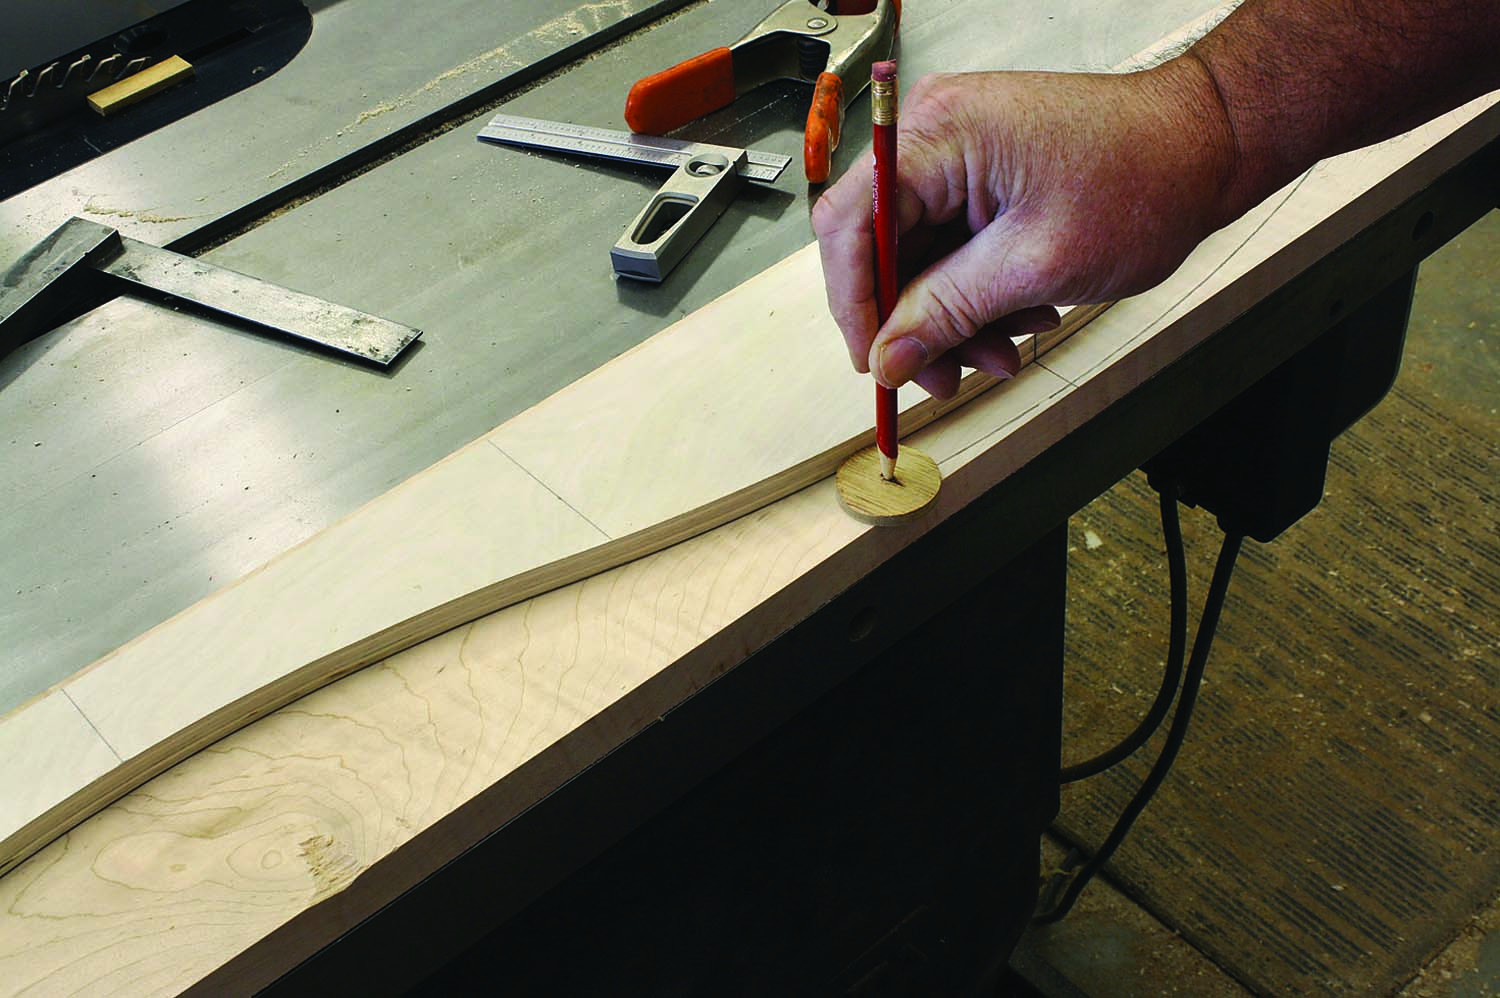
Call it a jig? I use a round plywood disk to mark my pattern offsets. To make the disk, drill a small hole at the center of a 11⁄2″ square, then pin it to a sacrificial board 3⁄4″ from the blade and rotate the workpiece through the band saw blade.
Next, fit the bottom front to the chest by aligning the centerline of the piece with the centerline of the chest bottom. With the pieces aligned, use a 3⁄8“-thick scrap to accurately mark your miter locations. Your front bottom piece is cut flush with the case side and mitered at the outside corner. Make the flush cut then use a scrap cut at 45º to guide your mitered cut – again, accuracy is key.
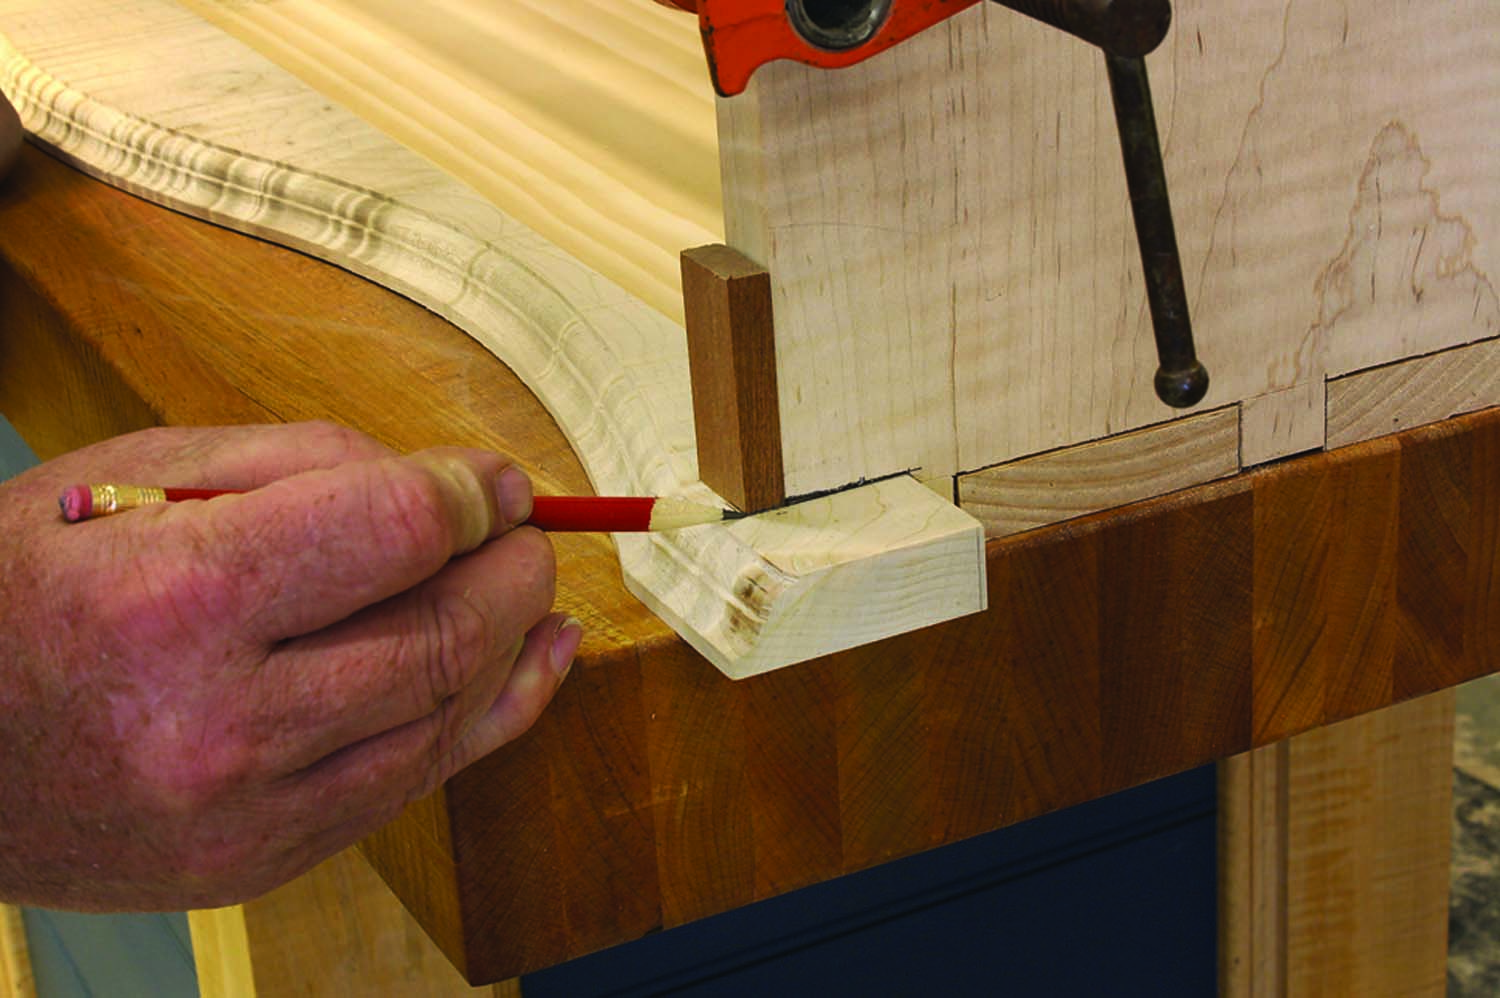
Tricky layout. A scrap simulates the 3⁄8″-thick x 3⁄4″-wide front face that is added to the front edge of the sides to prepare for the vertical 1⁄8″ bead. Also note the notch for the bottom front.
With the bottom front complete, glue it to the case bottom. I ventured from tradition and used four pocket screws to hold the pieces together as the glue dried. Clamps could mar the moulded edge.
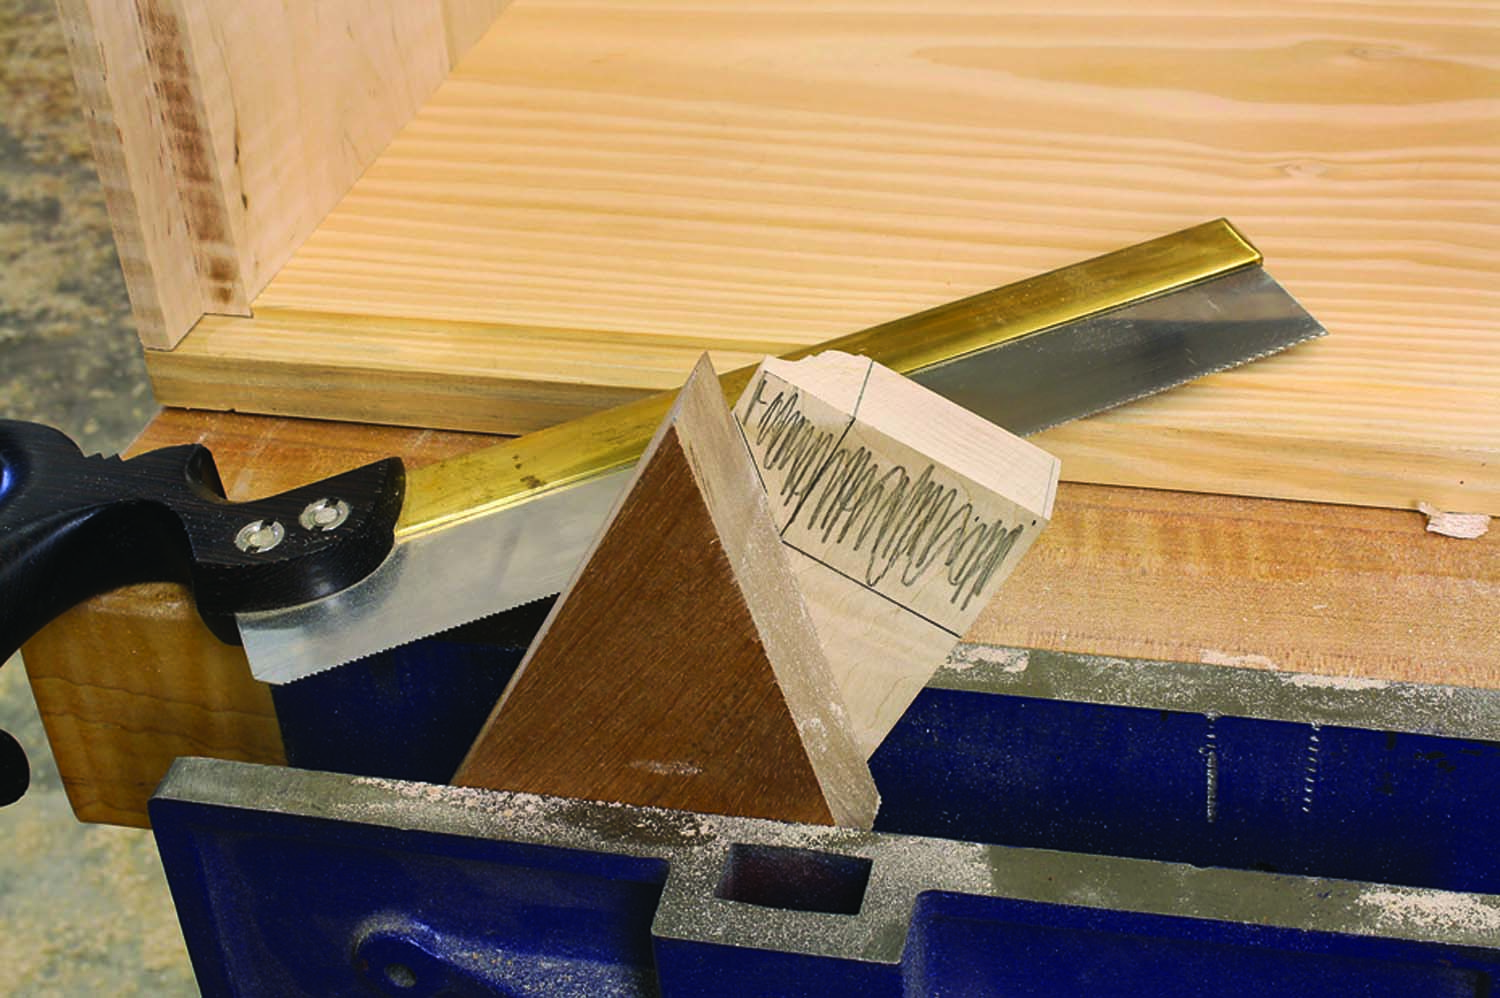
Miter aid. The bottom front must be trimmed flush to the case side and have a mitered outside corner. I use a scrap cut at 45° to help guide my saw for the miter cut.
Now install the drawer runners. Add glue to the first 4“ then slip the runner in place before nailing. Be sure your nails don’t blow through the side.
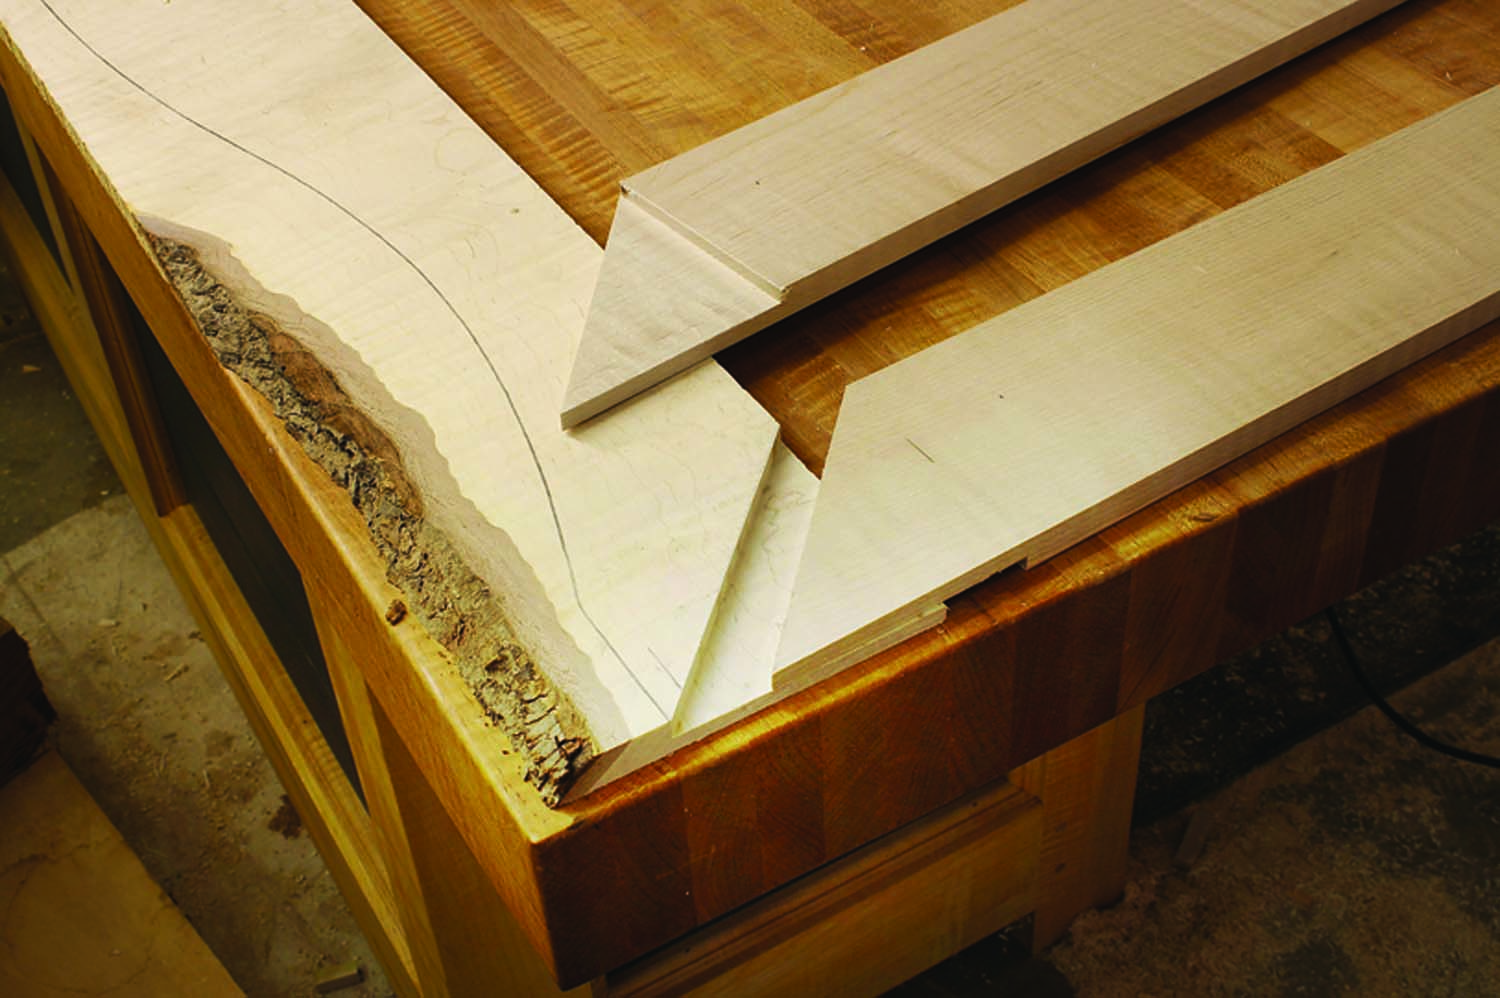
Super-strong joints. Although it’s a break with tradition, mitered half-lap joints add support to the base-frame mouldings and simplify how the return mouldings are attached.
The size and shape of the U-shaped base frame is taken from the bottom front, but it extends 1⁄2” out from the front. Again, use a washer or disk to extend the profile. Add straight lines at the ends of the stock to allow for mitering. The sides of the base frame are joined to the front with a mitered half-lap joint. 

More Sliding Dovetails
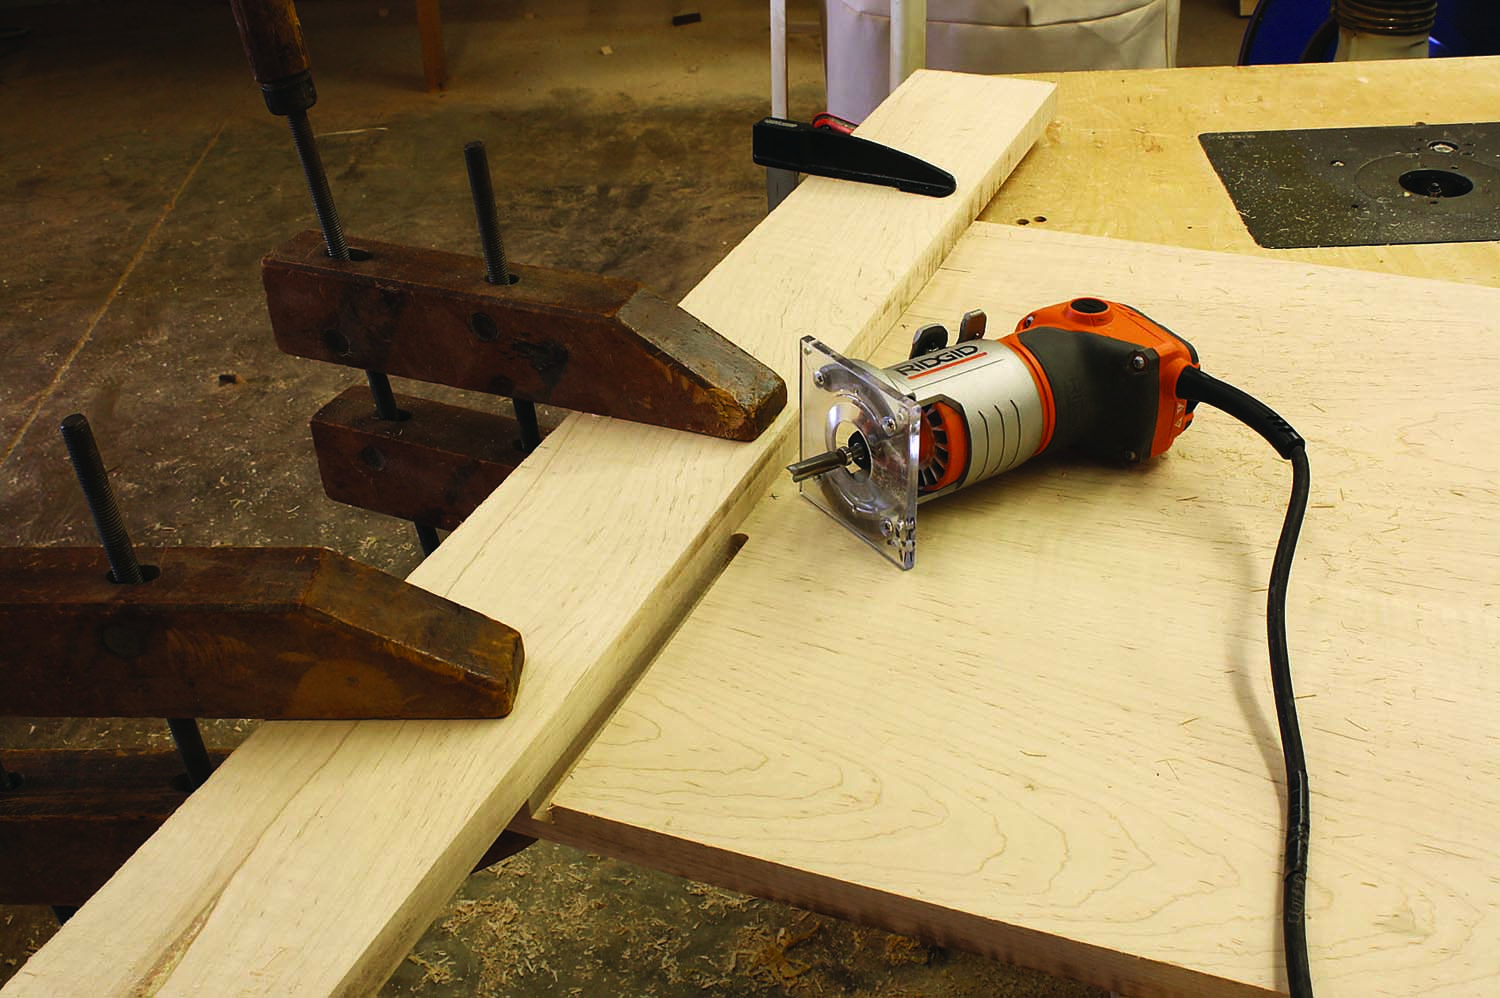
Step one. A lot of the waste at the sliding dovetail socket in the top is removed using a 1⁄2″ pattern bit. Complete the joint with a bushing/dovetail setup run along the same fence (move the clamps for router base clearance).
 The top joins the chest with sliding dovetails – but there is a twist. These “dovetails” are sloped on one side only and are square at the outer edge; that makes them sliding half-dovetails. The dovetails are cut using a shop-made jig. Start cutting the sockets using a straight router bit.
Cut your top to length but leave it overly wide for now. The location of the sliding dovetail sockets are taken from the assembled case. Align a straightedge or fence to the layout lines then plow away the waste using a 1⁄2“ pattern bit as shown on the next page. Stop the cut to match the sliding dovetail made at the top of the case sides.
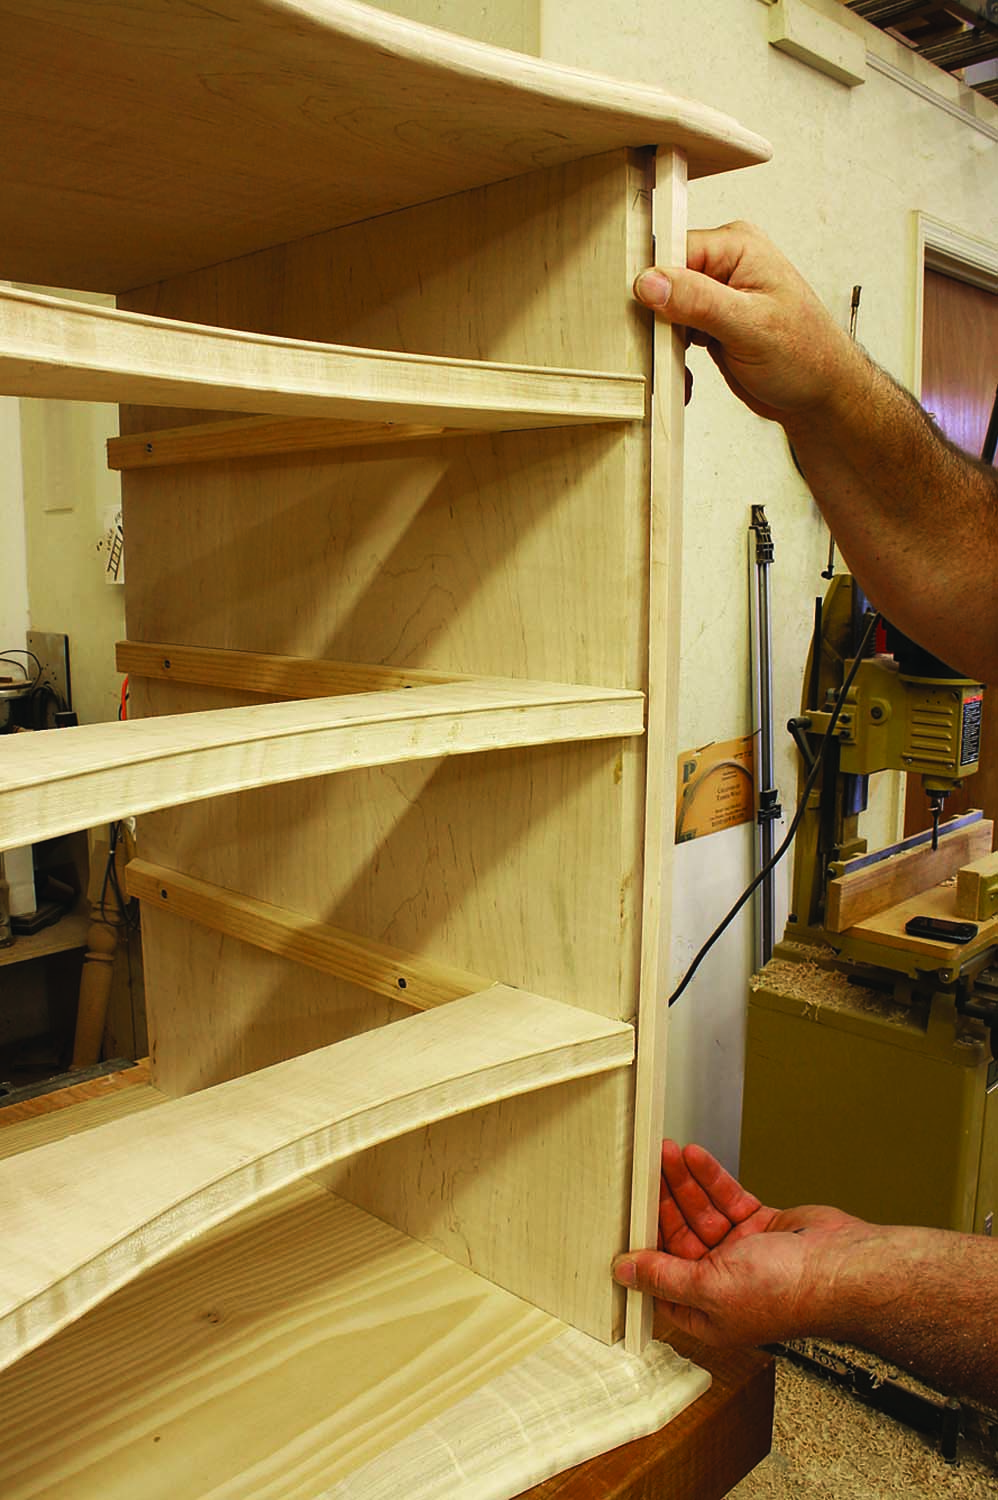
Front face. Fit then install the two front face pieces to the front edge of the case sides. Use glue and attach with 23-gauge pins.
With the fence still clamped in place, make a second pass at the joint with the dovetail bit/bushing setup from before. The 3⁄4” bushing keeps the 3⁄4” dovetail bit exactly at the edge of the straight cut. The result is a socket that is square on the outside and sloped on the inside.
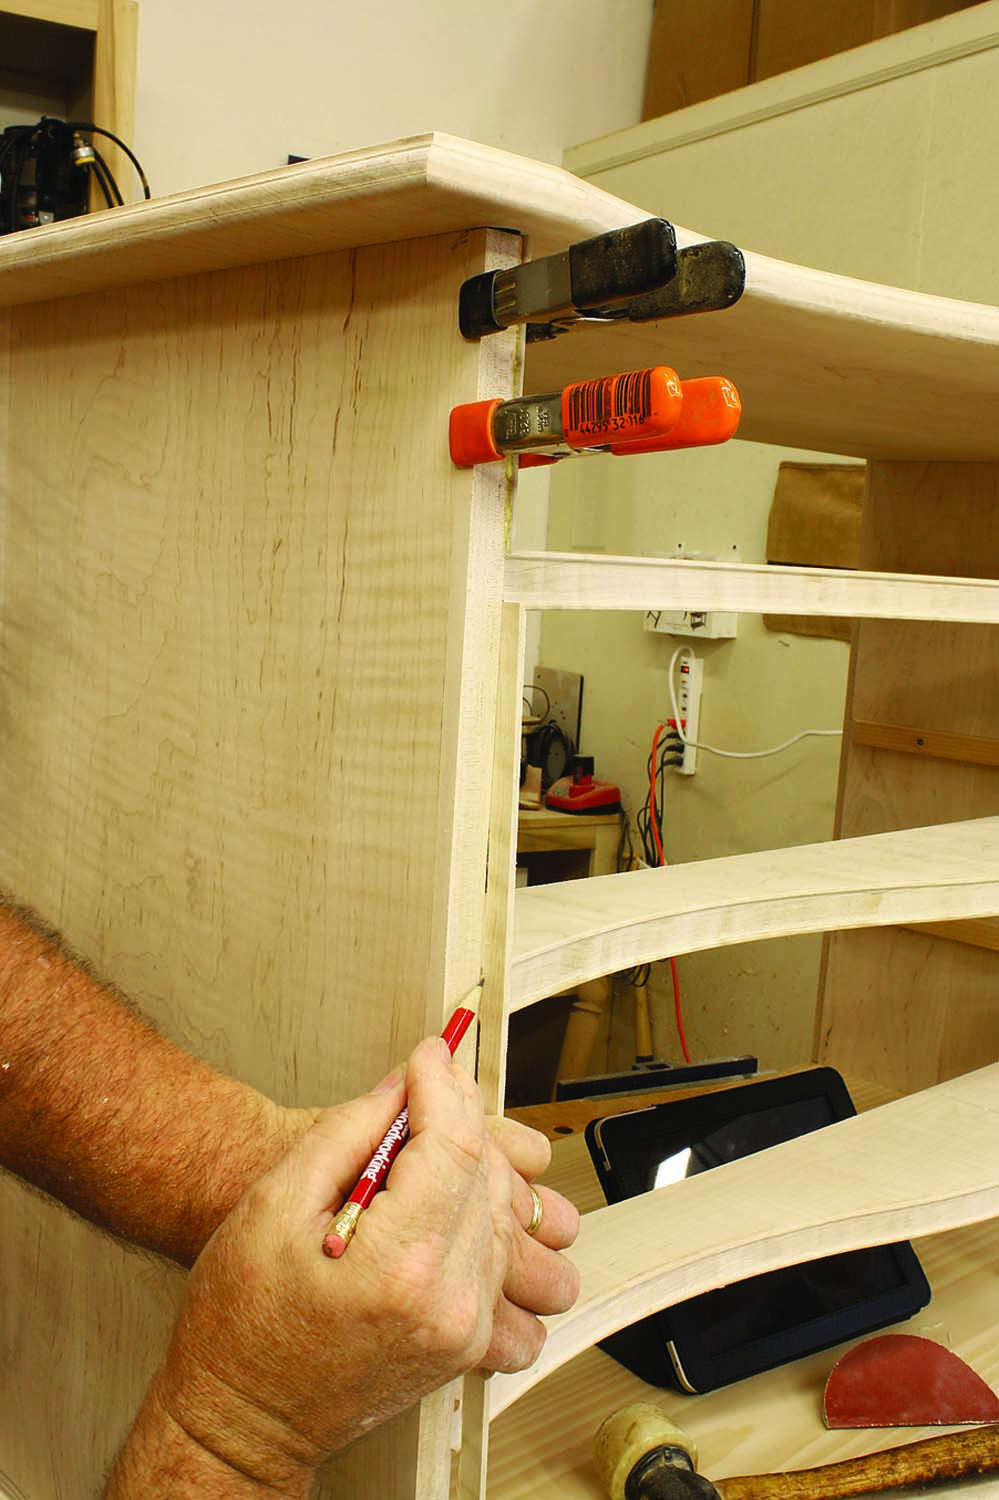
Fitting the beads. Miter one end of bead moulding stock, set it in place then mark the back of stock to easily determine the location of the second miter cut.
The front edge of the top matches the shape of the base frame made earlier. The straight portion at the two ends is cut to the lines then cleaned before profiling the top’s edge. Use the frame as a template. Mark the curve and cut it with a band saw or jigsaw to the waste side of the line. Clamp the frame to the top and flush-cut the front edge with a router and top-mounted bearing pattern bit.
Two router setups complete the edge profile on the top. Use a cove-and-bead bit for the top upper section of the profile then flip the top and run a 3⁄16” round-over profile along the bottom edge. Do not profile the back edge of your top.
The Fluff & the Feet
The show portion of the chest begins with two 3⁄8“-thick x 3⁄4“-wide front face pieces. Cut the pieces to size, then fit them to the front edge of the sides. This will leave space for the bead. Glue them and use clamps or 23-gauge pins to secure the pieces.
Size the bead stock to fit your case. It should be 1⁄8“-thick stock, more or less. The goal is that it be flush with the inside after the bead is in place. Because the stock is so thin, it’s easier to round over one edge with sandpaper than it is to machine the detail. Use #150-grit sandpaper.
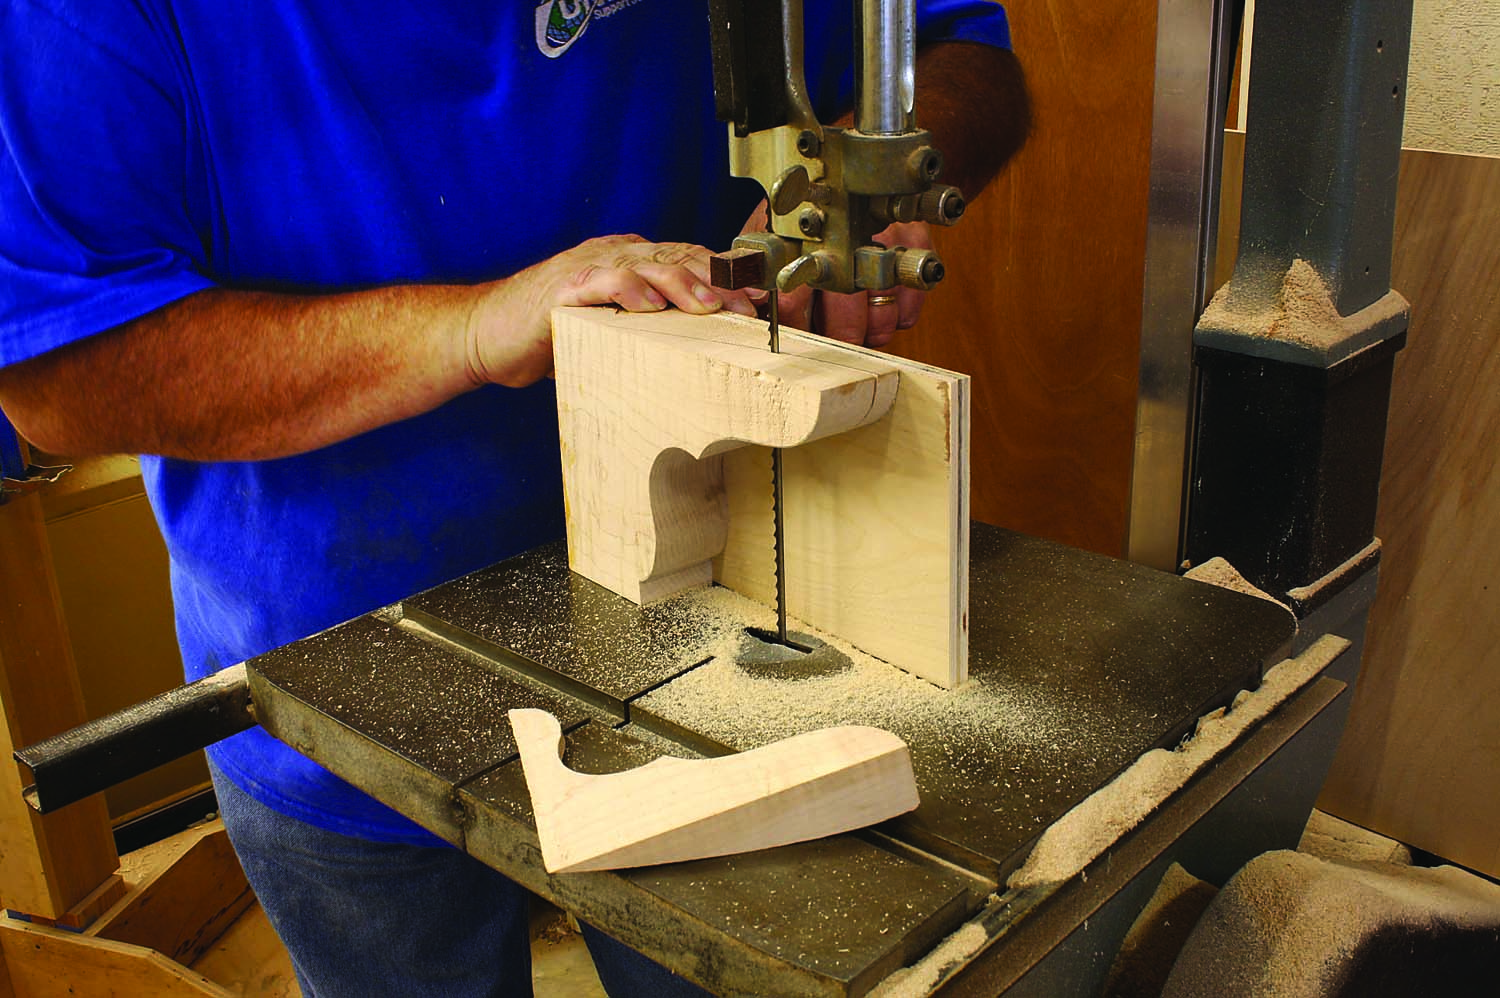
Play it safe. Without support of the work, your foot could be ripped from your hands as you make the band saw cut to shape the foot’s front curve.
Miter one end using a bench hook and handsaw, then fit the piece to the case to determine the actual length. (If you mark the back face of the bead stock, you can locate the exact cut length.) Miter the second end, then fit the piece between the ends of your drawer opening.
Attach the base frame to your chest before you cut and fit the return mouldings. A few screws and glue along the front, and nails on the two sides, does the job. Nail the returns in place with 18-gauge brad nails.
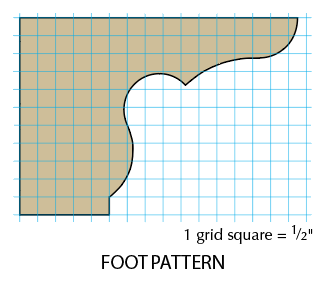
The front feet are constructed from 8/4 stock due to the curved detail. Cut your material to get both feet from one piece, then lay out the pattern from the drawing at left. Tilt the blade of your table saw to 45º and with your pieces face down, cut both ends of the material for four feet. With the saw still set at 45º, adjust your fence to make a cut into the miter of the previous cut. The grooves of each foot will match up for the splined joint. At your band saw, cut the feet to the pattern, then make splines for the grooves and assemble two pairs – one pair for each front corner.
Position the feet under the front corners of the chest. Transfer the curved shape to the top edge of the foot, then cut that profile at your band saw. Attach a piece of scrap to the inside of the foot for support.
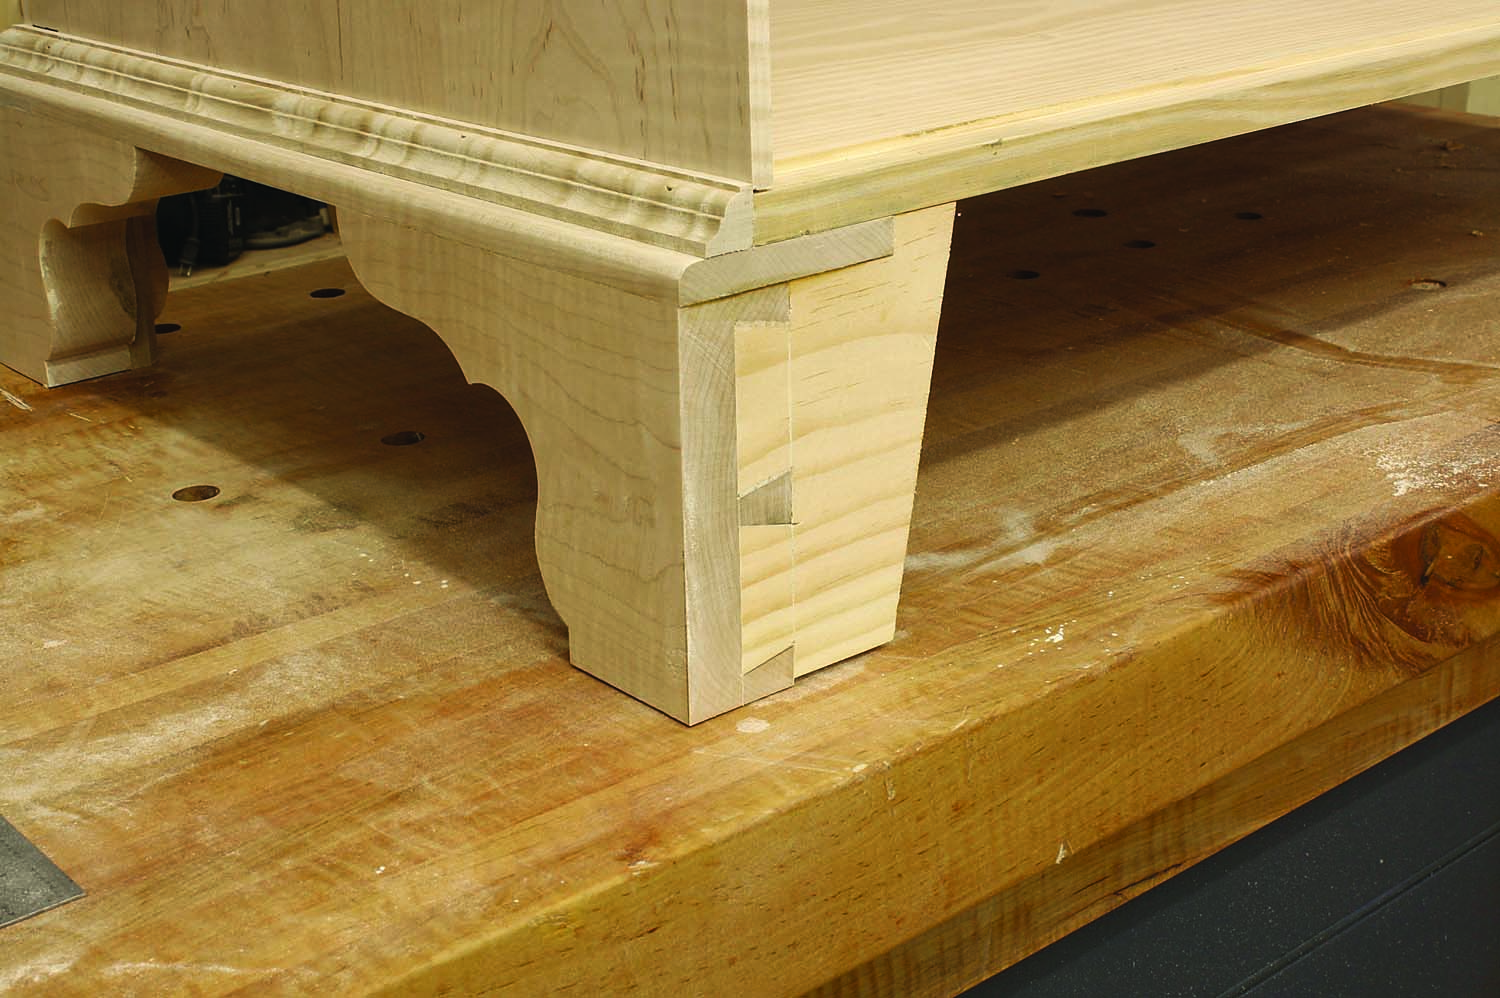
Plenty to show. The stubby rear feet fit around the base frame and you can see just how that frame carries other mouldings.
The back feet have shaped flat faces on the sides, with thinner returns below the back; they are attached with half-blind dovetails. Cut pins in the shaped feet and tails in rear feet.
Now the Drawers
Mill your drawer stock so the individual drawers fit the openings; plan for a 1⁄16” reveal on all sides of the fronts. Slip a front into position then pull it out even with the drawer blade at its farthest point of projection while keeping the front square to the case. Using a pencil, transfer the shape of the blade onto the drawer front.
Tune up your band saw before you begin to cut the curved shape on your drawer fronts. Install a new blade if the current one is dull. I like a 1⁄4” x 6 teeth-per-inch skip-tooth blade. Square your table to the blade.
Saw the drawer front at the cut line. Take your time and carefully follow the line. Any deviations from the line must be worked and smoothed. It can take a lot of work, but if you saw accurately, you’ll get by using a scraper and sandpaper.
With the fronts shaped on the outside face, slip one into the chest to mark the back cut line. Slide the front out until the rear face is flush with the two concave portions of the drawer blade. Use a pencil to transfer the design onto the top edge of the drawer front.
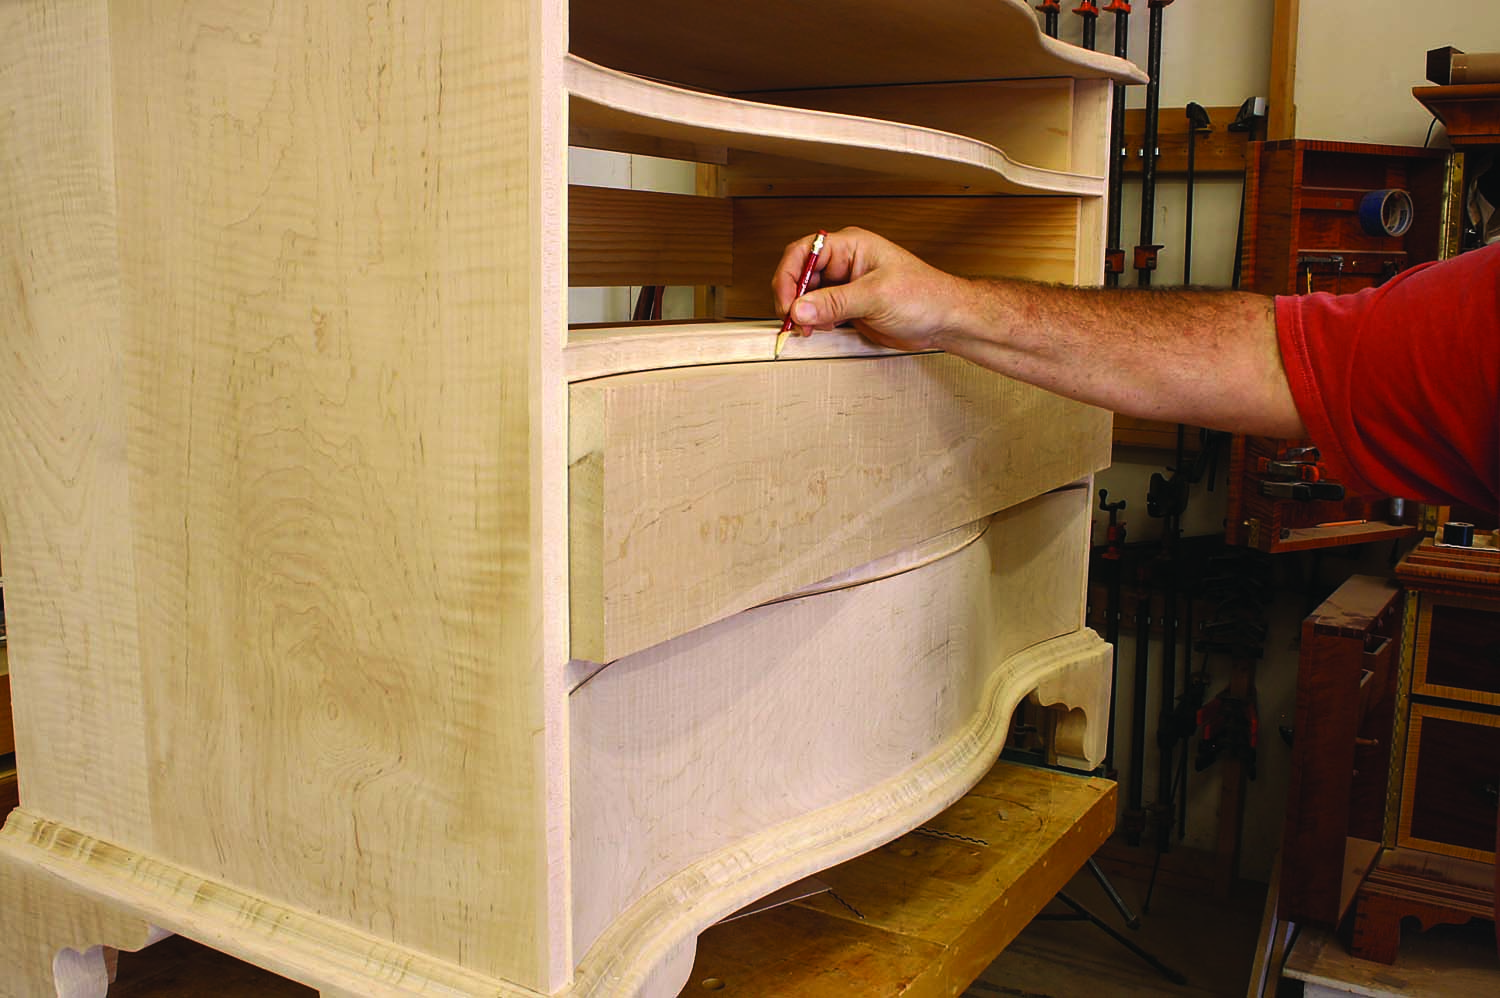
Time to trim. The front face of the drawer begins to appear as you transfer the pattern from the drawer blade.
The acute angles formed at the ends of each front – where the drawer sides dovetail to the drawer fronts – present problems. The fix, however, is quite simple. As shown in the center photo on the next page, use a combination square set to 3⁄4“ to square off the end of the drawer front and mark a line where the rule meets the back cut line. The additional material allows the drawer sides to meet the front at a 90º corner.
The drawer boxes are built using typical 18th-century construction techniques – through-dovetails where the sides meet the back, and half-blind dovetails at the front. The drawer bottoms slip under the back and slide into 1⁄4” grooves in the drawer sides and front. Two nails hold the bottom to the drawer back.
The serpentine curves of the drawer fronts are different from typical straight-front drawers, in that you cannot use a dado stack or table saw blade to make grooves for the drawer bottom. Due to this, it’s best to use your router with a 1⁄4” slot cutter installed. This is, of course, after you have dovetailed all the parts.
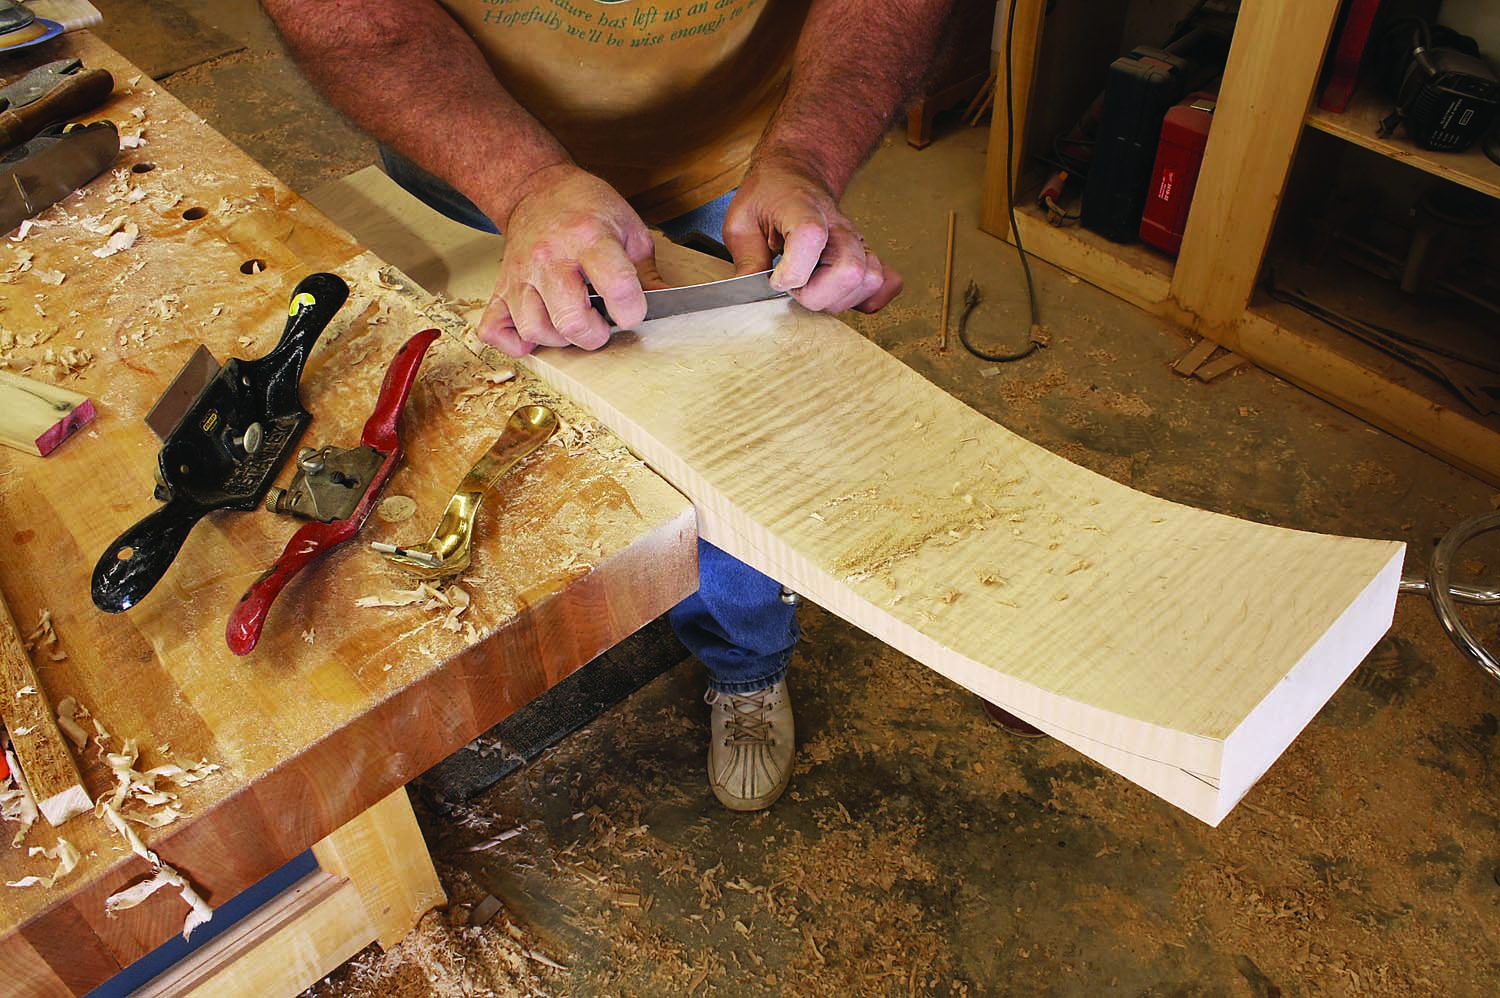
Keep it light. Wandering cuts at the band saw will mean more work to smooth the curved drawer fronts. Use a card scraper, spokeshave, sander or whatever other method you have available to get the job done. Better yet, saw accurately in the first place.
Another difference is in fitting the drawer bottoms. The serpentine front edges need to be cut prior to beveling the bottom so that the 5⁄8“-thick bottom fits into the 1⁄4” grooves. Position the drawer box on the bottom panel. Hold the box square and centered, and flush with the bottom front edge. Transfer the serpentine design to the drawer bottom.
Cut to the line before you bevel the underside of the bottom’s ends and front. You can work the bevel with hand tools, but I like to use a raised panel router bit for this job. To get the best fit, I had to finesse areas at the front once I was able to slide the bottom into the drawer box. When ready, affix the bottoms to the drawer boxes.
Finish Your Project
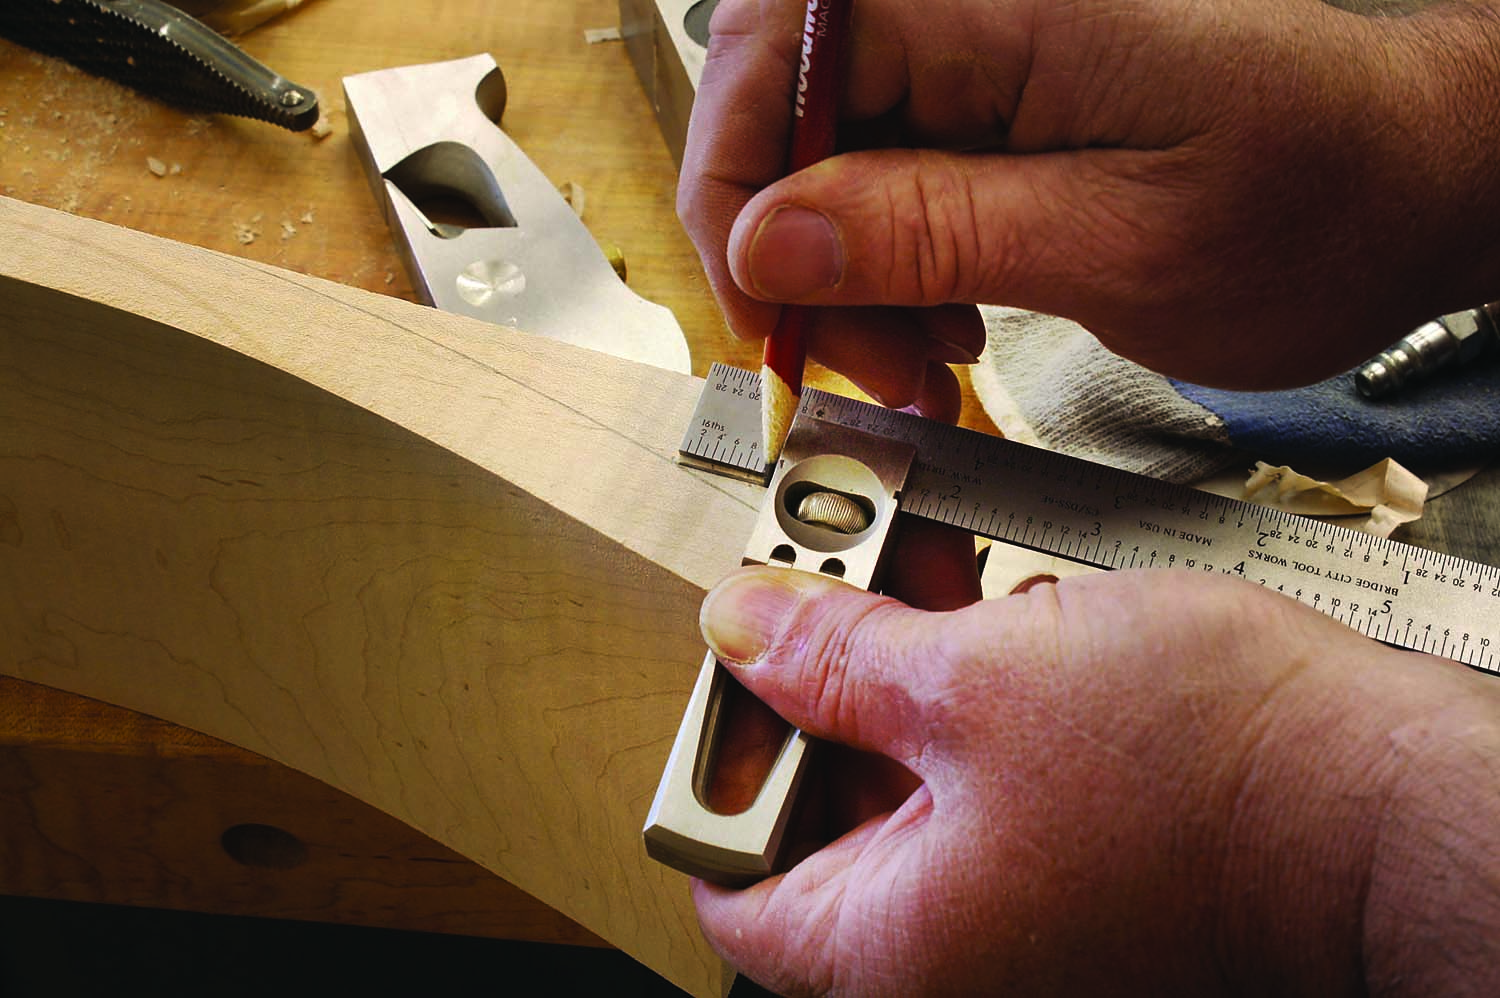
Square shoulders. Curved ends are not conducive to cutting dovetails. Add a straight section at the end to keep the corners at 90°.
With the drawers complete, insert them in the case. Hold the drawers about 1⁄8” behind the bead detail and evenly aligned side to side. Hold the drawers firm – small wedges slid into the space around the drawers will help – then install drawer stops against the case sides and flush with the drawer backs. Brads, or pins and glue, are best.
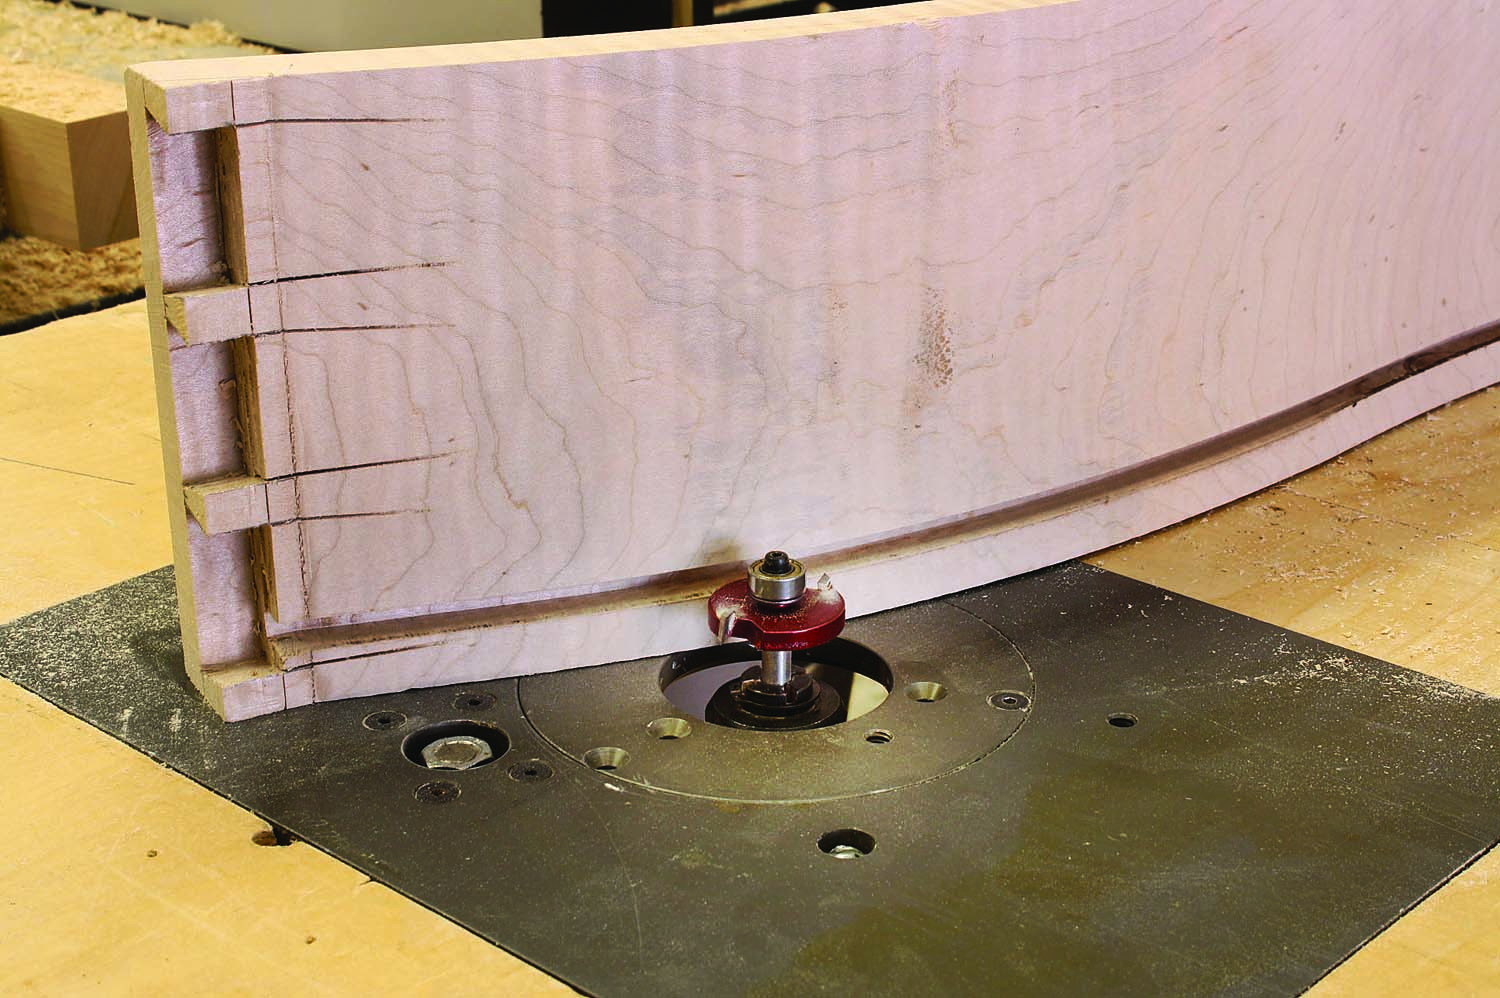
Curved grooves? A slot cutter in the router table is perfect for these cuts. Set the height of the cut at 3⁄4″ then run your grooves.
The finish on my serpentine chest starts with Moser’s water-based aniline dye; it’s a 50-50 mixture of golden amber maple and brown walnut. Next, I apply a couple coats of shellac followed by a coat of Behlen’s burnt umber glaze. That is followed by additional coats of shellac. I top-coated the chest with a single application of low luster pre-catalyzed lacquer for greater finish durability.
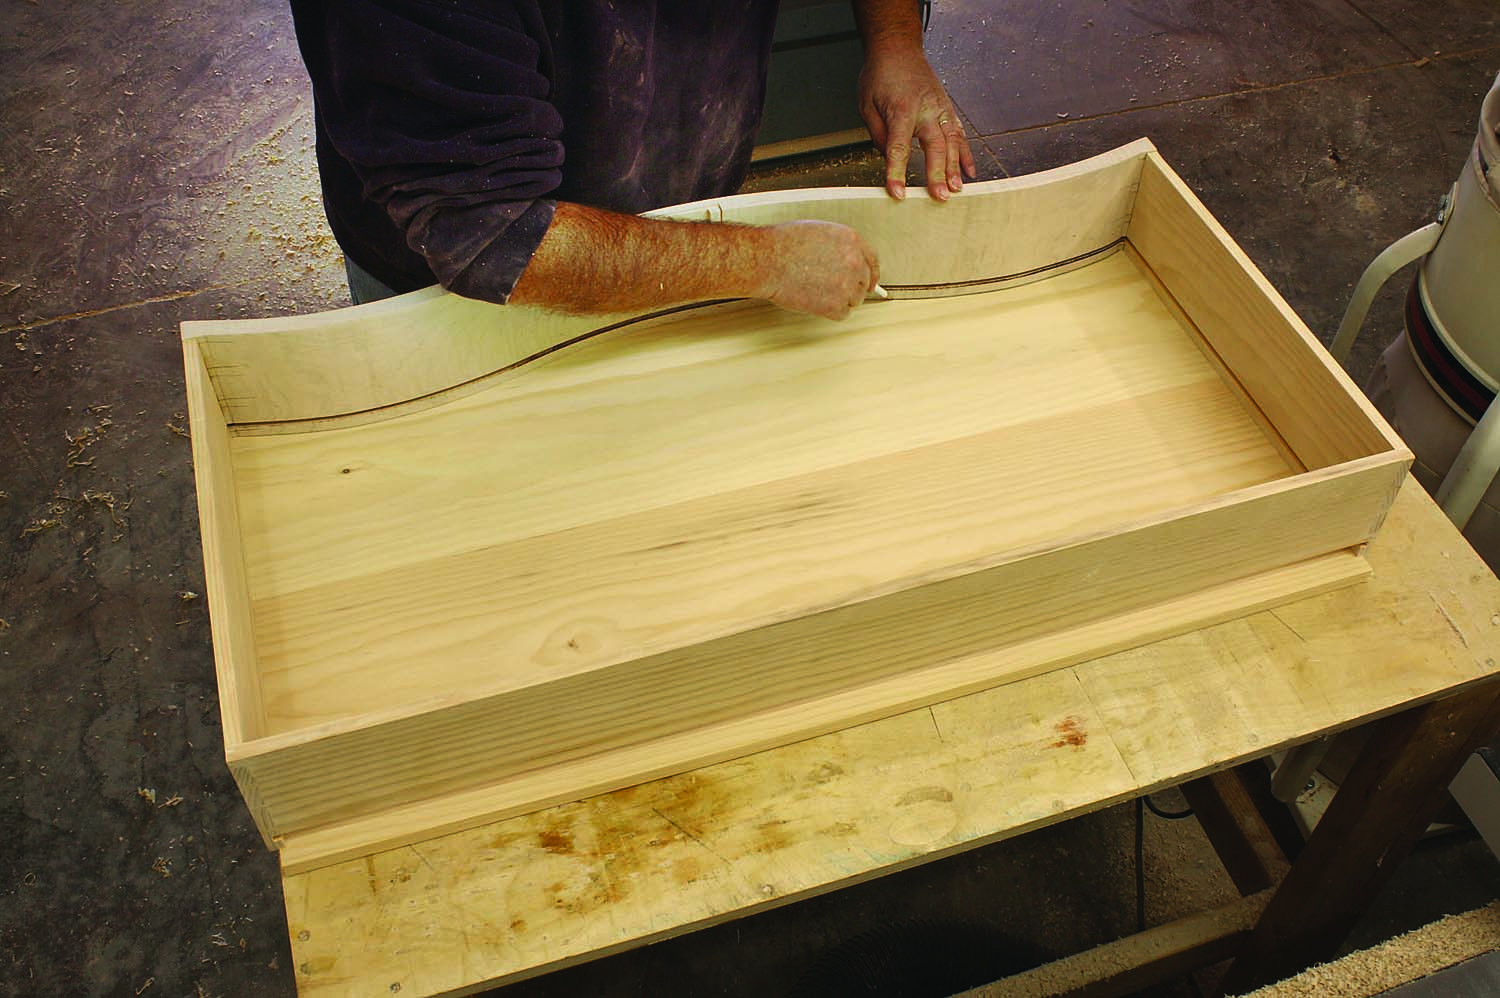
Another transfer. Drawer bottoms are milled to size and cut to slide into the 1⁄4″ grooves in the drawer boxes, but you need to shape the front edge to match the drawer front before you can slip them into place.
This project is a clear example of how a basic design is enhanced by a few well-placed curves. Straightforward work at a band saw results in a shapely showpiece that is sure to draw attention. And best of all, you’re just a simple pattern change away from building any of the three most noteworthy chest designs from the Chippendale period of American furniture.
MODEL: Click here for the SketchUp model of the Serpentine Chest.
VIDEO: See Glen use a router setup to remove the bulk of the waste from dovetail sockets.
Here are some supplies and tools we find essential in our everyday work around the shop. We may receive a commission from sales referred by our links; however, we have carefully selected these products for their usefulness and quality.


