We may receive a commission when you use our affiliate links. However, this does not impact our recommendations.
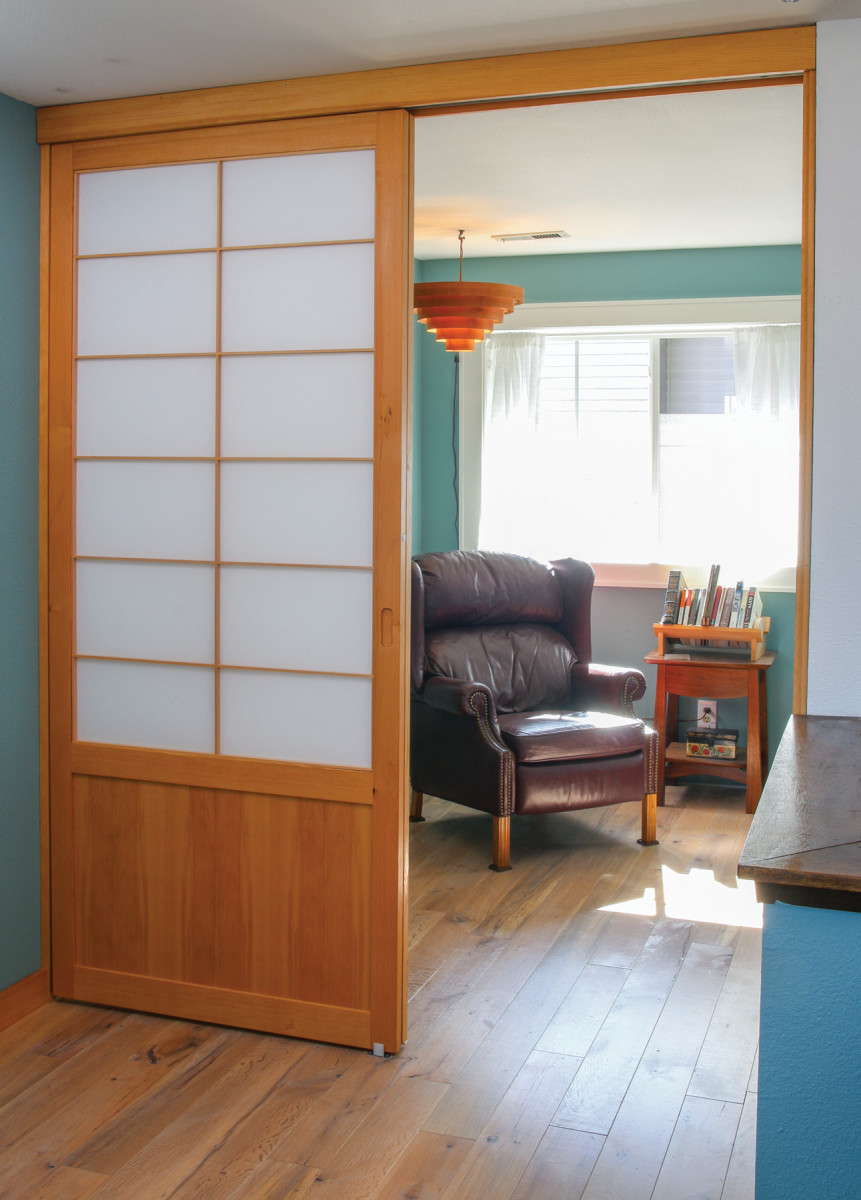
Transform your space with room screens that slide effortlessly.
Our latest house, a 1970s fixer-upper, includes an open second level that doubles as a master bedroom and home office. We love the light-filled space, but it’s hard for someone (my wife) to sleep while someone else (me) is tapping away on the keyboard. From the beginning I knew sliding doors would be a great solution, and kept an eye out for inspiration. I found the answer at my local woodworking guild.
The Oregon Guild of Woodworkers rents their workshop space from Greenline Fine Woodworking, a business that once occupied the entire building. Furniture maker Natsu Morioka, an employee, built two huge, shoji-style sliding doors to separate the workshop from the office. The beautiful doors now serve to close off the Guild’s library.
Morioka’s flawless gridwork muntins (kumiko) are straight out of shoji-screen tradition, but they have a little more heft and strength, with durable translucent plastic where the handmade paper (washi) would go. What also caught my attention is how silently and easily the big doors slide on an overhead track concealed at the top of the opening. I knew right away that my sliding doors would be something similar.
This isn’t my first foray into the Japanese woodworking style, or my first attempt at kumiko grids. I recently built a garden gate that includes a small, open gridwork and a lower panel pierced with the shapes of falling gingko leaves, which was featured in the May 2018 issue of Fine Homebuilding magazine. I’ve also built Japanese-style furniture with traditional sliding doors.
Big room-divider doors are a different deal, however. For starters, they mount to your house, which isn’t quite as square and straight as your furniture. Secondly, they’re large and somewhat heavy, so you need specialized hardware to hang them and careful work to fit the thin gridwork array into the expansive opening in the middle of each door.
Not to worry. Aside from studying the doors at the Guild, I consulted other Shoji makers and uncovered a number of tips and tricks on my own, as well as some specialized products that make the process simple and straightforward. Follow along, and you’ll learn how to craft beautiful sliding doors that will make any large living space more versatile, or close off a closet in style.
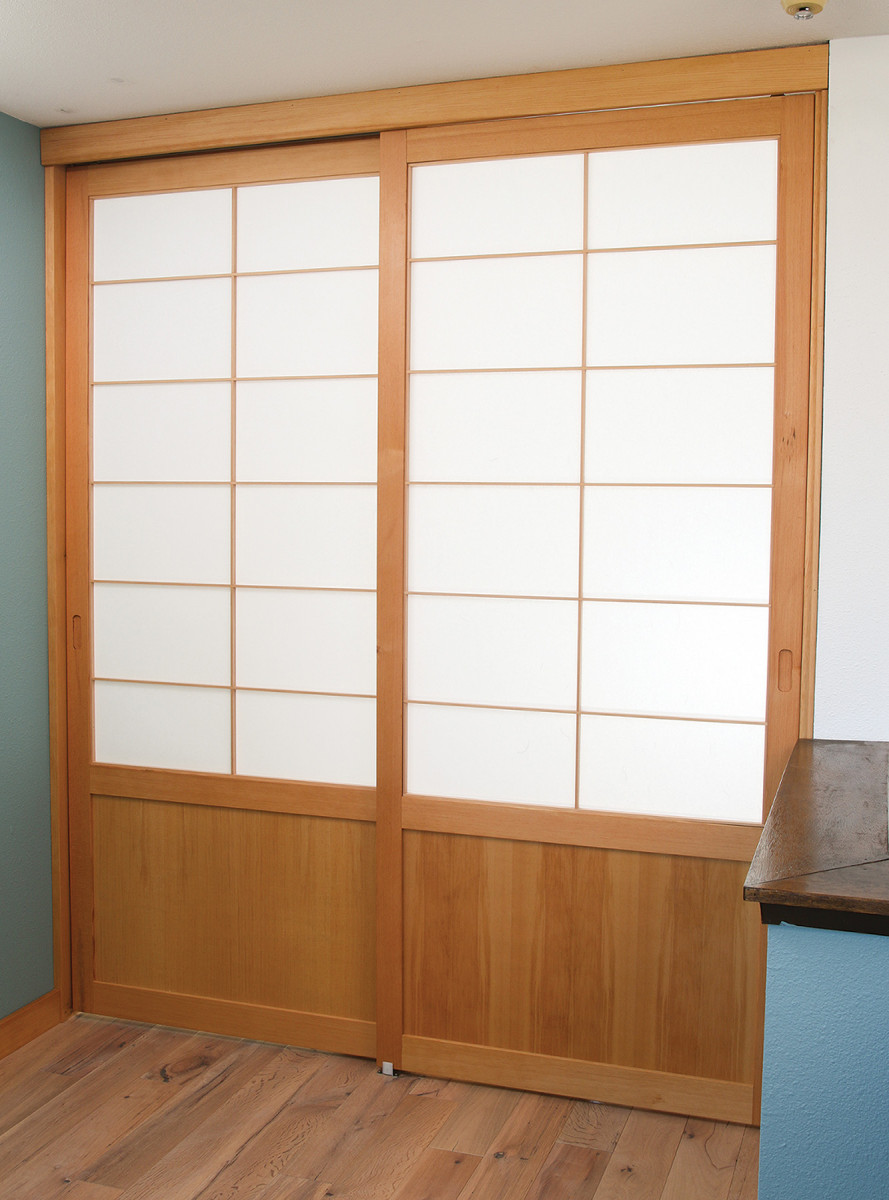
Open or closed the doors are lovely. They slide easily, sitting open as a neat pair and closing to create privacy.
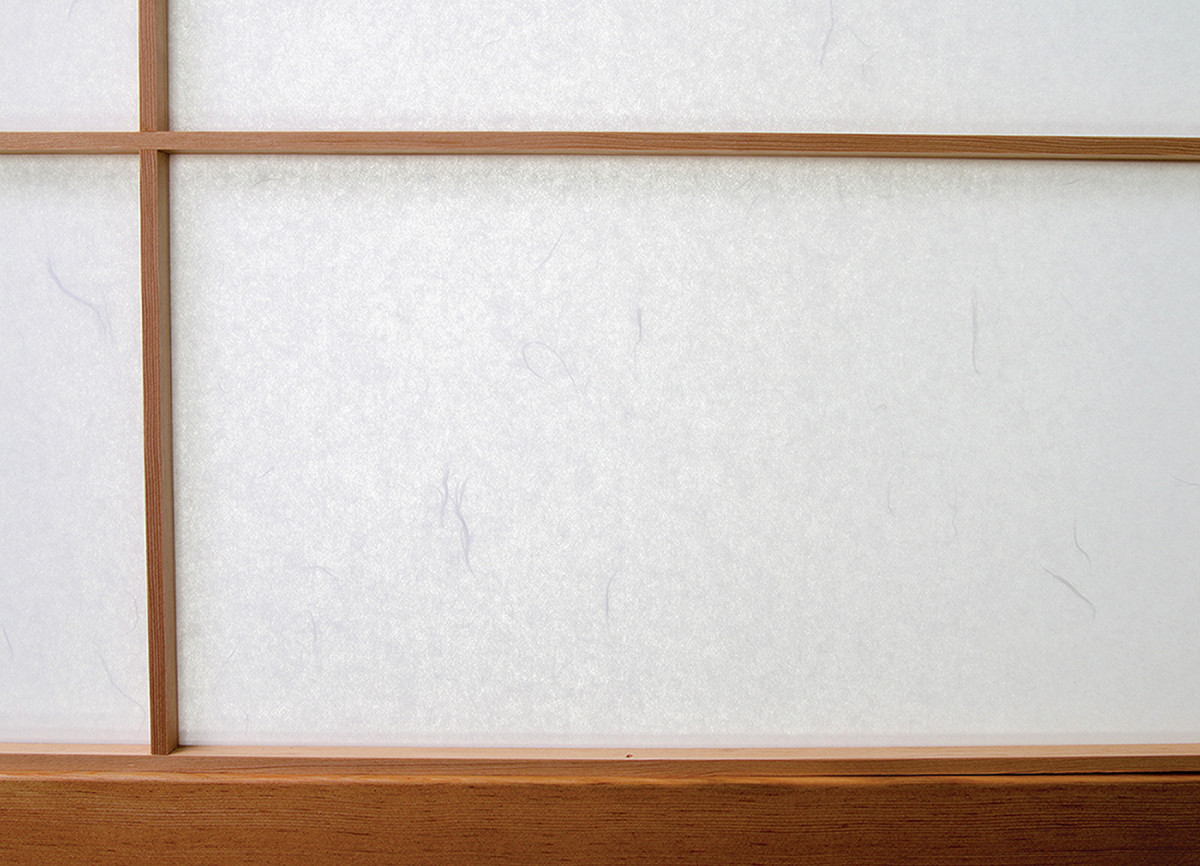
Quartersawn fir is used throughout the door, including the plywood panel that provides some sturdiness and protection at the bottom of the door, and gives the upper gridwork more pleasing proportions.
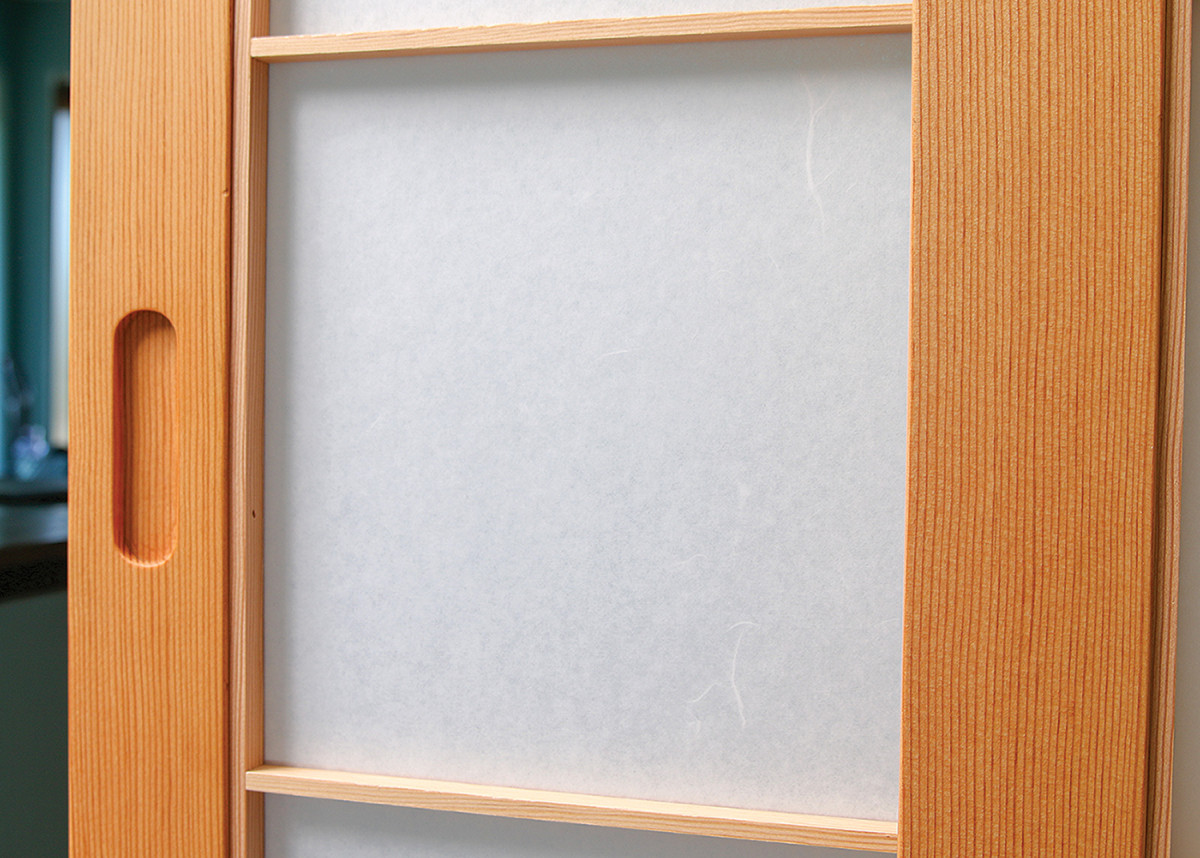
Work out the elements of your doors with a scale drawing of the front view. The thin, half-lapped gridwork is traditional, and the laminated paper has handmade paper inside.
Wood and Finish
Morioka made his doors from cherry, but I went with quartersawn fir, which is light, strong and grows throughout the Pacific Northwest, where I live and hike. If you choose to do the same, make sure to ask for CVG fir, which means clear (C) with vertical grain (VG), and pick boards with tight, straight grain lines. That will help keep the doors and grids at and stable, and look nice with the rectilinear design.
Another way to make the doors more stable is to stack the boards on thin sticks (stickers) for a few weeks in your workshop or house to let them finish drying and acclimate to their new environment before milling them to final size.
I love CVG fir for many reasons. It’s extremely easy to work with power and hand tools, and it glows warmly under an oil finish. Traditional Japanese woodwork often has no finish at all, but to add a bit of protection and luster, I added a low-key oil finish to the door frames, while leaving the gridwork natural for subtle contrast.
Laminated Shoji Paper
I’ve applied handmade washi paper to doors before, but this time I wanted something stronger. I went with something between traditional paper and thick plastic: a 0.45mm-thick laminated product from eshoji.com, an excellent Wisconsin company that specializes in imported Japanese shoji papers.
The laminated paper has traditional washi inside, encased in thin plastic that can be wiped clean and won’t dent or puncture when your cat gets frisky or the broom falls over. On the other hand, the laminated paper is thin enough that it can be cut with a sharp knife, meaning I could simply tape it to a finished grid and slice off the excess, as opposed to pre-cutting it perfectly to size.
Since my doors are meant to be viewed from both sides (as opposed to closet doors, for example), there’s gridwork on each side, ensuring that the laminated paper won’t get floppy in the big openings. There are stiffer products for doors with a grid on just one side.
The folks at eshoji.com also know a lot about building shoji screens and gave me some excellent tips for applying the paper to the grid, using thin, narrow tape (nitto) designed specifically for this job. At 5mm wide it hides behind 1/4″-thick muntins, and tightly grips both paper (plastic) and wood.
The laminated paper and specialized tape worked like a dream. As for the sliding-door hardware, I struck gold there, too.
Hang ’Em High
As opposed to the traditional sliding doors I’ve installed in furniture, captured in grooves above and below, these room-sized doors are suspended from overhead, riding on small rollers that move incredibly smoothly. As for the bottom of the doors, all it takes to keep them from swinging fore and aft are three small tabs mounted at floor level, where the doors always overlap and you’ll never step. I like the way our hardwood floors flow uninterrupted below the doors.
It turns out that most good makers of Shoji-style room dividers mount theirs this way, and I received multiple recommendations for Johnson Hardware (jhusa.net), which makes affordable overhead track systems here in the U.S., with kits for any size or number of sliding doors, and rollers that attach to the top of the doors in multiple ways. Automatic soft-close is a popular option, but since I planned to install rare-earth magnets at the door edges (3/4 ” cupped magnet sets from LeeValley.com), I went with the standard slides (Johnson item no. 100SD), rated for doors up to 200 lbs. each. These tracks require a minimum door thickness of 13/8″, which is what I was shooting for.
Since my doors will be viewed from both sides, I chose rollers that screw to the top edge over the type that mount with side plates. I was a little concerned about hanging thick doors from four screws, but the folks at Johnson assured me that the long, coarse screws are load tested well beyond their stated ratings. After hanging the doors, I have no doubt about the strength of the system.
The Johnson hardware includes 1/4″ of adjustment up and down at each roller position, making it easy to align the doors with the door opening. Everything about the Johnson hardware is clear and easy. What wasn’t so easy was hanging perfectly square doors in a house that isn’t.
Start with a Square Opening
Unless you have a perfectly square, level, and plumb door opening to work with, you’ll need to create one, so your doors hang level and hit the sides of the opening seamlessly. To start, I knew I needed to hide the two door tracks and the hardware gap at the top of the doors, so that meant a board on both sides. To give me something to attach those boards to, I sized a thick board to the width of the two tracks, and screwed it to the ceiling joists above. That let me screw the tracks solidly to that board, through the holes provided.
The trick is to get that thick board as level as possible, which requires an accurate level and probably some shimming. Then you attach the valance boards flush to the ceiling (or door opening) and screw in the tracks.

I started here with a 11/2 “- thick board, shimmed level and screwed into the ceiling joists. This board is just wider than the two door tracks. Then I nailed boards to the front and back to create a valance that hides the tracks and the gap above the doors.
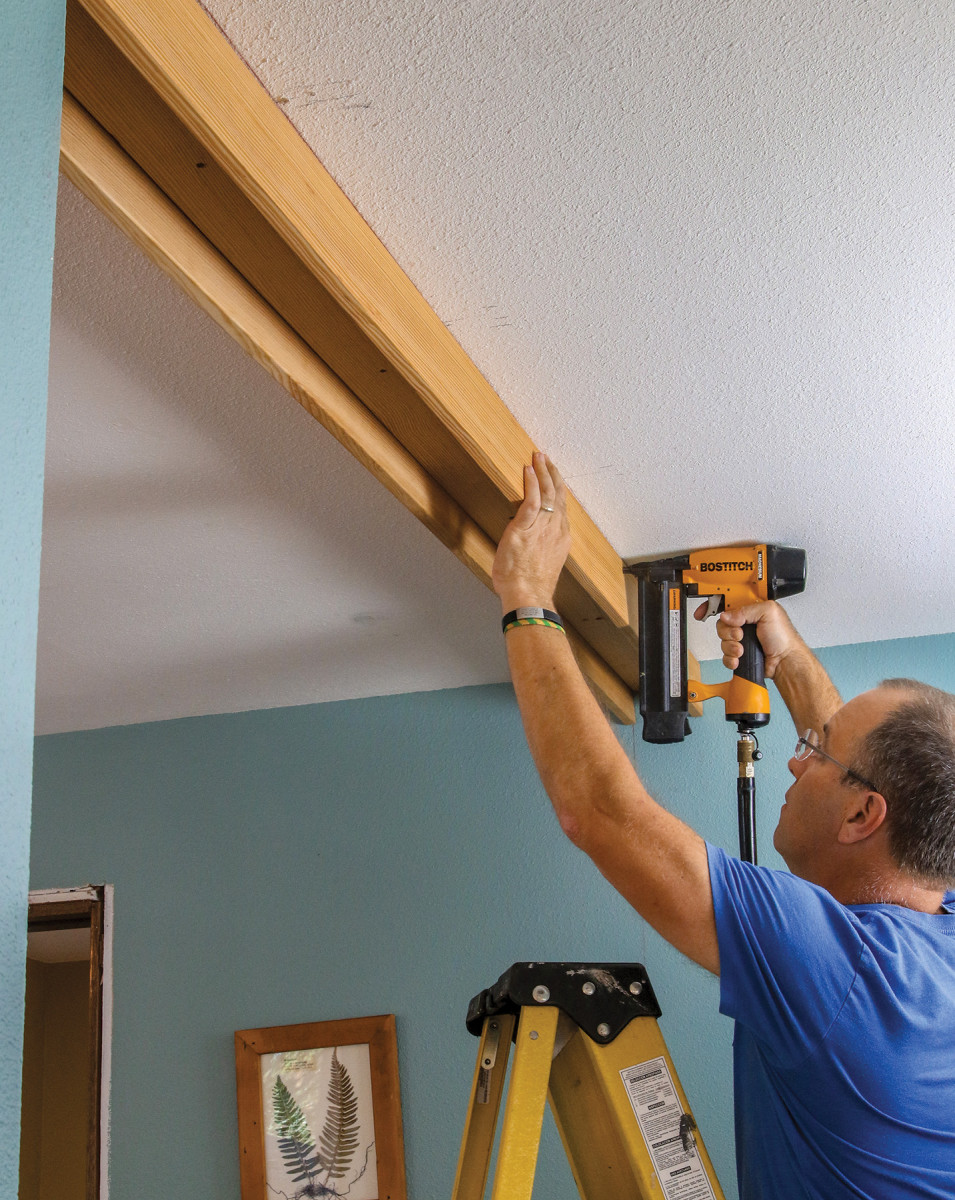
Last, I screwed the tracks up into the cavity.
Next, I tackled the sides of the door opening. To create a visual frame around the doors, and give them a flat, plumb surface to close against, I added fir boards that run from inside the valance down to the floor. Use your level again to make sure those are perfectly plumb, shimming if necessary, but I’d only screw them in place at the top. Once you actually hang the doors, you can fine-tune the position of those side boards to line up with how the doors actually hang.
This whole part of the job—where the doors meet the house—is tricky, and requires some careful recon, including locating and pre-marking the studs and joists.
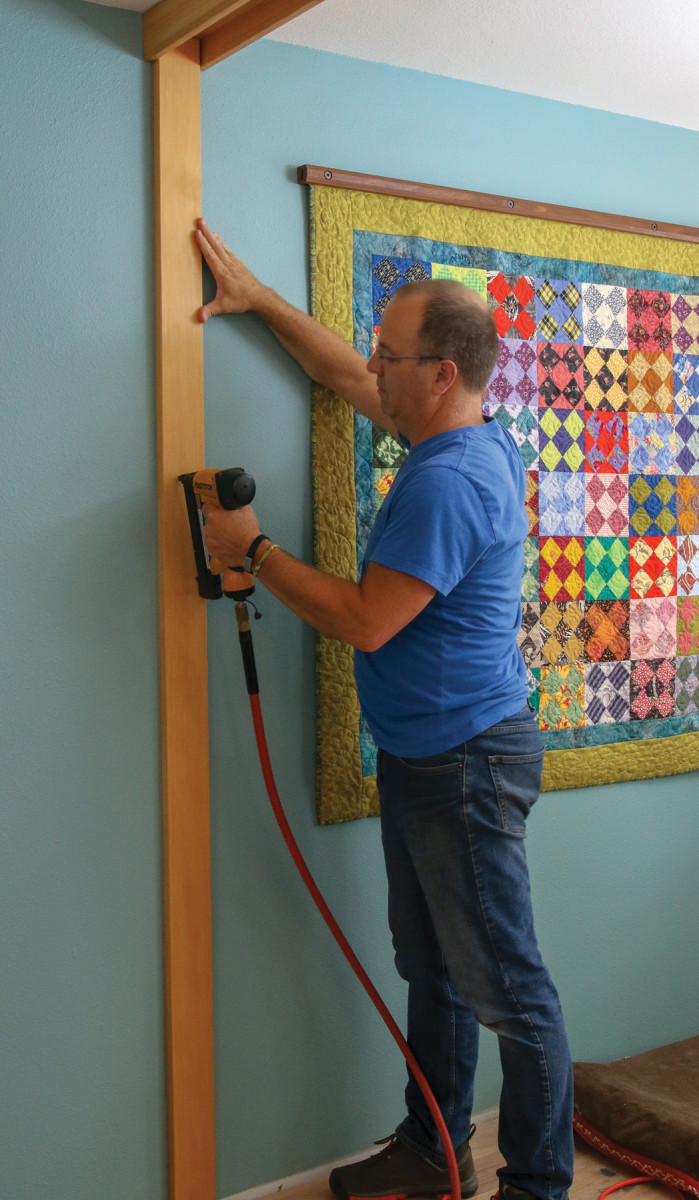 The side boards fit up into the valance. Shim the boards plumb, if necessary, and check the overall dimensions of the door opening, top and bottom. Drive a screw near the ceiling but just tack the lower end in place temporarily. You can fine-tune their position front or back once you see how the doors actually hang (to move a board just pull it outward and clip the brads off at the back).
Standard Door Construction
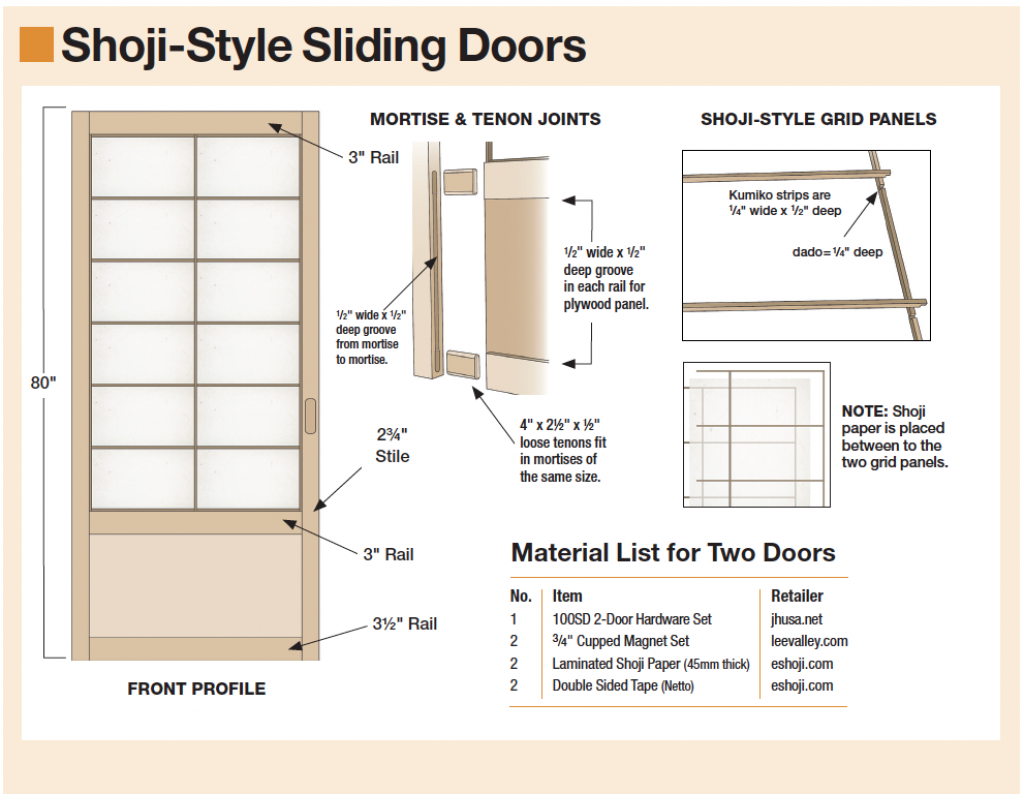
I highly recommend that you draw a front view of the entire opening to help design the doors and size them accurately. Start your drawing by adding the upper valance and side door-frame pieces to the overall opening, and then size the doors so their stiles overlap at the center.
In keeping with shoji tradition, I put a small panel at the bottom of the doors, to add some protection down low, break up the big expanse, and make the gridwork proportions more pleasing. To size the panel, I used the Golden Ratio, dividing the known width by 1.618 (there’s an online calculator for this) to get the height. The classic ratio isn’t always helpful, but it worked wonderfully here.
For the panel, I found nice CVG fir plywood to match the frame. I went with 1/2″-thick plywood to add strength and solidity without too much weight. I also like the 7/16 ” shadow lines at the front and back of the 1 3/8 “. thick doors. If you can’t find the right plywood, you can glue up panels from solid fir boards, leaving room in the grooves for seasonal movement. I also balanced weight and strength when sizing the doorframe parts, in various widths between 2 3/4″ and 3 1/2”.
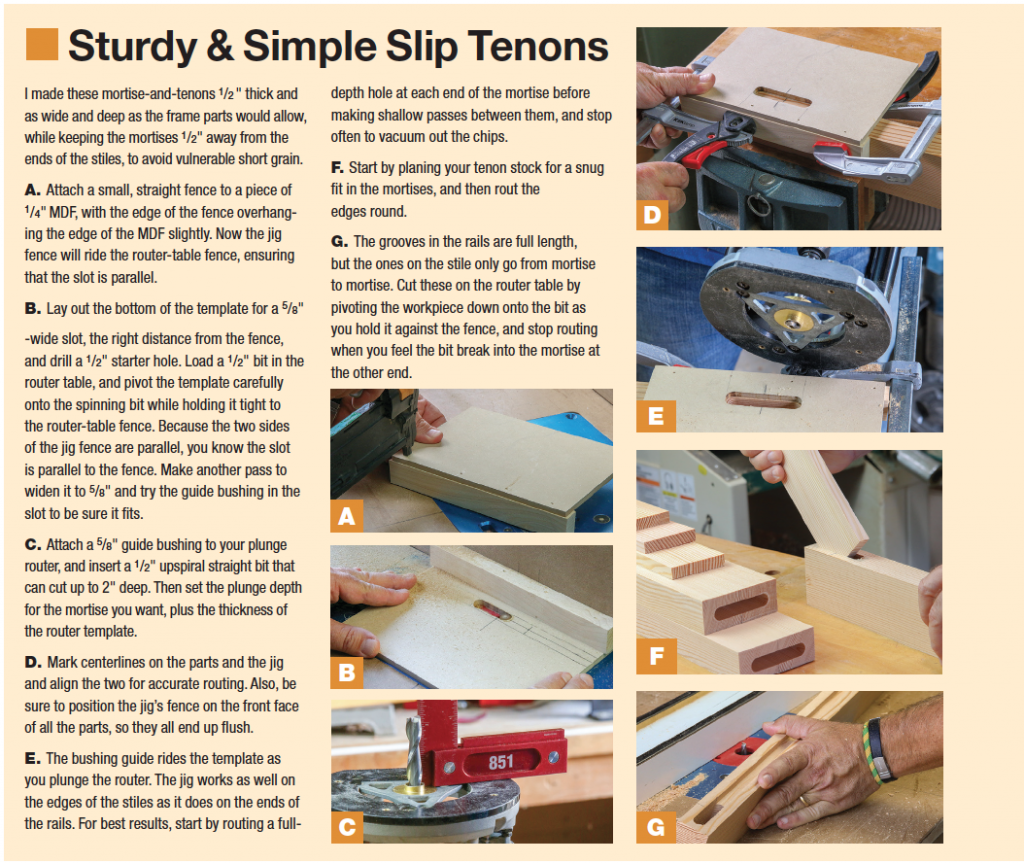
As for the joinery, it’s just hefty mortise-and-tenon, as big as your frame parts will allow. With so much width and thickness to work with, I went with slip tenons and matching mortises, which you can rout quickly with a single jig (see below). This template-routing jig is a favorite I learned about long ago when shooting an article by teacher and woodworker Gary Rogowski.
One of the many advantages of slip-tenon joinery is it makes it super easy to create a square door frame, since you don’t have to factor tenons into the length of the rails. It’s very important to be sure that all of your rails are exactly the same length, so the opening for the shoji gridwork is as uniform as possible. Aside from that, you just have to rout a groove for the plywood panel.
Tricks for Gridwork
Delicate gridwork of this size is a little intimidating, I’ll admit. For one, you have to really nail the little half-lap joints to get any glue strength, and then you can still pop joints loose if you don’t handle the finished grids carefully. But a few slick tricks will deliver perfect kumiko that fit your door opening precisely.
You don’t have to use a classic, understated grid like mine. Feel free to explore the rich shoji tradition for yourself, including the stylized flower patterns that can be inset into rectangular grid spaces to take your doors to the next level. I knew I wanted a single divider down the center of these grids, but worried about the careful division required to keep the spacing uniform between the horizontal pieces. There’s a helpful phenomenon, however: the top and bottom spaces can be a little narrower than the rest without disturbing the eye. That means you can make the rest of the spacing an even measurement that suits the tablesaw jig above, and let the top and bottom be something different, as long as it’s a little less.
The other trick is how you create dozens of perfect little lap joints with just a few cuts. After milling a wide board to 1/2″ thick, you create the half-laps by milling dadoes across the boards and then ripping them into 1/4″-thick strips that fit the tiny dadoes. If you take your time and make test cuts, you’ll be amazed at the results. See the photos on page 38 for how it all works, plus how you apply the laminated paper and install the grids.
*link to somethimg*
How to Cut Flawless Grid Pieces
Whether your opening is perfect or not, you can fill it with elegant gridwork that fits it perfectly. The trick with the vertical spacing is to pick an even dimension that leaves a slightly smaller space at the top and bottom, where the eye won’t notice it.
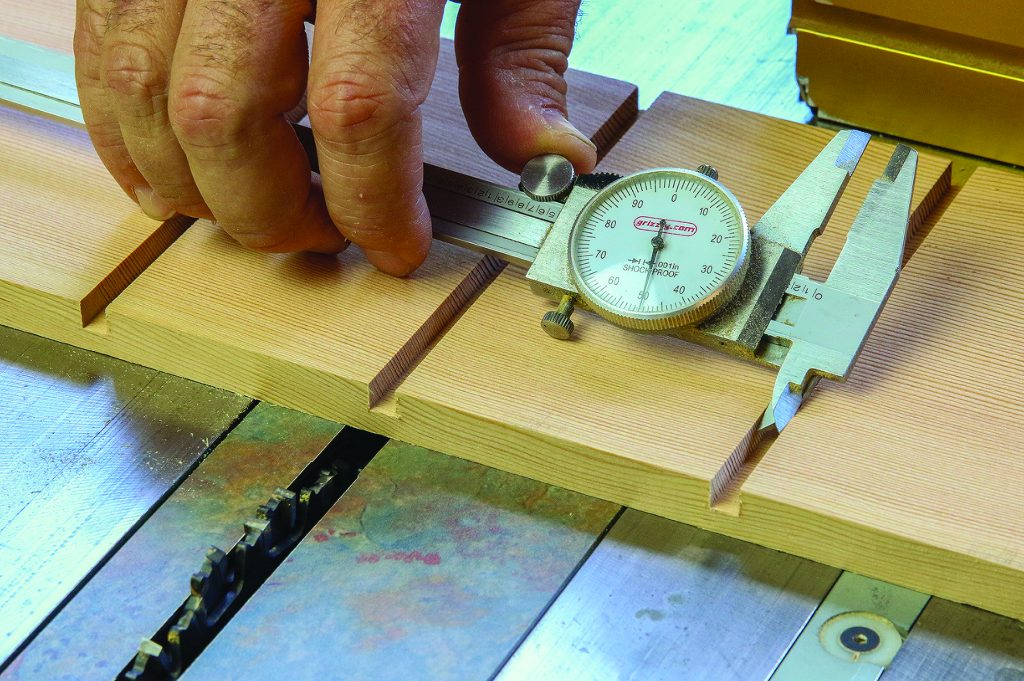
Mill an extra test piece and set up your dado for a 1/4″-wide cut that’s a hair over 1/4″ in depth (0.255 to 0.260). Check both dimensions with a dial caliper.
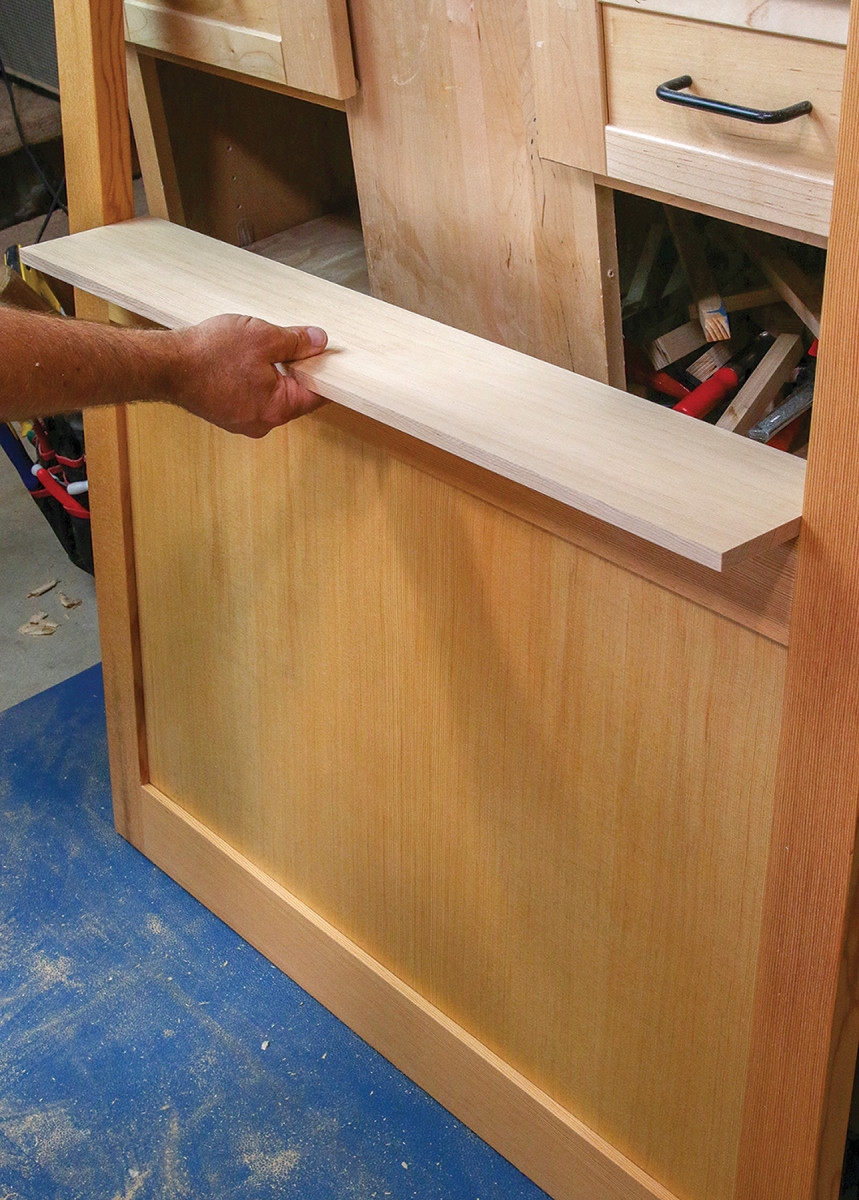
Mill a single board for the vertical strips and another for the horizontals. Plane these 1/2″ thick, and trim the ends to fit into the opening.
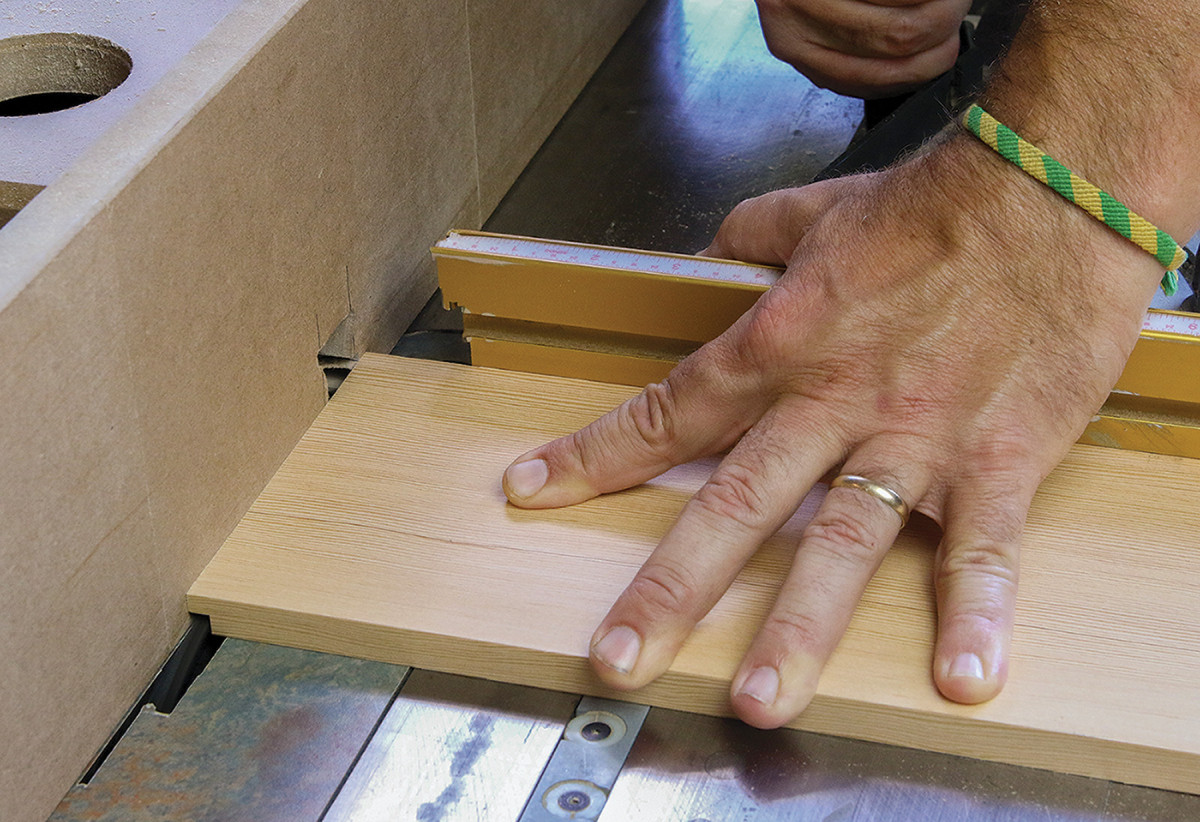
The ends of each board (verticals and horizontals) get little rabbets. Your dado set should just be touching an auxiliary fence attached to your rip fence. Support the parts with your miter gauge as they ride the rip fence as shown.
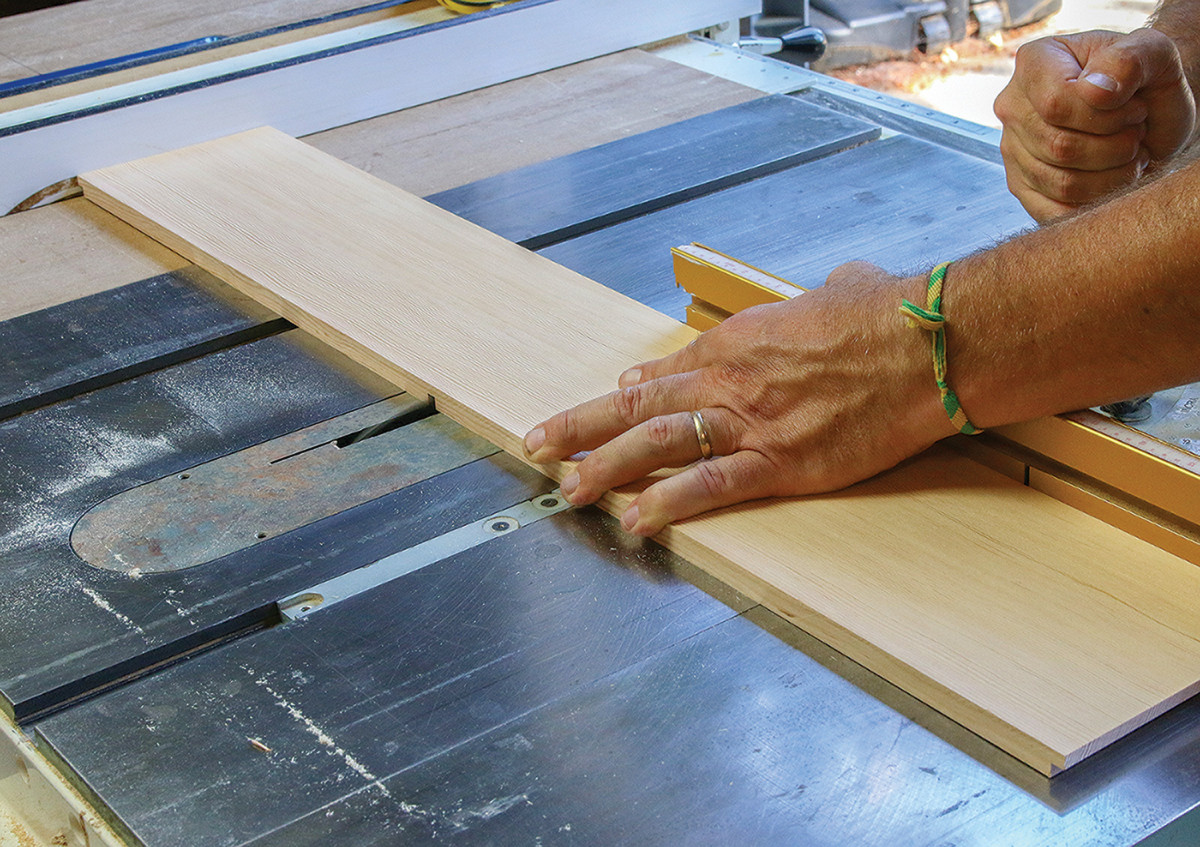
Horizontals need only one dado. Again the piece rides the rip fence and miter gauge. Center this dado as best you can.
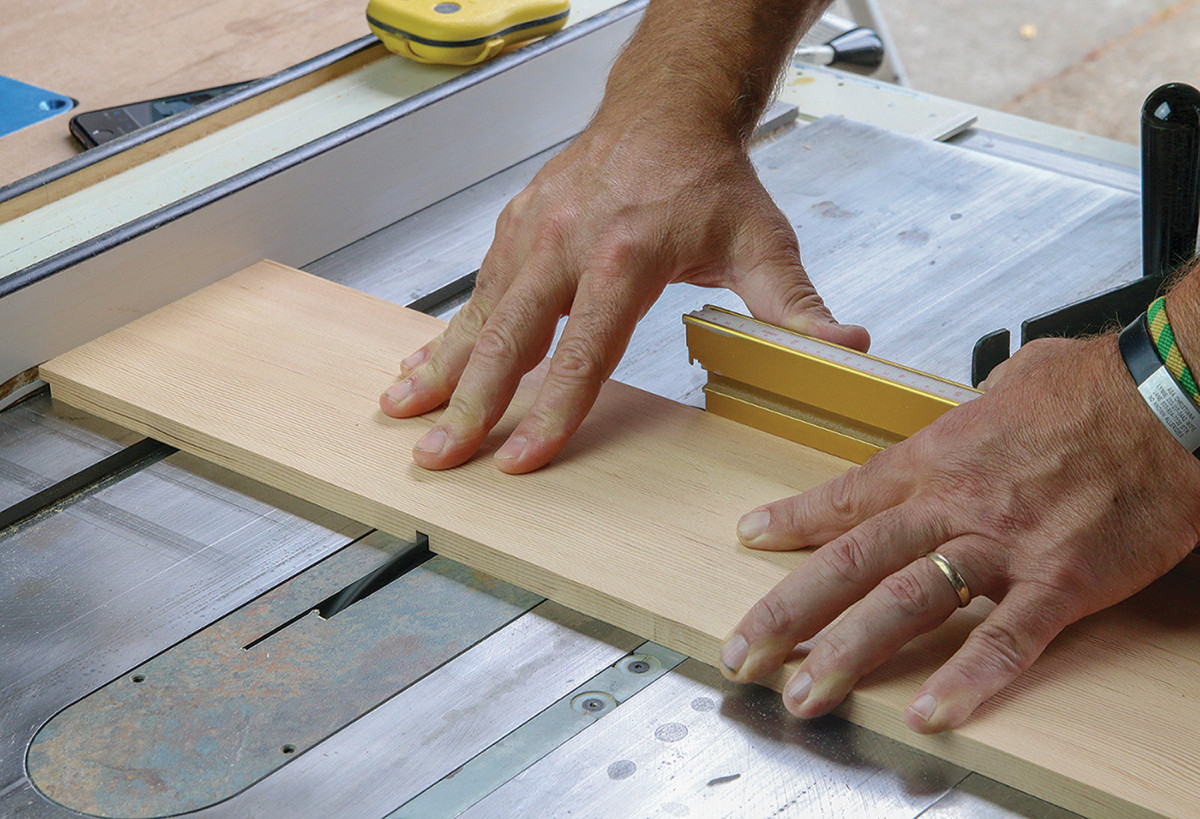
Cut the first dado in the verticals. Support this cut the same way you did before.
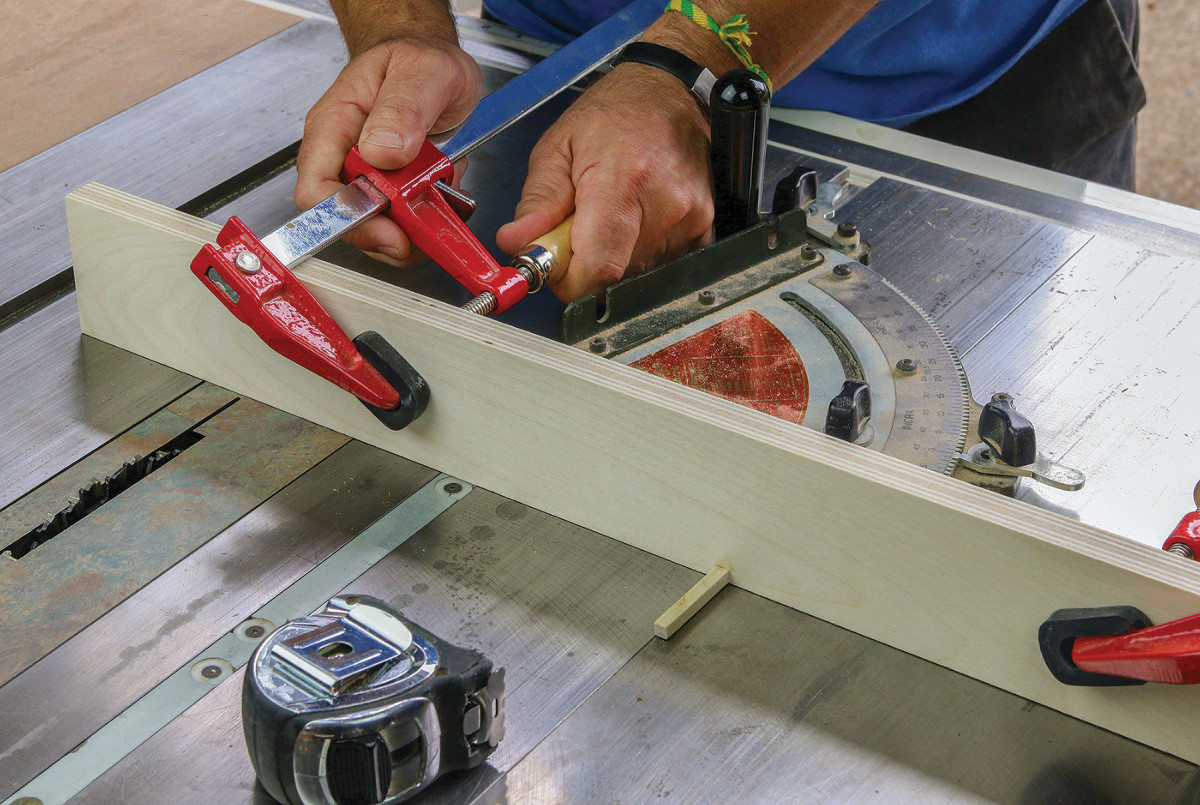
Make a spacer jig. Cut the same 1/4″ dado in an auxiliary fence for your miter gauge, and glue in a little key as shown. Then attach the auxiliary fence so the key is the right distance from the dado blades (equal to the desired gridwork spacing).
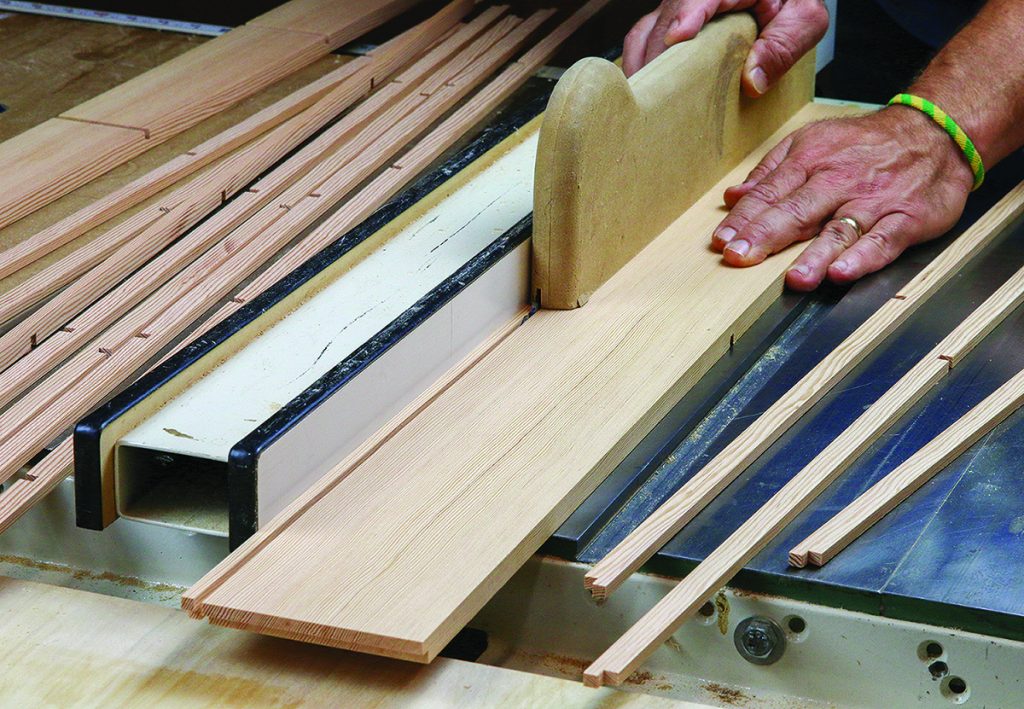
Using a thin-kerf blade to reduce waste, rip the wide boards into 1/4″-wide strips. These need to fit perfectly into the 1/4″ notches, so dial in the fit with test cuts on a waste piece.
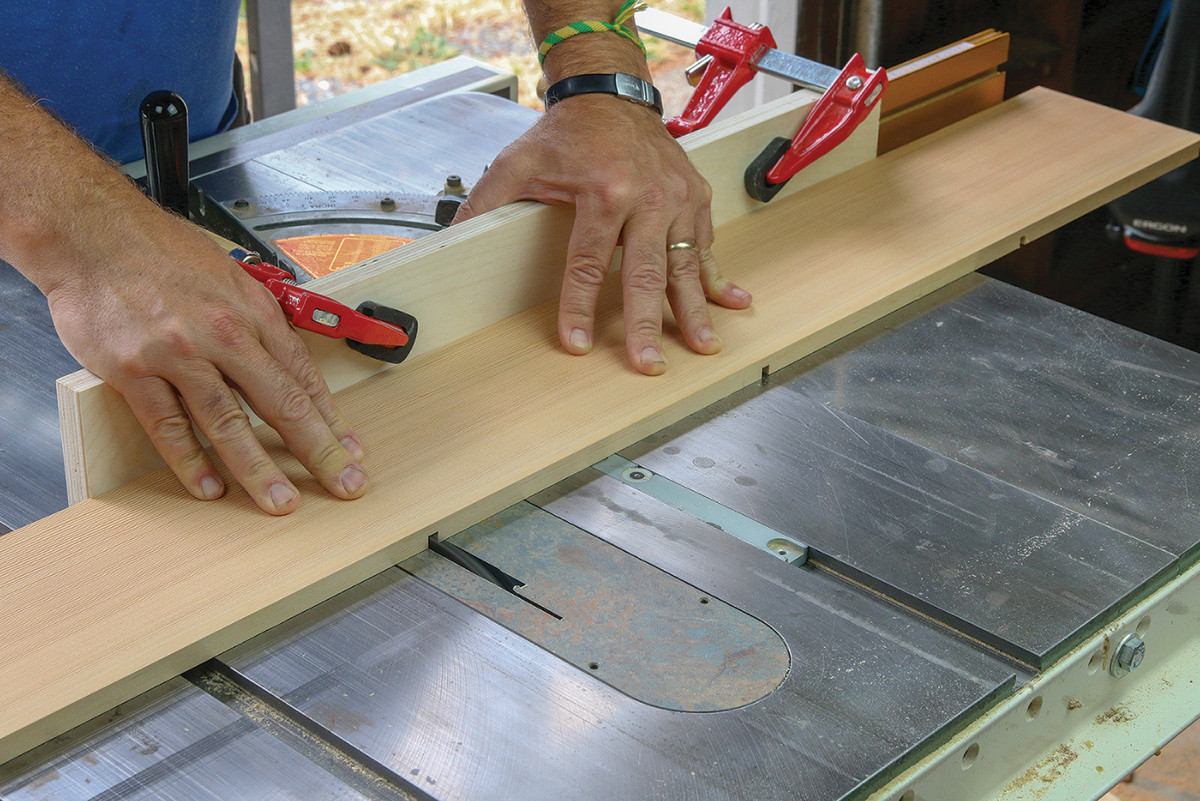
Cut the rest of the notches in the vertical pieces. Fit the previous dado onto the little key when cutting the next one. This guarantees perfect spacing.
You want a fit that’s gap-free but easy to assemble. An overly tight fit will result in a bowed grid assembly. Label one end of all the pieces so you can assemble them in the same orientation.
Assemble the Grid in Stages
After assembling the center part of the grid, you can check it in its door opening. If it doesn’t fit perfectly, you can mark and recut the overly long pieces, and recut the little half laps on their ends. Also, I found a 4×8 sheet of shop-grade plywood to be essential for working on the gridwork.
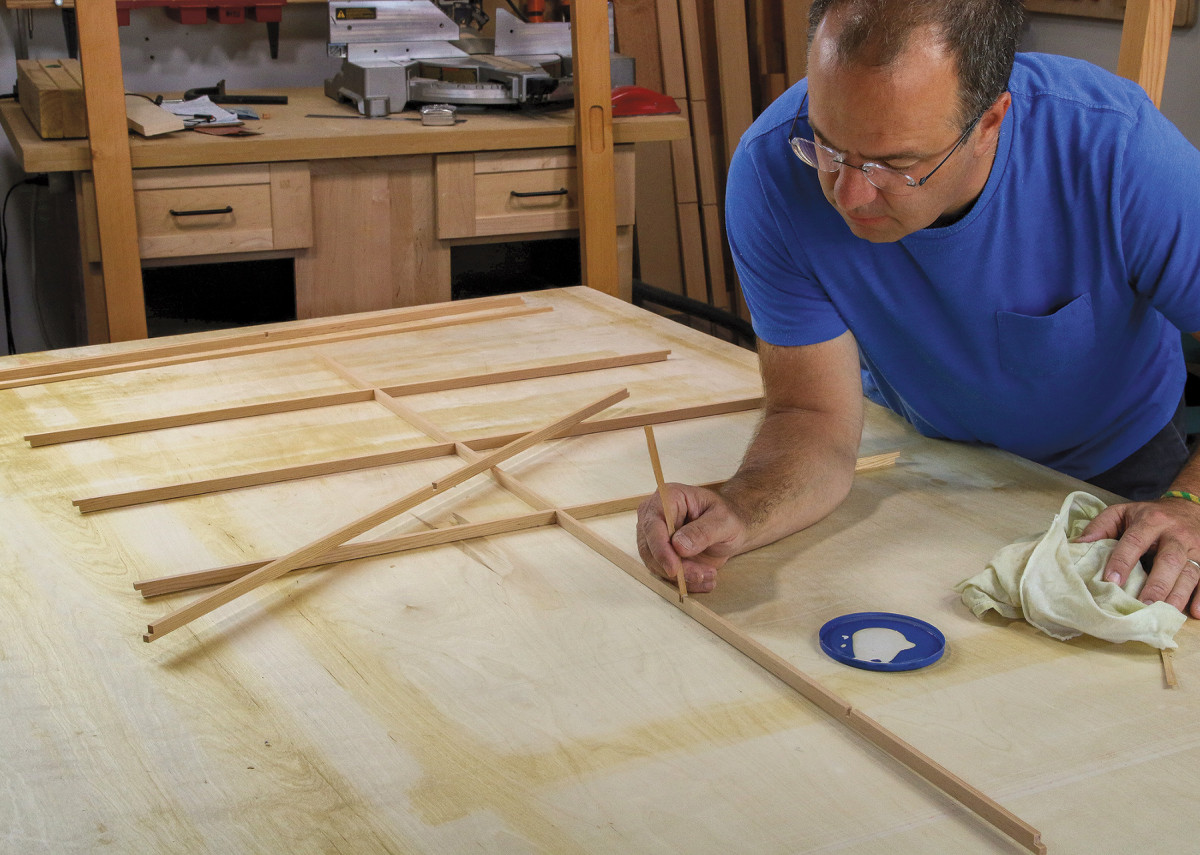
Put the central pieces together dry first and check them in the door opening. They should fit with just the tiniest bit of wiggle room. Then use a thin stick to spread a dab of glue in both parts of each little lap joint, and press the parts on the surface below to be sure they are flush with each other. No clamps are needed.
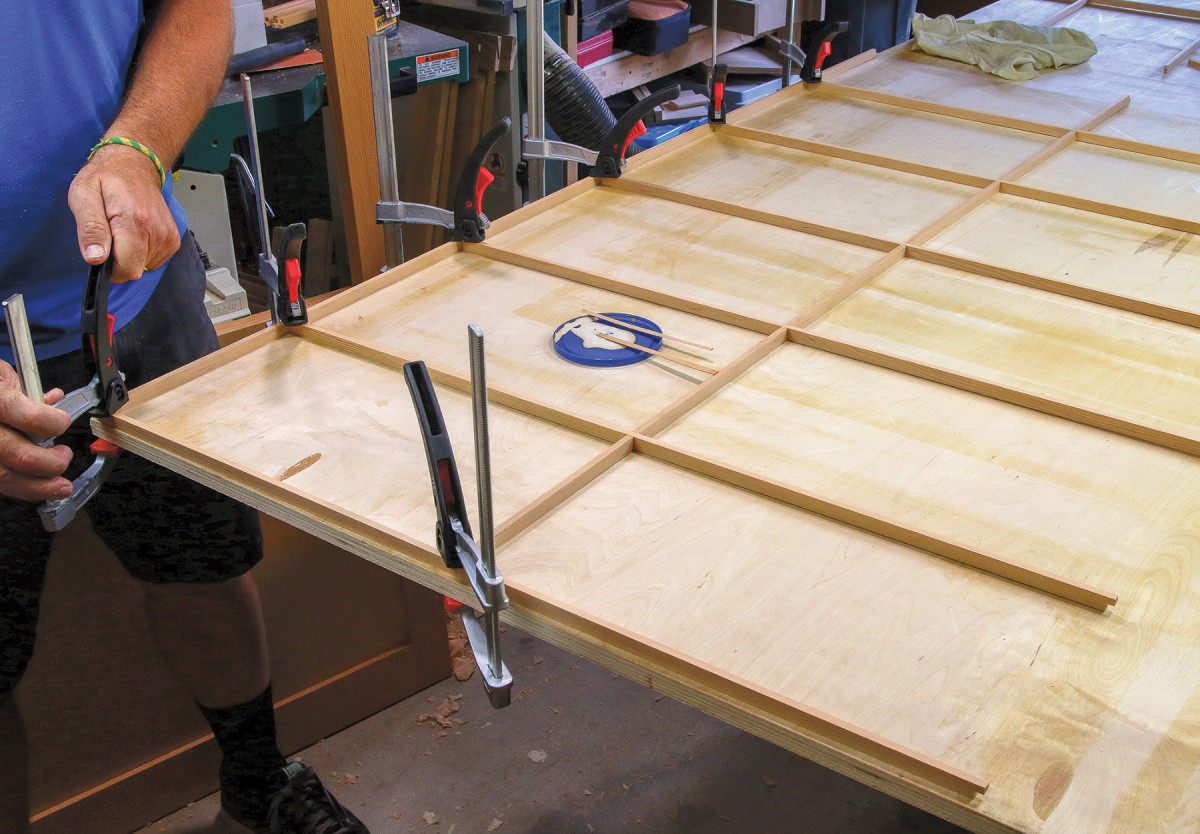
The outside pieces only have little rabbets on the ends, so attach them one at a time, pushing them tightly together and clamping then down to the edges of the plywood for support. You can attach two outside pieces at a time this way.
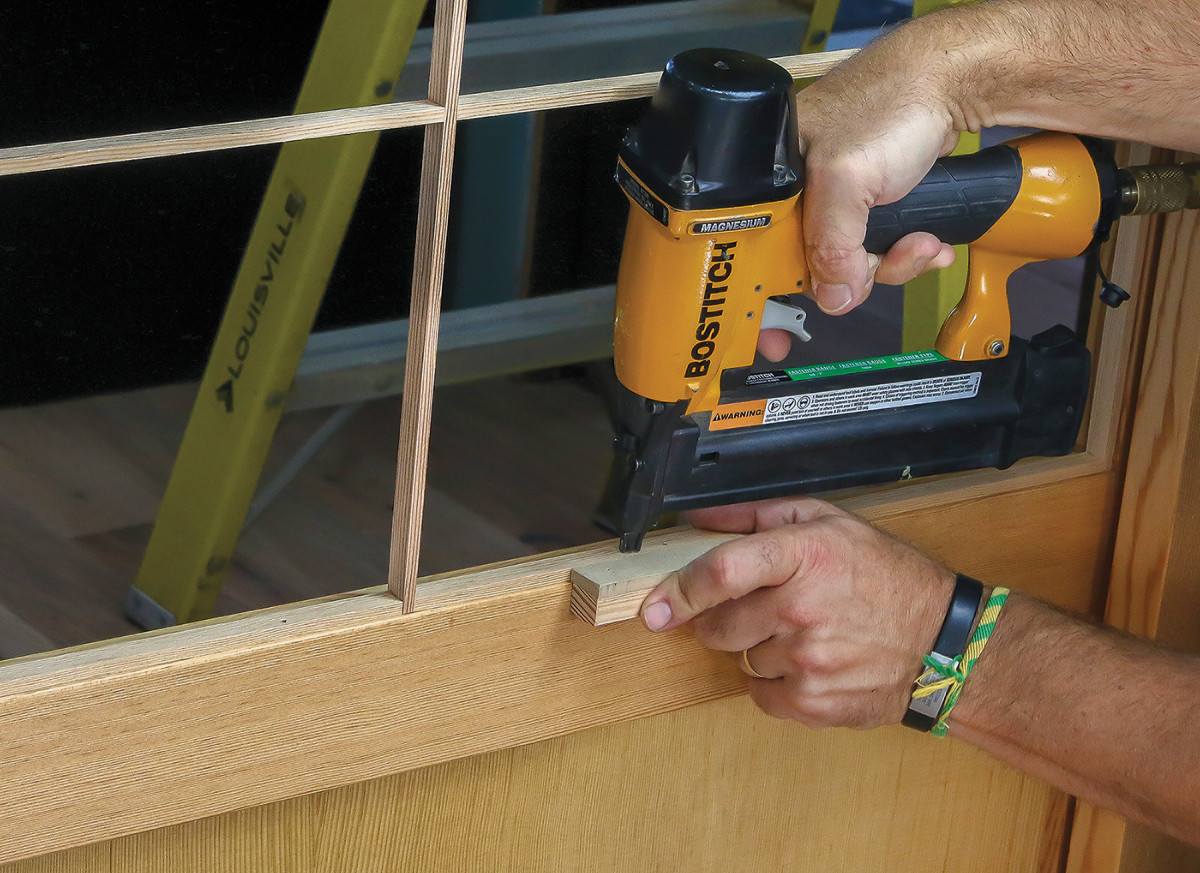
Attach the first grid. Note the little offset block I created to space the grid about 1/8 in. from the outside of the door frame as I brad-nailed it in place. If there are tiny gaps between the grid and door, place your nails away from the crosspieces, so the wood strip can flex outward a little.
Attach the Paper
The laminated shoji paper goes on the other grid, and specialized tape keeps it in place as you install it and prevents it from rattling around afterward.
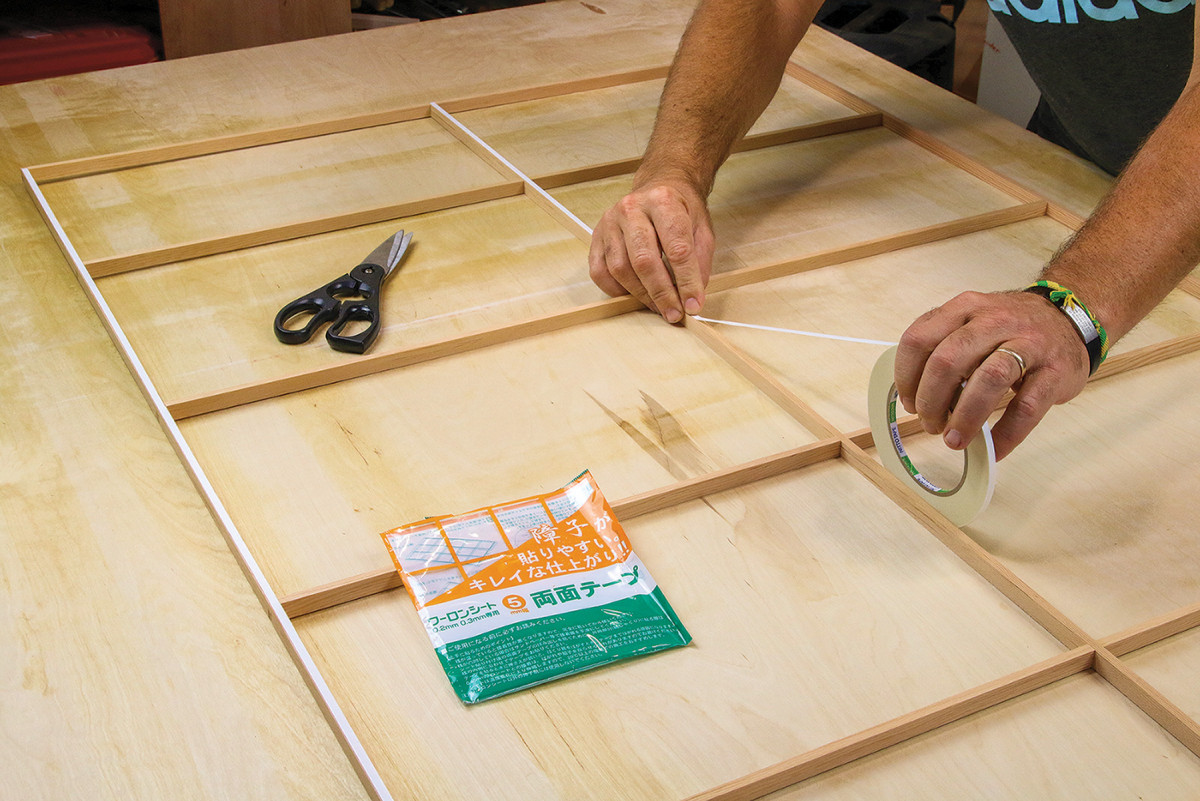
Netto tape is wonderful stuff. I put it on all the outside pieces, but skipped a few of the internal ones. That’s plenty for the job. Make sure the tape is hiding behind the edges of the grid pieces as you stick it down.
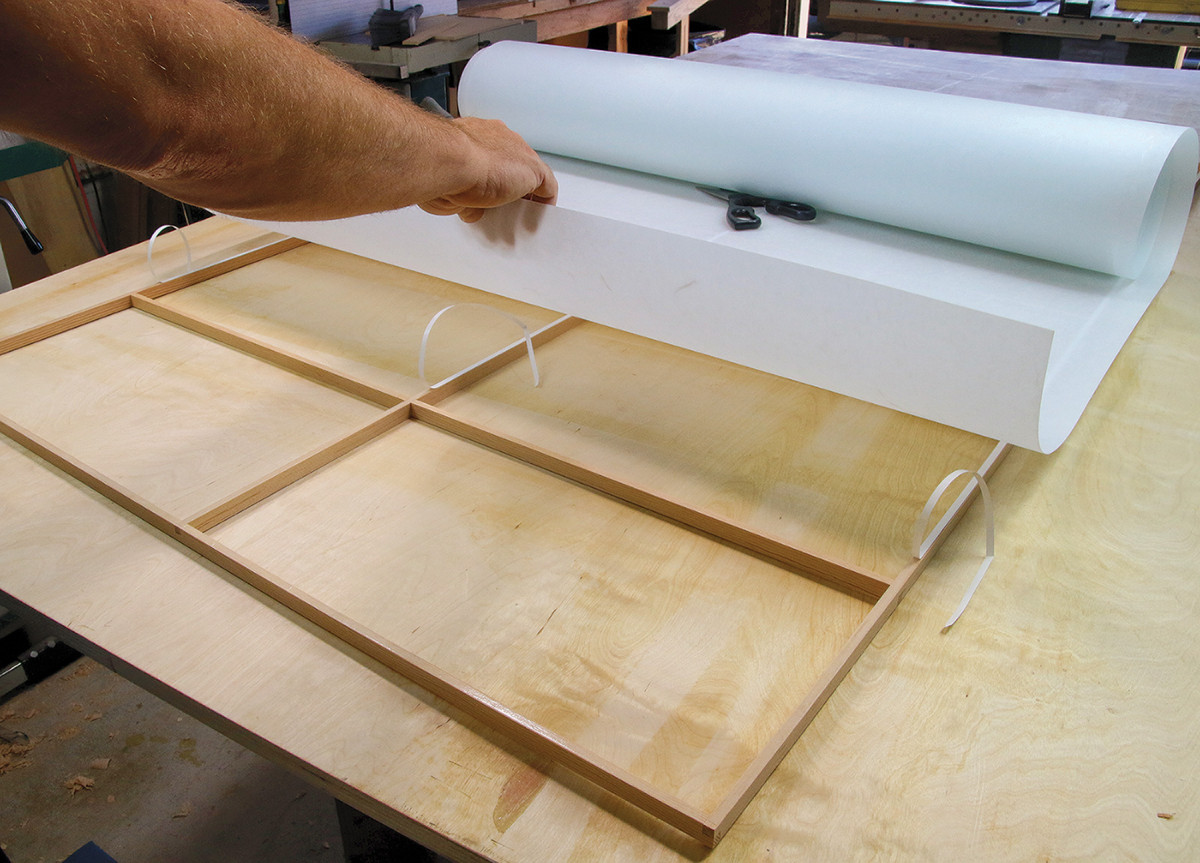
Start by pulling the backer of the tape strips only at one end of the panel, and stick down one end of the laminated paper there first, making sure it doesn’t overhang the edge. Then remove the rest of the tape backer and roll the paper steadily down toward the other end. Finish by rubbing your fingers firmly over all the gridwork pieces that have tape on them.
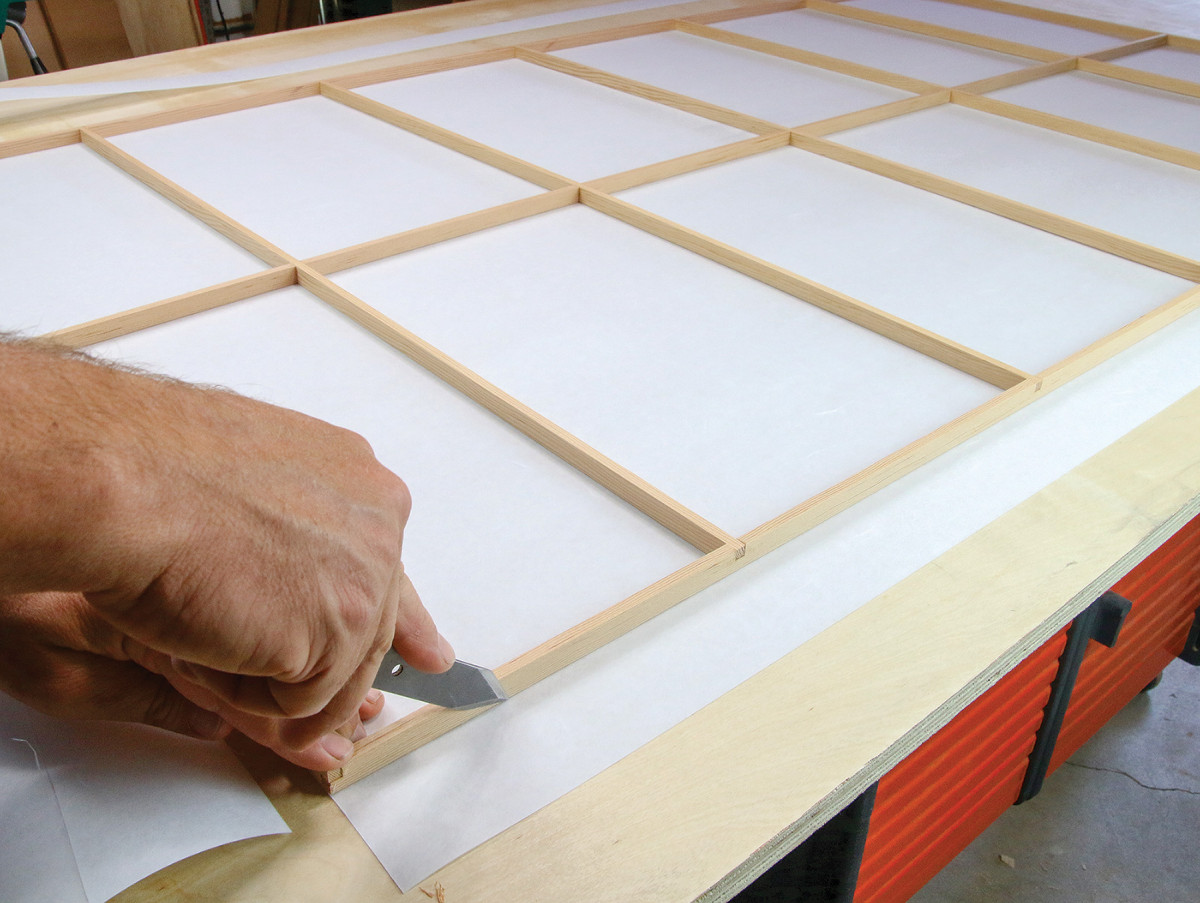
I recommend a flat-sided marking knife for trimming, which will hug the edges of the grid and trim the paper perfectly flush. Hone its edges to 8000 grit to get through the tough plastic. Work in short sections, starting with a light pass to establish the cut and holding the knife at a high angle to help keep it on track.
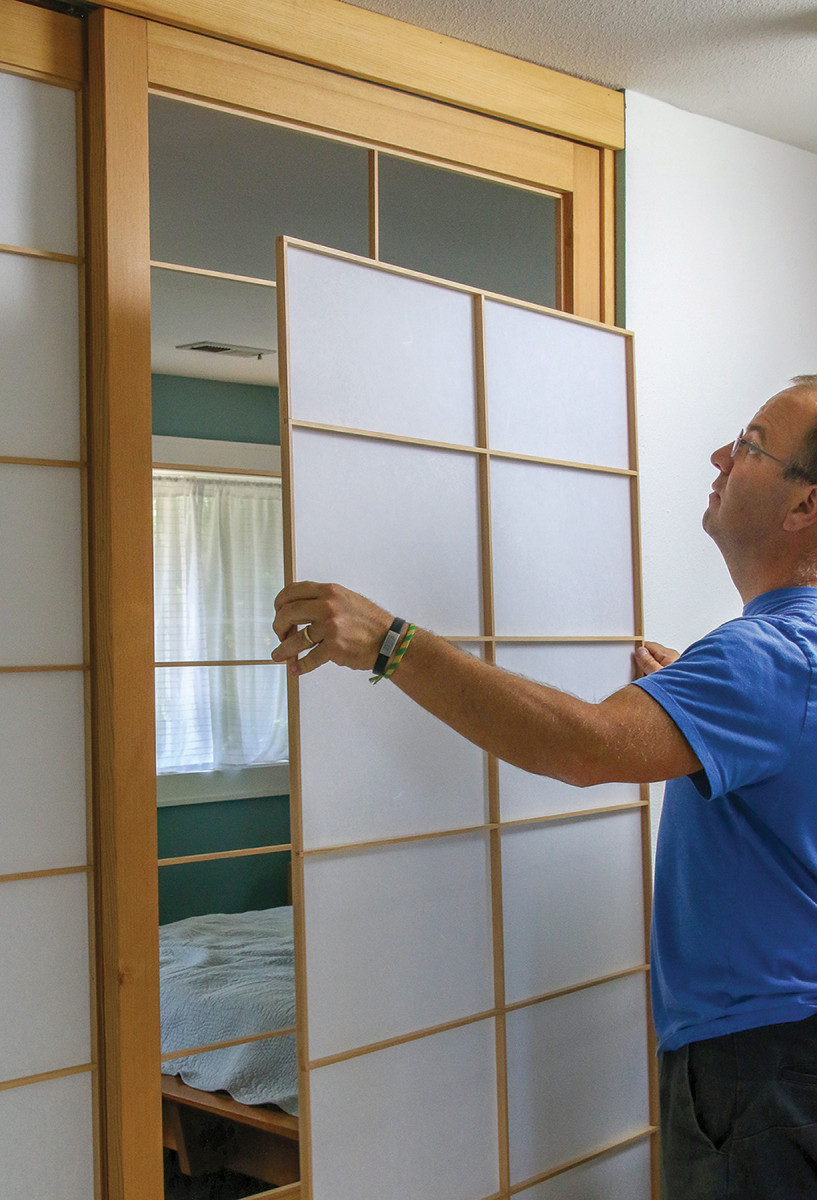
The last grid bumps right up against the open one you already installed, with a similar reveal at the front edges, and nails in place with brads as before.
Add the Finishing Touches
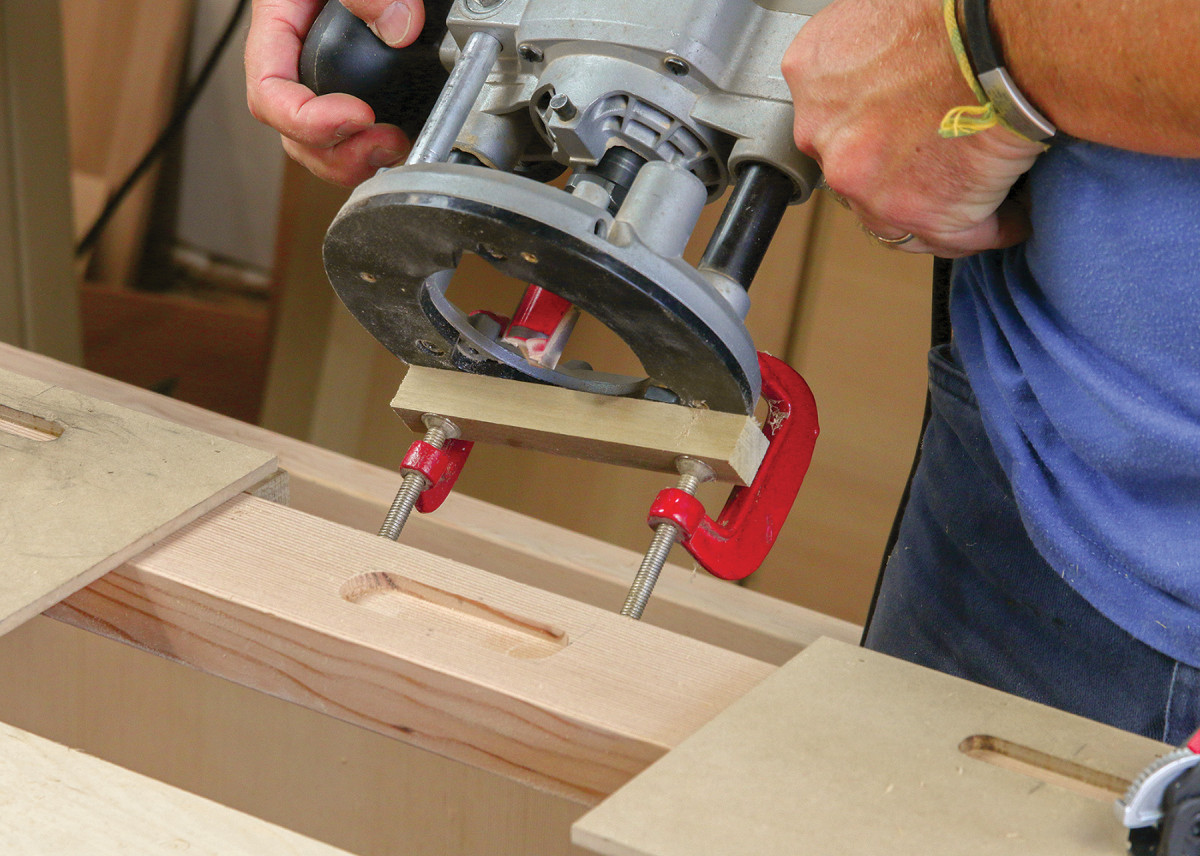
I clamped a makeshift fence to the base of my router and used a big, straight bit to rout 1/4 in. deep door handles in a couple of passes.
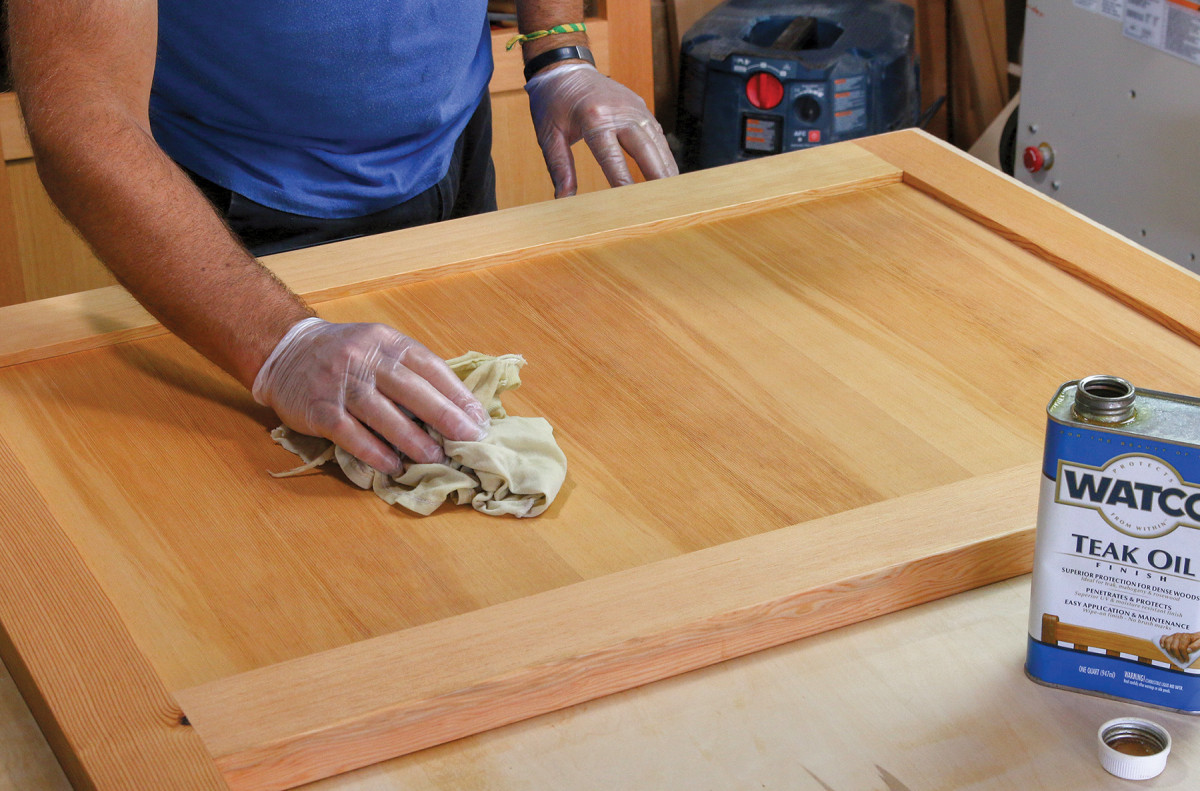
Two coats of almost any wipe-on oil adds a little depth, age, and polish to fir while leaving the natural look that is traditionally Japanese. For a buttery feel, sand the bare wood to 220 grit, and rub it with a brown paper bag between coats.
Hang the Doors
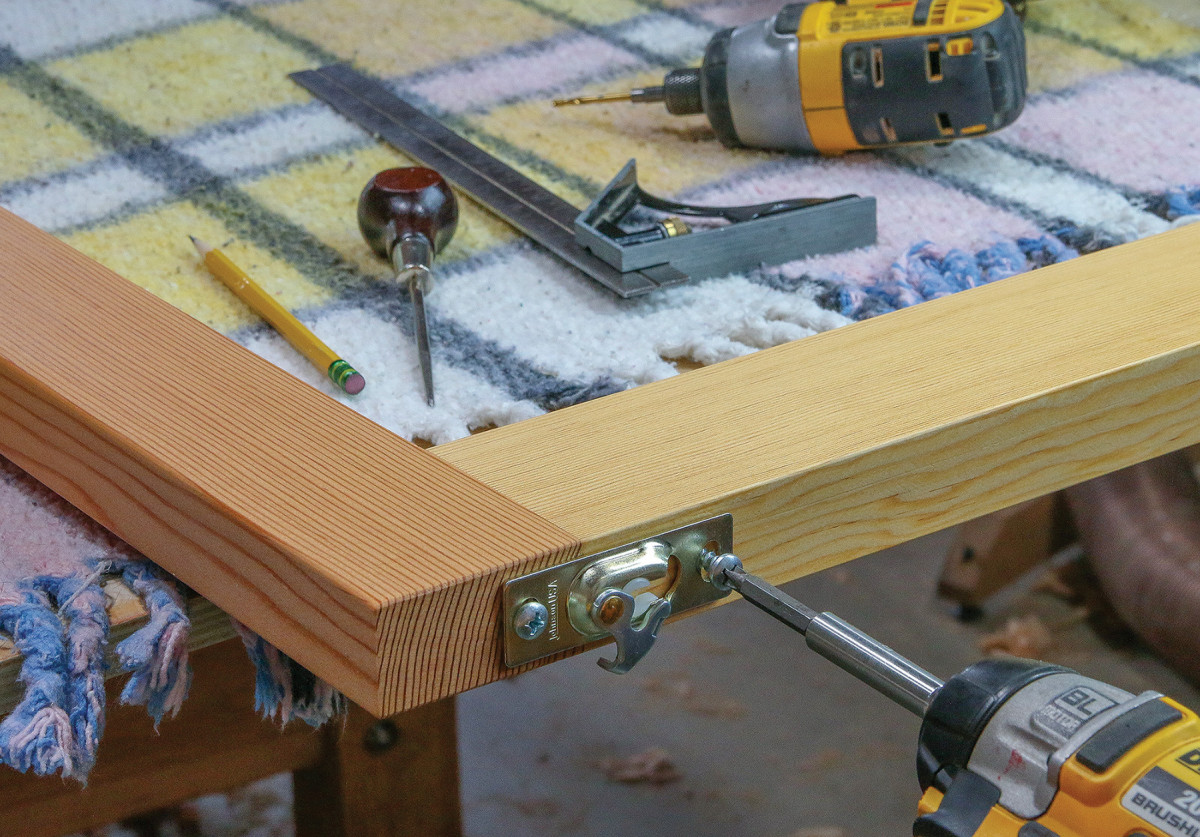
Sliding hardware is a cinch. You screw the overhead tracks (with the rollers inside) to the upper edge of the door opening, attach the other part of the hardware to the top edge of the door, and then hang the doors from the rollers, which allow ample vertical adjustment.
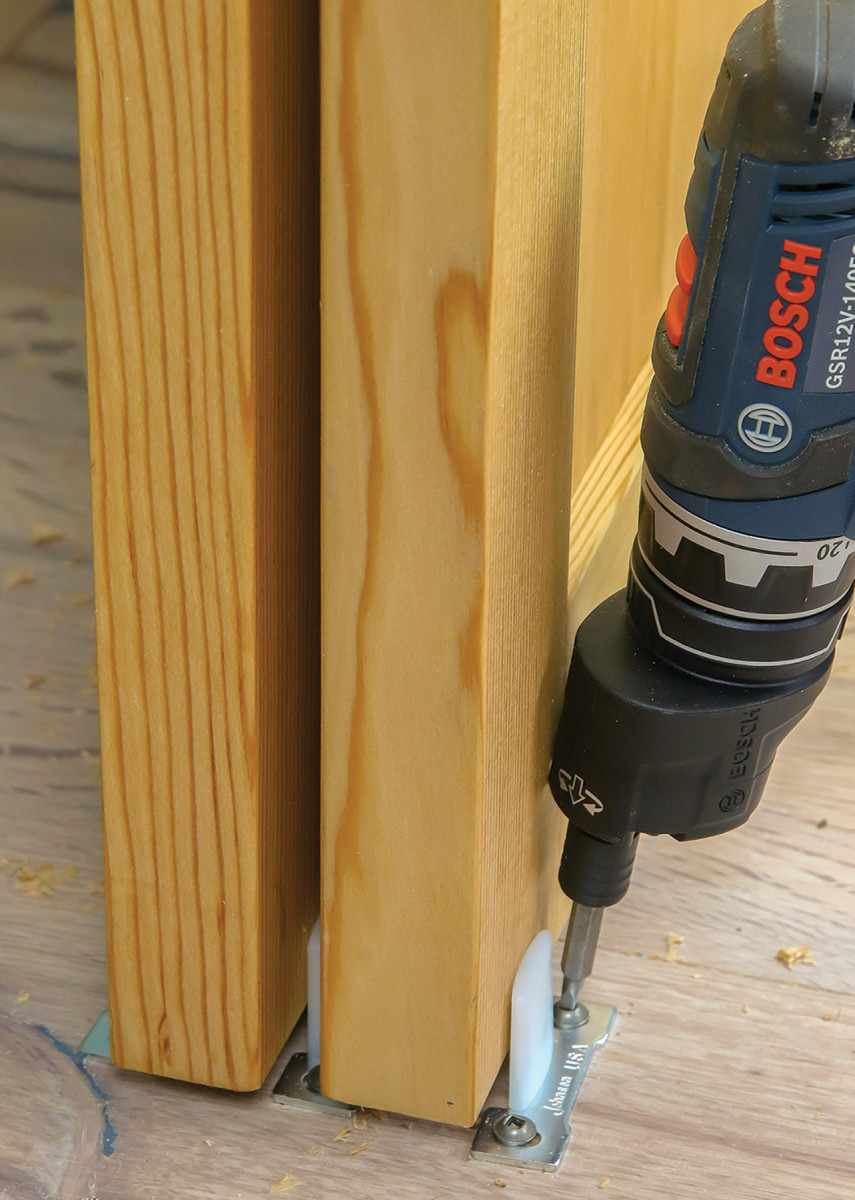
Once you see how the doors hang, install three guide tabs on the floor as shown, in the center where the doors will always overlap. Johnson Hardware sells these tabs too.
Once the doors were done, installation and adjustment was the easy part, thanks to the fantastic sliding-door hardware I used. I’m looking at the doors as I write this. They’re hanging perfectly in a neat pair, with sunlight coming through the panels.
Here are some supplies and tools we find essential in our everyday work around the shop. We may receive a commission from sales referred by our links; however, we have carefully selected these products for their usefulness and quality.


