We may receive a commission when you use our affiliate links. However, this does not impact our recommendations.
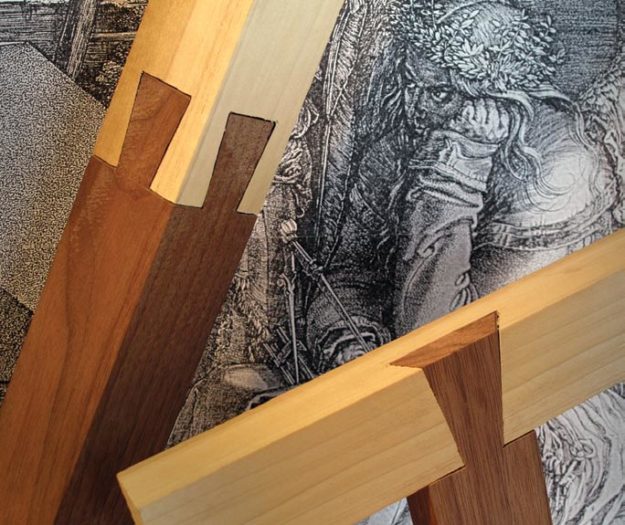 Amaze your friends with quadrilateral and rising dovetails.
By Roy Underhill
Pages: 38-39
From the November 2011 issue #193
Buy this issue now
An ordinary day in the shop, but suddenly, you’re dovetailing through another dimension, a dimension not only of sight and sound, but of mind. You’re on a journey into a woodworking land whose boundaries are that of imagination. That’s the signpost up ahead, your next stop … The “Impossitails” Zone!
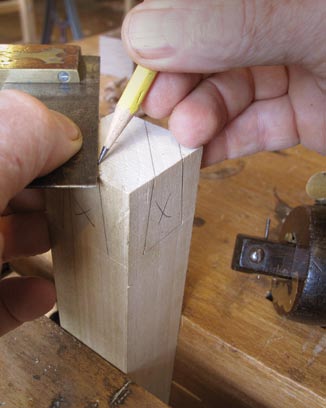
Quadratail layout. Start with two pieces of contrasting stock, truly square and equally thick all about. Mark the length of the dovetails (perhaps three-quarters of the thickness) around the ends of both pieces with a marking gauge fenced against the end grain. Lay out dovetails on each face, ensuring that they are identical by working your way around with a marking gauge, coming in from both edges to mark the wide ends of the dovetails. Then reset the gauge to mark all the narrow ends.
In the ordinary world, we accept the limitations of dovetails. They’re strong in most directions, but no matter how tight you cut them, they always have one plane of weakness – they can pull apart in the same direction that they were put together. That’s why, starting in the times of Dante and de Sade, certain deviant minds of woodworking began the quest for dovetails that interlock for eternity, configured so that the joint confronts solid wood in every direction. The dovetails they created can never come apart. Problem is, they can also never go together.
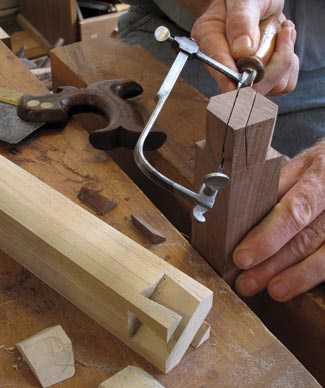
Quadratail cuts. Scribe the diagonal lines connecting adjacent dovetails across the end grain of both pieces. Mark the waste pieces accordingly and saw the cheeks of the tails and sockets. A fine saw running right down the layout lines should give you the right amount of clearance. You can easily saw the shoulders off the outside of the dovetailed piece, but the space between them and in the sockets on the other piece will need roughing in with a coping saw. Finish the end grain with your sharpest chisel.
Or so it seems. Welcome to the world of impossitails – joints that exploit our tendency to think at right angles to create the illusion of impossibility. We’ll look at two of these joints, the quadratail and the rising dovetail – unlocking their secrets with the key of imagination.
The ‘Quadratail’
… is a sliding dovetail scarf joint that connects two lengths of square stock with dovetails showing on all four faces. Now, a dovetail emerging on two opposing faces would make sense; you could just slide them together. But four? Our mind connects the dovetails through the joint at right angles to the four surfaces, forming a mental interior in the shape of a plus sign – impossible to slide together, but there it is!
The trick is that the dovetails connect obliquely through adjacent corners rather than directly across. Because the diagonal paths of the two sliding dovetails are parallel, the joint easily slides together and apart, but only at 45° to the faces.

Gauge the rising dovetail. Superimpose the two pieces just as they would intersect if pushed squarely together into a T. Lay out the width of each piece on the other and bring the lines all around. Starting on the piece that you will tenon, gauge down half of the thickness on the end grain. Mark that end, then, with the same setting, mark along the far side of the piece to be mortised.
Creating the illusion calls for precise saw and chisel work, but it’s easy enough. Simply draw equal dovetails on all four faces then saw and chisel them out on the diagonal. One becomes the positive and the other negative space – one the dovetail and one the socket.
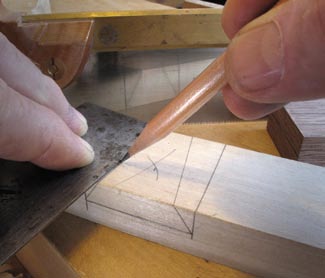
Convergent lines. Set your bevel gauge to a bold angle and draw two sets of convergent lines on the edges of the piece to be mortised – two lines beginning at the ends of the “half-of-the-thickness” line and two lines on the opposite edge beginning at the bottom. Connect the ends of these lines across the face (above) and you’ve defined the mortise. (You can see the layout of the backside of the mortise reflected in the face of the dovetail saw.)
The Rising Dovetail
… is even more irritating, and far easier to cut than to explain. Here, you create the dovetail illusion by exposing an oblique slice of a triangular prism. It’s called the rising dovetail because the tenon slides upward in the mortise to fill the exposed dovetail-shaped space.
This is the trick behind the notorious puzzle mallets from the turn of the last century (and an article you can read in the April 2012 issue of Popular Woodworking Magazine). This is not a particularly strong joint when used in equally-sized stock. The only place I have seen the rising dovetail used in furniture is in the teacher’s lectern in a little schoolhouse at a Colonial Virginia plantation.
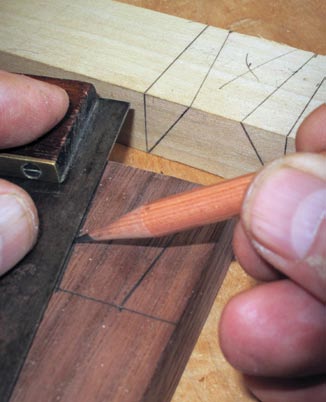
Transfer marks. Set this piece edgewise on the face of the tenon and transfer the dimensions. Connect the dots and you have defined the dovetail tenon.
The T-shaped foot of the lectern that faces the students was joined with a rising dovetail, posing a perpetual question and the lesson that things are not always as we suppose them to be!
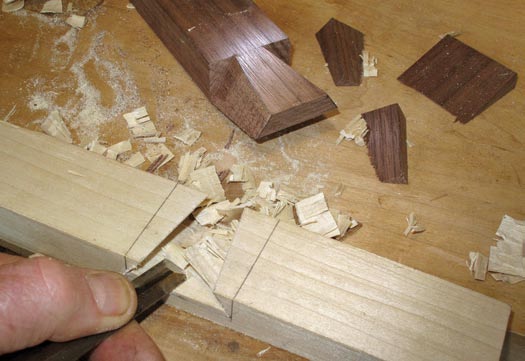
Cheeks and shoulders. Saw the cheeks and shoulders of the dovetail tenon. Cut the mortise by making three saw cuts, two down the sides and one down the middle then chisel out the waste. Trim as necessary and slide them together.
Some of the old books advise you to glue these impossitails together “so that the secret may not be discovered.” I’d leave them loose so that others can enjoy the mystery. It just depends upon how irksome you want to be. PWM
Roy is the host of “The Woodwright’s Shop,” the longest-running woodworking show on television (now in its 31st season on PBS).
VIDEO: Watch episodes from Roy’s “The Woodwright’s Shop” online.
WEB SITE: Take a class from Roy.
TO BUY: “The Woodwright’s Shop: A Practical Guide to Traditional Woodcraft.”
IN OUR STORE: “The Woodwright’s Guide: Working Wood with Wedge and Edge.”
From the November 2011 issue #193
Buy this issue now
Here are some supplies and tools we find essential in our everyday work around the shop. We may receive a commission from sales referred by our links; however, we have carefully selected these products for their usefulness and quality.


