We may receive a commission when you use our affiliate links. However, this does not impact our recommendations.
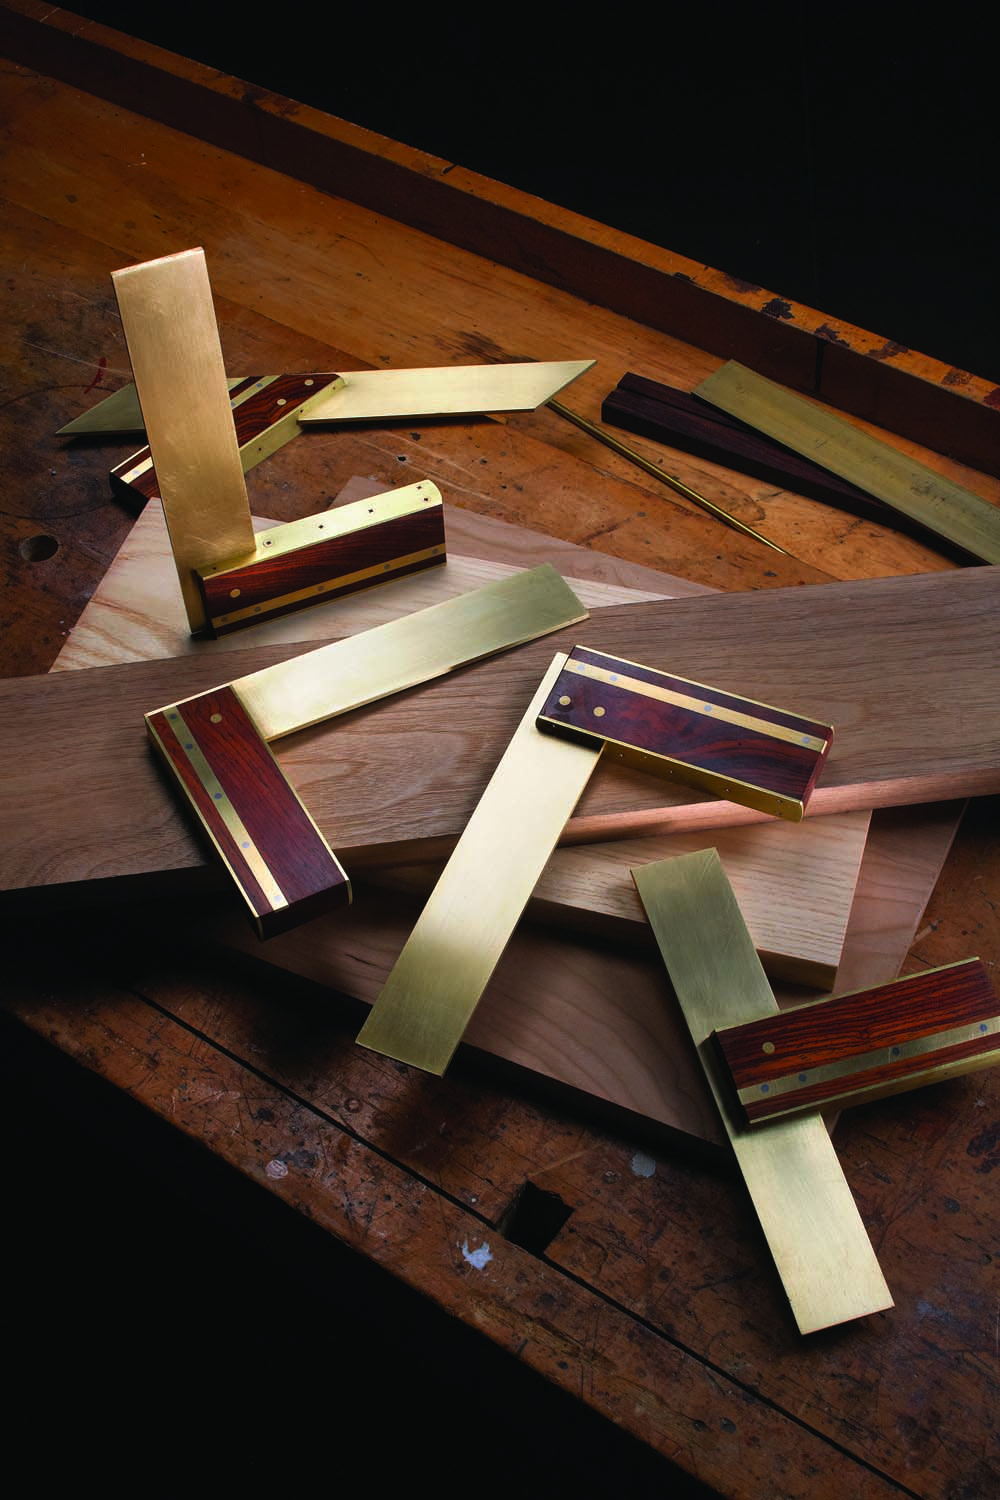
Student work. These beautiful try squares were made by John Economaki’s tool-making class at the Marc Adams School of Woodworking.
From 1977-1983 I made my living as a studio furniture designer and maker. In addition to making furniture, I found most of the hand tools available at the time so uninspiring and inconsistent with the craftsmanship values I was trying to impart in my furniture, that I made my own.
The roots of my personal “homemade” try square, however, go back to the fall of 1973 and my first days as a rookie woodshop teacher. Amongst the supplies ordered by my predecessor were a dozen Stanley try squares. Several of them were so visibly off I remember asking myself, “What do you call a square that is not square?” The answer I like best today: paint can opener.
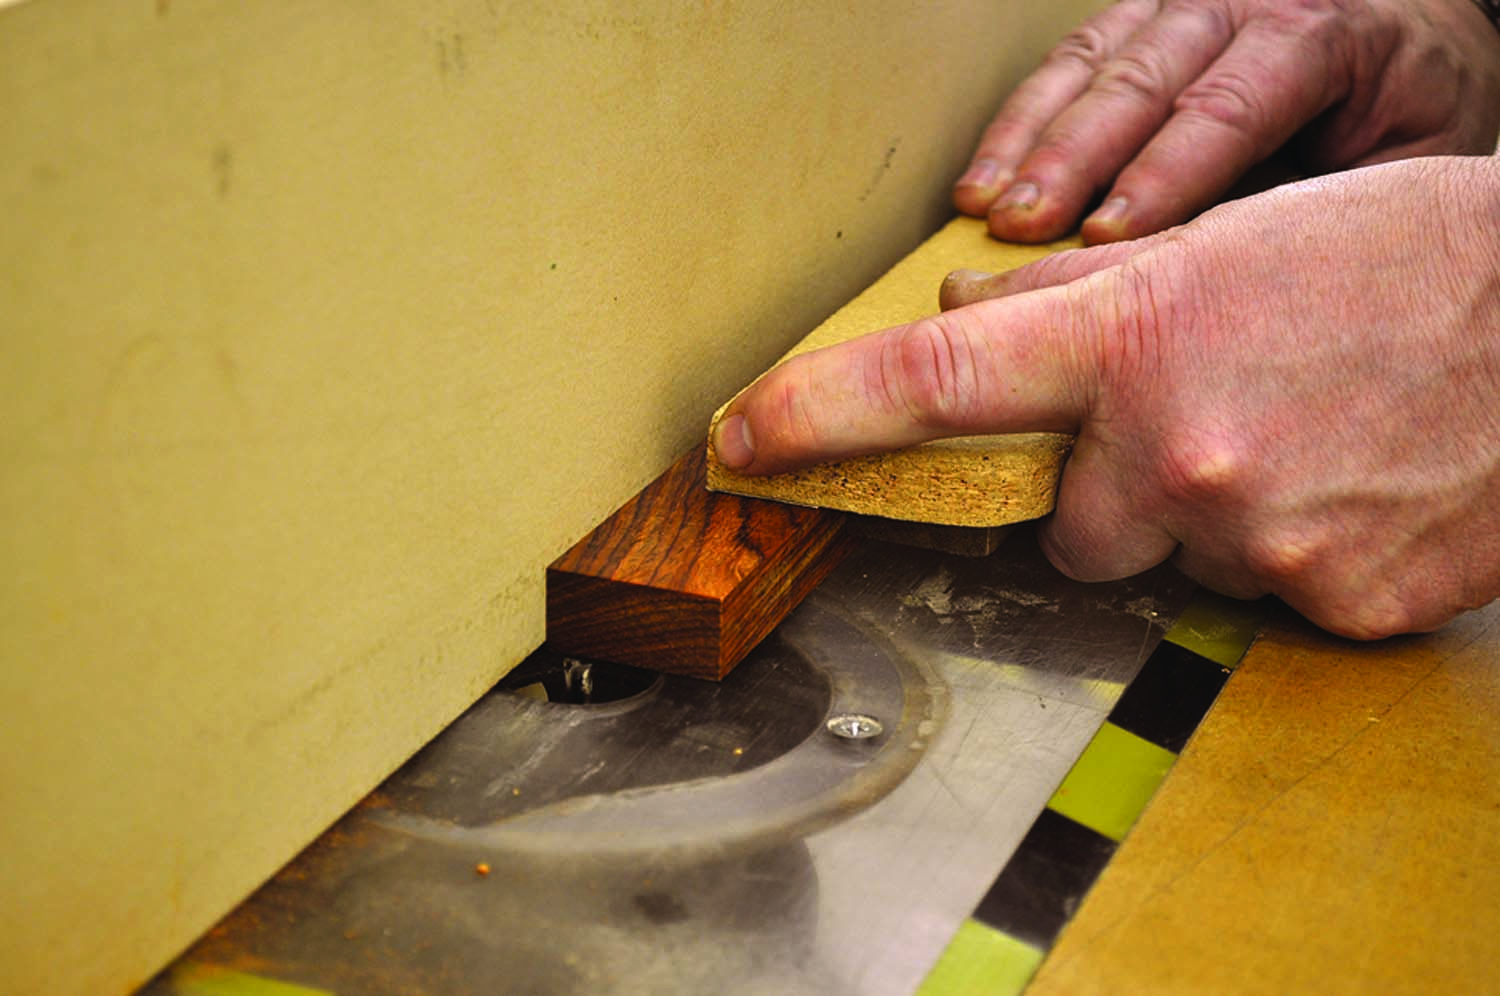
1. Rout the groove. After the handle stock is prepped to 1.5″ wide x .625″ thick, rout the .0625″-deep rivet seat grooves on the router table using a 1⁄4″ straight bit. (Toolmakers always work in decimal inches.)
Consequently, the first project for my 9th-grade students was pragmatic – they were to make their own try squares. The design was centered on available materials – a local veneer mill had donated all its solid Brazilian rosewood shorts to the school, and the adjacent metal shop had brass strips sitting around. So those became the materials for the square. The design was quickly revealed as flawed; too many students were splitting the handles while seating the rivets. My original design was modified to add a brass rivet seat, and that did the trick. Little did I know that 10 years later, in 1983, that exact square would launch a new company named Bridge City Tool Works.
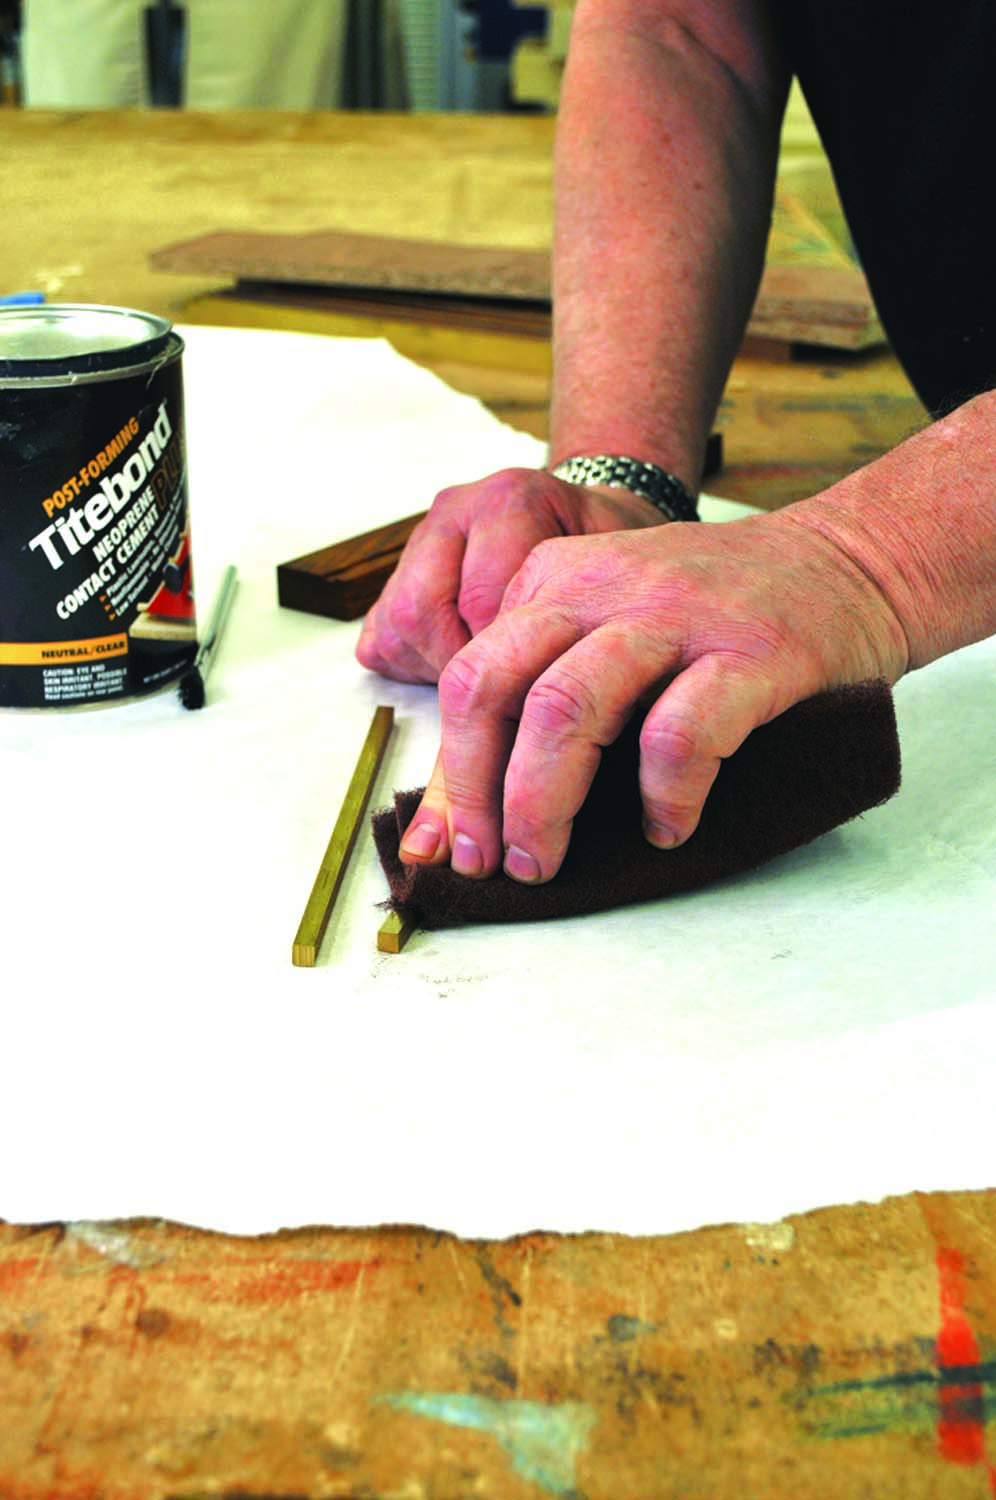
2. Clean before glue. Using a maroon Scotch-Brite pad, clean all brass surfaces of tarnish – the material should be shiny prior to applying adhesive.
Later in the fall, a vice principal asked me if we had any projects to represent the Industrial Arts program for Back-to-School-Night. I asked for a student volunteer and about 20 students enthusiastically responded with polished try squares. We arranged them in an arc on a glass shelf in the display case in the main hall. Beside each square was the maker’s name.
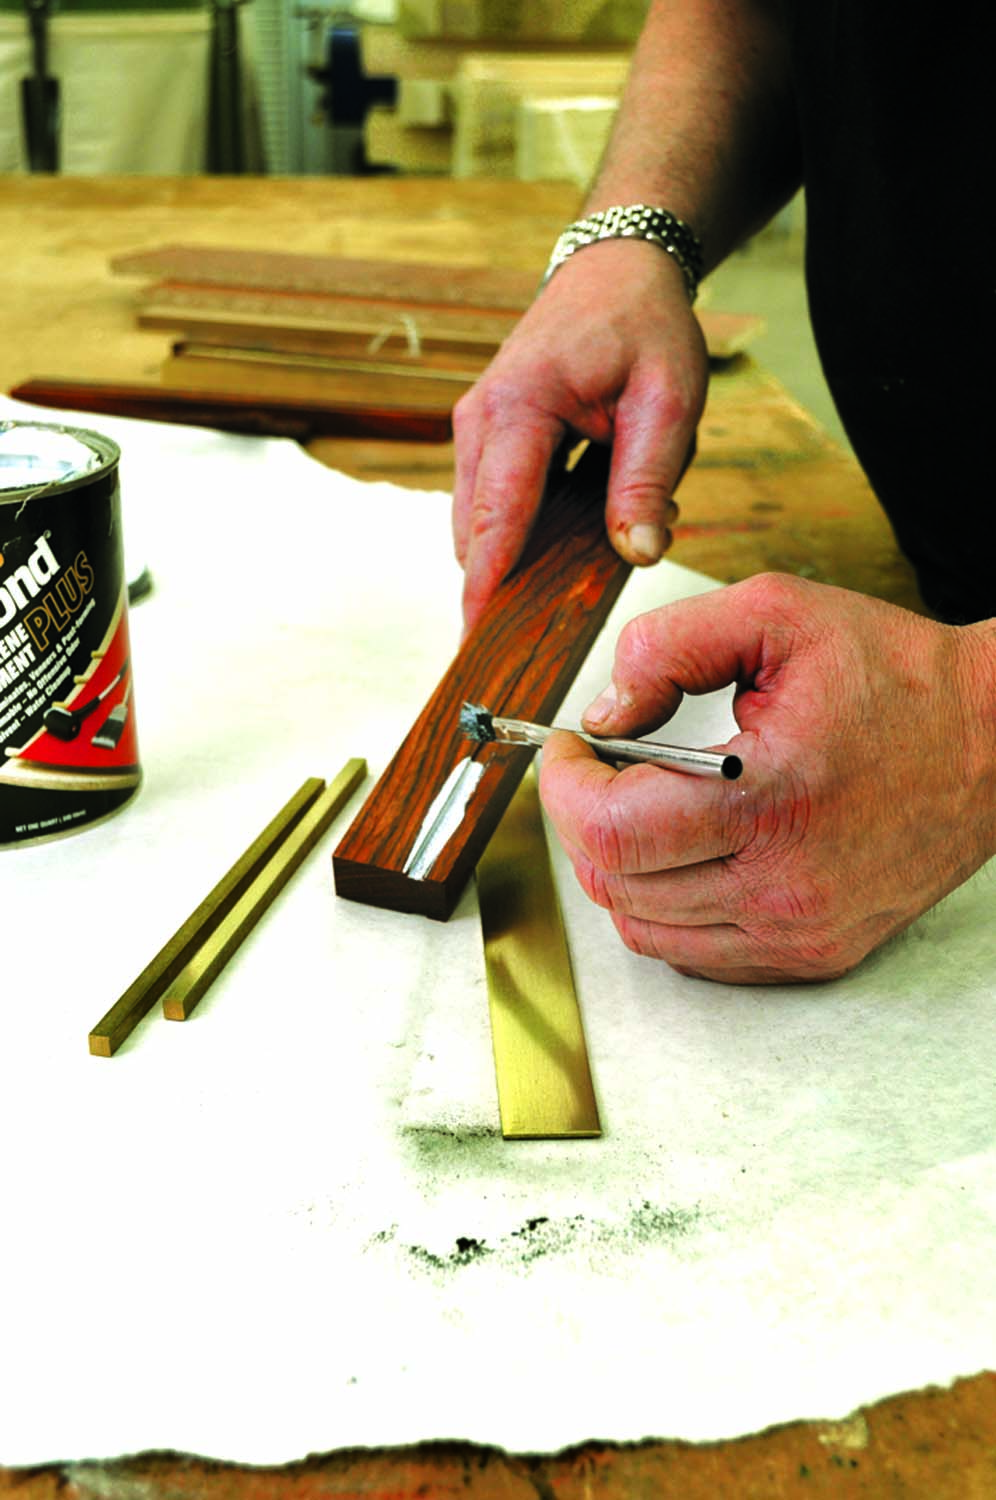
3. Glue in the brass. Rosewoods need to be wiped with acetone to remove the surface oils. Contact cement is a good first-choice adhesive if the components need to be separated. In addition to the rivet seat, adhere one brass wear strip (.0625″ x 1″) to the face farthest from the rivet seat grooves.
That little display completely gobsmacked the parents, students, most of the faculty and the administrators. Nobody could believe such quality and beauty could be accomplished in a “shop class.” It was an awesome experience for the kids and enrollment in the program took off overnight. Quality work became the theme of all subsequent projects.
Teacher, Maker, Toolmaker
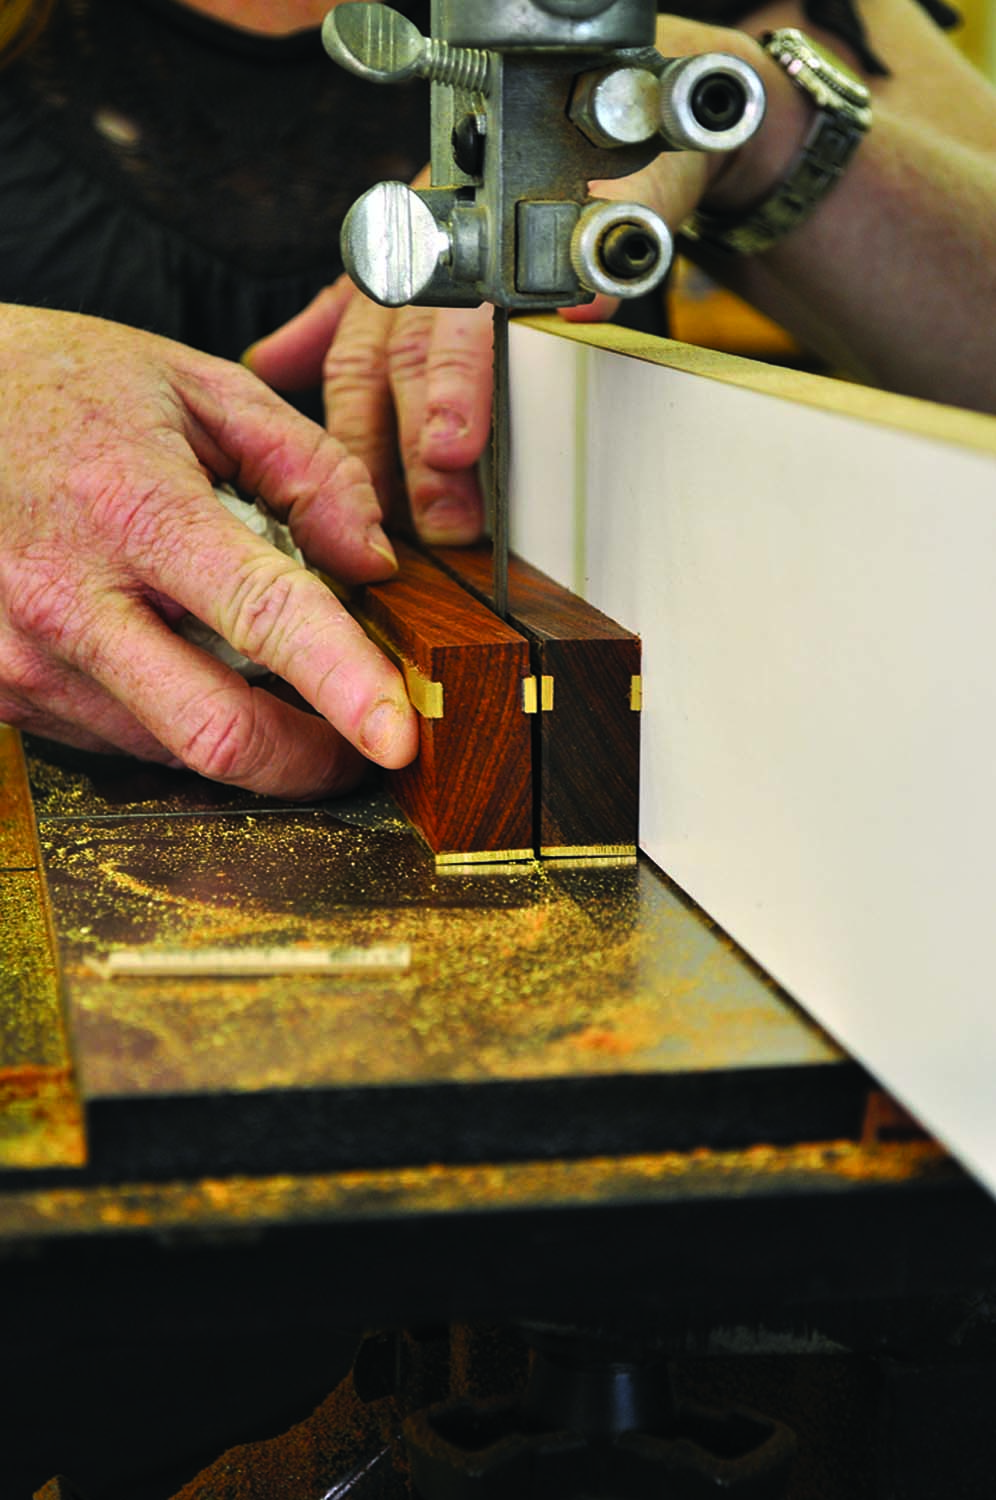
4. Two at a time. Note the orientation of the brass wear face and the rivet seats in this image. It is difficult to find 1⁄16″ x 1⁄4″ 360 brass, but 1⁄4″ x 1⁄4″ is readily available. This can be beneficial when making more than one handle at a time. Multiple handles can share a length of 1⁄4″ x 1⁄4″ brass and be separated on a band saw with a metal-cutting blade. After sawing, both faces of the handle need to be flush sanded on either a horizontal or vertical belt sander – #120 grit is ideal. Never allow the brass to get too hot to the touch. Handles can also be flattened by drawfiling with a mill file. The square’s second wear face will be attached after the handle is slotted.
I quit my teaching job in 1978 and became a full-time furniture designer and maker. In the late 1970s I had a “lunch hunch” that a couple of the tools I had designed and made would be of interest to others – visitors to my shop almost always commented on them. So, in the summer months when my shop was unbearably hot, I would do small runs of my try square and a scratch awl, and place them on consignment at the Contemporary Crafts Gallery in Portland, Ore. It was nice to get a check in the mail every now and then.
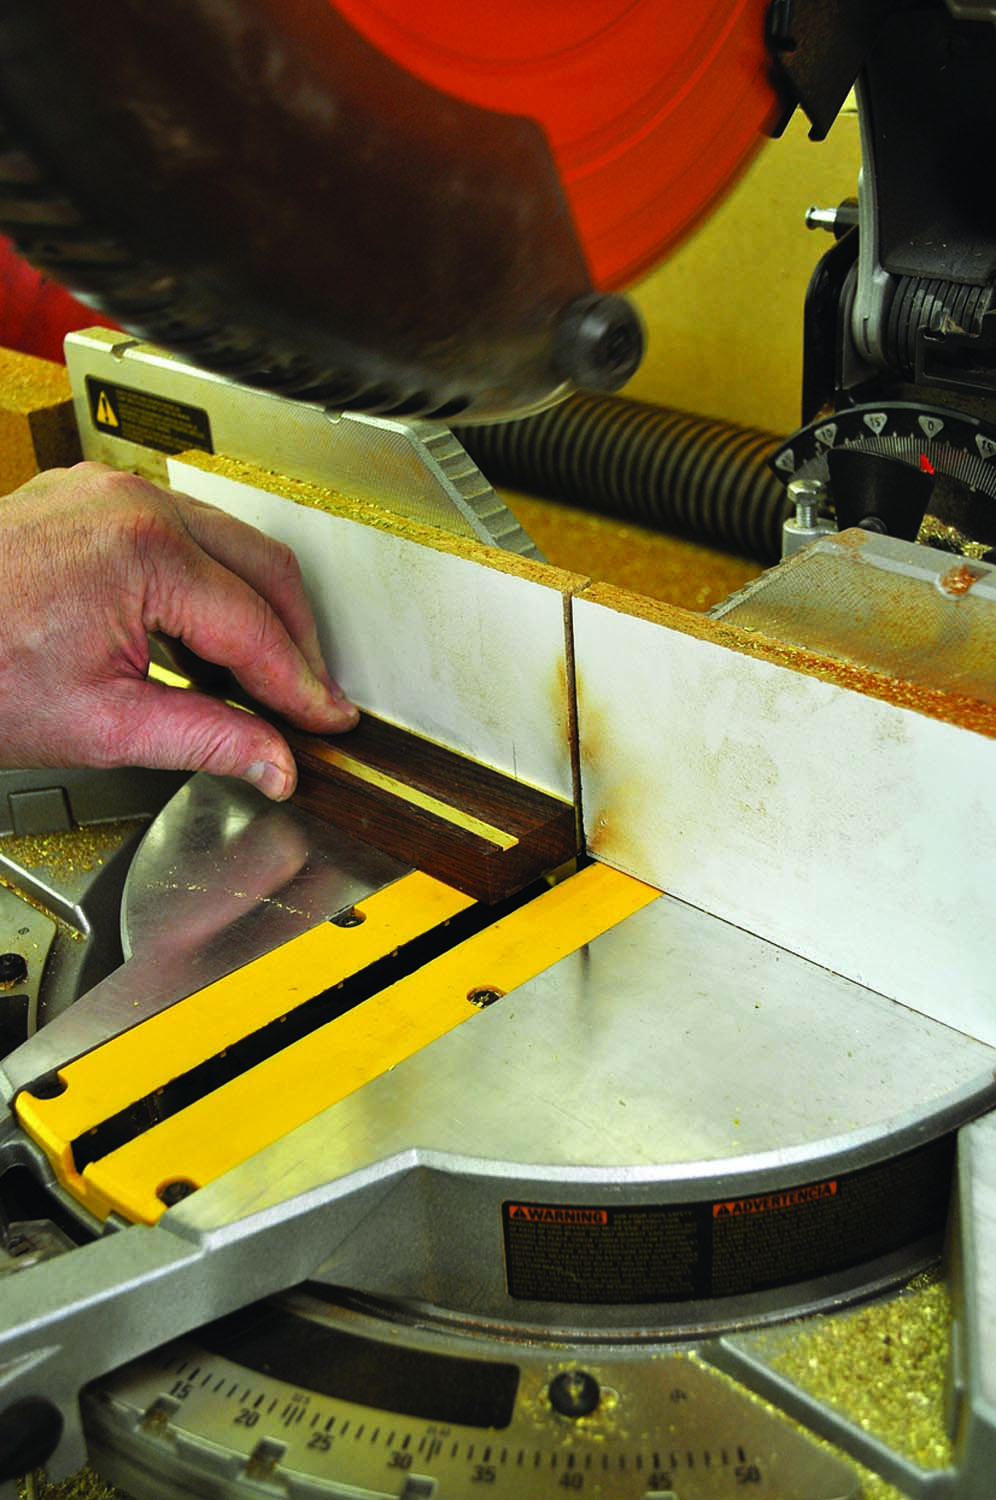
5. Trim the handle. Use a non-ferrous blade to trim the ends square to a final length of 4.75.”
Unfortunately, I took better care of my tools than I did of my body. I rarely wore a dust mask, and in early 1983 I woke up with double pneumonia and was informed that it was caused by a hyper-allergic reaction to wood dust. My days as a furniture maker were over – as in overnight.
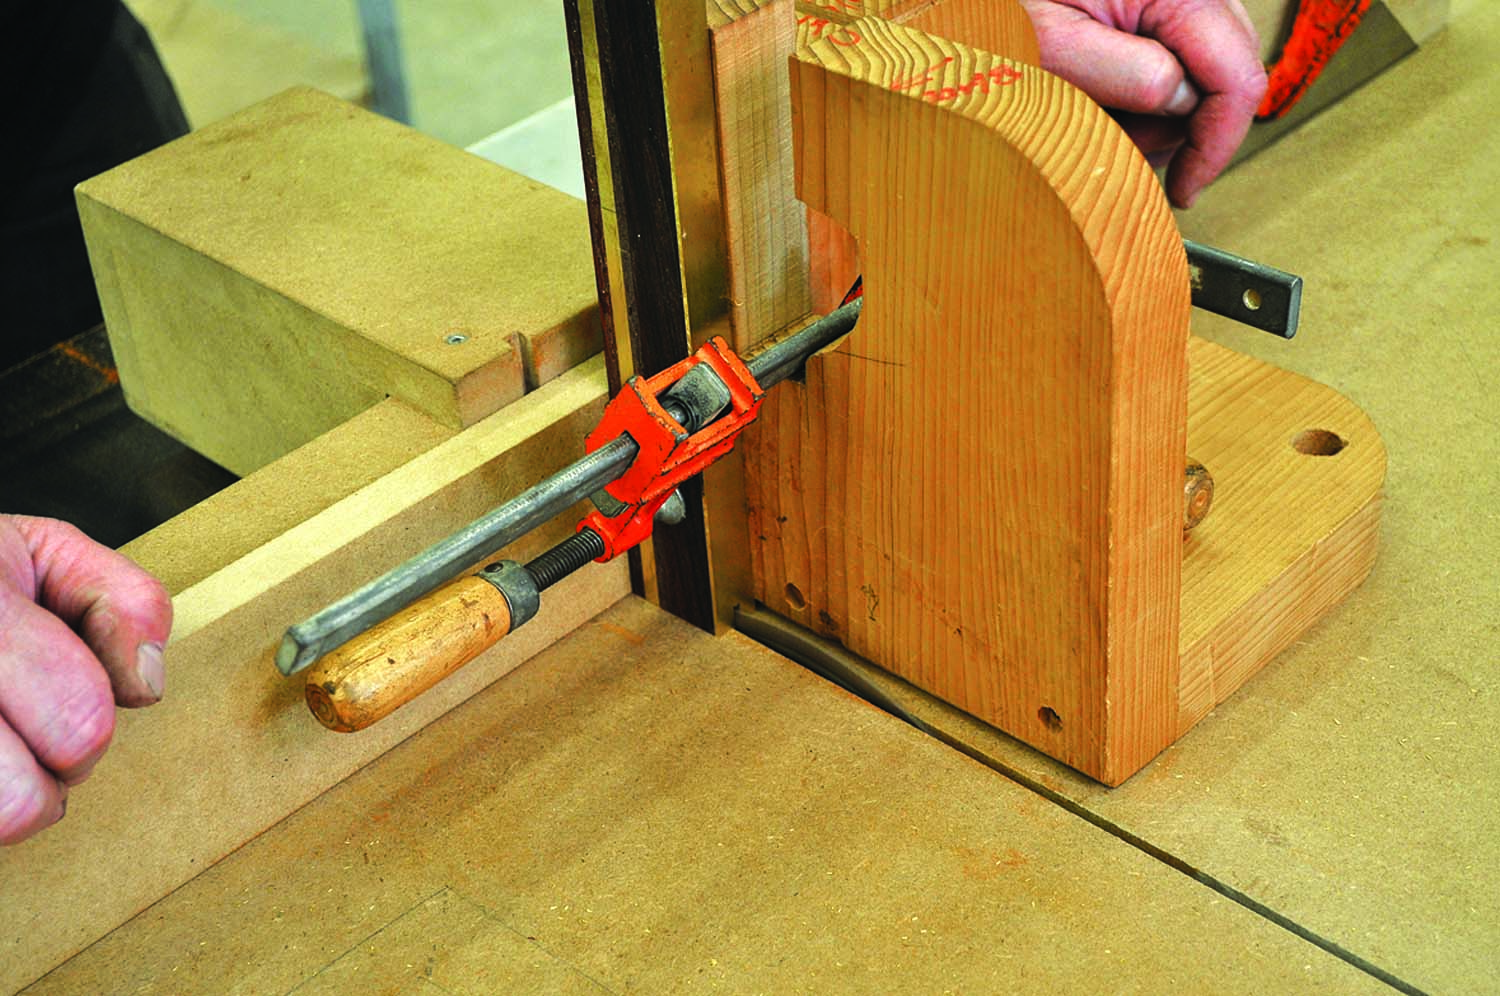
6. Slot the handle. Using a table saw sled with a tenon attachment, slot the handle. The kerf of the sawblade must be thinner than your square blade. Avoid overcutting or undercutting the slot. If the blade fits loose, your square won’t last. If it’s too tight, you won’t be able to seat the blade.
I thought high-quality tools might be of interest to woodworkers but all of the major mail-order companies at the time were adamant that Americans would not pay for quality. Consequently, the TS-2 Master Try Square and the SA-2 Scratch Awl were introduced to the woodworking community in the November/December 1983 issue of Fine Woodworking. I had spent every penny in the bank on that ad to find out that the mail-order companies were only partly correct.
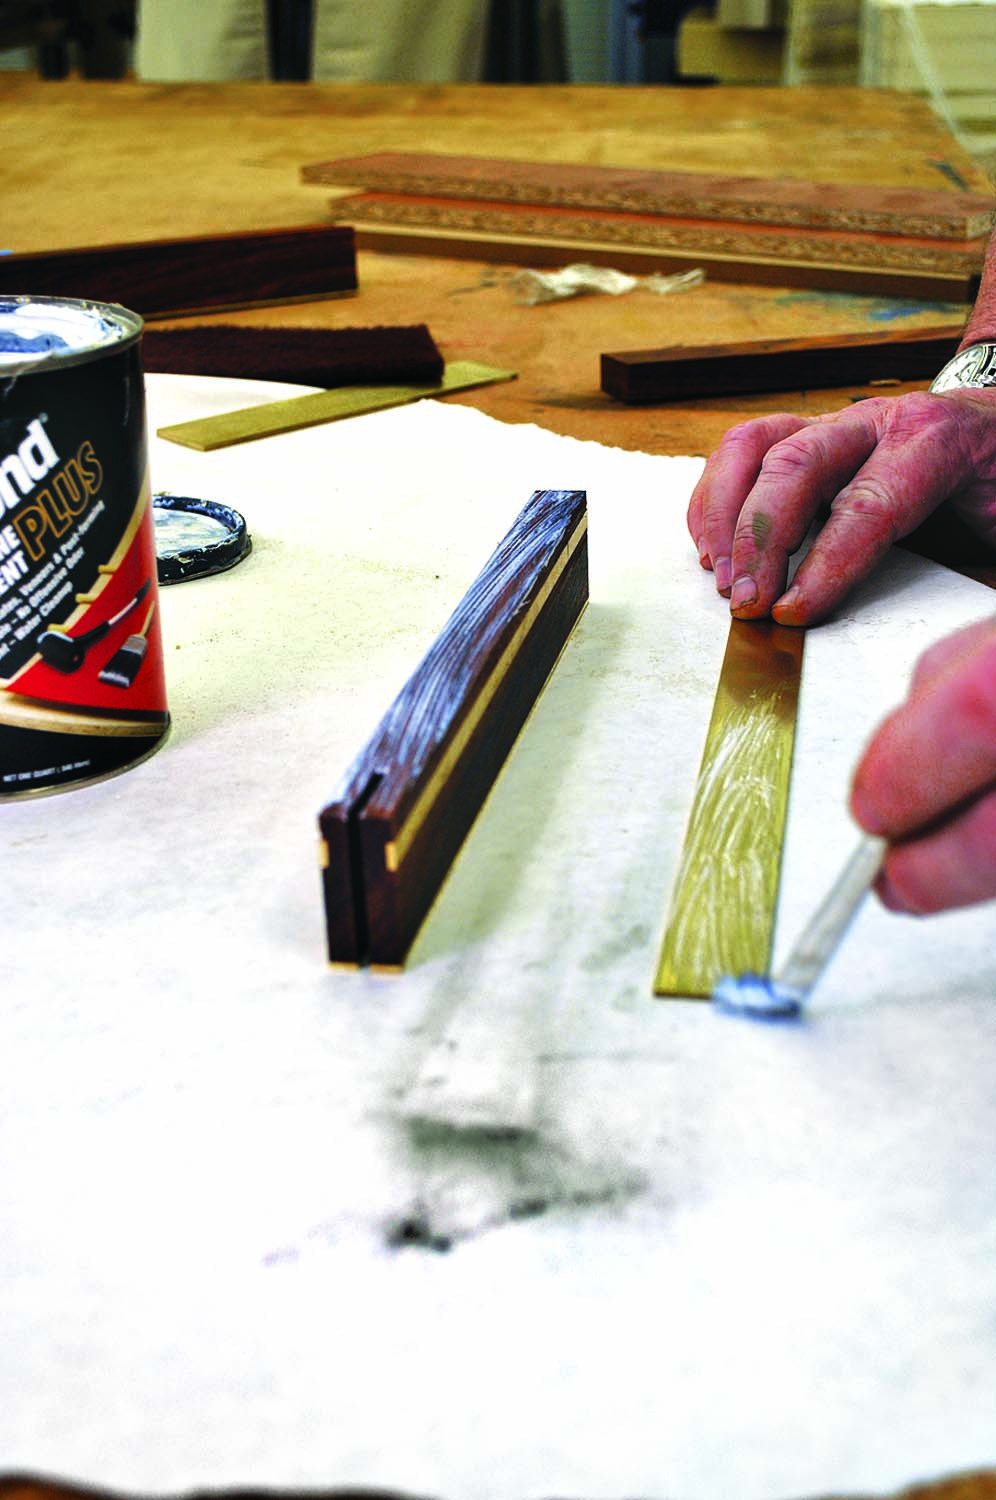
7. The other wear face. After slotting, attach the other .0625″ brass wear plate. Remove the overhanging brass with the band saw and flush sand both faces. When the glue is dry, the large faces of the brass blade are grained by “going through the grits” (#80 through #400 followed by a maroon Scotch-Brite pad), using a wooden sanding block – graining is along the length.
There is an elegance and soul to the TS-2 try square, and I am thrilled to be able to share how to make it with you. During the past four decades we have produced tens of thousands of TS-2 try squares and it is my hope you can find the time and inspiration to create a version for your shop. I believe it is one of the most rewarding weekend projects you will ever make and with a little care, will become an heirloom that will inspire future woodworkers in your family for multiple generations.
Design Philosophy
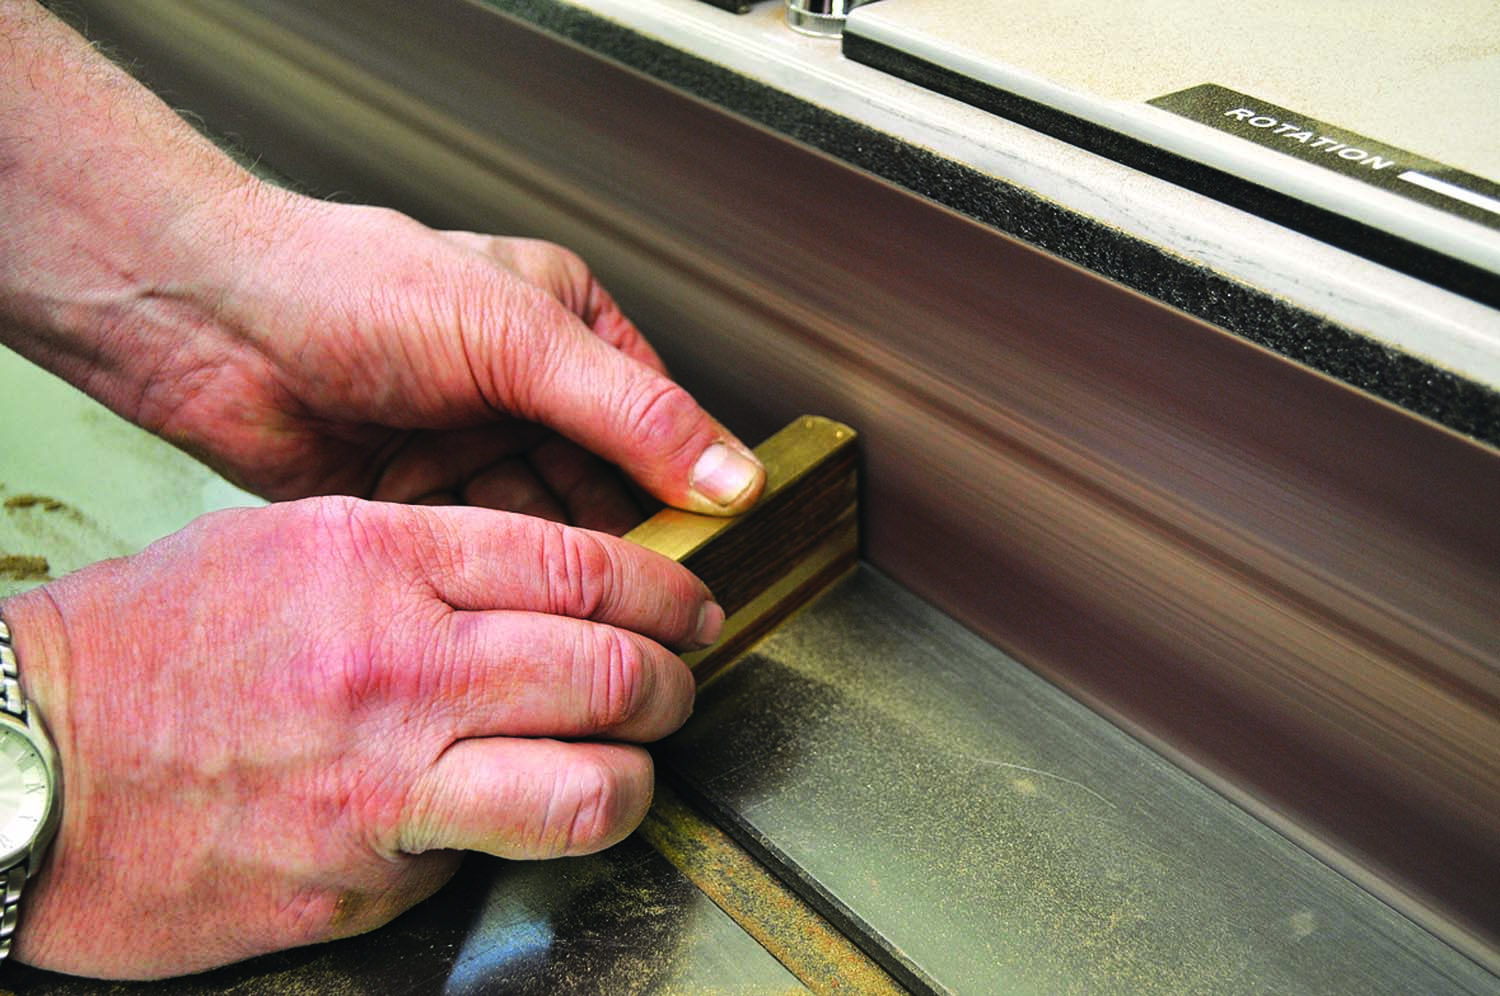
8. Drill. Screw. Sand. Lay out the screw holes using the exploded image on page 29 as your pattern. Carefully drill the shank holes to the proper depth (not too deep!), drill the pilot holes, and carefully countersink (single-flute countersinks do not chatter) each hole so the screw heads seat proud; they will be dressed flush on a stationary belt sander. Use the bottom of an aerosol can to lay out a crown on both ends. Sand to the crown line using a belt sander, or by hand with a file. Once it’s shaped, go through the grits and polish the ends but make sure to keep the hard line between the faces and ends crisp.
A try square is a simple tool that is candidly two “straight edges” affixed at 90° to each other. And when both components are parallel, both the inside surfaces of the square and the outside edges can be used as references. In addition, the inside square and the outside square are perfectly offset from each other, which means you can use the inside of the handle as a reference and scribe a line using either the inside or outside of the blade. Few woodworkers understand that a traditional wooden-handled try square (where just the inside face of the handle is brass) is an inside square only. You use the outside square at your own risk.
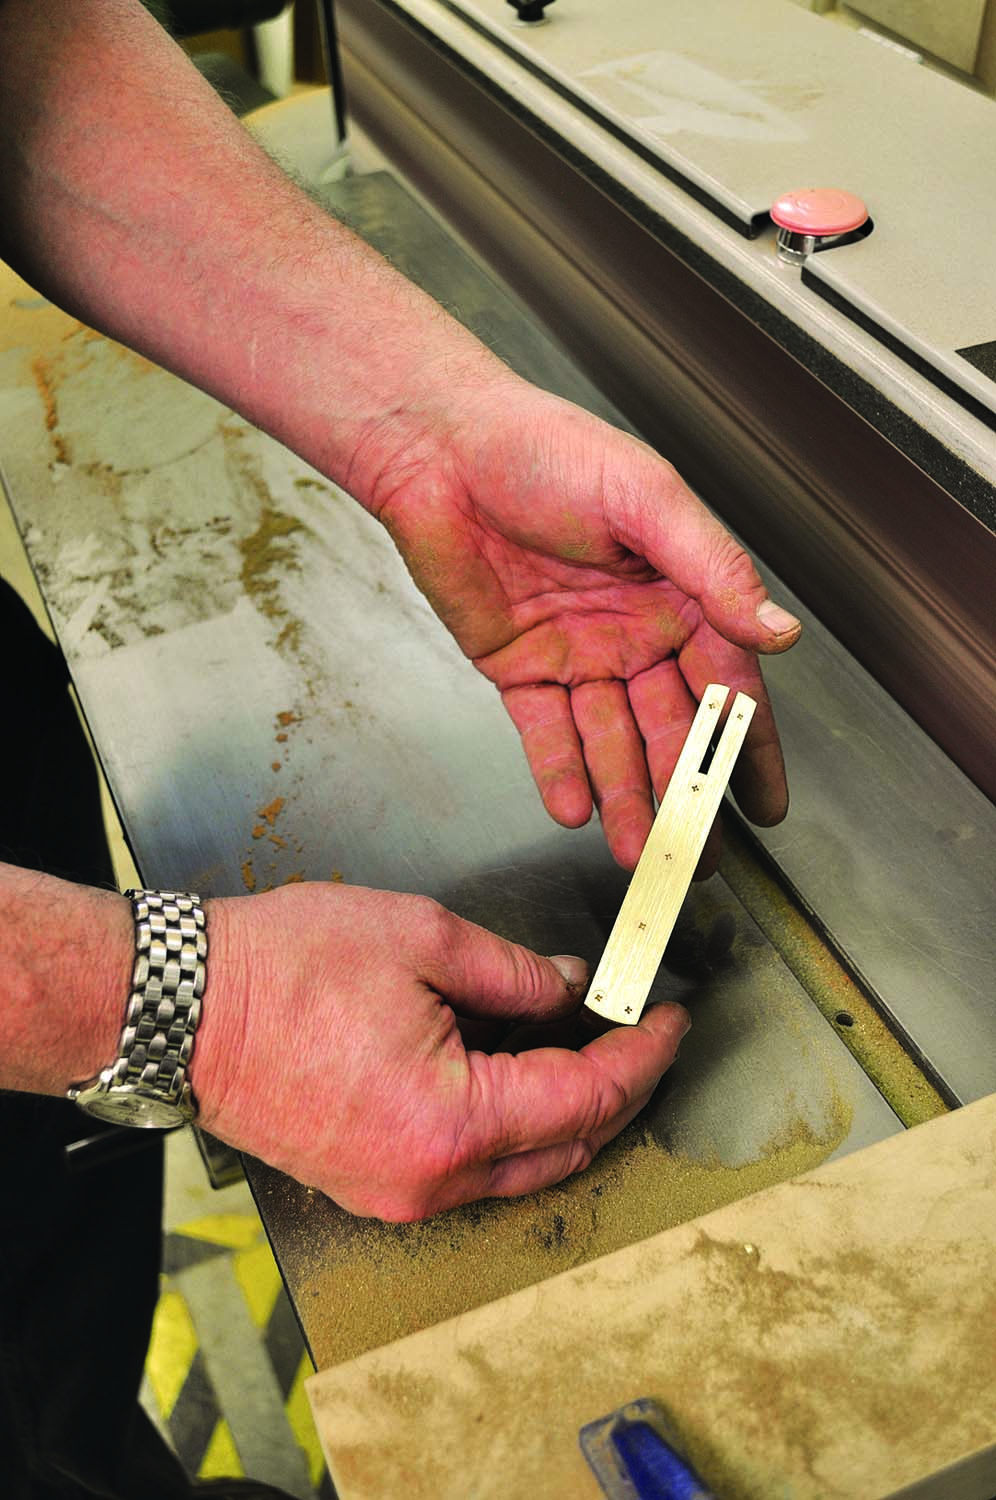
9. Parallel & identical. After flush sanding, both faces should look like this. Now, the square edges need to be paralleled by hand on a flat surface. Using a caliper, measure across the brass wear plates and both ends should have identical measurements. Once the edges are parallel, ensure the faces are flat.
Over the years I have been involved in many discussions about what makes a “great tool.” On one hand you have proponents who lament that any effort (read cost) that does not contribute to the obvious function is waste at best, and arrogance at worst.
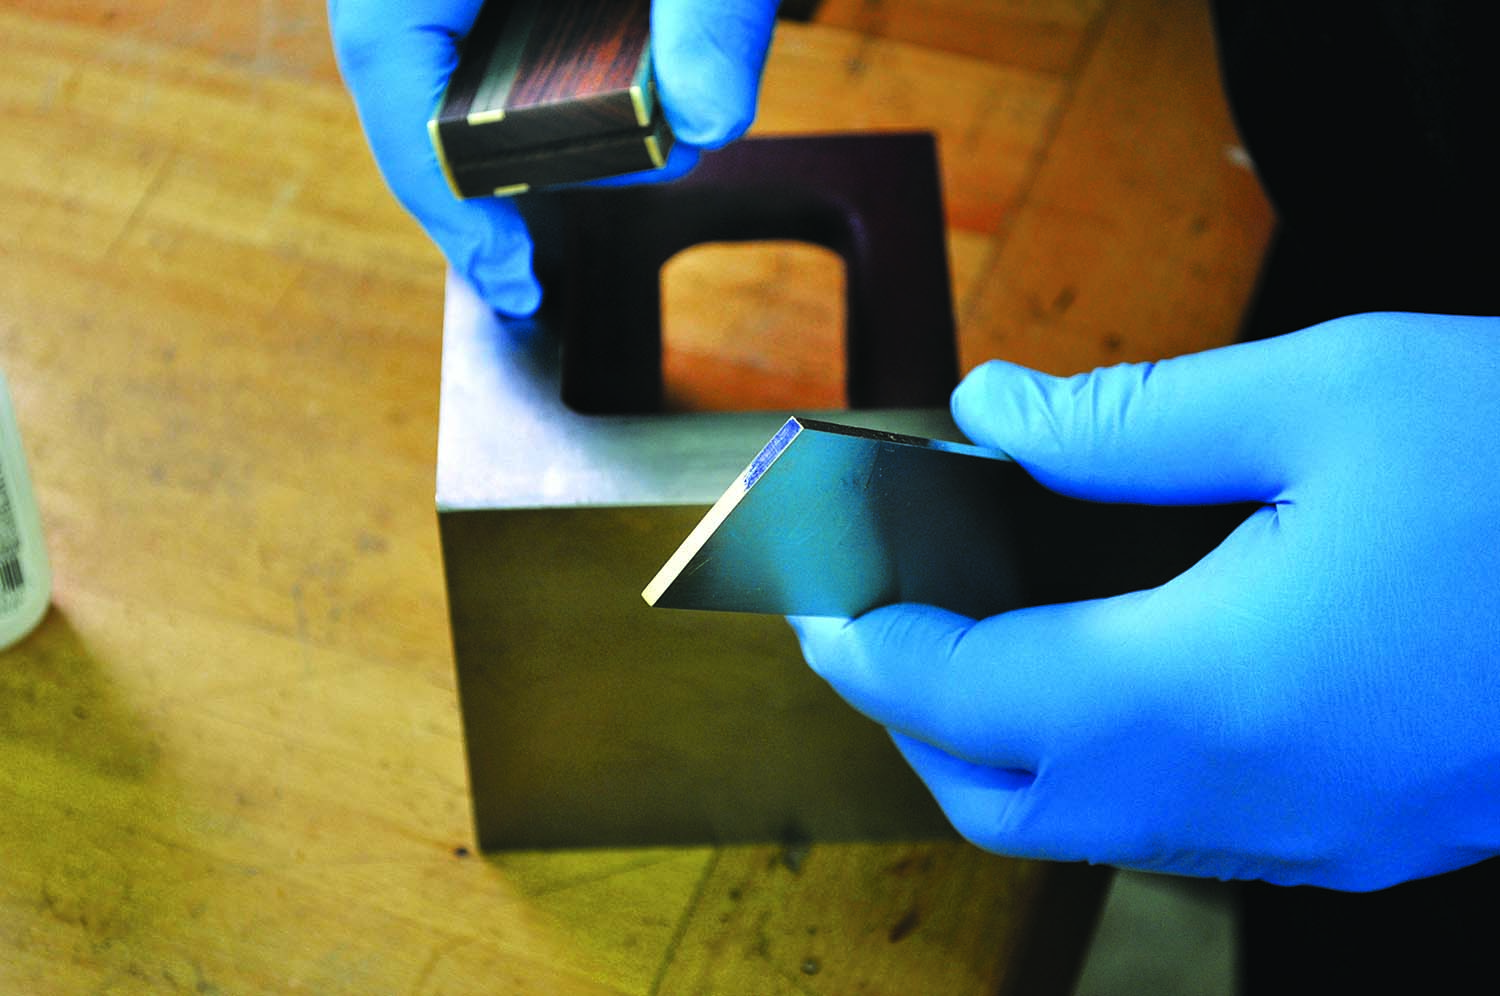
10. Dress the blade. Remove the factory tarnish and scale by sanding through all grits (from #80 to #400 – don’t skip any – then a maroon Scotch-Brite pad). Beginning .375″ from the blade’s top edge, file a bevel to the opposite edge ultimately removing .0625″ from the blade’s bottom. This taper is a glue pocket that prevents adhesive from squirting out of the square slot during assembly.
Consider this: Most of the tools in your workshop sit and do nothing most of the time. I believe there is another function for these “do nothing” tools (besides the obvious) that is equally important. That function is to inspire. While they are sitting and doing nothing, tools can inspire you to give your best effort 100 percent of the time. This is accomplished by their beauty, craftsmanship and soul – making it difficult for you to justify quick or shabby work.
In short, quality is contagious.
Materials
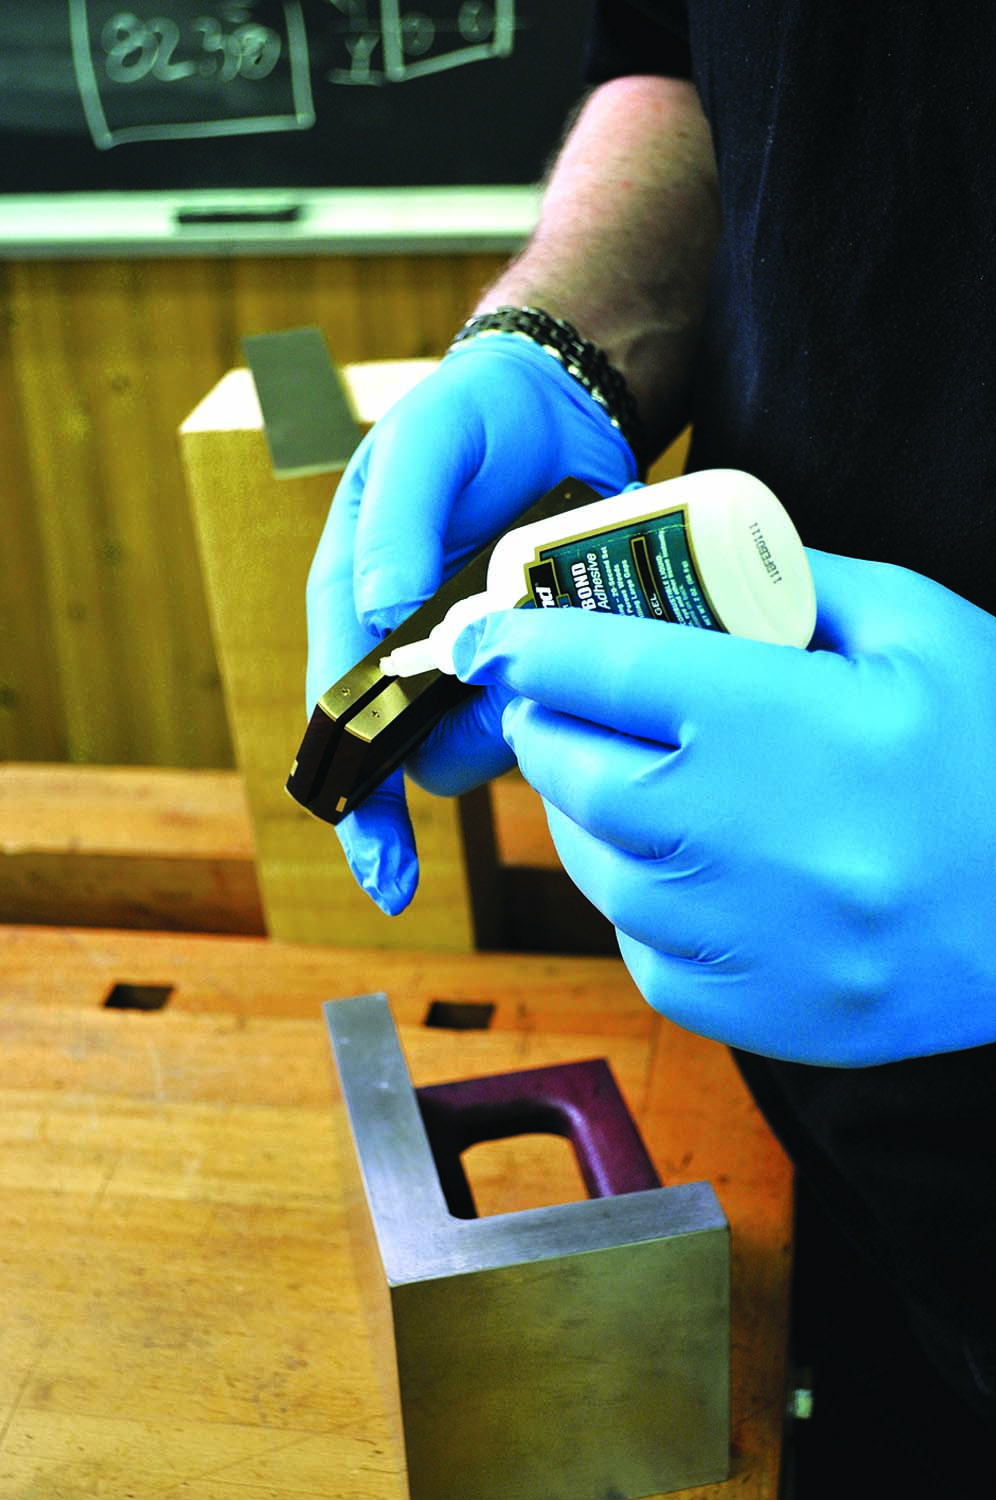
11. Just a dab. All it takes is two small drops of slow-setting (30 seconds) cyanoacrylate per slot face. Wipe off excess with a rag. Rubber gloves are a must, unless you enjoy having a partially assembled try square stuck to your hand.
The TS-2 looks and works best when made with a dark, stable (dry) wood. Most of the dark rosewoods look great with brass because the subtle reds in the wood and brass work together to create a rich, visual harmony. Whatever wood you select, imagine it photographed in black and white alongside brass. If the tonal ranges are close, the contrast will not be significant enough to create visual interest.
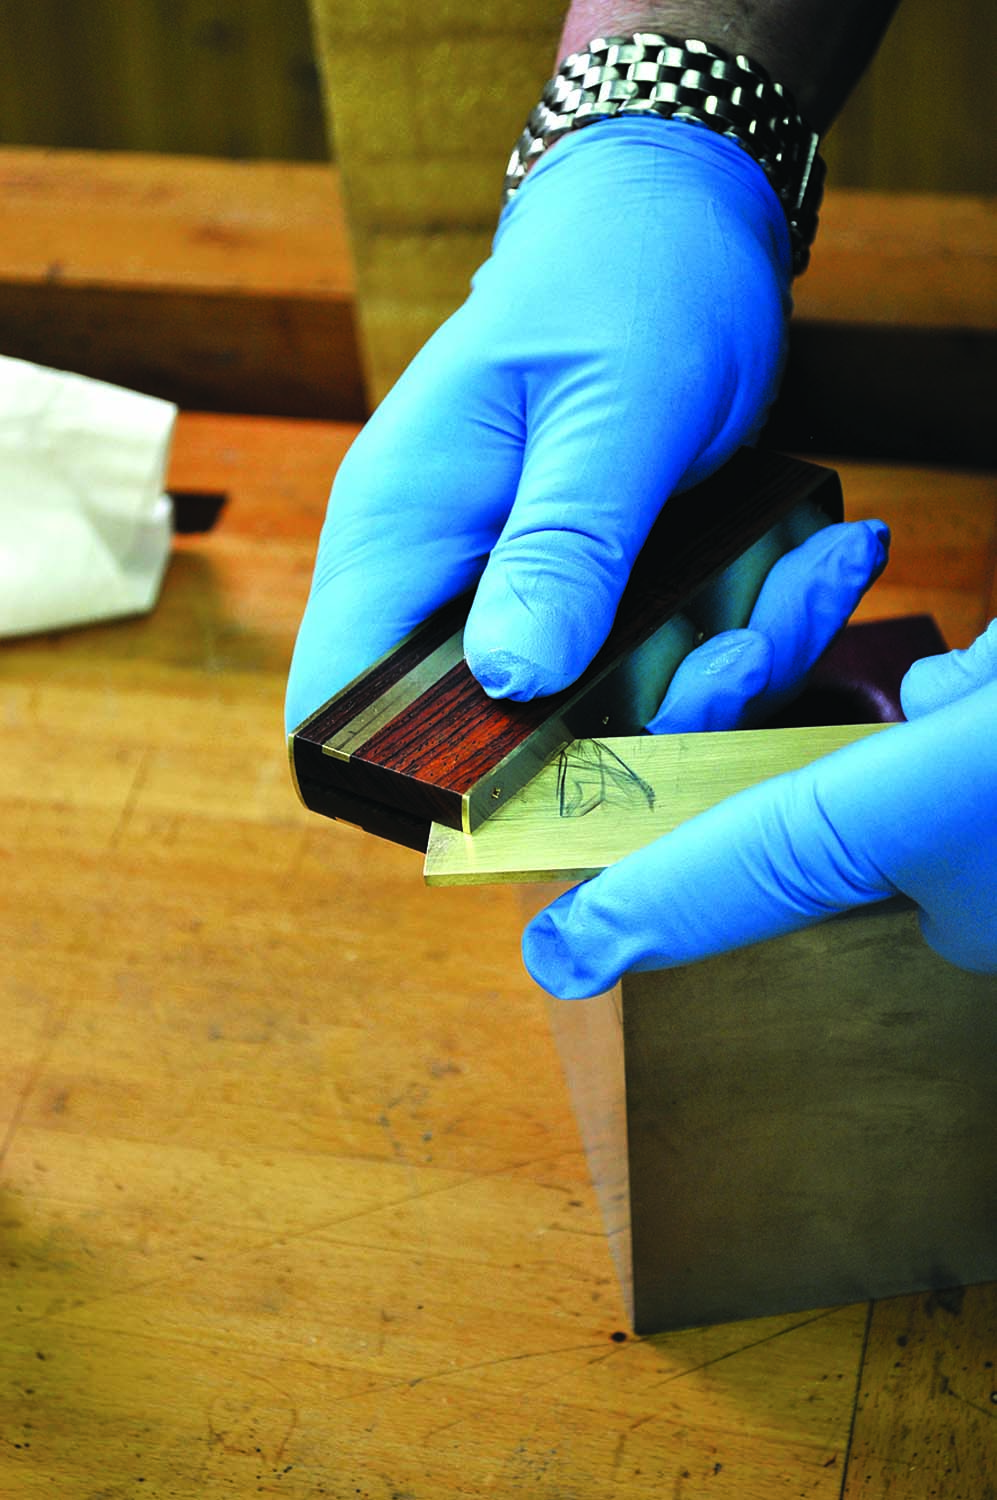
12. And slide them together. Carefully insert the blade working the adhesive down and back.
The caveat to using exotics is that it is rare to find them dried – the volume produced is so low that nobody has a reliable kiln schedule. Over the years we had all of our rosewoods dried in vacuum kilns to a moisture content of less than 8 percent. Ebonized woods would be a great alternative to exotics. If you are going to make this tool, the most important step you can take is to make sure your material is in the range of 6- to 8-percent moisture content.
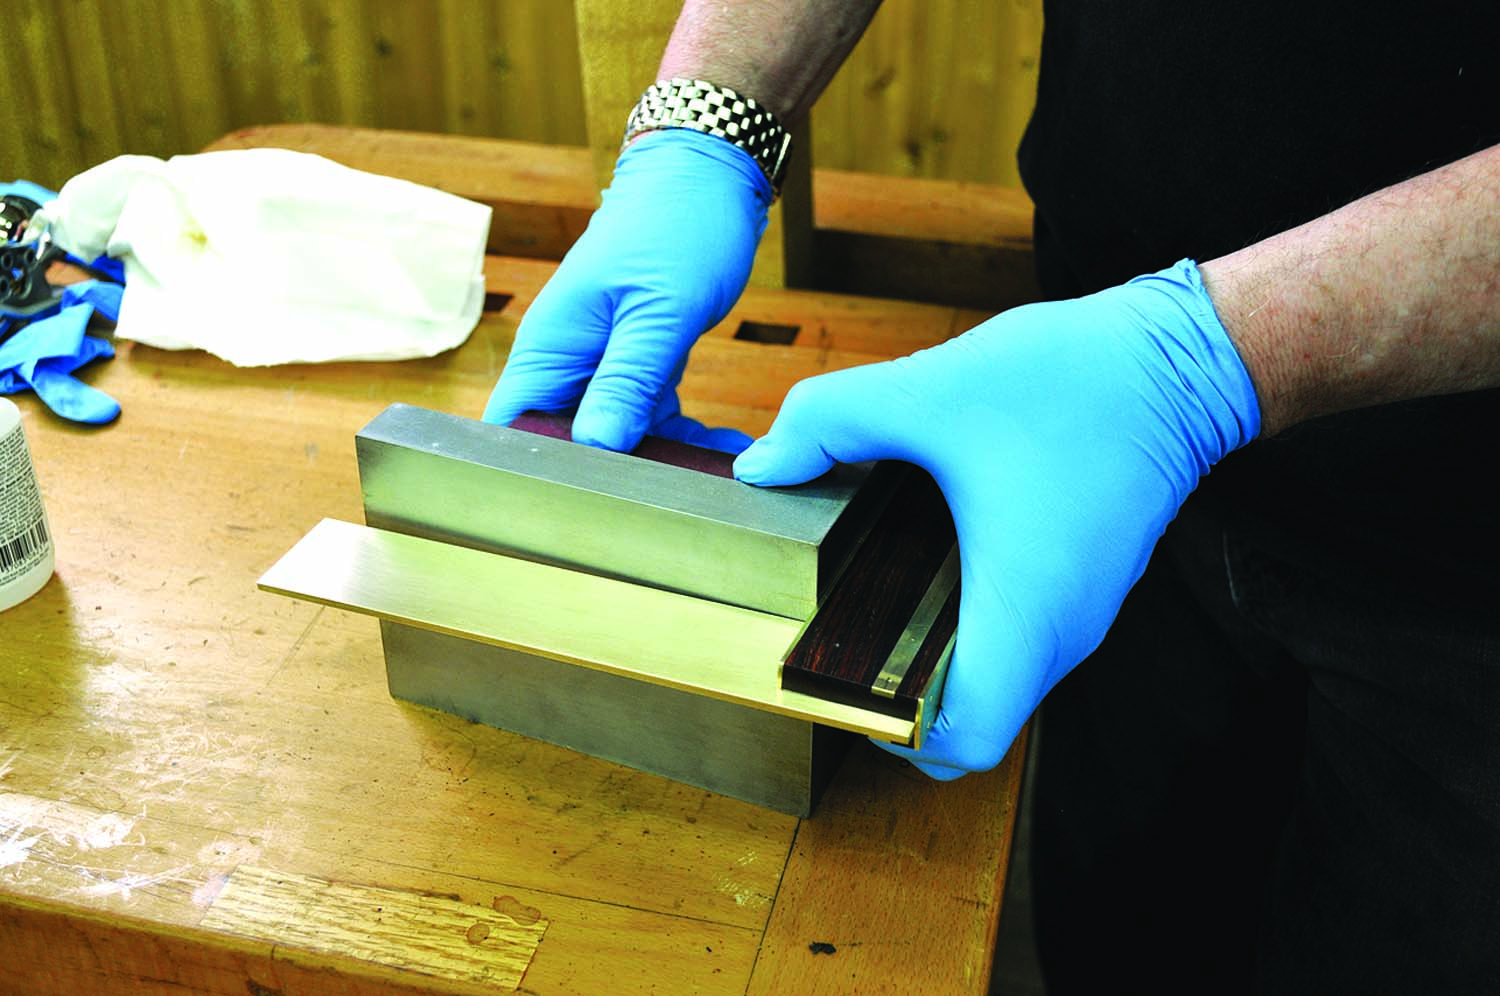
13. Out of whack. Here you can clearly see the square is obtuse – there are about 15 seconds left to adjust.
There are generally two types of brass alloy readily available that are commonly referred to as 260 and 360 brass. In its half-hard condition, 260 brass has a machinability rating of 30 compared to 360 brass, which is rated at 100. Consequently, when you purchase brass for the TS-2 Try Square, specify 360 half-hard, or “free machining” brass stock.
14. Taps fix it. This block of wood in a vise is great way to persuade the blade to where it belongs. A couple light taps usually does the trick.
There are two brass rivets and four steel rivets used in making the TS-2. The steel rivets are cut from 1⁄8” drill rod and the brass rivets are cut from 3⁄16” brass round stock.
Proportions
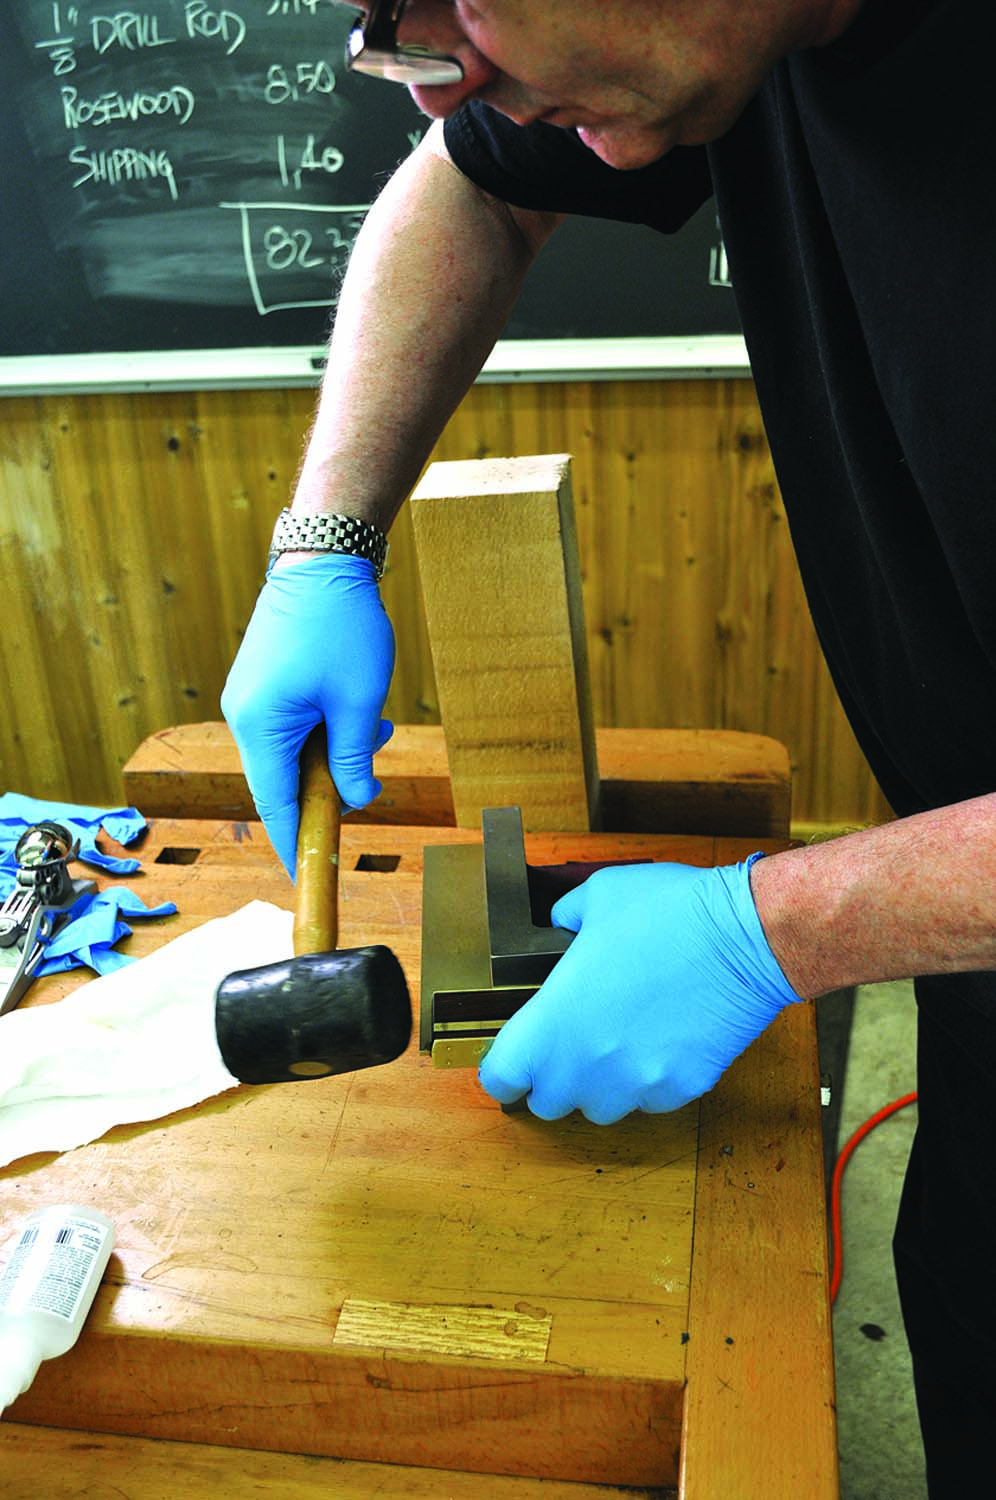
15. Another adjustment. Oops! Went too far … a couple taps with a rubber mallet.
Try square proportions are a big deal to avoid looking awkward or “gangly.” All of the major dimensions of Bridge City squares have conformed to the Golden Mean, or a 1:1.618 ratio. The TS-2, when made correctly, should fit precisely in a box with inside dimensions of 8″ x 5″.
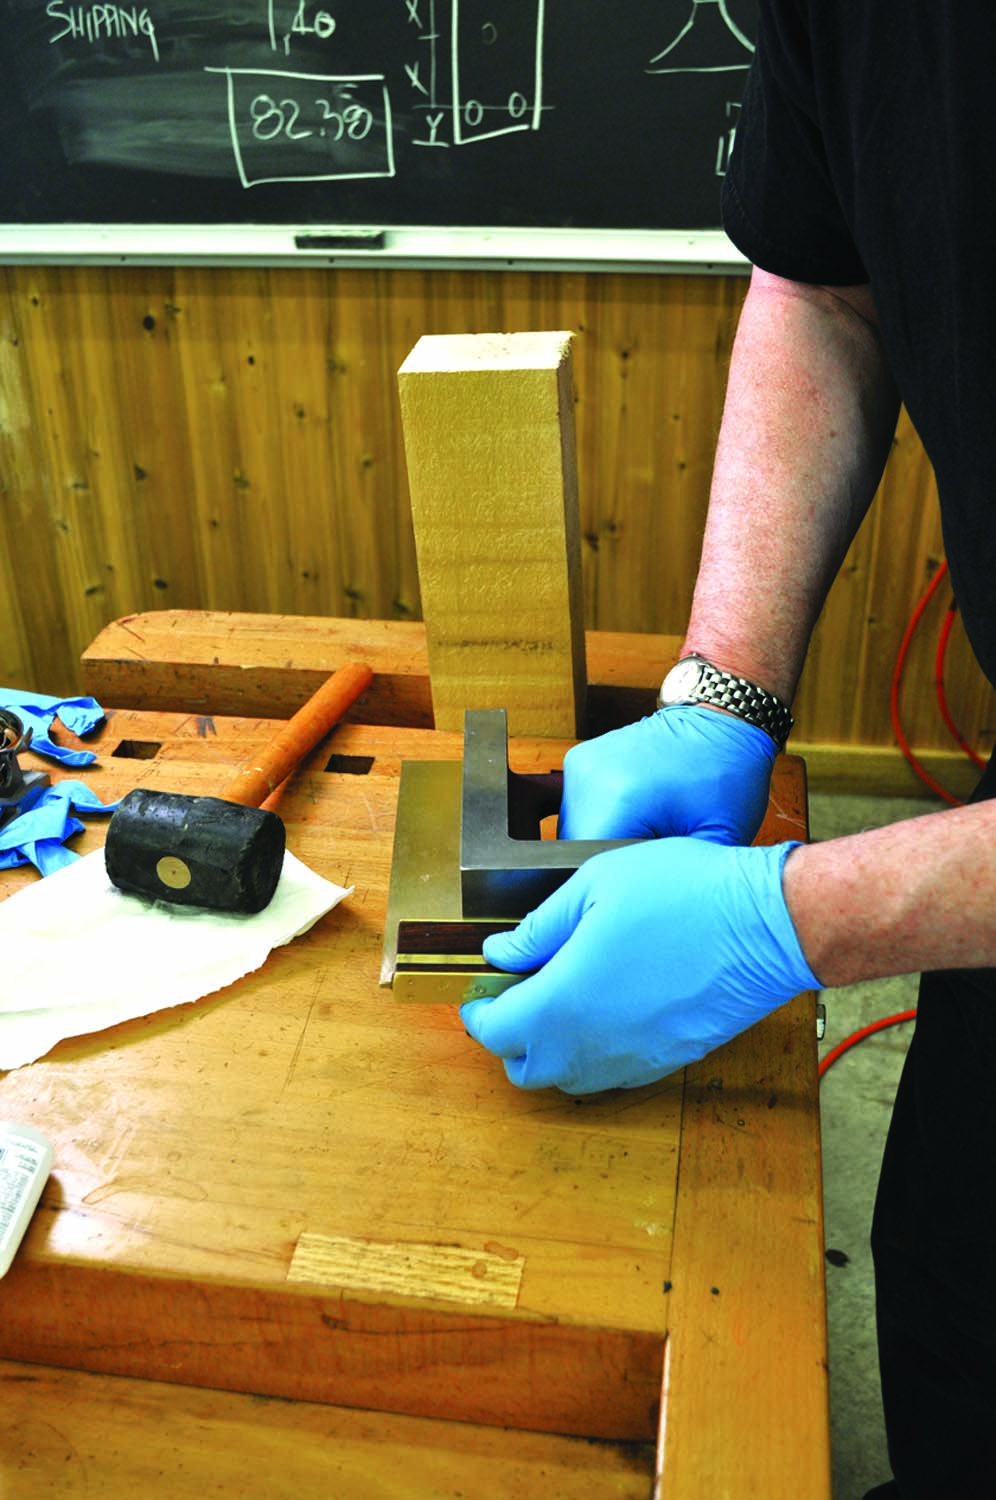
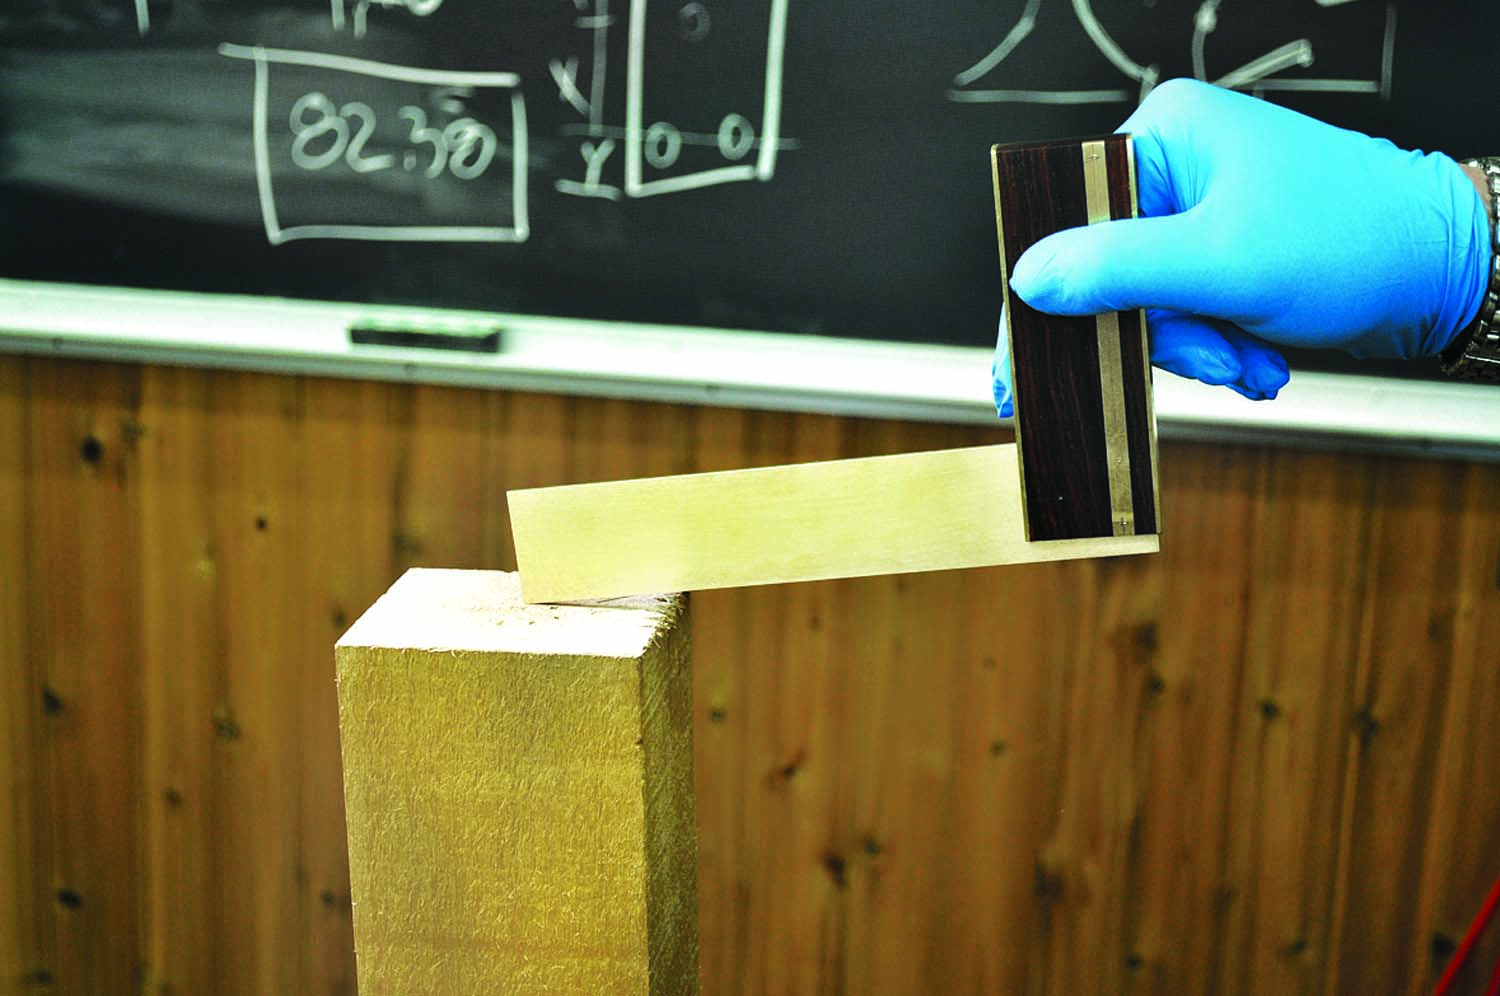
16. Victory. The square is now light-tight to the reference.
The other proportional dimensions that are important include the width and thickness of the handle in relation to the blade. Because the TS-2 can be used as either an inside or outside reference, it must be able to sit on a flat surface with the blade vertical. When used this way, the handle becomes a base for the blade and therefore needs to be wide enough to avoid a top-heavy and unstable square.
The width of the handle determines the amount of surface area that is exposed to the blade for joinery purposes as well as the gripping surfaces. Too narrow and the joint integrity is at risk; too large and the square looks awkward. We recommend that the handle width be equal to the blade width plus or minus 10 percent.
Lastly, you will want the blade to protrude about .250″ from the top of the handle. (FYI: Toolmakers always work in decimal inches – good calipers are a must.)
Construction Considerations
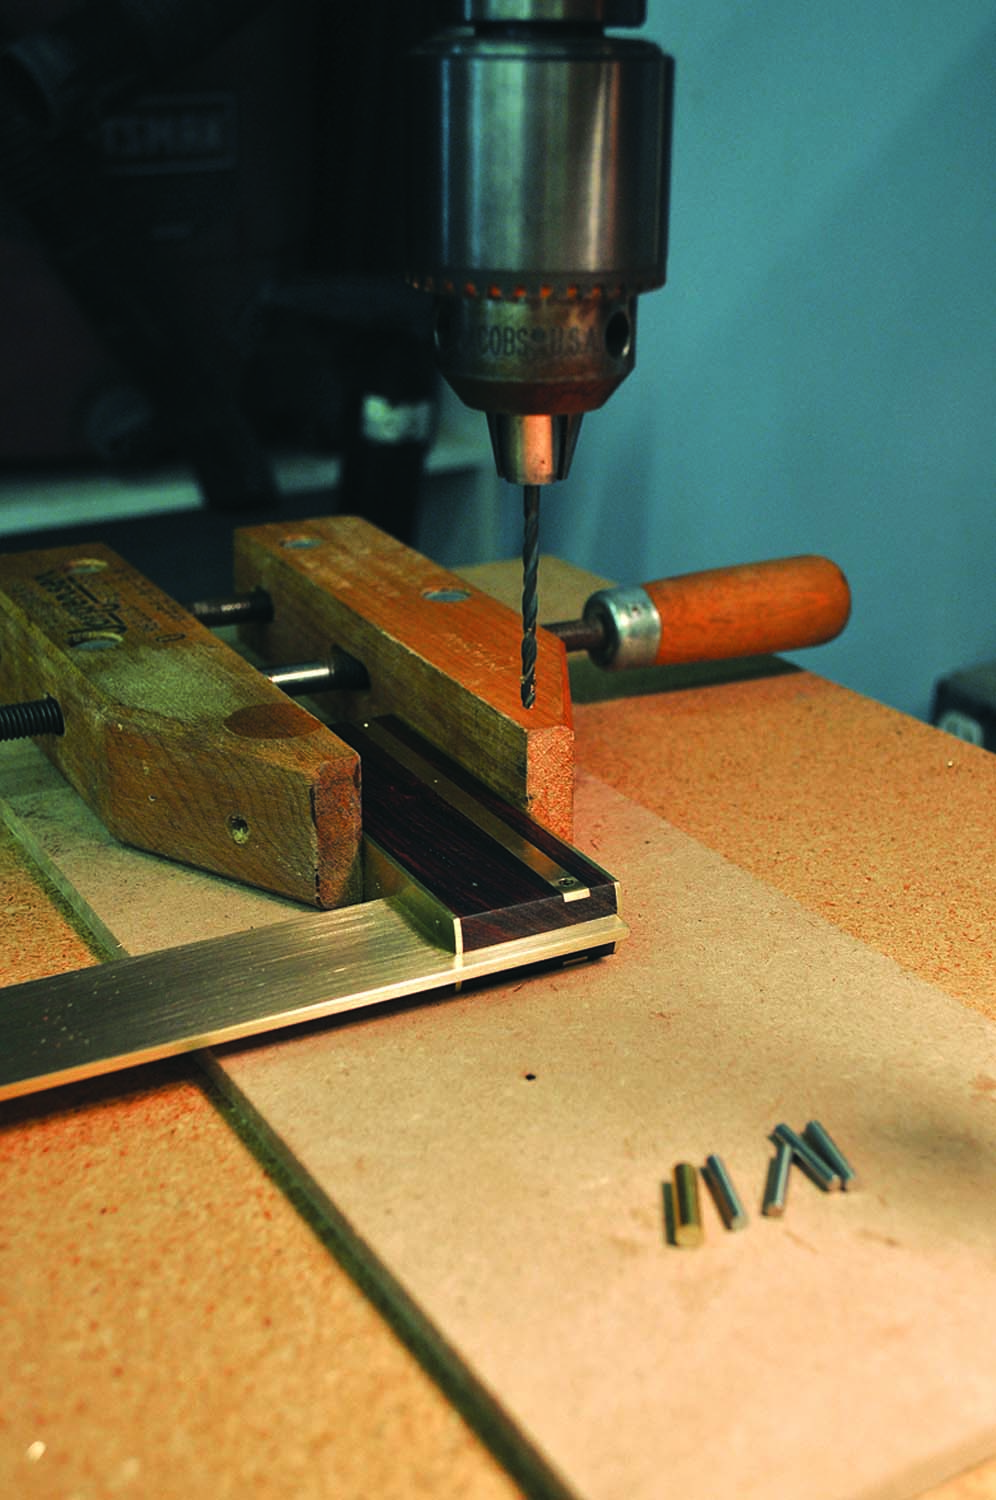
17. Ready to rivet. Once the blade is seated lay out the five rivet holes: four 1⁄8″ holes in the rivet seat and one 3⁄16″ rivet. Mark with a center punch (don’t punch too hard) and drill on a drill press.
Working with brass is not difficult – it can be thought of as a really hard, grainless wood. It can be sawn on a table saw, miter saw or radial-arm saw equipped with a triple-chip blade or any blade that is designed for non-ferrous metals. Safety glasses are a must, and I highly recommend a face shield. Other ways of cutting brass include metal-cutting band saws, reciprocating saws and, of course, a hacksaw. I also strongly recommend a zero-clearance throat plate for the table saw or the less expensive alternative, a false table slotted in 1⁄8“-thick hardboard, such as Masonite.
It is always best to attach brass to wood with both a chemical (adhesive) and a mechanical bond. In making the TS-2 we will use both adhesives and brass wood screws. Exotic woods tend to be oily so you will want to wipe the surfaces to be glued with acetone prior to applying an adhesive. Any quality contact cement will work great – both the wood and brass surfaces need to be coated – and when they are no longer tacky, pressed together. The main advantage of contact cement is that if the project takes an unexpected turn south, the material can be removed and replaced without damaging the wood substrate.
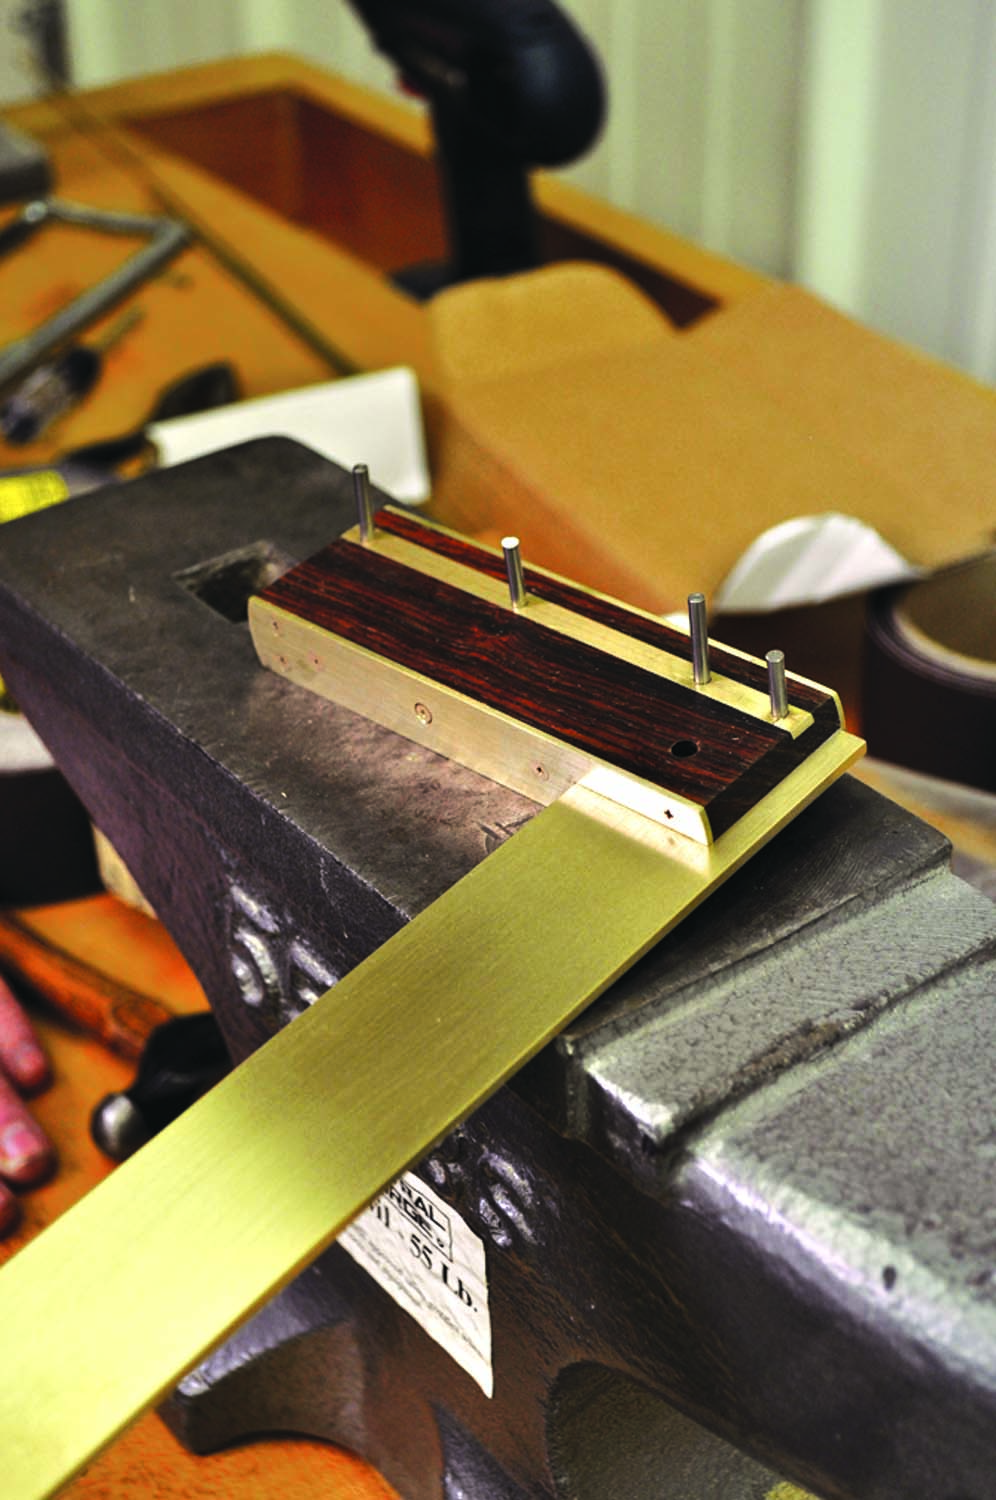
18. Only slightly proud. The rivets should be only .0625″ longer than the handle thickness. Insert rivets into the holes as shown.
Mechanical bonds are not limited to fasteners. If you have access to a milling machine, the brass and wood can be dovetailed together – it is not an easy joint but it looks great.
The beauty of the TS-2 is in the perfect flush surfaces of the steel, brass and wood. Whenever you have multiple materials with disparate hardness, the only way to flush them is with abrasives. This can be done by draw filing with a mill file, or using a stationary belt sander – the latter is not without considerable risk.
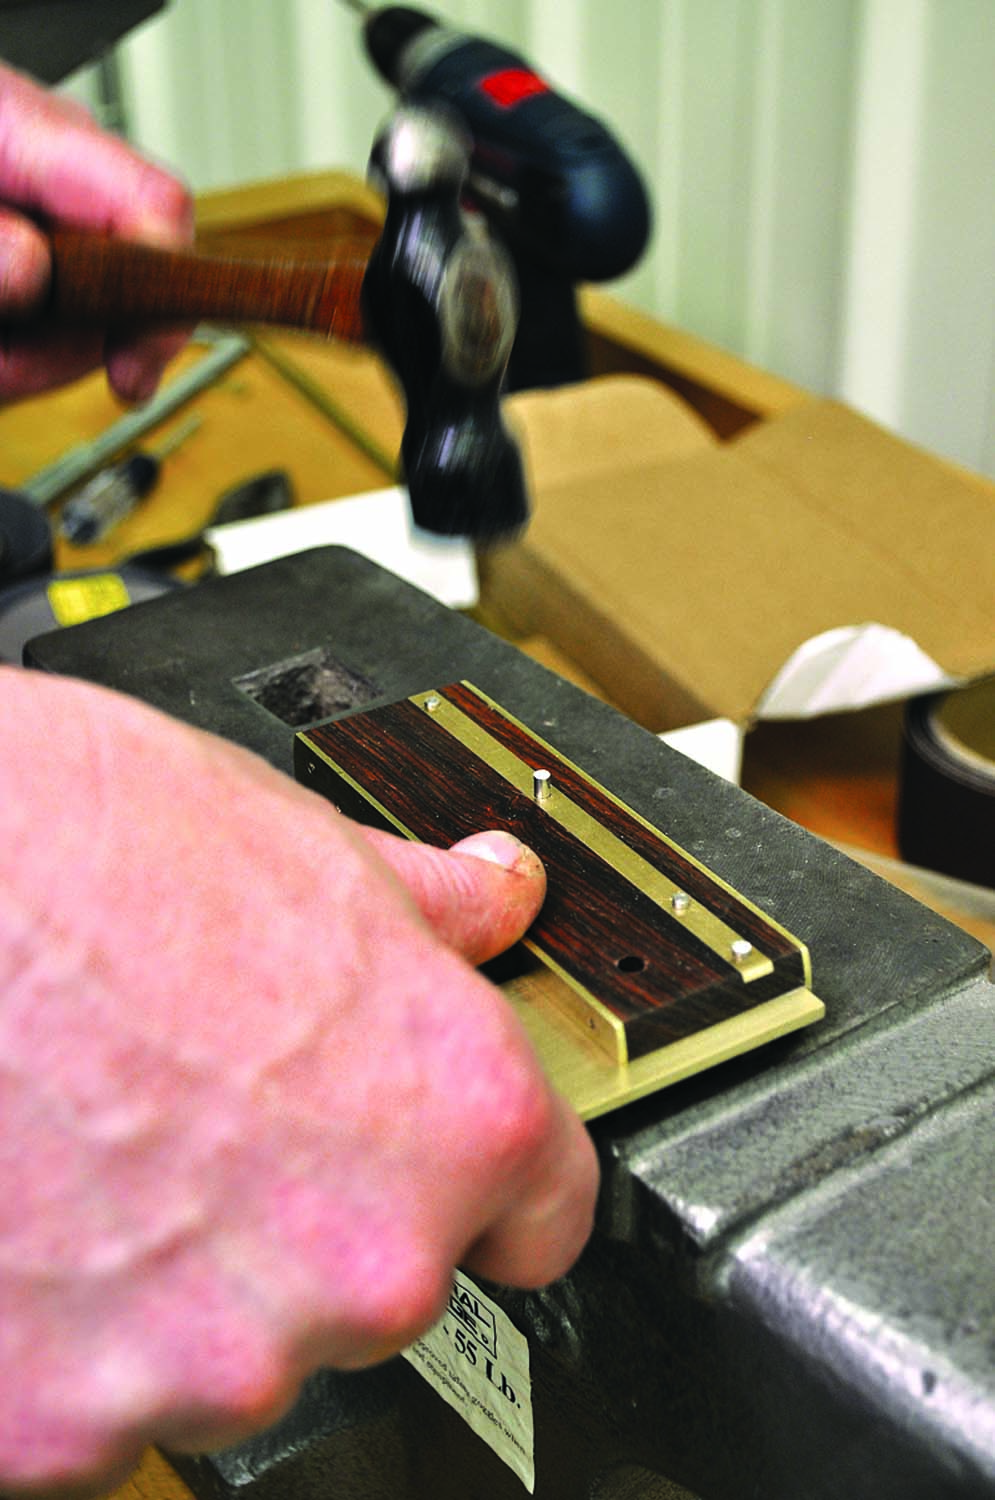
19. Tap the rivets. Use a ball-peen hammer and seven to 10 taps (the weight of the hammer is sufficient – save your effort for the gym). All you are trying to do here is slightly flare the top of the rivet.
Power-sanding metal, such as the steel and brass in this case, simultaneously generates substantial heat. Both the rivet seats and the wear plates are mechanically bonded to the wooden handle. As these metal surfaces get hot they expand between the anchor points and away from the wooden handle. If you are not extremely careful, you will ruin the handle blank.
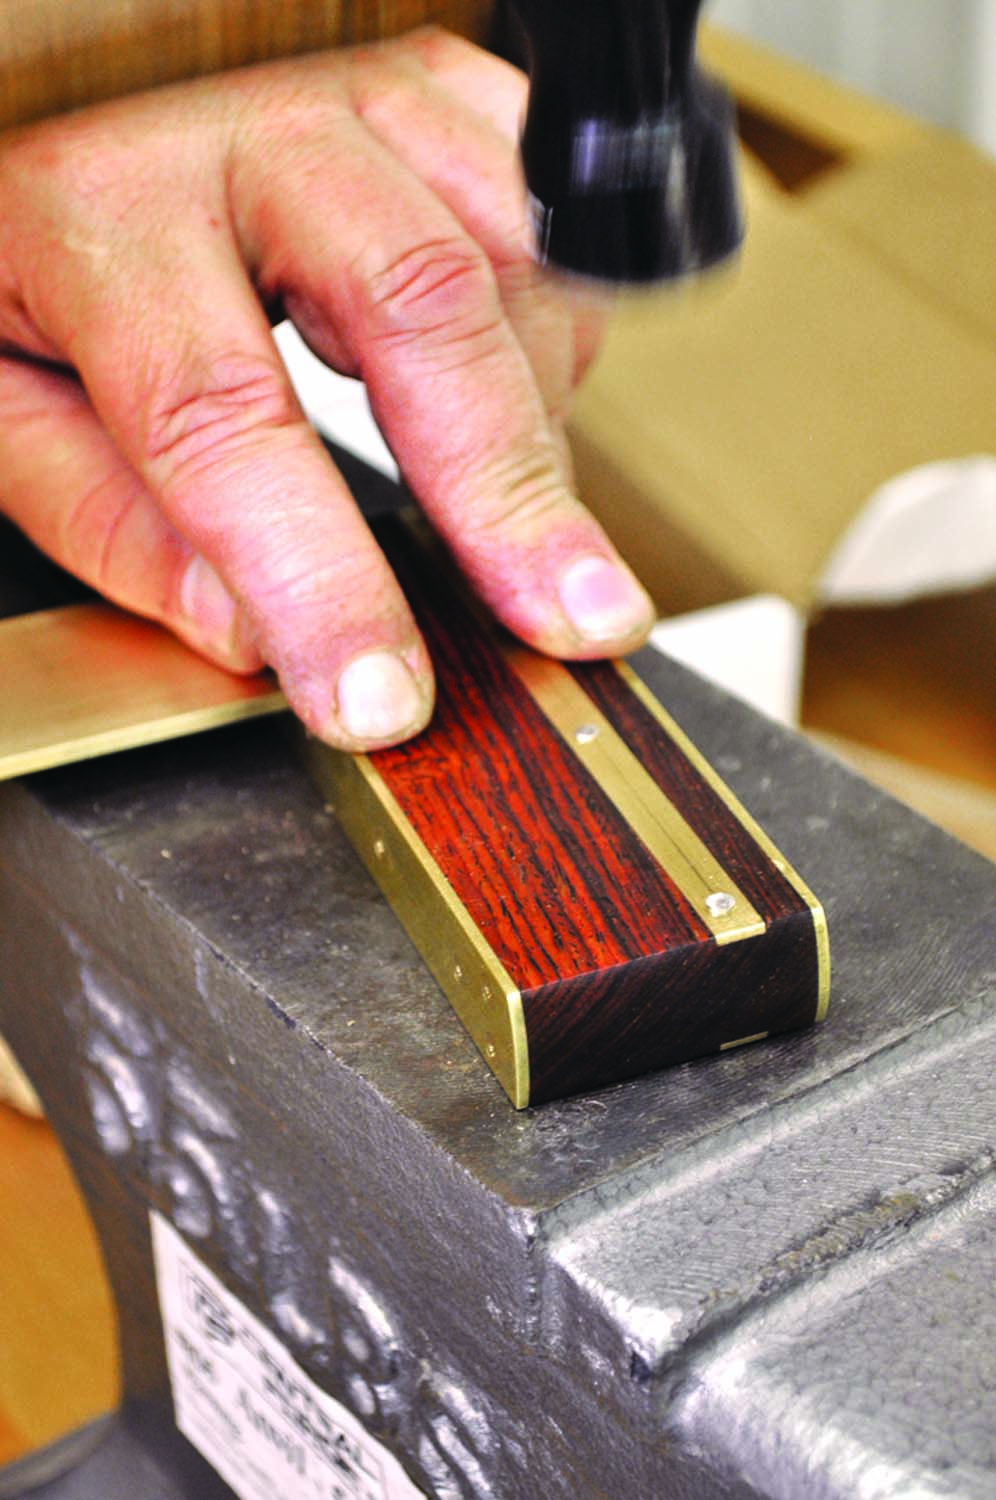
20. Tap the other side. Flip the handle and repeat the previous step. You should see no gaps between the rivet and the hole, nor should the rivets move. Do not use too much force – you can split the handle.
Squaring the Blade to the Handle
The blade is affixed to the handle with a slow-setting cyanoacrylate adhesive and when dry, four rivets are inserted for shock protection.
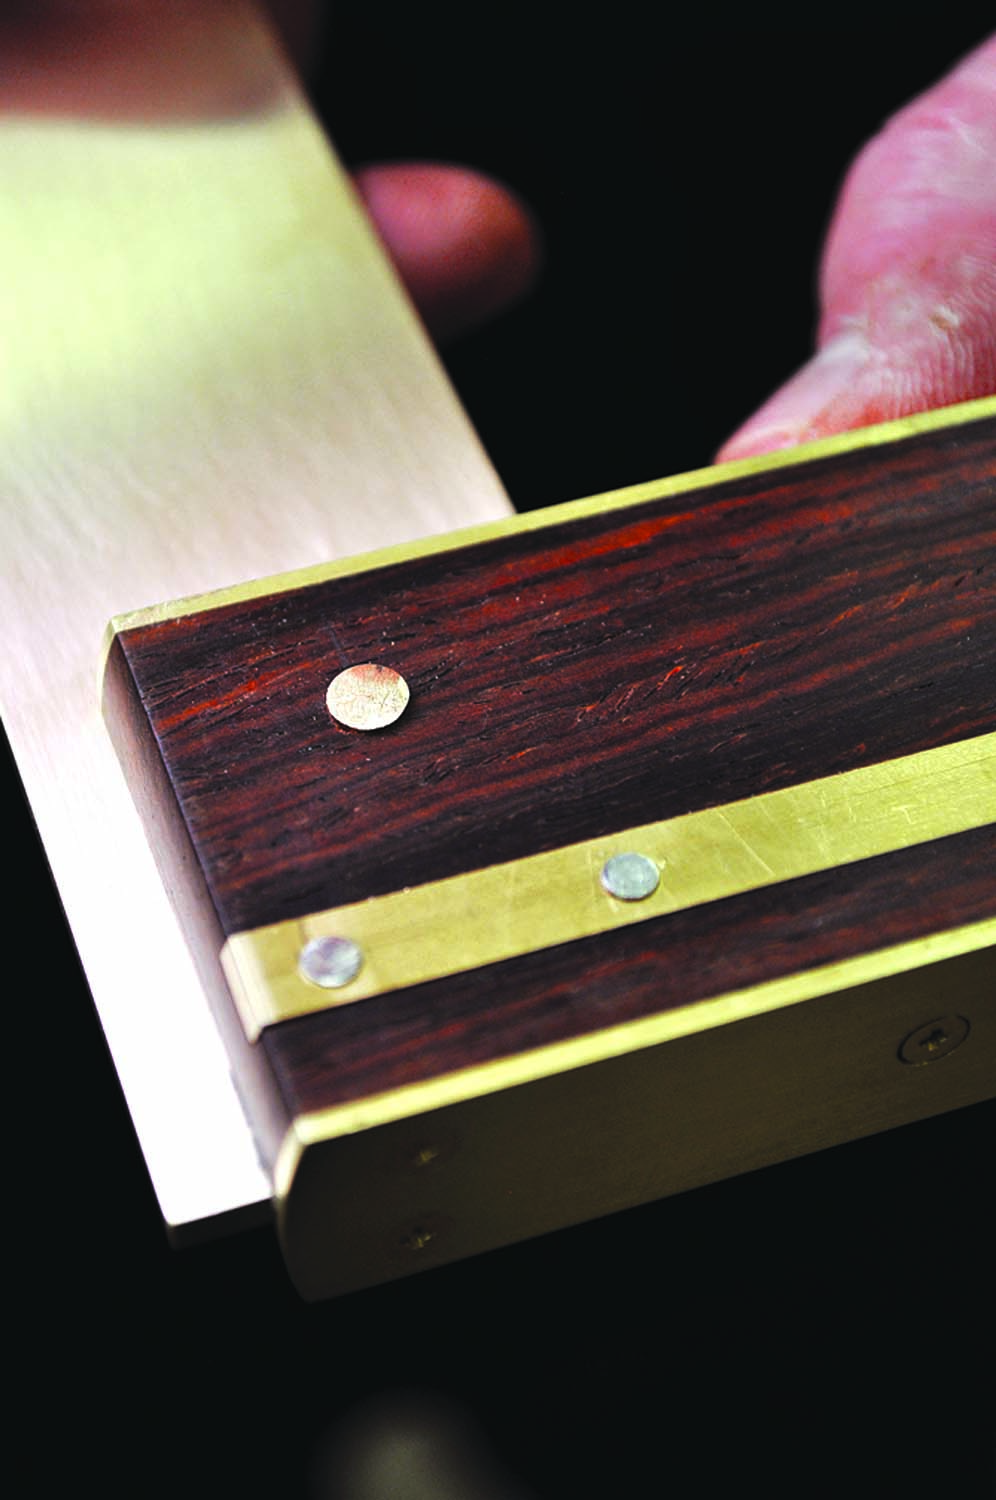
21. Brass rivet. Use the same steps for the 3⁄16″ rivet. These rivets provide shock protection if the square is dropped.
But first you need a reference for 90°, and this is easier than you might imagine. In the home shop, you can create a 90° reference by using the “flip-flop method” of crosscutting stock with parallel edges. Take your stock and crosscut it in half. Flip one half, and with both pieces resting against a known straight edge, the “gap” between the ends is twice the error of your cut. Adjust until the cuts “click” together and you will have a reference that is plenty accurate for an 8″ try square. In my toolmaking classes we set the blades against a machinist 90° angle plate to save time.
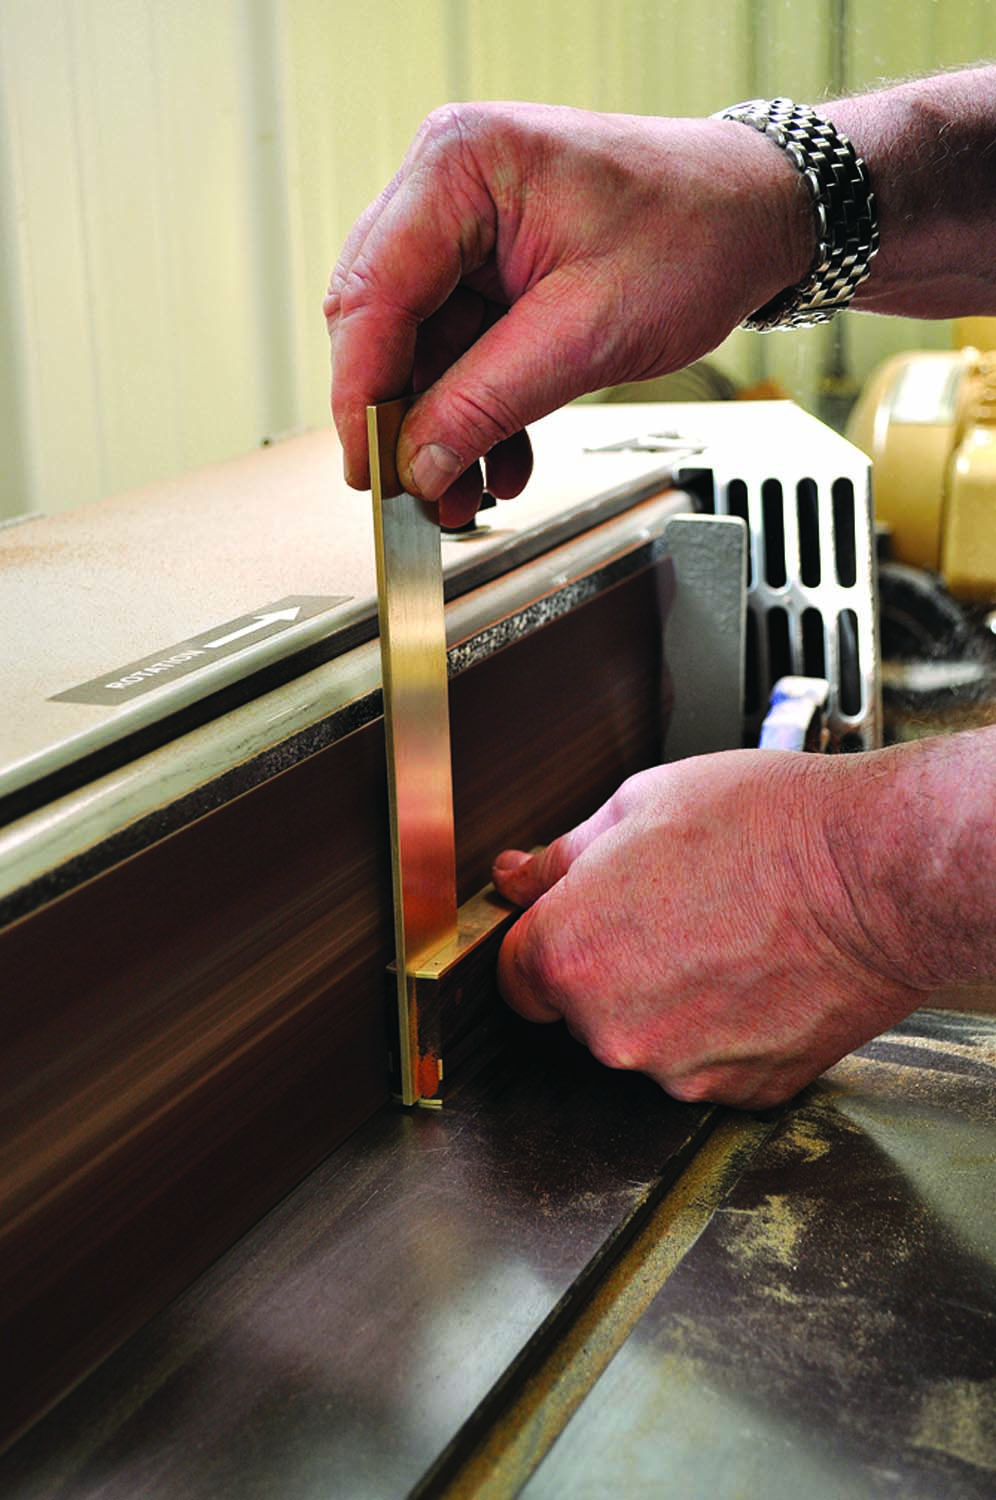
22. Flushed. Carefully flush sand the rivets on a stationary sander. (I prefer a horizontal sander for this step but an edge sander was all I had available for this build.) Do not let the brass get too hot – it has nowhere to go but into the sanding belt.
Caveats
There are a couple caveats in making this square that, if ignored, will ruin the project. First is the slotting of the blade. In my toolmaking classes each blade is hand-dressed. Consequently, all are different thicknesses. We used the KM-1 Kerfmaker on a sliding table with a tenon jig to cut the slots. They all came out spot on. The alternative is to creep up on the final dimension with multiple cuts. All it takes is a little slip and the square’s blade will be too loose to remain attached to the handle over time. Too tight and you will never be able to adjust the blade to 90° before the adhesive sets. (If this happens, use a rubber mallet to break the blade free and start again.)
The 82° countersinks need to be dead on. Too deep and there will be a ring around each screw head. Too shallow and you will sand away the Phillips recess. Here is where a little practice pays big visual dividends.
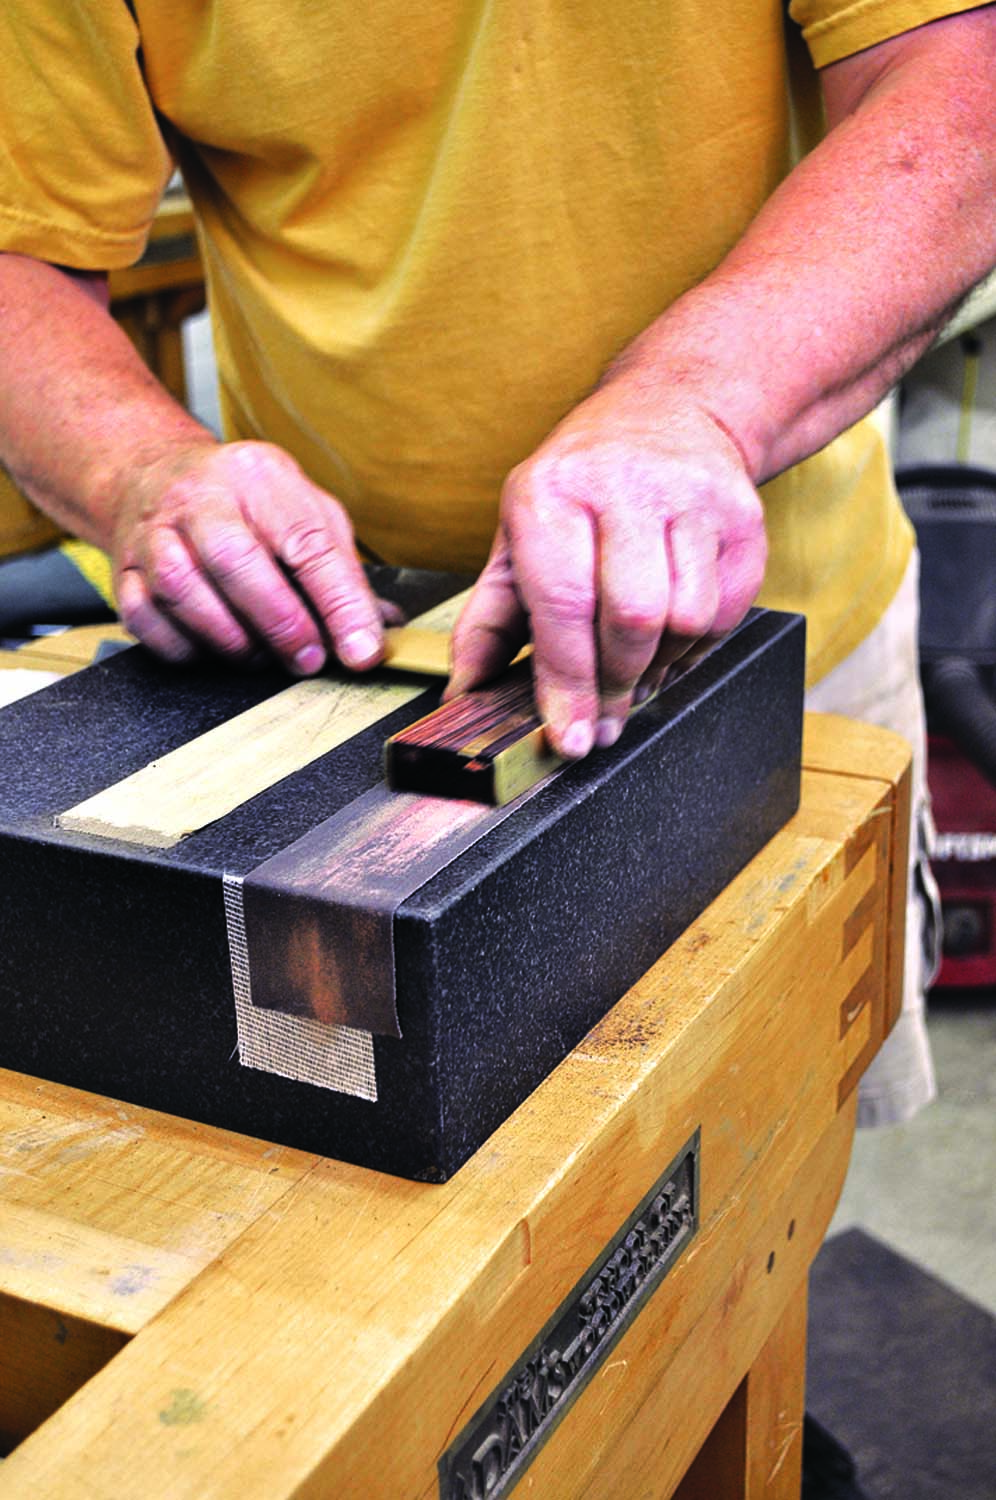
23. Final sanding. Once the rivets are flush, hand sand through the grits all the way up to #400. Take a couple strokes on the corners to remove burrs. The handle should not feel sharp on the corners. Use a maroon Scotch-Brite pad on all surfaces and finish with a high-quality paste wax.
Last, both the blade and the handle need to have dead-parallel edges. This can be done by hand by carefully sanding on a flat surface (glass or machine top). It is possible to get them within .001″ or better with this method. A good pair of calipers is needed for this step.
Summary
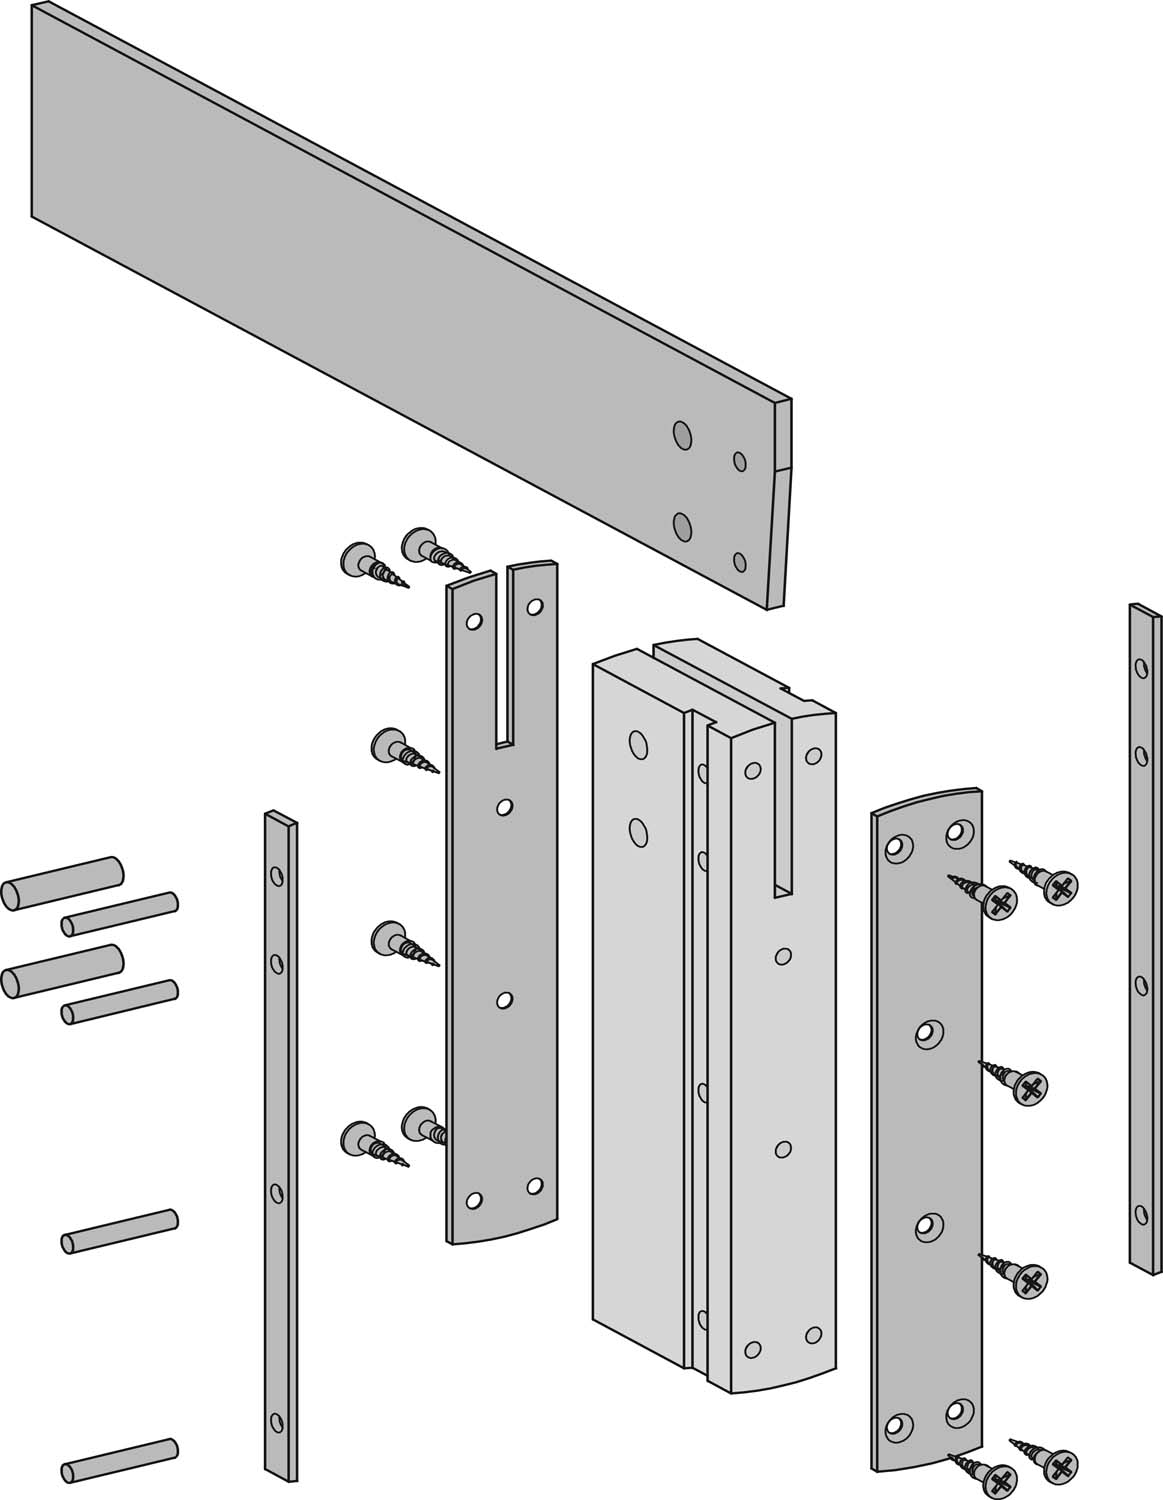
Exploded View
For almost 40 years this try square has been a pure joy in my life. It is one of the most popular tools we have ever made and it will be a trusty and faithful addition to your shop. When not in use, put it in a place where you can see it – or more accurately, where it can see you. I assure you, repeating 9th grade will never be more fun nor more rewarding.
VIDEO: Watch our “5 Questions” video interview with John Economaki.
VIDEO: Watch a short clip of John teaching a toolmaking class.
BLOG: Read John’s funny blog about furniture design and making tools.
Here are some supplies and tools we find essential in our everyday work around the shop. We may receive a commission from sales referred by our links; however, we have carefully selected these products for their usefulness and quality.


