We may receive a commission when you use our affiliate links. However, this does not impact our recommendations.
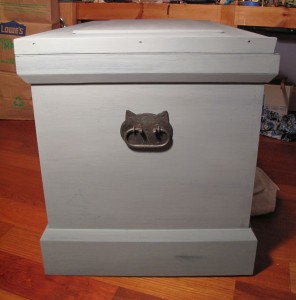
I’m putting the finishing exterior touches on my “Anarchist’s Tool Chest,” though I’m still deciding whether or not to add a lock. But I knew I wanted chest lifts (also known as handles) – even though this chest is going to live in my home shop and not get moved about; the thing just wouldn’t look right to my eye without them.
After a fruitless search on eBay and other sites for the “perfect” lifts, I turned to John Switzer at Black Bear Forge, with a picture of some rather plebeian antique lifts that I thought would be just exciting enough to break up the expanse of gray/blue milk paint on the chest sides, but not so fancy that they’d look out of place on a shop piece.
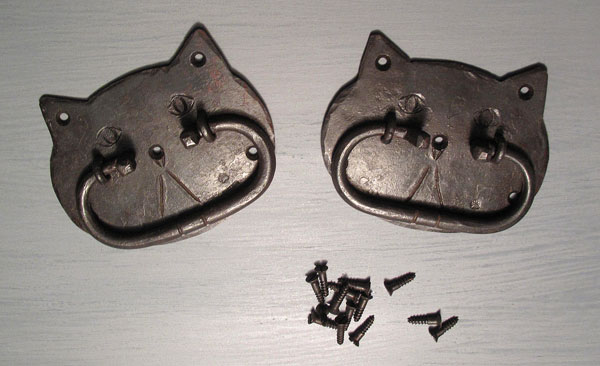
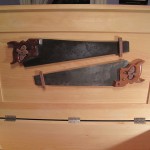
Then, I posted a picture of the toggles I cut to keep my panel saw in place underneath the lid. Well John saw that post, and pinged me with a (brilliant) idea: “How about chest lifts to match?” I couldn’t envision it – but John and his wife, Janet, could. She designed cat faces in an appropriate shape and size, then John headed to the smithy, made a prototype and sent me a snapshot. What he sent was darn near perfect; I asked only that he add in the upside-down V-shaped scratches under the center screw hole (also know as, in this case, the nose). Done. Perfect. And, John provided slot-head screws that are the same color as the lifts. (Note: If I ever do decide to take this chest on the road, I’ll replace the screws with bolts secured on the interior with nuts.)
And tonight, instead of watching the State of the Union address, I installed the lifts. (I’d rather read the address online in an hour – no lengthy pauses for clapping.)
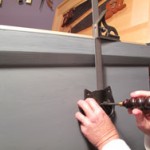
I eyeballed the location for the lift, then measured what looked right so I could a) get the lift centered across the width, and b) hit the same measurements on the other side. (The top of the cat’s head is 5-1/2″ down from the top of the dust seal.) I used a birdcage awl to mark the center of the nose screw hole, drilled for then installed that screw.
I thought leveling the ears to the dust seal would be easy – just pull out my little-used 24″ carpenter’s level to make quick work of it. I forgot that the floors in my 118-year-old house aren’t level. So neither is anything that sits on them. Ah well – a few more measurements and all was well. After marking, drilling and installing the remaining screws (and fretting over the correct slot orientation for the best effect), both lifts are in place.
 And now, I have well-made and unique chest lifts that work perfectly with my ailurophile aesthetics. I foresee more custom hardware in my future.
But for now, I foresee getting the interior of my ATC done (this weekend, dammit!), so I can, for the first time, actually store my tools neatly and properly protected, and reclaim the flat surfaces in my study.
• The chest I built is straight out of Christopher Schwarz’s “The Anarchist’s Tool Chest,” which is as good a book for its self-sufficient and artisan-made philosophies as it is for the step-by-step chest plans.
• Like the idea of trying a little blacksmithing yourself? Get our new DVD from Peter Ross, “Forging a Compass.” Peter walks you through the steps – both at the forge and at the bench – for making an 18th-century-style square-head compass (what we typically call “dividers”). All you need is a coal forge, an anvil and a handful of files (c’mon – I know you want a forge!)
Here are some supplies and tools we find essential in our everyday work around the shop. We may receive a commission from sales referred by our links; however, we have carefully selected these products for their usefulness and quality.


Not to coin a phrase, but . . . They are the Cat’s Meow!
Let’s see, if you get a cat lock (up for it John?) and three cat hinges to replace the ones you have that gives you 6 cat-like iron on our chest, plus the two cats holding the saws in place which brings you up to 8 cat-like accessories; then if your drawers have cat head pulls ,,,
I like it but have a concern that I might loose some man points if I put two on my chest. It has no carry handles yet. Maybe he could make some German Shepard one for a MAN”S chest.. Sorry Megan !!!
I have to say that this was a fun project and I’m thrilled that Megan gave me a chance to deviate from the original plan to do something fun. When I saw the cat shaped saw toggles these popped into my head and I couldn’t resist. Although I really expected Megan to either take it as a joke or simply a bit over the top. Seeing them on the chest, the effect is even better than I expected.
Thanks again Megan.
Kool Kitty
Nice stroke!
Level the chest first using a wedge(s) then level the fittings.
Five screws per lift should outlast all of us but bolts tend to cause splitting especially when two are in the same grain line which is often the case (sorry) with chests. A touch of hide glue on each screw also helps as it binds the wood fibers that have been split by the screw and stops screws working loose.
I like to clock so that the slot follows the long axis of the fitting. Hinges are easy but it took me a while to realize that with round and square fittings they are best running round parallel with the edge.
How did you clock them?
Purrfect!! Think they look awesome!
Looks like the cat’s meow to me.
Looks like the cat’s meow to me.