We may receive a commission when you use our affiliate links. However, this does not impact our recommendations.
When you’ve worked out of a traditional tool chest for 15 years, you sometimes forget how excellent it is to work from.
That is, until you teach others how to build the chest.
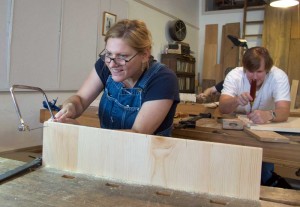
This week, I’m at Roy Underhill’s woodworking school, “The Woodwright’s School.” This is the last class I’m teaching in 2012 (aside from Woodworking in America), and it makes me a little sad for some curious reason.
I’ve helped bring more than 50 of these chests through the birth canal in the last 15 months, and every one has been a difficult delivery. While tool chests are simple projects – just dovetails, dovetails and dovetails – they require a certain level of devotion to complete.
That’s because unlike a workbench, you can put a tool chest aside to work on other projects.
So when someone sends me a photo of the tool chest that they built, or rebuilt or refinished, I am totally thankful. It is quite easy to dismiss a tool chest as antiquated or back-breaking. It takes someone with a streak of crazy, drunk or open-mindedness to actually build one and use it.
When these crazy, open-minded drunks report back to me, here is what they say: I never knew how awesome it would be to work out of a tool chest.
So build one. It takes only about 40 hours of time. If you don’t like it in the shop, your spouse will be thrilled to have a dovetailed blanket chest.
And it just might change the way you work.
— Christopher Schwarz
You may also like this tool chest plan:
“John B. Hetzel Tool Chest Woodworking Plan”
Find more resources at shopwoodworking.com.
Here are some supplies and tools we find essential in our everyday work around the shop. We may receive a commission from sales referred by our links; however, we have carefully selected these products for their usefulness and quality.


This seems the best place to put this although the thread is a little stale.
I built the Anarchist’s Tool Chest and wrote a little blog about why and how it differs from the book.
http://hkc-jp-blog.blogspot.jp/
Great book by the way. I’m re-reading it and finding it again full of valuable tidbits and deep insights.
In brief my box differs from the one Chris describes in a few ways:
1. It’s made of Douglass Fir, not pine. This makes a bigger difference than I would have thought because old dry DF is quite hard and brittle. As a result,
2. The bottom is screwed on not nailed. Nails and old DF just don’t get along besides I had a large stash of big brass screws that cost me next to nothing to acquire.
3. I used marine enamel instead of milk paint because first of all I had it left over from painting my boat and besides it is about a hundred times tougher than any other paint you can buy with the possible exception of 2 part marine epoxy paint. It’s perhaps not the best color but the coating is truly impervious to water so I’m not expecting big problems with rot.
4. I redesigned the saw till to take better advantage of the space. I found it hard to reach the bottom of the box if the bottom till did not slide all the way forward. With the original design I could not easily retrieve my hollow and round planes. I still haven’t been able to store my plow plane in there though. The thing is just too big in all dimensions to fit.
Many thanks for the design and especially for the philosophy. After doing the hundred or so dovetails in the toolchest I went on to dovetail another tool box to go inside, a TV stand for the living room and three plywood toolboxes for the move that motivated everything from the start. Once you get started its hard to stop.
How about a workshop in completing the chest? While the shell, skirts and top can be done in a week (a week of long days), the inside requires a lot of attention and guidance. I bet you fill the class!
Yes, I’m one of the guilty who is creeping along to the finish line after a very quick start under Chris’ guidance.
I finally finished my chest and have been working out of it for a few months. I have noticed that my bench stays cleaner and work progresses faster. I can’t see myself going back to having tools stashed in drawers and cabinets throughout my shop. Good luck with the class…it looks like it is going quite well.
Whew. Good to have the banjo back.
Ahhh memories…. Did you use the same source for the wood or some one else? Looks like you’re using Pine this time.