We may receive a commission when you use our affiliate links. However, this does not impact our recommendations.

Perfect patterns make for perfect parts. Start simple. Have someone CNC out your patterns for you.
In the first post of this series, I explained the process that I use to make paper patterns for parts. Simply put, output your design to your printer, use the tiling feature to divide larger drawings into printer size pages, splice the pages together, glue it onto MDF or plywood, cut close to the line on a bandsaw and finally, fair the results with rasps and files.
The most important ingredient is the first one: a digital drawing or CAD design. Though the process works well and is basically a no-cost way to making patterns, it does take time. Splicing together the paper, cutting and smoothing out the design and shape add up you have a number of patterns to make. The results can be satisfying, though close, they aren’t quite perfect. As it turns out, with the same drawings and for a reasonable cost, you can take the process one step further and have someone CNC patterns for you. That’s exactly what I did for many years.
How I do it
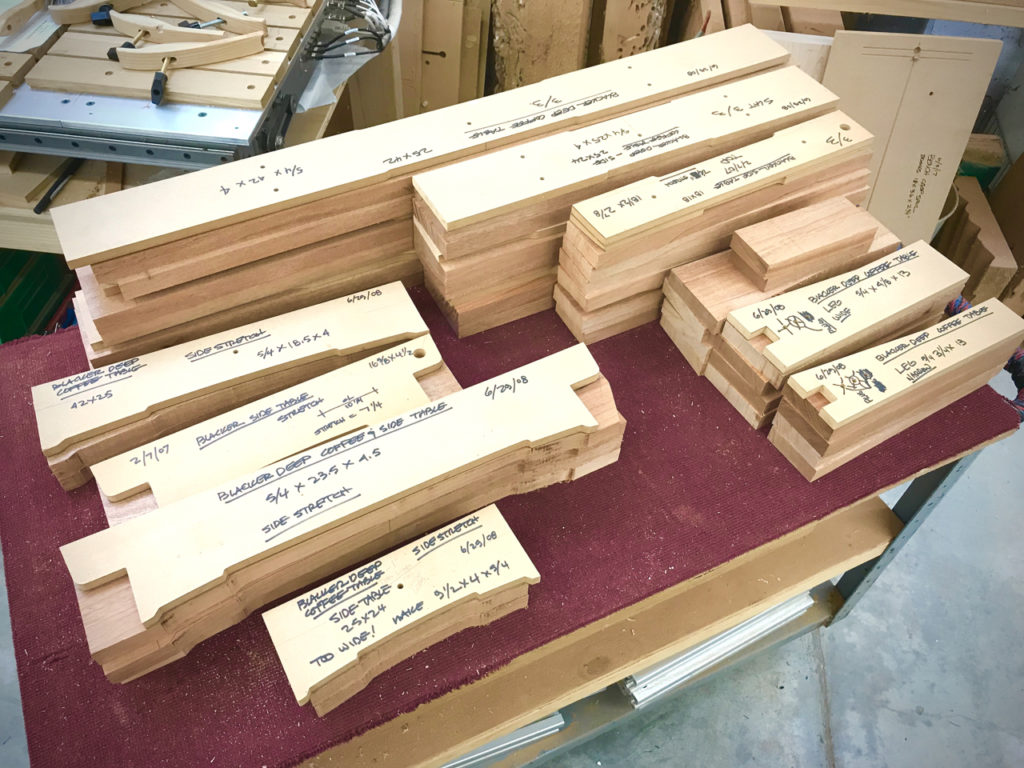
As a designer, one of my tasks was to design signs for clients. To do that, I’d work with local sign makers to fabricate them. A well known and very skilled sign shop in Seattle with a large CNC is the Davis Sign Company. For many years they’ve used their CNC to cut letters, logos and various things for client signs. I reasoned that outputting my patterns on MDF would be similar to cutting letters, and so it was. For a long time all my furniture patterns, jigs, and fixture parts were cut out by their CNC.
From a drawing to CNC patterns
The process goes like this: I would design my patterns in drawing software — just as I did in making paper patterns. In my case, I’d send them Adobe Illustrator files that they’d use to cut patterns out of 1/2” MDF. This worked very well for me. My shop’s attic is a library cram filled with hundreds or patterns that I’ve used to make my furniture.
You could do the same with little effort and low cost. The process works so well, that of all the digital woodworking recommendations I’ve made to Popular Woodworking readers, this is top of the list. Using CNC made patterns gives you the most important advantage of a CNC without having to own or operate one — accuracy and repeatability through the use of perfect patterns. And, whether you favor digital tools or remain dedicated to hybrid and/or hand tool woodworking, a perfect pattern is a pathway to perfect projects. Everybody can agree on that. This is the easy and inexpensive way to start. And, as I’ll explain in a future post, like story sticks, perfect patterns also keep you from making mistakes.

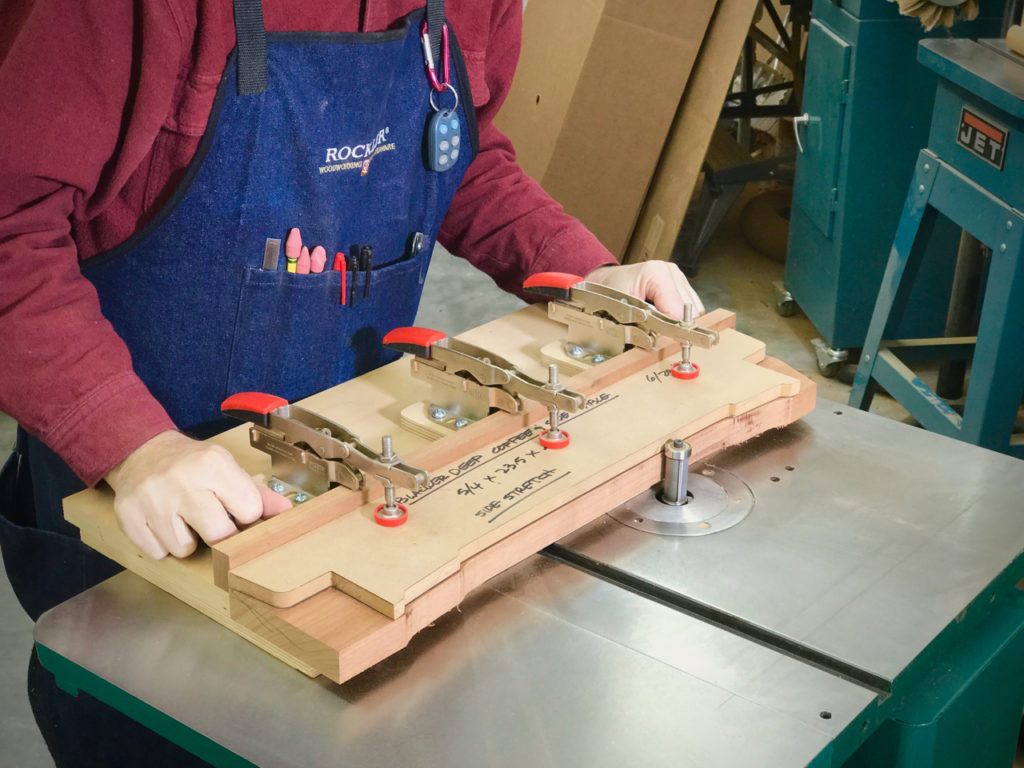
It all starts with a pattern. With one pattern you can make as many identical parts as you need. I use an adjustable, modular shaping jig that I’ve designed to machine my parts. I wrote about the jig in the August 2014 issue of Fine Woodworking.
The process
For anything to be machined on a CNC, you need digital drawings. You can create these with either CAD software — always the best long-term choice, or at the very least, some kind of vector-based drawing software like mentioned in the previous post. Drawing programs for the graphic design market are one way to get started. Examples are free software such as Inkscape or professional software like Adobe Illustrator or Corel Draw. CAD programs might be TurboCAD, DesignCAD, Fusion360, VCarve, CorelCAD, Rhino3D and many others.
Once you get a least somewhat proficient at creating accurate two-dimensional drawings of your individual parts, you’re ready to go. You need to draw each part/pattern individually at full size that you intend to make. A collection of part drawings can be within the same document or file.
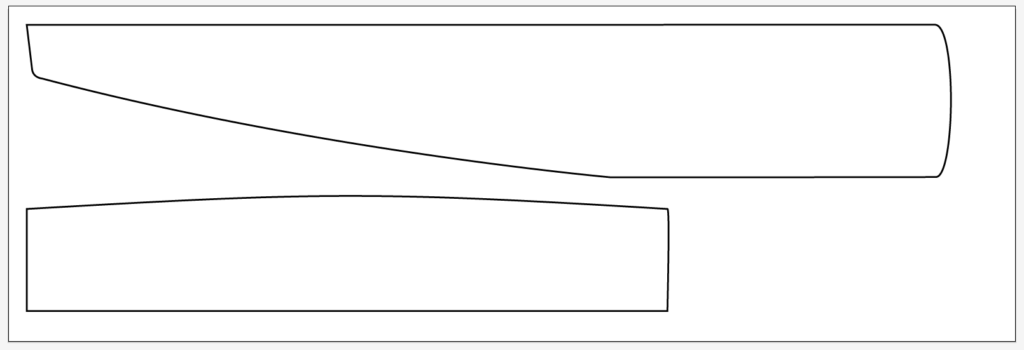
The drawings can be quite simple. Think two-dimensionally, not three. A line drawing of the outline of your part is all that’s required to get a pattern machined for you. For example, a drawing of a chair leg needs to be just the outline of the leg. No fill, texture or 3D treatment is needed.

It doesn’t take much. A simple full-size two-dimensional drawing of the outline of your parts is enough to get CNC machined patterns. Shown are the arm and stretcher of a Morris chair.
Work full scale
It’s critical that you draw at full scale using the measurement method you are used to. If, for example, you’re making a 62” stretcher pattern for a table, draw it 62” long. No less, no more. Be very precise. You can’t provide a drawing of a 31” leg and ask the CNC operator to double the scale. Provide full-scale drawings only. Fortunately, CAD software includes dimensioning tools makes this process a lot easier.
Next, make sure your pattern outlines are completely closed and joined. Check to make sure the ends are connected and a part is a single unit. The term for this is, “joined”. This is a very important as strange things can happen on a CNC if you leave something open. So, check your work.
Check the details
Next, consider that every detail about that part that will be accurately machined on the CNC. If there are any holes or openings intended to be in the part, there will be holes or openings in the pattern. So, think about any added details you want to be machined and include them in your drawings. Also, make sure that no detail is smaller than the bit that will be used. You can’t cut a 1/8” hole with a 1/4” bit. I like to add a few more details to my patterns to help me with alignment and joinery for final parts. I’ll get into that in a future post about how I detail my patterns for precision hybrid woodworking.
Coming up is a post on finding a vendor and preparing your job for a CNC shop.
Additional Resources
- All posts on Easy Entry Digital Woodworking, click here.
- Additional Digital Woodworking videos click here.
Here are some supplies and tools we find essential in our everyday work around the shop. We may receive a commission from sales referred by our links; however, we have carefully selected these products for their usefulness and quality.


