We may receive a commission when you use our affiliate links. However, this does not impact our recommendations.
One of the most exciting (and frightening) aspects of building a Windsor-style chair is the ever-present possibility that you will split the seat when you drive the legs home.
I always tell students: Keep hitting the leg’s tenon into its mortise until the very next strike will split the seat. Then stop.
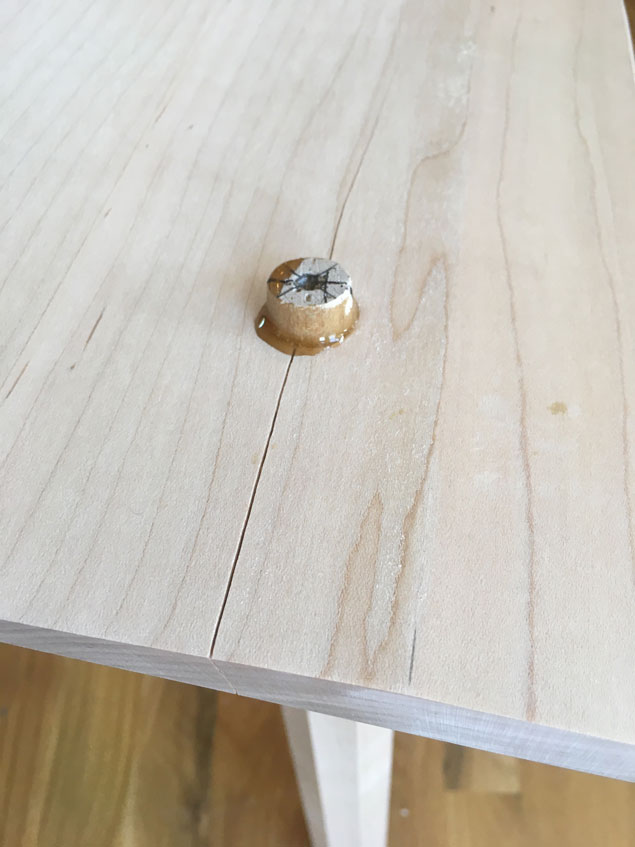
This is not always possible. Today, I split a seat twice. Both splits occurred in mortises for the front legs. That’s typical. And it’s an easier fix than the back legs (more on that sort of repair at the end of the entry).
When you split your seat, immediately remove the tenon from the mortise. The glue can still set up and make things worse. If your seat didn’t completely split into pieces, you are going to have to figure out a way to open the split (gently) so you can get glue in there.
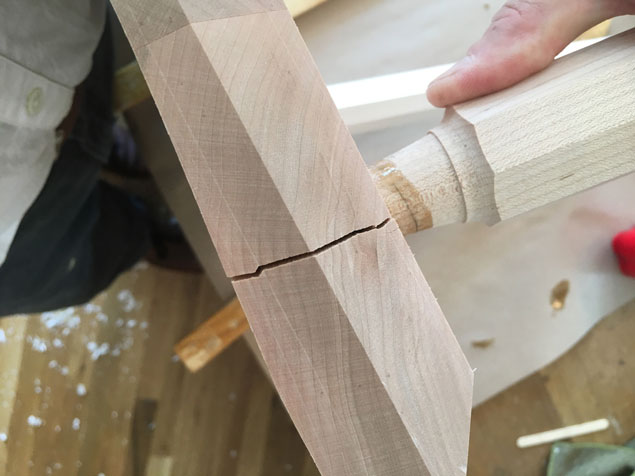
Luckily, you are holding a fantastic lever in your hands: the chair’s leg.
Insert the leg’s tenon about halfway into the mortise and lever it toward the centerline of the seat. The crack should open nicely. Do this a couple times so you can get a feel for how much leverage you need to open the split almost 1/8”.
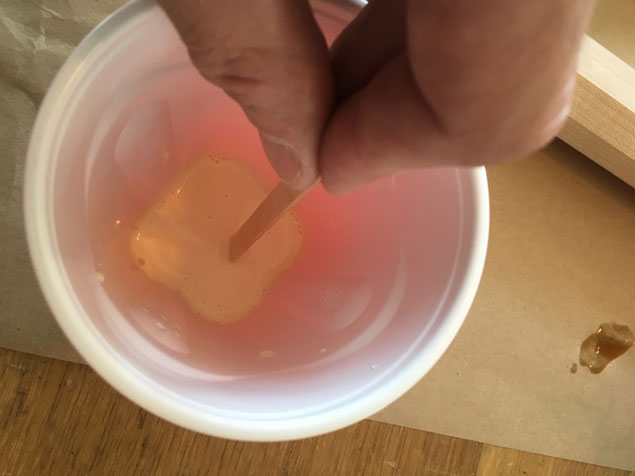
Now prepare the glue. You can use yellow glue or liquid hide for this operation. I used yellow glue because I was almost out of liquid hide and wanted to use the hide glue for the joints (not for the splits).
Thin the glue with water until it is the consistency of a thin varnish or lacquer. It should stick to a popsicle stick and run off in a thin stream when you pull the stick out of the glue.
Thinning the glue will slow its curing time and make it easier to wick into the splits. Thinning the glue can also weaken it a bit, so you want to be sure to get as much as possible into the split.
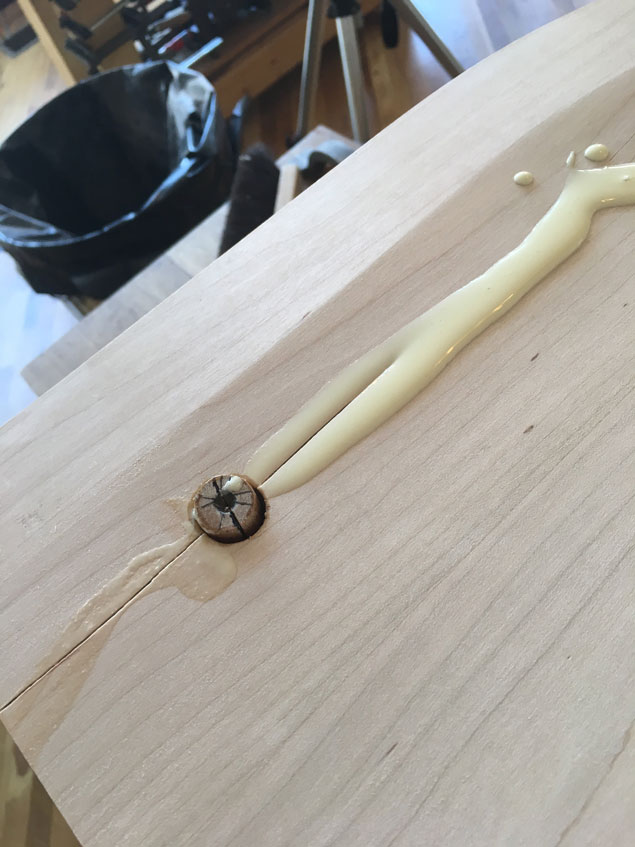
Open the split by levering the mortise with the leg. Pour the glue over the split and work the leg. The glue should wick into the split. Use your finger to redirect any excess over the split and lever again. After a few cycles of this, you will see the glue start to come out everywhere along the split when you close the split. That’s good.
For a long split, you might have to pour glue over it in a few locations. I had to put it on the end grain at the front of my seat and on the long grain on the top surface. This is not a time to skimp on glue.
After you wick the glue into the split, clamp up the seat across the split. With a D-shaped seat (as shown), this is easy. If you split the rear legs or your seat is shield-shaped, try using a band clamp around the seat to close the split. Then add some pressure across the grain anywhere you can get a clamp to hold.
With the seat clamped up, reassemble the chair. Re-apply hide glue. Drive the legs. Wedge the tenons. Because you have diluted glue spread everywhere, scrub the entire seat and legs. Leave the clamps on overnight.
Finally, cross your fingers that the glue got everywhere that it needed to go.
— Christopher Schwarz
Here are some supplies and tools we find essential in our everyday work around the shop. We may receive a commission from sales referred by our links; however, we have carefully selected these products for their usefulness and quality.


I may or may not know someone who might or might not use slightly thinned glue and hypodermic needles to fix cracks.
I’ve used the vacuum trick too but I have another method that works too if the job or split isn’t huge. I always have a short length of polyvinyl tubing hanging around just for that purpose. I simply blow the glue where it needs to be. First I keep some slow-set glue in a sriracha bottle so I can press the small tip to the crack and flood as much as I can get into it. Then finish off by pressing the end of the tubing to the crack and blowing it in. Careful though, if you blow hard and long enough you might end up a bit “silly headed”. LOL I’ve had success with this method with medium to small splits. If I ever split a seat, I’ll be sure and give your method a go. Thanks again, Chris.
Any thoughts, advice for an old chair whose seat has split down the middle from front to back?
Re; dental floss
Replace the blade in your coping or fret saw frame with dental floss for this purpose.
When fixing “mistakes” I prefer to use a white pva glue, for example Gorilla wood glue, LePage or Elmers white wood glue (not the Elmers school glue). They don’t contain the yellow dye added to yellow pva and thus dry clear. And when mixed with sawdust are invisible. However fixing a split as discussed here would be similar to edge joining and yellow pva will be likely be fine and hopefully you won’t see a yellow glue line. I only buy yellow pva, because I can get it by the gallon at our hardware store.
Thinning the GLUE!! Head slap!! I’ve tried the shop vac but never thinning the glue. That The beauty of this tip is that every time I strike the leg from now on I will do so with the confidence that I have the fix in my pocket ready to go.
I use a shop vac on the back side to suck glue into the crack. So far it has worked every time on a variety of shapes and usually without levering the piece. Usually.
I like to use dental floss to work the glue into cracks like this. The problem is growing a third hand to get it all done.
Could you put clamps like you have for the glue up on the chair before you drive the legs to prevent splitting?