We may receive a commission when you use our affiliate links. However, this does not impact our recommendations.
I have lost track of how many vises I’ve built or installed on workbenches. So my early-morning giddiness about the Benchcrafted Crisscross is worth note.
This week I’m putting a leg vise on my Holtzapffel workbench that will have both the new Benchcrafted Classic vise screw and the Crisscross Retro (instead of a parallel guide). I’ve used vises with the Crisscross installed, but this is the first Crisscross I’ve installed personally.
It is surreal.
When you install a Crisscross on a leg vise, you should install the Crisscross first. (What’s a Crisscross? I’ve been writing about these devices for many years. Here’s my first article from 2007.) Once the Crisscross is attached to both the chop of the vise and the leg of the bench, the chop floats in and out.
“Floats” is the only word, and it’s a word rarely applied to workbenches.
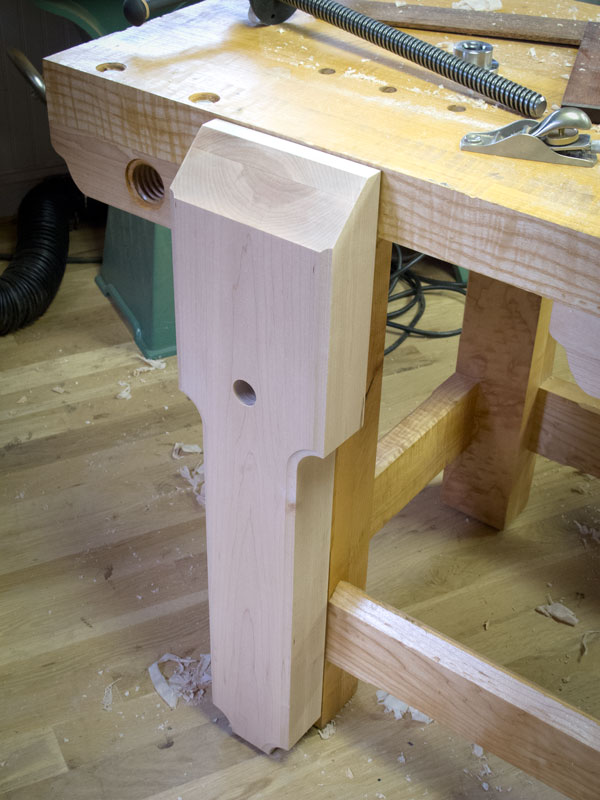
Today I also shaped the chop of the vise and got everything ready to add the Classic’s vise screw. But I am missing one Forstner bit that will finish the job.
— Christopher Schwarz
Here are some supplies and tools we find essential in our everyday work around the shop. We may receive a commission from sales referred by our links; however, we have carefully selected these products for their usefulness and quality.


Can you comment as to why you’ve switched out the vise and how you like it? Since I’m currently building this bench with the wide twin screw, I am interested in your thoughts on it.
Chris,
What a timely blog post. I have a Crisscross Solo waiting to be used for my bench build. After reading the installation instructions regarding bolting the front front rail to the leg, I’m debating on going with the parallel guide instead.
In your book, the attached the rails for the Holtzapffel using traditional M&T joinery. Your video doesn’t make it clear if you had to perform any surgery or add a bolt to keep your front rails joint tight.
Did you just route your channel for the Crisscross through the tenon? Would having a short tenon and drawbore pinning them be enough?
I really like the way you shaped the chop. Just so happens I will be shaping the chop for my new leg vise this weekend. Did you use a bandsaw to cut the radii at the corners of the cuts or is there another technique?
Have you ever tried to make a Saint Peter’s cross out of wood?
Very nice Chris! This may be a future upgrade from the bottom ratchet & roller style chop I have now. Also, for the Galoots out there; my wagon vise screw was made by sawing off the threaded end of a yard-sale weight-lifting set. No, it doesn’t float, but it satisfies my urge to “make do”.
Neat stuff, impressive gear. Question, tho:
Looking at the size of the chop, the “edge chamfer” on the top seems to be quite a lot. I can see it’s beefy enough for 4/4 stock and 8/4 stock will probably be okay, but to my eye, it looks excessive and limiting on the most essential working part of the piece. Why so large a bevel?
Very cool.
By the way, are those your legs, or are you riding a chicken?
(sorry, I couldn’t resist…I get the same comment all the time)
Is that some sort of bird’s-eye, quilted or otherwise figured maple on the inside of the back leg? It looks like a cool piece of wood.
Yes, I routed.
Yup, that pre-shaping chop sure is monolithic. And I love the cove detail on the finished chop. I know you avoid routers if possible, but did you use one for that?