We may receive a commission when you use our affiliate links. However, this does not impact our recommendations.
My mailbox has been deluged with questions about the Roorkhee chairs that will be featured in a fall issue of Popular Woodworking Magazine. The No. 1 question: What does a woodworker need to do to get ready?
Answer: First, make sure your subscription is up to date so you don’t miss the issue. New subscribers sign up here. Renew your subscription here. Have a question about your subscription? Go here.
No. 2 question: Do I need a lathe to make the chair? No. You can use a drawknife and a gouge to shape the legs. But these legs are easier to turn than the simplest pen. So give it a whirl. Or ask a friend to show you how.
No. 3 question: Where do I get the leather and hardware? OK, we’re all friends here, so I’m going to clue you into some inexpensive sources for very nice stuff.
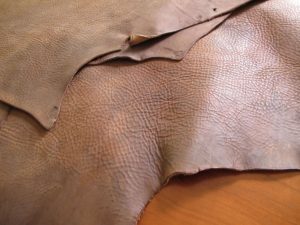
For leather, check out the stuff at Brettuns Village Leather. I just received 55 pounds of leather (five sides of cow) for my next run of chairs and couldn’t be more pleased with the price and the quality.
Check out the Crazy Horse sides, which are $85 delivered. A side is enough to do one chair and then some. These are dyed a beautiful chocolate brown on one side and are undyed on the other. And the stuff is soft like a broken-in leather jacket. But heavy enough for the chair.
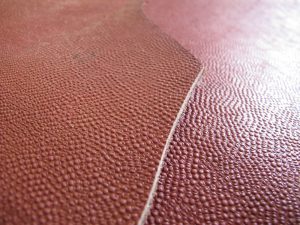
Also cool: The Gridiron Sides. I ordered these because they are waterproof. Very tough stuff, but still flexible enough to work on this chair. Also $85 delivered. Brettuns has some other beautiful sides. Look for something that is at least 3 or 4 ounces thick. One side – about 22 square feet or so – will be plenty for a chair and allow some goofs.
What about buckles? You’ll need some buckles for the optional straps that join the legs. Or for the left-to-right strap under the seat. Or for attaching the back. Installing the buckles makes the chair easier to assemble and disassemble. And it makes the leather adjustable if it stretches a lot.
I’ll post some videos on making buckles for the chair in a future blog entry. Until then, here is a good source for well-made buckles: Buckles International.
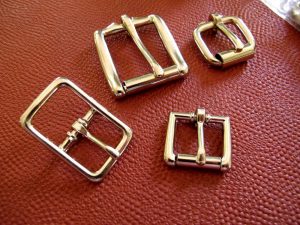
The good news is that these buckles are very well made and inexpensive – as low as 32 cents per buckle. The downside: there’s a $25 minimum order and you have to order a bag of 10 buckles to get the item. I ordered 40 buckles to get up to $25. So I’m set for the year. (I might be making people belts for Christmas gifts this year.)
These buckles are made in Taiwan. I ordered the 49-B 1” buckle for the understrap. And then a variety of 3/4” buckles for the strapping on other parts of the chair: the 75-Z, the 121-Z and the 999. Note the materials listed for each buckle. I bought brass buckles and stainless wire buckles – all with a nickel finish. I’m not a fan of zinc die-cast hardware (for the most part).
So there you have it: A jump-start on the project.
— Christopher Schwarz
Here are some supplies and tools we find essential in our everyday work around the shop. We may receive a commission from sales referred by our links; however, we have carefully selected these products for their usefulness and quality.


What issue is this project going to appear in? I thought it was going to be the August issue. Looking forward to it.
Hi Chris,
I’m enjoying your journey into 19th century traveling furniture. For the past few years I’ve been making and using 18th century traveling furniture. Thus far I’ve made a walnut folding field bedstead with tester frame, a walnut folding side chair, a flat-top leather covered trunk, and a round campaign-style leather covered trunk, as well as a crate and painted (ice)chest. I’m presently working on a mahogany folding table (I’m making my own hardware for this one) and a shaving box. Here is a link to these projects: http://tinyurl.com/nhks6v
Cheers,
John Johnston
Christopher, I thought I read on the blog that the chair would be in the next issue. When it arrived, it was about the chests. I have a deadline for a retired military officer. Can you point me to a plan?
Thanks
From what I’m reading, it’s $65 a hide for the leather. If this is the case, that is a great price. I worked at a tannery that supplied the big three and Nissan and Toyota with their leather. Employees could buy a hide for $50. In the ’90’s. Good source. Thanks.
How many chairs in a run and how many chairs can be made with 55lbs of leather?
Thanks for sharing your sources for hardware (and tools). Saves a lot of head scratching.
Mike
Looking forward to the plans!
This is the must-build project of the year. It’s beautiful, and can be used in our already furniture-filled house as extra comfortable seating when company comes.
Maybe I can work out a way to fold up the Morris chair and keep this one out?
Don’t forget the saddlery people. Here in Australia, they can be a good source of leather working hardware – including solid brass roller full buckles. These sure beat nickel plated, electro brass or die cast buckles for looks.
Three of the buckles pictured above are half buckles – they need leather keepers made to hold the strap tails down, which is a pest to do. A full buckle, as per the bottom left one pictured, does not need a leather keeper to hold down the strap tail. Much better and less mucking around.
Wood. Mahogany? 12/4?
I have no lathe (though this sure seems like a good excuse). Here’s a thought:
Sketchup a pattern for us to steal.
There are many mail-order / online turners (some of whom advertise in the mag). Maybe we can convince one to “make us a deal”.