We may receive a commission when you use our affiliate links. However, this does not impact our recommendations.

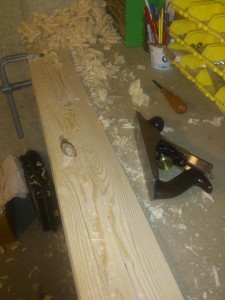
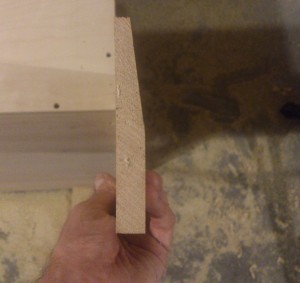
Cutting a bevel on a piece of trim with a handplane. This is a practice piece with a big knot in the middle.
I just did something pretty satisfying. I just completed my first woodworking task – a task that’s part of a build – with a handplane.
I’m pretty sure that no one other than me will be impressed with this feat. It was a really simple task, and if you look back in the blog archives, you’ll see that it has been a full three months since I bought the handplane in question.
In my defense, I had to tune up the plane. That took a few hours. And then I had to write about refurbishing the plane, since that’s my job – and that took another hour or so. I guess we’re only up to four hours total.
Anyway it is all the more satisfying for having taken a little while.
I’m working on my second traditional-looking tool chest, based on the Chris Schwarz design. On the first one, I used store-bought moulding to build the top dust seal and the bottom trim. This was expensive.
On the second tool chest, I resolved to make my own trim from some pine boards I have on hand. The only question was how to cut the bevel along one edge of each piece. Chris recommends using a table saw – and that is indeed an easy way to do it. But I don’t have a table saw and I didn’t want to rent one. It seemed like cutting a simple bevel would be something I can do with available tools.
My first idea was to use my lunchbox planer. I sprayed adhesive to a small piece of scrap wood and applied it to the back face of the trim piece in order to lift one side higher than the other. I ran it through the planer a couple times and it worked ok until the adhesive failed. After fiddling with some more adhesive and some blue tape, and still experiencing failure, I decided I could tackle this with the handplane.
Since the bevel was already started, the job was pretty easy. I guess this is the definition of hybrid woodworking. I simply clamped the trim piece to a workbench, adjusted the plane and started pushing it across the beveled face. After several minutes, the plane clogged up – but this only took a few minutes to fix. I got back to work and finished the job.
I can see I’m going to enjoy the rest of this build, and future projects, with the newfound skill on an old-fashioned tool.
Buy our fantastic handplane value pack so you can do the same! Quantities are limited.
–Dan Farnbach
Here are some supplies and tools we find essential in our everyday work around the shop. We may receive a commission from sales referred by our links; however, we have carefully selected these products for their usefulness and quality.


Dan,
How do I get a question to Bob Lang? Ref: 21st Century workbench.
Thanks
Randy Hartman
Lima,Peru
randall.e.hartman@gmail.com
When I was a kid, the term “hand plane” meant the same as ‘inoperable’ and ‘useless.’ Just in recent years I’ve become interested in planes, and now have five. One is a Stanley bought about ten years ago which, as it came out of the box, was unusable. I finally made it work but only with the aid of a friend’s milling machine. Design wise, it is still an abortion. Then I made a couple of planes – wooden ones. One of these became damaged and was discarded. I have bought two very old and rusted planes at estate sales. I brought ’em back to life, functionally, but they’re not much to look at. Then I bought a couple of Groz planes – a jack plane and a low angle scrub plane. Made in India, very low quality. Prices were unbelievably low so I didn’t expect much. Several hours work on each produced two very satisfactorily functioning if unlovely tools. I can get the shavings down to about 0.002″ thickness. However, recently I needed to use a plane for a project, and I tried several for curiosity’s sake. I was delighted to find that the best one in my collection was the one I had built myself. THAT is satisfaction.
One more thing. In 1947 I attended a school for aircraft and engine mechanics to get an FAA license. In the airframe classes, we had to learn to splice a wooden wing spar, which requires a scarf joint of, I believe, 10:1. Our spars in the class were about 1.5″ thick. We did it without power tools. It had to be quite flat and free of sawdust, so the plane was the last thing to touch it before gluing up. Cull plates were added and the hide glue was allowed to cure. Then each was tested by twisting action to the point of complete separation. If the exposed surfaces showed too much glue, we had to try again until we met with success. We must have had some good planes, but I guess I was too dumb to appreciate them.
Loved the post.
Now I don’t feel quite so guilty for delaying a task!
Just wanted you to clarify one small point, if you could….
When you wrote that you don’t own a tablesaw, what did you actually mean?