We may receive a commission when you use our affiliate links. However, this does not impact our recommendations.
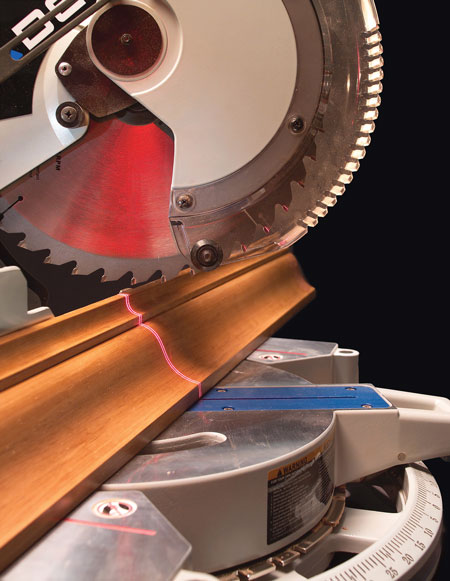
Whether you’re building furniture, cutting trim molding or framing a garage, a compound miter saw is an indispensable tool. It can swivel left or right to make a standard miter and tilt to make a compound cut. Miter saws are capable of both rough and precision work. But no matter what you’re doing, hitting your marking line right on the nose has always been a problem. Help is on the way. An accurate laser shows you exactly where the cut will go (Photo 1). A laser just might save you from a careless accident, too. As a fellow woodworker put it, “If the red line is shining on your hand, don’t cut!”
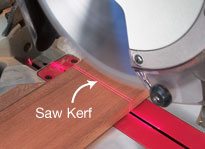
PHOTO 1: |
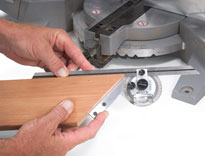
PHOTO 2: |

PHOTO 3: |

PHOTO 4: |
10-Inch vs. 12-Inch Saws
Most miter saws come with 10-in. or 12-in.-diameter. blades. (Some saws take 8-in. blades, but we didn’t test any of those. We also excluded a few saws that can’t tilt.) Both sizes share the same general features, but there are major differences: Capacity. Using construction lumber as a rough guide, a 10-in. saw can crosscut and bevel 4x4s and 2x6s. To handle 2x8s and wide crown molding you have to move up to a 12-in. saw. Price. There’s a huge difference. 10-in. saws start at about $100; 12-in. at $250. Weight. A 12-in. saw can weigh twice as much as a 10 in. Your back will know the difference if you have to lug the machine around a lot. 10 & 12 in Saws info
|
PHOTO 5: |

PHOTO 6: |
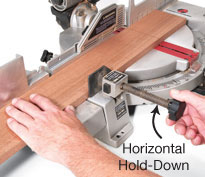
PHOTO 7: |
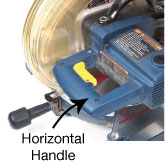
PHOTO 8: |
 |
Accuracy
Although a miter saw is awfully handy in the shop for simply whacking off boards to an approximate length, you should also be able to rely on it to precisely make a square cut and miter any angle. Every saw has preset detents for common angles, but we’ve always been skeptical about how accurate those detents really are. Our test results with a high-quality blade showed that virtually all saws are accurate to 1/12 degree of their stated angles (Photo 2). That’s an error of 1/64 in. over an 11-in. cut. Not perfect, but pretty darn good! Here’s the catch: Every saw, right out of the box, has to be tweaked to cut a perfect 90-degree angle before the other detents will be accurate. After that, you’re all set. All miter saws aren’t equally accurate between the detents, however. The best saws can easily be locked down 1/2 degree off a detent, but some need babying with two hands to prevent them from sliding back into the detent. At other angles, the best saws lock down without moving. However, the turntable on some saws rotates slightly, changing the angle from what you intend.
Cutting Crown Molding
Compound miter saws excel at cutting long lengths of molding. The most difficult to cut is crown molding, a wide, contoured piece of trim that’s angled between the wall and ceiling or placed at the top of a piece of furniture. The hard part is cutting crown molding to form a right angle, such as the inside corner of two walls. To cut that 45-degree miter on crown molding with any saw, you can lay the molding flat, tilt the blade and make a compound cut (Photo 3). Many saws have a helpful turntable detent at 31.6 degrees and a marking on the bevel scale at 33.8 degrees for this unusual cut. (However, the turntable detent replaces one at 30 degrees, a standard angle for splicing other kinds of trim molding, such as quarter-round.) On saws with tall fences, you don’t have to confuse matters by tilting the blade. Instead you can leave the blade at 90 degrees and stand the molding upright (Photo 4).
Other Feature
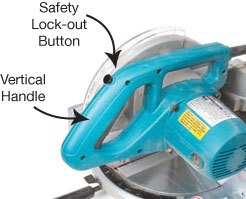
Dual Bevel. Some saws tilt both left and right (Photo 5). This means you can do all your cutting with the stock on one side of the saw. You only need one long extension table or support. Easy-to-Read Scale. Legibility is paramount, especially under dim or dusty conditions (Photo 6). Scales that are out in the open are best. You must look down inside a deep, shadowy well to read other scales. We prefer a hairline cursor rather than a pointer. When it’s time to tilt the blade, we like flat bevel scales because they’re easy to dust off. Scales with raised markings are harder to read. They’re dust magnets! Dusty or not, many bevel scales are difficult to read because their lines are too close together. We’d rather have a scale with widely spaced markings. Quick-Action Hold-Downs. Hold-downs are more convenient and work far better than clamps to secure your work (Photo 7). Some situations call for a horizontal hold-down; others, a vertical. The best saws have both, but often you must purchase them as accessories. Horizontal Handle. Horizontal handles are comfortable when the saw is any height off the floor (Photo 8). In fact, they’re good even when the saw is on the floor. Vertical handles work well at one height only. Safety Lock-Out Button. Many pros cringe at this feature because they find it a bother, but we like an additional button that prevents you from accidentally starting the saw (Photo 8). Unfortunately, few horizontal handles have this button. Low Noise. You should wear hearing protection when working with any miter saw. There’s a huge range of noise levels. The loudest ones are 10 times noisier than the quietest ones.
Good Dust Collection. Most miter saws throw dust everywhere. None have substantially solved this annoying problem.
Maximizing Capacity

Few things are as annoying as a miter saw that doesn’t have quite enough capacity to make a complete cut through your stock, as shown above. Miter saw capacity can be a confusing numbers game, but here’s the simple version:
• A 10-in. saw can handle 4x4s and 2x6s.
• A 12-in. saw can handle 4x4s, 2x6s and 2x8s.
The two simple tricks below can add a crucial amount of capacity to any miter saw.

Increase cutting depth by adding a piece of scrap to the fence. This saw previously left a sliver hanging on a 4×4, but now it makes a clean cut. |

Increase cutting width by laying a piece of scrap on the bed. A 3/4-in.- thick piece adds 1/2 to 3/4 in. to the saw’s capacity. Sometimes that’s all you need. |
Lazor
Lasers leave the old trial-and-error method of sawing to a line back in the dust. There’s no more guessing where the first cut actually goes. Imagine being able to accurately align a cut every time. When your mark is on the uneven surface of a molding, a laser shining across the whole face is really sweet. Here’s a close-up look at the three types of lasers
available on miter saws:
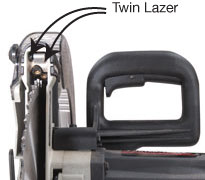
Two lasers are better than one. These lasers are located inside the guard housing. They’re easy to re-aim for blades of different thicknesses. |
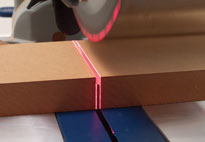
Adjustable double-line lasers are clearly the best. They can be independently aimed to show you exactly where the kerf will go. With two lines, it doesn’t matter whether your mark is on the right or left side of the blade. There’s a switch on the handle to turn on the lasers. These lasers are featured on one Delta and one Porter-Cable saw. |
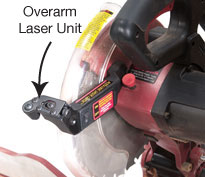
This laser is mounted on an arm in front of the guard. The laser can be adjusted to shine on either the left or right side of the kerf. |
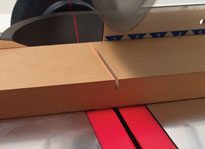
An adjustable single-line laser is second-best. It wraps down the front edge of a board, too, which is handy if that’s where your mark is located. There’s a switch on the arm to turn on the laser. You’ll find this kind of laser on one Tradesman saw. |

This laser is mounted in a disc that serves as the saw’s arbor washer. It only shines on the left side of the kerf, and cannot be aimed. |
A non-adjustable single-line laser is only a rough guide. The laser may be right on the money when the blade is upright, but the line moves off the kerf as you bring down the blade. The laser only comes on when the blade is spinning. You’ll find it on several Craftsman, Ridgid and Ryobi saws. |
Recommendations
On average, there’s a $150 price difference between 10-in. and 12-in. saws. Outfitted with a good blade, both are equally accurate. 10-in. saws are smaller and lighter, but a 12-in. saw has the extra capacity that someday, somewhere, you’re bound to want. A laser is icing on the cake. You don’t absolutely need one, but it sure makes cutting to a line far easier, particularly on moldings.
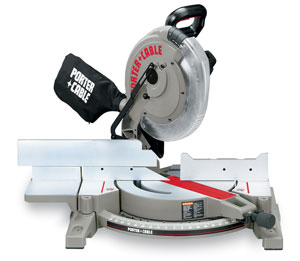
Editors’ Choices |

Remarkable state-of-the-art double-line lasers distinguish these two 12-in. miter saws. Both saws are essentially the same, and even without the lasers they’re great tools. One drawback: they’re large and heavy. |
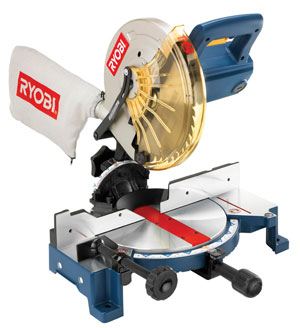
Best Buys: |
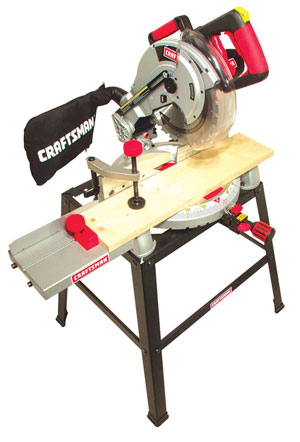
Craftsman 24276, $170
|
Here are some supplies and tools we find essential in our everyday work around the shop. We may receive a commission from sales referred by our links; however, we have carefully selected these products for their usefulness and quality.


