We may receive a commission when you use our affiliate links. However, this does not impact our recommendations.
I decided to avoid giving a written comprehensive lesson in how to prepare stock by hand (although I did record a video for you to watch – see below). I want to instead discuss the mindset of the process and things to consider with the aim of maximising your time in the shop. If you want the full written process you could do worse than read any decent woodworking book from mid 20th century or earlier (“The Practical Woodworker” is a good example – and there are numerous others. My copy was an eBay find but the stuff inside is just the same.
So I’m not going to tell you the the best plane for the job, the best radius for your jack plane or if you really need a scrub plane. If you stick with woodworking long enough you’ll develop your own preferences that work best for you, your material and projects. As I reflected further I also realised that the tips are very similar for stock preparation using machines; it’s just you feel more aware of your choices through your body when you do the process by hand, and it’s nice to feel like you’ve not been through 12 rounds at the end of the process.
The first point is remember you are a human; play to your strengths, or even weaknesses, depending on how you look at it. Face it: You’ll never be able to prepare stock like a machine. Not gonna happen. And why would you? Machines excel in powering through work quickly and making everything totally uniform and consistent. They were designed from the ground up for only one task. We, however, can be versatile. Let me be clear before I move on, what I’m proposing is not shoddy work, cutting corners and lowering quality. It’s working smart, working appropriately for typical woodworking projects and maximising time. It’s a view to prevent overworking the job.
With that in mind here are my tips.
Choose Timber Wisely
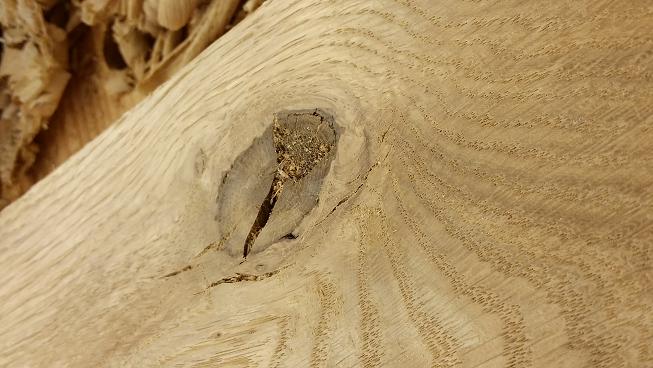
If you are able to pick your timber in person, do so. Look for straight and consistent timber, hopefully with the figure you require, and pick it for the best surfaces. But that’s the same for machines right? Yes it is – but you’ll want to be a bit more critical when working by hand. When I’m using machines, I care much less about the grain direction and straightness, because I know the machine won’t break a sweat getting it into shape. I picked a pretty grim piece of wood for the video, Quercus robur (English oak) with a stinking great knot and a snake-like wiggle along the length of the board. If I’d had the choice of standing in the lumberyard, I’d have looked for something a little better.
Accept What You Have Picked
So the project calls for all 3/4″ stock – you could fall into the machine trap here. Does it need to be 3/4″ thick? Will the design look any worse if it finished a trifle thicker? Most likely, it’ll make no difference. Just bearing that one thing in mind could save anything from minutes to hours depending on the project. Again, this point also applies to machine work, although making another pass on a board with power at hand takes only moments, with virtually no impact on project time.
Perfectly Flat?
Maybe, on some areas, it’s essential to get the stock perfectly flat; on others, less so. I had some feedback on the video along the lines of how difficult it can be for people to judge how straight a component should be. The proposal was a guide of how much gap beneath a straightedge is OK. The trouble is that this is the machine or the engineer in us. That’s not a bad thing; there are a lot of exciting things happening in woodworking right now with CNC and those mindsets will unleash something new by maximising the potential of those tools. If you are unsure on how flat something needs to be, go back a few steps and don’t mill yet. Pick some easy projects (a tool tote perhaps!). Have some fun and get a feel for it, discover how wood will change on you overnight, and how you have to adjust to get the best out of what you have.
Not All at Once
Try to use the wood as you go if at all possible. Milling a stack of boards by hand might be rewarding, but if you don’t join it together within a reasonable time frame, it’s likely to move on you and you’ll be breaking a sweat again.
Know When to Stop
If the grain is tearing, if you are in pain, if it’s not happening for you right now, take a break. Reflect for a moment – could you spin the wood around and work with the grain a little better? Is that cap iron set well and the iron sharp? Is the planing height right for you? (If not, add blocks under the bench or cut a few inches of the legs.) Pausing for 60 seconds might feel like a long time, but it’ll allow you to work smart and adjust.
No Need for Micrometers
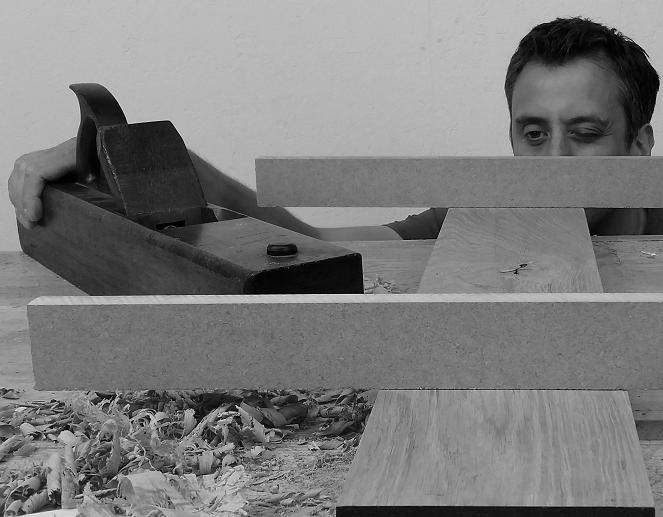
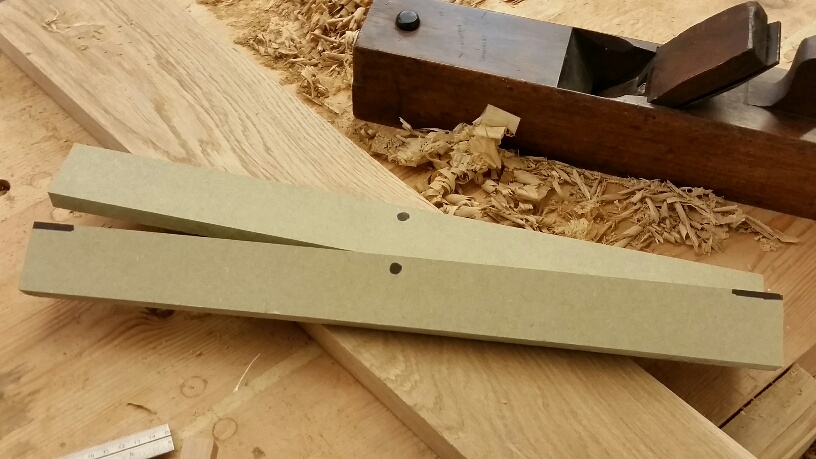
Above you’ll see my winding sticks, artisan MDF with hand-applied Sharpie. Joking aside, they are as good as anything else. Yes, I’ve got nicer ones. But the point is, they meet the criteria. The gauge will be your eyes; trust them and act accordingly. In addition, a straight edge is a straightedge; a pragmatic solution might be a spirit level.
Think about your project, if it’s a reproduction, try to look at some genuine furniture from the time period you are interested in. You’ll find tool marks, gaps and imperfections. You can reflect on what you see and transfer what you feel comfortable with to your project as it unfolds.
Be Prepared to Fail
Sometimes things don’t work out. You’ll go past a gauge line, rip out a chunk of grain or hollow out a board. Accept that, see if you can work around the issue and accept it. If not, it’ll come for something else. Plenty of practice on easy-planing woods such as pine will dial you in nicely; the nasty stuff can come later.
It’s Not Pointless
Having this skill can be very useful. When the stock is too big or too small to machine safely or conveniently, being able to do the task at hand with planes will make you a more versatile woodworker.
Have Fun!
If you hate it, don’t do it. Find a friend, club, guild or lumberyard that can prepare stock for you with machines. No shame in that at all. Or invest in some machines. Never prepare wood by hand because you think you should do it; do it because you want to do it.
I hope that I’ve conveyed something about the process, some of the softer things that technical write-up might not have. If you have any tips please leave a comment.
Here are some supplies and tools we find essential in our everyday work around the shop. We may receive a commission from sales referred by our links; however, we have carefully selected these products for their usefulness and quality.


Excellent video, and a helpful memory refresher. I’m curious: Should one always move from a jack plane to a trying (jointer) plane prior to using a smoothing plane? Would you have been able to get the same or similar result from skipping the trying plane? Why or why not? (Yes, I’m wondering if I must purchase a trying plane, which wouldn’t be the worst thing.) Thank you!
My dad, who was an engineer, made life a little easier with his oft-repeated comment: “Close enough for government work!” Nowadays most of my projects are apparently being done for “the government”, because I allow for the occasional “fudge” where it’s not essential. Or as the Navajo or Hopi indians do…I’m told each of their blankets contain intentional “mistakes” or flaws, on the theory that nothing made by humans can be “perfect”.
I’m following a certain fellow, Paul Sellers, whose projects often call for 7/8″ timber. Well, I can easily (read that as “inexpensively”) get 3/4″ lumber. Timber, lumber, the difference is only 1/8″, and anyway, the little old ladies I make canes for at my wife’s church are, by definition — “little”.
Good enough. I’ve done that for years and made a living elsewhere. Why not enjoy it now, also?
Thanks very much for this post!
Honestly, I almost just skipped it, thinking that I’ve seen/read enough about the topic. But I wanted something to ‘entertain’ me while I ate lunch, so I played it. It was well worth while. So glad I didn’t skip it! Beyond your central point about dimensions, which I appreciate, I picked up a couple of tips I didn’t know, or at least had forgotten.
So thanks again!
In some future video or blog, would you discuss your bench, why you chose/built that style, etc. I’m particularly interested in your face vise, which is wider than many and has a screw that appears offset from the typical center position. Thanks for all the info you are sharing.
Robert
Also, it’s an excellent workout, and no matter how much you might not enjoy it, it beats the heck out of a treadmill.
A few things I’d like to add…I agree with you completely considering stock thickness. Work with what you have. If your stock is 7/8 use it. If your plans call for 3/4 and your finished stock is above or below that, go with what you have. I rarely follow woodworking plans for two reasons, one being that most of them aren’t very helpful, and secondly they are far too arbitrary and are far too often based on “nominal thickness” stock.
As far as not preparing lumber by hand at all, I once again agree. If you don’t enjoy it you likely never will. Of course there are times when it’s necessary, but to reiterate, if you need to plane off 1/16th of one board to make it presentable and only 1/1000th from another, don’t worry too much about making them both uniform.
I try to purchase most of my lumber as prepped as I can get it and work with it from there. Even in the golden era of furniture making (18th-19th centuries) many shops purchased their lumber pre-dimensioned from the sawyer.
Very practical advice/encouragement.
As part time (as needed), wood worker, I agree, that “perfection”, is the desire, but not always necessary or achievable. It’s no reason to get all “in a bother”, or quit. My crude attempts, sometimes cause me great discouragement, especially since I’ve lost nearly all the sight in my left eye. To give up is (tempting), but not acceptable. So, I live with “good enough”.
Steve