We may receive a commission when you use our affiliate links. However, this does not impact our recommendations.
 From today on, expect to see a side bead on just about everything I build; I’ve recently received the 3/16″ beading plane I ordered from Phil Edwards of Philly Planes. And she’s a beaut – quartersawn English beech fully boxed with English boxwood and an 01 iron (at I believe a 50° pitch…I can’t find my protractor), all made by Phil in his Dorset, England, shop, using traditional methods.
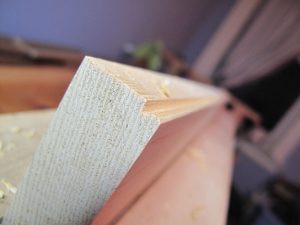
 So what does this plane do? It’s a dedicated profile with an integral fence and depth stop that cuts a bead (a semi-circular shape that ends in a quirk) on the edge of a board. And it cuts it fast – much faster than I can set up a router table (and a lot more fun, too) – just a few passes with a sharp blade and Bob’s your uncle.
Why would I want a bead on everything? Again, it’s a fun plane to use. Plus, beads are an excellent way to hide a seam where, say, the nailed-on bottom of a tool-chest till meets the front, or where shiplapped backboards meet. A bead at a top edge softens corners and adds visual interest. And did I mention it’s irresistibly fun?
Now I’d best review my copy of Larry Williams’ “Sharpening Profiled Hand Tools” DVD so I don’t muck up the iron. And I’d best start saving for another beader or two in different sizes.
Here are some supplies and tools we find essential in our everyday work around the shop. We may receive a commission from sales referred by our links; however, we have carefully selected these products for their usefulness and quality.


Gesh.. “Just because you got a new hammer, doesn’t make everything a nail!” or so I tell my 7 yr old. Oh wait.. wrong forum. (Or is it? )
Megan,
Although a well tuned moulding plane can be a pleasure to use, I prefer to make them from scratch, particularly the more unusual types. I recently completed a set of eight airtight case planes & last year a set of six planemaker’s boxing planes.
“Gateway Moulding plane” indeed! Someone get her a snipes bills set, and a couple of rounds! Or is is hollows? I can never remember, are they labeled for what they make, or are they labeled for what they are? A Hollow plane make a round, and a round plane makes a hollow, or a hollow plane make a hollow and a round plane makes a round? Where’s Matt Bickford when you need him?!
Seriously though, do you really need ANOTHER slippery slope to slide down? OTOH, what else are you going to put against the back wall at the bottom of your ATC?
(Owner of an enhanced half set of Mr Bickford’s work, so I know whereof I speak, the slippery part I mean.)
M Stone
Nice plane, congrats! Side beads are very handy planes to have. One tip, though: When you use a molding plane, you should start at the farthest part of the board from you and work back toward yourself in short strokes. This allows the plane to ride in the profile it has already cut, plus helps keep the plane from clogging up, as the mouth should necessarily be set fairly tightly. You will be able to pretty easily tell when you have fully cut your profile – you will smell it! The plane will actually burnish the wood. Then feel the molding after you’re done: no sanding necessary! it will be as smooth as the proverbial baby’s bottom.
Megan said
“just a few passes with a sharp blade and Bob’s your uncle.”
Never knew your were an Aussie
Megan, can you provide some examples of what this looks like on furniture (or toolchests)?
Thanks,
Shawn
I get an inverse tan from months of rainy northwest winter
Megan, I wholeheartedly agree. My first molding plane was a 3/8″ beading plane by Greenslade of Bristol, England. Like you say, it’s a blast to use, but it being vintage, I had to spend some time tuning it up. I’ve heard good things about Phil Edwards so I think you’ll have a lifetime of use out of your new treasure.
And you’re right, I find myself using it all the time. I use it to visually ease boring joints and to add visual interest by way of a decorative element. An example would be the wall-mounted wine-glass rack I built (http://lumberjocks.com/planepassion/blog/32287).
You can save the protractor by measuring the rise and run of the iron … I’m sure you have a ruler handy … then calc the inverse tan 🙂