We may receive a commission when you use our affiliate links. However, this does not impact our recommendations.

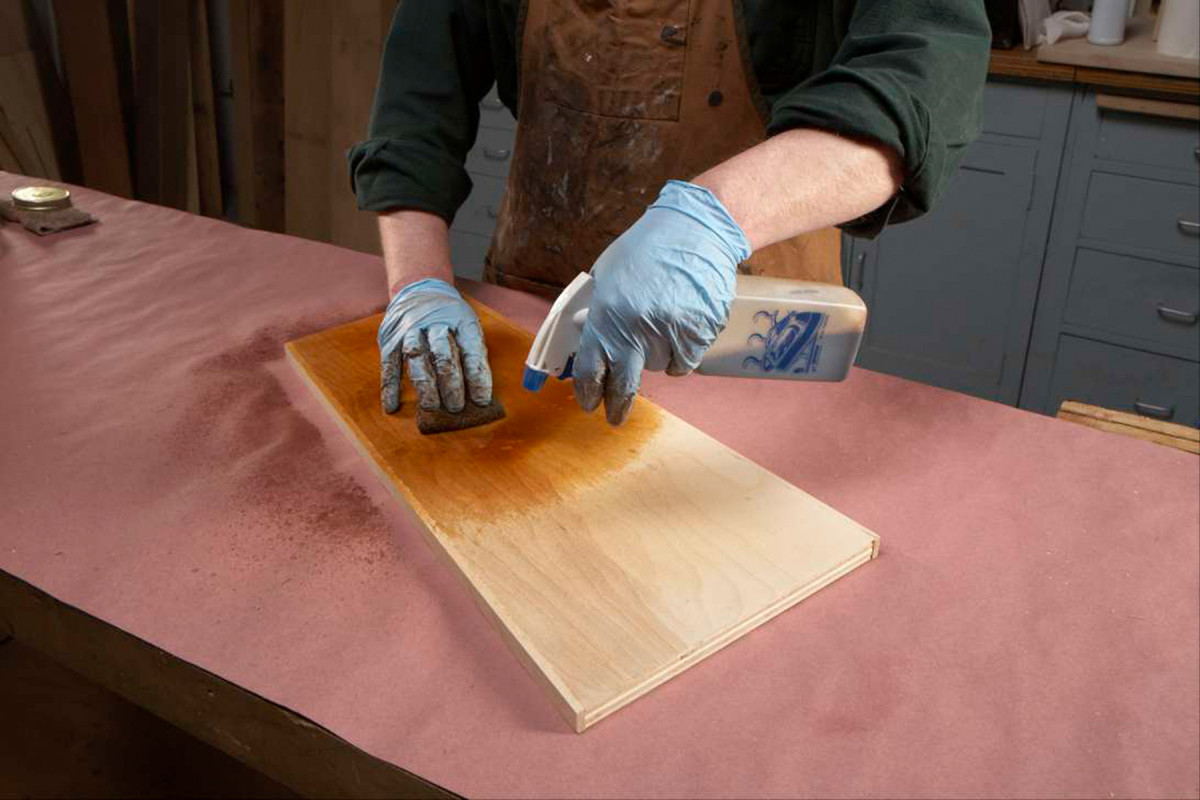
1. Quickly apply a coat of diluted golden brown water-based dye, using a pump sprayer and a rag. Let the dye saturate the surface, then wipe off the excess and let the surface dry.
Achieve rich, warm color without blotching in 4 easy steps.
If you’ve ever stained birch plywood a dark color, the results were probably so blotchy and difficult to reverse that you vowed, “Never again!” Which is too bad, because if you could stain birch plywood a deep, reddish-brown color so it looked like cherry plywood, you could save a bundle on materials for your next project.
Here’s why you should never say “never.” I’m going to show you how to give birch plywood a rich, warm color that resembles cherry. This process effectively blends the dark-colored heartwood and light-colored sapwood that typically appears on most grades of birch plywood. It even works on the budget-priced grades you’ll find at home centers. This process also blends solid wood edge banding with the plywood’s veneered surfaces. It uses readily available finishing products and it doesn’t require any special finishing equipment—you won’t even need a brush!
Baby steps
Creating a deep, uniform tone on birch plywood is a real challenge. Using regular dark-colored liquid oil-based cherry stains or dyes will result in unsightly blotching and/or a harsh unnatural color. Moreover, using stain or dye alone will not help blend the wood’s light and dark colors. Even gel stains (which are sometimes touted as “blotch-reducing” because they don’t soak in quite as much as liquid stains or dyes) work only a little better to meet these challenges.
Nonetheless, a more traditional cherry look can be achieved with a good plan and a little extra care. The best way to accomplish this is to deepen the color gradually, using a series of steps that are designed to minimize the risk of blotching. Each step also helps blend color differences between dark heartwood and light sapwood and also between birch veneer and solid birch edge banding.
Sand carefully
Sand the plywood and edge banding to 150 grit. The final sanding should be by hand to ensure no machine marks. On some grades of birch plywood the veneers are super-thin and the surfaces aren’t perfectly flat, so be careful. It can be easy to sand through the veneer, especially when you’re flushing up the edge banding.
Step 1
Mix two teaspoons of TransTint Golden Brown dye in 32 ounces of water. When applied to the bare wood, this diluted golden tone provides a warm ground color without causing noticeable blotching. Blotching becomes more noticeable with dark-colored stains or dyes, so you shouldn’t use them for this step. In order to minimize blotching, you have to deepen the color gradually.
Apply the dye and work it around to ensure consistent saturation and consistent color (Photo 1, above). Keep the wood wet long enough for the dye to saturate the surface—about two minutes. Wipe off the excess and let the surface dry for an hour or so, just long enough to let the water evaporate. Overnight curing isn’t required.
Step 2

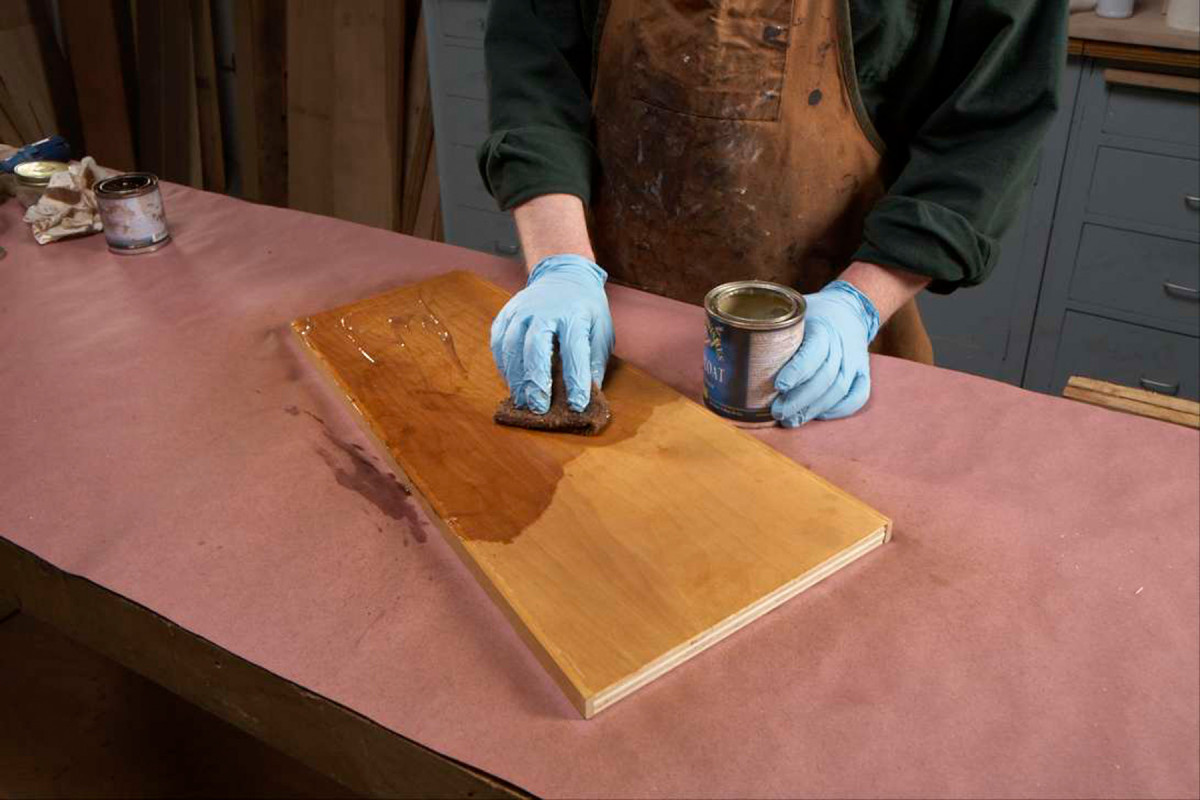
2. Apply a generous coat of clear gel varnish and rub it in to scrub off any grain-raising caused by the water-based dye. Remove the excess varnish and then immediately move to the next step.
Stage 1: Use General Finishes Clear Gel Topcoat as a stain controller to seal against blotching (Photo 2). Wipe on a coat and scrub it in, using a gray nylon abrasive pad to remove any raised grain caused by the water-based dye used in Step 1. Then rub off the excess.

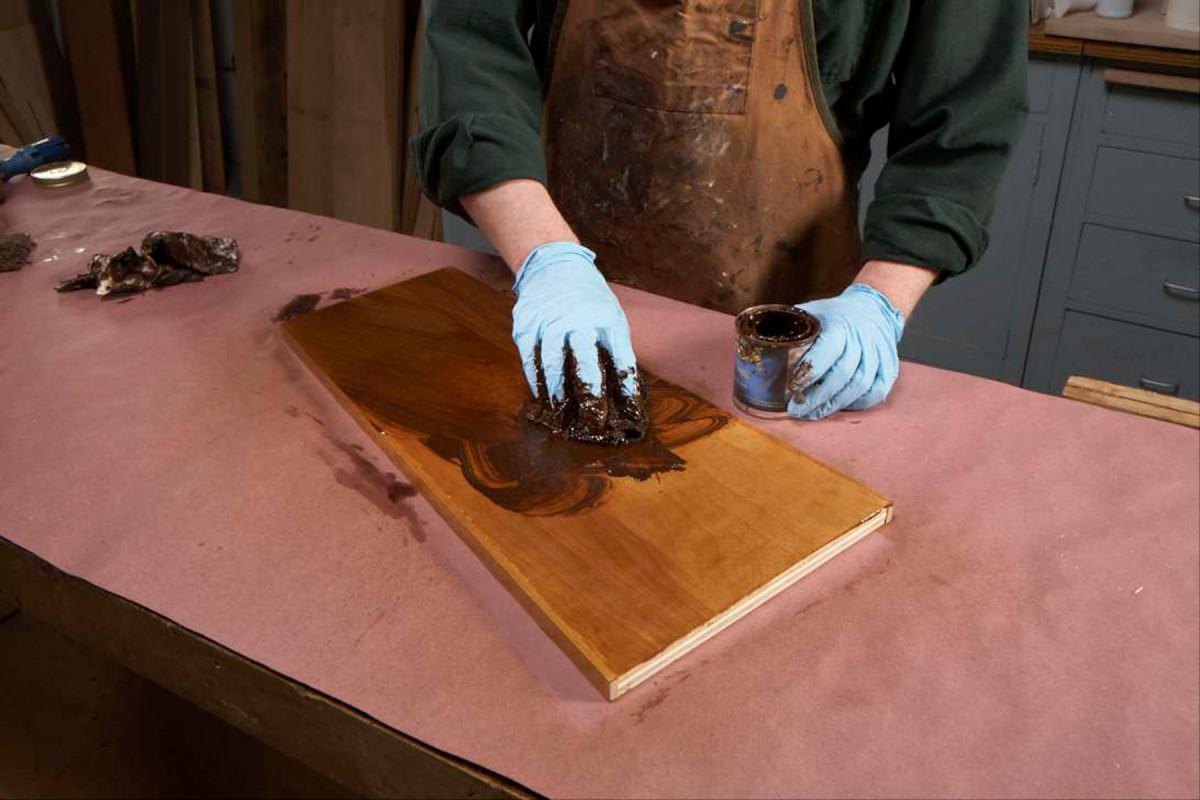
3. Apply golden brown gel stain. The wet gel varnish acts as a stain controller to keep the wood from looking blotchy. Rub off the excess stain and let the surface dry overnight.
Stage 2: Without any delay or drying time, follow by applying General Finishes Nutmeg Gel Stain (Photo 3). Work it in and rub off the excess within five minutes. Rub harder to lighten darker areas. Allow 24-hour drying time.
This two-stage application reduces blotching in two ways. Putting the clear gel varnish on first partially fills the wood’s porous areas, as a liquid stain controller does. Unlike a stain controller, though, the gel varnish doesn’t evaporate. It remains in the wood’s porous areas and dries, to help seal the surface. In addition, the nutmeg gel stain is a darker shade of golden brown than the dye, but it isn’t dark enough to cause blotching, so it simply adds part of the final color.
Step 3

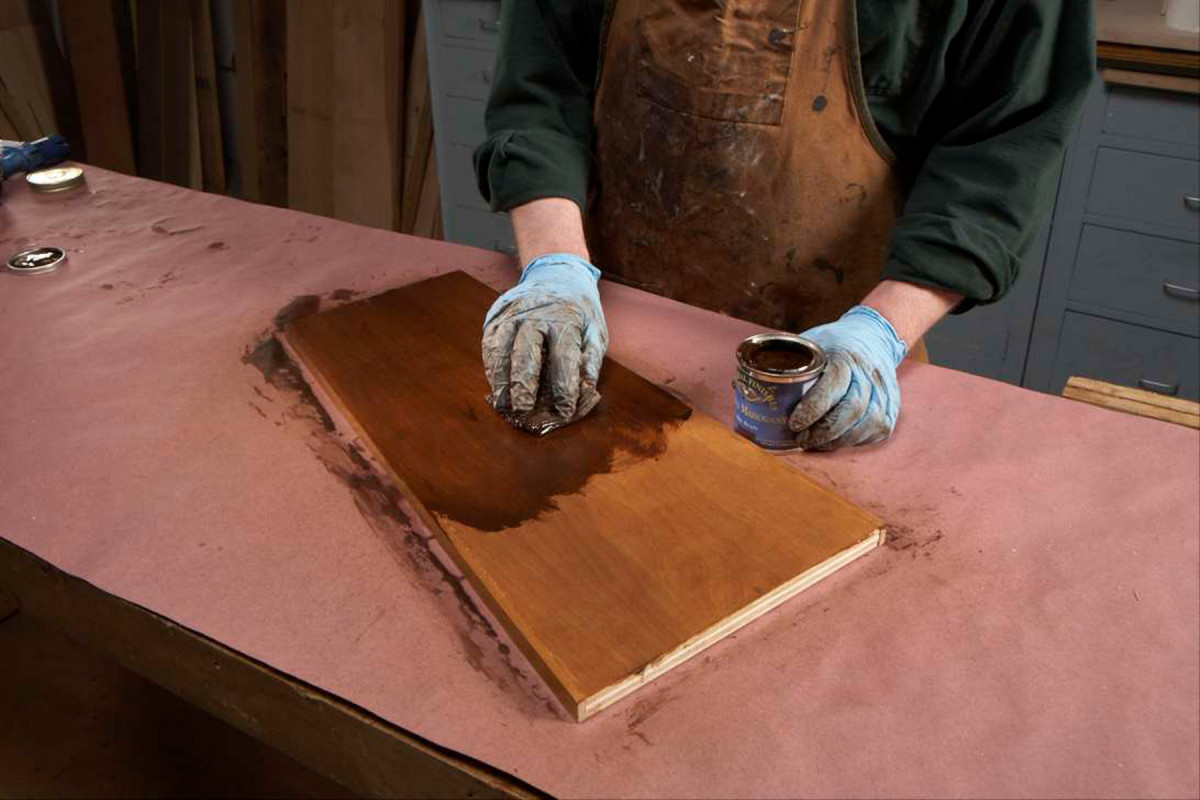
4. Now you can safely darken the color to a rich, deep brown, because the wood is sealed against blotching. To simulate cherry, wipe on and rub off dark, reddish-brown gel stain.
At this point, the surface is sealed well enough to prevent blotching (especially in the porous areas), but it’s still absorbent enough to soak up a little more stain. This makes it possible to evenly deepen the wood’s overall color and tone it to look like cherry by using a dark, reddish-brown gel stain (Photo 4). Liberally apply General Finishes Brown Mahogany gel stain and rub off the excess.
Let the surface dry for 24 hours. Then you can selectively add color to any areas that remain too light by using the brown mahogany gel stain as a glaze. As the previous coats have dried, there’s no risk: You can erase any glazing attempts that you don’t like with a little paint thinner on a rag. After glazing, allow 24 hours before applying clear coats.
Step 4
For a perfect hand-rubbed look, wipe on and rub off two more rounds of General Finishes Gel Topcoat. If you want a waterproof surface, apply one or more coats of General Finishes Satin Arm-R-Seal.
Here are some supplies and tools we find essential in our everyday work around the shop. We may receive a commission from sales referred by our links; however, we have carefully selected these products for their usefulness and quality.


See
…thats just to much man.
Nice article, but a photo of the finished process would have been helpful…