We may receive a commission when you use our affiliate links. However, this does not impact our recommendations.
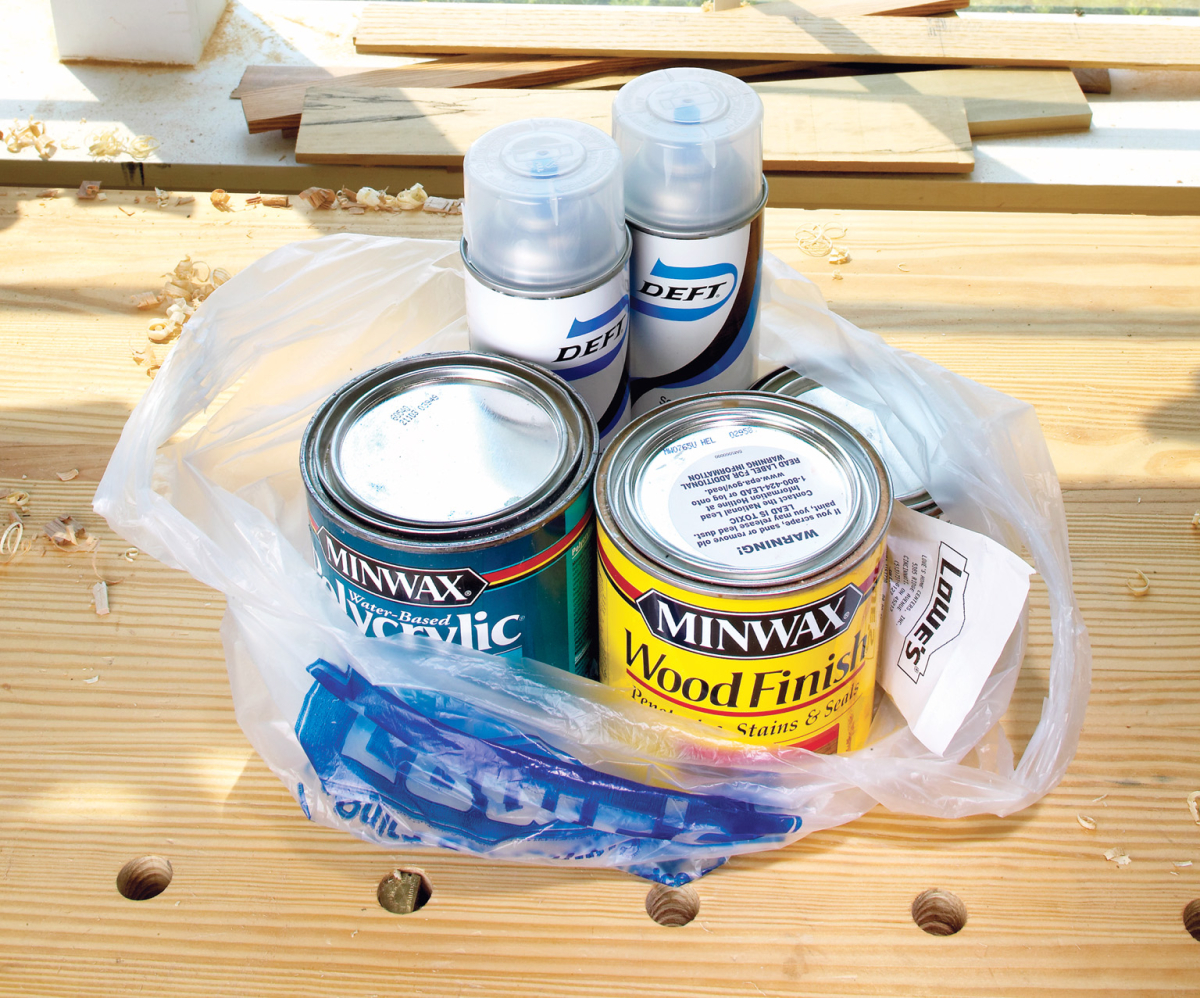
Home-store finishing. You don’t have to go to specialty retailers to find finishing supplies; you can produce a quality finish from products readily available at home centers.
You can achieve a great finish from commonly available products.
We all love home centers for the good stuff they carry and for their low prices. But home centers cater to the lowest common denominator consumer – that is, they carry only the stuff that has a big market.
The result is that many of the finishing products used on furniture and cabinets, products you read about in woodworking magazines or hear about in woodworking classes, are rarely found in these stores. Examples include very fine-grit sandpapers, dyes, glazes, paste wood fillers, spray lacquers and high-performance finishes such as catalyzed lacquer.
So how do you proceed if you have to do your finishing entirely from the products available at home centers?
It’s not all that difficult, really. You’re just limited in some of the decorative effects you can achieve – decorative effects you’re probably not interested in anyway because you’re using the natural color and figure of the wood for your decoration.
With the limited choice of finishing products at home centers, you can still get all the following:
■ Protection and durability ranging from minimal to the best possible
■ A sheen ranging from gloss to dead flat
■ Finishes ranging from amber to colorless
■ A near-flawless finish resembling sprayed lacquer
■ Elimination of blotching from stains
■ A glaze substitute
■ A pore-filling option
■ The ability to block off problems in the wood.
Marketing
Before proceeding with how to accomplish these objectives, I want to explain how companies producing and marketing finishing materials sell their products (how all companies probably sell their products, for that matter).
Finish companies target specific markets. Within any given category – oil stain, varnish, water-based finish, etc. – all companies’ products are very similar, if not identical. But because stores and catalogs carry different brands, and because the marketing can sometimes make you believe some brands are somehow better than others, you may think you’re getting inferior products at low-end, mass-consumer home centers when you’re not.
For example, a big brand name in home centers is Minwax, while General Finishes and Behlen dominate in woodworking stores and catalogs, and Old Masters is popular in independent paint stores. There are also stores that feature Sherwin-Williams, Benjamin Moore, Pratt & Lambert, Varathane and many other brands.
In addition, some companies target just contractors, others target cabinet and furniture makers, and still others (an entirely different group of companies) target refinishers.
Within any finish category – oil stain, glaze, varnish, lacquer, etc. – all these companies make essentially the same thing. They all have access to the same raw materials, and the instructions for putting these raw materials together are available to everyone, even to you and me if we want them.
So there’s nothing at all inferior about the finishing products available at home centers. There’s only a limitation of what’s available.
From these limited choices, however, you have many possibilities for achieving the results you want.
Protection and Durability
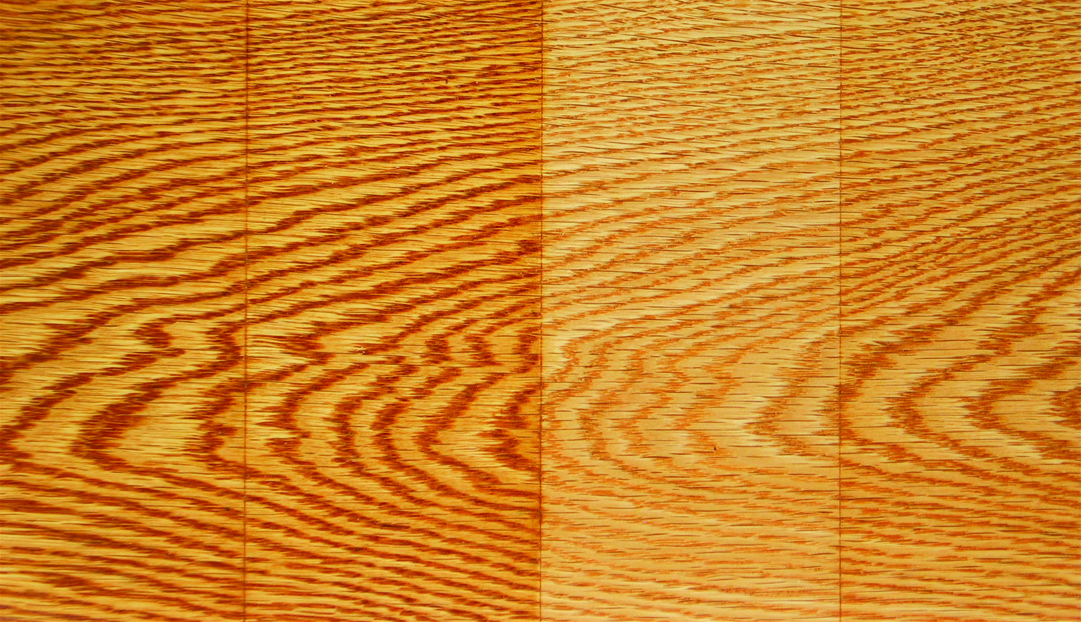
The aging process. Boiled linseed oil and 100 percent tung oil add yellow coloring to the wood initially but then darken significantly as they age. This oak board was finished with three coats of each finish more than five years ago. From the left are boiled linseed oil, 100 percent tung oil, wiping varnish (varnish thinned half with mineral spirits), and a half-and-half mixture of boiled linseed oil and varnish. Notice that the linseed and tung oils have oranged about the same and that the mixture of oil and varnish has darkened about halfway between that of the oils and varnish alone.
You have control of the amount of protection and durability you get simply by how much you build your finish and by your choice of finish.
Protection means resistance to moisture penetration into the wood – in liquid or vapor (humidity) form. All finishes provide better resistance the thicker they are, so the finishes that harden well and can be built up on the wood are capable of much better protection than finishes such as boiled linseed oil, 100-percent tung oil, and blends of one of these oils and varnish, that don’t harden.
Among the finishes that harden, oil-based polyurethane varnish provides the best resistance to moisture penetration and also the best durability – that is, the best resistance to being damaged by scratches, heat, solvents, acids and alkalies. Polyurethane is almost as protective and durable as the best of the high-performance finishes used in industry.
Following polyurethane in declining order are alkyd (regular) varnish, polyurethane water-based finish, acrylic water-based finish, lacquer and shellac.
But even fresh shellac is considerably more protective and durable than the finishes that don’t harden, as long as you apply several coats. Because shellac loses a lot of hardness and water resistance as it ages in the can, it’s best to use it within a year of manufacture. The date of manufacture is stamped on the bottom of the can.
Color
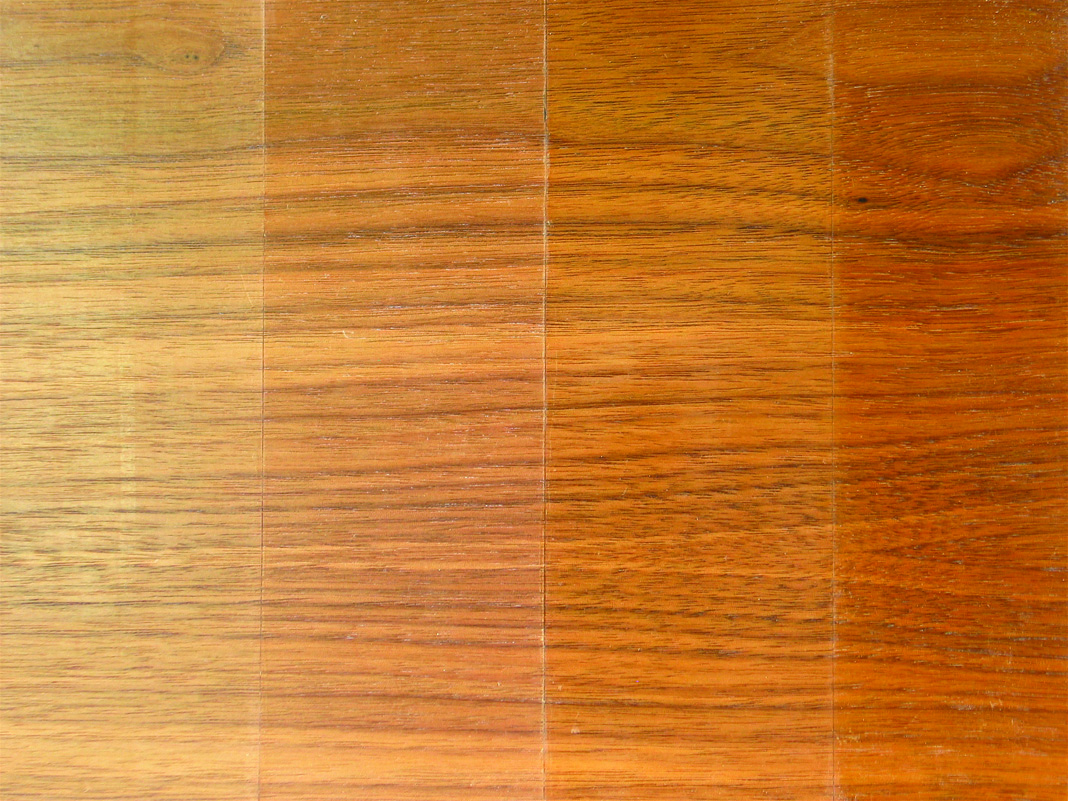
Orange effects. Your choice of finish can have a big effect on the color you get, whether or not you have stained the wood. From the left, water-based finish darkens this walnut a little but doesn’t add any color; lacquer adds a little yellowing; polyurethane varnish adds a little orange; and amber shellac adds a distinctly orange coloring.
The color you get on the wood is partially contributed by the finish. Finishes differ in how much yellowing or “oranging” they add.
Amber shellac adds the most orange color. You can use this finish on pine, for example, to create the knotty-pine look popular in the 1950s, or recreate the warmth common on oak trim and paneling original to early 20th-century houses.
Boiled linseed oil and 100-percent tung oil have a slight yellow color to begin with, and then they yellow, or rather orange, significantly as they age. You can use either of these finishes under any other finish to achieve this oranging as long as you let the oil cure well first. A week or two in a warm room should be adequate.
Oil-based varnishes, lacquer and clear shellac also have a slight yellow tint, which may darken a little with age. But the finish most significant for color is water-based, both polyurethane and acrylic. These finishes aren’t, and don’t, yellow at all. They are “water clear.”
So you would choose a water-based finish for light woods such as maple or ash, or for white pickled woods, if you don’t want them to have a yellow tint. You would probably choose one of the other finishes for darker woods because water-based finishes usually make these woods appear “washed out” unless you apply a stain underneath.
Sheen
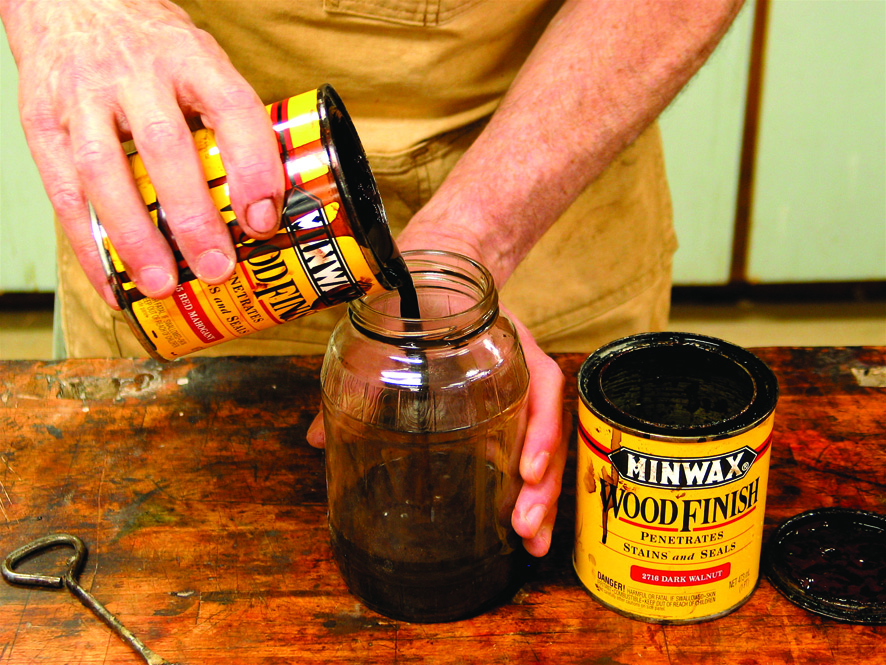
Create custom colors. Keeping in mind that the name of the color on the stain can is merely a manufacturer’s interpretation, you can adjust any stain by mixing. You can even mix two or more stains of different brands as long as you stay within one type: oil or water-based. Here, I’m increasing the reddish tint in a “walnut” stain by adding some “mahogany.”
It’s rare that home centers provide finishes with sheens other than gloss and satin (shellac comes in gloss only), but you can use these two to achieve any sheen you want.
Sheen is the amount of gloss, or reflection, in a finish. If no flatting agent is added – that is, there’s nothing at the bottom of the can that has to be stirred into suspension before application – the finish produces a gloss, or sharp image clarity. Manufacturers create satin and flat finishes by adding a flatting agent, which is usually silica. The more flatting agent added the less reflective the finish.
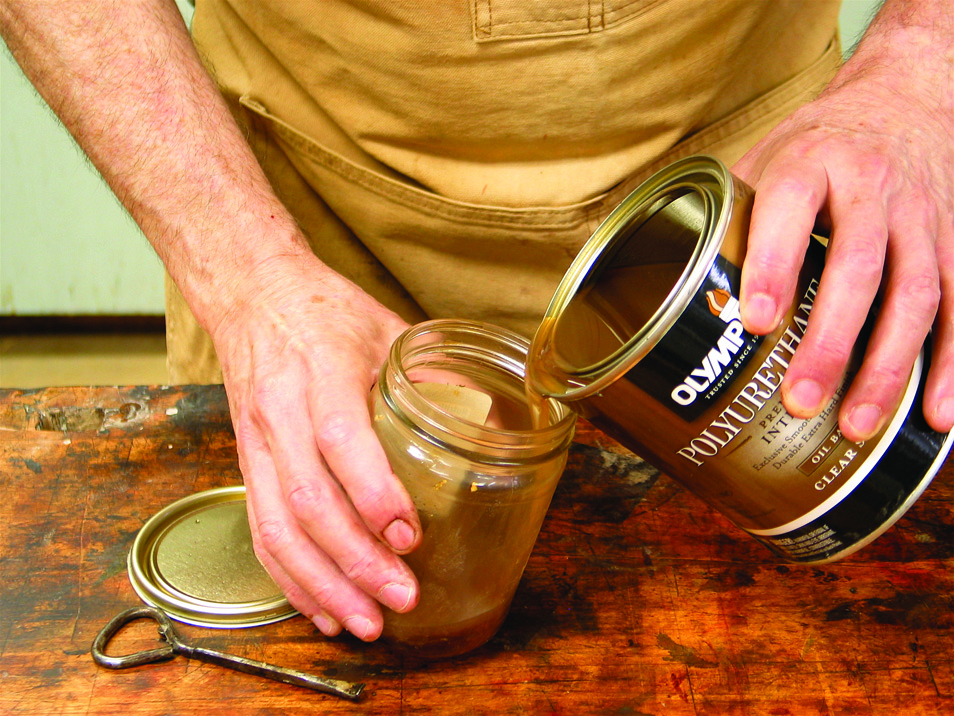
Control sheen. You can achieve any sheen you want just from the gloss and satin varieties of varnish, water-based finish and lacquer offered in home centers. To get a sheen in between the gloss and satin, mix the two. To get a sheen flatter than the satin, pour off some of the finish (as I’m doing here) from a can of satin in which you have allowed the flatting agent to settle, and then mix the two to get what you want.
To get a sheen in between that of gloss and satin within any finish type – varnish, lacquer or water-base – simply mix the two (after stirring the satin, of course). To get a sheen flatter than the satin, let the flatting agent settle (don’t let the store clerk shake the can) and pour off some of the top. What is left will be much flatter. You can then mix these to get something in between if you want.
Because it is the top, or last, coat applied that is responsible for determining all of the sheen, you can change the appearance simply by applying another coat with a different sheen.
Avoiding Flaws
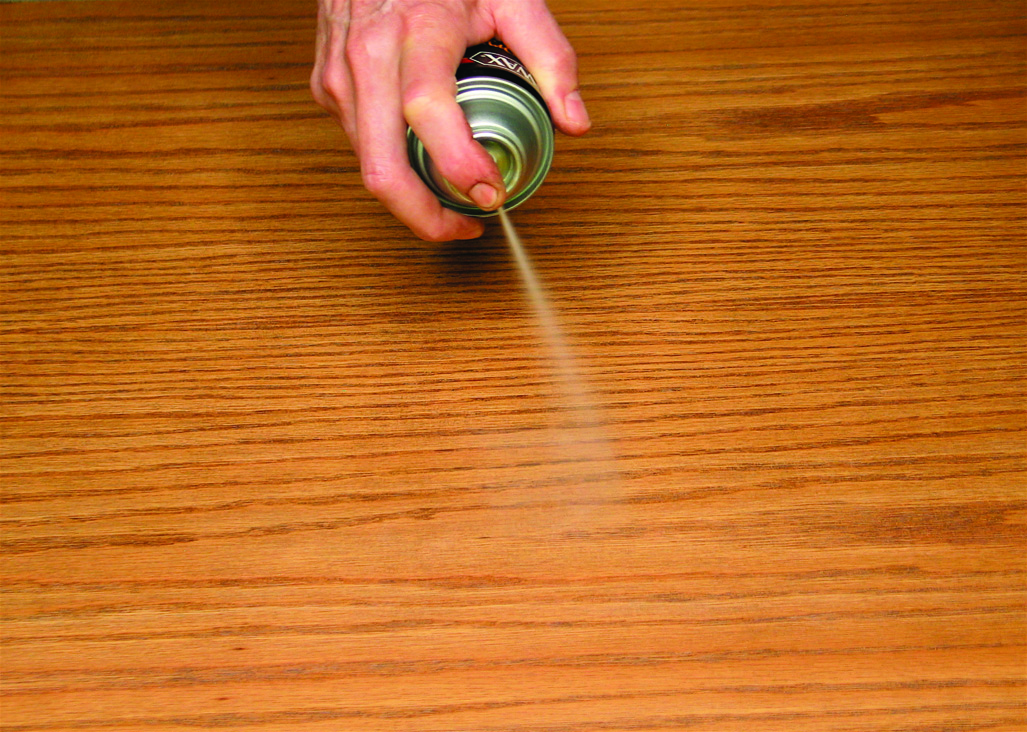
No HVLP necessary. You can use aerosols as an alternative to a spray gun to achieve a level surface. Aerosols are available in polyurethane and water-based finish in addition to lacquer. To get a thicker build with less expense, brush two or three coats, then sand the surface level up to #400 grit and spray a couple of coats with the aerosol.
Spray guns can be used to produce nearly flawless, meaning almost perfectly level, surfaces. But you can achieve the same without a spray gun simply by thinning the finish or using an aerosol. The thinner (meaning “thinned”) the finish, the better it levels and the faster it dries.
Better leveling means no brush marks. Faster drying means reduced dust nibs.
You can thin any finish to get it to level better, but the easiest to use are the varnishes. All home centers carry already thinned alkyd and polyurethane varnishes. These are sometimes labeled “Wipe-On Poly,” but also “tung oil,” “tung oil finish” or “tung oil varnish.” In no cases do these products (which I call “wiping varnish” because they’re easy to wipe on wood) have anything to do with tung oil, but they produce wonderful results nevertheless.
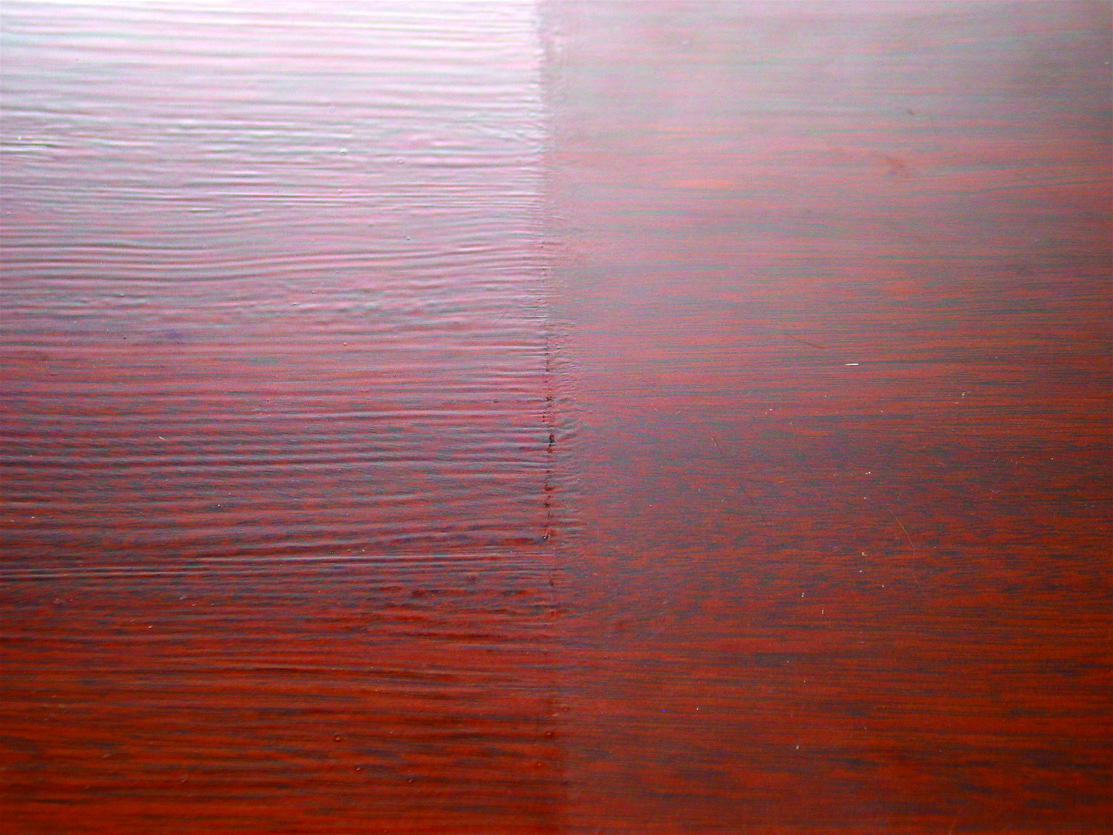
Thin to achieve a smooth finish. To eliminate brush marks (shown on the left), thin the finish a quarter to a half with the appropriate thinner and then brush it. If you want to speed the build, brush two or three full-strength coats, then sand the surface level up to #400 grit and apply a couple thinned coats.
There are three good ways to apply a wiping varnish: Wipe or brush it on the wood and wipe off all the excess; wipe or brush it on and wipe off some or most of the excess; brush it on and leave it. The more you leave the greater the build but the longer time dust has to settle and stick to the finish.
To get a thick build with fewer coats, brush several full-strength coats of alkyd or polyurethane varnish, sand the surface level up to #400-grit sandpaper, then apply several coats of wiping varnish and wipe off some or most of the excess. You can make the wiping varnish yourself by thinning the same finish you’re brushing by half with mineral spirits, or you can use one of the already thinned brands.
You can also use an aerosol for your finishing. Aerosols are now available in oil-based polyurethane and water-based finish in addition to lacquer and shellac, but they are relatively expensive. Instead of building all your coats with the aerosol, you can brush a couple, sand out the brush marks then use the aerosol of the same type of finish to apply level final coats.
Whatever finish you’re applying and however you’re applying it, always watch it in a reflected light to spot runs as they develop and respread or rewipe to remove some of the excess.
Whatever method you use to get a level surface, rub it lightly with a folded brown paper bag after the finish has hardened to remove minor dust nibs and make the surface feel smoother.
Blotching
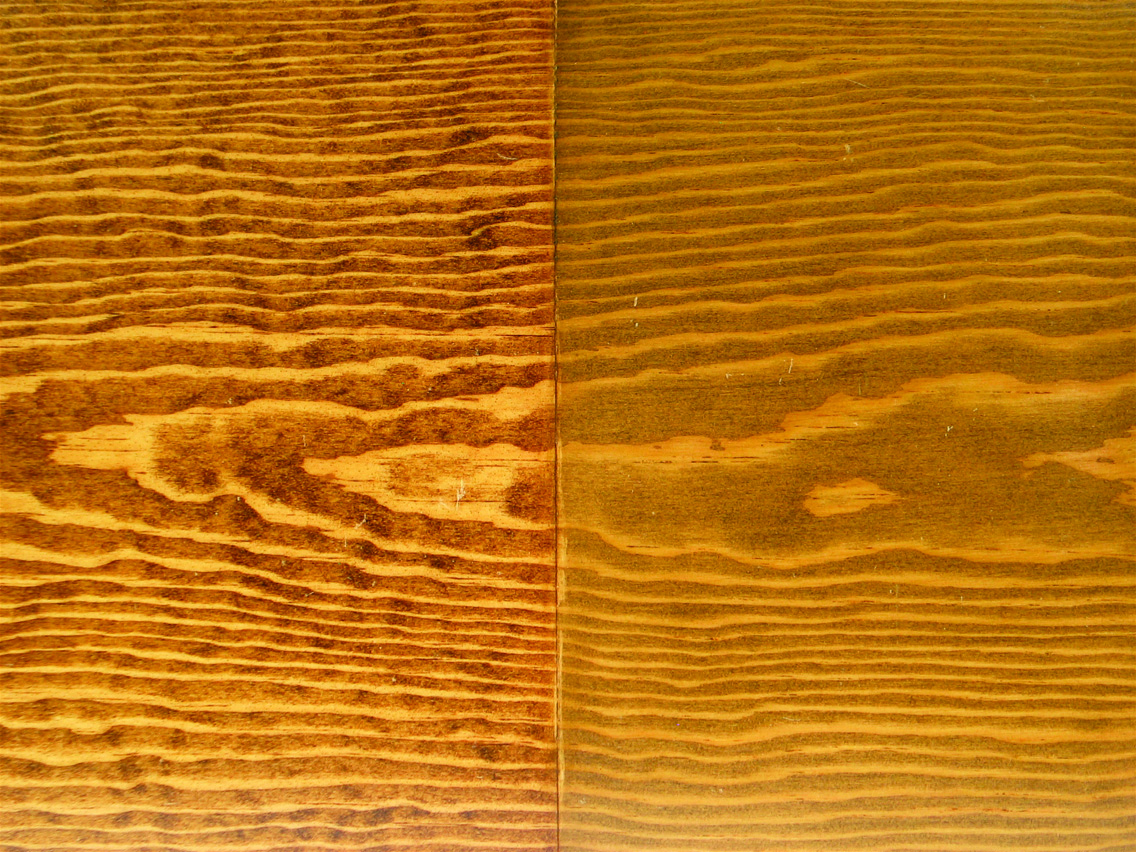
Eliminate blotching. The easy way to eliminate blotching in pine is to apply a gel stain as I have done to the right half of this pine board. The left side is stained with a liquid stain. Gel stains are so effective on pine they should be called “pine stain.”
Blotching is uneven, and usually ugly, coloration caused by stains penetrating the wood unevenly.
To avoid blotching on softwoods such as pine, use a gel stain. This is a stain thickened enough so it doesn’t penetrate. Gel stains ought to be called “pine stain” because they are so effective at eliminating blotching in pine.
On hardwoods such as cherry, birch, maple and poplar, it’s more effective to use a washcoat. This is any finish thinned to about a 10 percent solids content. Lacquer is used in industry, but the type sold in home centers is varnish or a blend of oil and vanish labeled “wood conditioner” or “stain controller.” You can make your own by thinning any full-strength varnish or blend of boiled linseed oil and varnish with two parts mineral spirits.
When you apply this washcoat, be sure to let it cure at least six hours in a warm room, better overnight, or it won’t be very effective. This is different than the directions on the cans, which usually say to apply the stain within two hours.
There is no need to apply a washcoat to woods such as oak, ash, walnut and mahogany that don’t blotch.
Glaze Substitute
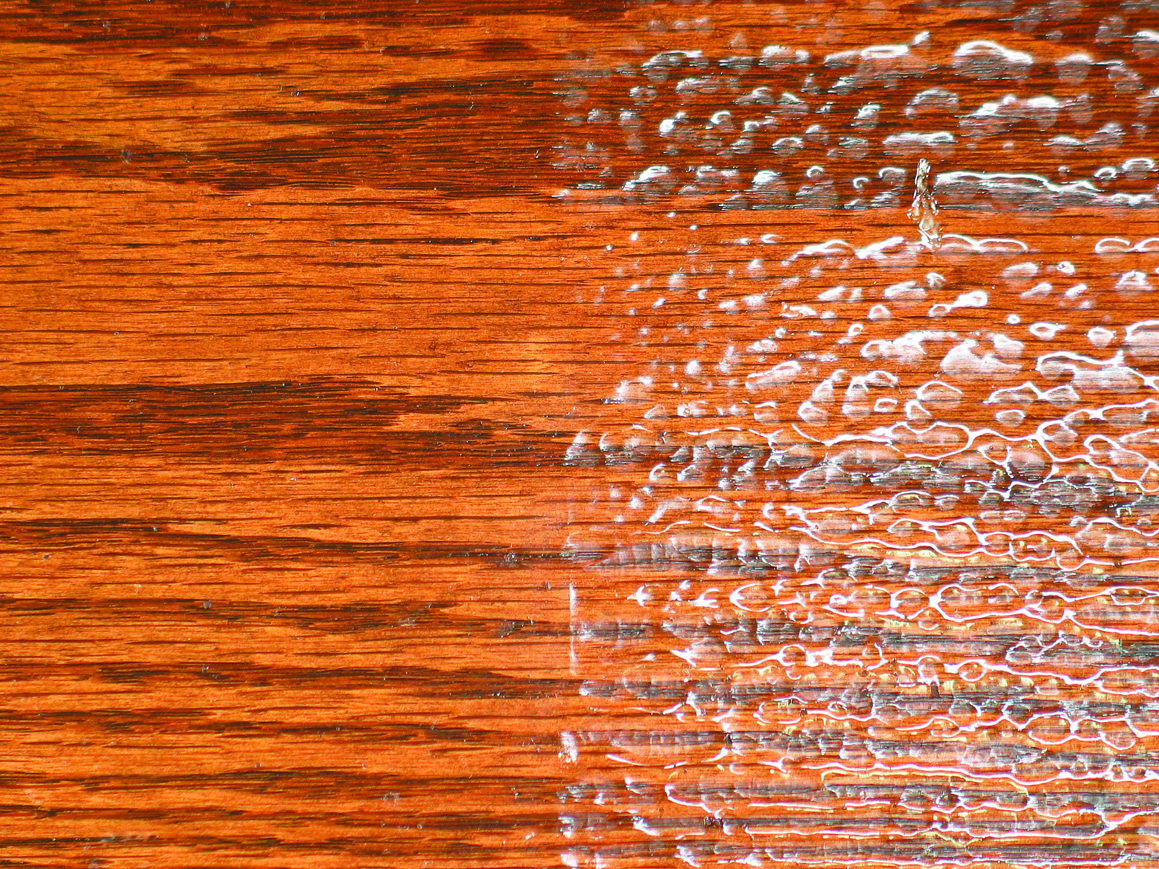
Refinishing woes. Fish eye (cratering) is one of the most serious problems in refinishing. It’s caused by silicone from furniture polishes getting into the wood and causing the new finish to wrinkle when applied. One easy way to avoid fish eye is to block it with a first coat of shellac, applied here to the left side of the board. The only new-wood use for shellac as a first coat is over resinous knots in softwoods such as pine.
Colored glazes are used to add highlighting, antiquing or create faux graining over at least one coat of finish. Glazes are rarely available in home centers, but you can substitute a gel stain with excellent results. Glazes and gel stains are essentially the same thing anyway – a thickened stain.
To do glazing, brush or wipe the glaze or gel stain over at least one coat of finish and then remove all the color you don’t want using a rag, brush, sponge, graining tool (usually available at home centers), steel wool or any other tool that produces the results you want.
A typical use of glaze on cabinets and furniture is to leave it in recesses to add three-dimensional depth or an antique look. Be sure to apply at least one coat of finish over the glaze after it has dried to protect it from being scratched or rubbed off.
Pore Filling
Some woods look better with their pores filled to create a “mirror-flat” surface. Mahogany is the best example.
Products called “paste wood filler” or “grain filler” (not the same as wood putty or wood filler) designed to achieve this look are rarely available at home centers. But you can achieve the same result by sanding a number of coats of finish down to the deepest level of the pores. You can sand a little between each coat, or you can sand more after you have applied all the coats.
Because we all apply finishes differently, you will have to experiment on scrap to determine the number of coats necessary so you don’t sand through.
For the easiest sanding between coats, use stearated sandpaper. Norton “3X” and 3M “Tri-Mite” and “Sandblaster” are all stearated. This means they contain a soap-like lubricant that reduces clogging. You can use your hand to back the sandpaper when sanding between coats, but you should use a flat sanding block on flat surfaces when sanding many coats level.
For the easiest sanding after a number of coats, use black, wet-dry sandpaper with a mineral-oil, mineral-spirits or mixed mineral-oil/mineral-spirits lubricant. Begin sanding with a grit sandpaper that levels efficiently without creating larger-than-necessary scratches (for example, #320 or #400 grit) and then sand to finer grits if they are available.
If finer grits aren’t available, apply one more coat of thinned finish (so it will level well), spray with an aerosol or rub the surface with #0000 steel wool. You can use a wax, oil or soap-and-water lubricant with the steel wool to reduce scratching and improve smoothness.
Problems in the Wood
Of all the finishes, shellac is easily the most effective for blocking off problems in the wood. The most common problem in new wood is resinous knots in pine and other softwoods. The resin can bleed into the finish and cause it to remain tacky and not cure.
In old (refinished) wood, the most common problems are fish eye (cratering or ridging) and odors from smoke or animal urine. Shellac blocks all these problems so you can then successfully apply any finish over it. If you are using varnish or water-based finish, it’s best if you use dewaxed shellac, sold in most home centers as “SealCoat.”
To make your own dewaxed shellac, pour off or decant the shellac from a can of Bull’s Eye Clear Shellac after the wax has settled to the bottom. It will take a long time for this to occur on its own, so don’t shake the can when you buy it, or thin the shellac with at least two parts denatured alcohol in a glass jar (so you can see it) to get it to settle faster.
If there are no problems you need to block off, there’s no reason to use shellac as a first coat.
Conclusion
Somehow, a lot of unnecessary mystique is introduced into wood finishing. In reality, however, it is quite simple. This is most evident when you realize all the possibilities available from just the few products stocked by home centers. pw
Bob is author of “Understanding Wood Finishing” and a contributing editor to Popular Woodworking.
Here are some supplies and tools we find essential in our everyday work around the shop. We may receive a commission from sales referred by our links; however, we have carefully selected these products for their usefulness and quality.


