We may receive a commission when you use our affiliate links. However, this does not impact our recommendations.
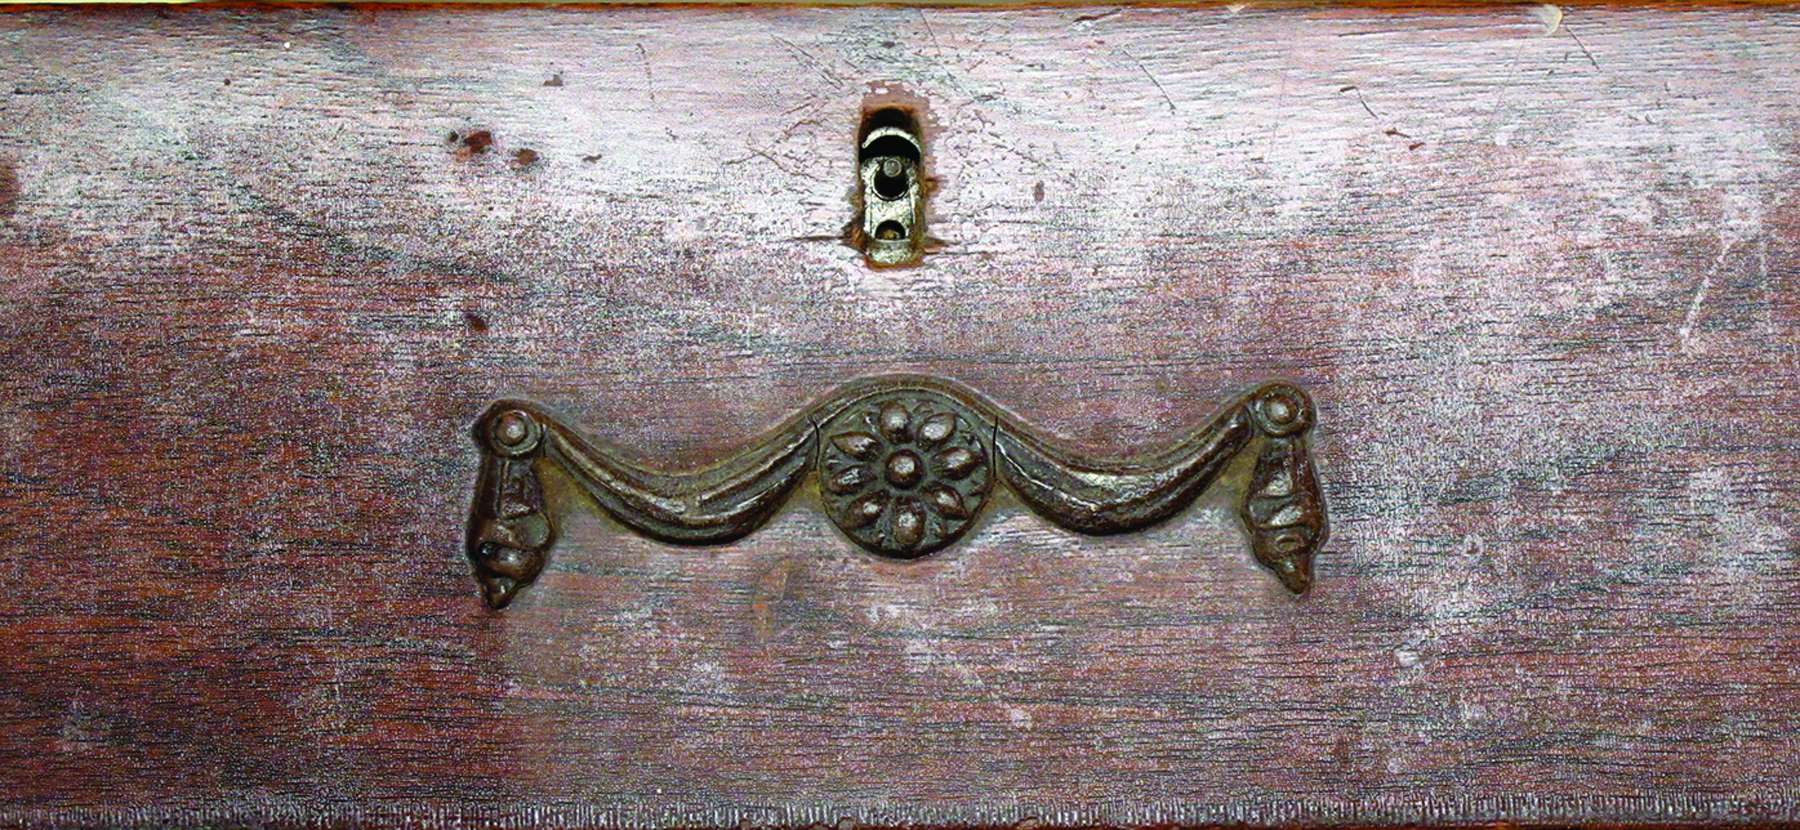
Crazed finish. Reviving a finish is a great solution in many situations where it has deteriorated. But be aware that the deterioration can be so bad that nothing short of stripping and refinishing can be done successfully. This example of a 100-year-old drawer front is such a case.
Discover how (and when) to give old, deteriorated finishes new life.
As finishes age, they deteriorate. First they dull, then they begin showing small cracks (called “crazing”). The culprit of this degradation is oxygen, which attacks the finish very slowly. Crazing is accelerated so much by ultraviolet light and heat, however, that it’s more helpful to think of these as the real causes.
As the deterioration worsens, not only does the finish look bad, it loses its primary function of protecting the wood from contact with liquids. Excessive moisture getting to the wood leads to veneer cracking, as well as joint and veneer separation, splits and warps.
Old furniture with a deteriorated finish usually ends up in a landfill. This is the reason the “Antiques Roadshow” message, “Don’t refinish,” is so unfortunate. Refinishing saves old furniture.
But old finishes can often be “revived,” and most methods are quite easy. You just need to have some idea of situations and ways to proceed.
The Deterioration Process
As light and heat attack a finish, they begin breaking up the surface molecules. At first, you don’t see the separations, you see just the dullness caused by light being randomly reflected. Eventually the crazing becomes visible to the naked eye.
The process occurs slowly and there are many stages along the way. In all cases the depth you can see into the wood is reduced, more so the worse the crazing.
There are four primary reviving procedures which you can use at any stage:
■ Apply furniture polish or paste wax
■ Clean and apply more finish
■ Sand the old finish smooth and rub out
■ Sand smooth and apply more finish.
If one approach doesn’t work to your satisfaction, try another. Keep in mind that the worst-case scenario would be that nothing works well and you end up stripping and refinishing. You aren’t ruining anything.
Furniture Polish & Paste Wax
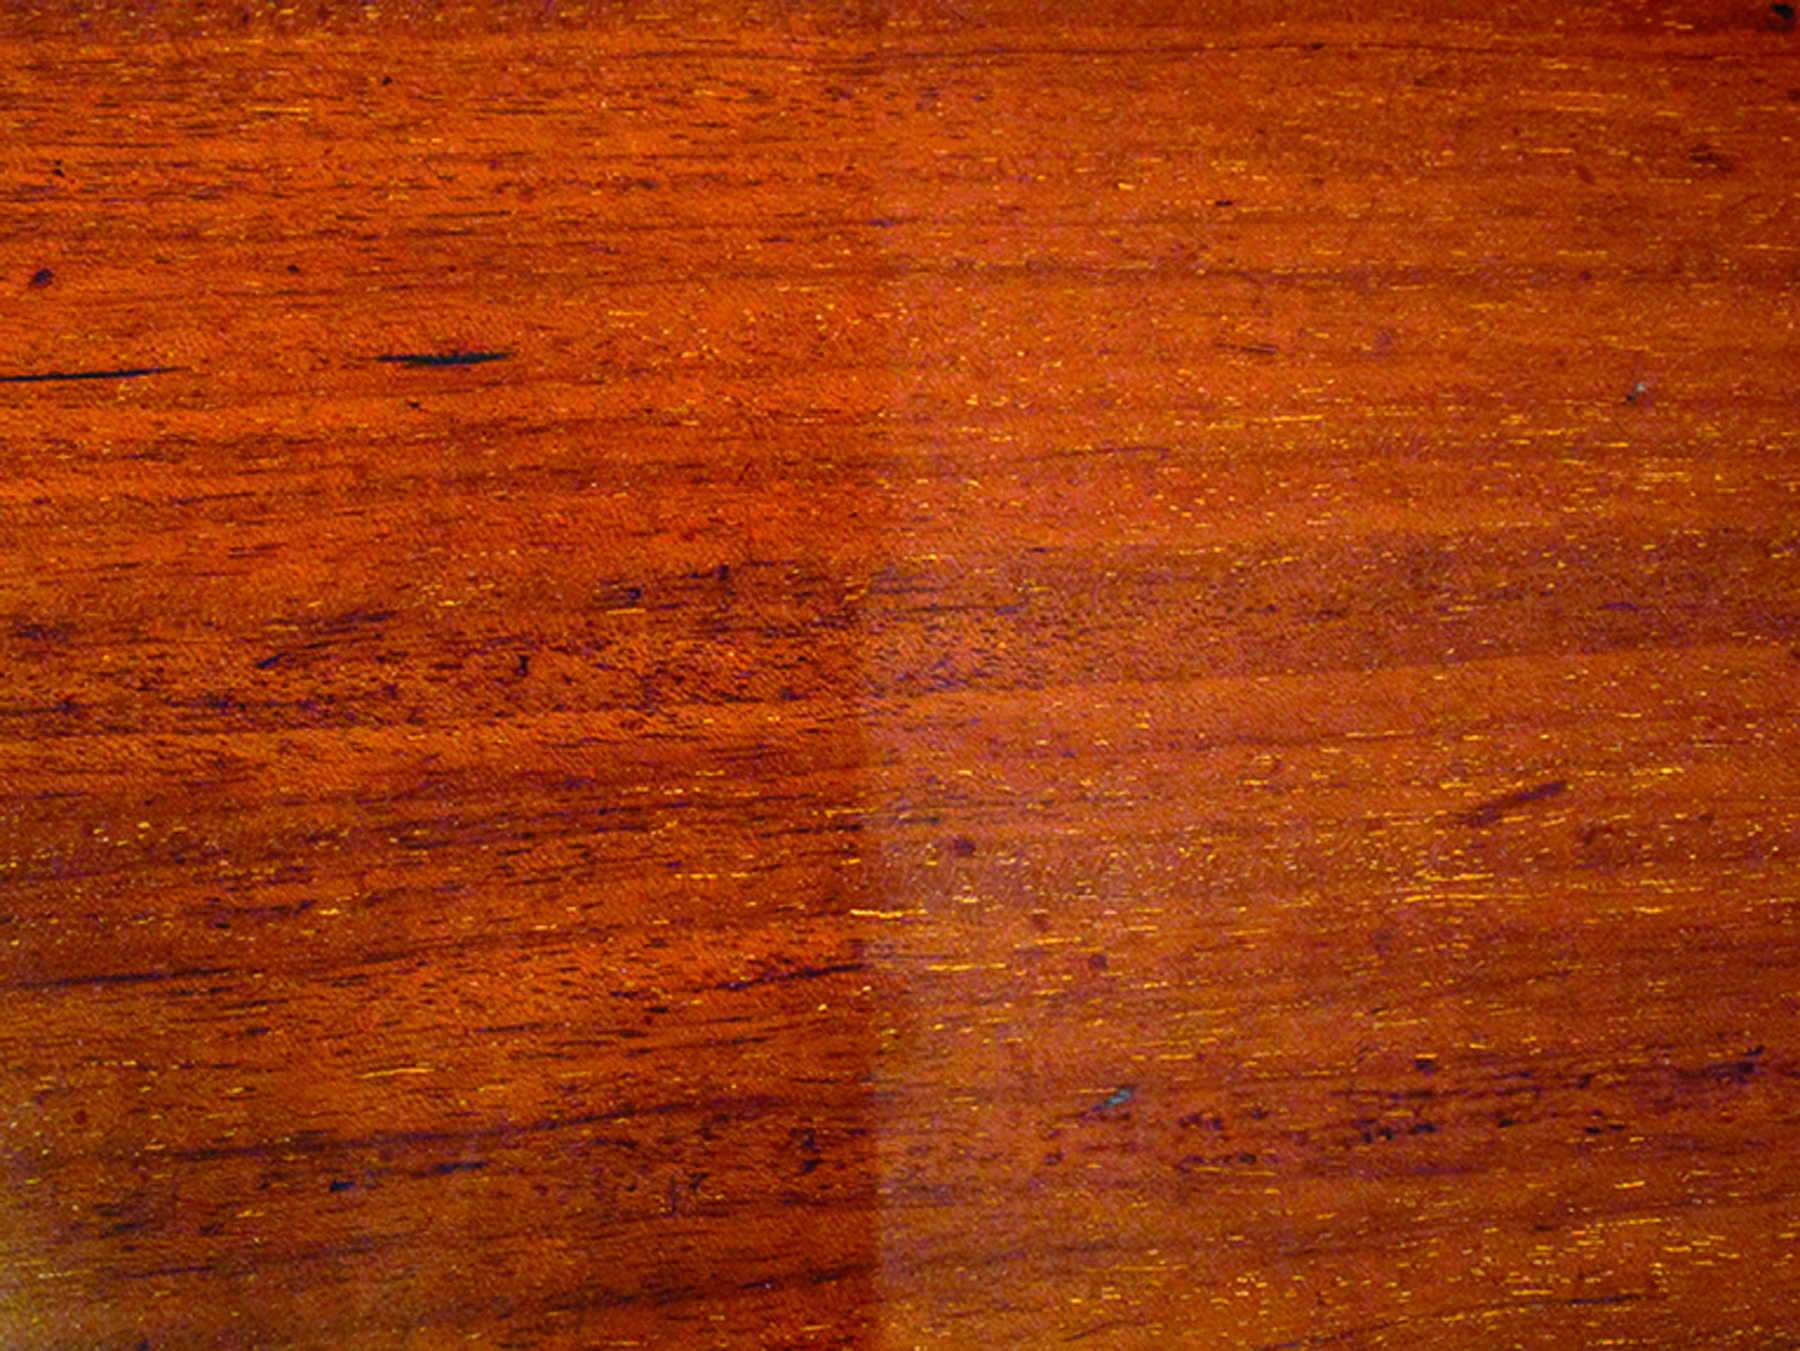
Wet to see depth. To see what a revived finish will look like, wet the surface (left) with mineral spirits or furniture polish. Neither will damage any finish and they flow out better than water.
Furniture polishes and paste waxes add shine, reduce scratching and restore depth as long as the finish isn’t badly crazed. The most effective furniture polishes are those that contain silicone. This includes most available aerosols.
Unfortunately, silicone has gained a bad reputation from furniture conservators, refinishers and antique dealers who hate having to deal with fish-eye problems (small craters in applied finishes) that silicone can cause. But homeowners and housekeepers love silicone polishes, which have close to a 90 percent market share, because they last much longer and add the most depth and scratch resistance.
Furniture polishes don’t work well on crazed surfaces, however, because the liquid highlights the cracks. For crazed finishes, paste wax is by far the better product to use.
The easy way to apply paste wax to large surfaces is to put a lump of the wax inside a cloth and wipe it over the surface. The cloth limits the amount of wax you are depositing so removing the excess is easier.
When the shine of the applied wax disappears (due to solvent evaporation) and the wax develops a noticeable resistance, rub off all the excess with a soft, clean cloth. Refold and change the cloth often so you transfer the wax to the cloth and not just spread it around.
Clean & Apply More Finish
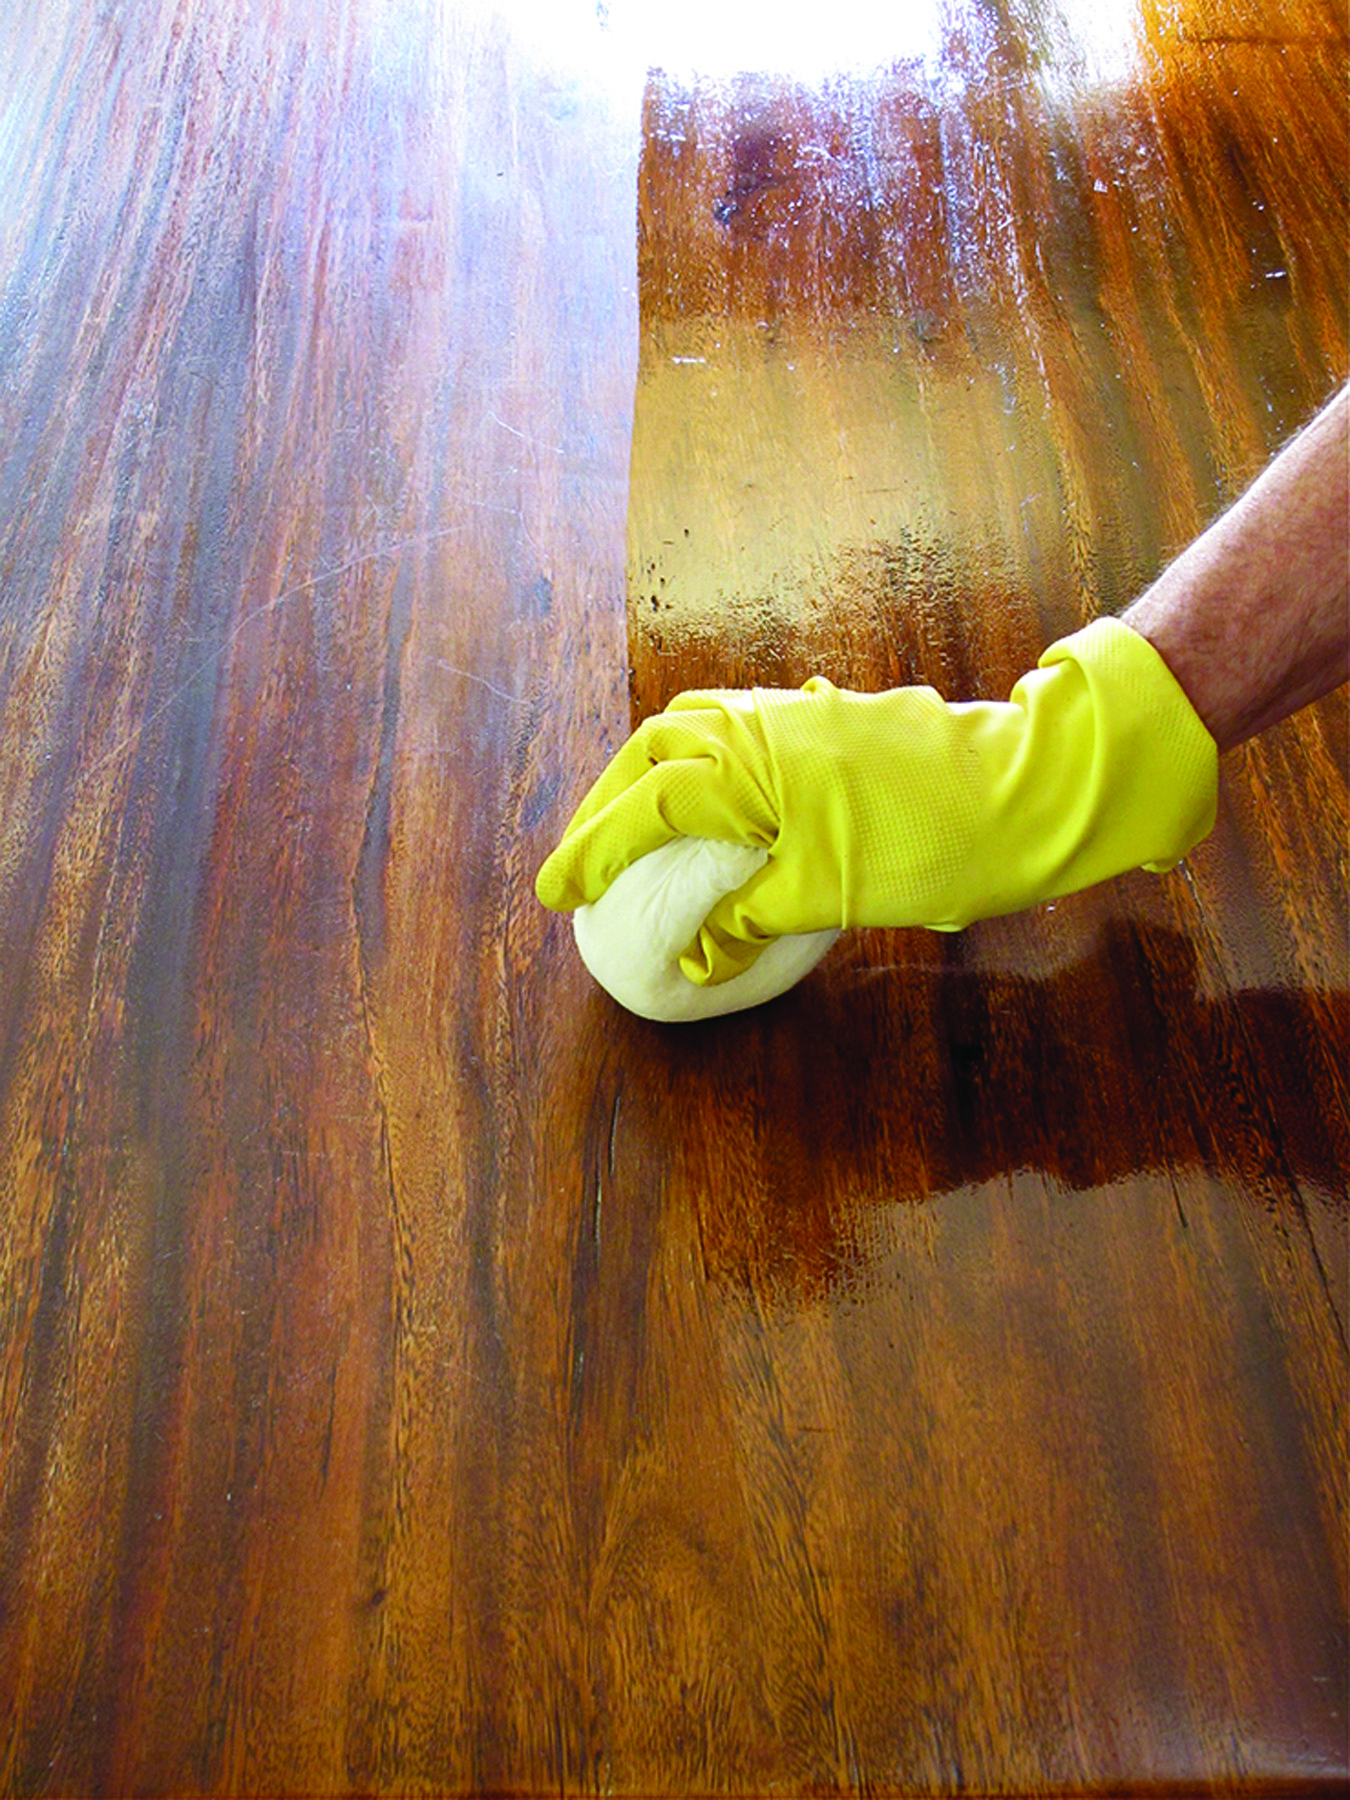
Thin finish. Applying a thin coat of finish avoids the fish-eye problems caused by silicone furniture polishes having been used. Padding wiping varnish, as I‘m doing here, can be done on site.
Surfaces must be clean to apply more finish successfully. You can clean an old finish with any number of products, including soap and water, household ammonia and water, or a solvent such as mineral spirits or naphtha. Soap and water are best for removing sugary dirt. Solvents are best for removing grease, wax and furniture polish. About a cup of household ammonia in a bucket of water is effective for removing both types of household grime.
Applying more finish can sometimes be tricky because of the likelihood of silicone contamination. Two good solutions are to apply a first coat of shellac, which will “seal off” the silicone left on the surface, or apply a wipe-on finish such as oil or wiping varnish – with very little build, fish eyes don’t have the possibility of developing.
To reduce the gloss of any finish, rub with #0000 steel wool. Use an oil, soap and water or wax lubricant to soften the scratching.
For spraying lacquer, you can add fish-eye eliminator instead of applying a first coat of shellac. But spray very light coats at first so that the solvent in the lacquer doesn’t have time to blister the old finish.
Sand & Rub out
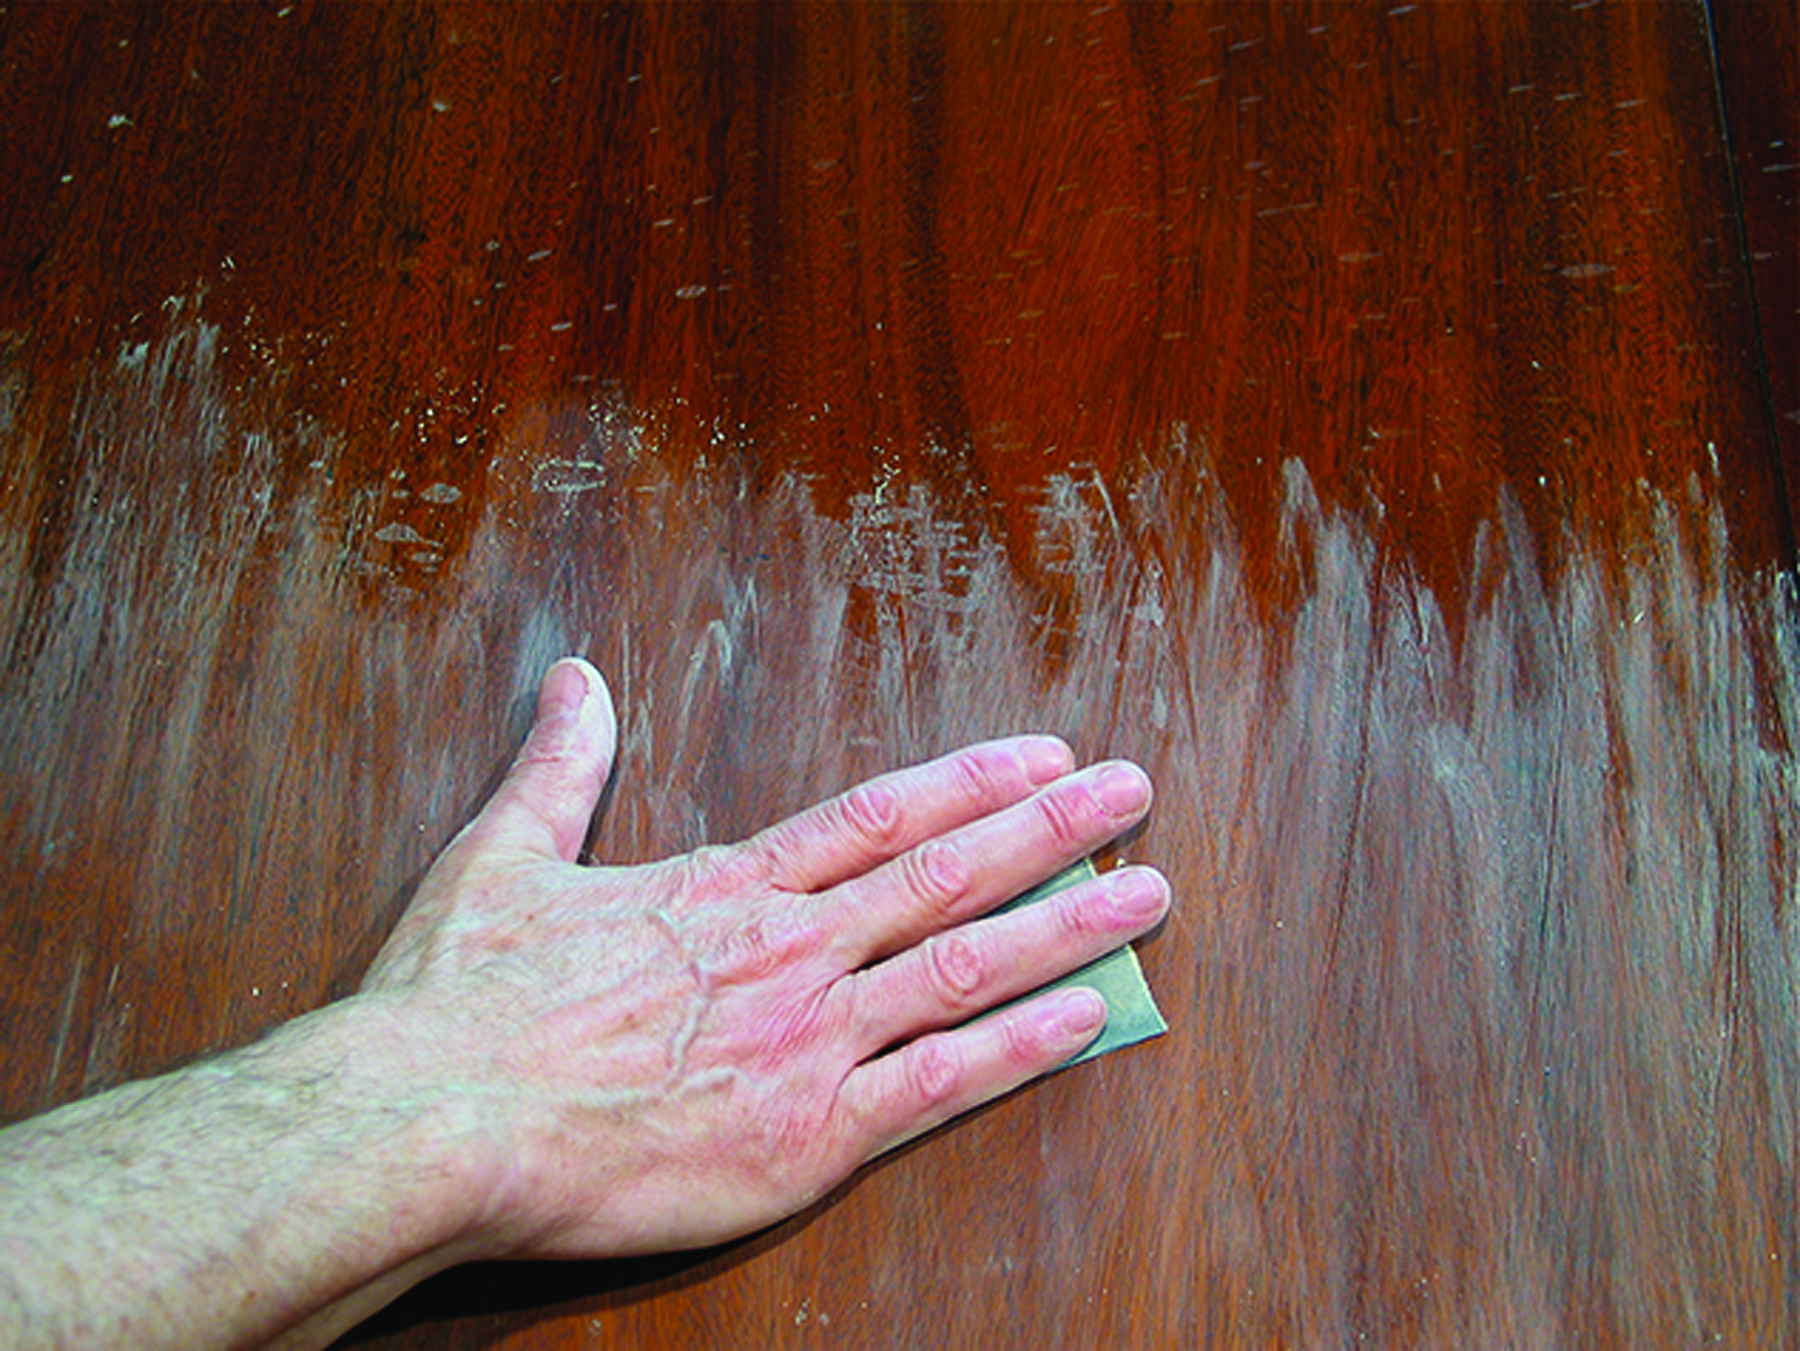
Sand to remove problems. Sanding removes surface crazing and other problems. Use the finest grit that will do the job efficiently. Here I’m using #600-grit sandpaper.
If the old finish is supple and thick enough, you can sand and rub it out with increasingly finer-grit abrasives, just as you would a newly applied finish.
Begin with the finest-grit abrasive that will efficiently remove whatever problems exist. Think #320-, #400- or #600-grit sandpaper. Don’t use a sanding block unless you are sure the surface is perfectly flat.
With the problems removed, switch to #0000 steel wool or another abrasive to achieve the sheen you want.
Sand & Apply More Finish
In most cases, if the finish is crazed, it won’t be supple enough to rub out. You’ll need to apply more finish following the instructions above, after you have sanded out the crazing. If the crazing goes through to the wood, the best course of action is to refinish. Applying more finish won’t hide the crazing when you look straight into the finish.
Color Problems
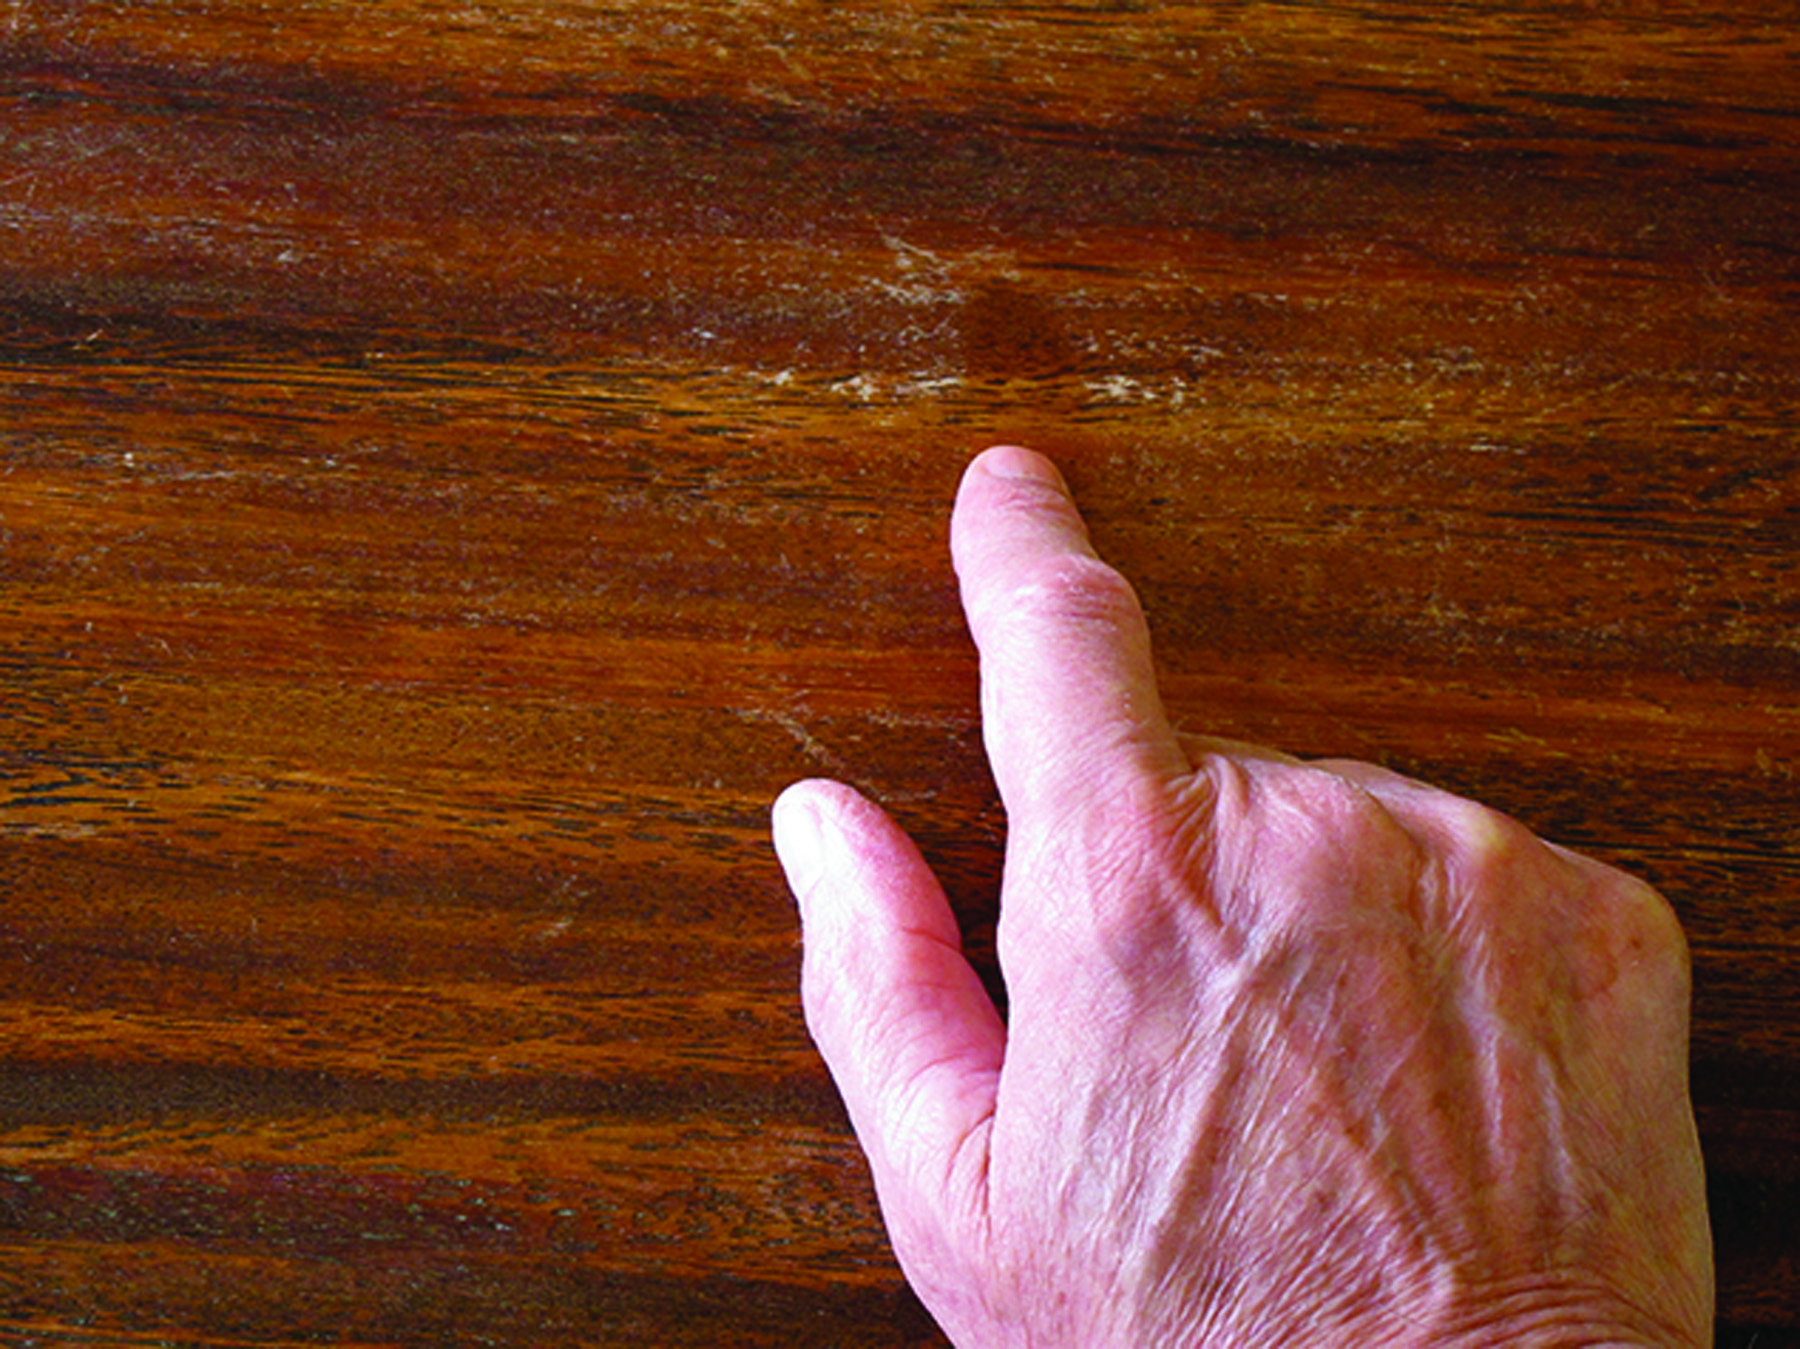
Test for color. A simple finger wipe with a little saliva (or other liquid) will show if more finish will restore the color. If the color isn’t restored, you will need to add stain or paint in more color.
Often there are color problems to deal with. White rings are superficial and will be removed when you sand or rub out the finish. Black rings are in the wood and can’t be removed without removing the finish first. If that is the case, use oxalic acid to bleach and remove the marks.
There are two types of lighter-colored marks caused by scratches or when you rub through the finish: marks that go through to the wood and marks that remove color that was in the finish but don’t go to the wood.
In the first case, you can usually replace the color by wiping with a colored wax (many imported brands come in colors), a wiping stain or water-soluble dye, or a widely available product called Howard Restor-A-Finish, which comes in colors.
In cases where the damage doesn’t go to the wood, you’ll need to figure a way to paint in the color, usually with a stain or glaze, or make your own with colored powders mixed with shellac or lacquer.
Small areas are usually easy to match adequately. Large areas can be impossible.
Here are some supplies and tools we find essential in our everyday work around the shop. We may receive a commission from sales referred by our links; however, we have carefully selected these products for their usefulness and quality.


