


We may receive a commission when you use our affiliate links. However, this does not impact our recommendations.

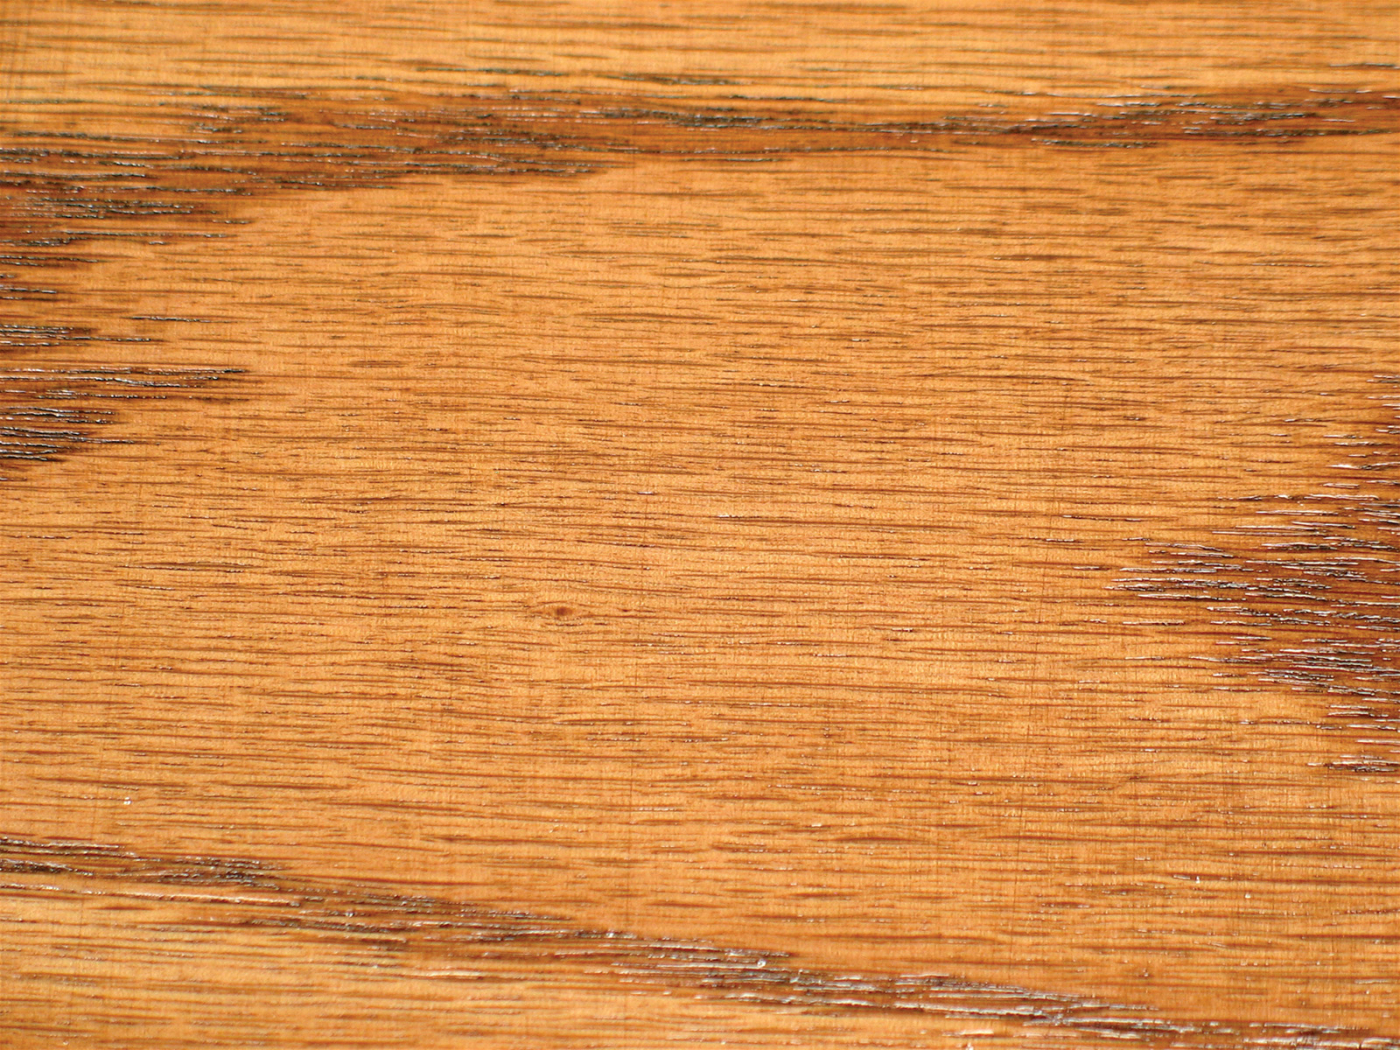
Washboarding. The primary reason you need to sand wood is to remove the washboarding and other mill marks caused by machine tools. On this board, the washboarding, which was caused by a planer and has been highlighted with stain, is particularly severe. I think it would have been most efficient to begin sanding with #80 grit.
Material and finish choice help dictate grit progression.
The objective of sanding wood is to remove mill marks, which are caused by woodworking machines, and to remove other flaws such as dents and gouges that may have been introduced in handling. The most efficient method of doing this is to begin sanding with a coarse enough grit of sandpaper to cut through and remove the problems quickly, then sand out the coarse-grit scratches with finer and finer grits until you reach the smoothness you want – usually up to #150, #180 or #220 grit.
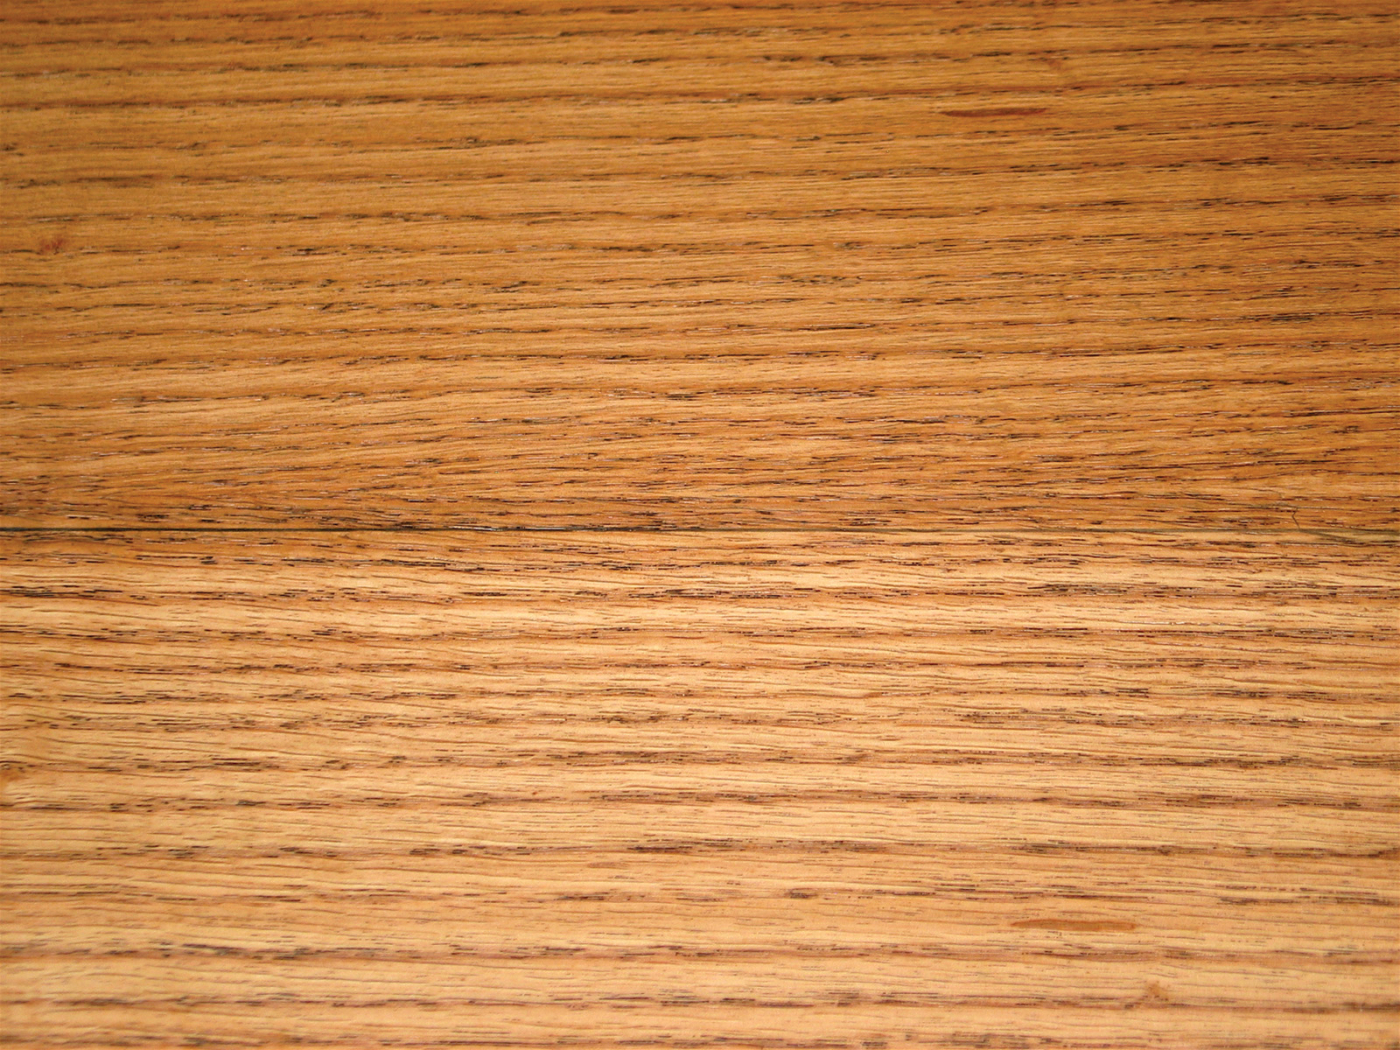
Cross-grain. Sanding cross-grain tears the wood fibers so the sanding scratches show up much more, especially under a stain. The best policy is to always sand in the direction of the grain when possible. The scratching that does occur is then more likely to be disguised by the grain of the wood.
This is a very important concept because it gets past all the contradictory instructions about which sandpaper grits to use. Conditions vary.
Squigglies. Random-orbit sanders are more efficient than vibrator sanders, but they still leave cross-grain marks in the wood. I refer to these as “squigglies.” The best policy is to sand them out by hand in the direction of the grain after sanding to the finest grit, usually #180 or #220, with the sander. Doing this is especially important if you are staining.
For example, a board that has been run through a planer with dull knives will require a coarser grit to be efficient than typical veneered plywood or MDF that has been pre-sanded in the factory. You can finish-sand both of these surfaces with #180 grit, for example, but you might begin with #80 grit on the solid wood and #120 grit on the plywood. It would be a total waste of time and effort to begin with #80 grit on the pre-sanded veneered wood (and you would risk sanding through). So you don’t want to begin with too coarse a grit because it will cause you more work than necessary sanding out the scratches.
There’s also no fixed rule for how to progress through the grits. Sanding is very personal. We all sand with different pressures, number of passes over any given spot and lengths of time.
Unquestionably, the most efficient progression is to sand through every grit – #80, #100, #120, #150, #180 – sanding just enough with each to remove the scratches of the previous grit. But most of us sand more than we need to, so it’s often more efficient to skip grits.
You’ll have to learn by experience what works best for you.
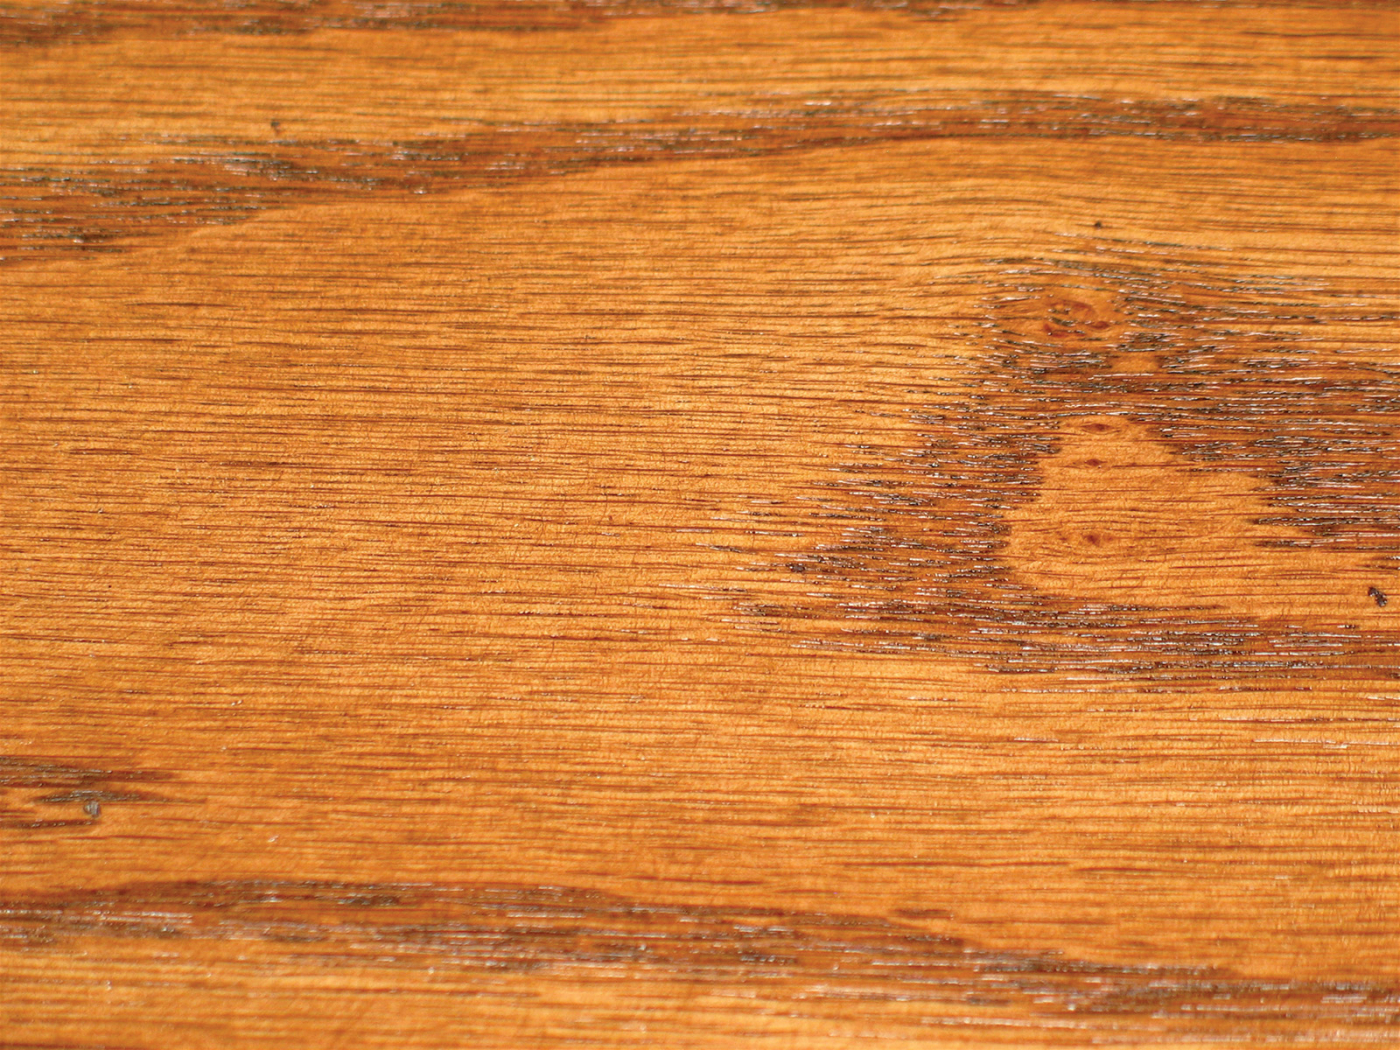
Fine sanding. Sanding finer than #180 or #220 is wasted effort in most cases, as explained in the text. In fact, the finer the grit the wood is sanded to, the less color a stain leaves when the excess is wiped off. In this case, the top half was sanded to #180 grit and the bottom half to #600 grit. Then a stain was applied and the excess wiped off.
How Fine to Sand
It’s rarely beneficial to sand finer than #180 grit.
Film-building finishes, such as varnish, shellac, lacquer and water-based finish, create their own surfaces after a couple of coats. The appearance and feel of the finish is all its own and has nothing any longer to do with how fine you sand the wood.
Oil and oil/varnish-blend finishes have no measurable build, so any roughness in the wood caused by coarse sanding telegraphs through. But these finishes can be made ultimately smooth simply by sanding between cured coats or sanding each additional coat while it is still wet on the surface using #400- or #600-grit sandpaper. It’s a lot easier doing this than sanding the wood through all the grits to #400 or #600. (See “What Is Oil?” in issue #154, April 2006, for a more thorough explanation of both processes.)
Only if you are staining or using a vibrator (“pad”) or random-orbit sander does sanding above #180 grit make a difference.

Hand sanding. The most efficient use of sandpaper when backing it with just your hand is to tear the sheet into thirds crossways and then fold one of the thirds into thirds lengthways. Flip the thirds to use 100 percent of the paper.
The finer you sand, the less stain color will be retained on the wood when you wipe off the excess. If this is what you want, then sand to a finer grit. If it isn’t, there’s no point going past #180 grit. The sanding scratches won’t show as long as they are in the direction of the grain.
Sometimes with vibrator and random-orbit sanders, sanding up to #220 grit makes the squiggly marks left by these sanders small enough so they aren’t seen under a clear finish. Sanding by hand in the direction of the grain to remove these squigglies then becomes unnecessary.
In all cases when sanding by hand, it’s best to sand in the direction of the wood grain when possible. Of course, doing this is seldom possible on turnings and decorative veneer patterns such as sunbursts and marquetry.
Cross-grain sanding scratches aren’t very visible under a clear finish, but they show up very clearly under a stain. If you can’t avoid cross-grain sanding, you will have to find a compromise between creating scratches fine enough so they don’t show and coarse enough so the stain still darkens the wood adequately. You should practice first on scrap wood to determine where this point is for you.
Three Sanding Methods
Other than using a stationary sanding machine or a belt sander, which will take a good deal of practice to learn to control, there are three methods of sanding wood: with just your hand backing the sandpaper, with a flat block backing the sandpaper and with a vibrator or random-orbit sander.
Using your hand to back the sandpaper can lead to hollowing out the softer early-wood grain on most woods. So you shouldn’t use your hand to back the sandpaper on flat surfaces such as tops and drawer fronts because the hollowing will stand out in reflected light after a finish is applied.
The most efficient use of sandpaper for hand-backed sanding is to tear the 9″ x 11″ sheet of sandpaper into thirds crossways, then fold each of these pieces into thirds lengthways. Sand with the folded sandpaper until it dulls, flip the folded sandpaper over to use the second third, then refold to use the third third. This method reduces waste to zero and also reduces the tendency of the folds to slip as you’re sanding.
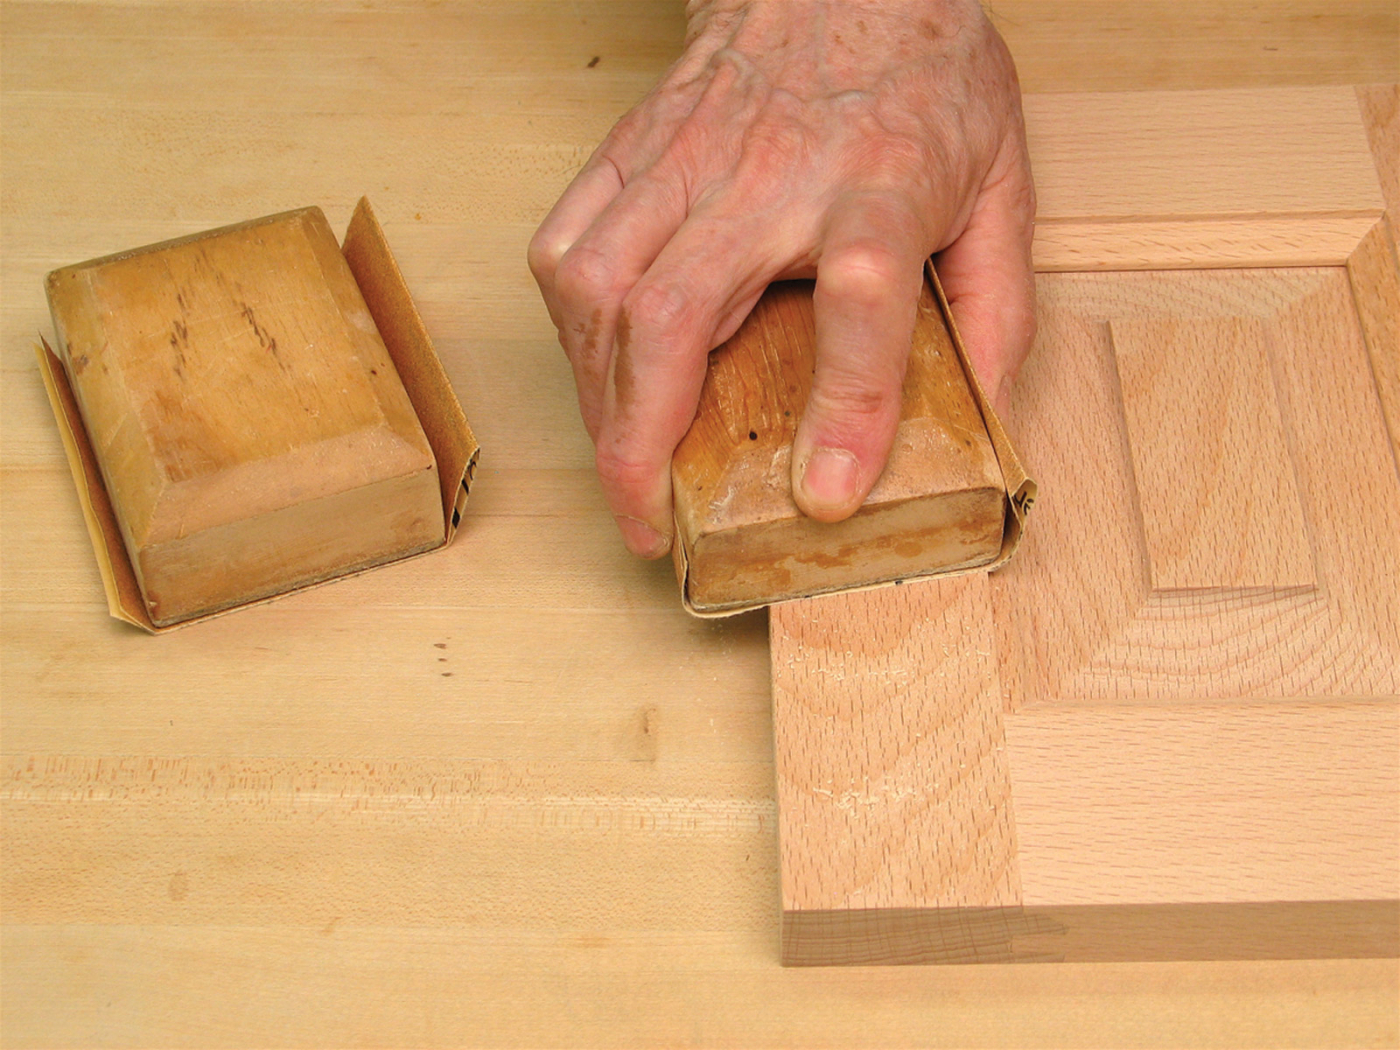
Block sanding. The most efficient use of sandpaper when backing it with a flat sanding block is to tear the sheet into thirds crossways and then fold one of the thirds in half. Hold onto the block with your thumb and fingers as shown here. Flip the folded sandpaper for a fresh surface, then open up the sandpaper and wrap it all around the sanding block for a third fresh surface.
If you are sanding critical flat surfaces by hand, you should always use a flat block to back the sandpaper. If the block is hard (wood, for example), it’s best to have some sort of softer material such as cork glued to the bottom to improve the performance of the sandpaper. (I find the rubber sanding blocks, available at home centers, too hard, wasteful of sandpaper and inefficient because of the time involved in changing sandpapers.)
I made my own sanding block. Its measurements are 23⁄4” x 37⁄8” x 11⁄4” thick, with the top edges chamfered for a more comfortable grip. Any wood will work. I used sugar pine because it is very light in weight.
To get the most efficient use of the sandpaper, fold one of the thirds-of-a-sheet (described above) in half along the long side and hold it in place on the block with your fingers and thumb. When you have used up one side, turn the folded sandpaper and use the other. Then open the sandpaper and wrap it around the block to use the middle.

Power sanding. Random-orbit sanders are easy to use and efficient for smoothing wood. To reduce the likelihood of the squigglies these sanders produce, use a light touch. Don’t press down on the sander. Let its weight do the work.
Most woodworkers use random-orbit sanders because they are very efficient, easy to use, and they leave a less-visible scratch pattern than vibrator sanders due to the randomness of their movement. For both of these sanders, however, there are two critical rules to follow.
First, don’t press down on the sander when sanding. Let the sander’s weight do the work. Pressing leaves deeper and more obvious squigglies that then have to be sanded out. Simply move the sander slowly over the surface of the wood in some pattern that covers all areas approximately equally.
Second, it’s always the best policy to sand out the squigglies by hand after you have progressed to your final sanding grit (for example, #180 or #220), especially if you are applying a stain. Use a flat block to back the sandpaper if you are sanding a flat surface. It’s most efficient to use the same grit sandpaper you used for your last machine sanding, but you can use one grit finer if you sand a little longer.
Removing Sanding Dust
No matter which of the three sanding methods you use, always remove the sanding dust before advancing to the next-finer grit sandpaper. The best tool to use is a vacuum because it is the cleanest. A brush kicks the dust up in the air to dirty your shop and possibly land back on your work during finishing.
Tack rags load up too quickly with the large amount of dust created at the wood level. These sticky rags should be reserved for removing the small amounts of dust after sanding between coats of finish.
Compressed air works well if you have a good exhaust system, such as a spray booth, to remove the dust.
It’s not necessary to get all the dust out of the pores. You won’t see any difference under a finish, or under a stain and finish. Just get the wood clean enough so you can’t feel or pick up any dust when wiping your hand over the surface.
How Much to Sand
The biggest sanding challenge is to know when you have removed all the flaws in the wood and then when you have removed all the scratches from each previous grit so you can move on to the next. Being sure that these flaws and scratches are removed is the reason most of us sand more than we need to.
A lot of knowing when you have sanded enough is learned by experience. But there are two methods you can use as an aid. First, after removing the dust, look at the wood in a low-angle reflected light – for example, from a window or a light fixture on a stand. Second, wet the wood then look at it from different angles into a reflected light.
For wetting the wood, use mineral spirits (paint thinner) or denatured alcohol. Avoid mineral spirits if you are going to apply a water-based finish because any oily residue from the thinner might cause the finish to bead up. Denatured alcohol will raise the grain a little, so you’ll have to sand it smooth again.
Here are some supplies and tools we find essential in our everyday work around the shop. We may receive a commission from sales referred by our links; however, we have carefully selected these products for their usefulness and quality.


