We may receive a commission when you use our affiliate links. However, this does not impact our recommendations.
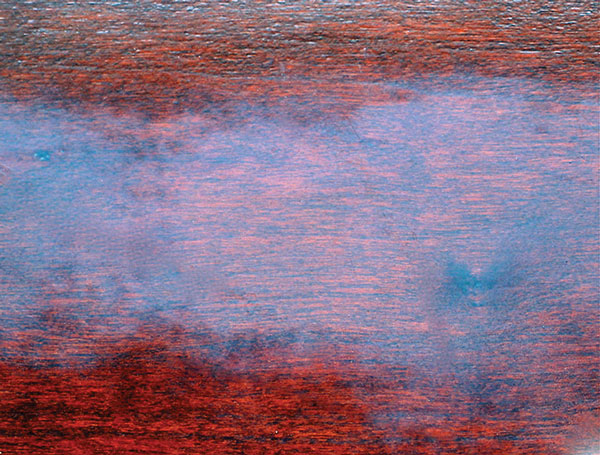
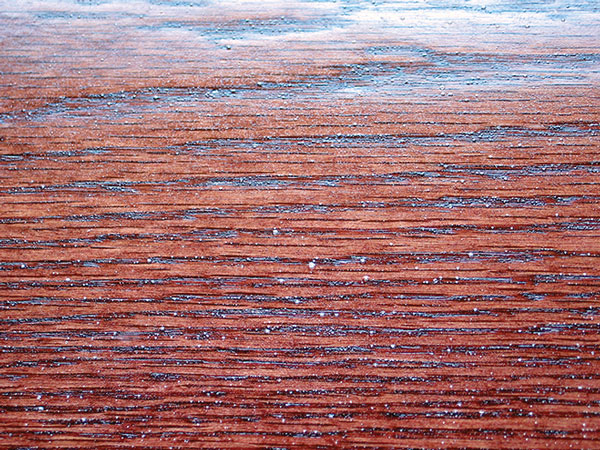
Blushing. Lacquer and shellac can turn milky white in humid weather right after application. To avoid this, slow the drying of the finish by adding a retarder (a slower evaporating solvent).
Solutions to a baker’s dozen of common finishing difficulties.
It’s easy enough to provide instructions for applying finishes. But in the real world, things go wrong; problems occur that you have to deal with.
With the combined goals of defining the problems, providing ways to avoid them, then fixing them after they occur, here are a baker’s dozen of the most common application problems in alphabetical order.
Bleeding in oil finishes: the oil bleeds out of pores after any excess oil has been wiped off.
■ To avoid, continue wiping off every half-hour or so until the bleeding stops.
■ To fix, if the bleeding has dried, disguise it by sanding or rubbing with steel wool, and apply another coat – or strip and start over.
Bubbles dry in brushed alkyd or polyurethane varnish: more likely in hot weather.
■ To avoid, work in cooler temperatures.
■ To avoid, “tip off” (use light passes while holding the brush nearly vertical) after each couple of strokes to break the bubbles.
■ To avoid, add 5-10 percent mineral spirits (paint thinner) to the varnish so the bubbles are more likely to pop out on their own.
■ To fix, sand level and apply another (thinned) coat.
Blushing: a milky whiteness that appears in a lacquer or shellac finish on a humid day within seconds after application. (See picture at top)
■ To avoid, wait for a drier day.
■ To avoid, add lacquer retarder (for shellac, use butyl cellosolve).
■ To fix, mist on the retarder.
■ To fix, rub with fine steel wool.
■ The blushing often disappears on its own by the next day if you can wait.
Brush marks: ridges in the finish caused by the brushing.
■ To avoid, add enough of the appropriate thinner to the finish to allow it to flow out level.
■ To fix, sand level and apply another (thinned) coat.
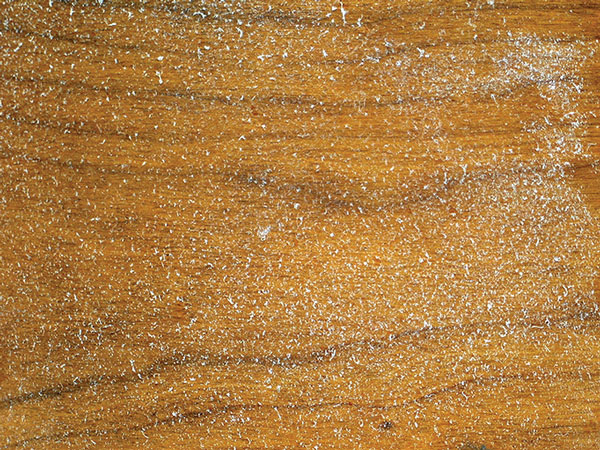
Cotton blush. If you add a lacquer thinner meant for cleanup rather than thinning to lacquer, the finish will come out of solution and show up on the wood as white fuzz resembling small pieces of cotton. Always thin with a proper thinner.
Cotton blush: small white clumps appearing in a lacquer-type finish when it dries, caused by using too weak a lacquer thinner that is meant just for cleanup.
■ To avoid, use a lacquer thinner meant for thinning lacquer, not for clean up.
■ To fix, sand out and apply another coat using the proper lacquer thinner.
Dry spray: a sandy looking and feeling surface caused by spraying shellac or lacquer that is drying too fast. It’s common when spraying the insides of cabinets and drawers.
■ To avoid, add lacquer retarder (butyl cellosolve for shellac).
■ To fix, sand level and apply another coat with retarder added.
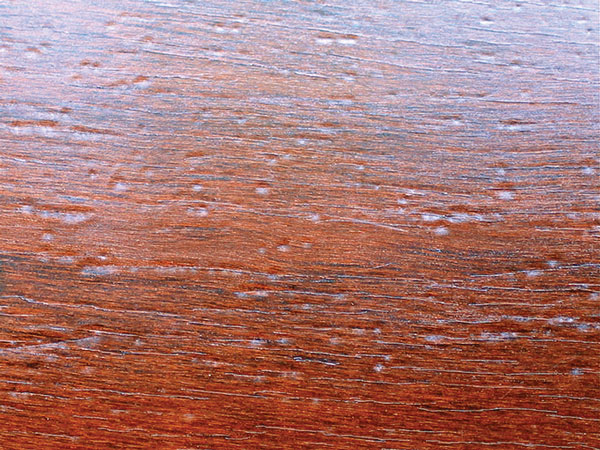
Fish eye. Finish doesn’t flow out well over silicone (which has a low surface tension), which is often included in furniture polishes. So when refinishing, the finish may bunch up into craters or ridges if you don’t first wash off the silicone, seal it in with shellac or add a fish-eye eliminator to the finish.
Fish eye: the finish bunches up into craters or ridges (most common when refinishing, due to silicone from furniture polishes getting into the wood).
■ To avoid, wash the wood thoroughly with any solvent, ammonia or trisodium phosphate.
■ To avoid, seal the wood with shellac.
■ To avoid, add fish-eye eliminator to the finish. When adding to alkyd or polyurethane varnish, thin the eliminator first with mineral spirits. Use an emulsified eliminator with water-based finishes.
■ To fix, sand level and add fish-eye eliminator to the next and all following coats, or strip the project and start over.
Glue splotching: usually shows up as lighter areas around joints or from fingerprints, especially under a stain.
■ To avoid, put less glue in the joints.
■ To avoid, quickly wash off all the glue seepage and sand smooth.
■ To avoid if the glue has dried, sand or scrape it off.
■ To fix after stain application, sand out with sandpaper that is wet with more stain.
■ To fix after a coat of finish has been applied, disguise using markers or an artist’s brush with colorants, and apply another coat.
■ To fix, strip the project or sand it to an even color and restain.
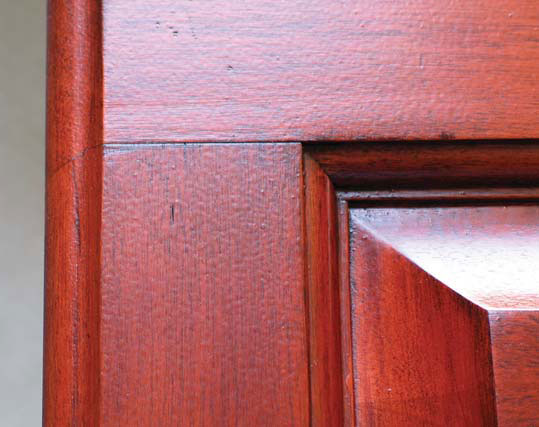
Orange peel. The most common spraying problem is orange peel, which is caused by spraying too thick a finish with too little air pressure, or moving the gun too fast or too far from the surface. Knowing the causes makes the ways to avoid orange peel obvious.
Orange peel: a sprayed surface that resembles the bumps on the surface of an orange.
■ To avoid, thin the finish more or increase the air pressure.
■ To avoid, watch what’s happening in a reflected light and adjust your speed and distance to get an evenly wet coat just short of runs and sags.
■ To fix, sand level. Then thin the next coat, or adjust your speed or distance.
Pinholes. On open-pored woods, air can come back out of the pores and cause bubbles in the finish. These turn into pinholes when you sand them level. The best way to avoid this problem is to spray “dust coats” to begin with until you get enough of a build to spray wetter coats.
Pinholes: small bubbles in a sprayed lacquer finish that appear right over the pores on porous woods such as oak and mahogany. They are caused by air trapped in the pores coming into the finish and forming bubbles. These become pinholes when you sand them level.
■ To avoid or fix, “dust” with almost dry coats by holding the gun farther away and move it faster. Follow with increasingly wetter coats with plenty of drying time between each.
■ To avoid, fill the pores of the wood and avoid really wet coats at the beginning.
Runs & sags: areas where thick finish is applied and gravity causes it to droop.
■ Least likely to occur with lacquer-type finishes because they set quicker. ■ To avoid, watch what’s happening in a reflected light during application, and brush out the sagging as it occurs.
■ To avoid if spraying, apply coats thinner on the wood.
■ To avoid if brushing, stretch coats out thinner.
■ To fix, sand or scrape level, then apply another coat.
Sticky finish: the finish is still tacky or gums up sandpaper after a reasonable drying time for that finish.
■ To avoid, work in a warmer temperature.
■ To avoid with a lacquer-type finish, add acetone.
■ To avoid on naturally oily woods, wipe over with naphtha or acetone just before applying the finish, or apply a shellac sealer coat.
■ To avoid with shellac, use more recently dissolved shellac.
■ To fix, raise the heat, or strip and start over taking one of the above precautions.
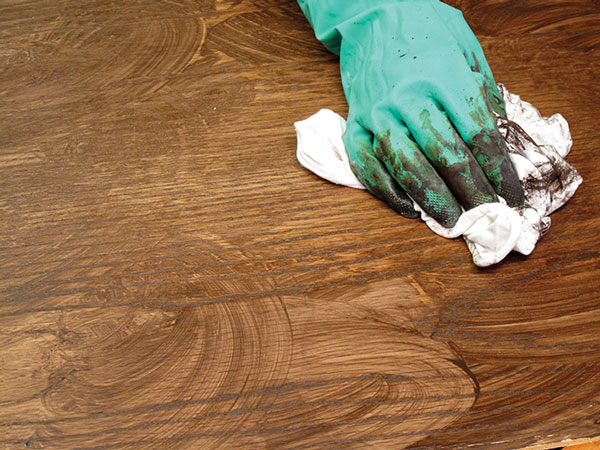
Stain streaks. Water-based and lacquer stains dry very fast, especially in warm temperatures. To apply and wipe off the excess successfully, work faster or on smaller surfaces at a time, or get a second person to help.
Streaking from stain application: occurs when some of the stain dries before it is wiped off and shows up as opaque streaks (most common with fast-drying lacquer and water-based stains).
■ To avoid, use a slower-drying stain, or work faster or on smaller areas at a time.
■ To avoid, have a second person wipe off quickly after you apply.
■ To fix, strip the wood and start over. You may be able to use the thinner for the stain or acetone, or even more of the same stain, if you catch the problem quickly.
Here are some supplies and tools we find essential in our everyday work around the shop. We may receive a commission from sales referred by our links; however, we have carefully selected these products for their usefulness and quality.


