We may receive a commission when you use our affiliate links. However, this does not impact our recommendations.
 In Part 4 we cut three more holes in the seat and copied three more legs into position, even though it was only temporary. We created two rungs, each different in length, but the second being a simple lengthening of the other. We used the splay planes to locate the rung axis and to locate where the rung axis intersects the legs axis. Part 4 made use of drawing resources we had already created to further the completed model.
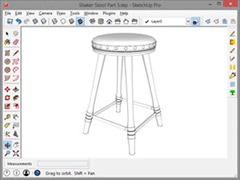
Today we are going to use the Rotate/Copy tool numerous times to provide us rungs and legs to operate on. We will use the Intersect Faces with Selection tool to create lines in the leg, outlining the faces we need to open for the mortises. But that alone will not give us the mortises we need. We will learn to “steal” primitives from already created components – the rungs – to add to our legs to complete the mortises.
We will also learn to use the fact that circles are formed of line segments, and extruded circles are formed of planes, to provide a surface on which to draw seat cover tacks. We will use the Rotate/Copy tool and the nX option to create an additional 23 tacks from the one we draw to provide a total of 24 tacks for the seat cover.
As usual I will demonstrate this modeling effort in a video. And as usual, butter and salt the popcorn, sit back and enjoy the show.
Here are some supplies and tools we find essential in our everyday work around the shop. We may receive a commission from sales referred by our links; however, we have carefully selected these products for their usefulness and quality.


