We may receive a commission when you use our affiliate links. However, this does not impact our recommendations.
Bandsaw Fence
Our fence shines where commercial models fall short.
By Richard Tendick
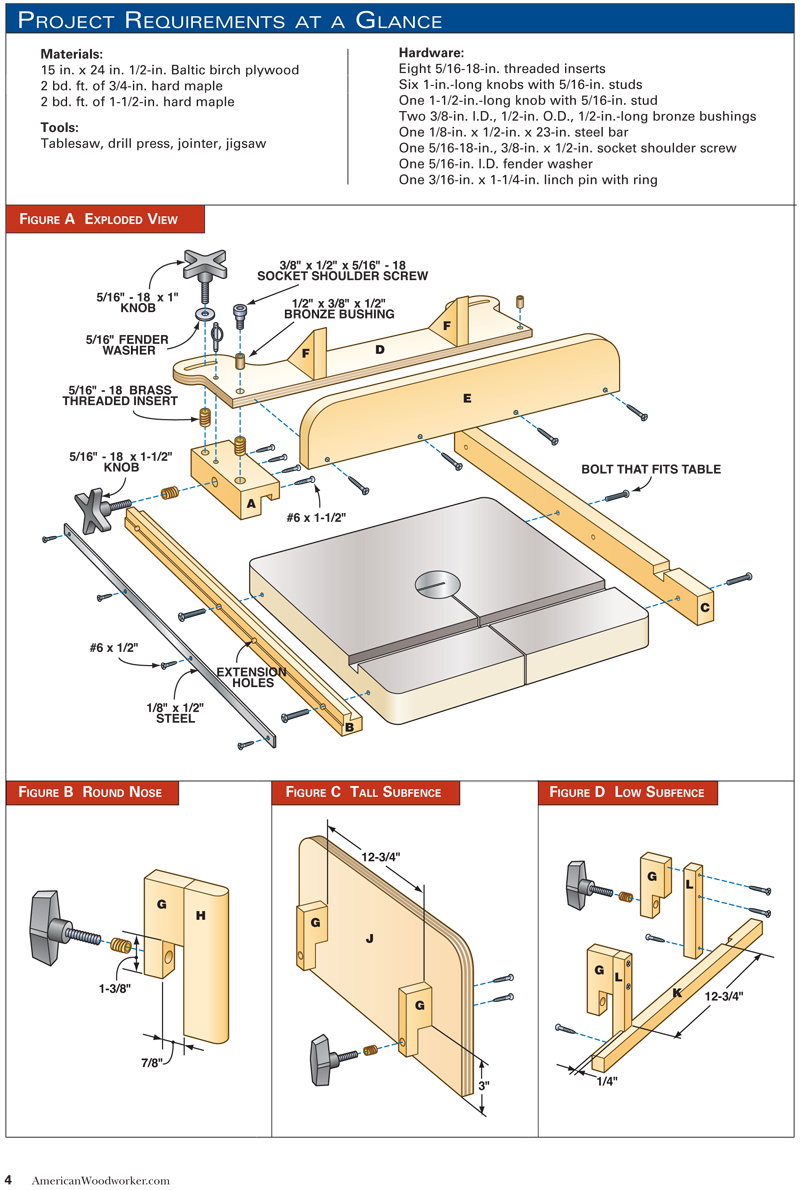
| Every bandsaw deserves a good fence. After all, a bandsaw is capable of doing much more than cutting curves. With a well-designed fence, you can accurately resaw boards into thinner pieces, rip warped rough lumber without worrying about kickback and precisely cut tenons, half-lap joints and even dovetail joints.Commercially made bandsaw fences for 14-in. saws are quite good, but many miss the boat on one crucial feature: You can’t easily adjust for blade drift (see “Setup for Accurate, Straight Cuts,” right). Without that adjustment, it’s very difficult to make a long, straight cut with a guaranteed square edge.My fence is a cinch to adjust for drift. This doesn’t make it more complicated to build, however. I’ve used standard hardware, plus some Baltic birch plywood. I’ve also designed three optional attachments that add even more versatility (see “3 More Fence Configurations,” right).
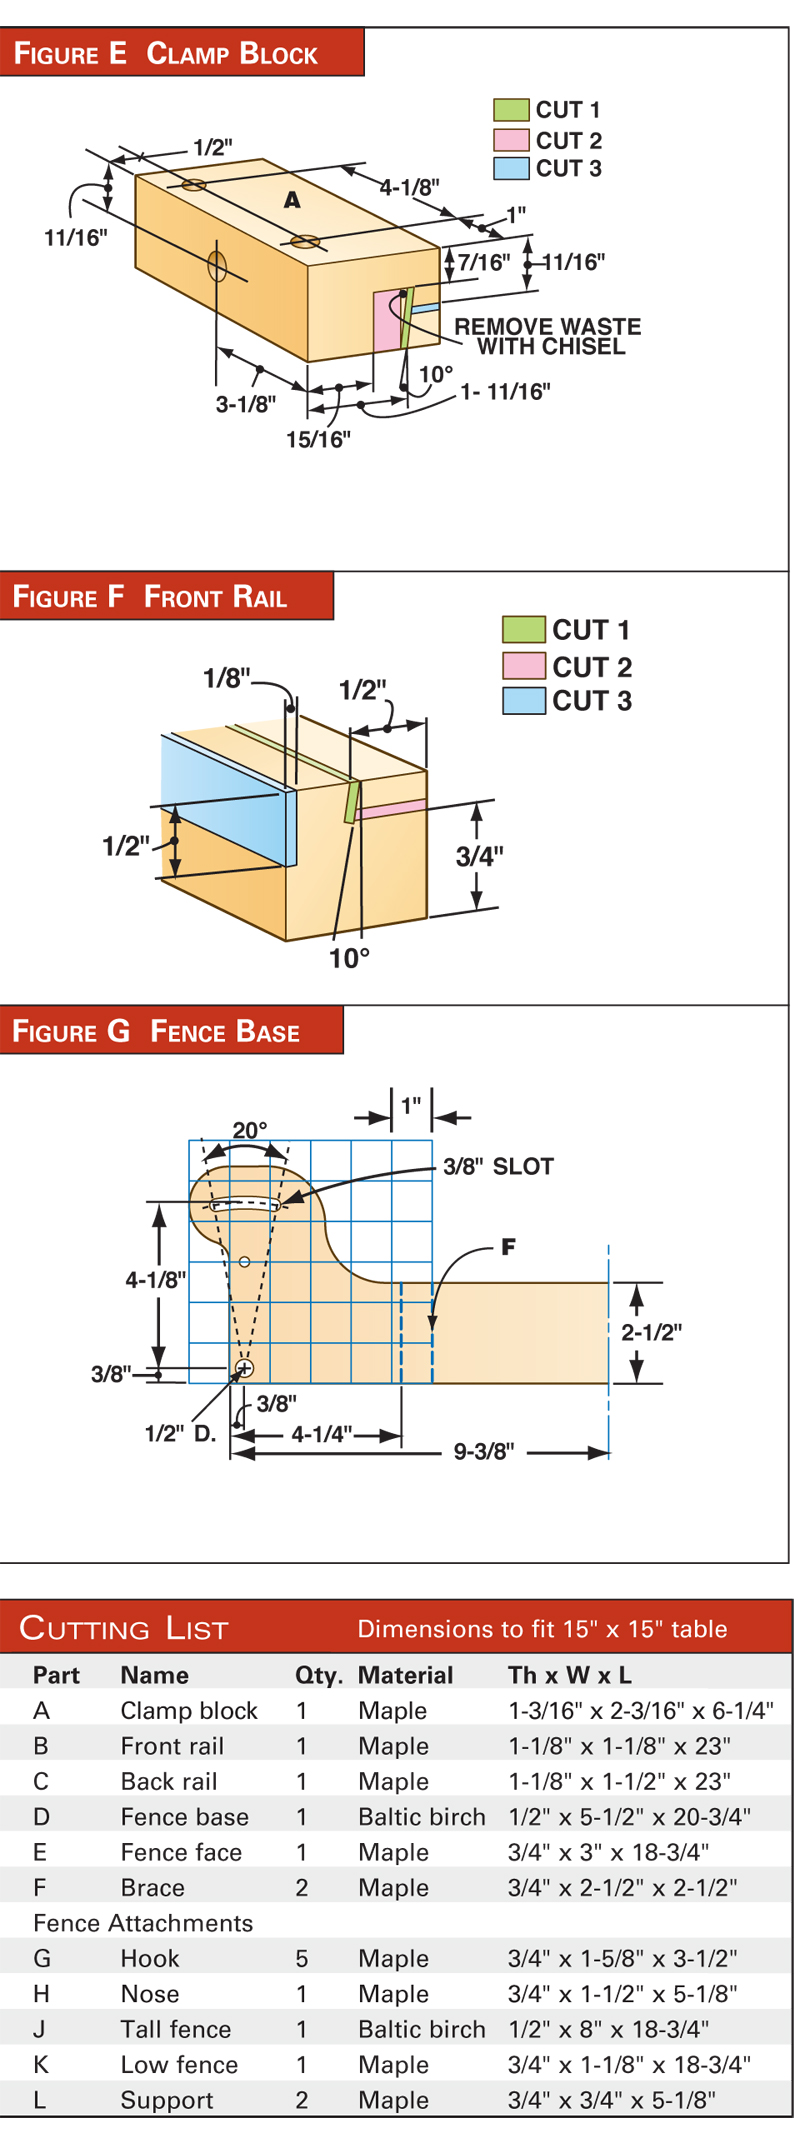
Saw the clamp block1. Mill the clamp block to final thickness and width, but leave it 12 in. long. Drill holes for three threaded inserts. 2. Make the clamp’s dovetail slot in three steps. Tilt the tablesaw blade to 10 degrees and make Cut 1. Install a 5/8-in. dado blade for Cut 2. Remove the remaining waste with a chisel. Trim the dovetail to length with Cut 3. Cut the clamp block to final length. Save the long offcut for later use. 3. Predrill and install four screws to strengthen the dovetail. Without the screws, the fence could break if you overtighten the clamp. 4. Install the threaded inserts flush to the surface.
Make the rails5. Mill the front and back rails (B and C) to final dimensions. Tilt the saw blade to 10 degrees and cut the dovetail angle on the front rail. Return the blade to 90 degrees to cut the remaining section of the dovetail. 6. Mark and drill holes for mounting the rails to your bandsaw. Most bandsaw tables have predrilled holes for mounting accessory fences. It’s vital that the top of the clamp block, when attached to the front rail, is level with the top of the bandsaw table. The easiest way to ensure this is to remove the table from the bandsaw. To do so, unscrew the knobs below the table trunnions and lift the table straight up and off. 7. Place the table upside down on a flat surface (Photo 1). Assemble the clamp block, its offcut and the front rail so the dovetails interlock. Turn them upside down and place them next to the front of the table. Align the rail with the right side of the table and transfer the position of the table’s holes. Move the rail so it lines up with the table’s left side and mark the holes again. Repeat for the back rail, without using the clamp blocks. 8. Drill the four bolt holes in both rails on the drill press. Turn both rails over and counterbore these holes using a Forstner bit. 9. Cut the wear-strip rabbet in the front rail. Cut a dado on the back rail for the table’s miter gauge. Bolt both rails to the table. Replace the table on the bandsaw. 10. Drill and countersink screw holes in the wear strip. Mount the wear strip on the front rail.
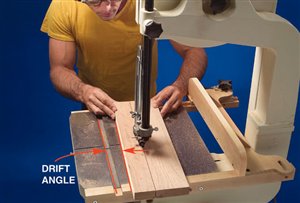
Build the fence11. Lay out the fence base. Cut the curved slots with a jigsaw. Use a Forstner bit to drill two holes for bronze bushings. Epoxy the bushings into the holes. Cut the outside profile. 12. Make the fence face (E) and braces (F). Glue, but don’t screw, the face and braces to the base. Wait overnight for the glue to dry; then joint the fence square (Photo 2). Add four screws to reinforce the glue joint.
Assemble13. Install a locking knob on the clamp block. Place the clamp block on the front rail. Attach the fence to the clamp. Remove the blade from the bandsaw and align the fence with the table’s miter slot. Tighten the clamp and fence. Drill the index pin hole through the fence base and the clamp. 14. For most cuts, keep the fence on the left side of the blade. For extra rigidity, use a C-clamp to fasten the fence base to the back rail. To put the fence on the right side of the blade, unscrew the fence from the clamp, turn it around and remount it. To extend the rails past the table’s right side, remove the wear strip, unbolt the rails from the table and remount the rails using the second set of holes.
|
Click any image to view a larger version. 3 more fence configurationsRound noseIf you’ve only got one or two boards to resaw and accuracy isn’t critical, add the round-nose attachment. It clamps right on to the standard fence. Position the nose directly opposite the front of the blade, draw a line down the board and saw away. Stay on the line by pivoting the board on the nose as needed.
Tall subfenceA tall fence helps you make a truly vertical cut on a wide board or any board with a roughsawn bottom edge. Tip: Use a featherboard whenever you’re resawing. Then you only have to push in one direction: forward.
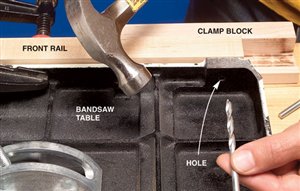
Low subfenceWe all know a bandsaw’s blade guard should be set close to the workpiece. But that’s not possible when you rip narrow pieces because most fences get in the way. Adding this low subfence makes narrow cuts a lot safer. 1. Transfer the location of a hole using a brad-point drill bit. Tap the bit with a hammer through the hole in the bandsaw table to mark a pilot hole on the fence rail. 2. Joint the fence after assembly to make it absolutely square. On any kind of jig, jointing is much easier than trying to glue two pieces at a precise right angle. Just be sure the jointed side is solid wood, rather than plywood.
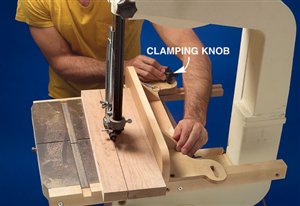
Setup for accurate, straight cutsWhen I want to saw an absolutely straight line, I adjust my fence at a Step 1. Draw a line parallel to the edge of a 2-ft.-long board. Saw the line freehand. Angle the board until the blade tracks straight. Stop halfway and keep the board at that angle. Step 2. Pivot the fence to match the board’s angle by loosening the top clamping knob. Retighten the knob after the fence and board are aligned. You’re good to go for any width of cut.
Extra featuresLock it parallel. To return the fence parallel to the blade and miter slot, simply insert this index pin. It fits tightly into a mating hole below, locking the fence into a precise 90-degree position. Use this setting for short straight cuts, when you don’t have to worry about blade drift. Use it on either side. Just turn this fence around to cut on the table’s right side, or for cutting a bevel. You can adjust for blade drift on this side, too. For wider capacity, temporarily extend the fence’s rails by remounting them in a second set of holes. |
| This story originally appeared in American Woodworker November 2005, issue #118. |
Here are some supplies and tools we find essential in our everyday work around the shop. We may receive a commission from sales referred by our links; however, we have carefully selected these products for their usefulness and quality.


