We may receive a commission when you use our affiliate links. However, this does not impact our recommendations.

Linker Logs Project
Have fun while learning to fabricate with plywood.
By Randy Johnson
Although linker logs are made with the aid of a computer—
once complete, they’re a great way to get kids (and
parents) off the computer for an afternoon of old-fashioned
fort building and pretend. The techniques shown here—
including pre-finishing the plywood, programming correct
joint tolerances, arranging parts, locating hold-downs and
placing tabs—can also be used for other plywood projects.
Th e inspiration for making these building planks comes
from a story titled “Plywood Play Planks” that appeared
in the December 1953 issue of Mechanix Illustrated magazine.
Th e original designers used 3/4″ plywood and a dado
blade to cut the joints. That technique can still be used,
but using a CNC provides more freedom when designing
the shape of the planks. Bill Young (a ShopBot guru from
Virginia) adapted the idea for the CNC by creating a wide
variety of planks, all with a standard notch spacing. The
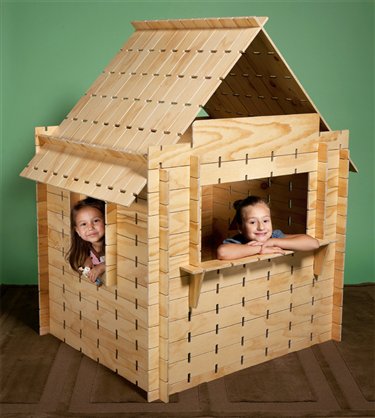
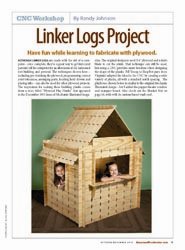
playhouse shown below is similar to the original Mechanix
Illustrated design—but I added the puppet theater window
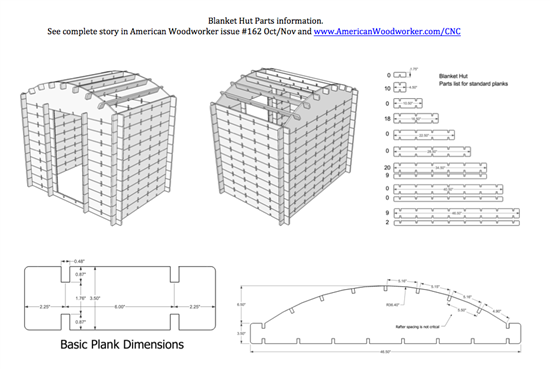
and marquee board. Also check out the Blanket Hut below, with with its custom barrel vault roof.
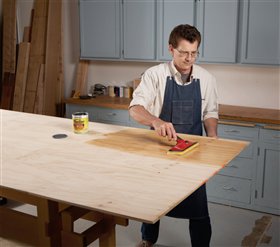
Start by finishing
A coat of shellac followed by a water-based topcoat provides
a durable finish for Linker Logs —and most other plywood
projects. Finishing a sheet of plywood is much easier than
finishing dozens of individual pieces, so applying the finish
first makes lots of sense. Shellac dries quickly and seals the
wood so the water-based topcoat won’t raise the grain, and
gives the plywood a nice amber tone. See “Pre-finishing
Plywood” (page 68) to learn more about finishing plywood. |
|
Click any image to view a larger version.

|
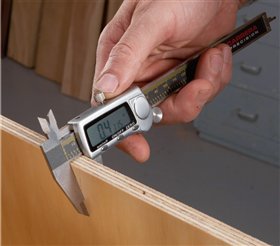
Measure the plywood
The thickness of the plywood must be consistent so the cross-lap
joints that fit properly. I recommend a tolerance between
sheets of plus or minus .005″. Most good-quality AC or AB
sanded plywood will be consistently sized. The sheets of 1/2″
plywood that I used to make this playhouse measured .47″ thick.
Measuring after applying the finish ensures the most accurate
measurement. |
|
 |
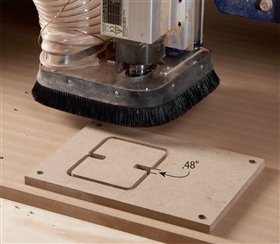
Cut a single part to test the joint
Rout a test part. When you test the fit in the next step, the
width of the notch is the only thing that matters, so you can
make the test part out of almost anything. I used 1/2″ MDF.
The test notch measured .48″ wide, which should provide the
desired .01″ clearance when the cross-lap joint is assembled. |
|
 |
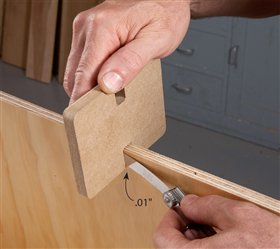
Check the joint’s fit
A mechanic’s feeler gauge works well to measure the gap
between the parts of the cross-lap joint. Ideally, this gap will be
.01″, but anything from .005″ to .015″ is acceptable and will hold
the Linker Logs together while still allowing them to be easily
assembled and disassembled. |
|
 |
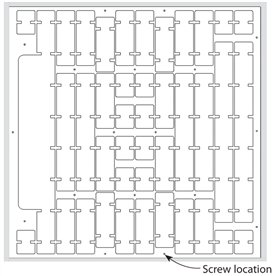
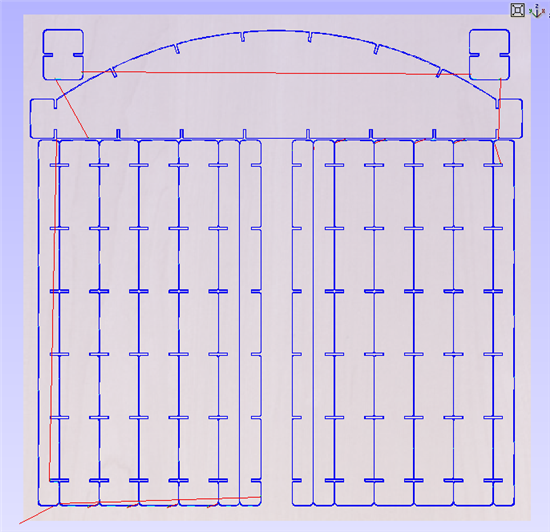
Nest parts and locate screws
Most CNC design programs include a “parts nesting” feature
that automatically fits multiple parts to the plywood. The Linker
Log parts shown here are nested .27″ inches apart—slightly
larger than the 1/4″ bit that will cut them out. Once the parts are
nested you can still move them around to attain the exact layout
you want. This allows you to safely locate the hold-down screws
that secure the plywood sheet.
PROJECT PLANS ARE AVAILABLE AT THE BOTTOM OF THIS PAGE. |
|
 |
Add connecting tabs
The next step is to add tabs between the parts to keep them
attached during routing. Since there is no waste material
between most of the parts, tabs need to be added opposite
of each other. The tabs added here measure .1″ thick x 1″ long.
An alternative to adding tabs is to adjust the routing depth to
leave a thin layer of material (a skin) at the bottom of the kerf.
A skin of .05″ would work fine for this project. |
|
 |
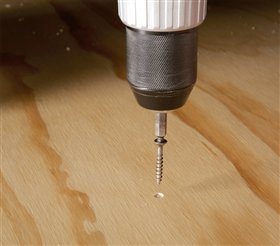
Secure the plywood with screws
Program the CNC to mark the location of each anchoring screw
with a shallow plunge cut. Locating the screws in your drawing
and transferring them to the plywood guarantees that the router
bit won’t run into the screws while cutting the parts. |
|
 |
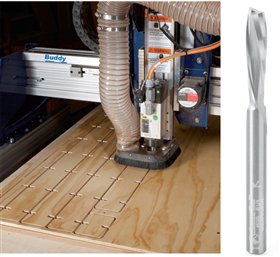
Use a down spiral bit
A down-cut spiral bit pushes the wood down while cutting,
so it leaves a nice, clean edge at the top of the plywood. The
bottom of the cut is also clean, because the spoil board under
the plywood prevents blow-out. |
|
 |
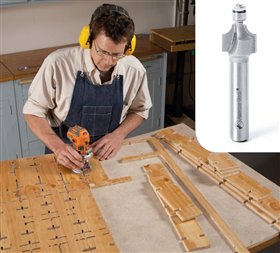
Separate and roundover in one step
Remove the connecting tabs. A straight flush-trim bit
works well for this, but I used an Amana 1/8″ roundover
bit (#MR0112) with a miniature bearing. This bit removed
the tabs and rounded the sharp edges. It also allowed the
joints to fit fully together, because the logs’ rounded-over
edges match the rounded inside corners of their CNC-routed
notches. I left the edges and notches unfinished. |
|
 |
Combo Puppet Theater and Play House
A combo puppet heater and play house that all kids seem
to enjoy, It features a marquee with room to engrave or paint your kid’s theater logo.
Project plans, Vectric Aspire, .dxf, and SketchUp files for the two playhouses can be downloaded at the bottom of this page.
Additional plank designs that included angles and curves
can be found at LinkerLogs.com. You supply the kids. |
|
 |
Alternate T-bone notch
If you want to keep the plywood edges square, use a
“t-bone” notch design. Most CNC drawing programs
have a built-in tool that lets you quickly add the
right size “t-bone” to your joints. As you can see, this
modification lets the plywood fully seat in the bottom
of the notch. |
|
 |

Download parts info (PDF)

Download Vectric Aspire, DXF files, and SketchUp files here. These are all in one zipped folder.
See more Linker Log ideas at www.LinkerLogs.com
| This story originally appeared in American Woodworker October/November 2012, issue #162.

|
|
DOWNLOAD STORY PDF

|
Product Recommendations
Here are some supplies and tools we find essential in our everyday work around the shop. We may receive a commission from sales referred by our links; however, we have carefully selected these products for their usefulness and quality.


