We may receive a commission when you use our affiliate links. However, this does not impact our recommendations.
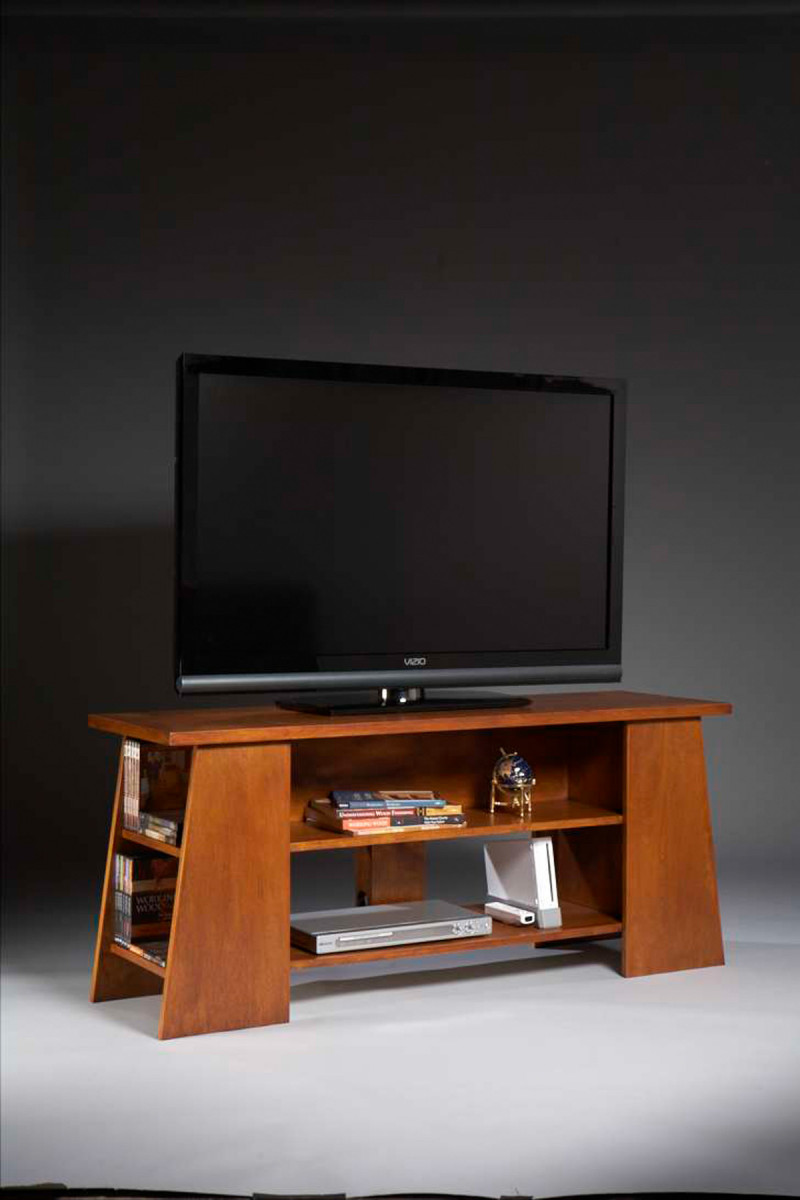
Build a rock-solid cabinet from one sheet of plywood.
Your state-of-the-art TV deserves something better than a flimsy flat-pack shelving unit from the big box store. This handsome display stand features sturdy construction, storage for CDs and plenty of room for cable, gaming and sound-system components. It’s even designed to hide the cord clutter that’s inevitable when you connect everything together. You can build it in a couple weekends using basic shop tools and a single sheet of plywood. If you use birch plywood from the home center, as we did, you can build this cabinet for less than most flat-packs will cost.
The finishing touch is a wipe-on finish that makes birch plywood—even budget-priced birch plywood—look rich and sumptuous. Professional finisher Kevin Southwick explains how to create that look in “Cherry Finish for Birch Plywood”.
Contemporary TV Stand Cut List
|
Part |
Name |
Qty. |
Material |
Th x W x L |
|
A |
Back Panel |
1 |
Birch plywood |
3/4″ x 8-25/32″ x 35″ |
|
B |
Top |
1 |
Birch plywood |
3/4″ x 16-1/2″ x 53″ |
|
C |
Leg |
4 |
Birch plywood |
3/4″ x 10-1/2″ x 23″ (a) |
|
D |
Wide edge banding |
2 |
Birch |
1/4″ x 1″ x 84″ (b) |
|
E |
Narrow edge banding |
4 |
Birch |
1/4″ x 3/4″ x 96″ (b) |
|
F |
Center shelf |
2 |
Birch plywood |
3/4″ x 13-1/4″ x 35″ |
|
G |
Top end shelf |
2 |
Birch plywood |
3/4″ x 6″ x 13-1/2″ |
|
H |
Bottom end shelf |
2 |
Birch plywood |
3/4″ x 7″ x 13-1/2″ |
|
J |
End panel |
2 |
Birch plywood |
3/4″ x 13-1/2″ x 19″ |
|
K |
Chase center |
1 |
Birch plywood |
3/4″ x 5″ x 8-3/4″ (c) |
|
L |
Chase side |
2 |
Birch plywood |
3/4″ x 3″ x 8-3/4″ (d) |
Overall Dimensions: 23-3/4″ H x 53-1/2″ W x 17″ D
Notes:
a) Leg tapers to 7-1/2″ at top. Cut two tapered legs from one 18-1/8″ x 23″ blank.
b) Cut length to fit.
c) Both edges mitered.
d) One edge mitered.
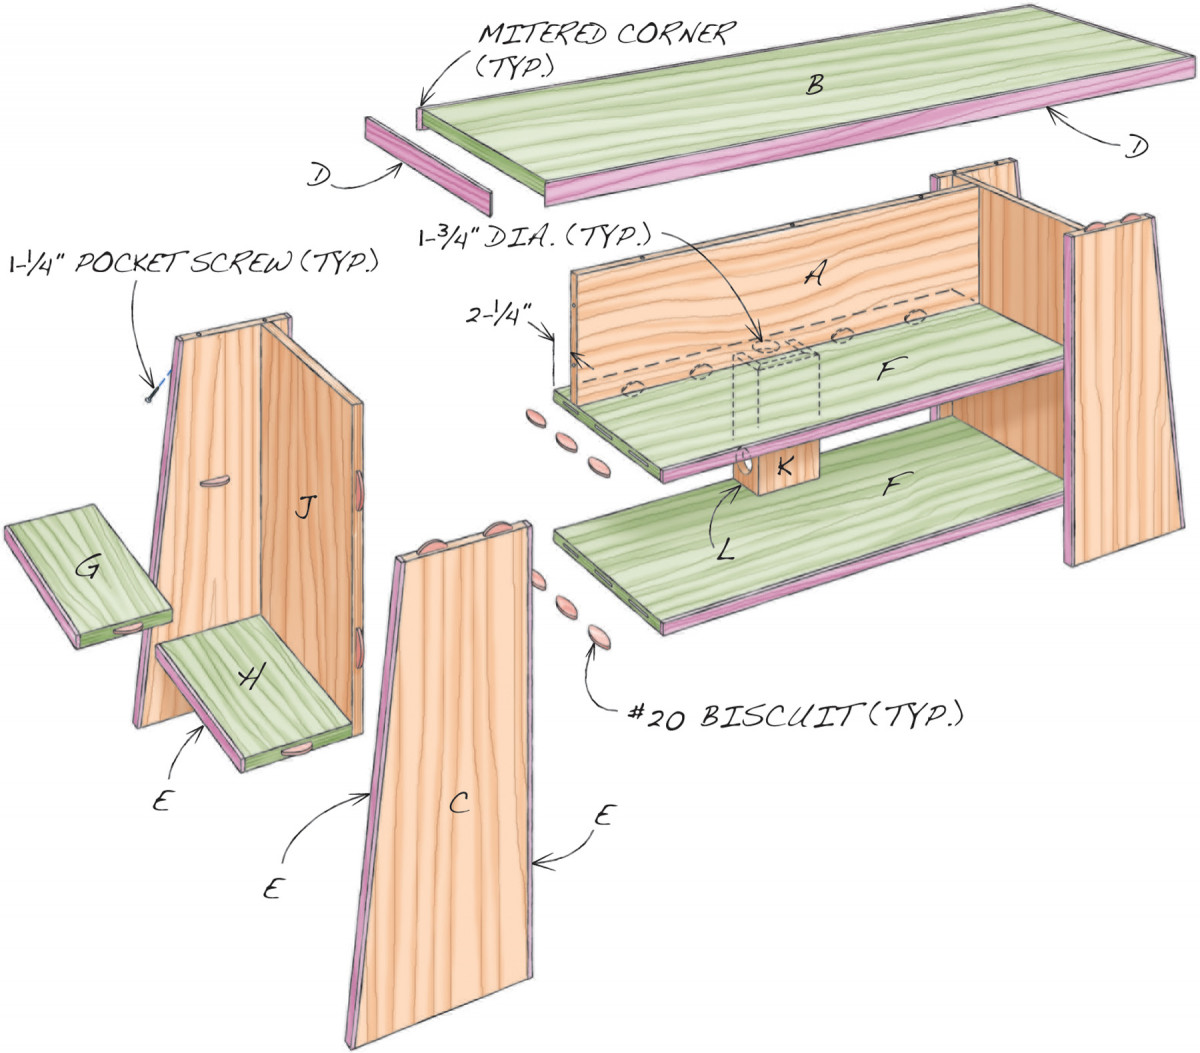
Fig. A) Exploded View
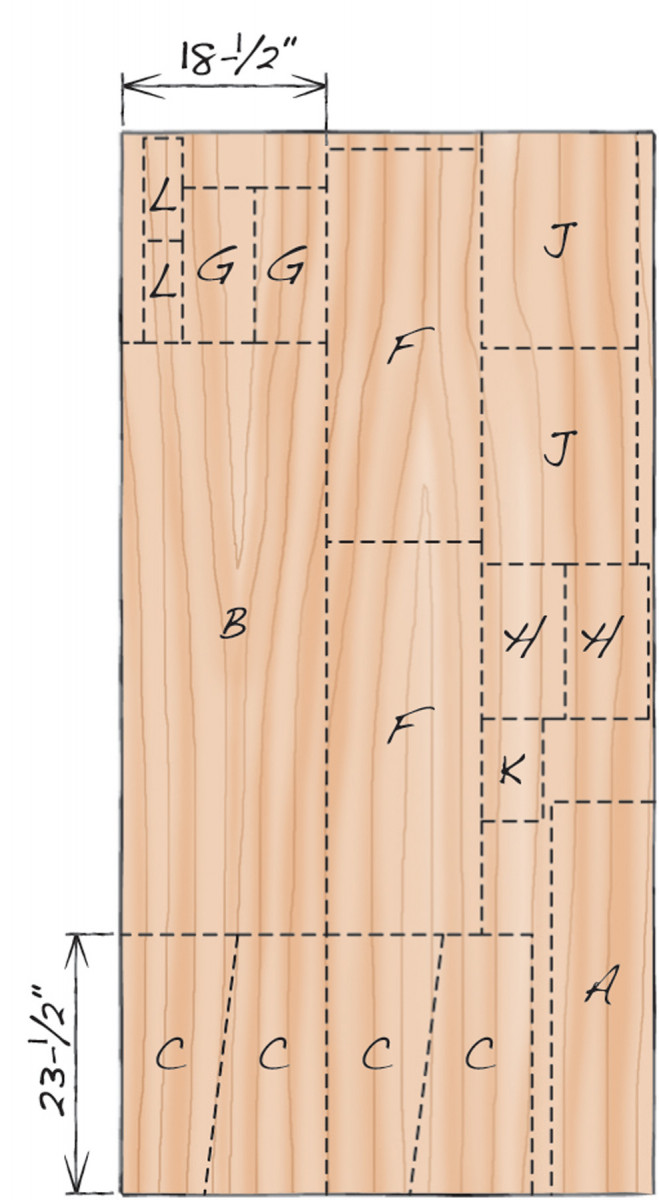
Fig. B) Plywood Cutting Diagram
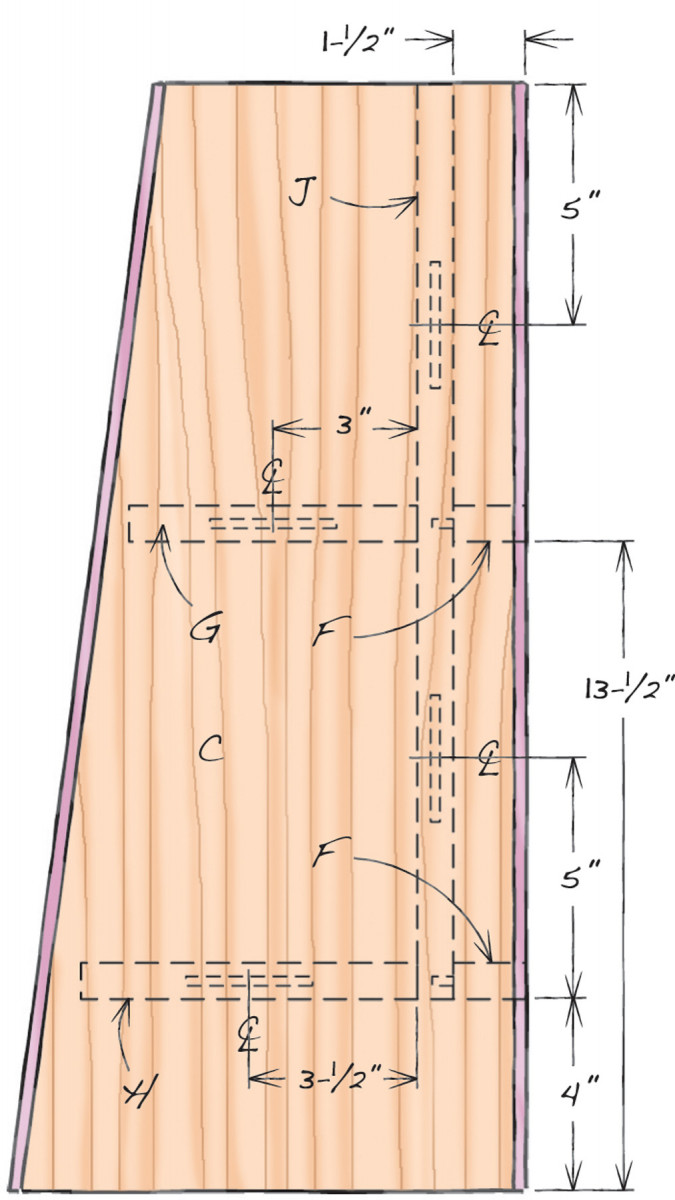
Fig. C) Leg Details
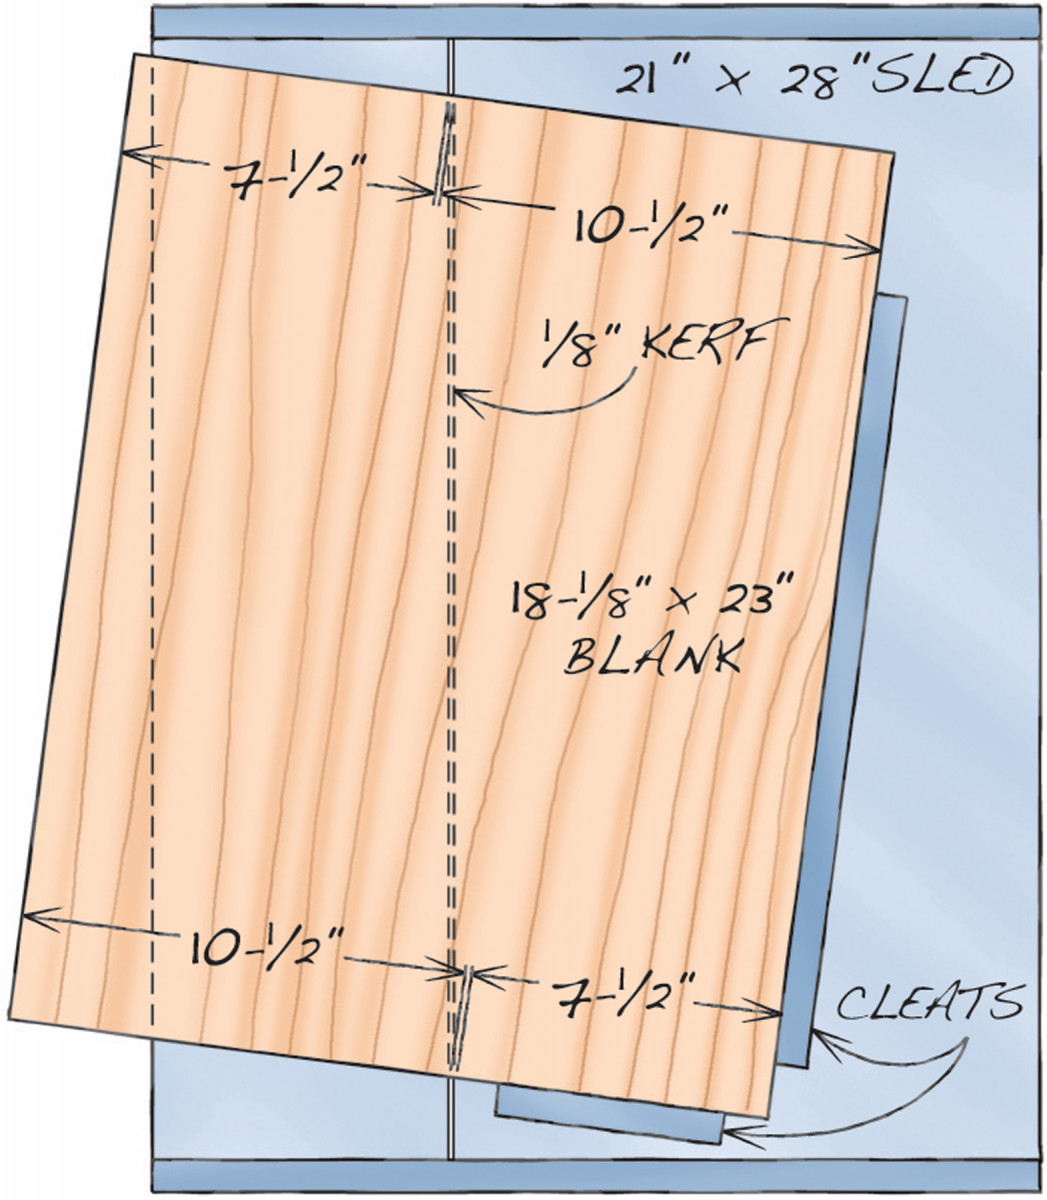
Fig. D) B Leg Tapering Set-up
Home center plywood
Home center birch plywood isn’t likely to win any awards, because it’s a lower grade product than the birch plywood sold at hardwood lumberyards. The face veneers on home center plywood are usually very thin and they almost always contain both light-colored sapwood and dark-colored heartwood. Grain patterns and figure can vary widely, even on the same sheet. Try to avoid sheets with significant color contrasts, wild grain or pronounced figure.
Some sheets may contain substrate materials that aren’t flat. Eyeball each sheet at a low angle and avoid sheets with divots or depressions in the surface or areas where the birch veneer appears to be sanded thin. You only need one sheet of 3/4″ birch plywood for this project, so if you can’t find a sheet you like, try another store or come back another day.
As far as purchasing solid birch for edge banding the plywood, it’s a puzzle why home centers that stock birch plywood don’t always stock birch boards. I didn’t want to use iron-on edge banding, so I had to go to a hardwood lumberyard to buy the birch.
Cut the tapered legs
The veneer on home center plywood is prone to chipping, so before you cut the sheet, it’s a good idea to install a zero-clearance throat plate in your tablesaw along with an 80-tooth alternate top bevel (ATB) blade designed for cutting plywood.
Lay out the parts on the plywood according to the cutting list (page 50) and cutting diagram (Fig. B, same page). Note: Oversize the parts by 1/2″ in both dimensions when you lay them out.
Break down the plywood sheet into manageable pieces. First, use a jig saw to rough-cut the back panel (A, Fig. B and Fig. A). Then either rip the sheet to separate the 18-1/2″ wide section that includes the top (B), or crosscut the sheet to separate the two 23″ long leg blanks (C); note that each blank contains two legs. Once these preliminary cuts are made it’s much easier to cut all the pieces to final size.
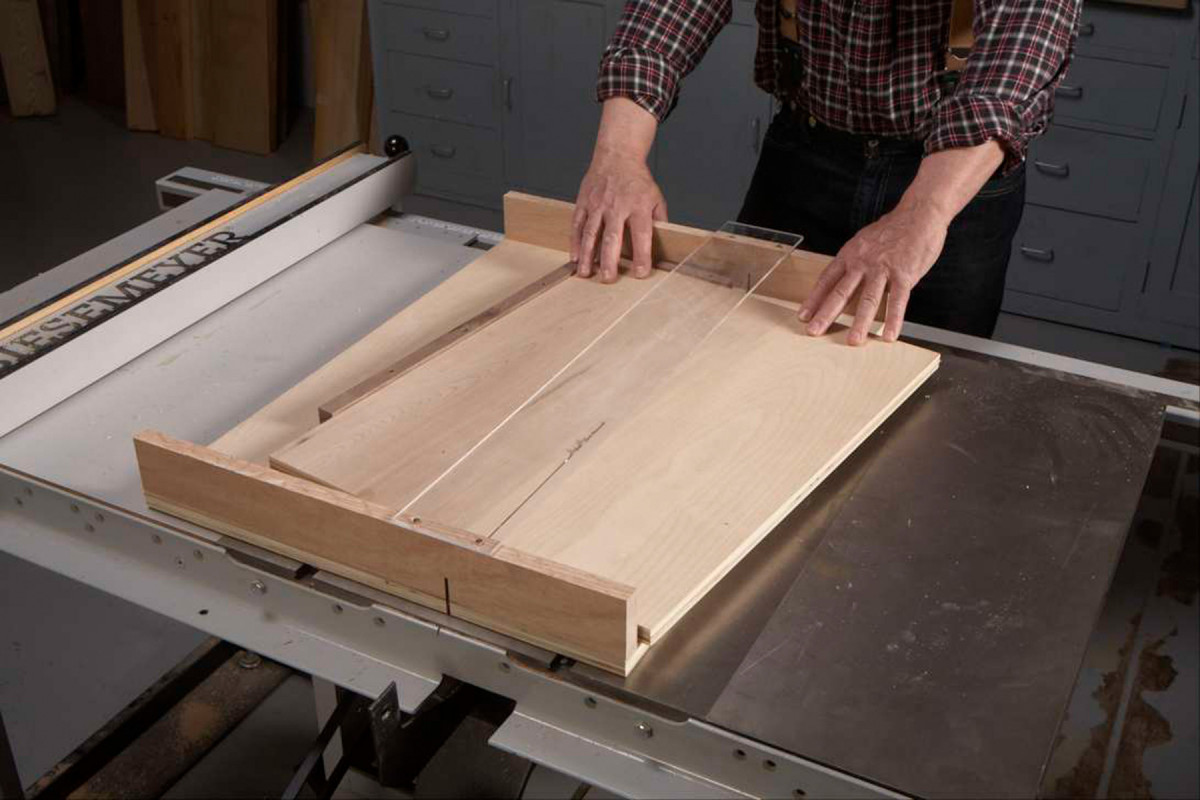
1. Cut two tapered legs at once using a sled with cleats attached to hold the blank at an angle. Runners attached to the bottom of the sled ride in the saw’s miter gauge slots.
Rip the two leg blanks 18-1/8″ wide. Then use a crosscut sled to cut each blank into two identical tapered legs (Photo 1). Fasten a pair of cleats to the sled to hold the blank at the correct angle (Fig. D).
You don’t need to measure any angles—just mark the legs’ 7-1/2″ top and 10-1/2″ bottom measurements onto the ends of the blank. Place the blank on the sled and align the 1/8″ spaces between the two lines you’ve drawn on its ends with the sled’s saw kerf. Hold the blank in position and trace its right edge and bottom edge onto the sled. Screw the cleats along these marks, and you’re ready to cut the tapered legs. Orient the blanks so that the front faces of the left and right front legs will look good together. Pay attention to the grain: You may decide to cut one of the blanks with its back face up, because that’s the best-looking face.
Edge band the plywood
Rip lengths of wide edge banding (D) for the top and narrow edge banding (E) for the legs, center shelves (F) and top and bottom end shelves (G, H). Spread a generous bead of glue on each plywood edge and spread it evenly. Center the edge banding on the plywood and stretch tape across the joint to hold the edge banding in position for a couple minutes to allow the glue to tack. Then clamp the joint, using a caul to evenly distribute the pressure.
Here’s a neat trick: After gluing and taping the edge band to one shelf, use another shelf of the same length as the clamping caul. This trick works for the tapered legs, too.
Be sure to remove all the squeezed-out glue before it dries. For a neat, finished appearance, I glued the top’s 1″ edge banding all around and mitered the corners.
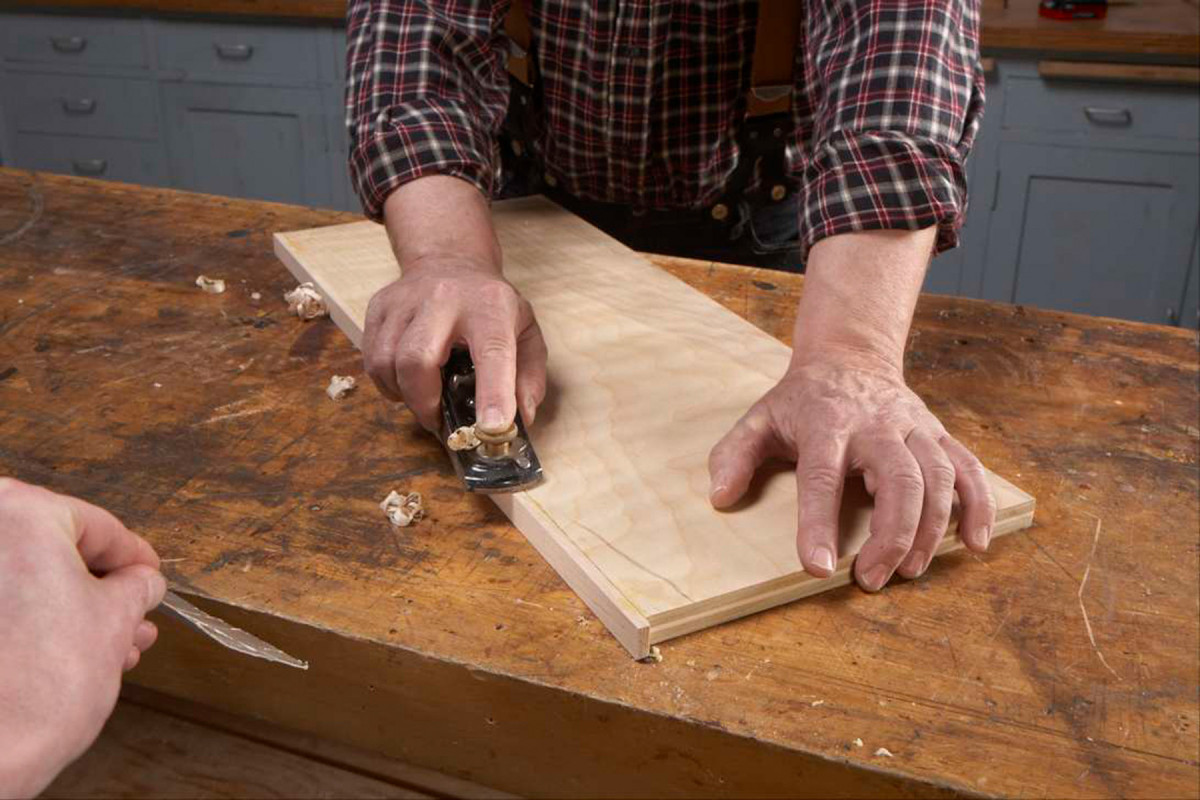
2. Plane the edge banding nearly flush with a block plane. Then finish the job by hand sanding with a block. Power-sanding is risky because the veneer is so thin.
Trim the edge banding flush with the ends of each piece. Then use a block plane to flush the edge banding with the plywood faces (Photo 2). Set the plane to make fine shavings and follow the grain. It’s OK to sand the faces of the edge banding with a random orbital sander, but it’s best to sand the plywood by hand, using a sanding block.
It’s a good idea to plane and sand a test shelf to get a feel for the limits posed by the super-thin birch veneer on this low-cost plywood.
Easy joinery
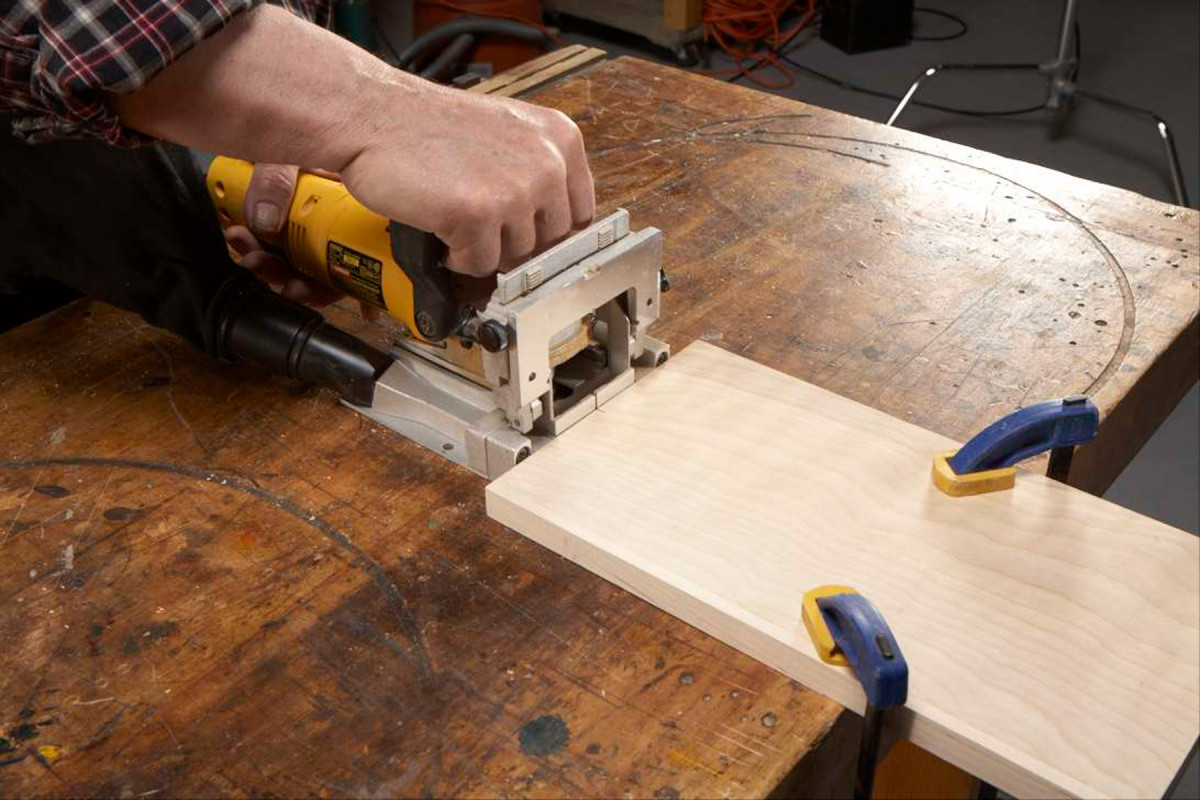
3. Use the bench to register the biscuit joiner when you cut slots for biscuits in the ends of parts such as the shelf shown here. Center each biscuit using the joiner’s index line.
Lay out slots for #20 biscuits in the ends of all the shelves, the top ends of both front legs and the bottom edge of the back panel (Fig. A and Fig. C). Center the slots or space them evenly. Orient the biscuit joiner horizontally to cut these slots (Photo 3).
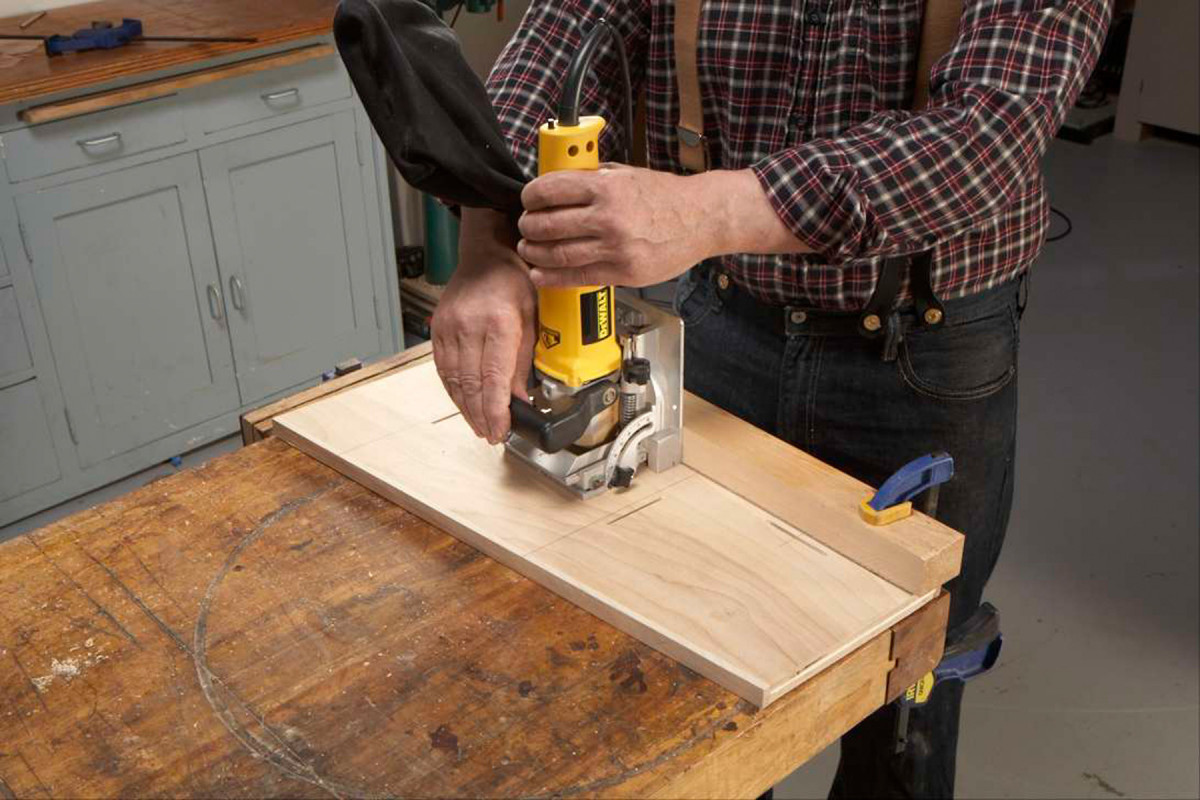
4. Use a fence to register the biscuit joiner when you cut slots in the faces of parts such as the leg shown here. Position the fence on a layout line that indicates the bottom of the adjoining piece.
Lay out matching slots in the top face of one center shelf and in the inside faces of each leg and both end panels (J). Note that on the end panels, the center shelves mount directly opposite the end shelves, but only the center shelves are biscuited. Draw lines that indicate the bottom of each adjoining piece. Then clamp a fence on the line and orient the biscuit joiner vertically to cut these slots (Photo 4). The fence registers the biscuit joiner so that these slots will align with the ones already cut in the ends of the other pieces. To cut the slots in the end panel for the bottom center shelf, simply clamp the fence to the end of the end panel.
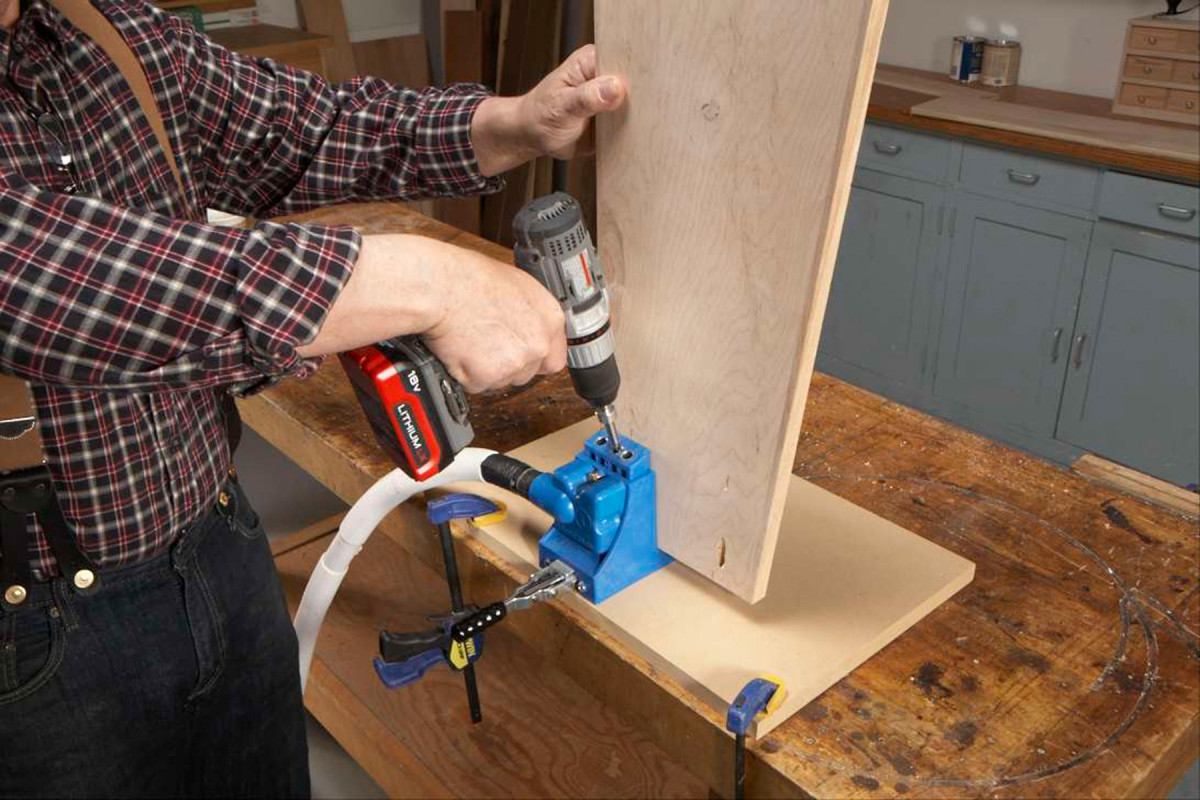
5. Drill pocket holes in the back legs and the back panel. Using both pocket screws and biscuits simplifies assembly.
Lay out and drill pocket holes in the back faces of the back legs and back panel, using a jig (Photo 5). Set up the jig to assemble 3/4″ stock with 1-1/4″ coarse-thread pocket screws.
Assemble in stages
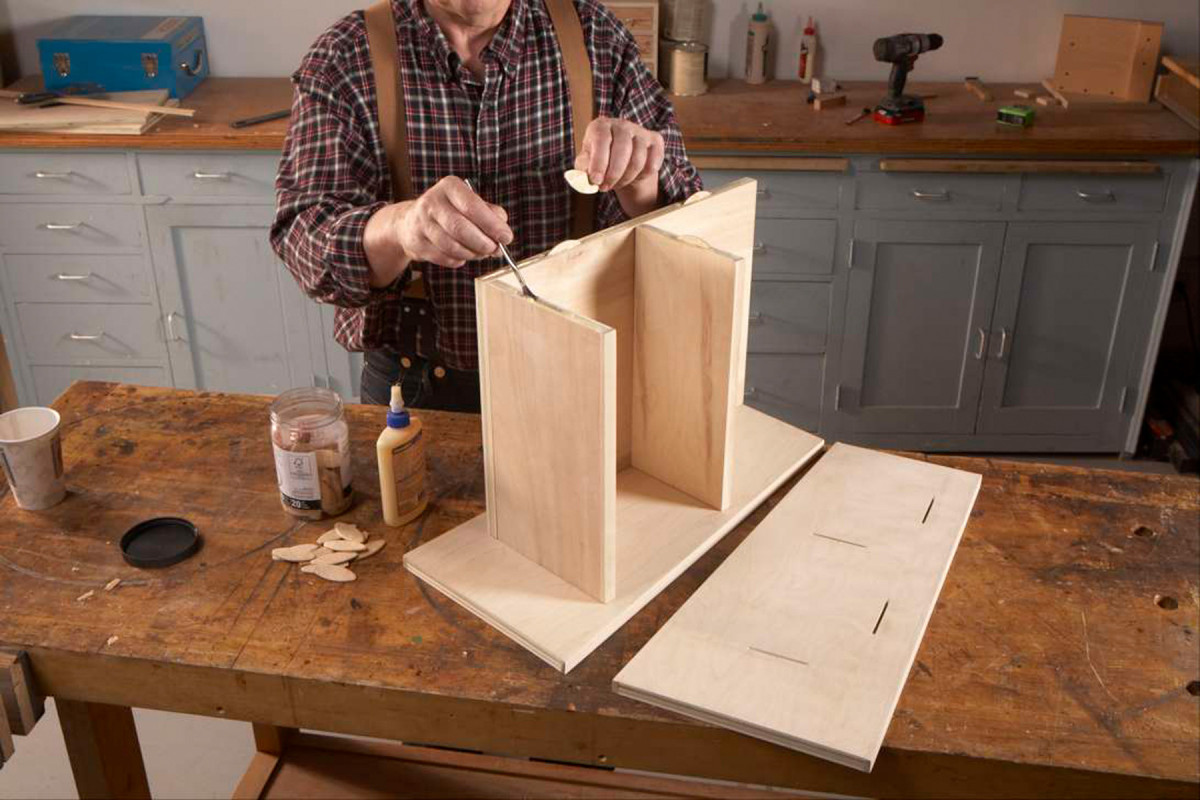
6. Assemble the bookshelf ends with biscuits and glue. Work on a flat surface and make sure the glued-up assembly is square.
Start by gluing together the two bookshelf ends (Photo 6). Sand all the parts by hand, using a block. Start with 120 grit sandpaper, then switch to 150 grit for final sanding. Be careful not to sand through the veneer. Remove any layout lines that won’t be covered by the joints.
Working on a flat surface, dry-assemble the parts to make sure everything fits properly. Then use a flux brush (available at hardware stores) to spread glue into the slots and on the plywood edges. Position the back panel first, flush with with the leg at the top and the layout line at the back. Then install the shelves, followed by the remaining leg.
Stand up the assembly to clamp it together. Make sure everything is straight and square and remove any squeezed-out glue before it dries. Note: You’ll be able to clamp the bottom shelf to the back panel, but not the top shelf. Use a couple pin nails to secure it.
Drill a 1-3/4″ dia. hole in the upper center shelf, 1-1/4″ from the back edge and centered between the ends. Finish-sand this shelf and the back panel and then assemble these parts using biscuits and glue. Make sure the ends remain flush when you clamp the joint. Finish-sand the lower center shelf.
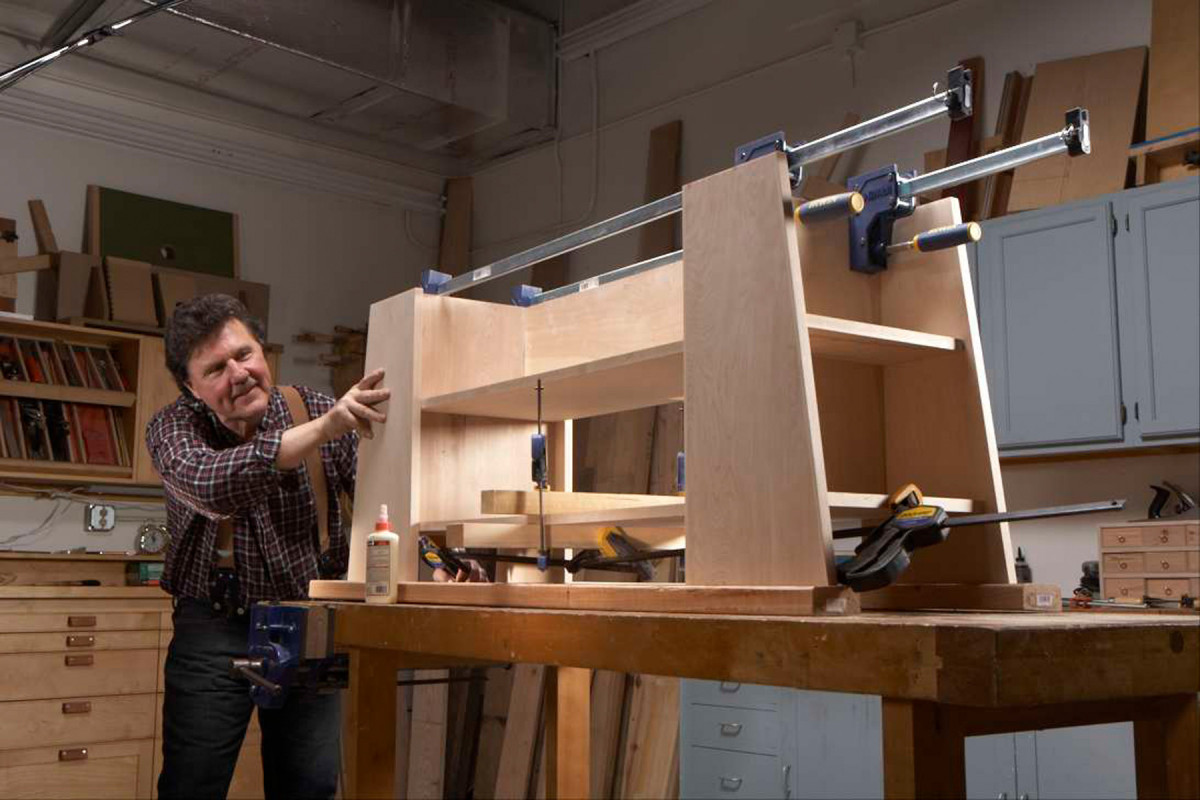
7. Glue and clamp the shelves between the ends. You can use short clamps to complete this job by clamping 2x2s to the lower shelf (photo, at right).
Glue the center shelves between the bookcase ends (Photo 7). This large assembly can be hard to manage, so it’s a good idea to enlist an assistant to help apply glue, install biscuits, align the parts, position the clamps and remove the squeezed-out glue. Fasten the back panel to the end panels to stabilize the base (Photo 8).
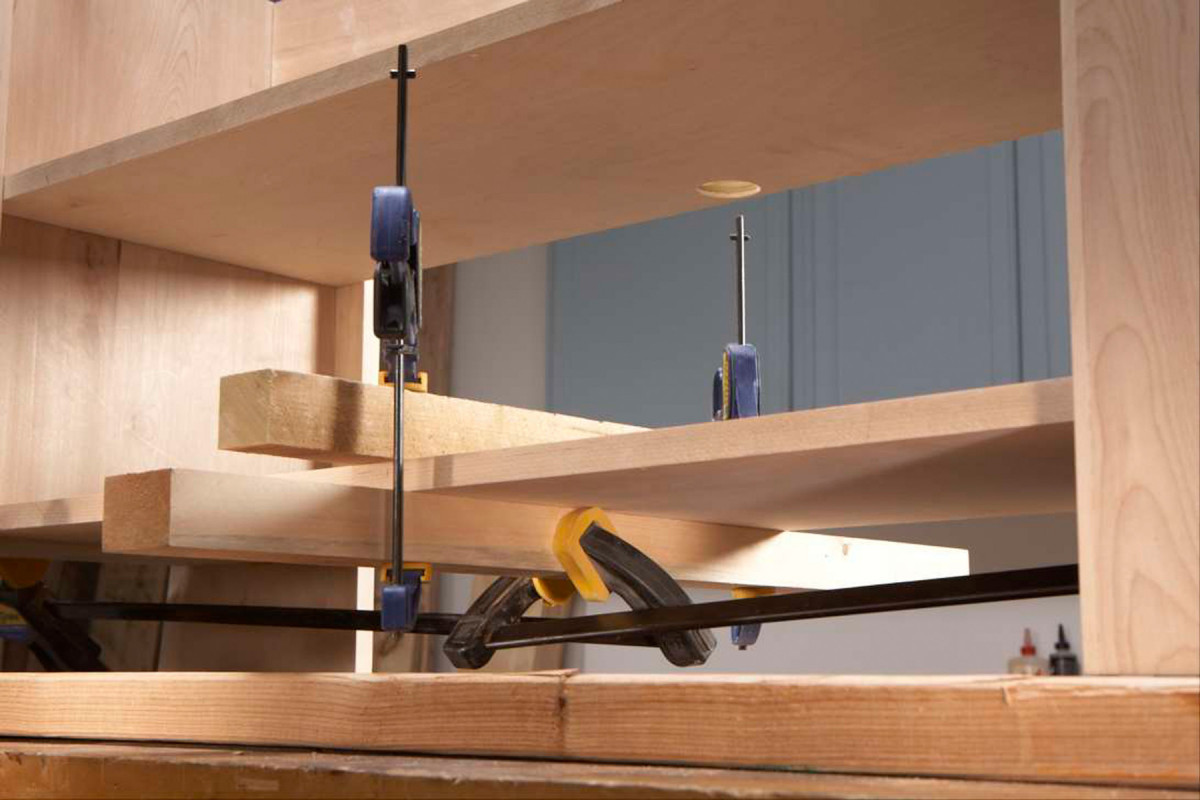
7B.
Locate and cut the biscuit slots on the underside of the top. You can flip over the base and center it on the top to transfer the slot locations, but there’s an easier way: Inside the edge banding, the top overhangs the base by 3/4″ at the front.
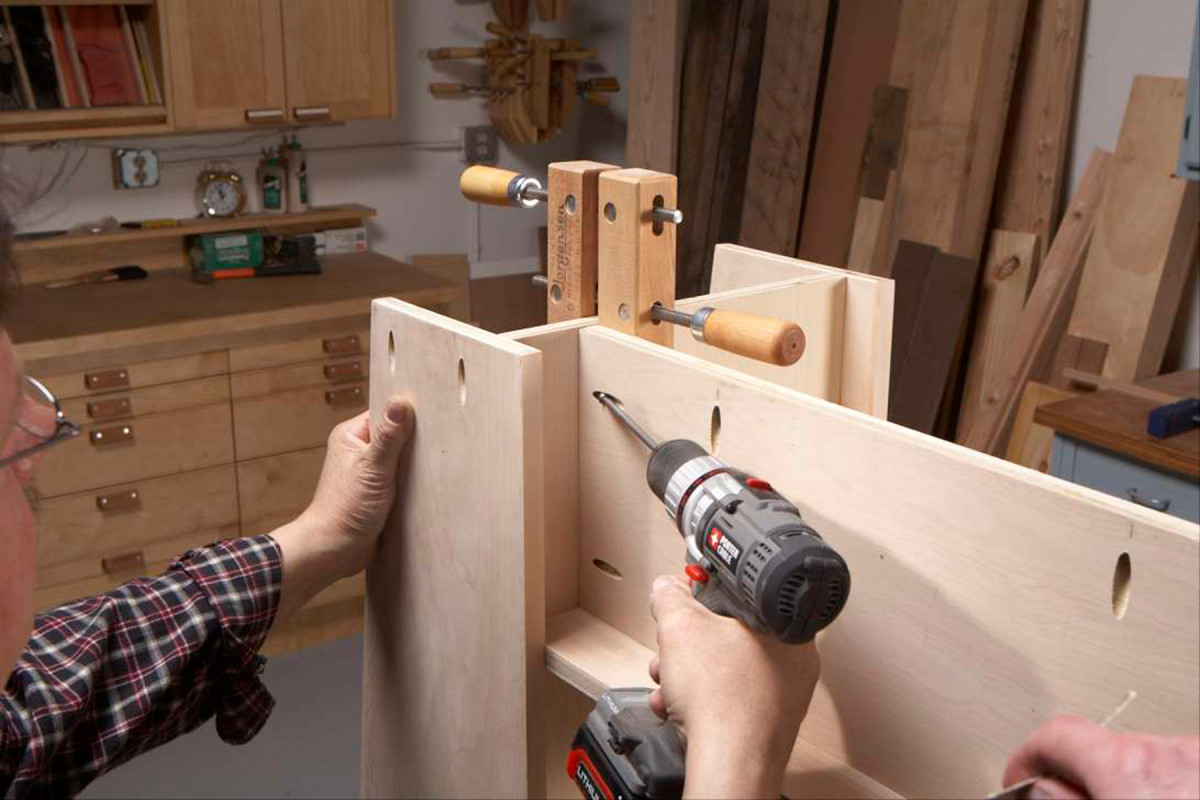
8. Pocket-screw the back panel to the end panels to keep the base from racking. Use a clamp to back up the glued butt joint.
That means all you have to do to properly register the biscuit joiner is install a 3/4″ wide fence against the front edge banding. Similarly, the top overhangs the base at both ends by 2-1/2″. So, just measure the slot center locations in the top of each leg and add the 2-1/2″ overhang to transfer them to the top.
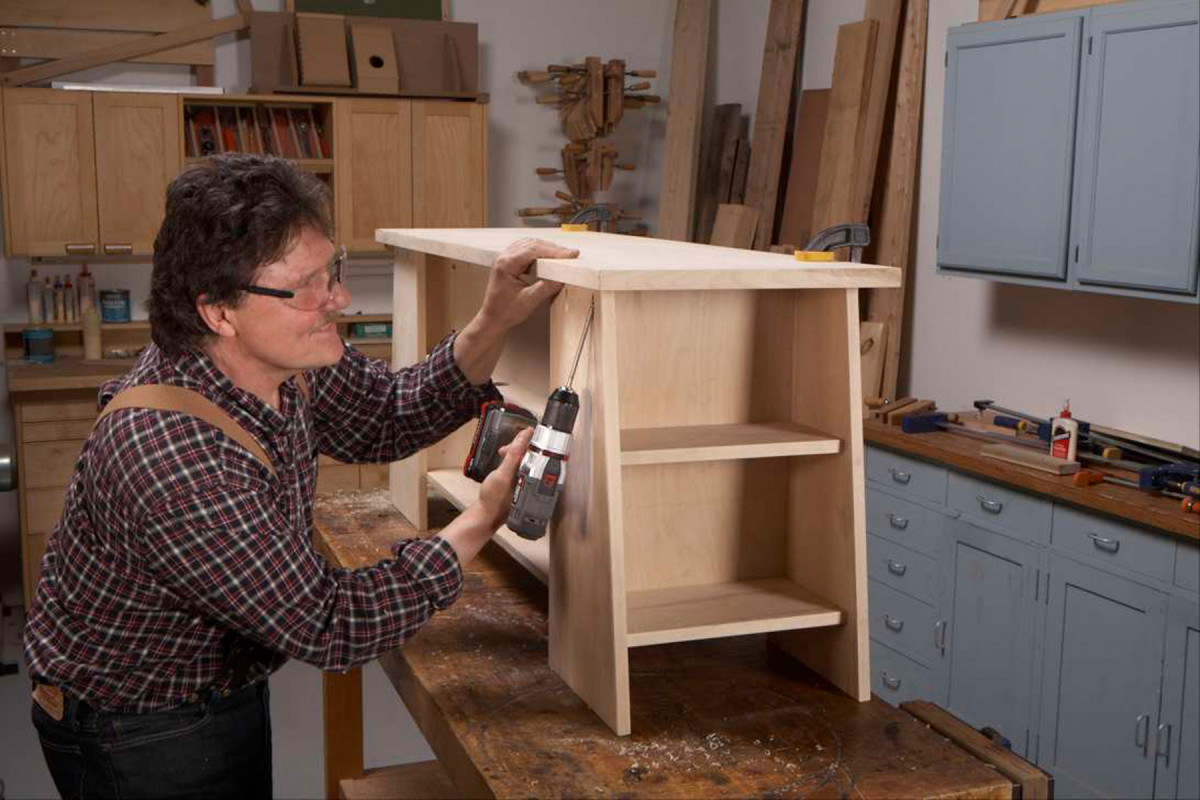
9. Install the top. Glue and clamp the biscuit joints at the front and install pocket screws at the back. This method hides the joinery at the front and eases the assembly in back.
Install the top. Apply glue in the slots and to the ends of all the legs and both end panels. Insert the biscuits, position the top and clamp it at the front, using the underside of your bench. Then anchor the back of the top with pocket screws (Photo 9).
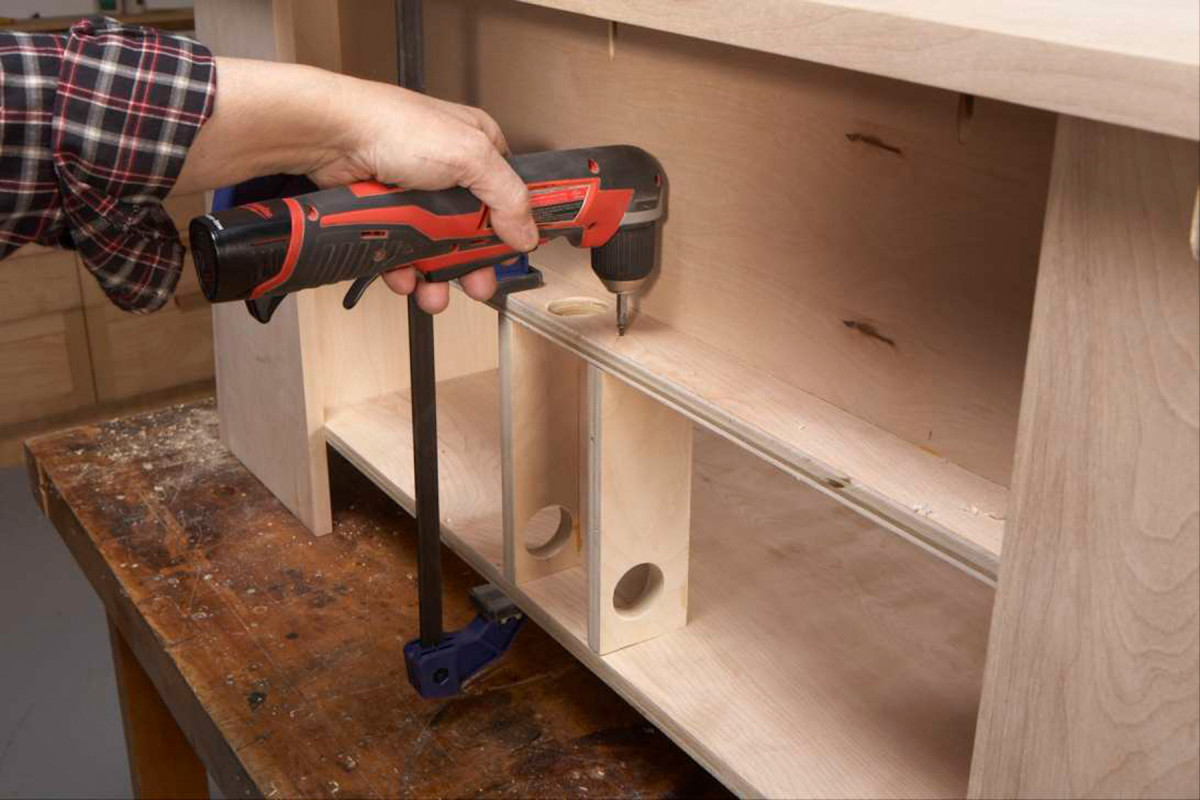
10. Fasten the cord chase after centering it on the hole in the upper shelf. The chase and the recess behind the back panel make it easy to hide all the power cords.
Assemble and glue the mitered cord chase (K, L) after drilling 1-3/4″ dia. holes in both of the side pieces. Then fasten it between the center shelves (Photo 10). Install grommets for a finished appearance.
Here are some supplies and tools we find essential in our everyday work around the shop. We may receive a commission from sales referred by our links; however, we have carefully selected these products for their usefulness and quality.


