We may receive a commission when you use our affiliate links. However, this does not impact our recommendations.
 With one board, you can put together this side table that packs in a bunch of great woodworking techniques.
Project #2418 • Skill Level: Intermediate • Time: 3 Days • Cost: $250
I enjoy a good scrap wood project as much as the next woodworker but you can only make so many cutting boards. Surprisingly, the Excedo Table was originally designed to utilize many of the less desirable offcuts leftover from other larger furniture projects. I tend to choose straight rift sawn parts for my furniture over flat sawn most of the time. I like this look but it can be very wasteful. So as we will discuss later, if you turn a flat sawn board on edge you now have a straight quarter sawn that works perfect for the table top.
 The Excedo Table is a fun and simple project containing all kinds of great furniture making techniques and can be adjusted to meet your needs. This table works great as a single side table or can be part of a nesting set if you want to make a second. I recommend adjusting the leg height up or down by 2“ so the tops can slip past each other slightly.
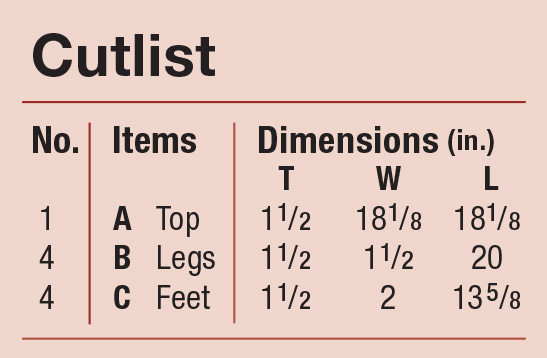
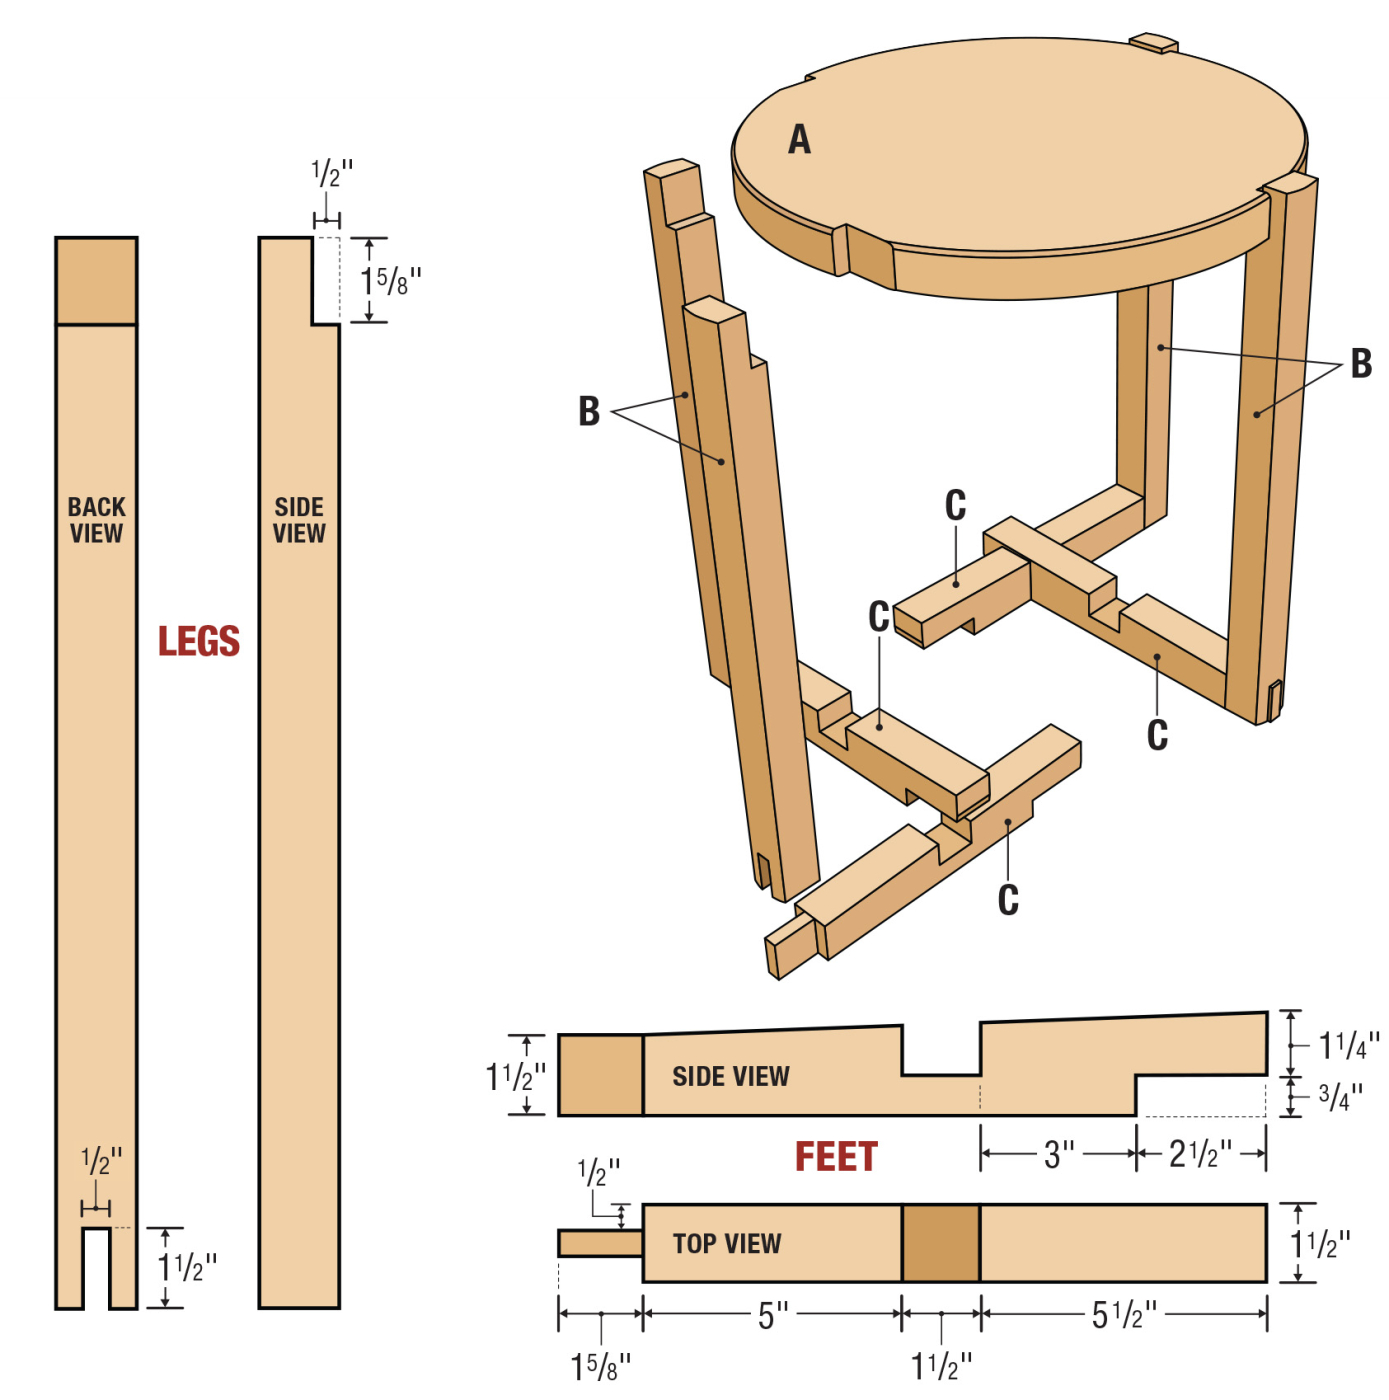
Cutlist and Diagrams


 Prepare the Parts
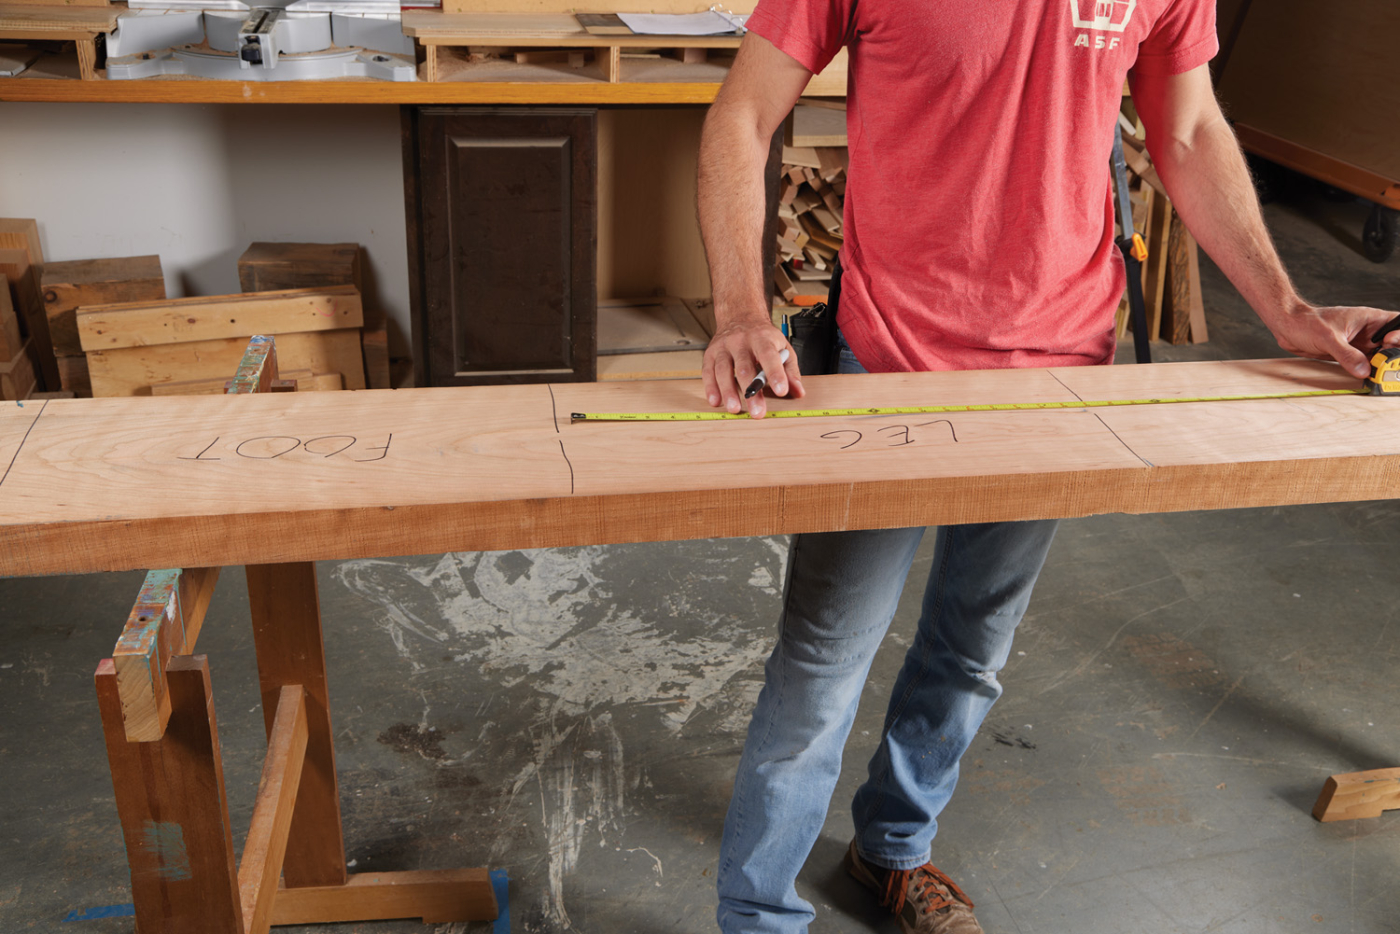
1 Lay out your parts with a marker, lumber crayon, or carpenter pencil.
This table can be made with mix-matched parts you have laying around the shop or extra time can be spent to grain match the legs to the feet. If you choose the latter, you will need one board that is 8/4 (2“ thick) 9“-10“ wide and at least 82“ long. Ideally, the board you choose will be clear, without knots and have a nice rift sawn edge on each side with flat sawn in the middle.
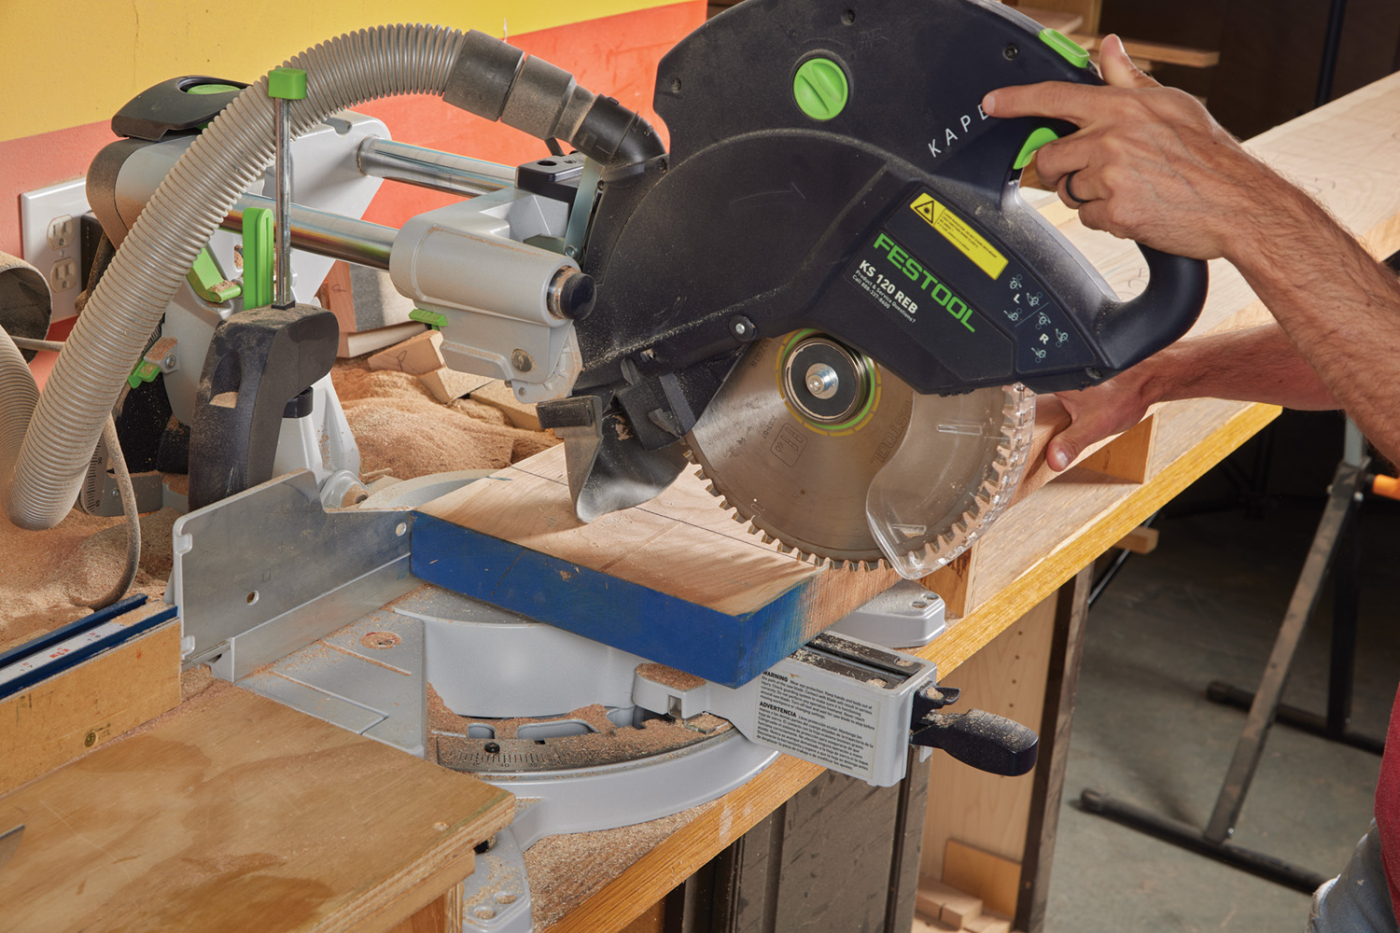
2 Cut the parts to rough length on the miter saw.
Start by roughly marking out the blanks. Each blank will contain a foot or leg on the outer edges and the inner material will be used for the top. Mark 19“ for a foot section, then 21“ for a leg section, then 19“ for a foot section, then 21“ for a leg section. Cut out the blanks on a chop saw taking care to mark each one and keep them in order.
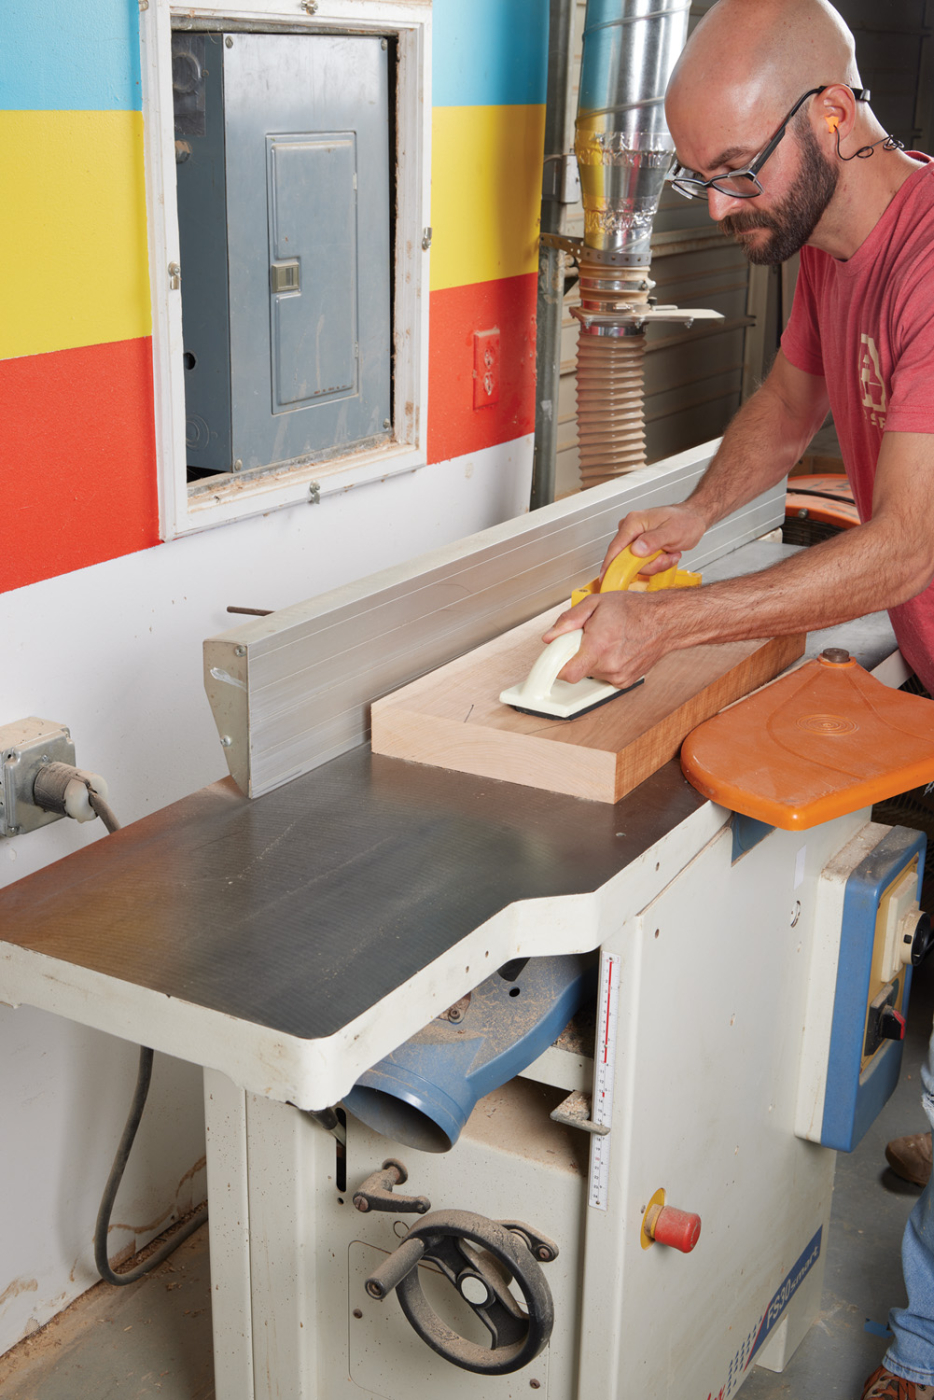
3 Flatten the rough blanks on the jointer.
Lightly joint and plane the faces of these blanks. Only take off what you need to get them flat and parallel. Go ahead and mark the end grain of the blanks with numbered lines so they are easy to identify and reassemble once ripped.
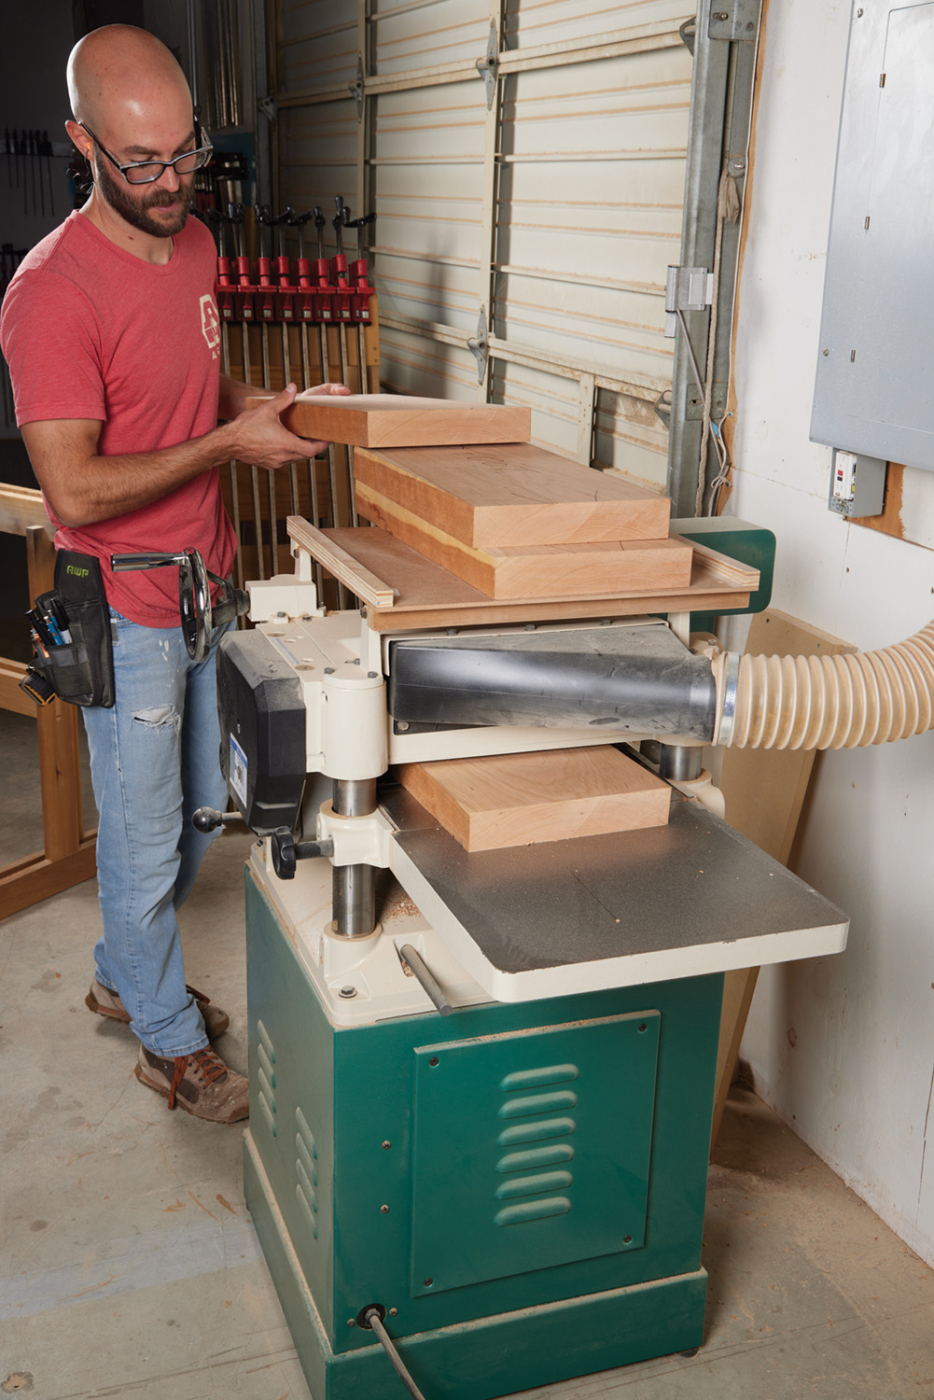
4 Plane to thickness on the thickness planer.
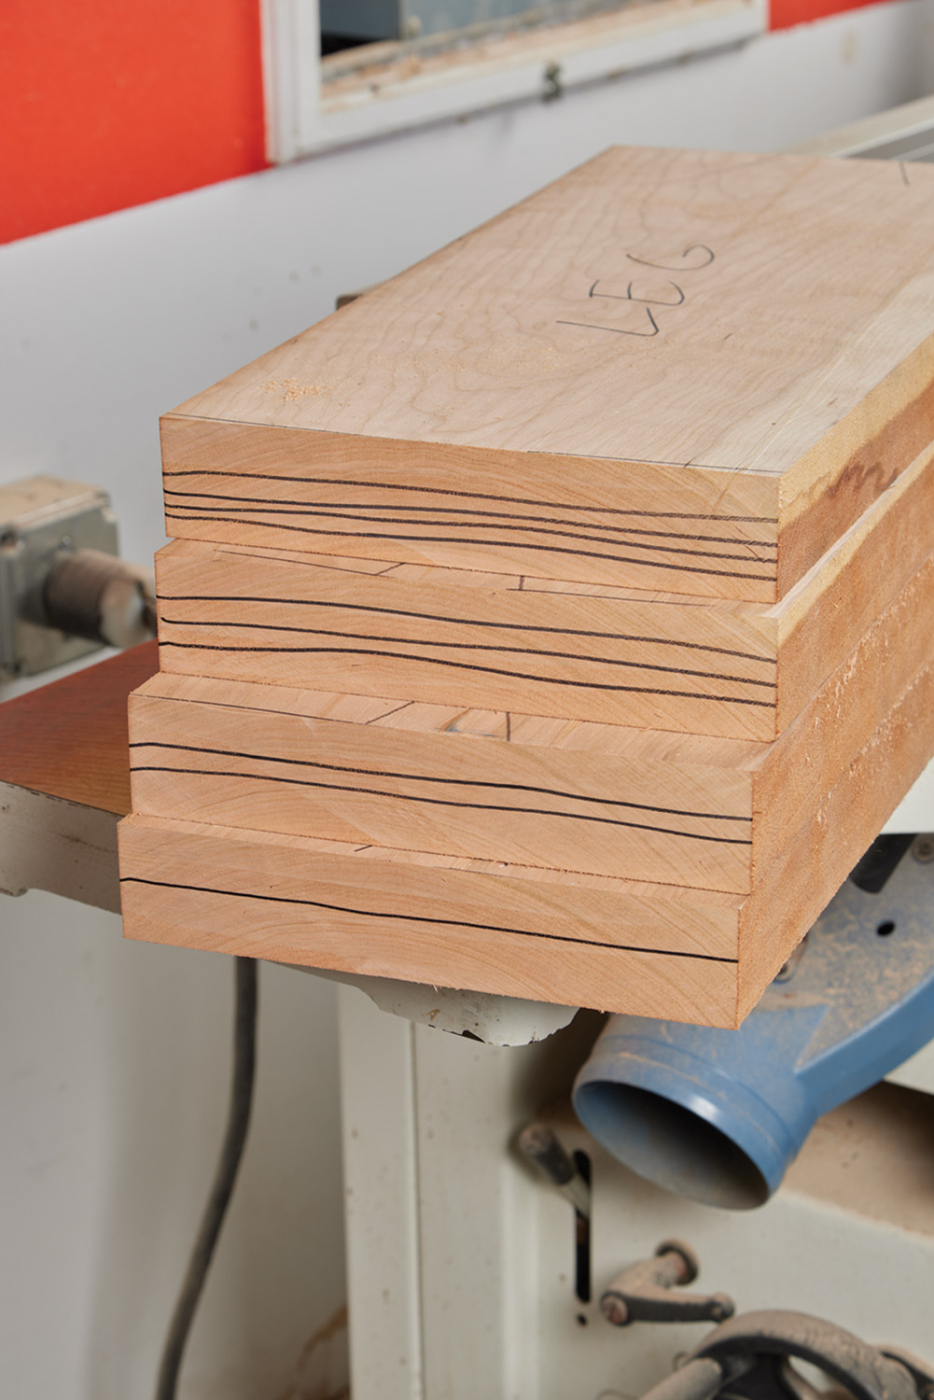
5 Mark the end grain of each board to indicate their order and orientation.
Head to the bandsaw to rough rip the individual parts. If your material thickness is still above 2“ thick you can rip all the rough parts at 1-3/4“. If your material thickness is below 2“, you’ll need to rip the rough feet parts at 2-1/8“.
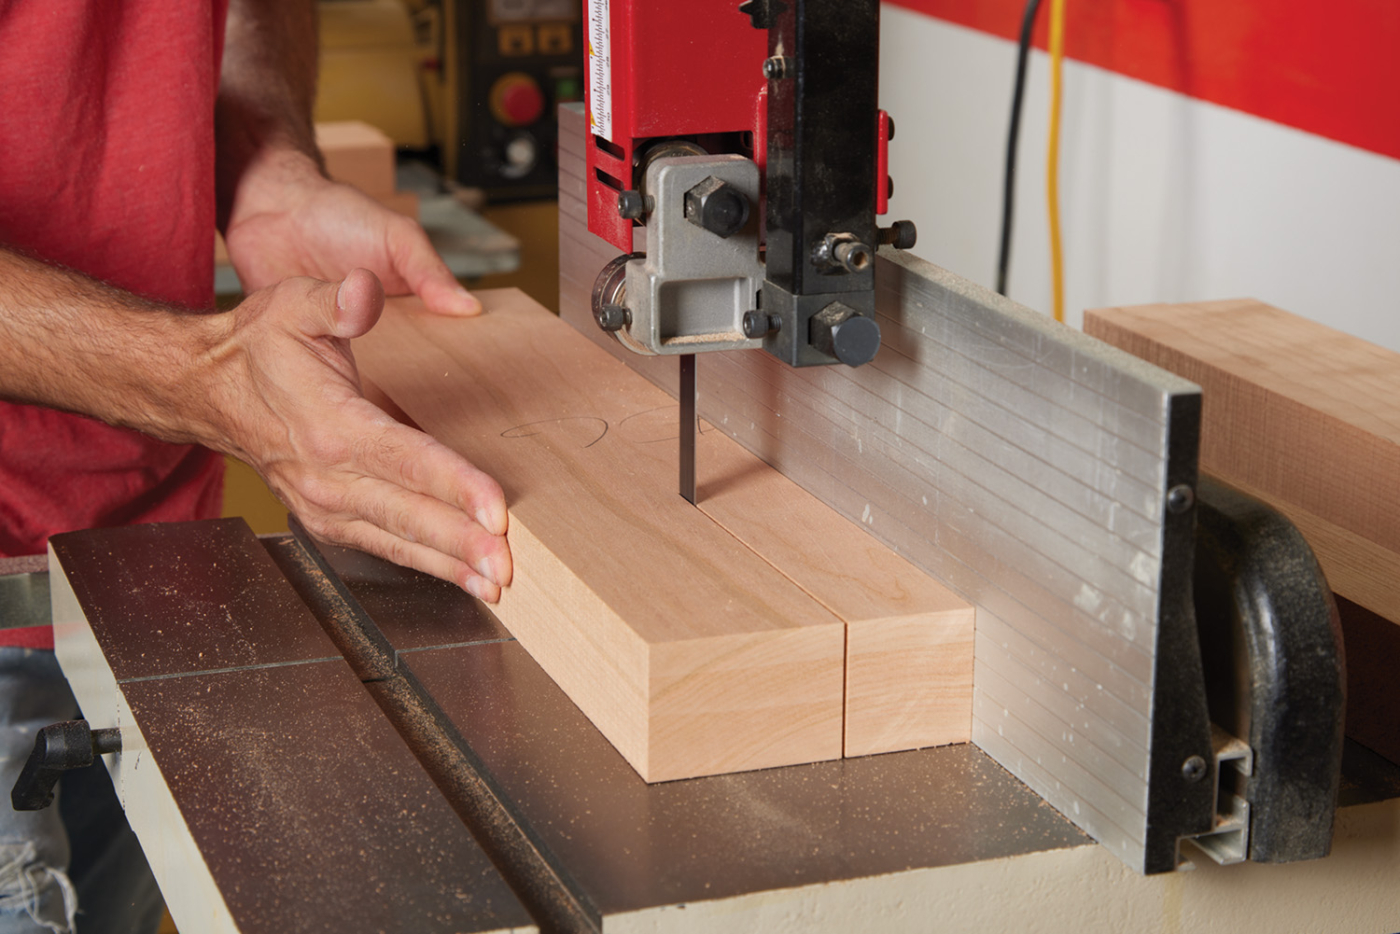
6 Roughly rip the parts to width on the bandsaw.
The material I used was below 2“ so I started with the two 19“ blanks and set the bandsaw fence to 2-1/8“. Cut one part from each edge—these are the feet. Move the fence over to 1-3/4“ and rip all parts to rough width and thickness including the inner sections of the feet blanks. The outer edges of the 21“ sections are the legs and the inner parts are for the top.
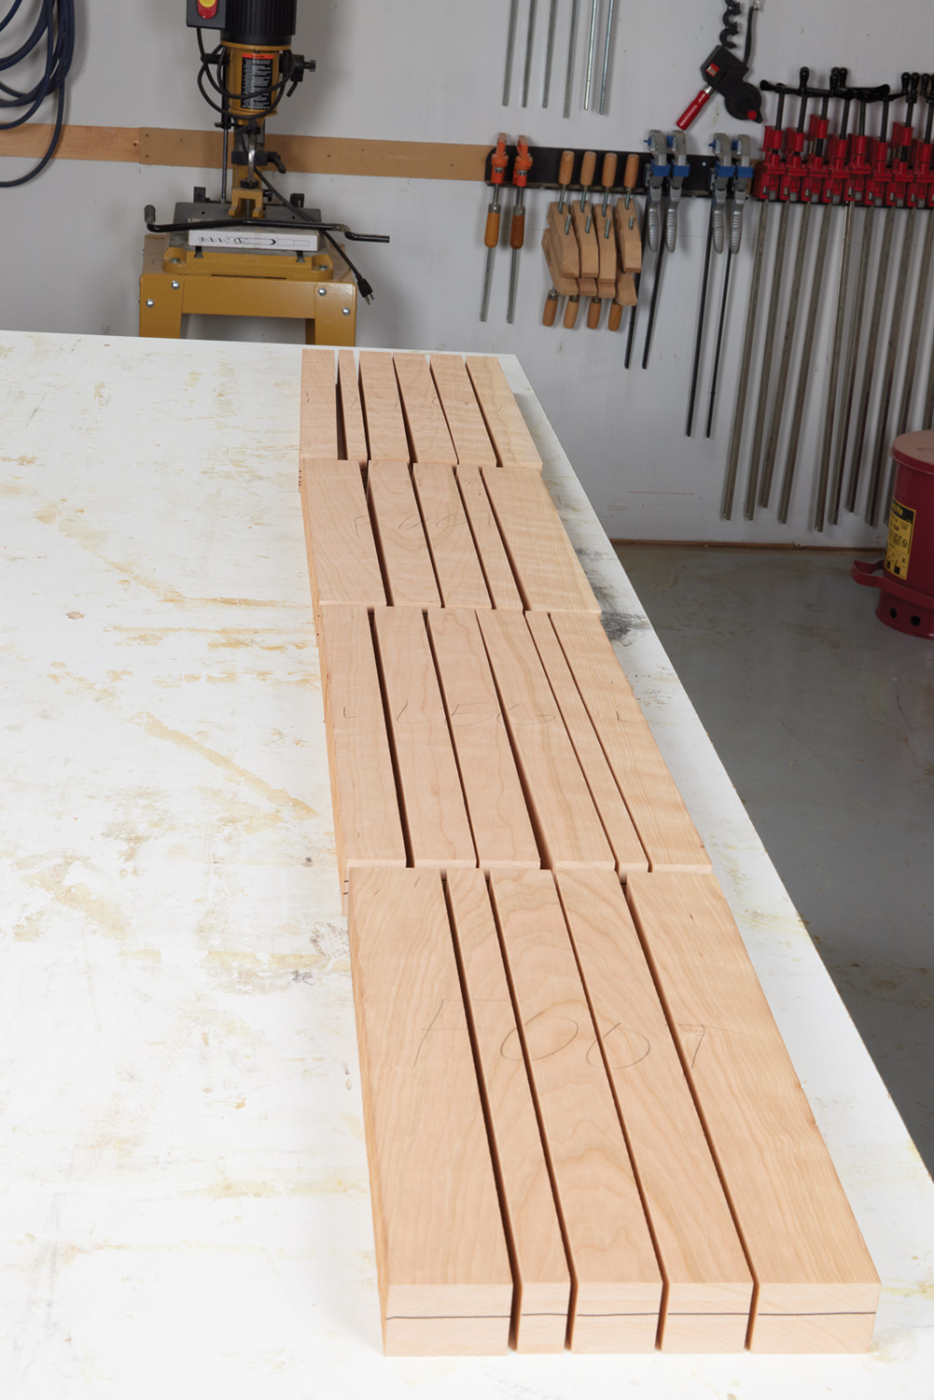
7 Lay out all the parts as if they were still one board.
Glue Up the Top
On a large surface lay out the table parts in their original location and orientation—essentially reassembling the board. Label the parts well as you begin to separate them from the full board. The outer four 2-1/8“ x 19“ blanks are the feet and the four 1-3/4“ x 21“ blanks are the legs and can be set aside for now.
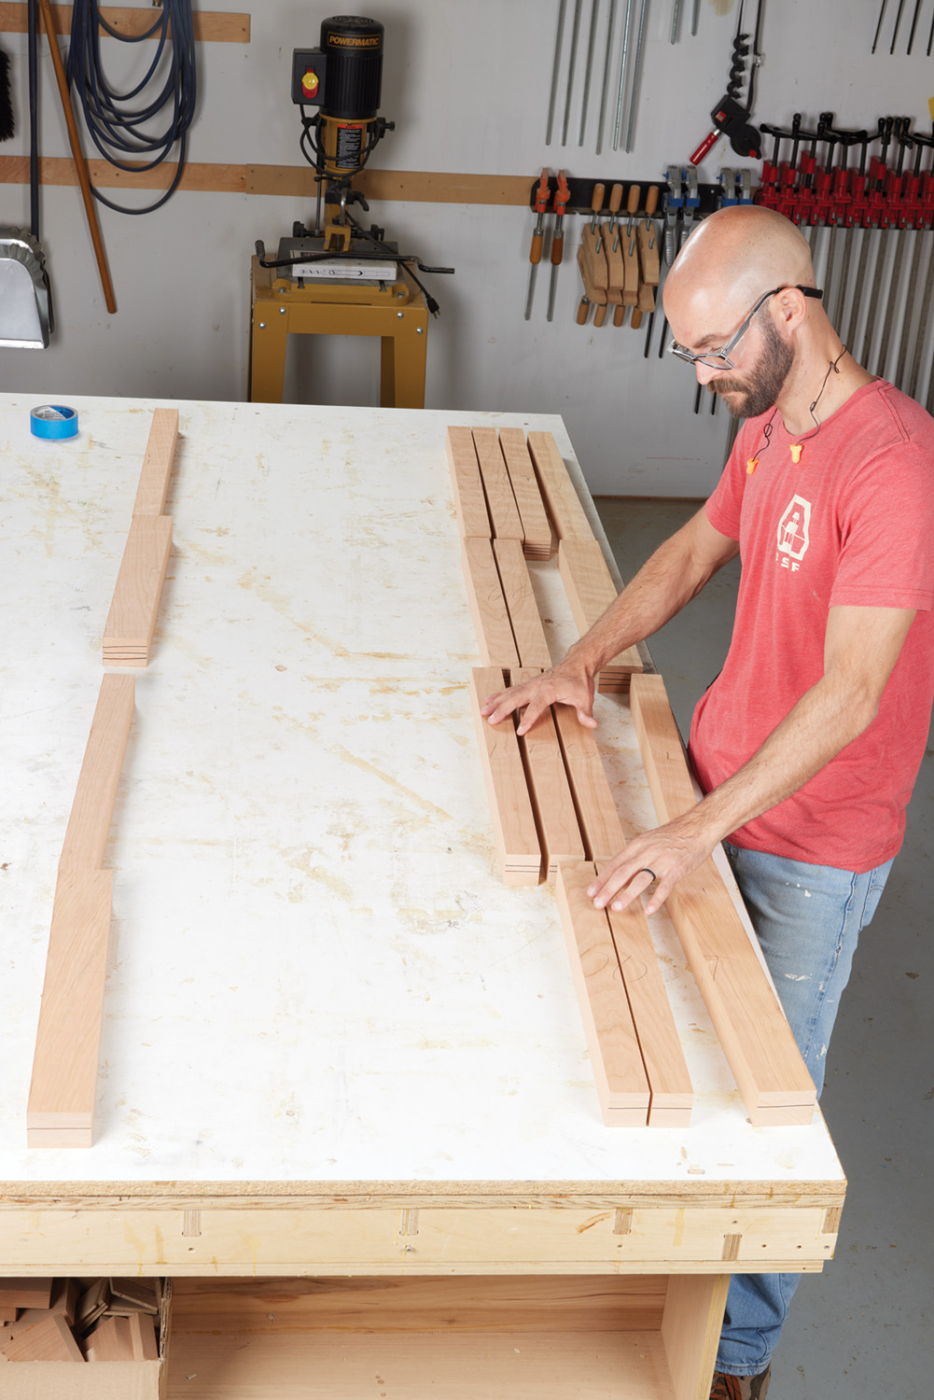
8 Separate the parts into legs, feet and table top.
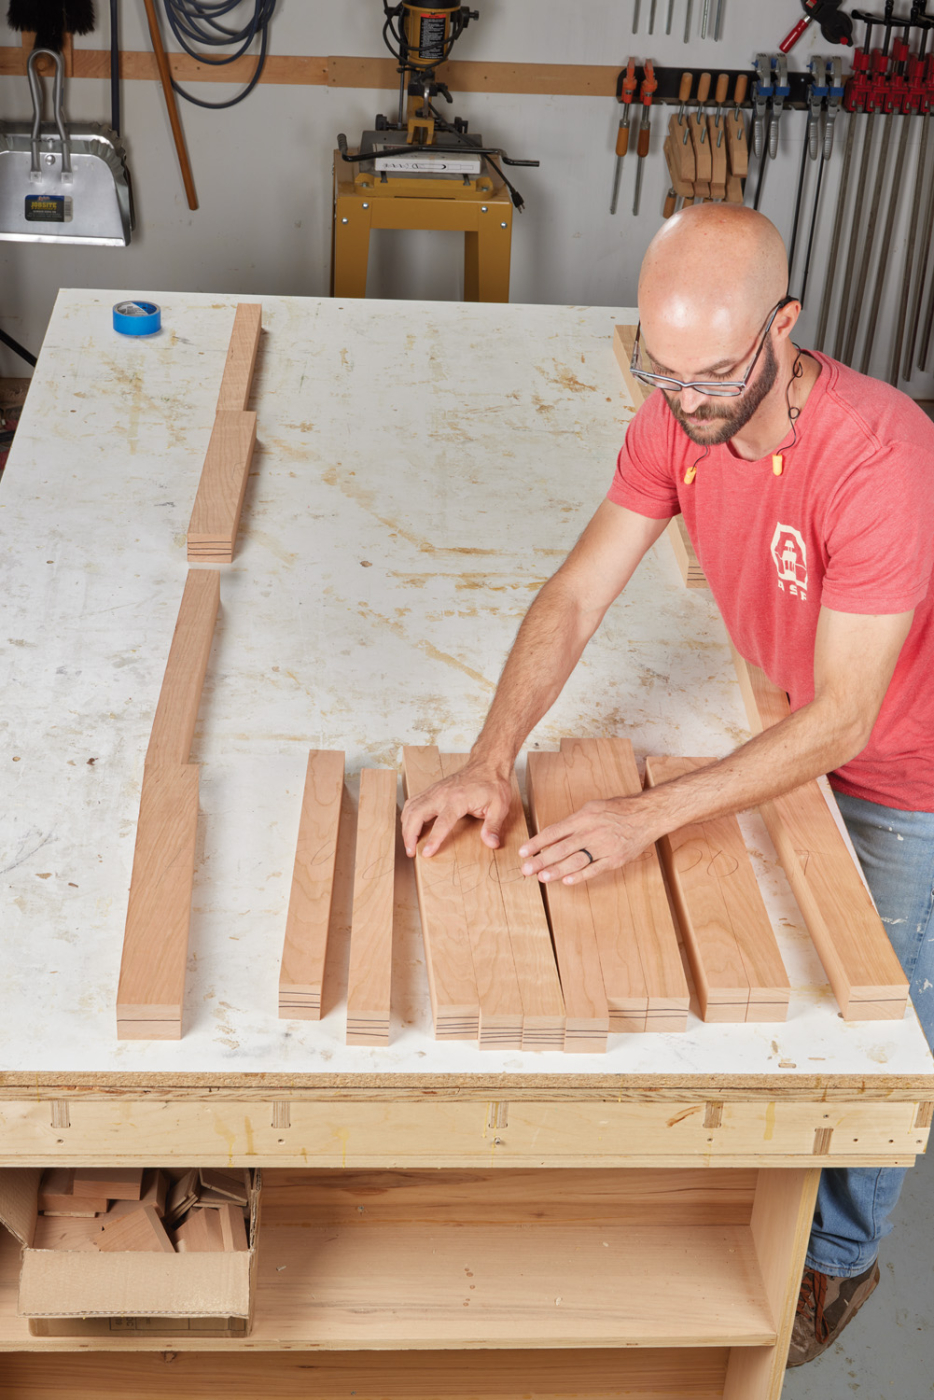
9 Gather all the table top parts with the flat sawn side still facing up.
 Gather the leftover inner sections that will become the top. You should still be looking at their original flat sawn surface. Roll each individual blank 90° to expose its quarter sawn side. Push all the blanks together and draw a triangle across the top. Since we already milled the top and have now rolled that surface to the side, the parts should fit together nicely without any gaps between them. The parts can be lightly milled if needed.
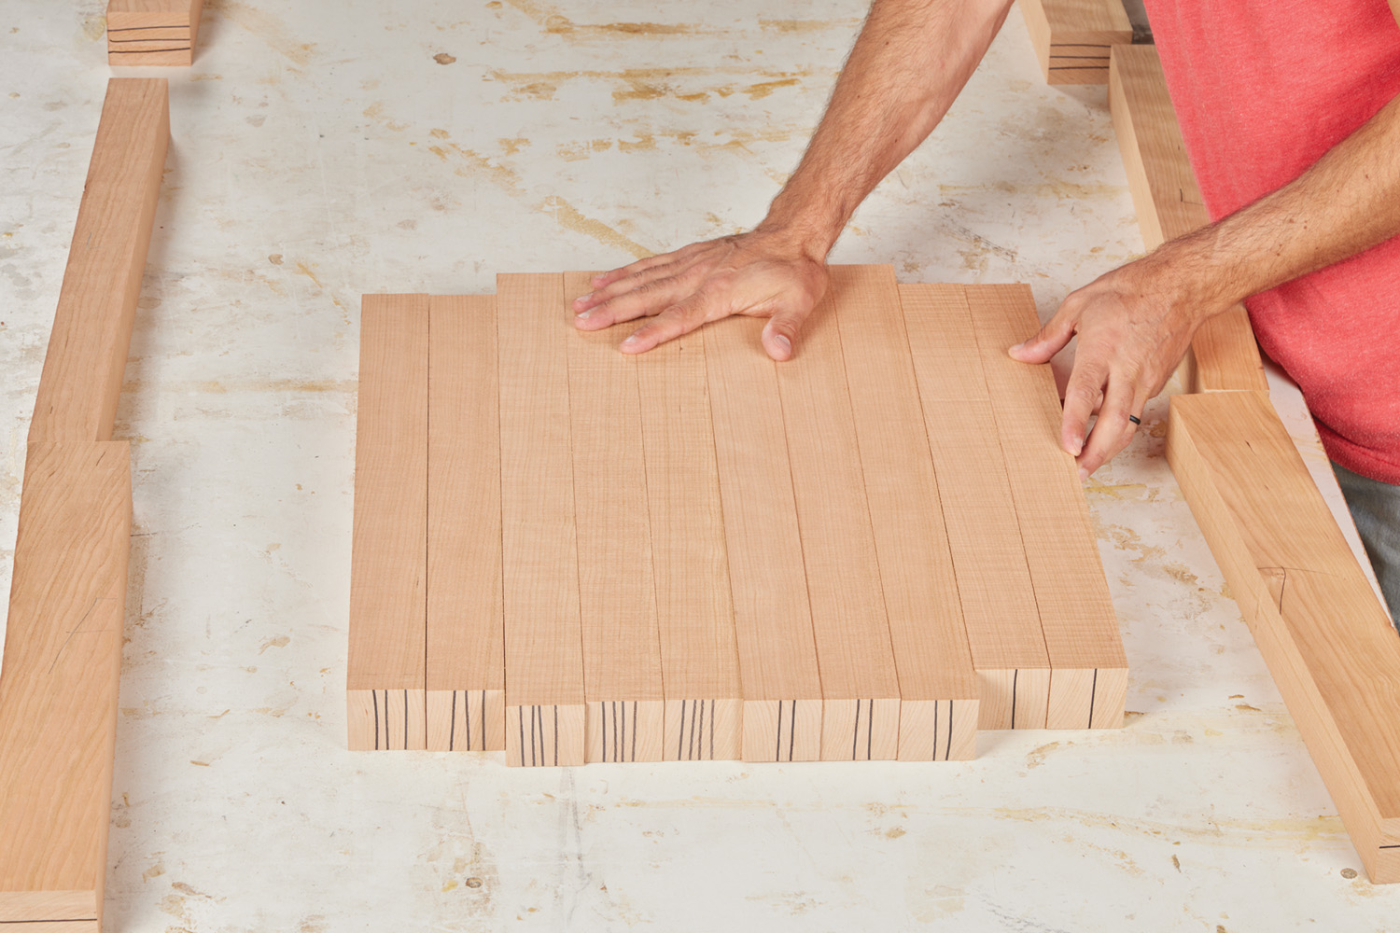
10 Flip each part to the right so their quarter sawn face is up.
Glue the top parts together in two groups so that they can be run across the jointer after they have dried. The most important part is that the seams are tight with no gaps. The rough top and bottom do not matter at this time.
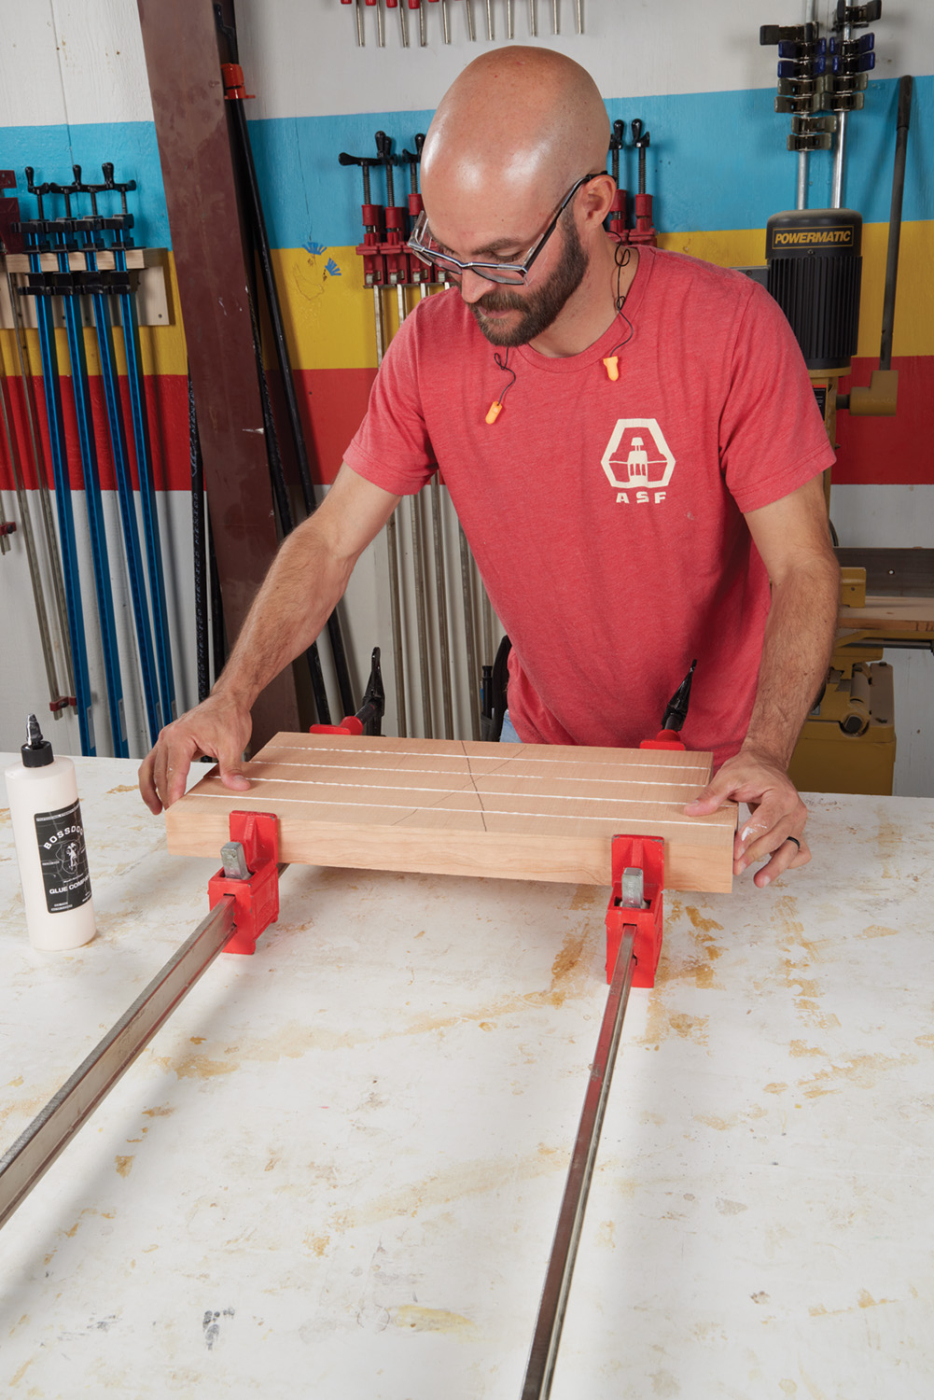
11 Glue up the table top parts into 2 blanks.
Allow the glue to dry and then join and plane the two blanks together to a thickness of 1-1/2“. Glue the two blanks together taking care to ensure they are lined up vertically. An F-Style clamp on either side should help.
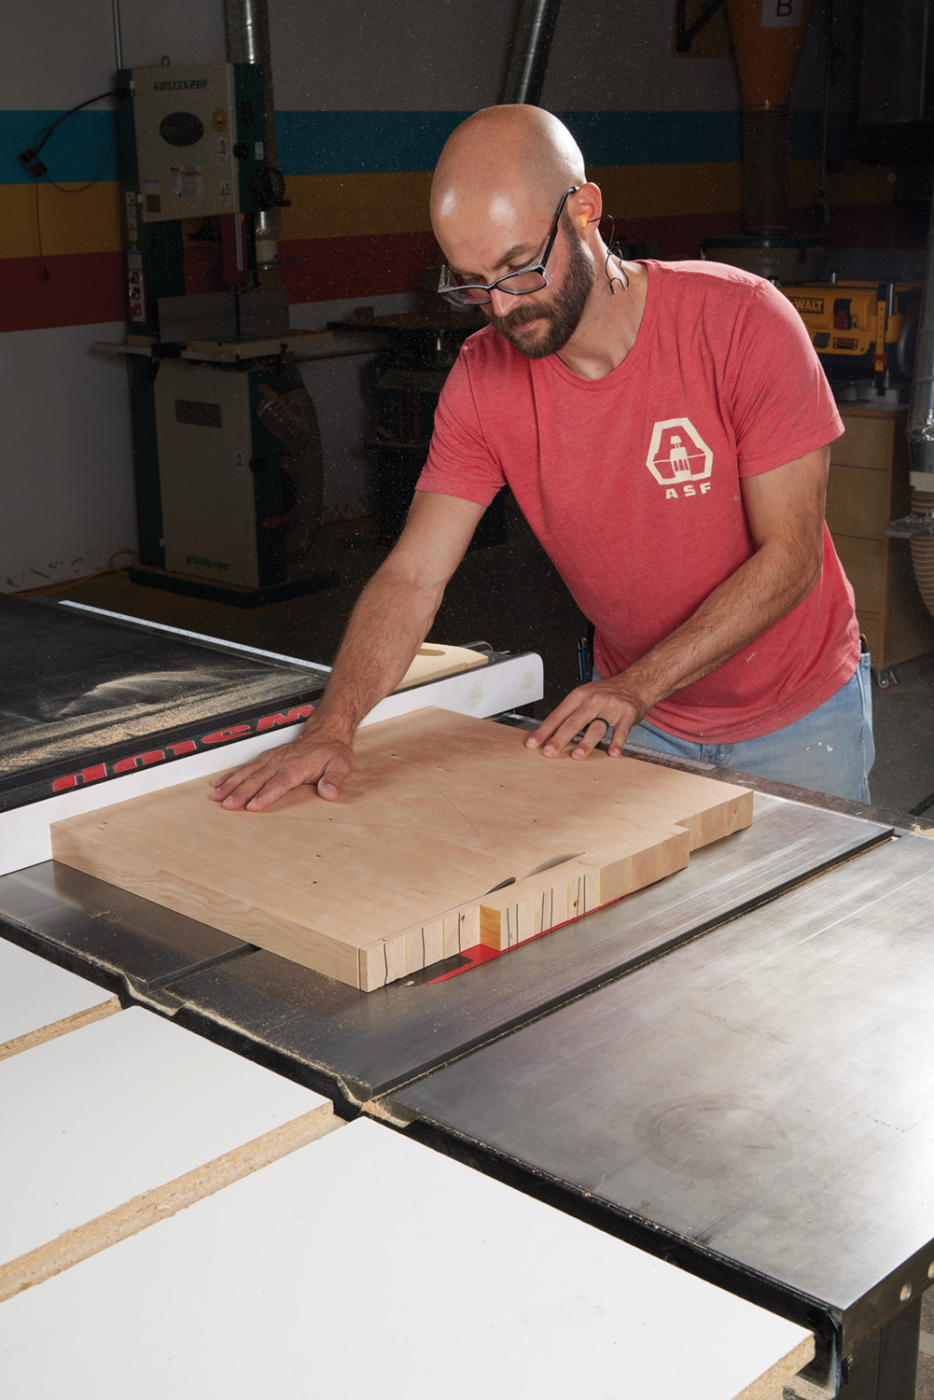
12 Cut the table top into an 18″ square.
Once dried, scrape off any large chunks of glue so that it is smooth to the touch. The top can now be cut into a 18-1/8“ x 18-1/8“ square. Run one edge (not the end grain sides) across the jointer and rip on the table saw. Use a table saw sled to cut the remaining sides. Set the top aside until it is time to cut the joinery.
Mill and Shape the Legs
Mill the legs to 1-1/2“ x 1-1/2“ square and your desired length. The sample project legs are 20“ long. Once milled, it’s best to do any shaping to the outside of the legs before starting the joinery so as not to impede any router bits with a bearing. A fingernail bit is a great look.
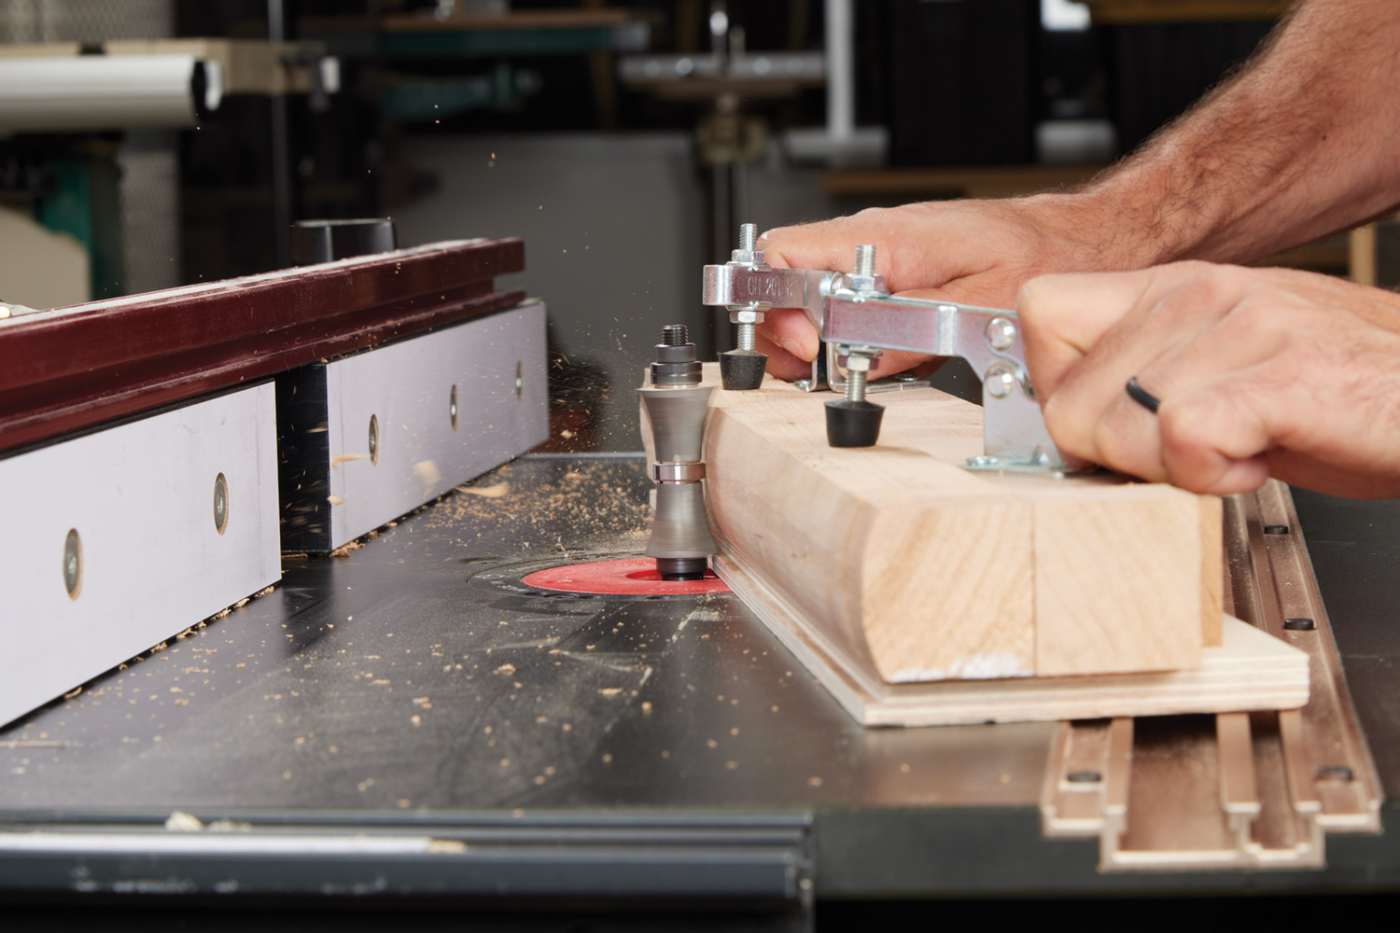
13 Cut profile on the outside of legs on the router table.
Install the fingernail bearing bit in the router table and set the fence to be back a few inches from the bit. I used the Magnate 5869 with a bearing. Use push blocks or a jig to keep your fingers away from the bit. Do not shape the inside of the legs until after it is joined to the foot.
Next, cut the notches in the upper inside of the legs to receive the top. This can be cut by hand or with a dado blade on the table saw. The notch should be 1/2“ deep by 1“ long.
Cut the Bridle Joint
Like most things in woodworking there are several ways to do the same task. The bridle joint can be cut by hand, on the table saw with a dado blade and a straddle jig, a hollow-chisel mortiser or with a PantoRouter. If you have access to a PantoRouter it certainly makes it easy since you can cut both parts of the joint on the same machine with the same setup.
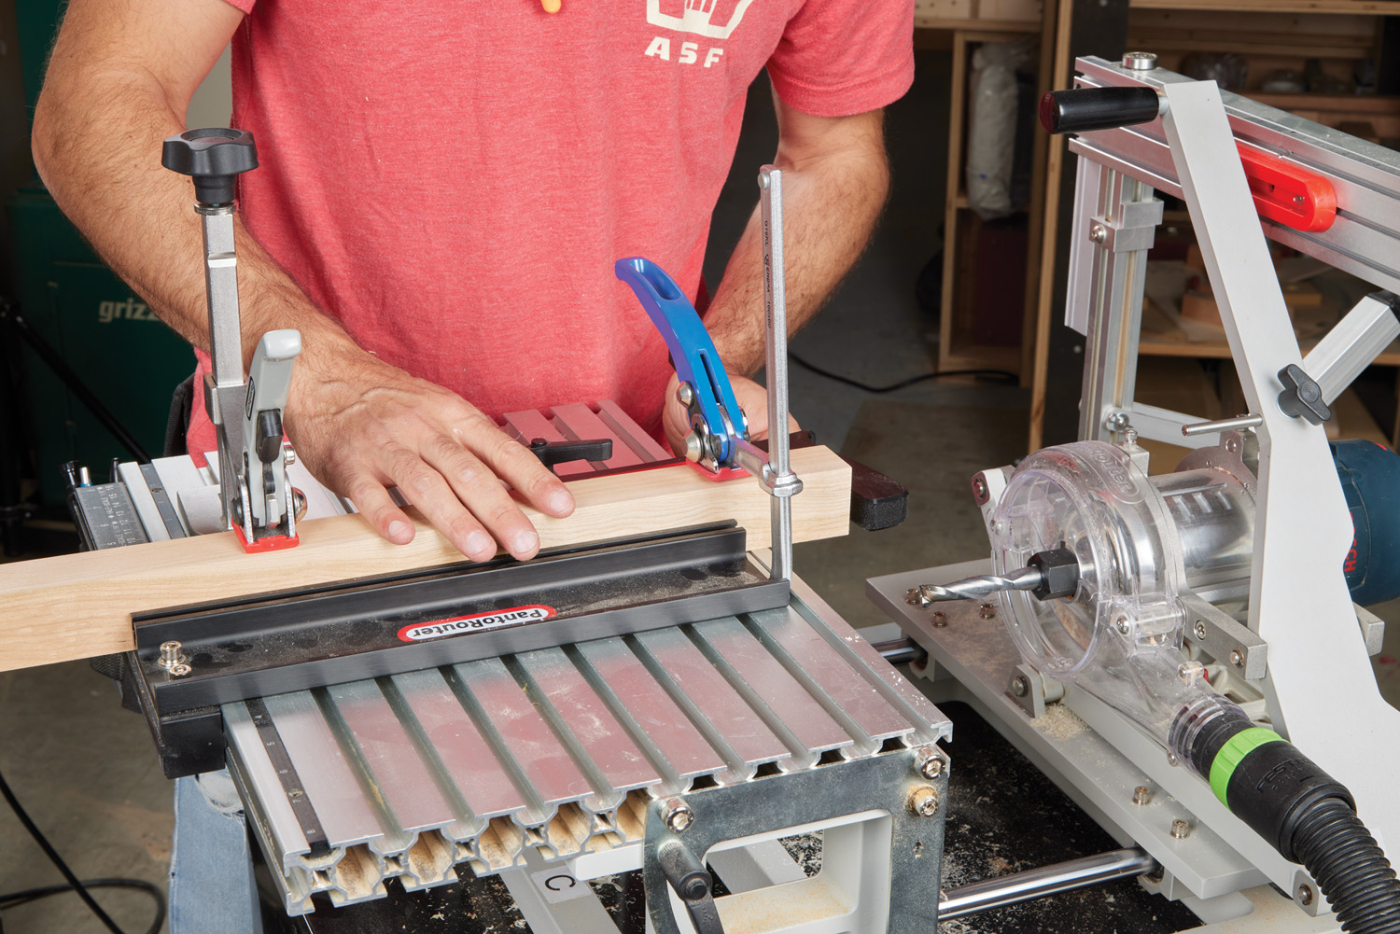
14 Set up bottom of leg to receive the bridle joint.
The bridle joint will be cut in the bottom of the leg and the end of the foot. They will meet at a right angle when joined. The notch in the leg is in the exact center and is 1/2“ wide by 11/2“ tall. The foot that receives the tenon is 1/2“ thick by 1“ long.
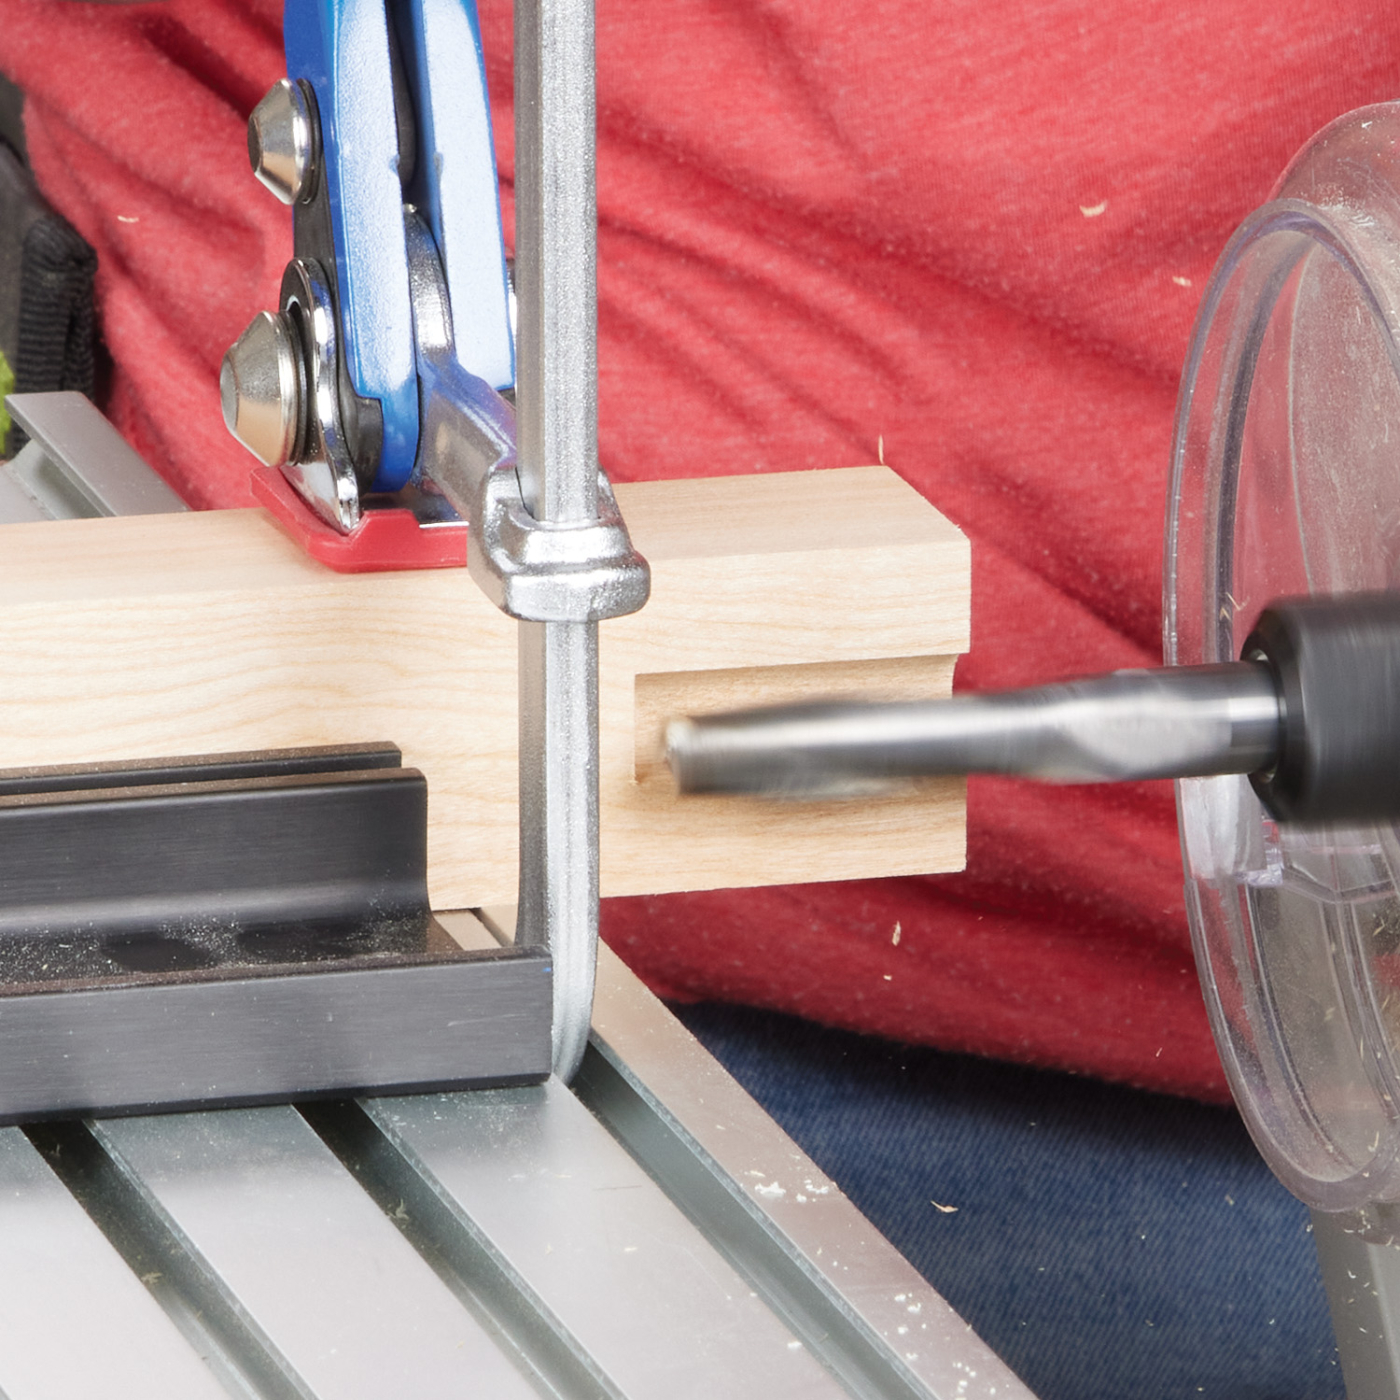
15 Lightly cut the outside of the legs to help prevent tear out.
Follow the provided PantoRouter manual to properly set up the machine with a 3“ horizontal template and the thickness set to the 11/2“ leg. Using the fence, clamp the leg in the center so its rounded outer edge is facing you. Use the swing stop to make finding the same leg location more repeatable. Make sure there is at least 2“ overhanging the table and then clamp the leg securely. Set the depth of cut to be 1-1/2“.
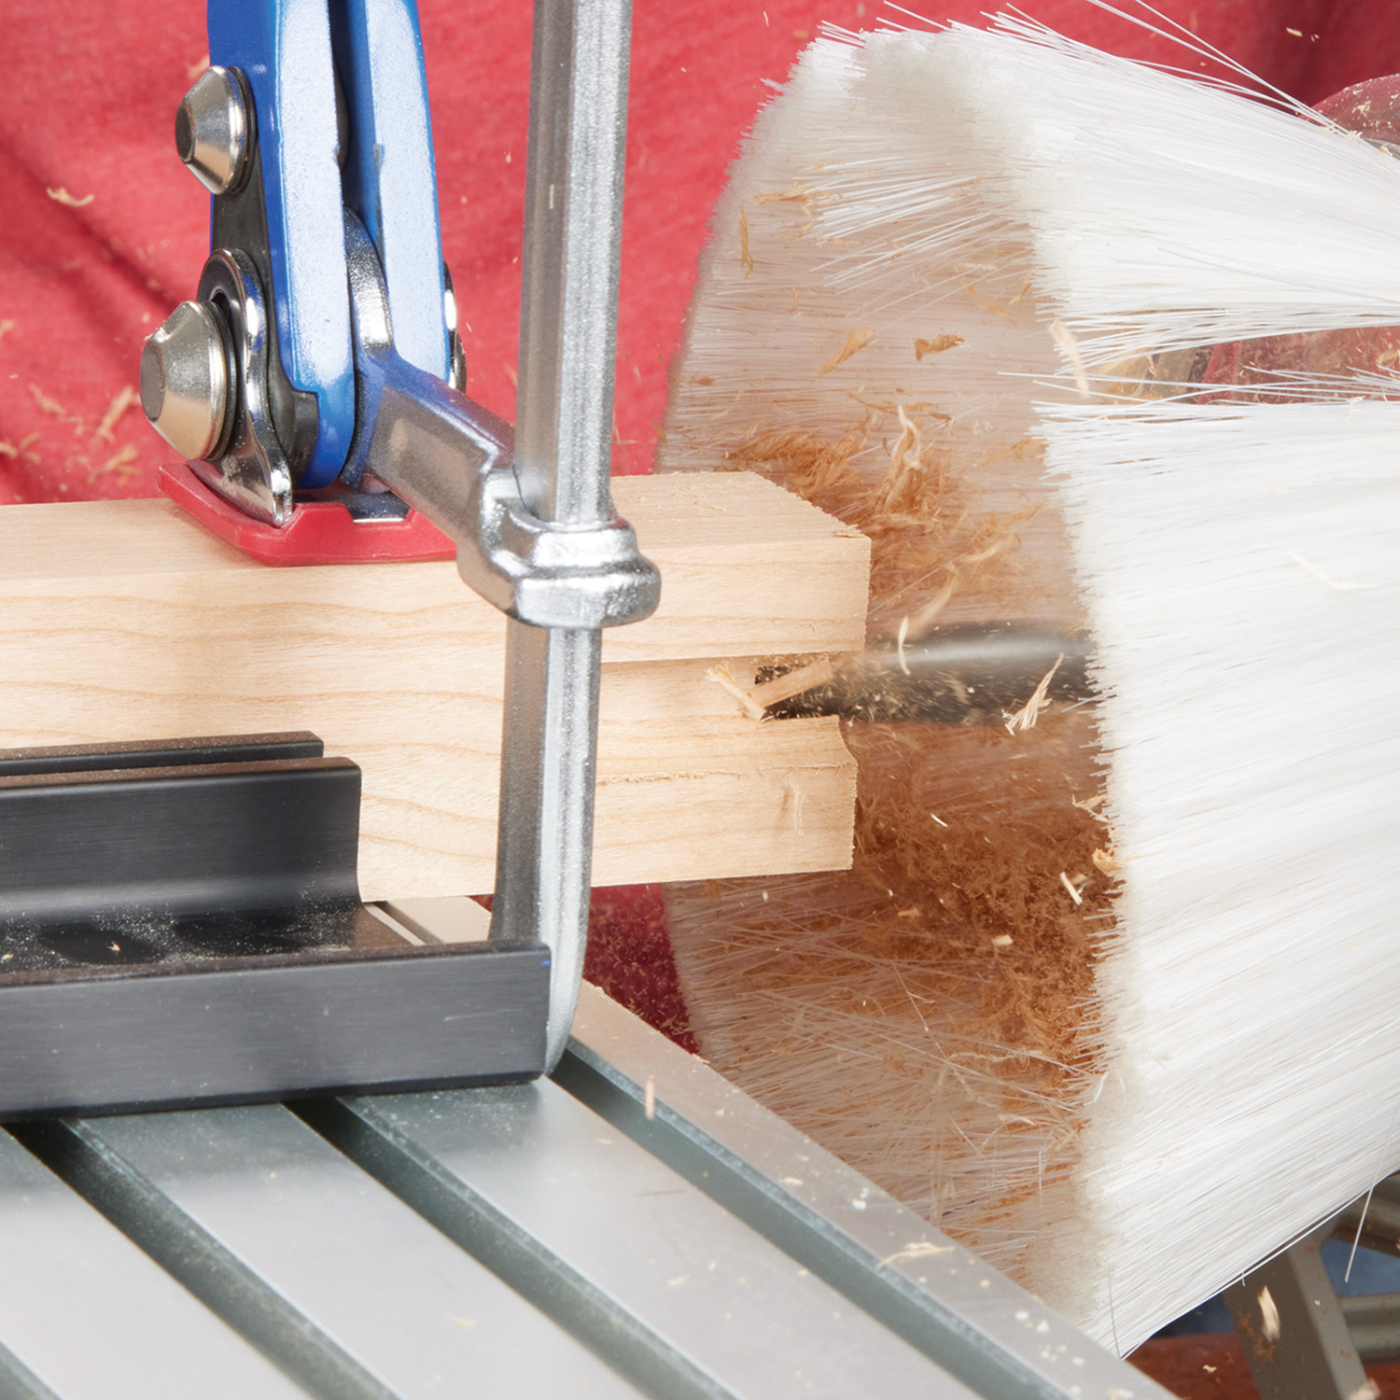
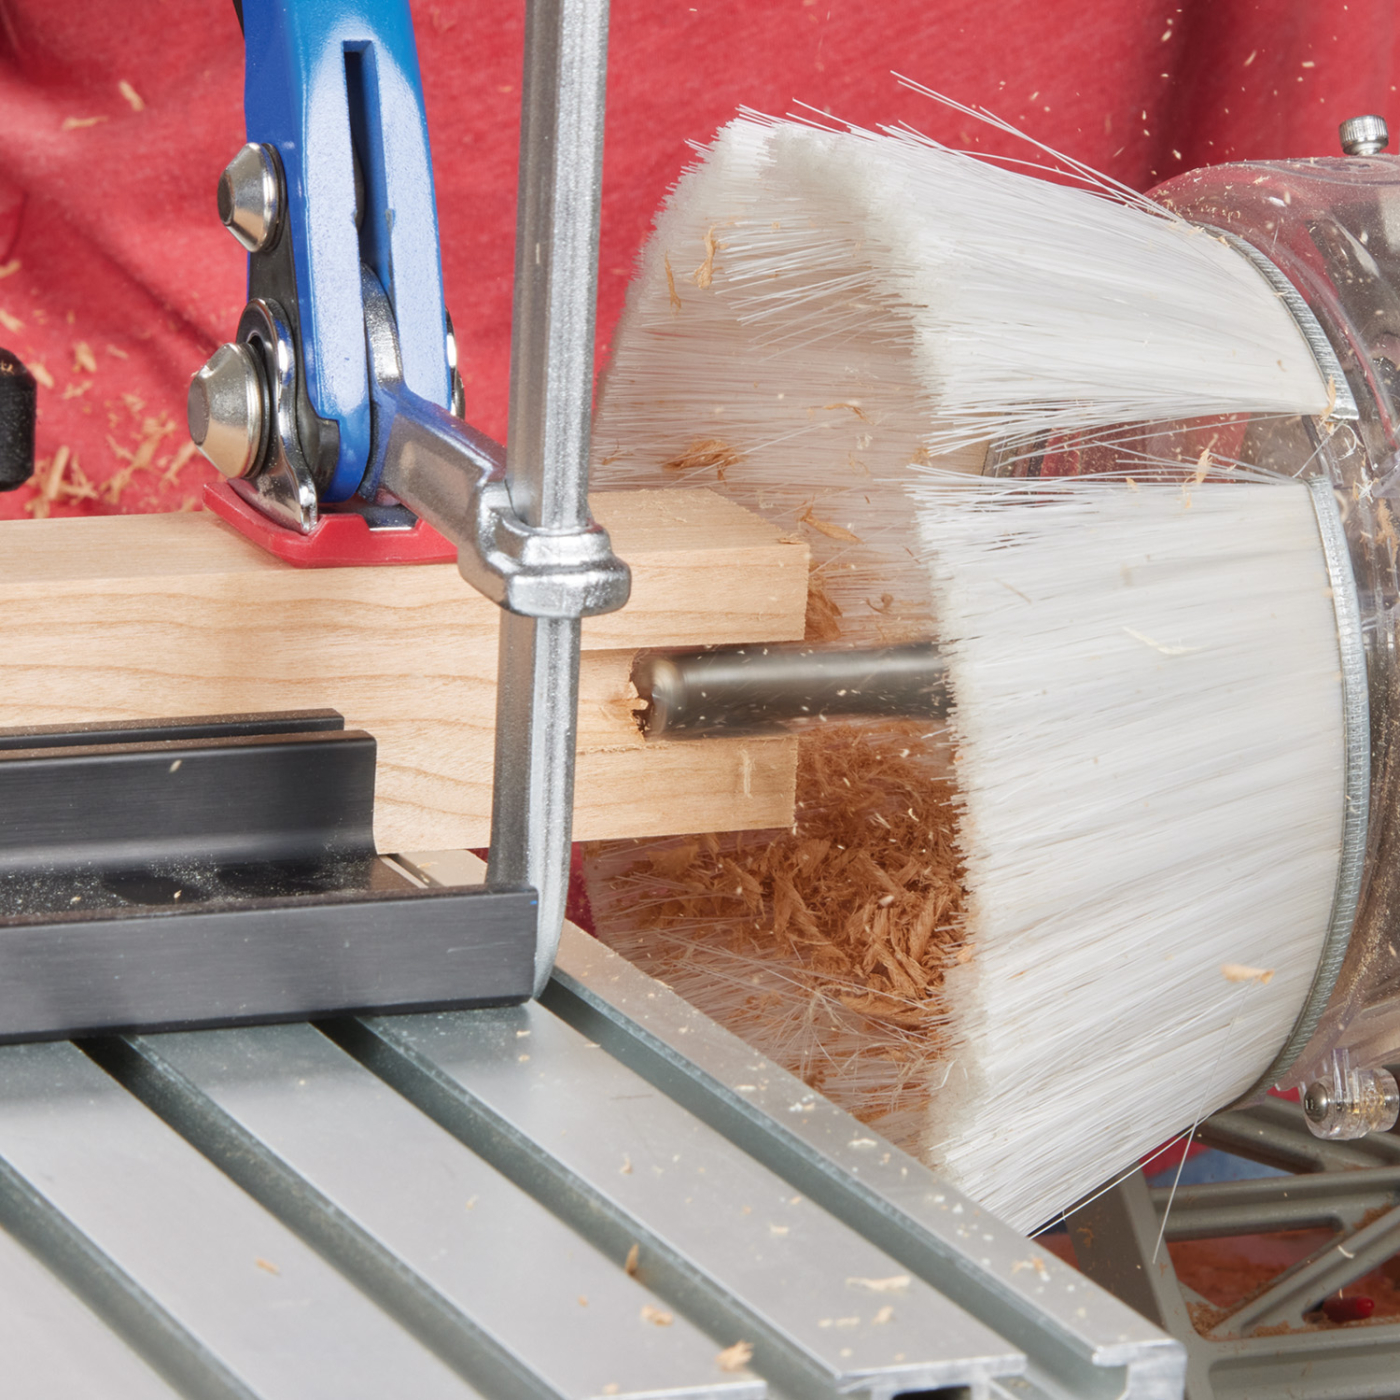
16-17 Cut out the interior of the bridle joint.
17
Starting with the 10mm bearing on the inside of the 3“ template, cut a slot all the way through the end of the leg. I found it best to take small incremental cuts starting on the rounded outer edge so any blow out is on the back side. Move on to the feet once all four legs are cut.
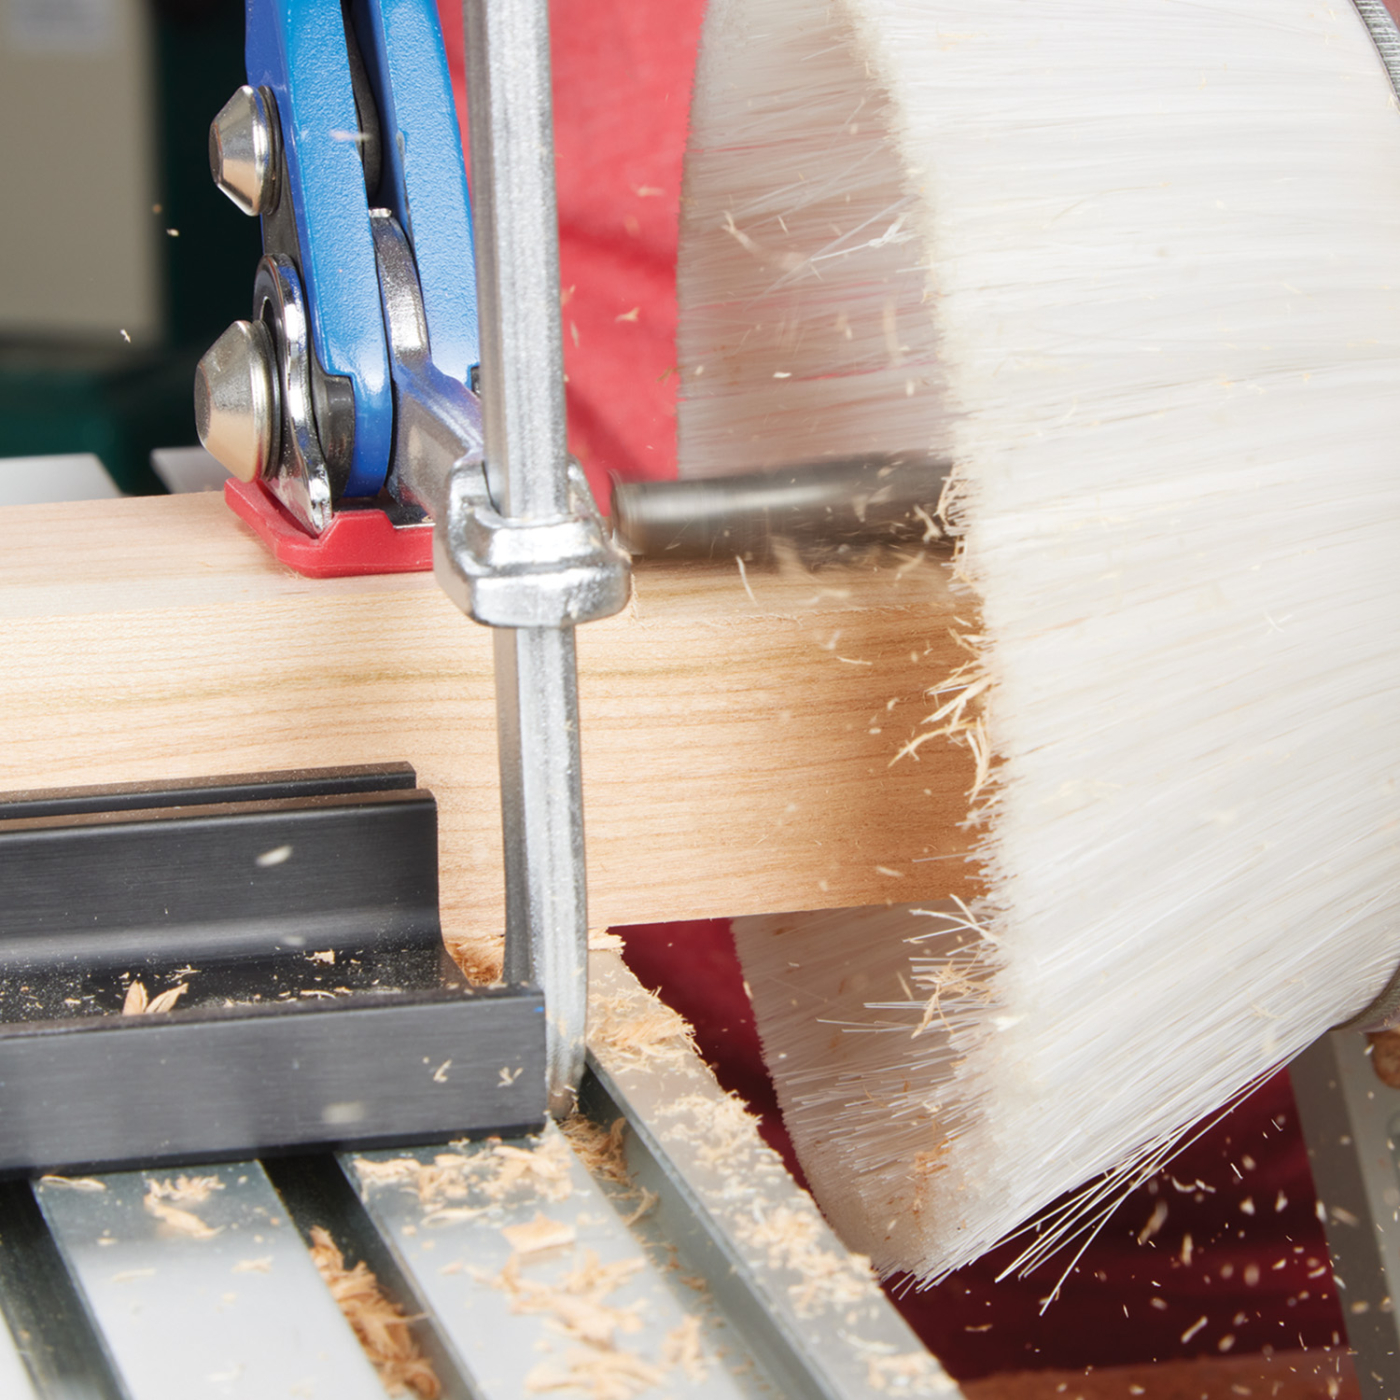
18 Replace the leg with the foot and cut the opposing bridle joint tenon.
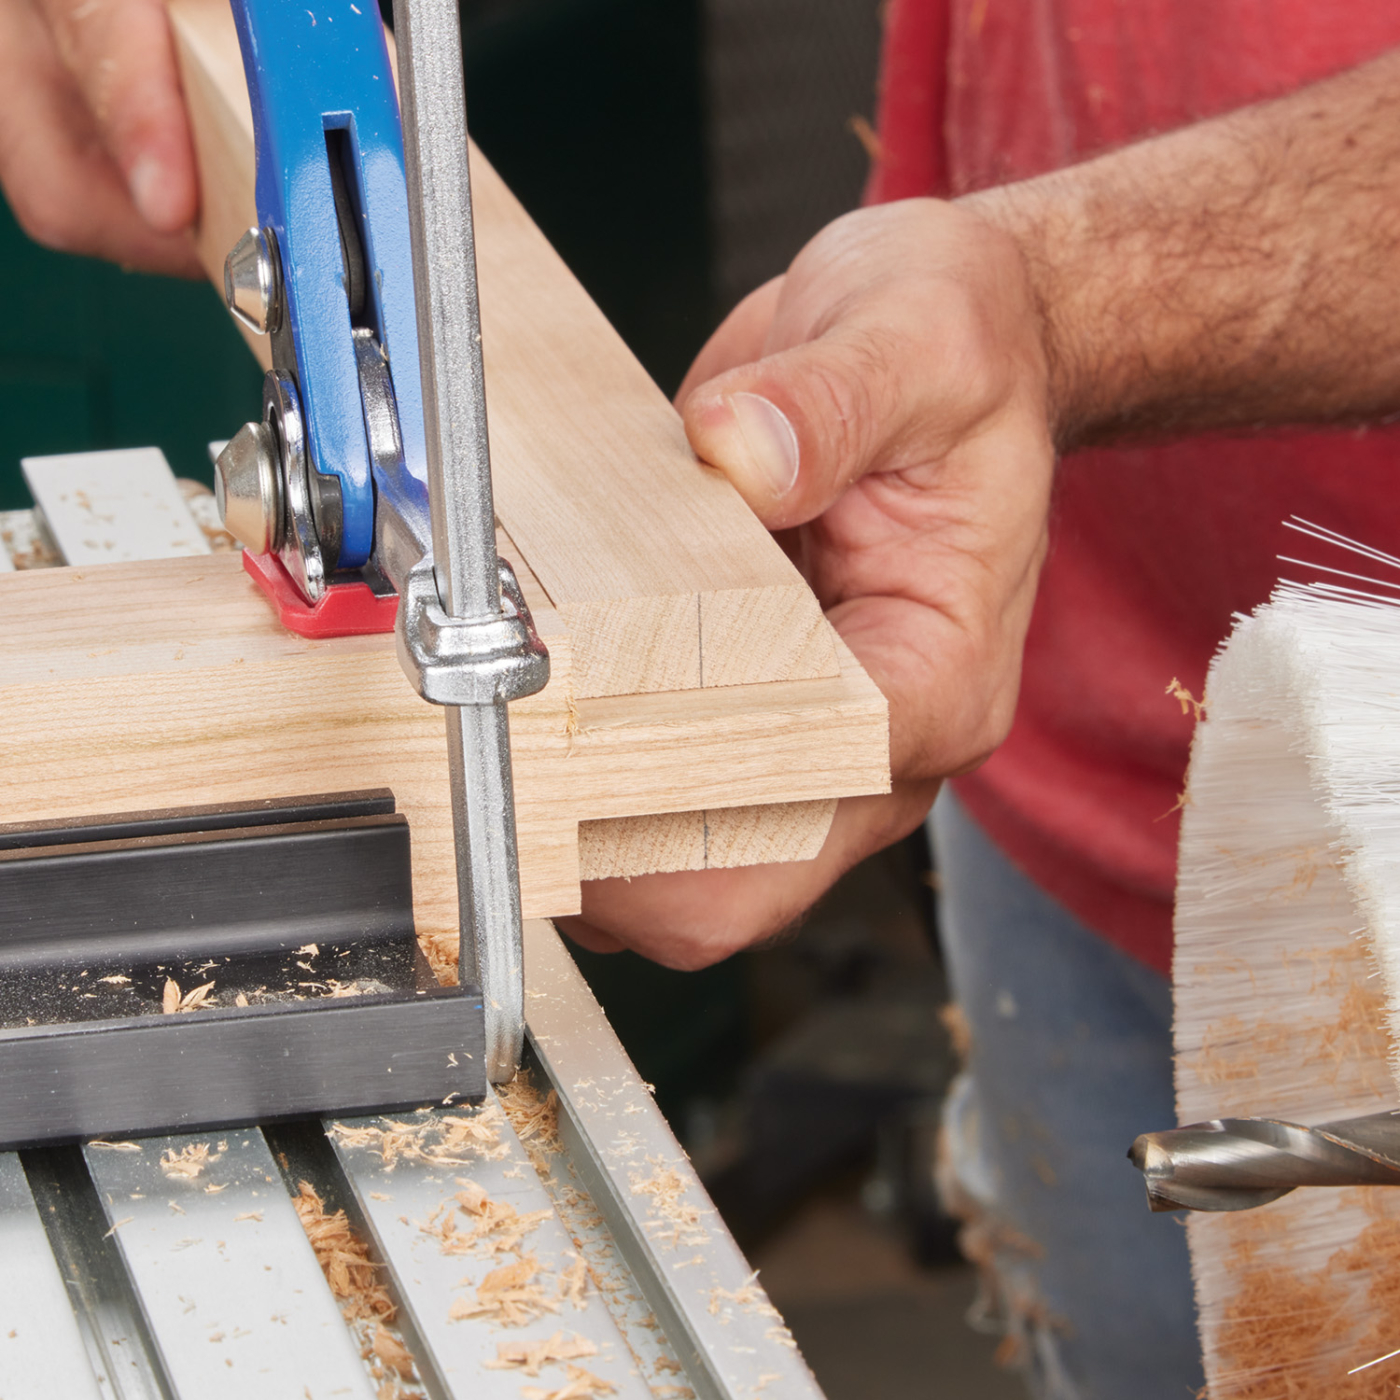
19 Test fit the joint once the machine is off and the bit has stopped spinning.
Swap out the 10mm bearing for the 22mm bearing and place it outside the template. Move the fence slightly to accommodate the 2“ tall foot. Clamp it in place and slowly remove material to reveal the 1/2“ tenon. Test fit the first foot, moving the bearing down the tapered template until you have a perfect fit.
Cut the Half-Laps in the Feet
To cut the half-laps in the feet you will need a 3/4“ dado blade on the table saw and a dado crosscut sled. Spend some time marking out the first foot according to the drawings so you can use it to set up your stops. It is helpful to use the tenon shoulder and the bottom of the foot as your reference faces and to pull all measures from those two surfaces.
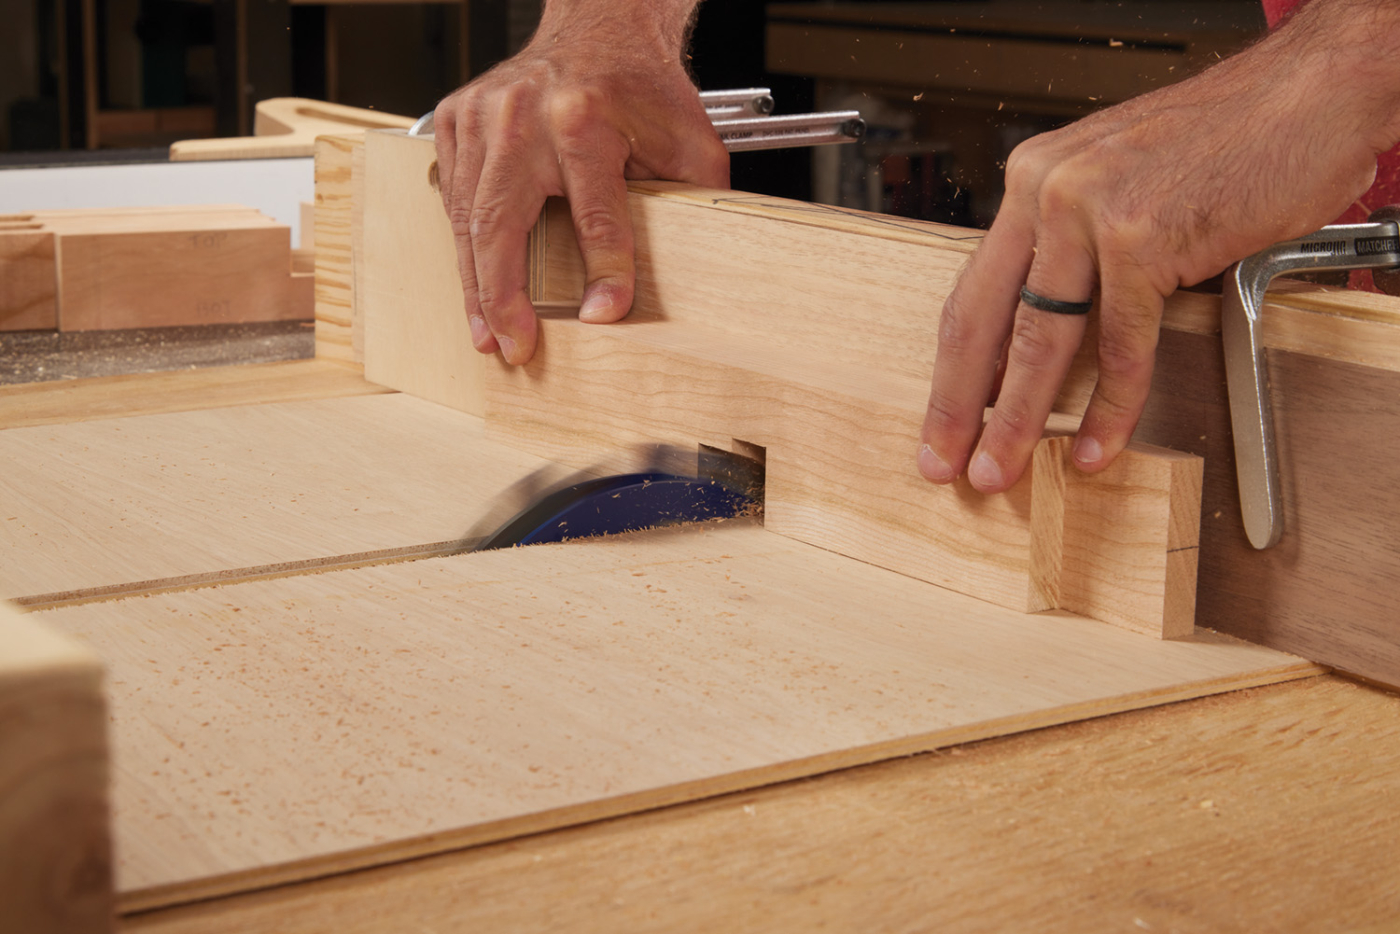
20 Cut the first lap joint in the foot using a sled and dado blade.
The first notch will be cut on the top side of the foot closest to the tenon. It is 5“ from the tenon shoulder and is 1-1/2“ wide by 1-1/16“ deep. You will need to take multiple passes on the dado blade to achieve this width.
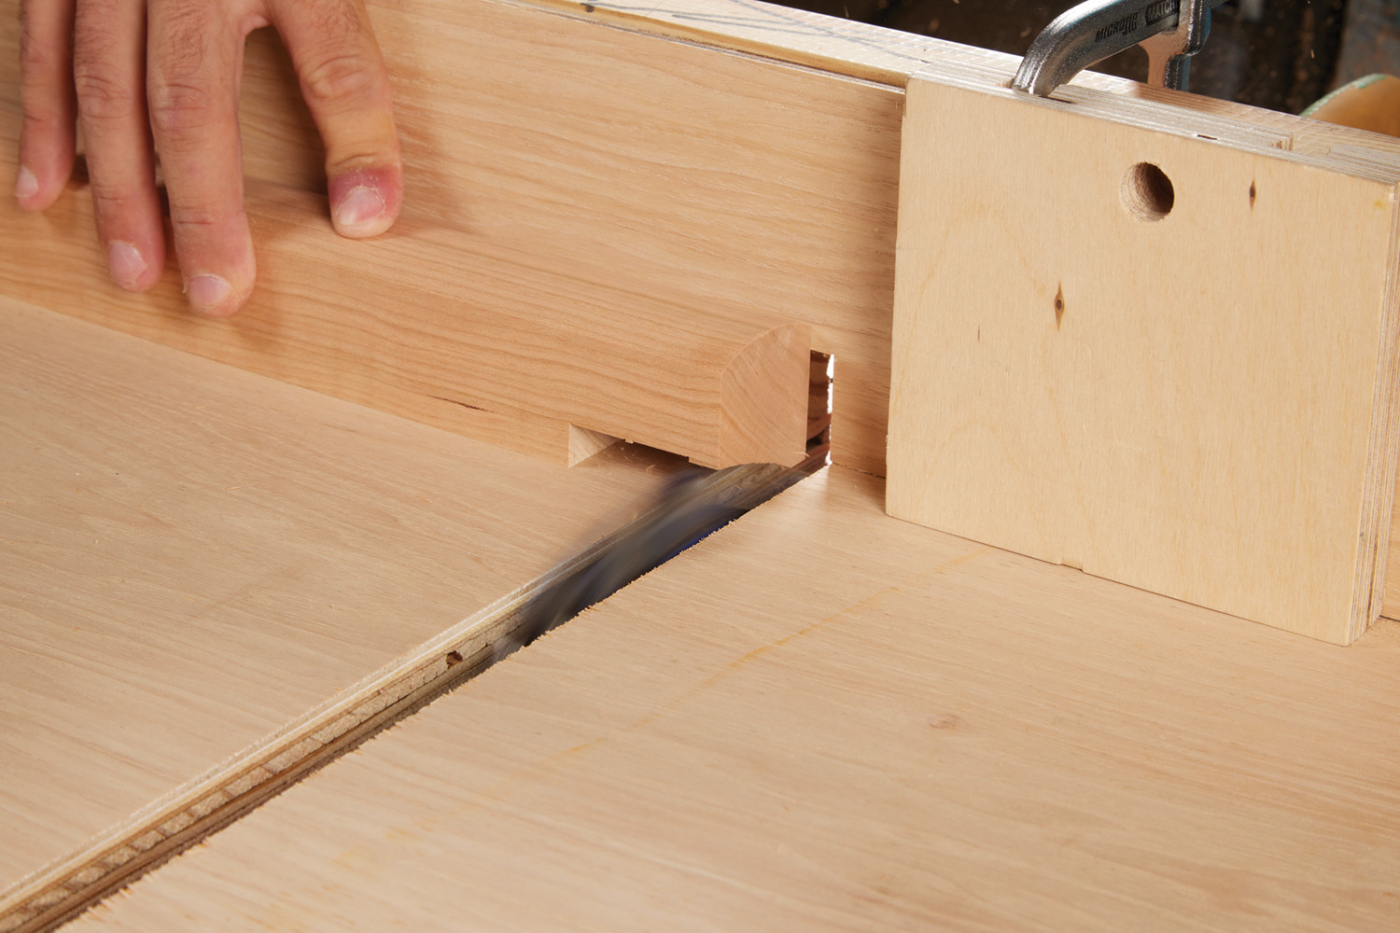
21 Cut the second lap joint at the end of the foot.
The second notch is on the opposing side of the foot and is 91/2“ from the tenon shoulder. This notch is 15/16“ deep and runs out the end of the foot. The half laps should be snug but not difficult to get apart. Make sure the half laps can fully seat and do not contact each other prematurely. Leave the dado blade set up on the table saw for the top joinery.
Taper Feet
Next, taper the top side of the feet. This can be done on the bandsaw or on the table saw with a tapering jig. The taper should start at 2“ at tip and go down to 1-1/2“ on the tenon side. I recommend leaving this a little big and fine-tuning with a handplane.
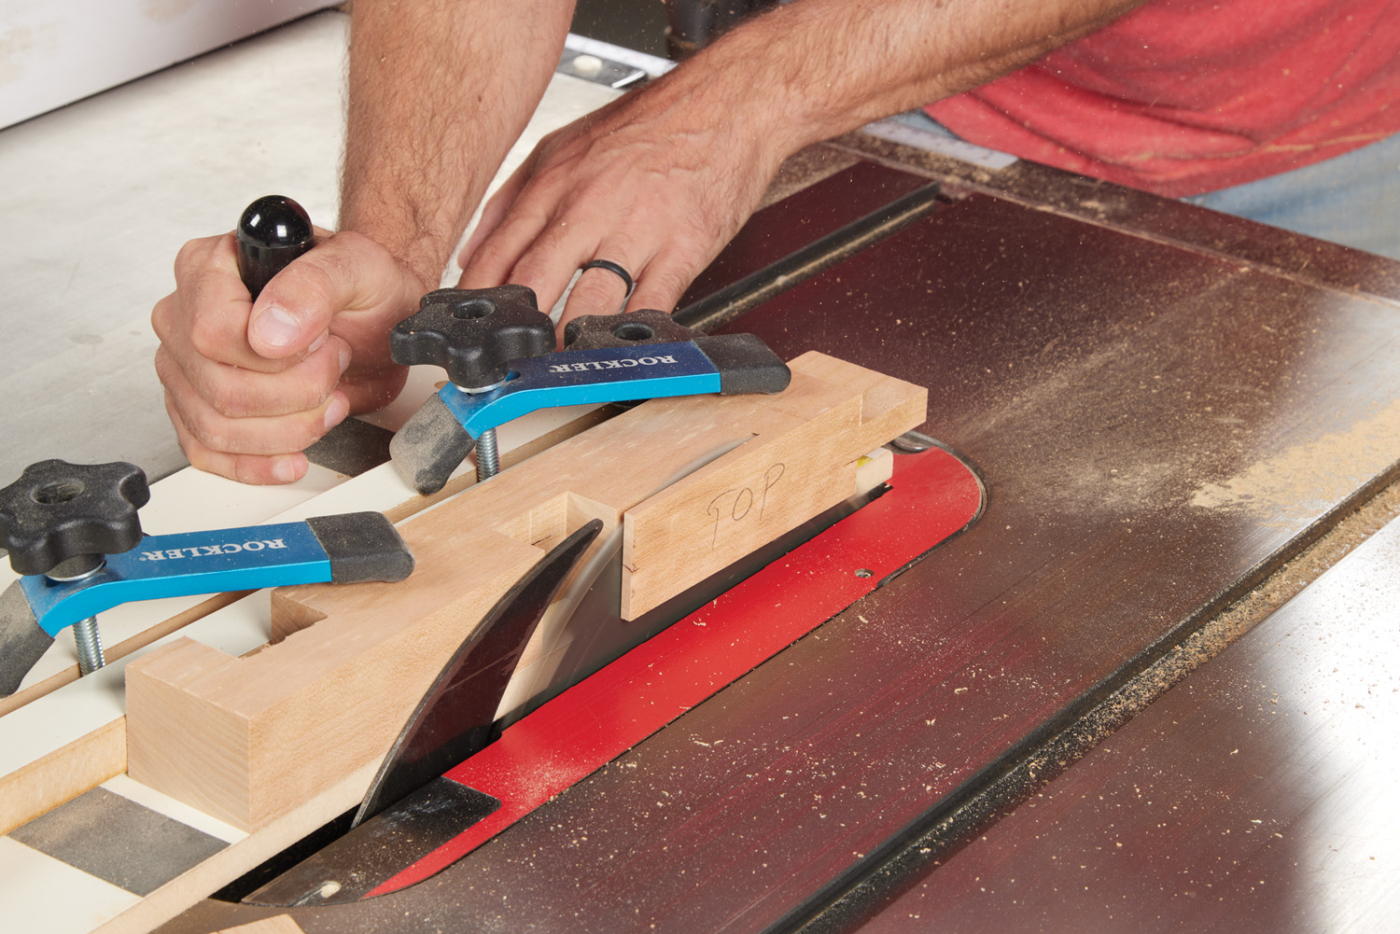
22 Taper the top of the foot.
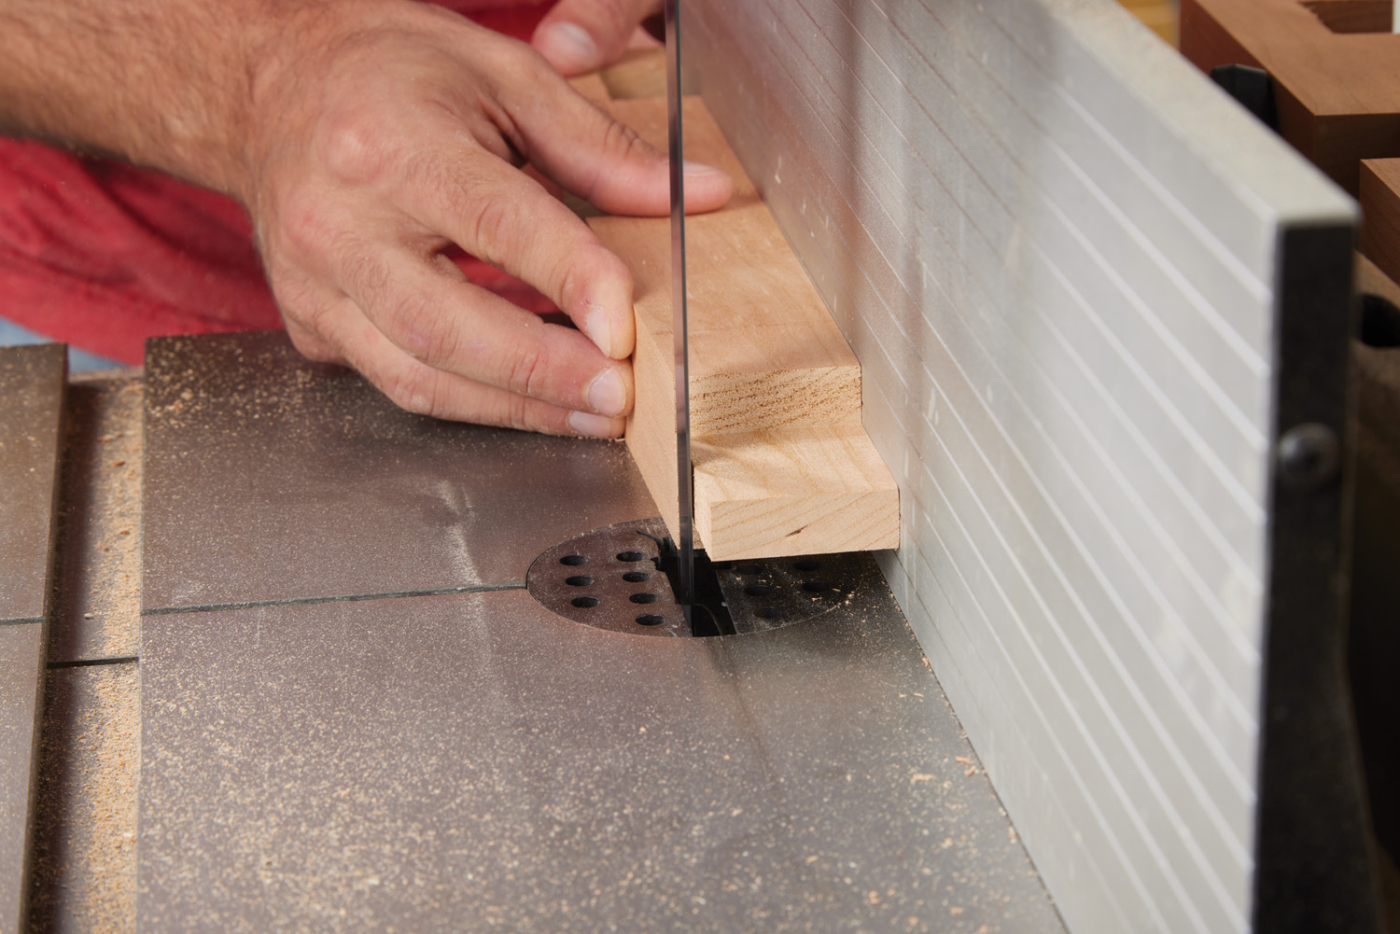
23 Cut the tenon straight.
The tapered tenon will now need to be cut straight so it fits perfectly in the bridle joint. Set the fence on the bandsaw at just a hair over 1-1/2“. Cut off the top portion of the shoulder with a handsaw so it is inline with the shoulders on the sides of the tenon. Fine-tune by hand with a chisel.
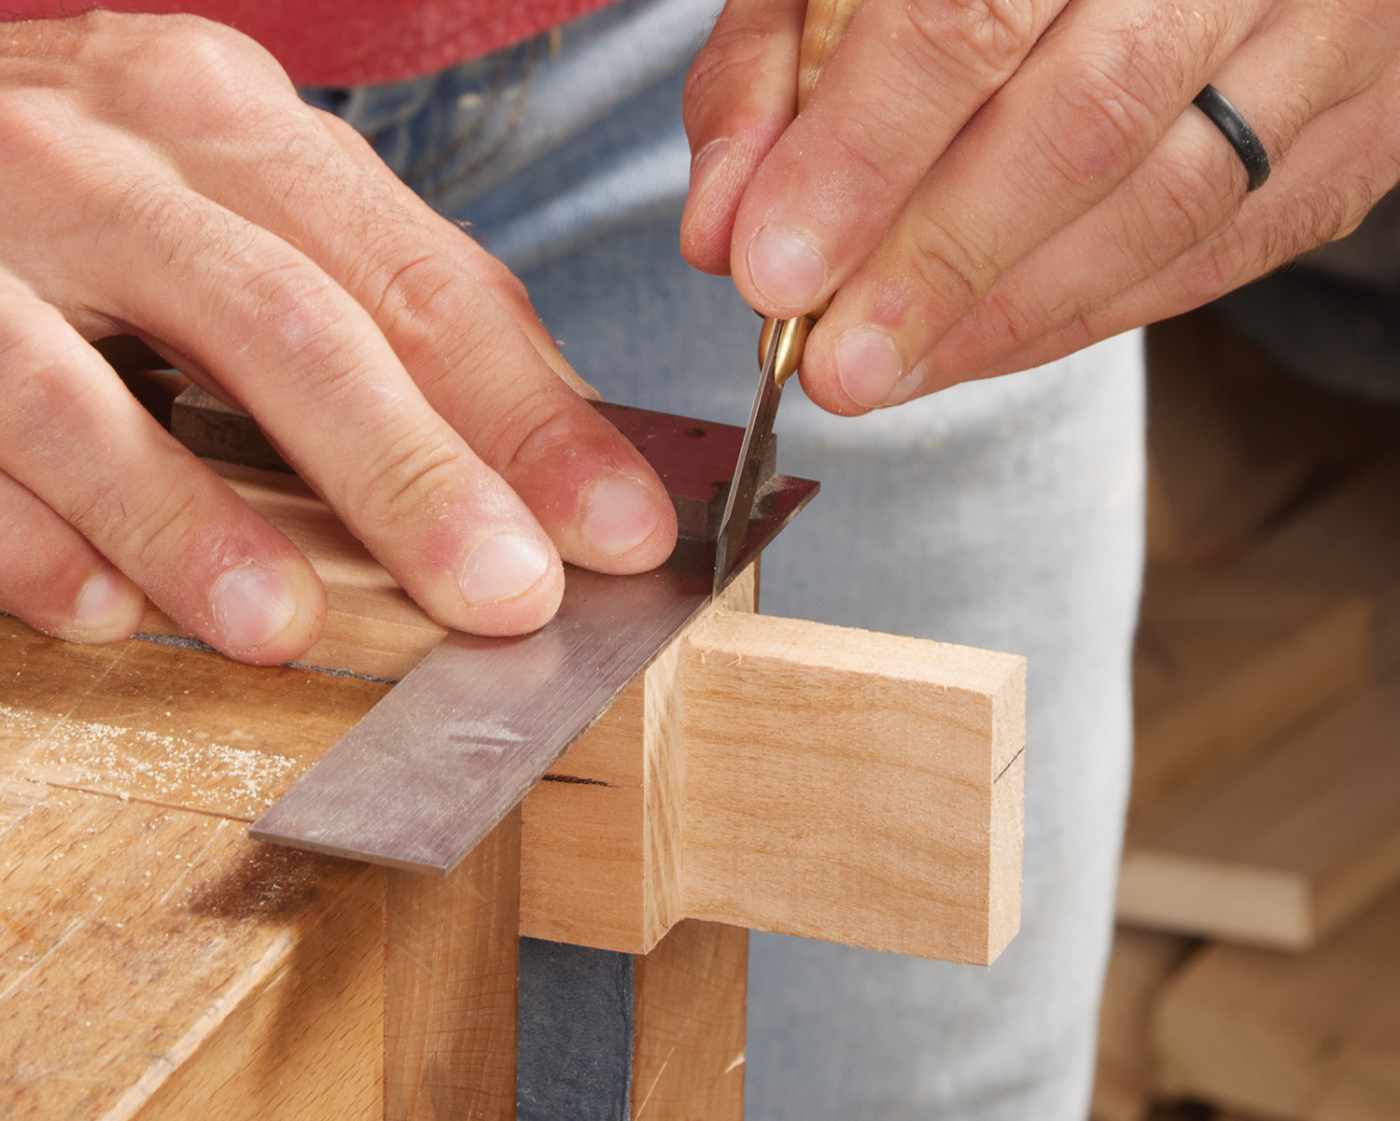
24-26 Clean up the tenon with a sharp chisel.
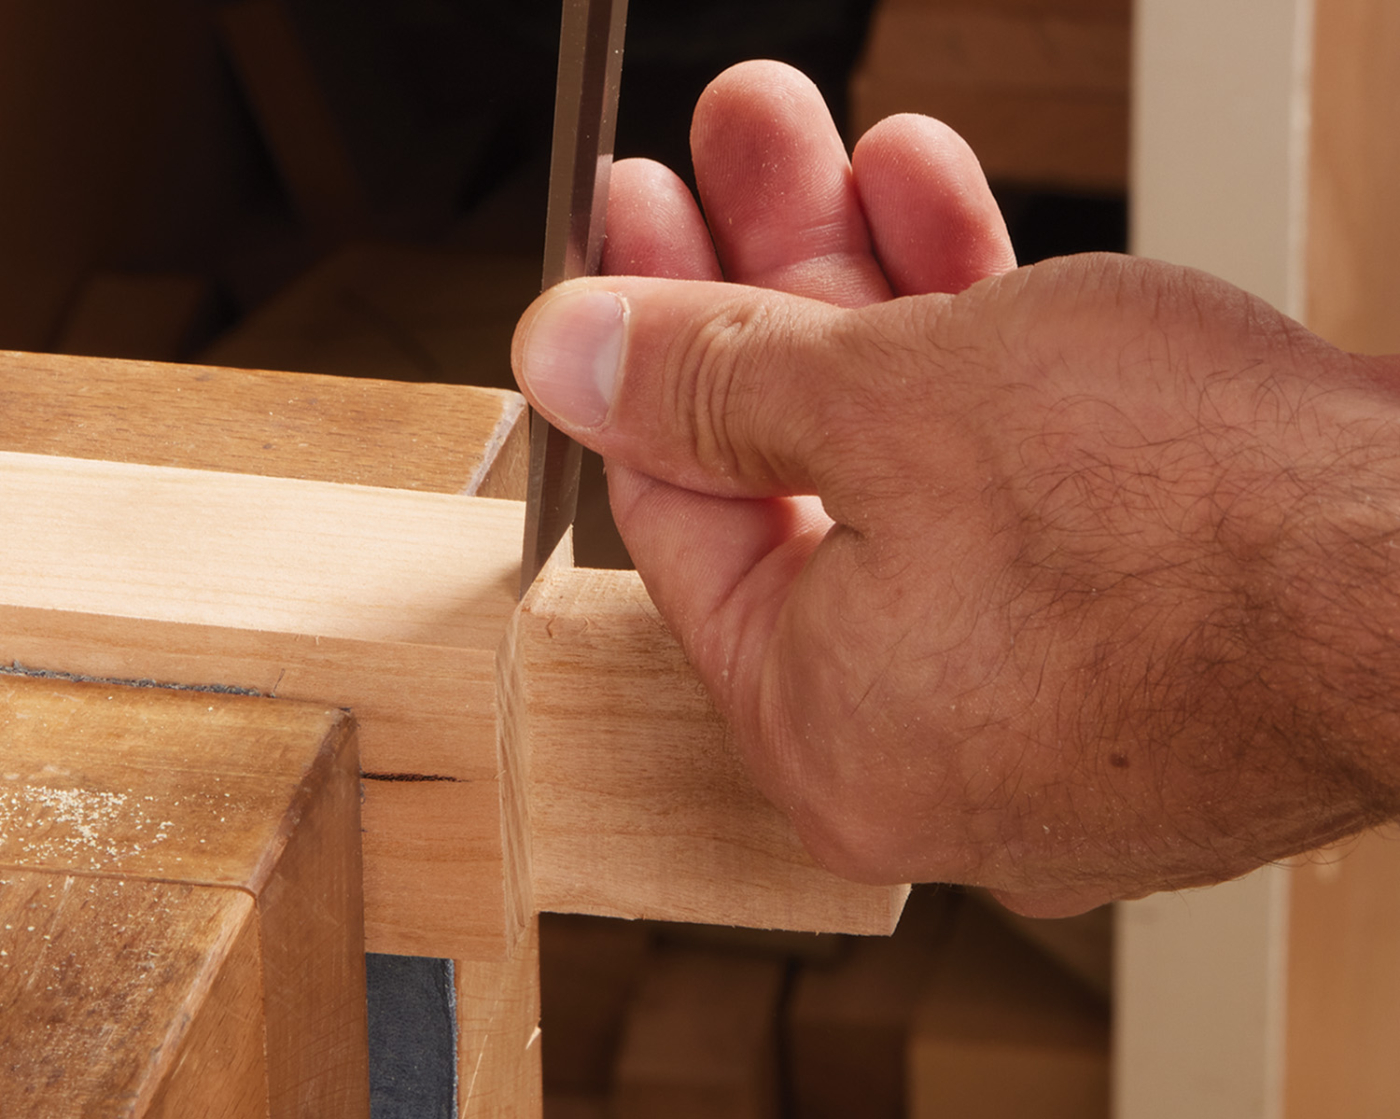
25
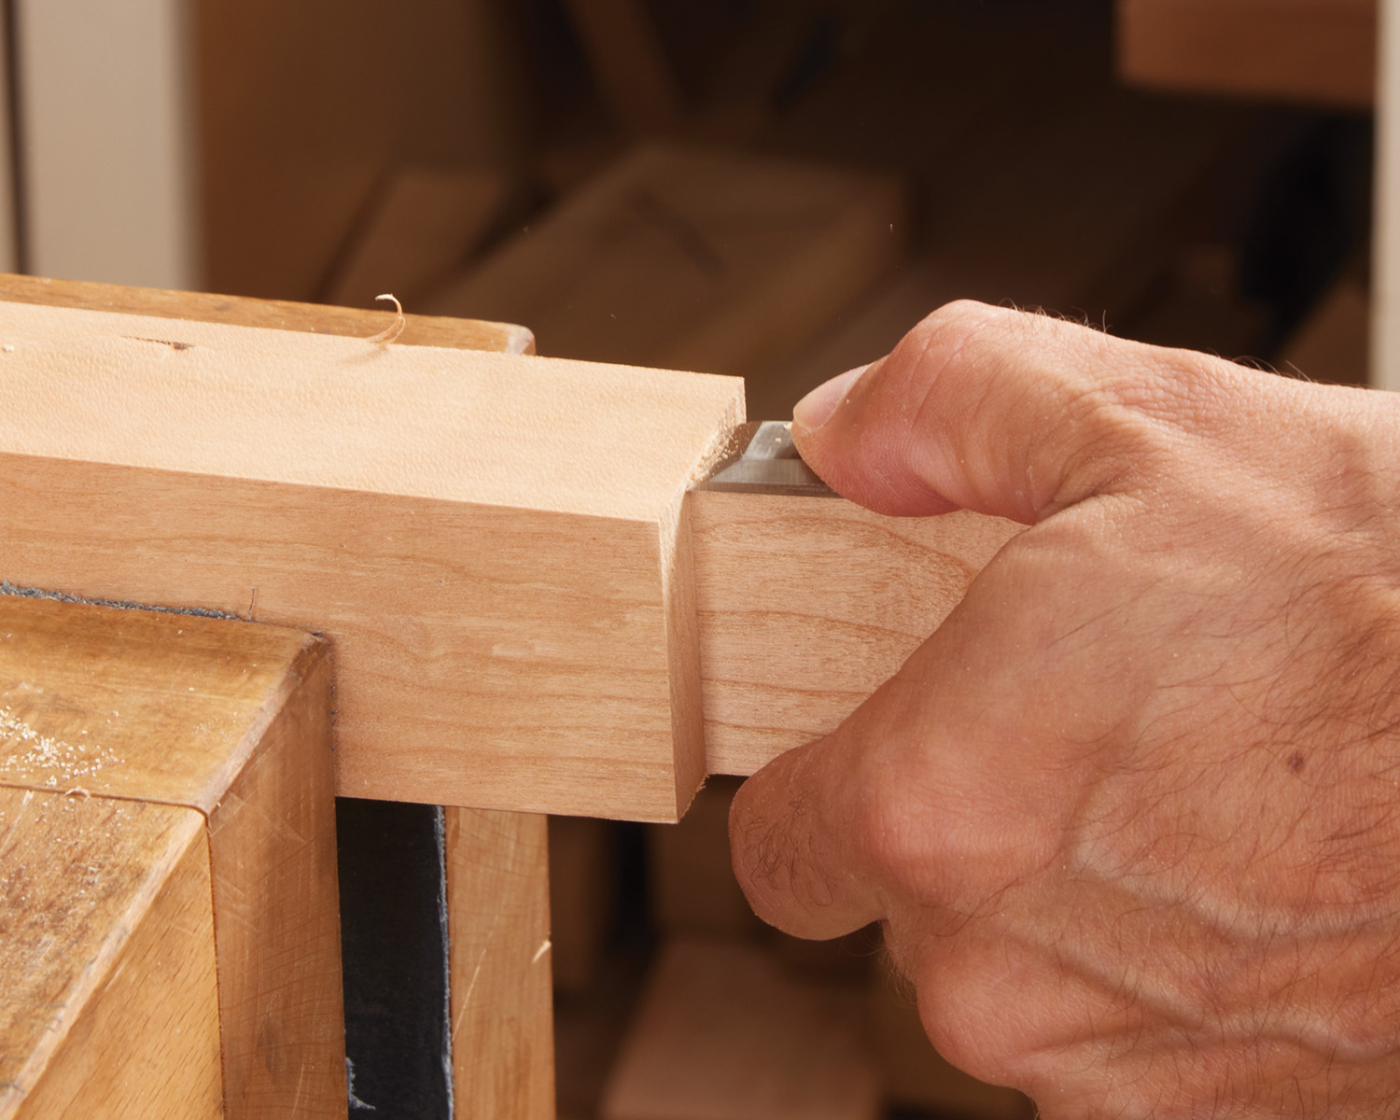
26
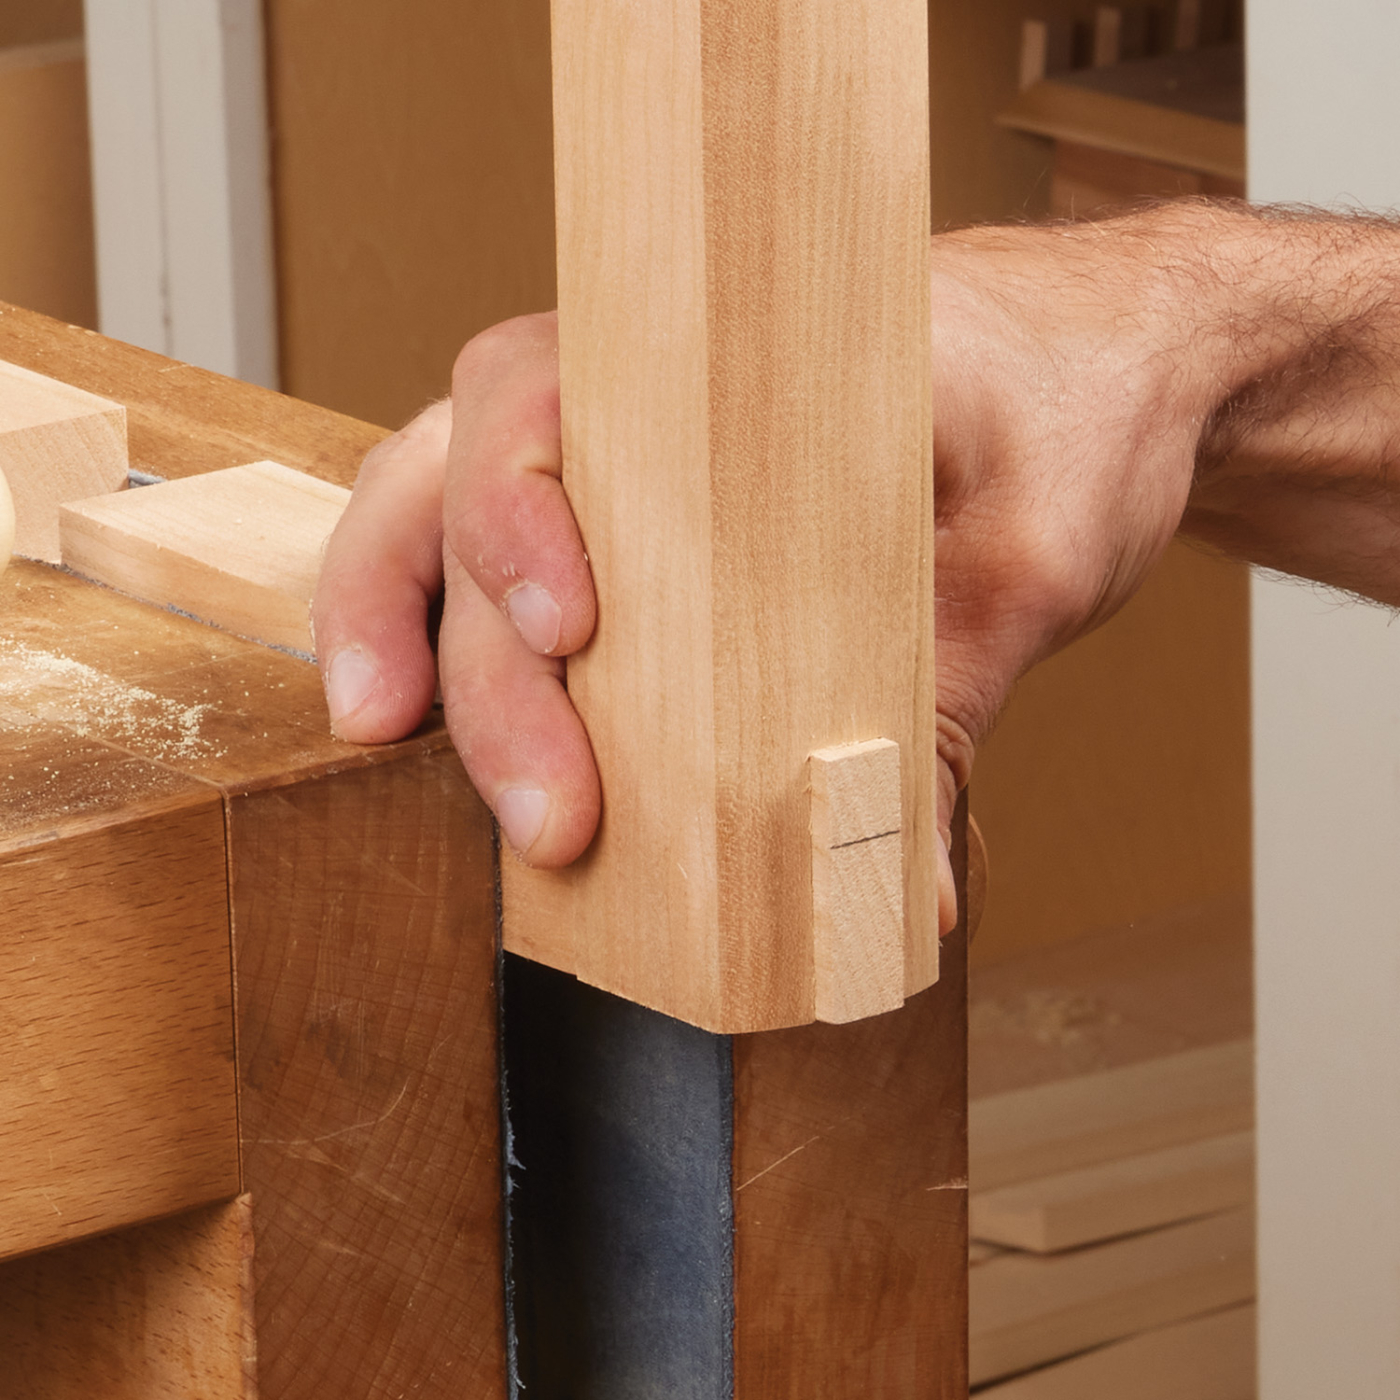
27 Dry fit each bridle joint.
Glue the Legs and the Feet
Glue the bridle joint by spreading glue on the inside of the bridle and outside of the tenon. Don’t put glue on the last 1/8“ of the tenon. Clamp the bridle and make sure the joint is tight.
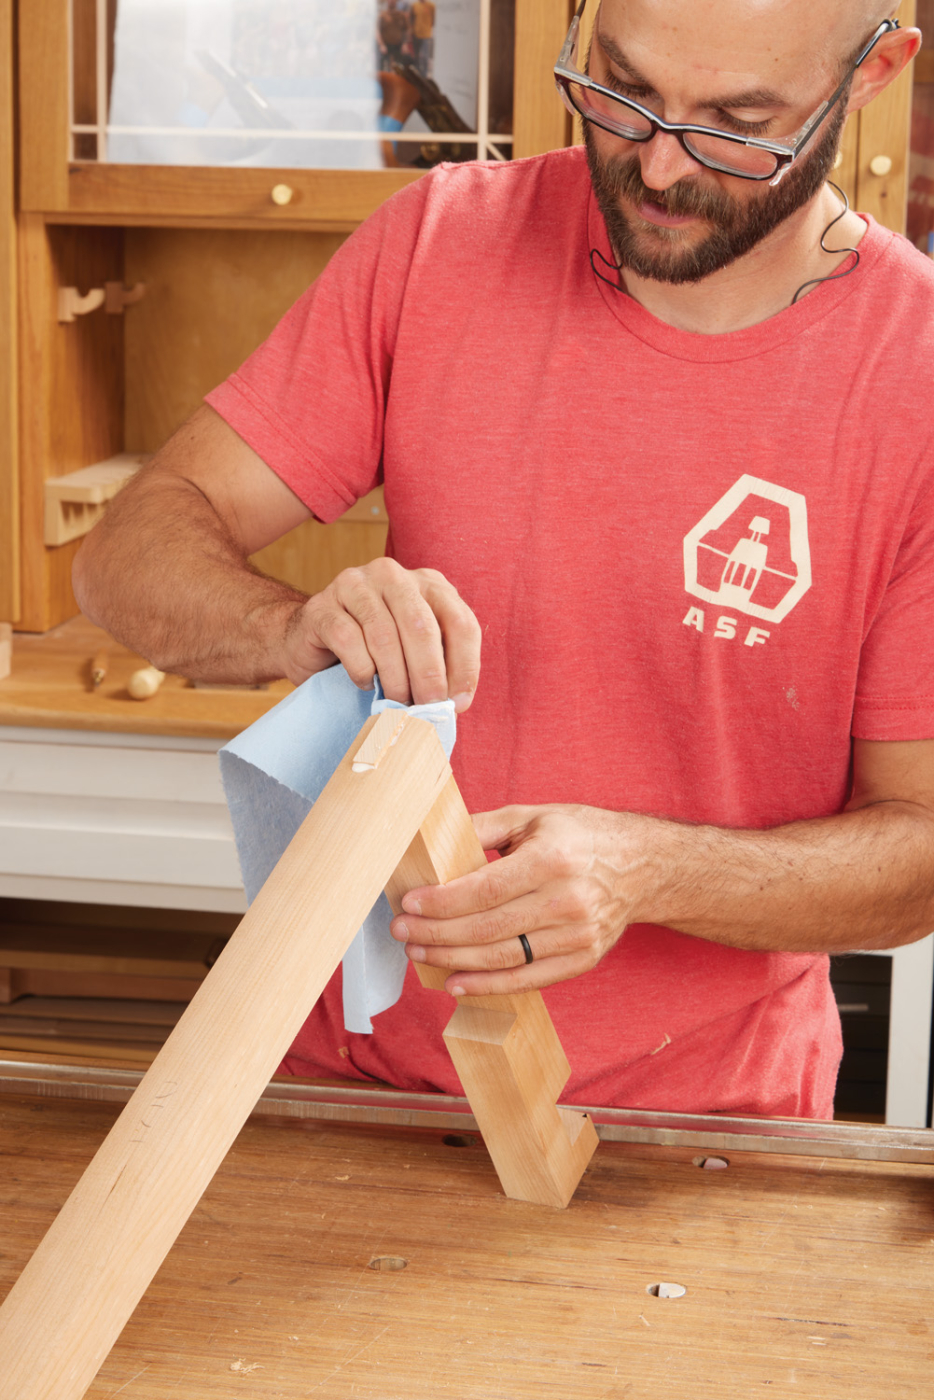
28 Glue the foot to the leg without getting glue on the last 1/8″ on the tenon.
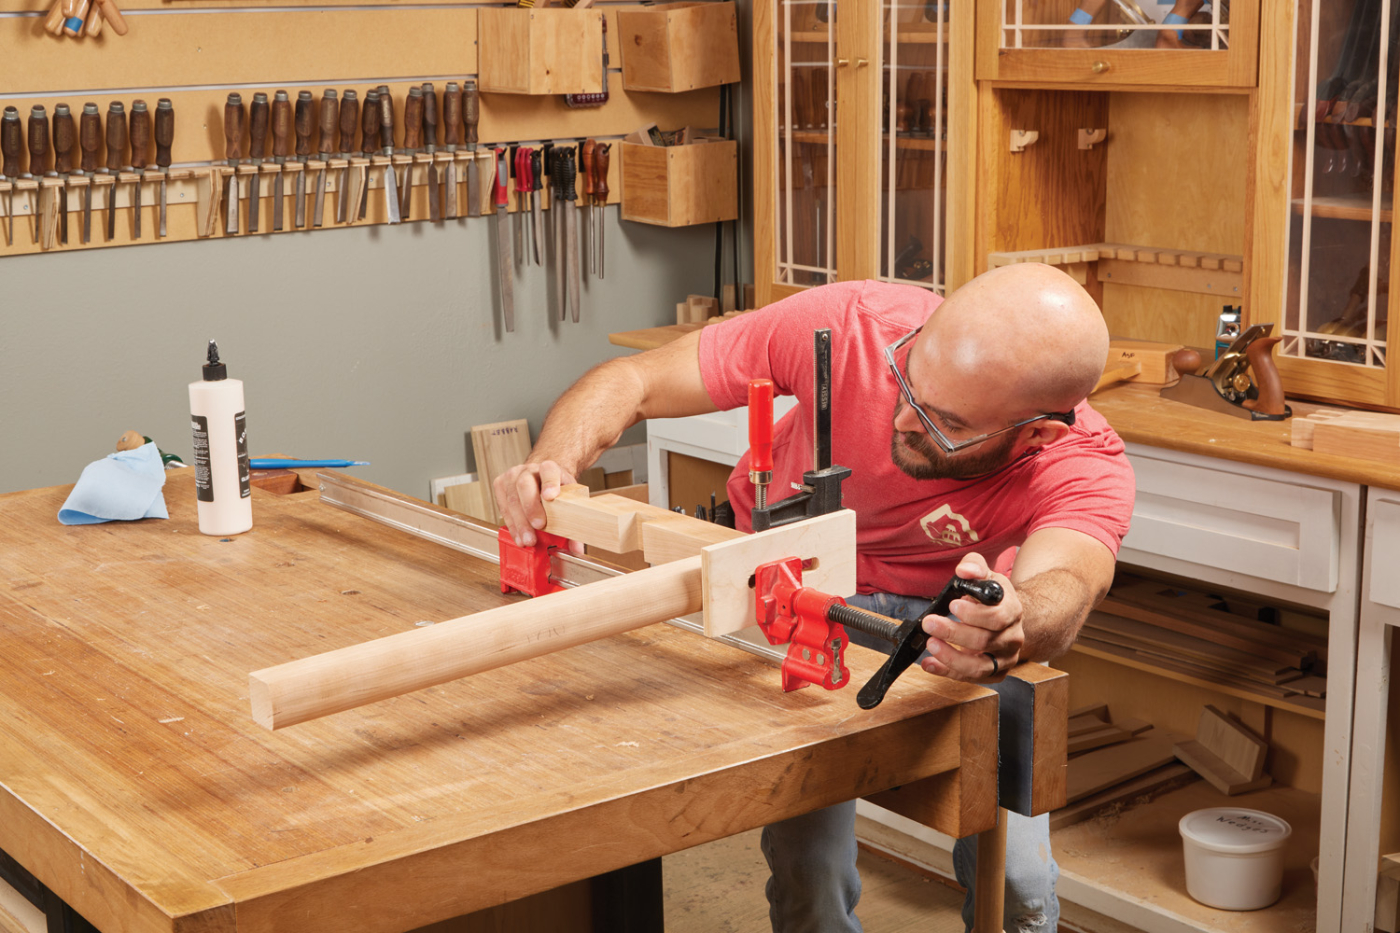
29 Clamp securely and clean squeeze out. Let it dry.
Once the glue is dry, the inside of the leg and the top of the foot can be shaped with the Magnate 5869 fingernail bit.
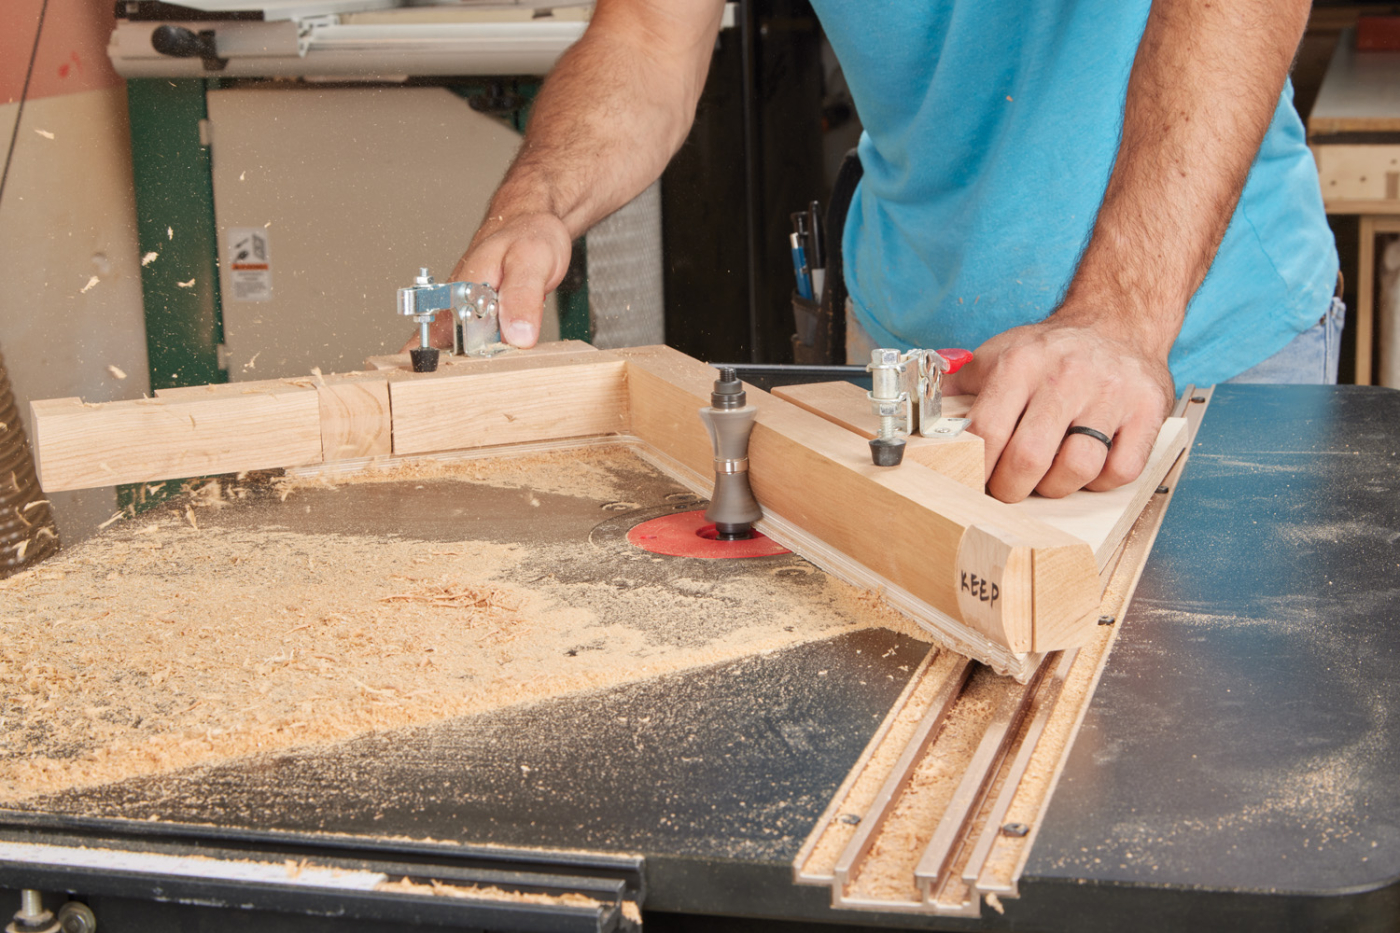
30 Cut profile on the interior of the leg and top of the foot.
Top Joinery
The top will be stood up on edge against the dado crosscut sled with a stop set up to one side. Make sure your sled fence has a zero clearance sacrificial board installed to avoid blow out. Install the 3/4“ dado blade if it is not still set up from the previous operation. Set the blade height at 35/64“. Start by marking out the first notch 6-3/16“ from the left edge of the top. Make a second mark 1-1/2“ from the mark you just made.
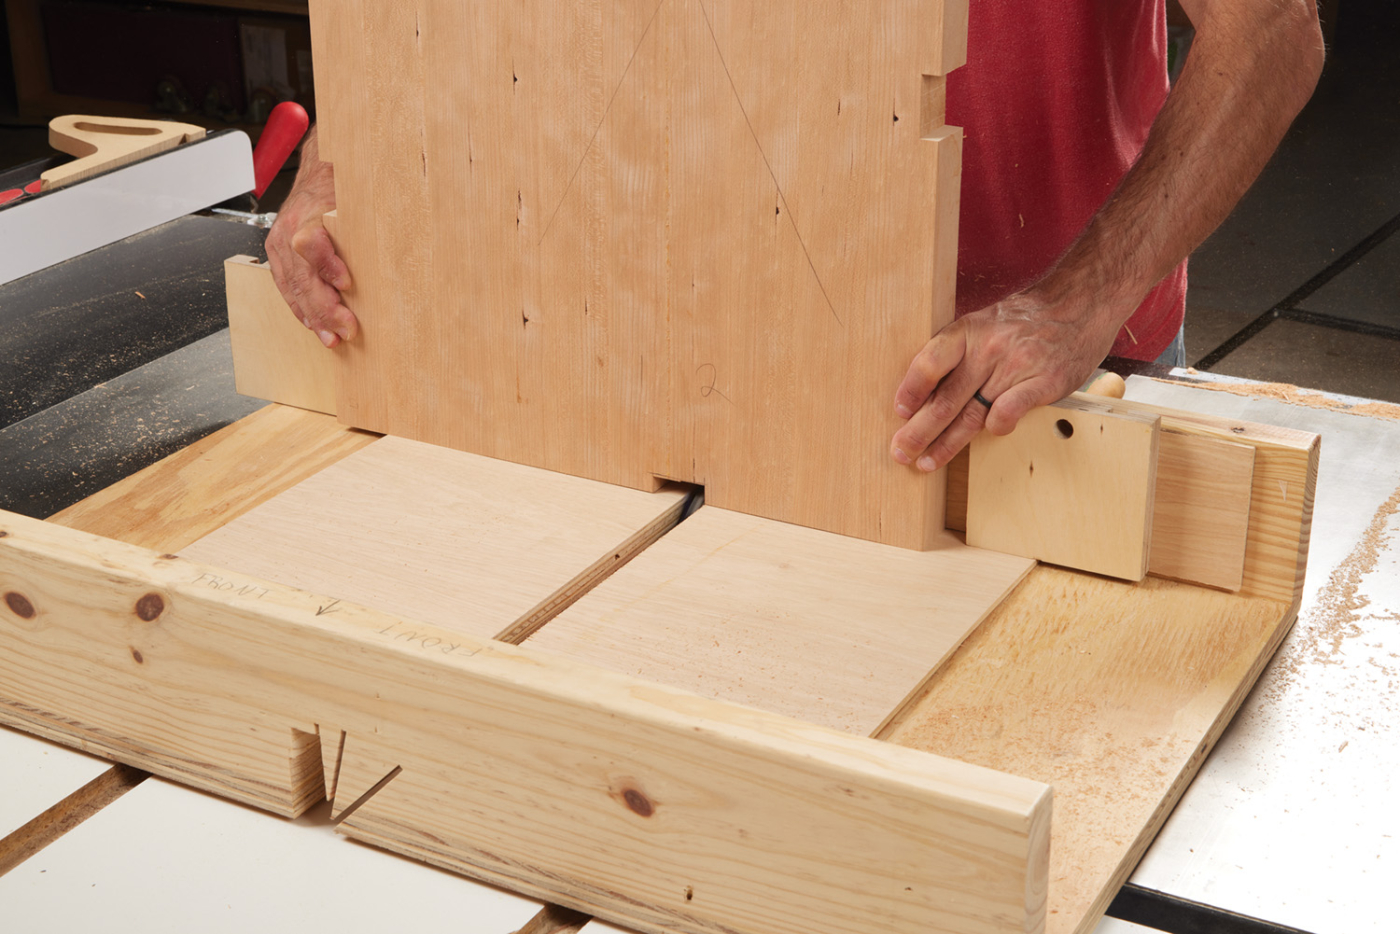
31 Use the dado blade to cut a notch in the square top.
Line the blade up to the inside of the 2nd mark and set the stop. Make a series of cuts until you reach the first mark. Repeat this step on all sides.
Cut the Top into a Circle
Find the center of your top by drawing two diagonal lines from corner to corner (on the bottom). Drill a small pilot hole in the center of the “x”. Using that hole, you can now cut the top into an 18“ circle by either using a circle cutting jig for the plunge router or a circle cutting jig for the bandsaw.
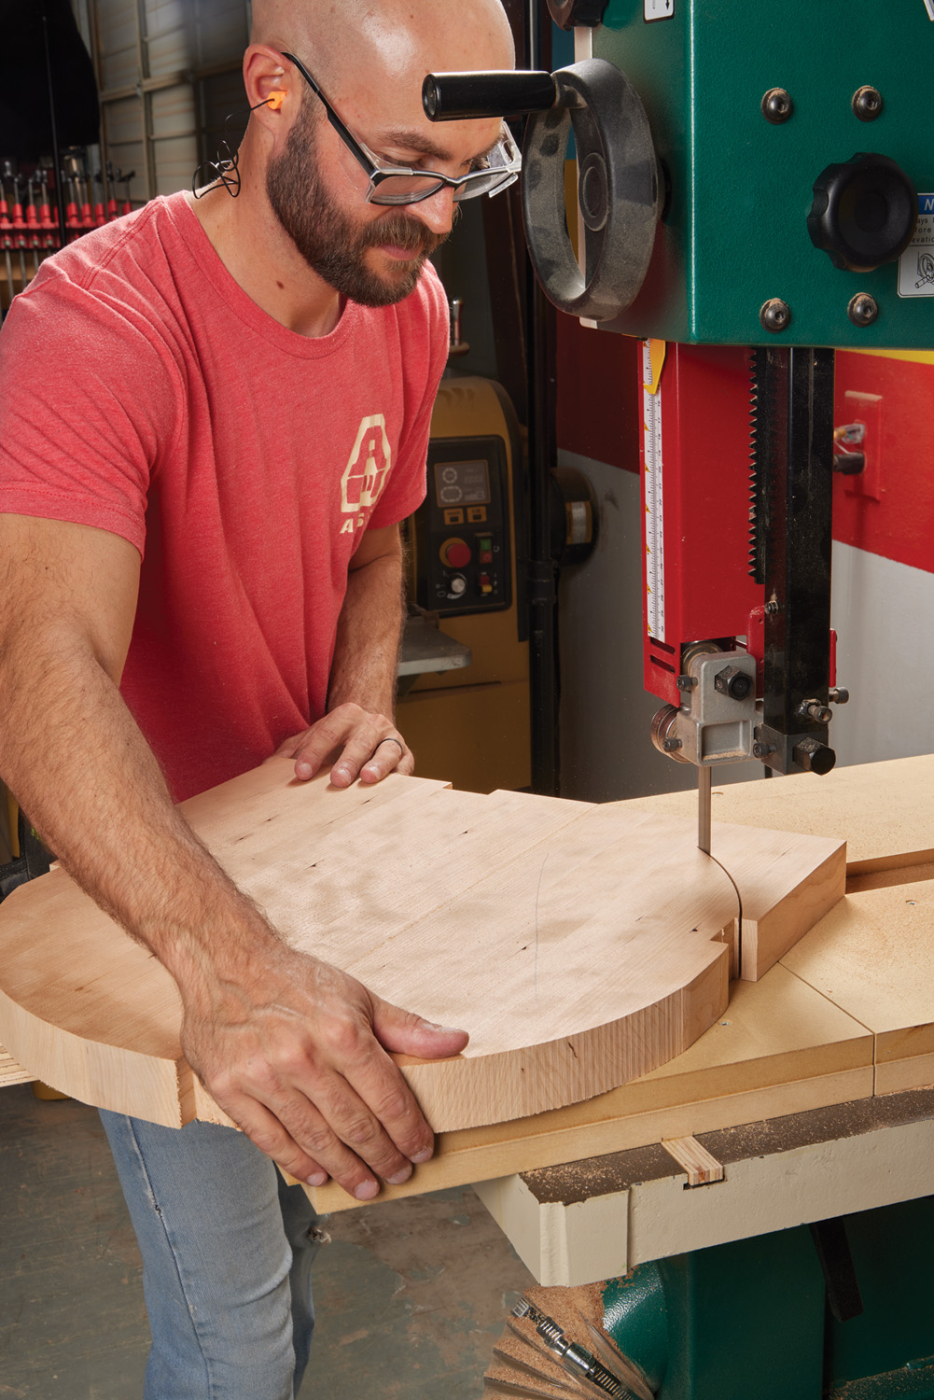
32 Cut the top into an 18″ circle.
If you use the bandsaw you will also need a way to clean up the edge to remove the bandsaw marks. This can be done with lots of sanding or with an 18“ MDF circle template. Set up your bandsaw circle cutting jig with square top attached with a small screw in the center hole. Move the top into the blade slowly rotating as you go. Continue to rotate until a perfect circle is formed.
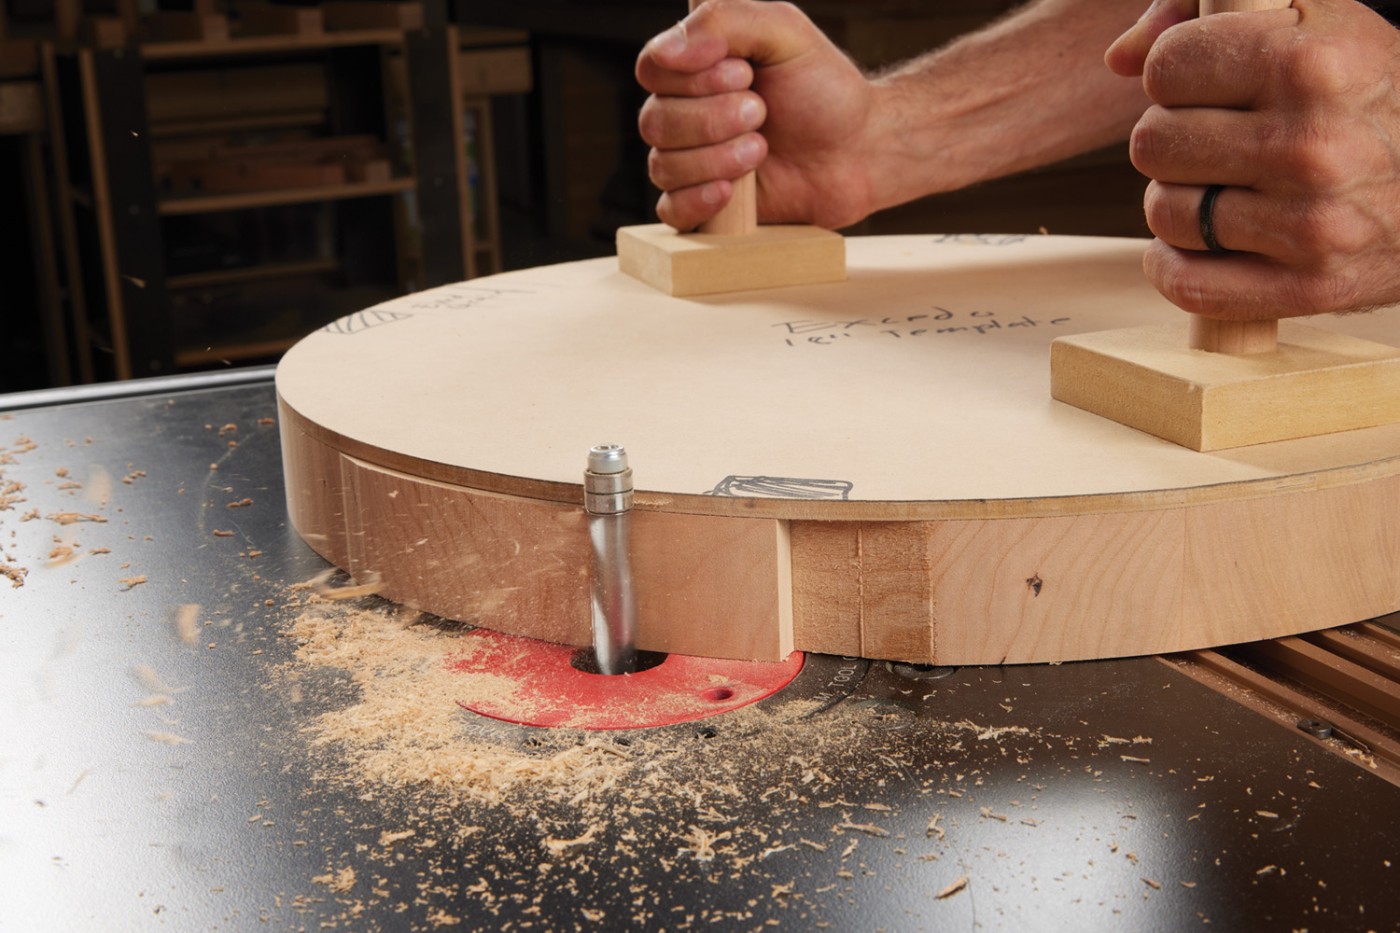
33 Flush trim on the router table or sand smooth.
Remove the top from the jig and attach a 1/4“ x 18“ x 18“ piece of MDF to the same circle cutting jig. Cut the MDF into a circle and then sand smooth. Attach the 1/4“ MDF template to the top with double sided tape. Use a flush trim bit with a top bearing to route the top smooth. Be sure to use push paddles to keep your fingers away from the bit.

34 Round over the edges of the top if desired.
Final Touches
The final few steps are to put a small roundover around the top and bottom of the top using a trim router. Knock down any sharp edges with sandpaper or a block plane. Sand down the surface of all parts to your desired smoothness.
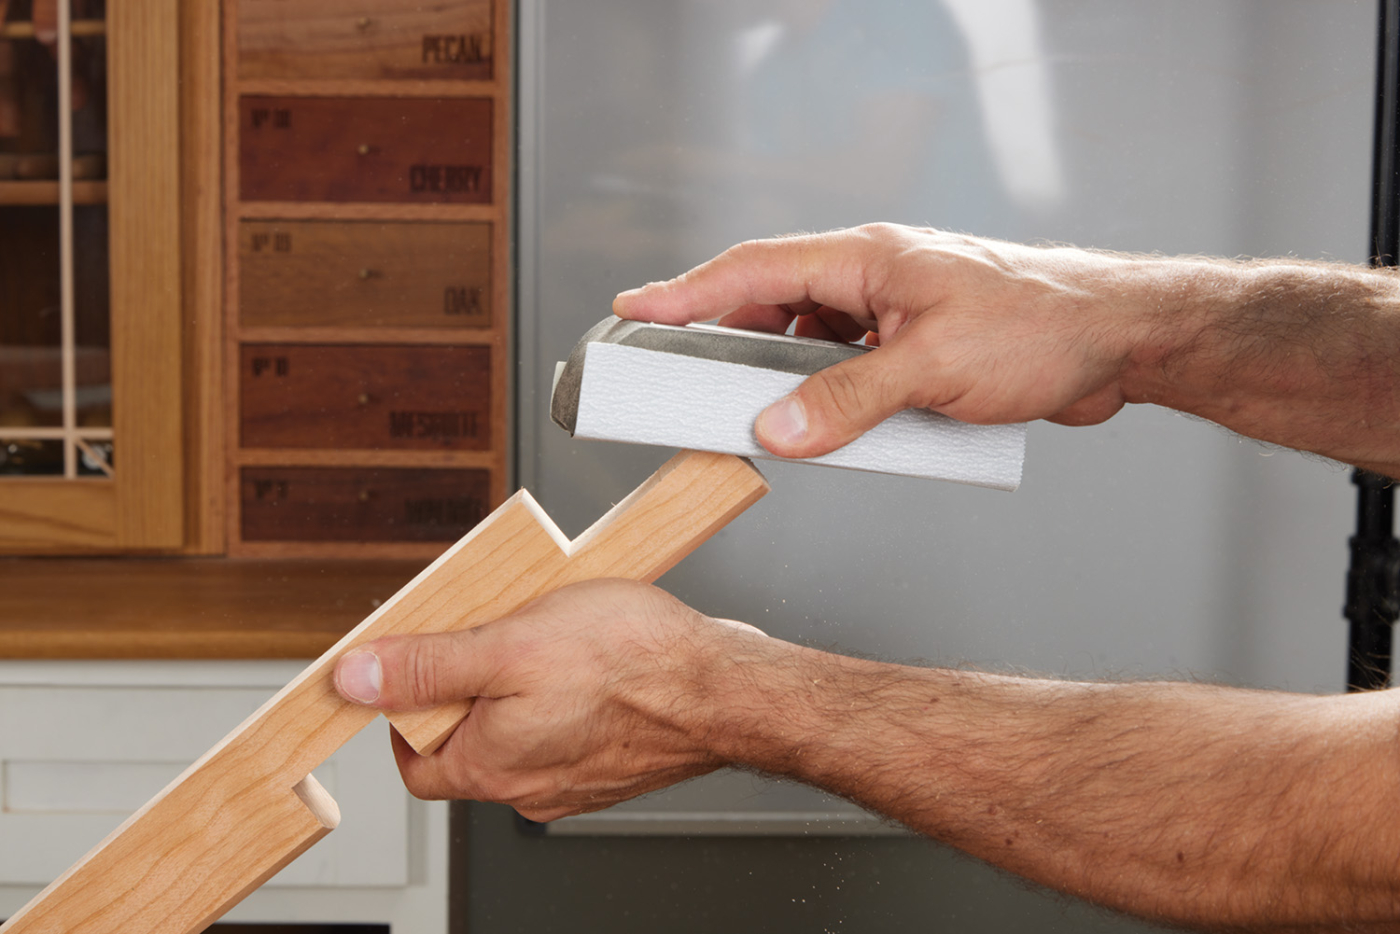
35 Shape and sand the bottom of the foot.
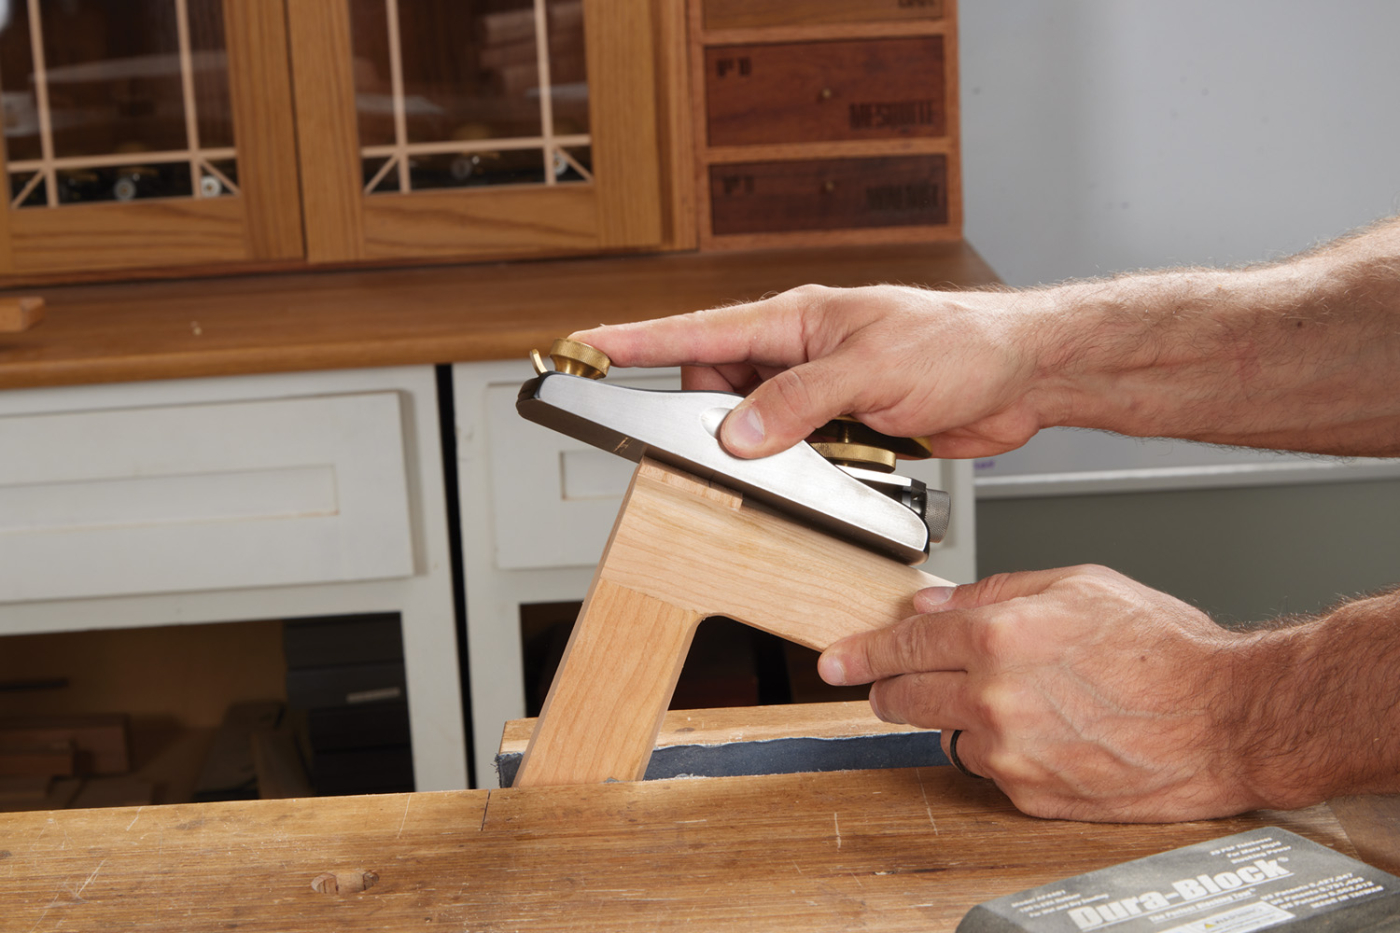
36 Use a block plane to chamfer or round over bridle joint tenon.
Glue up the Base
There is a wrong way to glue up the base so make sure to do a full dry fit with the top before gluing. Glue up two sets of two feet at a time before bringing them all together. Place the top in the top of the legs to make sure they don’t move out of place. Clamp the half-laps down while also clamping across the base to pull it in tight. Once done, apply your favorite finish and you are all done.
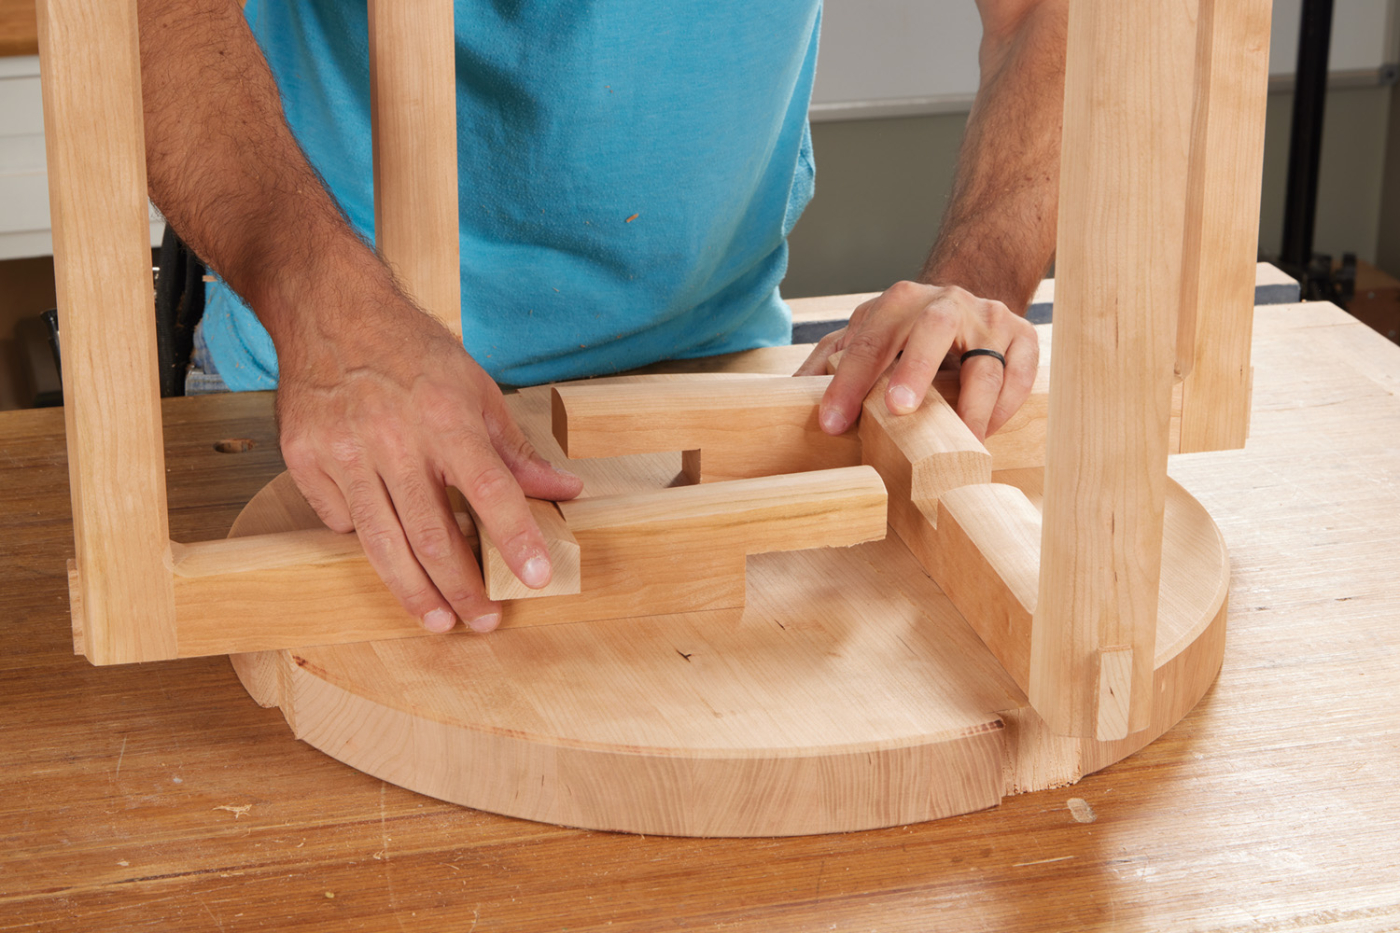
37 Dry fit all lap joints.
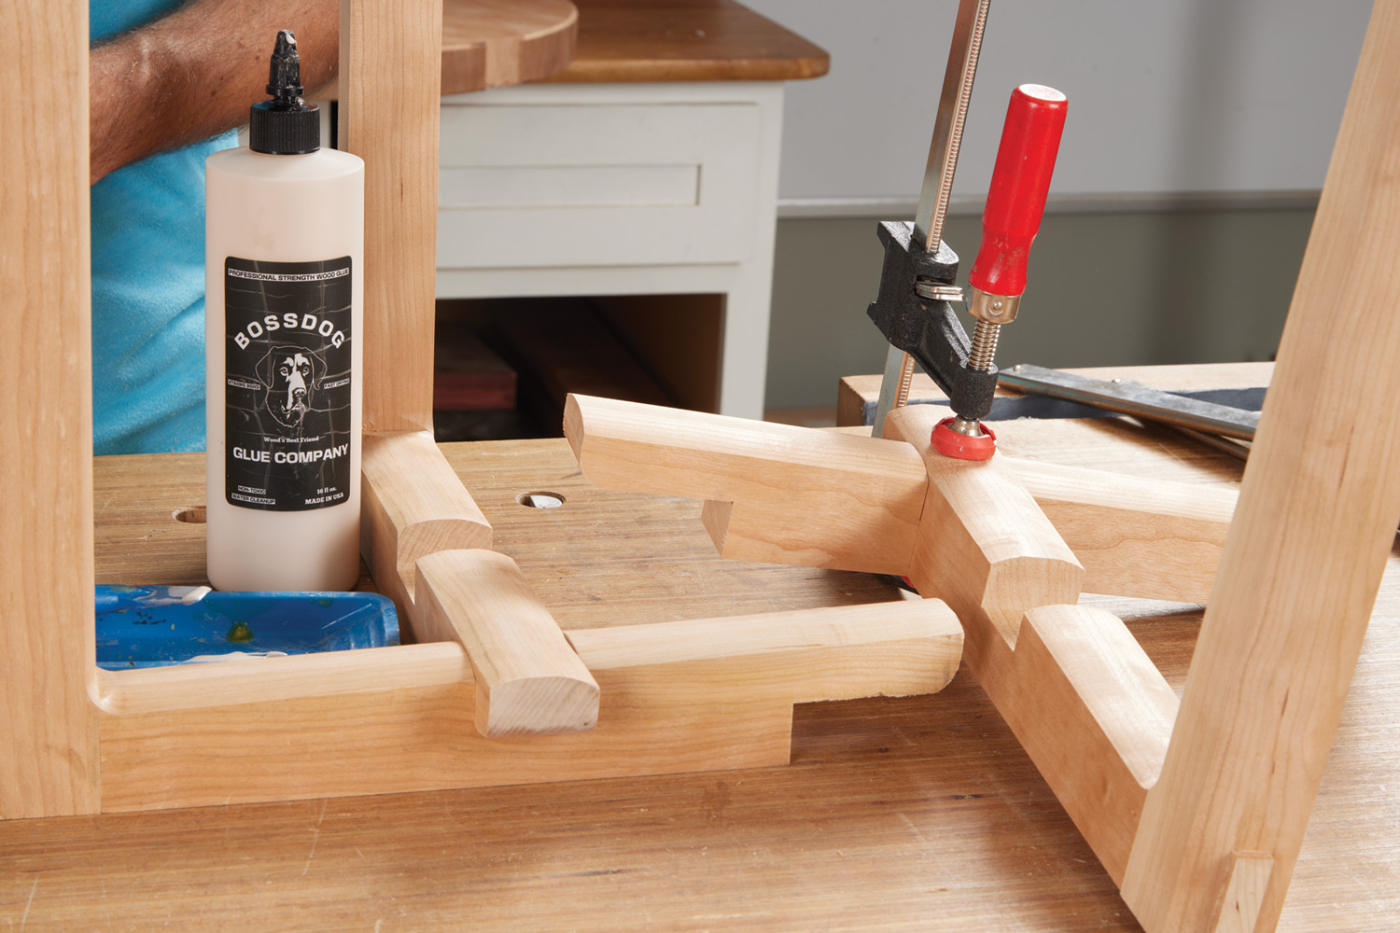
38 Glue feet lap joints in
two stages.
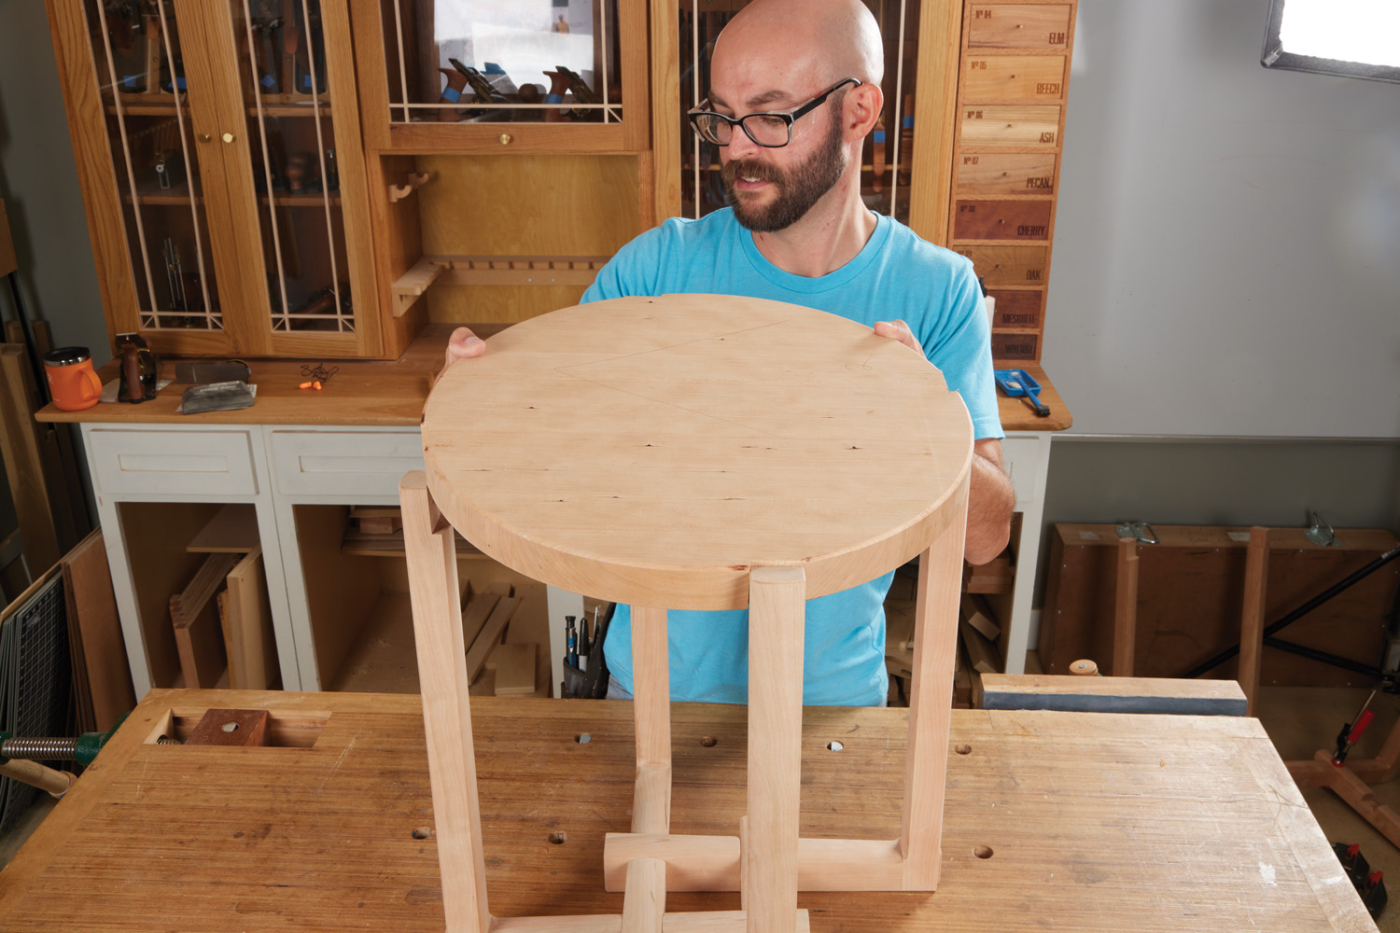
39 Drop in the top.
Here are some supplies and tools we find essential in our everyday work around the shop. We may receive a commission from sales referred by our links; however, we have carefully selected these products for their usefulness and quality.


 With one board, you can put together this side table that packs in a bunch of great woodworking techniques.
 Prepare the Parts


![Tooley Park Scriber Review [Discount Week of Feb 3 2025]](https://dev.popularwoodworking.com/wp-content/uploads/bfi_thumb/dummy-transparent-olcy6s63it1p9yp7uhusjas7c8kahafrhg9su7q9i0.png)

