Iron-on Edge Banding
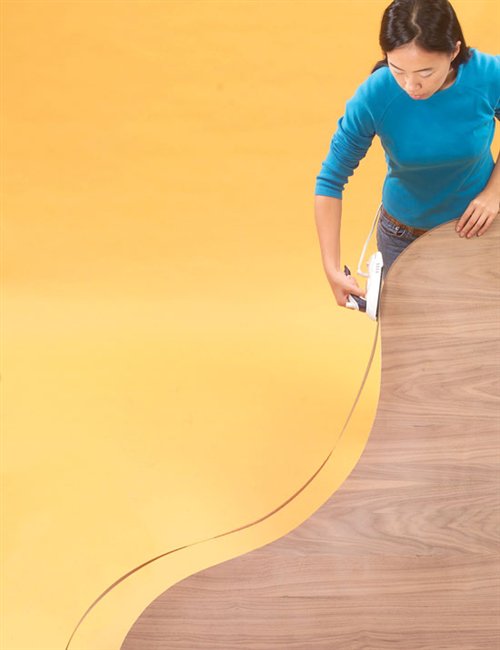
If you can iron a shirt, you can apply edge banding!
By Bruce Kieffer
Iron-on edge banding is a modern cabinetmaker’s best friend. It quickly covers the raw edges of veneered sheet stock, saving lots of time compared with traditional glued-on solid wood edging. It takes a finish in the same way as your veneered sheet stock does. Its many uses include covering edges of shelves, doors and frameless cabinet components. Edge banding is not, however, a substitute for solid wood trim on edges that can get physical damage, such as on a tabletop. Impact from chair backs, for instance, would damage its thin veneer.
Edge banding, or edge tape as it’s also known, is simply a veneer of wood, plastic or metal with a coat of hot-melt glue on one side. It’s available in a variety of wood species, including birch, cherry, hickory, maple, oak, pine and walnut. The plastic banding comes in wood grain or solid color for use with plastic laminate and melamine. Metallic banding’s many varieties include brass, brushed copper and aluminum. Edge banding is available in 5/8-in. to 2-in. widths and 8-ft. to 600-ft. lengths. It’s pocketbook friendly considering the time you save using it. The per-foot cost ranges from $0.10 to $0.40 depending on brand, species and size.
You need only a handful of tools to get started with iron-on edge banding. Our recommended starter kit includes a travel clothes iron ($18), a handheld trimmer ($13) and a utility knife ($6). If you’ve never tried edge banding because you thought it was tricky business, you owe it to yourself to give it a shot.
5 Steps to Apply Edge Banding
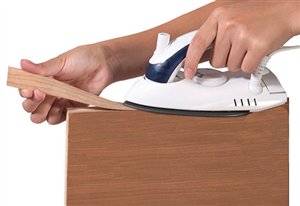
| 1. Just iron it on. Edge banding is easy to apply. Set the iron on high and use moderate downward pressure. The trick is to move the iron quickly enough to keep the wood from scorching, but slowly enough to melt the glue. It takes a little practice to get it right.
Tip: Cut the edge banding an inch or two longer than the edge you’re covering. It makes it easier to position the banding while you iron. |
|
 |
|
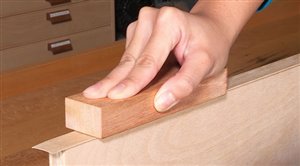
2. Press the edge banding down with a wood block while the glue is still molten. Rub back and forth for a few seconds until the glue sets. Tip the block along the edges to ensure a tight joint without a visible glue line.
For edge banding longer than 3 ft., heat and press short sections at a time. Otherwise, the glue sets up before you can rub it down. |
|
 |
| 3. Cut the ends flush with a utility knife after the glue cools. Don’t try to cut the tape in one stroke or you’ll tear the edge banding. Make several light cuts until the waste piece falls away. |
|
 |
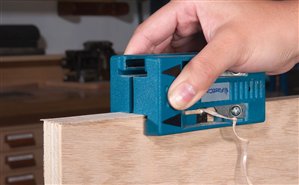
| 4. Trim the edges using a double-sided edge trimmer. For under $15, it’s the only way to go. The trimmer has two openings with knives that can be set to cut a flush or a bevel edge. We recommend leaving both sides set up for flush trimming, because sandpaper does a better job of easing the edges.
The trimmer is designed for stock between 5/8 in. and 1 in. thick, but you can take it apart and trim one edge at a time on thinner or thicker stock. |
|
 |
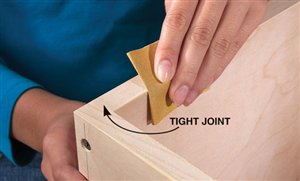
| 5. Ease the banded edges with sandpaper. Edge-band your cabinet parts before assembly, but ease the edges after assembly. Otherwise you risk having open joints where a horizontal shelf meets the side. |
|
 |
6 Tips for Better Edge Banding
|
Avoid Finger Joints
Real wood edge banding is a series of 6- to 9-ft.-long pieces of veneer connected by finger joints to make full-length rolls. The finger joints can be difficult to see until you apply finish, but then they stick out like sore thumbs. Inspect each strip for finger joints beforehand to avoid putting them on your piece. |
|
 |
| Reapply Heat to Undo Mistakes
One benefit of iron-on edge banding is that it’s easy to remove. Just reheat the surface and peel it off. Some of the old glue will be left behind on the plywood edge, but that’s OK. Put the new edge-banding piece right on top, and the old glue will blend with the new. |
|
 |
| Soup Up Your Trimmer
Tear-out can be a problem when you trim wood edge banding. The answer is to modify your trimmer so it leaves a slight overhang after the first pass. Just apply strips of edge banding to the inside edges of one opening in the trimmer. Make your first pass with the shimmed side. This removes most of the overhanging edge. Then flip over the trimmer and make the final cut. Because the second pass is only removing very thin strips, there’s little chance for tear-out to occur. |
|
 |
| Use Self-Stick Edge Banding on Curves
Self-stick edge banding works great on a tight radius. Iron-on banding tends to pull off the curve before the glue has a chance to cool and set. Self-stick application is easy: Peel off the protective backing, position the edge banding, apply pressure and trim the edges. You’re done!
On the downside, though, self-stick is twice as expensive as iron-on banding, it leaves a visible glue line and the sticky trimmings can be annoying. Professionals use self-stick for on-site work where an iron would be impractical. Our recommendation is to use iron-on whenever possible. |
|
 |
| Roll Faster
This is the Ferrari of rollers. It’s used to apply bonding pressure to either iron-on or self-adhesive edge banding. Well-balanced and easy to hold, it has a low profile that’s easier to handle with one hand than a J-roller is. The roller speeds the application process because it concentrates pressure at its contact points on both end. |
|
 |
| Trim Edges Quickly, Precisely
Cut your end trimming time in half with this tool. It’s as accurate as it is fast. It slips over the edge banding’s untrimmed edges, rests flush against the end of the panel stock and easily trims off the excess with a quick press of the handle. It’s not inexpensive, but if you do a lot of edge banding, you’ll love this tool.
Sources
(Note: Product availability and costs are subject to change since original publication date.)
Woodworker’s Hardware, wwhardware.com, 800-383-0130, End trimmer, #VIRC21E; Fast Cap Fastedge; Double-sided edge trimmer, #VIAU93.
Fast Cap, fastcap.com, 888-443-3748, Speed Roller.
This story originally appeared in American Woodworker March 2005, issue #113.

March 2005, issue #113
Purchase this back issue. |
|
 |
Product Recommendations
Here are some supplies and tools we find essential in our everyday work around the shop. We may receive a commission from sales referred by our links; however, we have carefully selected these products for their usefulness and quality.


