


We may receive a commission when you use our affiliate links. However, this does not impact our recommendations.
 This project brings together a diverse set of skills including epoxy work, bent lamination, metalworking, turning, and riveting.
 This project brings together a diverse set of skills including epoxy work, bent lamination, metalworking, turning, and riveting.
Project #2316 • Skill Level: Intermediate • Time: 4 Days • Cost: $75
Chopping vs. coping dovetail waste can be a fiercely debated topic, but I find coping better fits my workflow. Debate aside, I find hardware store coping saws have clunky ergonomics, insufficient tensioning mechanisms, and difficult scroll angle adjustments. After looking at some antique saw designs, the answer was obvious— why not make a coping saw out of wood? Add in some metalwork and a little epoxy, and you will have a lightweight saw that cuts fast and true.
A bearing at the top allows you to continuously adjust the scroll angle as the cut progresses; this may take a while to get used to, but I find it much faster to switch angles as I cut dovetail waste. A quick-release blade allows fast blade changes and adjustments without your hand leaving the handle. Lastly, the rigid saw frame allows significantly more tension than hardware store saws, all while weighing in at just under 7oz.
Cutlist and Diagrams
Download the full-size templates here (PDF): Coping Saw Full-Size Template
 Begin with the Bow

1 Resaw the veneer at the bandsaw using a resaw blade.
It all starts by cutting accurate veneers. A freshly jointed face against the fence, a well-adjusted bandsaw with a Wood Slicer blade and full feather-board produces veneers that require minimal planing. Use calipers to ensure veneers aren’t thinner than specified.

2 Mount the templates on the veneer using spray adhesive.
Next, align the templates onto the veneer. But first, careful consideration is needed to ensure the grain direction wraps around the saw. I do so by aligning each piece with the grain, as seen in photo 2 while keeping holes away from the edges to minimize splitting. I don’t adhere my template directly onto the veneer. Instead, I use spray adhesive to adhere my templates to a layer of painter’s tape for reside-free removal. While you are gluing, attach the assembly fixture to 3/4“ plywood.

3 After drilling the veneer, cut the veneer to shape.
Time to cut and glue the pieces. Both types of wood are strong but very brittle; I find that pilot holes, sharp Forstner bits, a 6-tpi bandsaw blade, and a zero-clearance insert reduce splitting and tear-out. I like to saw pieces slightly oversized to accommodate small shifts during glue-up, then carefully trim any joints for a tight, dry fit on the assembly fixture. Before gluing, transfer the joint lines to the side of the assembly fixture to aid in alignment and coat the entire assembly fixture in packing tape to prevent the epoxy from sticking. Glue on the first side of the bracing and allow the epoxy to fully cure before scraping and gluing on the opposite side. For more tips on mastering epoxy, check out the bonus section at the bottom of this article. Once fully cured, sand or file the exterior and interior surface until it is square and matches your fixture. This is where the excess material hides minor shifts during glue-up.

4 Use a two-part epoxy to glue together the first half of the core.

5 Scrape off the excess epoxy in between glueups.
Set this aside and cut four pieces of thinner purple heart veneer to laminate for the spine. Use a scraper to quickly remove irregularities caused by the bandsaw. Apply four layers of aluminum foil duct tape to the outermost veneer to prevent cracking when bent. This tape can be easily removed after gluing. To laminate the spine, use epoxy to glue the spine in two stages. First, glue the laminates together and clamp to the assembly fixture to achieve the outer shape. Once cured, remove the spine, scrape off the excess epoxy on the inside, and glue it to the core. Start clamping at the center and work towards the outside, minimizing gaps.

6 A cabinet scraper brings the veneers down to the final thickness.

7 Glue the spine to the core.

8 Use a block plane to plane the spine down to final width.
To finish the bow, plane the spine laminates to width. You want the final spine to be 7/16“ wide in the middle, 3/8“ on the corners, and 5/16“ at the ends. Once done, give the entire bow a light coat of epoxy, and wipe off the excess, lightly sanding when cured.

9 Mark the bracket holes and the profile. Using layout fluid or a marker increases visibility.
Start Metalworking
Refer to the plans at the top of this article to mark critical dimensions. Use machinists’ dye or permanent marker to make the layout marks more visible. Accuracy is critical for marking the #42 cross hole on the lower bracket—it needs to be centered on the edge of the 5/8“ through-hole for the keeper pin to work correctly. This keeper pin prevents the handle from falling out when a blade is not installed and can be skipped if the accuracy is too much of a hurdle. Scribe all other lines deeply, as they will be your references for filing later. Leave extra material near the large holes to avoid deformation during drilling.

10 Drill the small cross-holes.

11 Counterboring the top leaves a ledge for the bearing.

12 Drill a larger through-hole for the bottom bracket.
Time to begin drilling holes. Start with the keeper and rivet holes, as they are more likely to drift if drilled after the larger holes. Accurately drilling large holes can be challenging—use cutting fluid, secure your vice to the table, and drill pilot holes. Use a 1/2“ counterbore bit to drill the top hole to the prescribed depth and flip the bracket and drill from the other side, leaving an 1/8“ thick ledge. Larger pilot holes are recommended prior to drilling the 5/8“ hole with a twist bit to prevent catching or drifting. Alternately, a 5/8“ counterbore bit can drill the bottom through-hole in one pass.

13 Use a file to form the scallop on the end.
Now start shaping the scallop—a hacksaw, sharp files, and sandpaper help you to quickly work to your marked line. Use the hacksaw to rough cut the legs, then file and sand to your lines. If you have access to a metal cutting bandsaw, it will greatly speed up the roughing process.

14 Remove the waste using a hacksaw.

15 Shown here is the before and after the final filing and sanding is complete.
With the brackets complete, it’s ready to secure them to the bow. First, fine-tune the laminated bow so the brackets slide snuggly on. Then, use epoxy to secure them in place and fill any gaps. Prepare the rivets by taking 11ga. finishing nails and filing the heads so only 1/16“ remains. Drill through the bow using a #31 bit and rivet the brackets in place. For tips and tricks on riveting check out “Rivets Made Easy” below.

16 The rivets are cut to length before they’re peened.
Now we’re on to the guards, which are cut out of 0.032“ brass sheet. Scribe the lines of the saws interior curve and use a pair of dividers spaced at 1/4“ to mark the far side. Guards should extend beyond the corner braces 3/8“ in both directions. Give your old coping saw one last hurrah by fitting it with a metal cutting blade and roughing out the guards. Leave excess material on the inside curves then file/sand the outside curves.

17 Scribe the bow shape onto the brass plate.

18 Use dividers to form a parallel cut line.

19 Drill rivet holes through the brass and frame.
Lastly, rivet the guards into place. First, use dividers to mark evenly spaced rivet holes less than 1/2“ apart. Next, carefully drill through the entire assembly using a #59 bit with a small drill bit adapter. CA glue or epoxy holds the guards in place during drilling and riveting. Once drilled, use #19 finish nails to rivet them in place. After riveting, give the bow a coat of varnish to prevent the epoxy from yellowing.

20 Small rivets are peened over and attach everything.
Rivets Made Easy
Making a strong riveted joint is a lost art, but it’s easier than it looks:
Any nail can be a rivet. Copper works best, but steel will be used here for added strength.
Start with an accurate hole. Slightly under-sized holes prevent the rivet from bending in the joint.
Drive in the nail. Hammer the nail through the assembly until the head contacts.
Finding a “bucking iron.” Make sure a heavy piece of steel/anvil always contacts the back of the rivet.
Set the rivet. Support the rivet head and snug assembly. A slender piece of wood with a hole just larger and deeper than the exposed nail works well for setting.
Clip the exposed end. Use the side cutters to clip the rivet leaving ¾ of a nail diameter in length.
Peen the head. Many light taps (30-100) with a 13oz genno hammer form the exposed end into a dome, ideally hitting the rivet at different angles working around the circumference. Hitting too hard will crack the wood. Once the top is domed, flip the piece, and peen the bottom if needed.
The Handle
Begin by preparing the handle stock. Accuracy is important to ensure the quick-release mechanism works smoothly without binding—using a pair of calipers to get thicknesses with +/-0.005“ saves you time fitting parts later. Start with a piece of hickory that is long enough to safely run through your machines. Re-saw and plane it to 0.315“ thick setting the offcut aside for later. Next, cut a centered groove on the stock just wide enough for your 1/4“ brass bar to slide through smoothly. I then use a small router plane to clean up the bottom of the groove. Plane the offcut and glue it back on. Once the glue dries, I re-saw and plane the offcut side so the total thickness is 0.370.“

21 True up the bottom of the groove with a router plane.

22 Glue the offcut onto the grooved workpiece.
Apply the templates, drill the hole in the top core, and cut and smooth the blanks. Glue the blanks together, ensuring the edges are flush, and drill the remaining holes after the glue has dried. Sand the two blanks until they nest together nicely with the top holes aligning (the handle won’t swing until it is turned). Apply two generous beads of hot glue to the sides and temporarily assemble the top and bottom together; this glue holds the blanks together during turning.

23 Attach the templates with spray adhesive.

24 Glue up the handle blank parts.
Saw off the corners and mount the blank in a 4-jaw chuck. Next, insert the 1/4“ bar stock into its channel, wedge it in place, and mount the free end in your live center. Many wraps of electrical tape support the weak hot glue joint and can be removed and reapplied to other areas. Carefully turn the tenon 0.005“ smaller than the hole you drilled on your bow bracket. Follow the drawing to make sure the handle profile is not too thin. Once turned, give the tenon a light coat of epoxy to add durability, and apply finish (I find jojoba oil protects the wood while leaving a nice grip) to the handle assembly.

25 The handle blank is held in the lathe chuck.

26 Carefully measure the tenon on the handle.

27 The finished handle should pivot freely.
More Metalworking
Mark the brass quick-release components, drill holes, and lightly countersink the holes on the drawbar. Rough out the profiles, file to your lines and sand the finished parts. A kerf from a hacksaw makes the perfect slot for a coping saw blade. The slot can be fine-tuned using a jeweler’s file or sandpaper wrapped over the backside of a hacksaw blade until the blade freely slides in.

28 Mark out the linkage parts.

29 A before and after shot of the finished linkage components.
Insert the ear into the slot on the drawbar and transfer the first rivet hole to the ear using a 3/32“ bit. Then insert a 13 ga finish nail into the hole and rivet. Repeat for the second rivet, then file rivets flush on both sides. Next insert a 3/32“ dowel pin to connect the link to the ear and cut off the excess using a rotary tool. Some fine-tuning may be necessary so that the link rests against the drawbar as shown in photo 32. Round over the bottom corners as shown. Apply a little soft wax to the assembly, insert it into the handle, carefully insert dowel pins and use a rotary tool to cut off the excess. The assembled handle should move freely and when closed should not open when you pull on the drawbar.

30 Smooth out the blade notch with sandpaper wrapped around a hacksaw blade.

31 Rivet the ear to the end of the drawbar, peening over the ends.

32 Here, you can see the finished linkage and how the parts fold
together once it’s assembled.

33 The linkage and drawbar is inserted into the handle and riveted
in place.
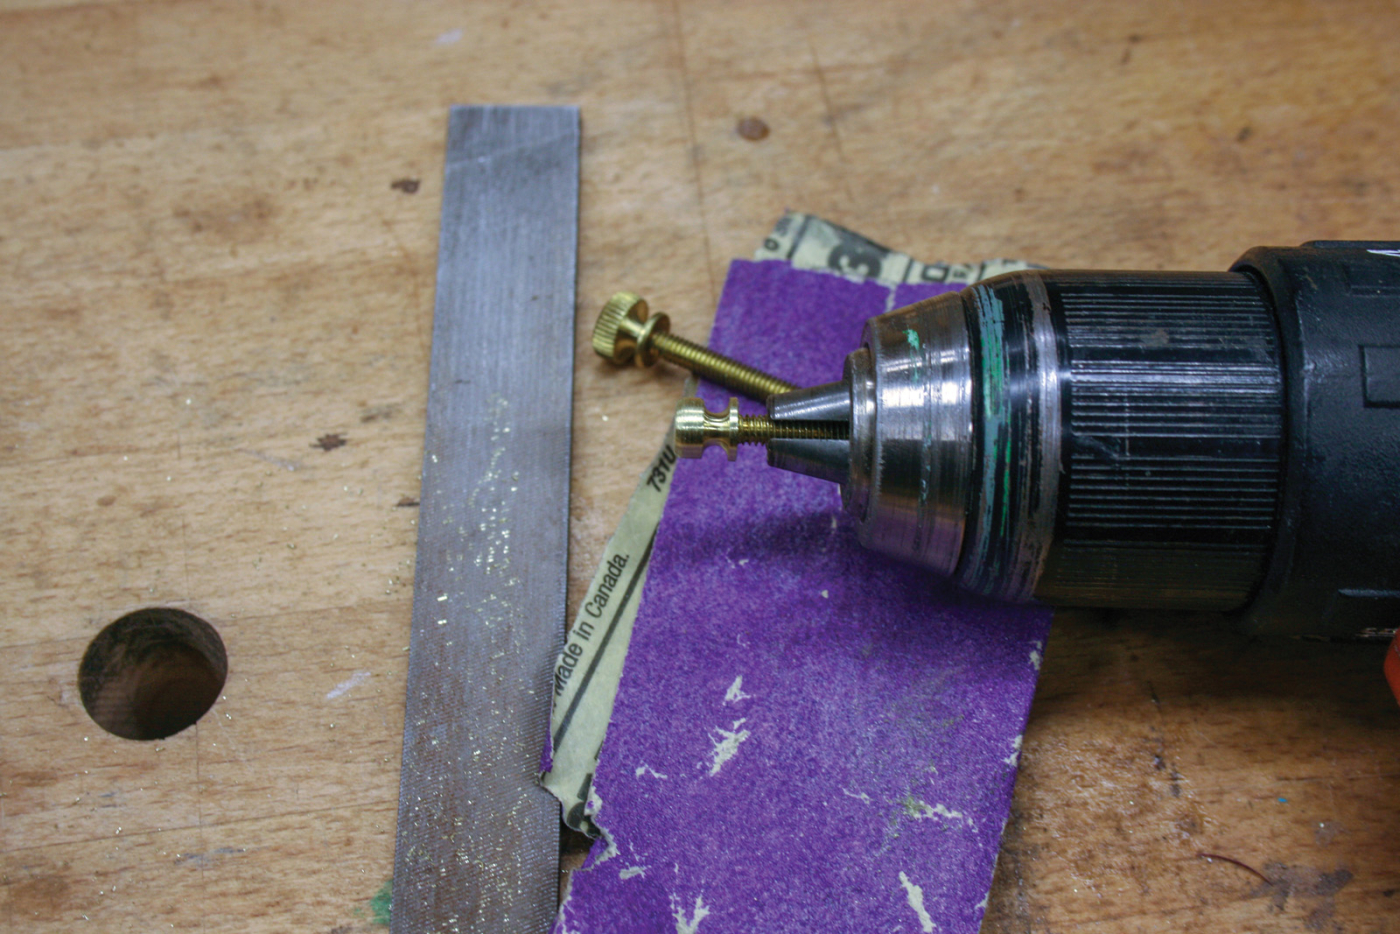
Mount a #8-32 brass thumb screw in a drill and use a file and sandpaper to slightly turn down the diameter. Now unplug the drill and use it as a vice while sawing the angled and vertical slot for the blade. File and sand the slots until the blade slides in freely.
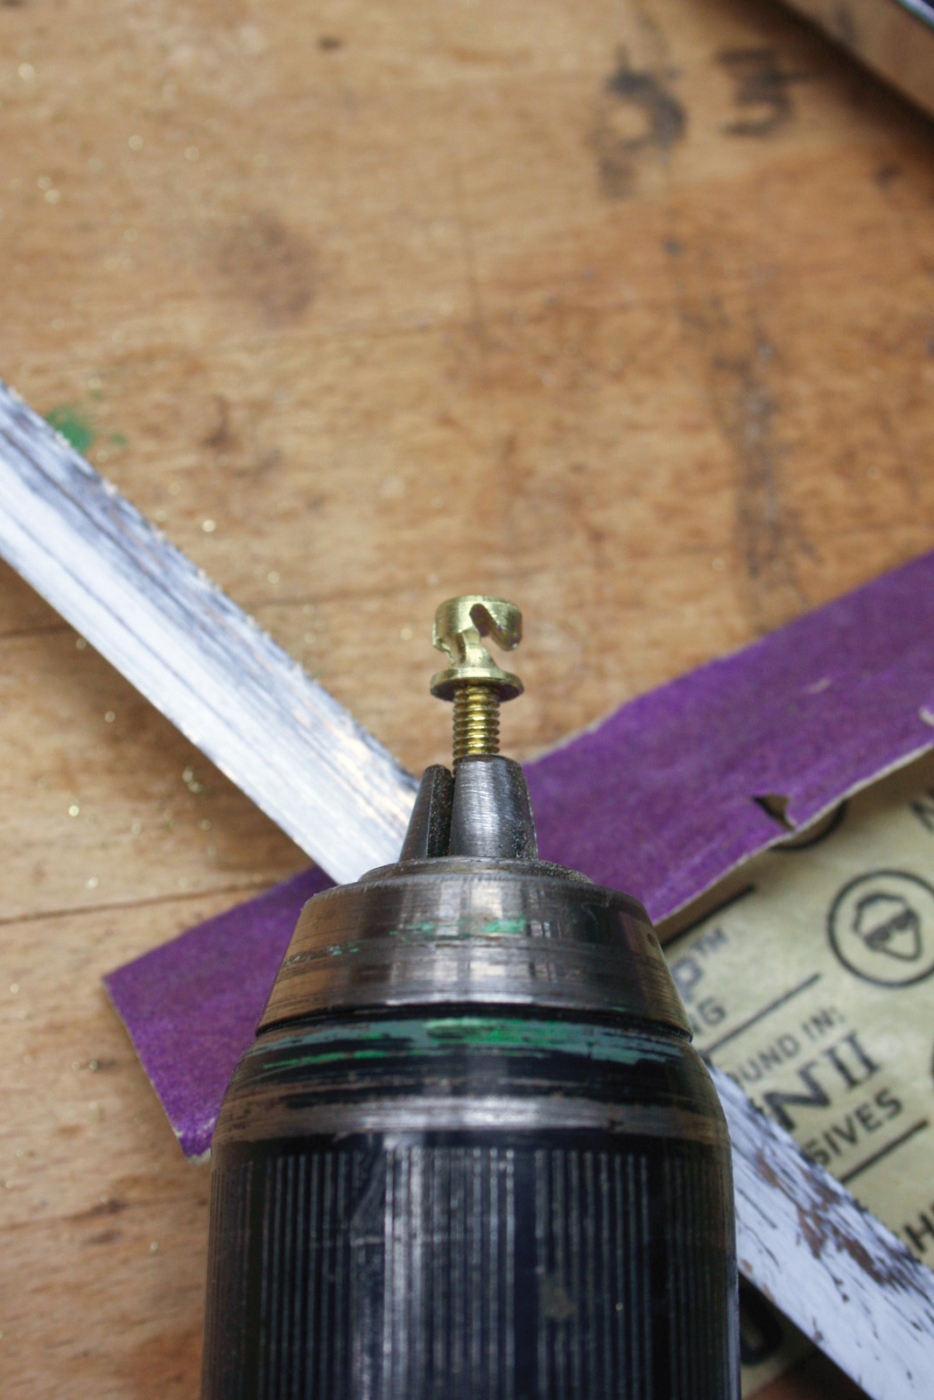

34-36 File down the knurling on the thumbscrew and cut a pair of slots in it — one for the blade body and another for the tabs to hook into.
Insert the top blade holder into the top bracket and add the thrust bearing and knurled nut. Thrust bearing can be traded for a stack of washers if you don’t want it to rotate freely. Next, apply soft wax to the handle tenon and insert it into the bottom bracket. Tap in a 3/32“ dowel pin to keep the handle from falling out, and cut off the excess with a rotary cutter.

37 Assemble the thrust bearing.

38 Add a keeper pin to the handle.

39 Open the handle to extend the drawbar and insert a blade. Then, close the handle to tension the blade.
Time to Try it Out!
Here are some tips on how to use your new coping saw.
1. Pivot the handle forward to
unlock the blade tension mechanism while changing the blade or adjusting the tension.
2. Place your thumb on the bow while cutting to control the scroll angle.
3. Use a sharp blade and avoid heavy cutting pressure to pre-
vent unintended blade twisting.
4. Remember to relieve tension when not in use so the bow maintains its shape.
At the end of this project, you not only have a saw that performs beautifully, but you also have a handcrafted saw that you can pass down for generations to come.
Bonus: Mastering Epoxy
Strong joints are crucial for a lasting saw and only takes a few simple steps:
1. Protect. Wear disposable gloves. Follow the manufacturer’s safety guidelines.
2. Use high-quality epoxy. I use West Systems 105 with 206 and measure each part carefully.
3. Mix parts together for 1 minute.
4. Coat each side of the joint. Use as-mixed epoxy so it can seep into the grain.
5. Thicken remaining epoxy. Mix in West Systems 406 filler until it is the consistency of ketchup.
6. Apply thickened epoxy. Spread a thin layer to the joints and apply gentle clamping pressure.
7. clean up. Remove as much squeeze-out as possible before it cures using paper towels and cotton swabs dipped in acetone.
8. cure. Follow the manufacturer’s instructions.
9. clean off the waxy residue. Wipe down using white vinegar.
Here are some supplies and tools we find essential in our everyday work around the shop. We may receive a commission from sales referred by our links; however, we have carefully selected these products for their usefulness and quality.


