We may receive a commission when you use our affiliate links. However, this does not impact our recommendations.
 How do you make strong joints in wood like this?
When I need wood for a project, my first stop is a small mill near my shop that specializes in local hardwoods. On one particular visit I noticed a pile of offcuts sitting out in the rain. As I pawed through the pile. A slab of white oak caught my eye. The sawn surface was wet and the grain just popped. The bark was almost completely gone on the flip side, leaving a smooth, natural surface that was miraculously free of damage from chainsaws and harvesting equipment. Turns out the slabs were free for the taking so I took several slabs back to my shop to dry.
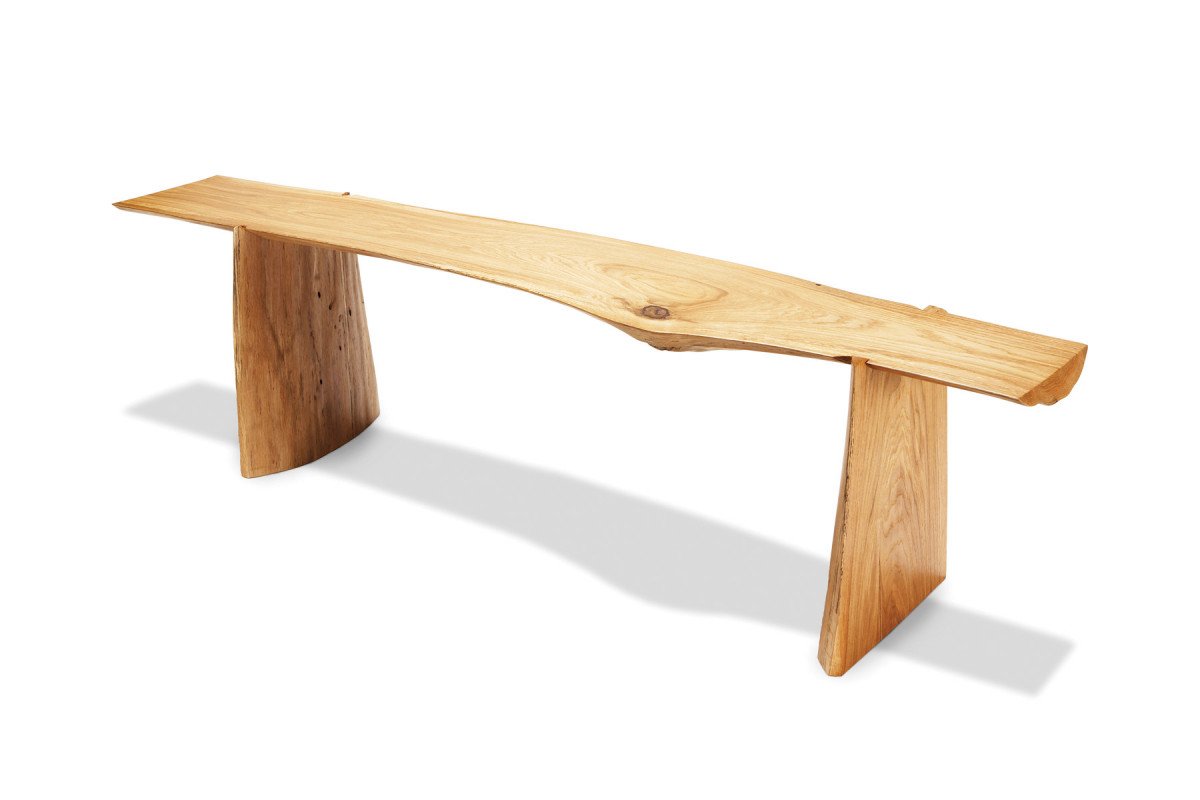
 For months I kept wondering what to make with the slabs. Other than a few wormholes, the grain and natural edge were quite interesting. The undulating line where the flat sawn surface met the natural edge of the log intrigued me. From some angles, the plank’s thickness was almost invisible. Eventually, I decided a bench would be the best way to retain the natural look of the slab and highlight its best features. The slab’s 14-in. width was wide enough to provide sufficient stability, and at over 1-1/2-in. thick, it was plenty strong. That strength and a unique joint I came up with allowed me to eliminate the typical stretcher between the legs and help keep the design as clean and natural looking as possible.
I still had to figure out how to orient the legs to the slab. I choose to turn the natural sides of the legs inward. That kept all of the natural surfaces facing one another.
Leg position was another big decision. I once had a bad experience with a cantilevered bench like this. There were three of us on a bench, two got up and guess who ended up on the floor? The lesson was that there are limits to how far you can safely cantilever a bench seat. I wanted to avoid the “teeter-totter” effect I fell victim to. I’m sure that there is a formula somewhere for finding the point of stability, but I’m no engineer, so I found this point through trial and error. By adjusting the legs and a series of test sittings, I found a point where the legs were offset enough to look visually pleasing without making the bench tippy or unstable.
Prep The Slab
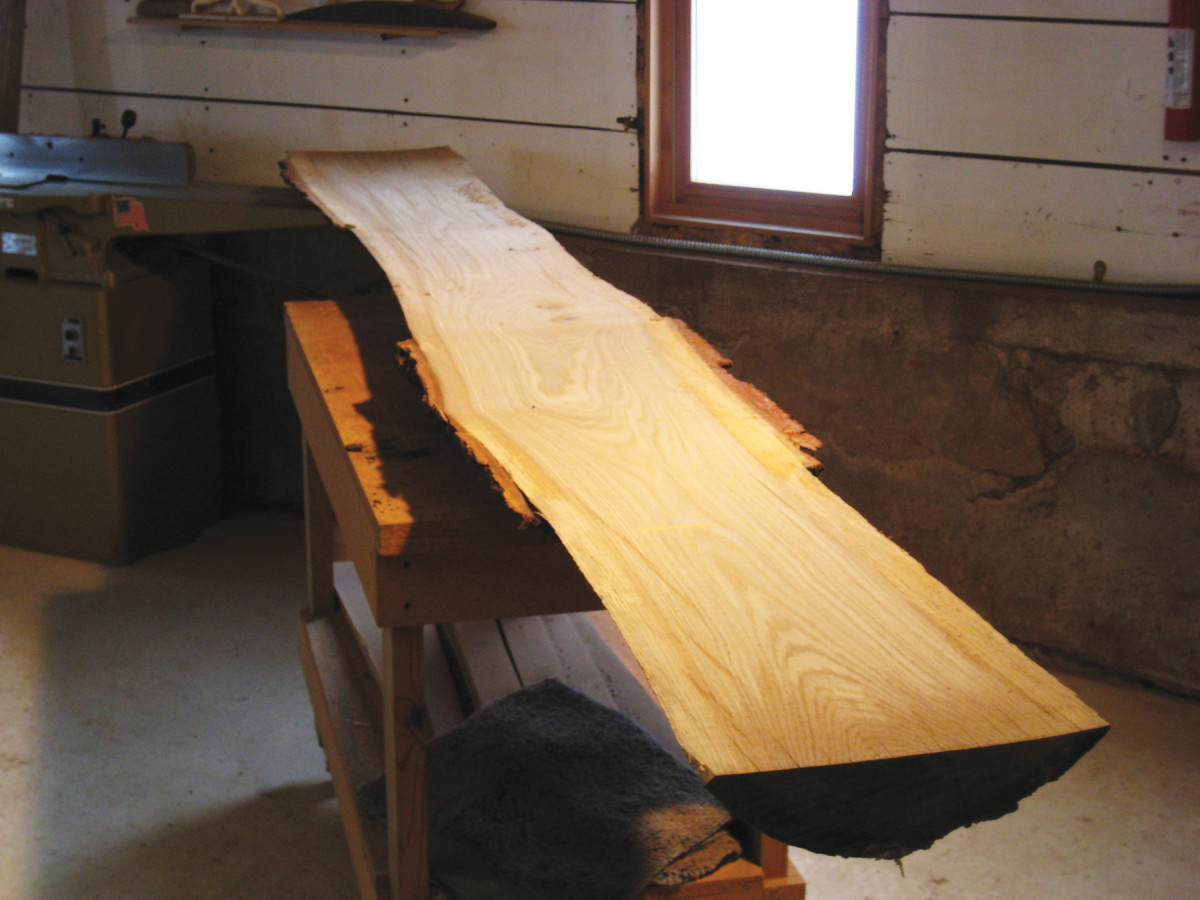
1. The first step is to create a smooth, flat surface on the rough-sawn face of the log. I used a hand plane and power sanders.
The first step is to flatten and smooth the sawn face of the slab (Photo 1). You can use a hand plane to remove milling marks and any twist or warp. If there’s a lot of material to remove, a hand-held power plane is easier. Sand to 180-grit, using a random orbit sander. This provides a flat reference surface and sets the plank’s final thickness.
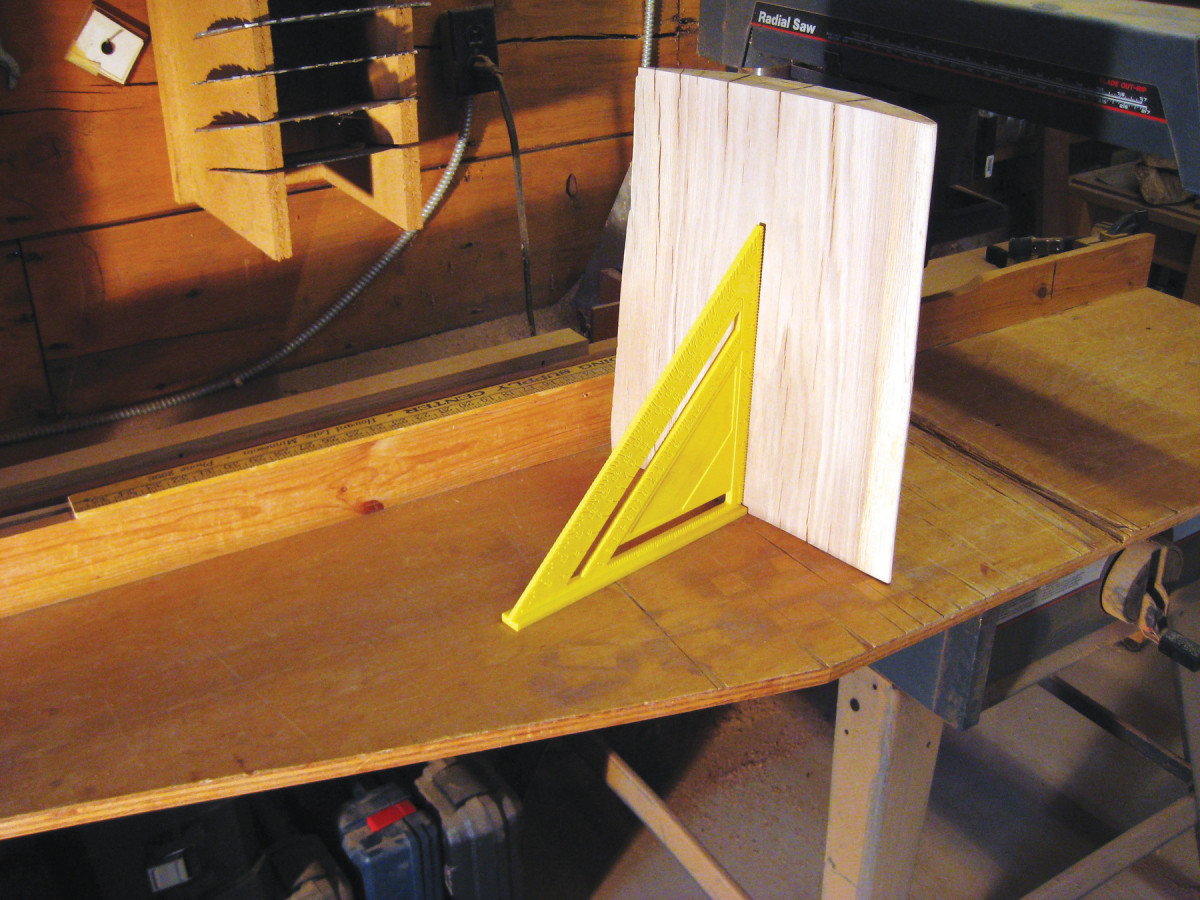
2. Saw the legs from the plank. Then fine-tune the cuts until each leg stands on it’s own at 90-degrees.
The next step is to cut the legs off the slab. I turn the plank flat side down on my radial arm saw to make the cuts. Due to the curvature of the log’s edge you’ll have to approximate a square cut. This first cut doesn’t need to be perfect. Once the legs are removed, fine-tune the cut until each leg stands square (Photo 2). Next, make a 20-degree angle cut on either end of the seat blank (Fig. A). If you don’t own a radial arm saw, you can make all these with a circular or jigsaw and a straightedge.
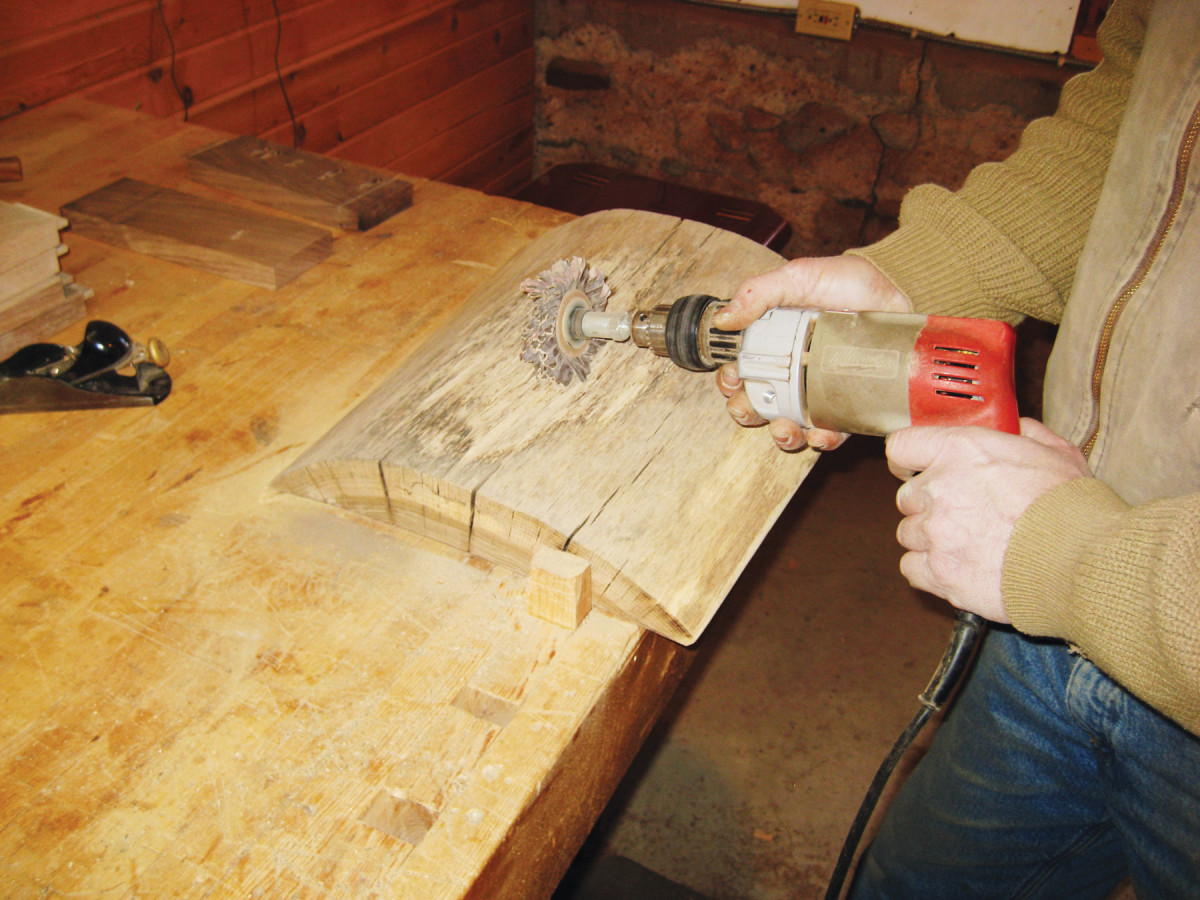
3. A flap sander quickly removes oxidation and loose debris from the slab’s bark side. Don’t try for a perfect surface. Just sand smooth to about 180-grit.
Lightly sand the bark side of the slabs by hand with 100- grit sandpaper. Sand just enough to remove the oxidation on the surface and smooth any rough edges. Sand up to about 150-grit. Then switch to a flap sander chucked in an electric drill (Photo 3). Finish by sanding the flat portions of the bench to about 220-grit.
Cut The Joints
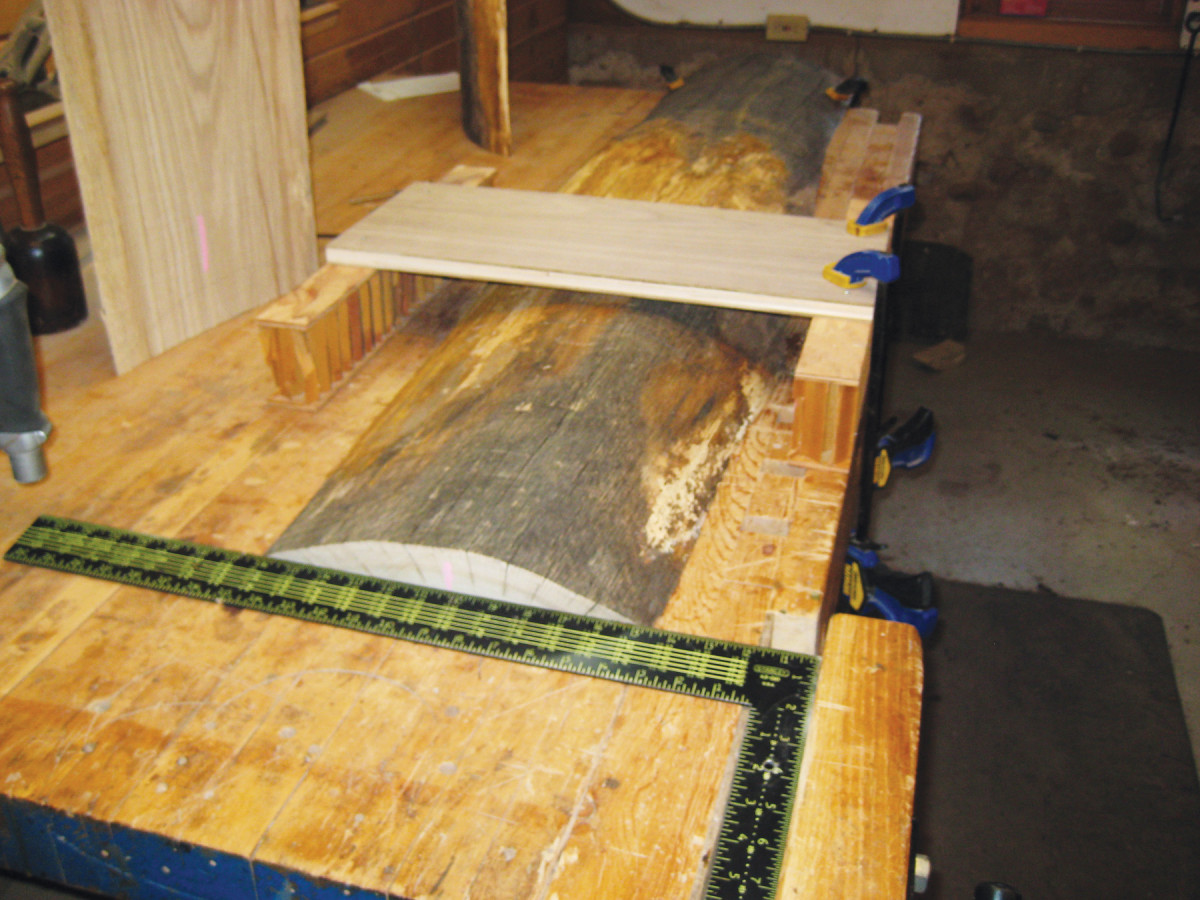
4. Build a bridge over the seat to rout the mortises. The bridge acts as a straight edge to guide the cut and a platform to support the router.
Cutting a stepped mortise with a natural edge sounds daunting. I found a pretty easy way to get the job done using a simple router jig and some chisels. First, build a simple jig to bridge the width of the seat plank and provide a level platform for your router to ride on (Photo 4).
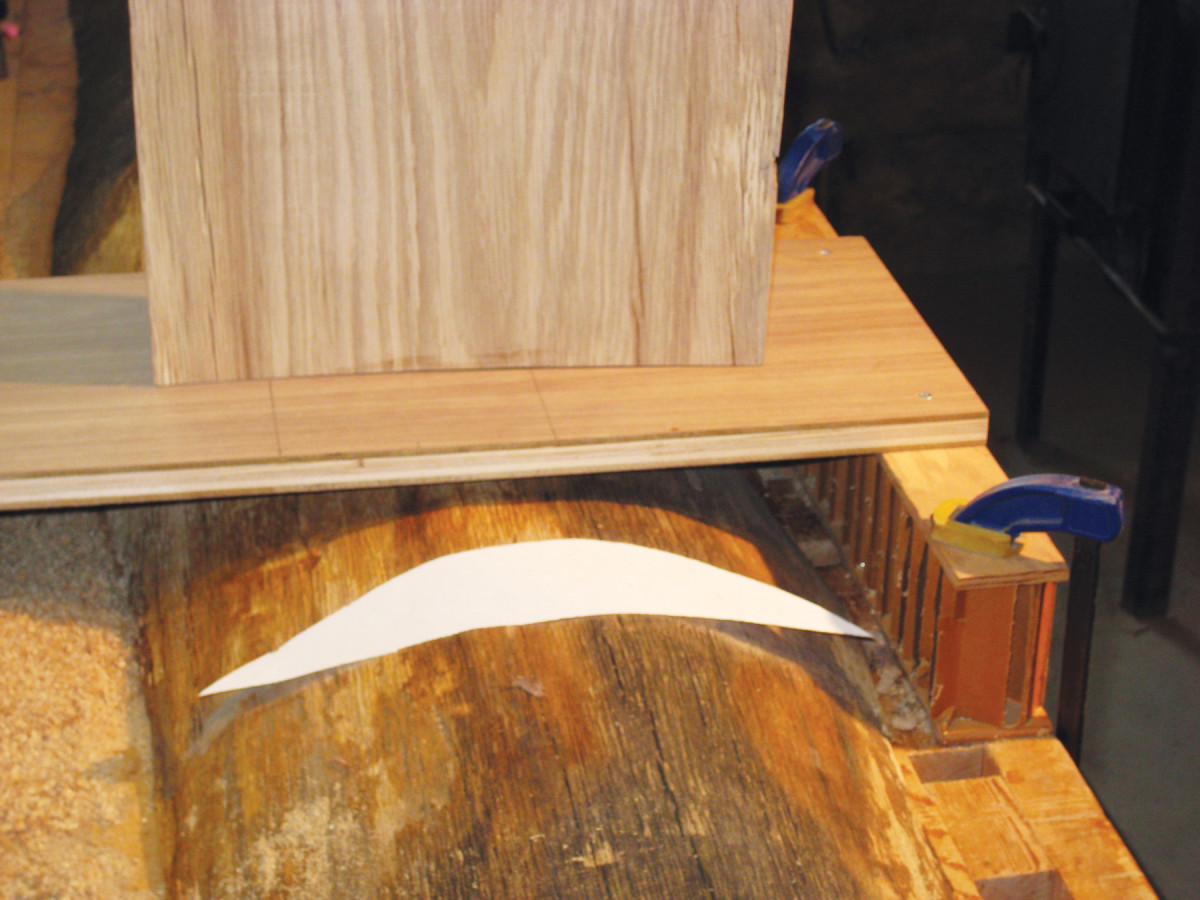
5. Use a template to lay out the mortise for each leg on the seat plank. Make the template by tracing the top of the leg onto a piece of paper.
Then lay out the location of the legs on the plank with a paper pattern of the leg’s top (Photo 5).
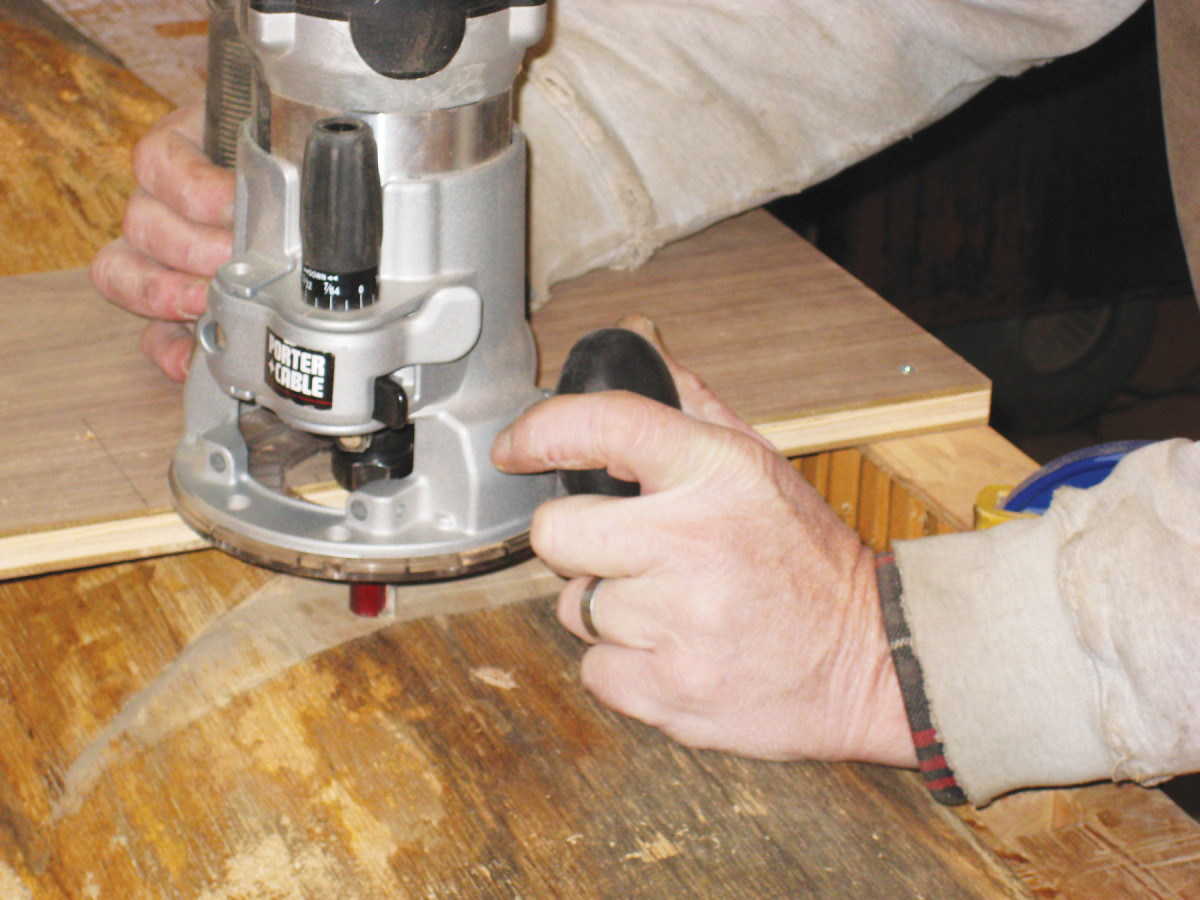
6. Rout the center portion of the mortise with a top bearing flush-trim bit. The stepped ends of the mortise will be finished later. Use the edge of the bridge to guide the bit along the mortise’s straight edge. Move the bridge slightly to rout the rest of the mortise.
Set the jig to remove most of the wood in the first step of the mortise (Photo 6). Stop routing short of the natural edge of the mortise and use a chisel to pare to the pencil line.
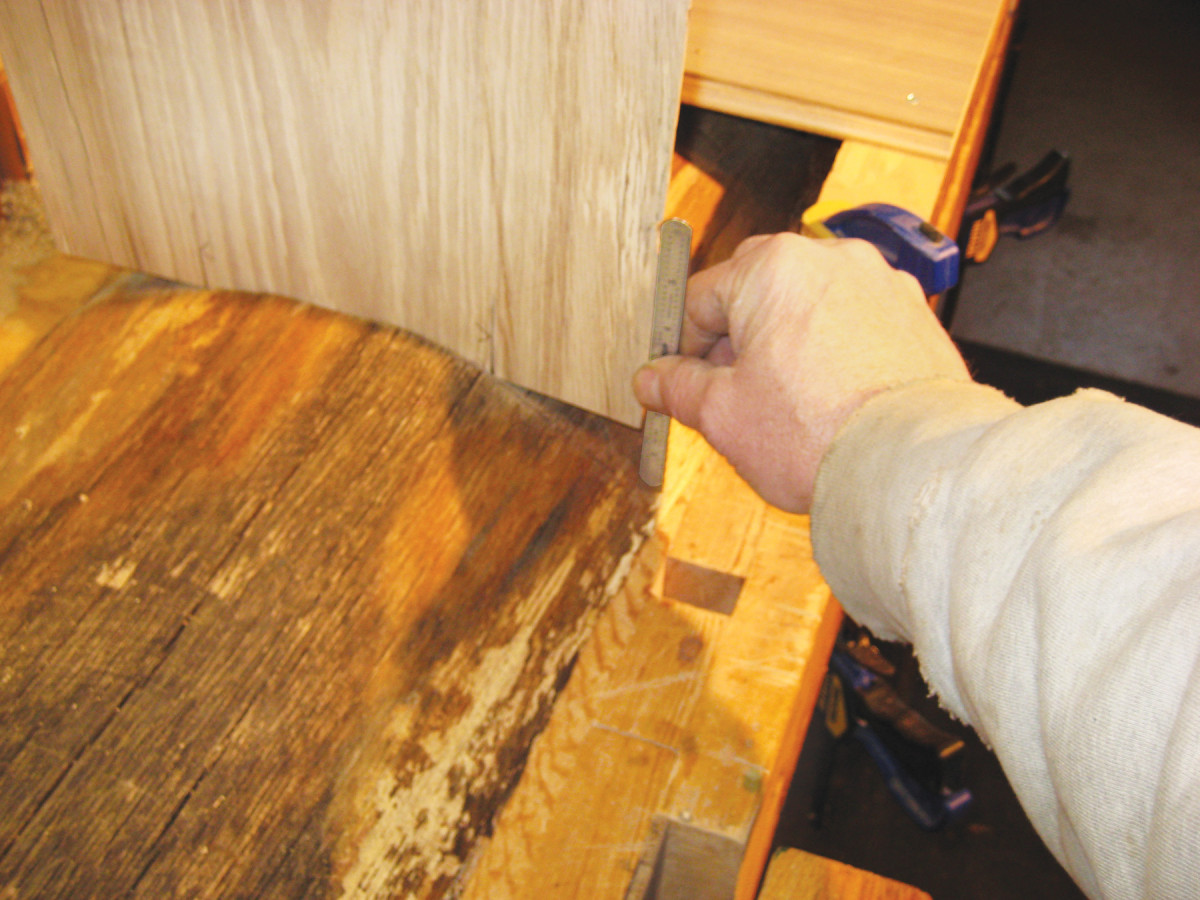
7. The next step in fitting the joint is to cut a corresponding notch in the leg. With the leg set in the mortise, mark the notch’s length. Then determine the notch’s depth by measuring the gap between the leg and the curved surface.
Next, tap the leg into the mortise until it bottoms out. Then calculate how deep the notch must be to bring the outside edges of the leg flush with the top of the seat (Photo 7).
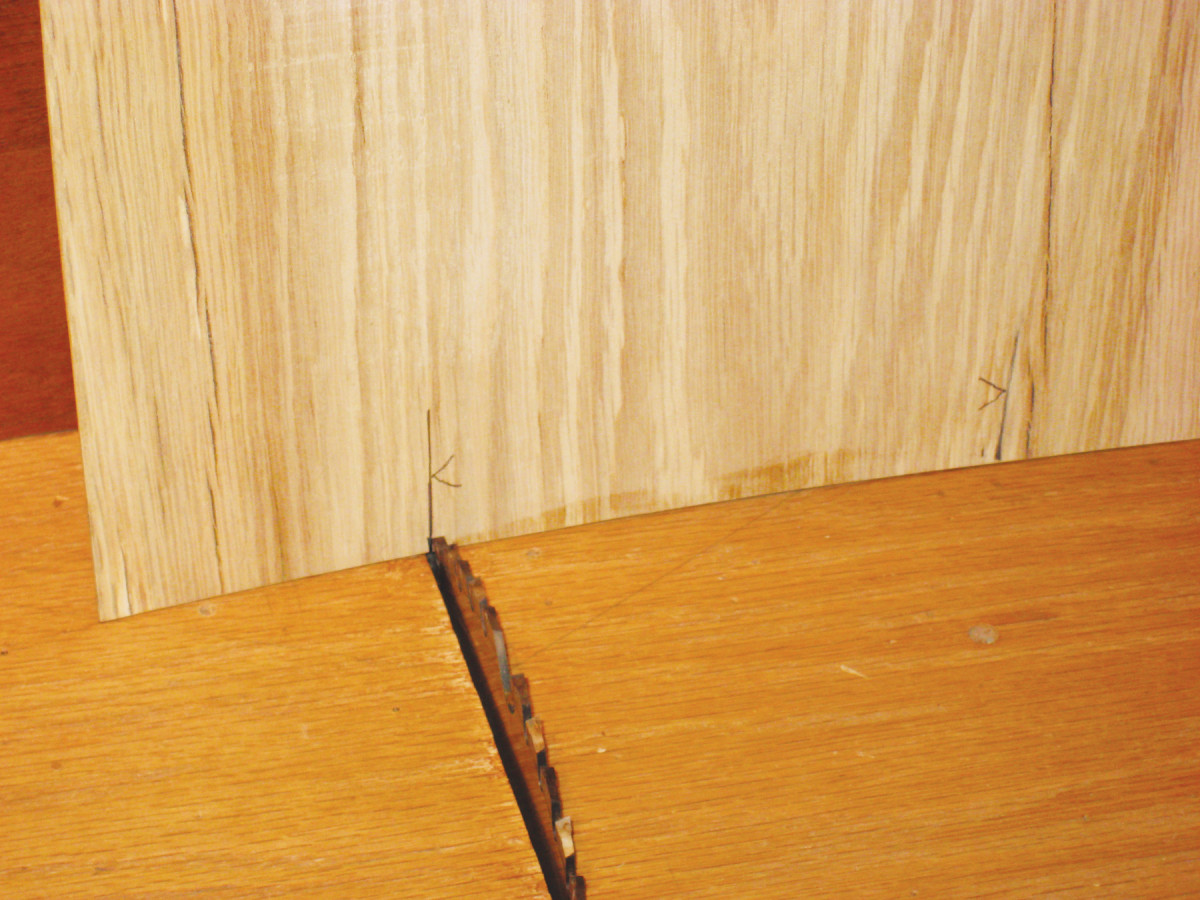
8. Cut the stepped notch at the top of each leg using a tablesaw sled. Secure the leg to the fence with clamps and wedges. Use your marks to position the leg and set blade height.
A crosscut sled on a table saw works well to cut the notch (Photo 8). By tapping the leg into the seat plank once again, you can see where to begin the second and third steps of the mortise. Use a chisel to chop the steps in the seat plank. Return to the tablesaw and sled to finish the steps in the leg.
ATTACH THE LEGS
Lay out and drill holes in the mortises for the 3/4-in. dowels. Insert dowel centers in the holes and tap the leg in place (below). The centers transfer the hole locations to the top of the leg. Drill dowel holes in the legs and the joint is ready to assemble (Photo 9).

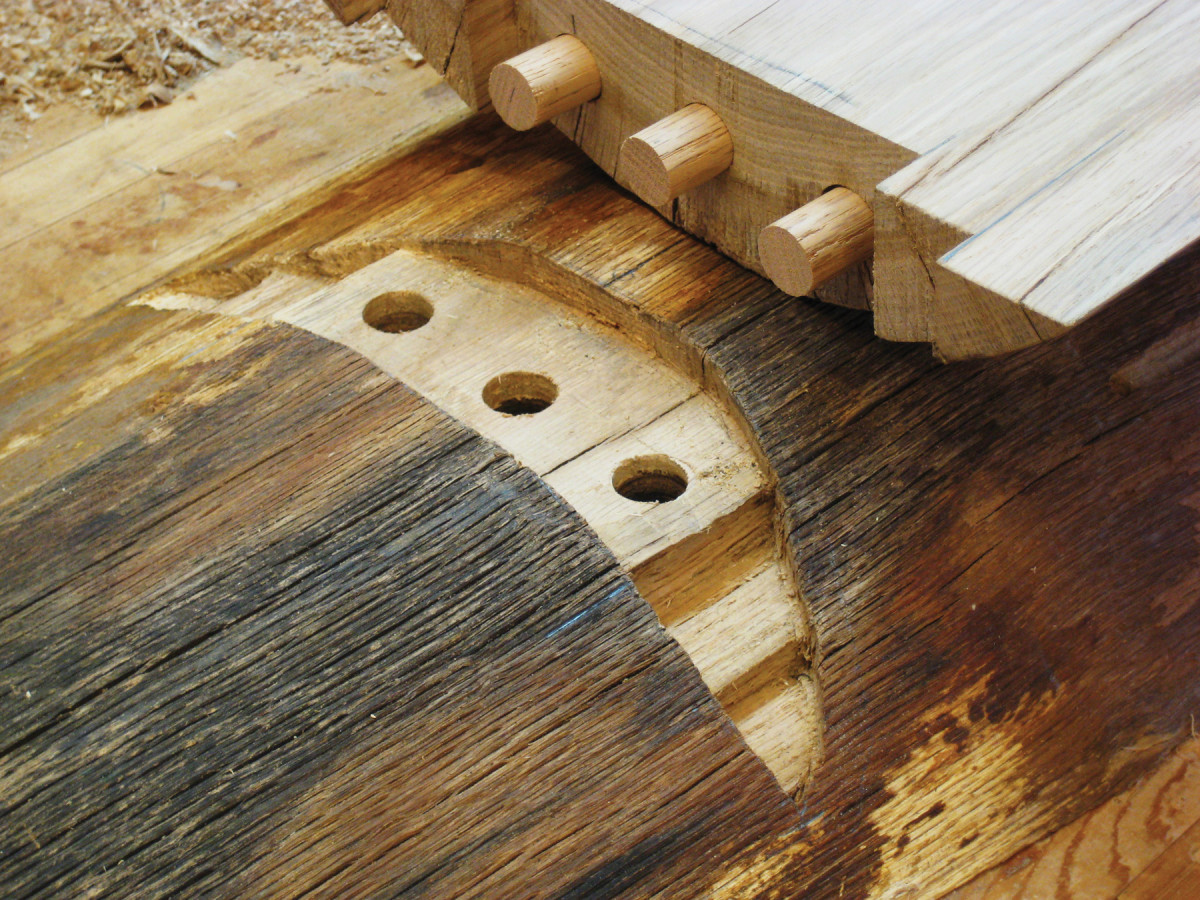
9. Glue the dowels into the legs. Now you’re ready for the final glue-up.
Use epoxy to glue the bench together. Epoxy is gap filling and slow setting, perfect for a glue up like this. First, glue the dowels into the legs then the legs in the seat. Tap the legs in place with a mallet until they bottom out. Carefully rotate the bench upright and use two cauls and four clamps to apply clamp pressure (Photo 10). Allow the epoxy to dry overnight.
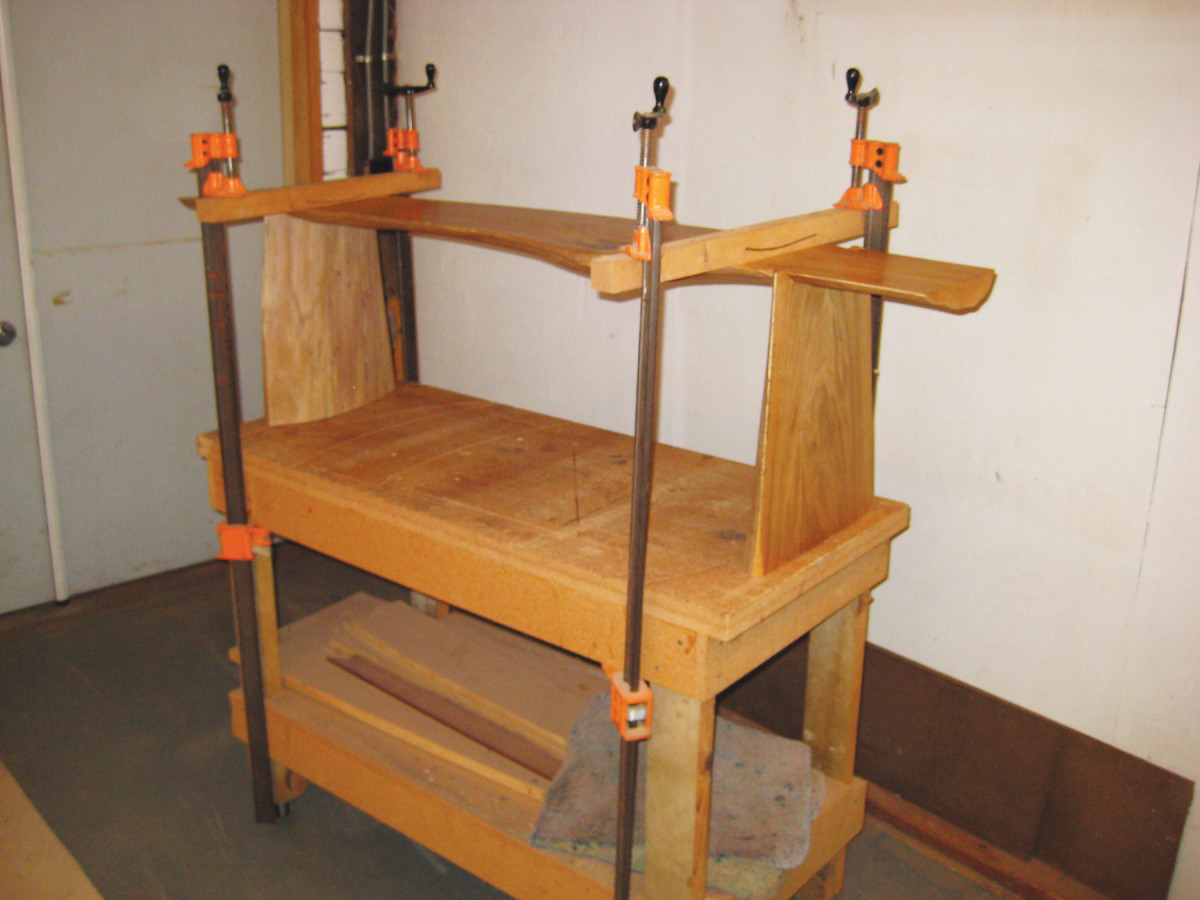
10. Glue the bench together on a flat surface, so it sits properly. Use cauls to transfer light clamping pressure.
Apply your favorite finish. I used four coats of Sam Maloof’s Poly-Oil Finish on the flat surfaces to give these surfaces a satin finish. I used one coat of paste wax on the natural surfaces to give them a flat finish.
Here are some supplies and tools we find essential in our everyday work around the shop. We may receive a commission from sales referred by our links; however, we have carefully selected these products for their usefulness and quality.


 How do you make strong joints in wood like this?


