We may receive a commission when you use our affiliate links. However, this does not impact our recommendations.
Lock Miters
This simple set-up process guarantees perfect joints!
By George Vondriska
Lock miters are strong, attractive joints that make assembly easy. So why the heck don’t we use lock miters more? I think it’s because they can be a pain to set up.Well,no more excuses.Here’s a clever technique, sent to us by Jim Rodgers of Martinez,California. Give it a try and you may become a lock miter enthusiast.
What’s a lock miter?
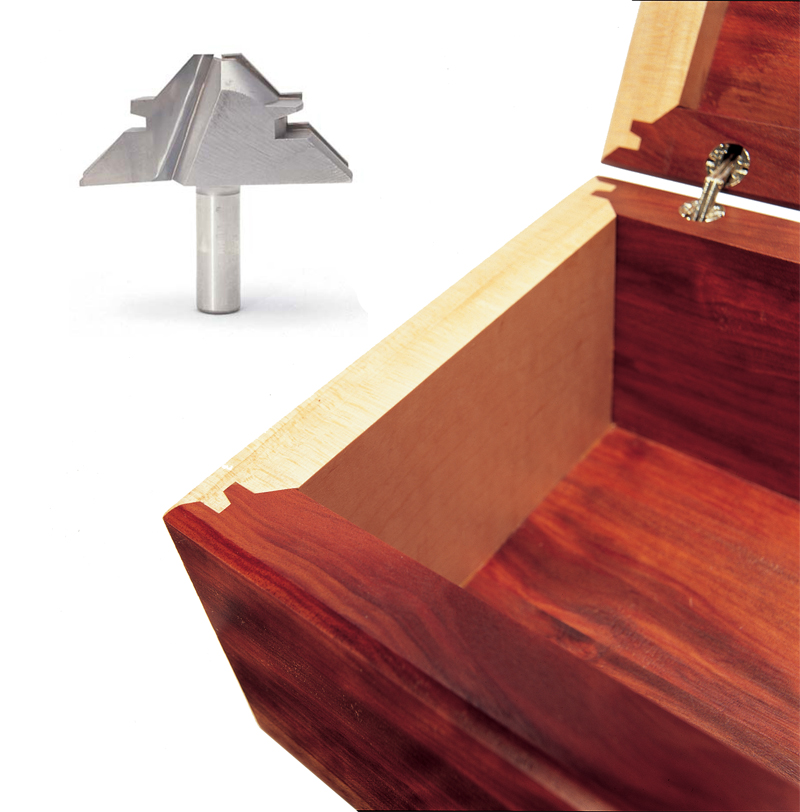
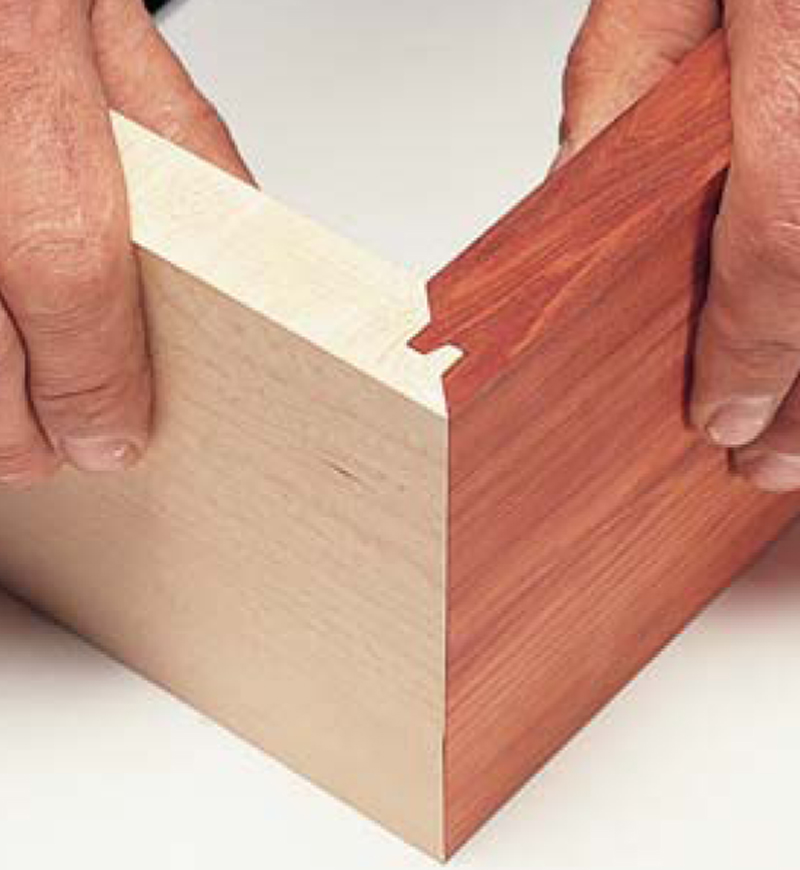
A lock miter router bit cuts a 45-degree miter with a tongue and groove. When correctly cut, the parts go together at a perfect 90-degree angle and the interlocking tongues and grooves make for lots of mechanical strength and glue surface area. Lock miters are also great at keeping parts aligned during assembly.Use this joint on drawers, boxes or even hollow columns like newel posts.You can cut a lock miter on end grain, as shown in our photos, or on the long grain.Almost anyplace you’d use a miter, you can successfully use a lock miter.
Tooling up
Lock miter bits come in a range of sizes.The size you use depends on the thicknesses of your wood.Even the smallest lock miter bit makes a substantial cut, so I prefer bits with a 1/2-in. shank. They’re more stable and result in smoother cuts.Expect to pay $50 to $100 for a bit,depending on the size.
Note: The maximum size lock miter bit you can run in a 1-1/2-hp router is the 2-in.diameter.Larger bits must be run in a 2-hp or higher machine.
It is essential that you run these massive cutters at the right speed—about 10,000 rpm. Your router must have variable speeds so you can slow down for these big cutters.
The perfect set-up
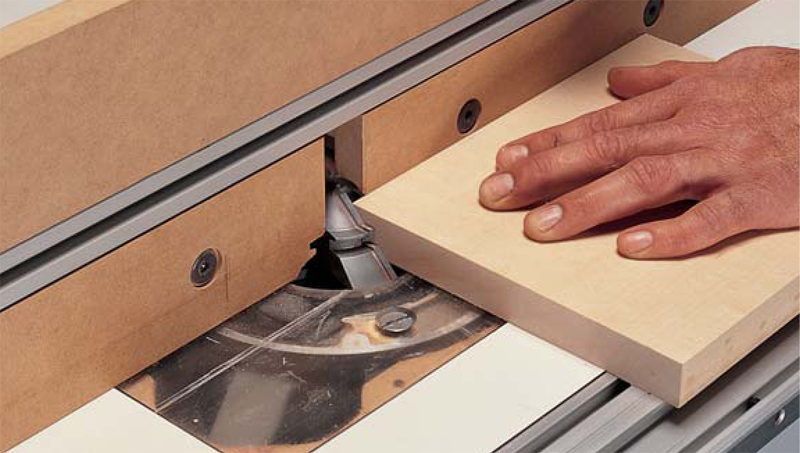
Follow the sequence shown in Photos 1 through 7 to produce perfect lock miters on your router table.Remember to have on hand the material required for your project plus six test pieces. It’s critical that the test pieces be the same thickness as the project pieces because the bit set up is specific to the thickness of your material. As you get more familiar with the set up procedure you’ll need fewer test pieces.
Lock miter tips
If you follow the steps you’ll be able to cut perfect lock miters. Here are some tips to make it even easier:
Use wide pieces. Your project parts must be cut to the right length before cutting the lock miters, but they can be any width. Leave them 1 in. too wide, and cut them to final width after you’ve done the routing. They’ll be easier to handle, and the “blowout” you get on the back of the cut will be cut off when you machine to final width. If your project calls for narrow pieces, 2 in. to 3 in. wide,machine pieces 6 in. to 7 in. wide and rip them to the size you need.
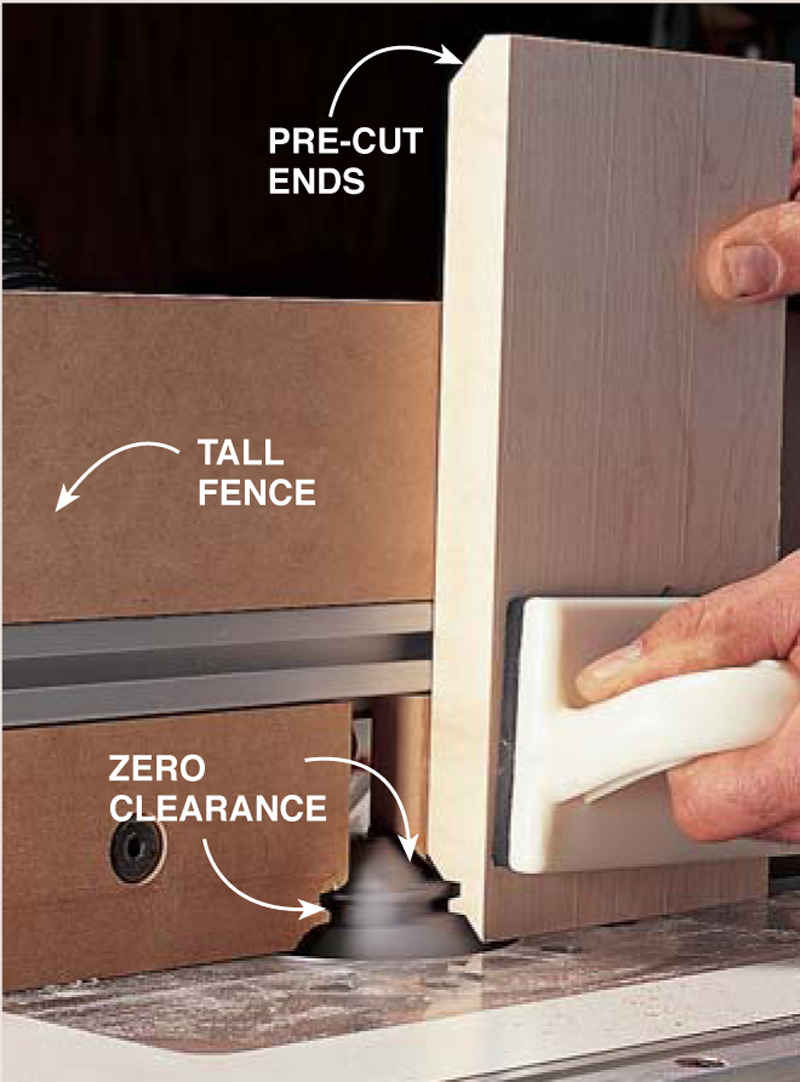
Use a tall fence. Holding a piece vertically against the fence is a lot easier if the fence is high. Use one that’s about 7-in. tall.
Use a “zero clearance” fence. Having the opening surrounding the bit as small as possible helps prevent your workpiece from slipping into the opening.
Precut your parts. A 2- or 3-hp router will hog all the material off in one pass, but it’s going to be a lot easier to machine the lock miter if you precut your parts on the tablesaw with a 45-degree bevel.Trim off only about 3/8 in. on 3/4-in. stock.
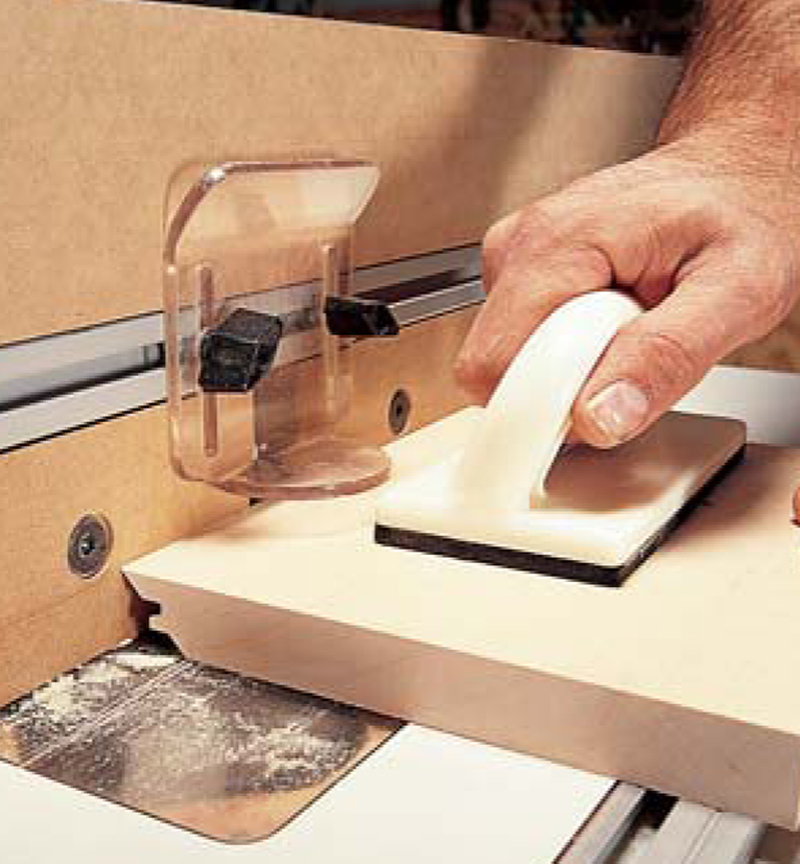
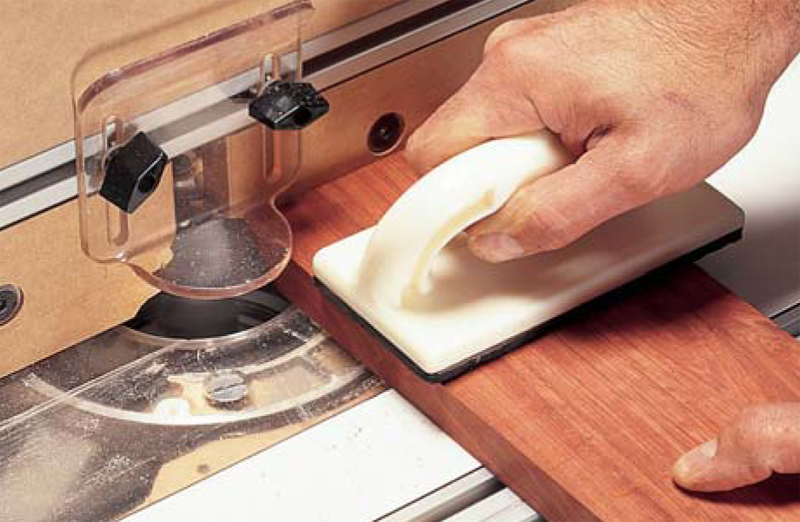
Use push blocks. Neoprene-padded push blocks will make cutting lock miters easier and safer (see Sources, below).
Make a permanent set up piece. When you have all the setup done, machine a piece and keep it for your next project. If you want to set up the whole operation for the same thickness of material again, use the set up piece to set the thickness of your work, the height of the bit and to position the fence.You’ll still need to do some test cuts and some final tweaking, but you’ll be darn close.
Fig. A: Centering the Bit
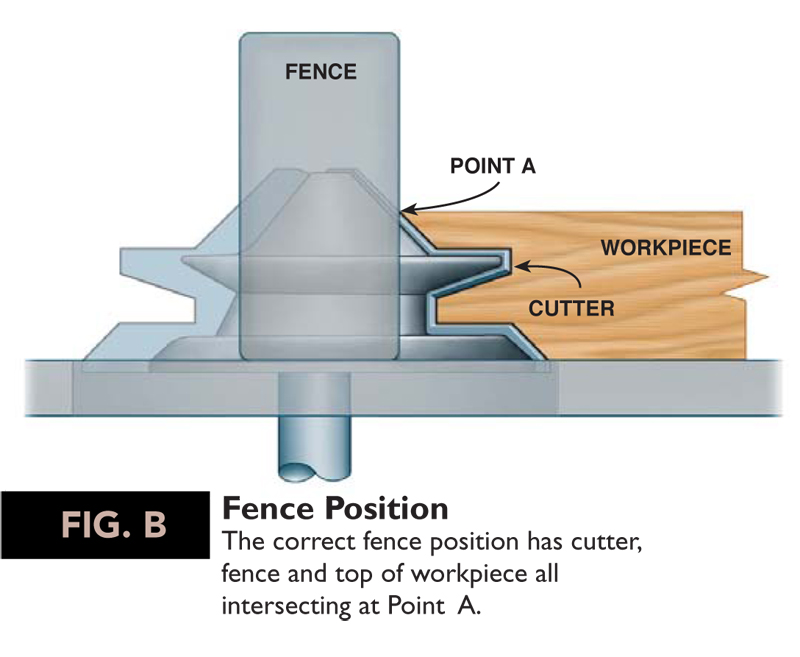
Fig. B: Fence Position
Sources
(Note: Product availability and costs are subject to change since original publication date.)
Router Bits:
CMT, 888-CMT-BITS
Eagle America, 800-872-2511
Jesada, 800-531-5559
MLCS, 800-533-9298
Whiteside, 800-225-3982
Woodline Arizona, 800-472-6950
Push Blocks:
Eagle America, 800-872-2511
This story originally appeared in American Woodworker April 2000, issue #79.
Purchase this back issue.Click any image to view a larger version.
A lock miter router bit.
First, center the bit on the material.
1. Center the bit on your workpiece by eye. Be sure your router is unplugged.
2. Adjust the router table fence by eye to its approximate position.Three points must be aligned.The top of the workpiece, the face of the fence and the 45- degree angle of the cutter (Fig. B).This is just a preliminary set up.You’ll perfect the fence position later.
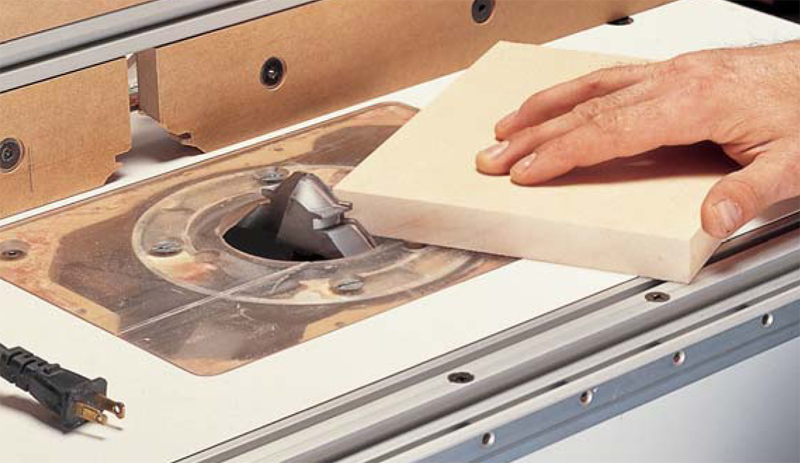
3. Test the height of the router bit by cutting two test pieces. Hold each piece flat on the router table.
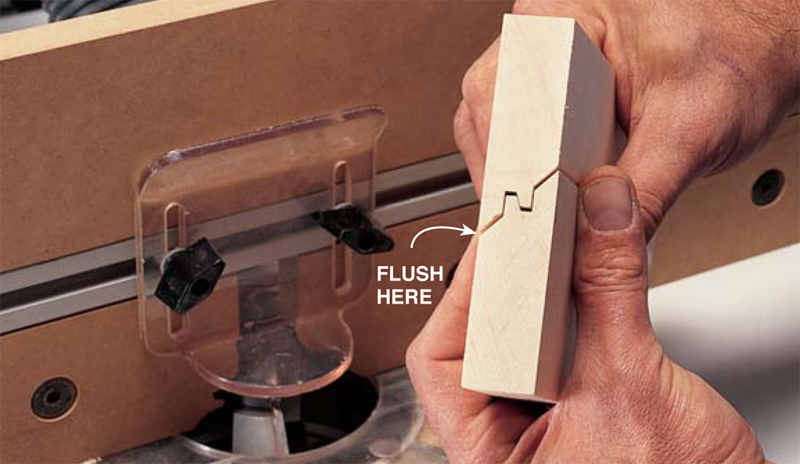
4. Assemble the test pieces. When the cutter is perfectly centered, the faces of the two pieces will be aligned.Adjust the bit as needed.You must have the bit centered on the material before you start working on the fence position.
Now, set the test position.
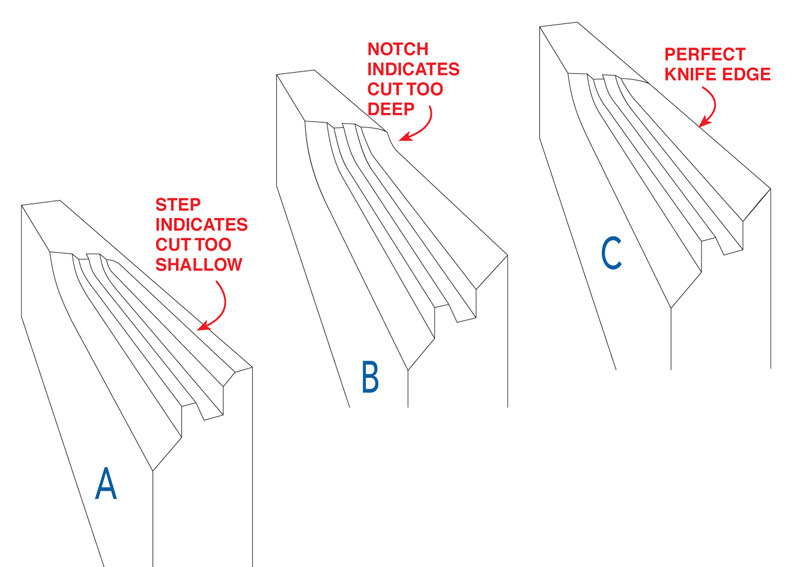
5. Examine the test cuts to determine if the fence is correctly positioned. If the cut looks like A, the cut is too shallow and the fence must be moved back. If the cut looks like B, the cut is too deep and the fence must be moved forward. Adjust the fence until the cut looks like C; producing a perfect knife edge on the cut.
Finally, cut your parts.
6. Machine your parts. One part is held flat on the table.The mating part is held vertically against the fence.
7. Assemble the pieces. Your careful machining will result in perfect-fitting corners.
Here are some supplies and tools we find essential in our everyday work around the shop. We may receive a commission from sales referred by our links; however, we have carefully selected these products for their usefulness and quality.


