In Projects, Shop Blog, Techniques

We may receive a commission when you use our affiliate links. However, this does not impact our recommendations.

Miter-Free Picture Frames

By Tim Johnson

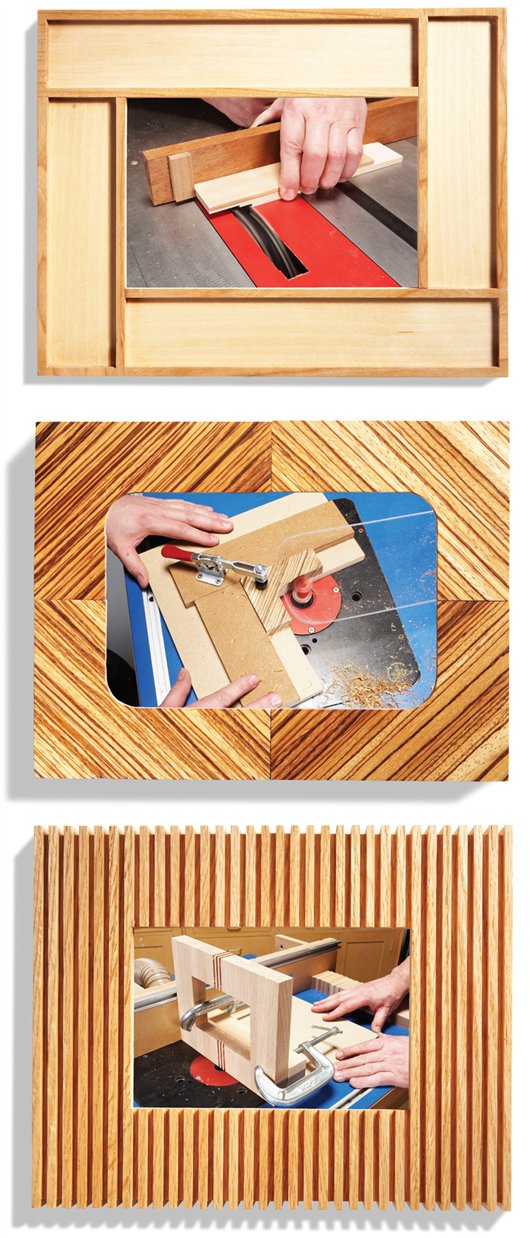
Mitered corner joints define
most picture frames—but not
these! The Framed Frame (top right) goes
together with half-laps, the Magnetic Frame
(middle) employs butt joints and the
Grooved Frame (bottom) is simply edgeglued.
These distinctive frames share another
common trait—they’re routed. All three
frames are made using a router table; the
Framed Frame also requires a small handheld
router. Most of the routing is done with
different types of straight bits (flush trim pattern
bits and a spiral bit). You’ll also need a
slot cutter.

You can make any one of these frames in
less than a day. They’re all made from 3/4-
in.-thick boards—at most, you’ll need a couple
board feet per frame. Simple jigs and fixtures
make each frame a perfect candidate
for making multiples, so they could also be a
great solution for your scrap stock problem.

Framed Frame

Routing
creates
framed
edges more
easily than
gluing on
tiny strips.

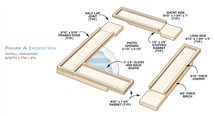
This frame consists of four
pieces that are identical
except for length (Fig. A).
Each piece has two rabbets for
the half-lap corner joints, one
on each face. The pieces
assemble “elephant” style
(nose-to-tail). The framed
edges are created prior to
assembly, by routing away the
center of each piece, using a
custom-made jig (Fig. B).

You can make a simple version
of this frame from a single
piece of solid stock that’s
2-in.-wide by 36-in.-long. Just
plane it to final thickness and
you’re ready to cut the four
pieces. To create the two-tone
version shown here, start with
three pieces of 3/4-in. by 2-in.
by 18-in. stock. Glue the
pieces together with the contrasting
piece in the middle.
Resaw the blank in half (Photo 1).
Then plane the resawn blanks to final
thickness. Each blank contains two
frame pieces, one long side and one
short side. Cut the four pieces to final
size. Then cut the rabbets on each
piece (Photo 2).

Plane the center-routing jig’s solid
wood spacers to 9/16-in.—
the same thickness as the
frame pieces. During assembly,
center one frame piece
between the side spacers.
The frame piece must fit
snugly. Install the support
block. Then add the guide
pieces, making sure they
overhang the frame piece
equally, by 3/16-in., the
width of the framed edges.
Slide each frame piece into
the jig. After routing and
squaring the corners (Photo
3), use the finger notch to
grip the piece and remove it
from the jig.

Dry-assemble the frame
and mark the inside edges of
each piece. Then use a
straight bit to rout rabbets
for the glass (Photo 4 and
Fig. C). Fit one corner joint
at a time when you glue the frame
together (Photo 5). Clamping the
frame between cauls assures a flat
result (a good thing!).

Fig. A: Exploded View

Fig. B: Center-Routing Jig

Fig. C: Rabbet-Routing Sled

Pro-Quality Stand

The EaselMate frame stand screws on in
a minute and can be adjusted to any
angle. Available from Albin Products Inc., albinproducts.com, 800-225-6821.

Click any image to view a larger version.

1. Create two-tone blanks for the
frame pieces by resawing a lamination
of 3/4-in.-thick boards. Plane the
cherry faces to 3/16-in. thickness. Then
plane the maple faces until the stock
reaches final thickness.

2. Saw rabbets for the half-lap joints
on both ends of each piece. One
rabbet goes on the top face; the other
goes on the bottom face.

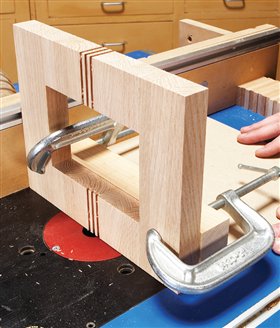
3. Create the framed edges by
routing each piece, using
the jig and a mortising bit (at
right). Rout just deep enough
to remove the top layer of
wood. After routing, square
the corners with a chisel.

4. Rout stopped rabbets for the glass.
Create clearance for the glass’s
square corners by making the rabbets
extra long. A sled makes the short, narrow
frame pieces easier to handle.

5. Clamp the joints with spring clamps
for a couple minutes, until the glue
tacks. Then switch to adjustable clamps
and re-clamp the frame between MDF
cauls, to evenly distribute clamping
pressure across the joints.

Magnetic Frame

Snaps
together
and pulls
apart,
so changing
photos is
easy.

This frame consists of four
identical corner sections
that assemble around the glass,
photo and back board (Fig. D).
Rare earth magnets hold the sections
together. To make this
frame, you’ll need a routing jig
(Fig. E), a pattern and two pieces
of 3/4-in. (or thicker) stock cut to
4-1/16-in. by 4-9/16-in. rectangles.

Build the routing jig first. It’s
used to rout the inside edge of
each piece as well as the grooves
that house the photo assembly.
Use the jig to make the pattern.
Saw a 3-1/16-in. by 4-1/16-in.
piece of 1/2-in. MDF into an Lshape.
Install it in the jig and
rout the inside edges with a 1-
in.-dia. pattern bit (a flush-trim
bit with the bearing mounted
above the cutting flutes).

Use the pattern to lay out the
frame pieces on the two blanks
(Photo 1). Cut the short legs to
length (Photo 2). Then cut the blanks
apart on the bandsaw, install them in
the jig and rout the inside edges
(Photos 3 and 4). Install a 3/16-in.-
wide slot cutter and rout a
1/2-in. deep slot for the photo
assembly (glass, photo and
back board) in each piece
(Photo 5). The photo assembly
provides the frame’s structure,
so it must fit the slot
snugly, but without binding.
Size the slot’s width to fit the
thickness of your photo assembly
(for single-strength glass
and a 1/8-in. back board, the
slot will be slightly less than
1/4-in.-wide).

Fill the slots to fit the photo
assembly (Photo 6). Before
you glue in the strips, assemble
the frame around the
assembly to test the fit. After
gluing, flush each strip with
the end. Then drill centered
holes for the rare-earth magnets
(Photo 7) and install
them flush with the ends—make sure
to orient the magnets’ poles correctly!
Secure the magnets with epoxy.

Fig. D: Exploded View

Fig. E: Jig for Routing Inside Edges

1. Lay out two corner sections on each
blank. Make sure the grain runs
across the outside corner. If it runs
toward the corner, as on the blank in
the background, the pieces will be
impossible to rout.

2.Cut the short legs to final length
using the miter gauge with a fence
and a stop.

Caution: The blade guard must be
removed for this operation. Be careful!

3. Rout the inside edges with a 1-in.-dia.
pattern bit. Because of the grain’s
direction, you can only rout one leg at
a time. Stop before the bit touches the
adjacent leg or disastrous tearout will
occur.

4. Flip the workpiece over to rout the
other leg. Routing into the corner
can still cause tearout, so complete the
job in stages. Rout a bit, flip the workpiece
and rout a bit more. Then repeat
the process.

5. Rout a centered slot in each piece.
Center the bit by eye. Then make
two passes, one on each face. Rout
halfway, as before, then flip the workpiece.
Once the slot is established, you
can rout against the grain to widen it.

6. Reduce the slots’ depth to 3/16-in.
by gluing in fill strips. Leave the
inside corner 1/2-in. deep, to accommodate
the square corners of the glass.

7. Drill holes for the rare earth magnets
using a fence and a stop block.
The fence centers the hole between the
faces; the stop block centers it
between the edges.

Grooved Frame

Follows
the
straight
and
narrow
rout(e).

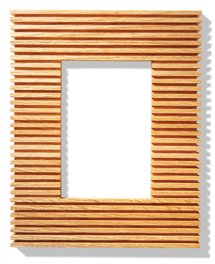
This frame looks as if it’s
made from a single board
(Fig. F). But it isn’t: A board
this wide could cup or twist,
and seasonal movement could
bind the glass and cause trouble.
To minimize these potential
problems, this frame is
made by ripping plainsawn
stock into thin pieces, standing
them on edge and gluing them
back together. This method
creates a blank that’s more stable
than a solid board, because
it has quartersawn grain, narrow
pieces and multiple glue
joints.

Start by crosscutting a 6-in.-
wide by 30-in.-long board into
three 10-in.-long sections. Then
rip each section into 1-1/16-in.-
wide pieces (Photo 1). This
frame requires fifteen pieces. Glue
the pieces together to form a 1-1/16-
in.-thick blank (Photo 2). Level the
blank’s top and bottom faces by sanding.
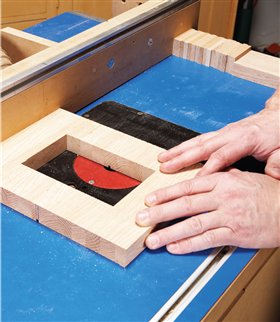
Create the frame by cutting the
blank apart and reassembling it (Photo
3). Rip the blank into three pieces, two
that are 2-1/8-in. wide and one that’s 5-
5/8-in. wide, the height of the photo
opening. Next, crosscut the wide center
piece into three sections. The center
section must be 3-1/2-in.-wide, the
width of the photo opening. Glue the
frame blank together (Photo 4).
Knock out the center section. Then
crosscut the ends of the blank to create
2-in.-wide frame rails. Joint or rip
the two stiles to final width—make
sure these widths are identical, so the
photo opening is perfectly centered.

Set up for routing the grooves
after installing a 1/8-in.-dia. spiral bit
(Photo 5). Install sixteen 5/16-in.-
thick spacers at both ends of the
fence. Firmly press stop blocks
against the spacers and clamp them
to the table. Rout the first groove on
the face and both edges (Photos 6
and 7). Adjust the fence (Photo 8).
From here on in, you rout two
grooves on the face and edges
between each fence adjustment
(Photo 9).

Use a rabbeting bit with a 7/8-in.-
dia. bearing to rout 1/4-in.-wide glass rabbets.
Square the corners with a chisel. The
rabbeted opening should measure 6-1/8-in.
across the grain, to allow for seasonal movement
around the 6-in.-tall glass and back
board.

Fig. F: Exploded View

Fig. G: Jig for Ripping Thin Strips

Fig. H: Sled for Routing Edges

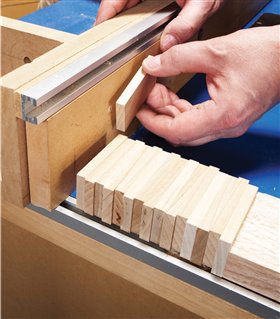
1. Rip 1-1/16-in.-wide pieces from 3/4-
in.-thick blanks that have been cut
to length. A thin-rip jig (Fig. G) makes
the process simple and safe.

2. To glue the blank together, stand
the pieces on end and clamp them
between cauls. Cauls keep the pieces
flush, to minimize sanding.

3. Rip the blank into three pieces. Then
crosscut the center piece into three
pieces. The outer pieces are the frame’s
stiles and rails. The middle section is
exactly the size of the photo opening.

4. Glue the outer pieces back together
to create the frame blank. The center
section automatically creates the
photo opening. Bevel its corners so it
doesn’t get stuck by glue squeeze-out.

5. Position the fence so the frame’s
first groove will be exactly centered.
Install spacers at both ends and clamp
on stop blocks.

6. Rout the first groove on the face.

7. Use a sled with a support block (Fig.
H) to rout the edges.

8. Remove one spacer from each side.
The spacers’ thickness determines
the distance between the grooves.
Reposition the fence against the
remaining spacers and lock it in place.

9. Rout the remaining grooves in
pairs. Rout one groove, then flip the
frame end for end to rout the other
groove. Ditto for routing the edges.


Product Recommendations

Here are some supplies and tools we find essential in our everyday work around the shop. We may receive a commission from sales referred by our links; however, we have carefully selected these products for their usefulness and quality.

Recommended Posts

Start typing and press Enter to search