We may receive a commission when you use our affiliate links. However, this does not impact our recommendations.
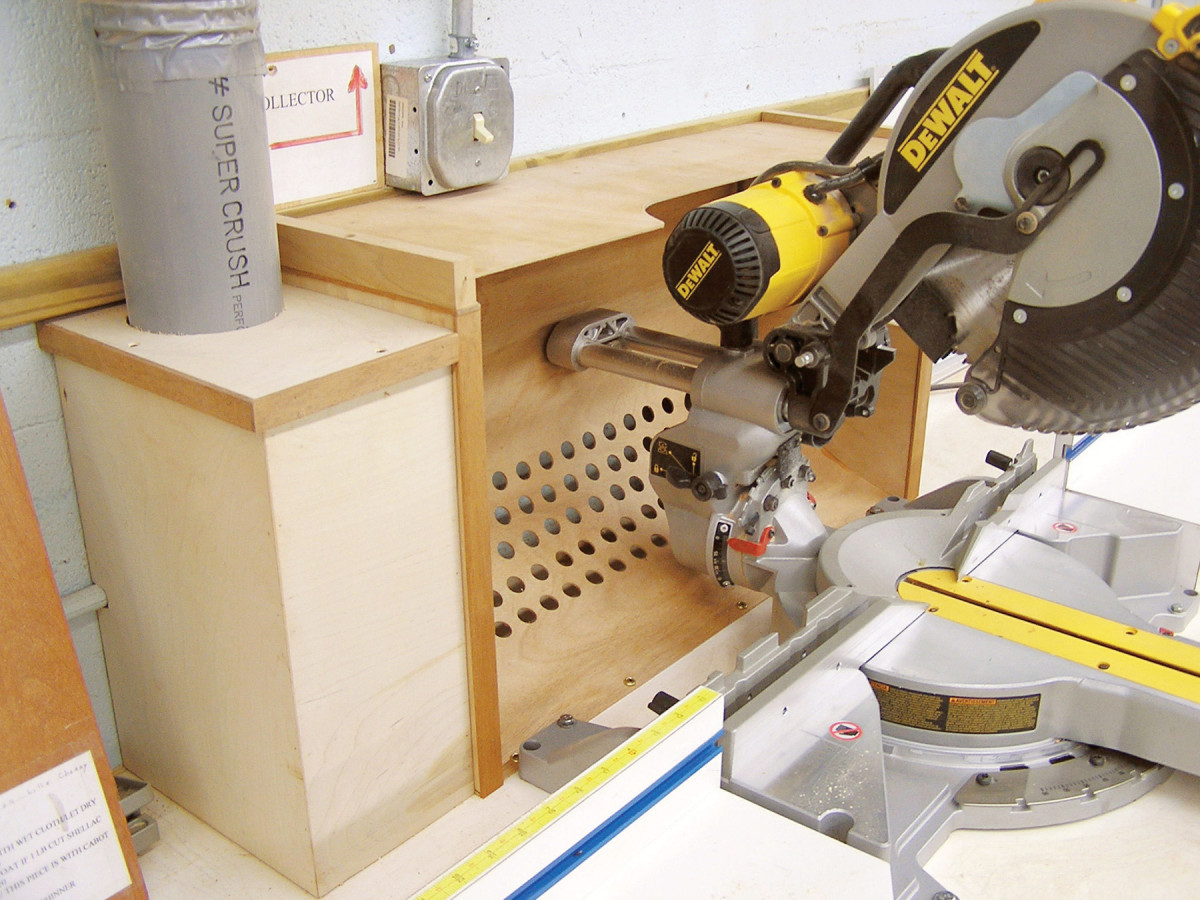
Effective control for a notorious sawdust creator
In addition to being versatile, accurate and virtually indispensable, my sliding miter saw also excels at spewing sawdust and resisting effective dust collection. I tried connecting a shop vacuum, but even when I remembered to turn it on, the vacuum only collected about half of the dust. I also got tired of reattaching the hose every time it came loose from the saw—a fairly frequent occurrence, because of the saw’s sliding, rotating and tilting action. So when I installed a central dust collection system in my shop, I decided to try something different.
My collection box isn’t anything fancy, but it captures most of the dust. Even if I don’t religiously turn on the dust collection system, the captured dust settles inside the box, so it gets removed the next time I turn on the system.
I took advantage of the wall behind my saw and the bench that it sits on to build my collection box—they serve as the back and bottom of the box. You’ll probably have to alter the design to make it work for your saw and its location.
Miter Saw Dust Collection Box Cut List
Overall Dimensions: 16-3/4″ H x 34-7/8″ L x 10-1/4″ D
|
Part |
Name |
Qty |
Material |
TH x W x L |
|
A |
Curved front |
1 |
Door Skin |
1/8″ x 20-1/2″ x 28-1/4″ |
|
B |
End |
2 |
Plywood |
3/4″ x 9-7/8″ x 15-3/8″ (a) |
|
C |
Right end cover |
1 |
Plywood |
3/8″ x 10″ x 15-1/2″ |
|
D |
Box right side |
1 |
Plywood |
3/8″ x 9-5/8″ x 14-1/2″(a) |
|
E |
Box back |
1 |
Plywood |
3/8″ x 5-1/2″ x 7″ |
|
F |
Box front |
1 |
Plywood |
3/8″ x 6-1/4″ x 14-1/2″ |
|
G |
Box left side |
1 |
Plywood |
3/8″ x 9-5/8″ x 14-1/2″ |
|
H |
Box lid |
1 |
Plywood |
3/8″ x 6-1/4″ x 10″ |
|
J |
Collar |
1 |
Hardwood |
1″ x 7″ dia. (b) |
|
K |
Trim |
1 |
Hardwood |
1/4″ x 1-1/8″ x 72″ |
|
L |
Top |
1 |
Plywood |
1/4″ x 9″ x 27-1/4″ |
|
M |
Riser |
2 |
Hardwood |
3/4″ x 1″ x 9″ |
|
N |
Beam |
1 |
Hardwood |
3/4″ x 3/4″ x 26-3/4″ |
(a) Back edge is shaped to fit curved front.
(b) Trim to fit inside DC box.
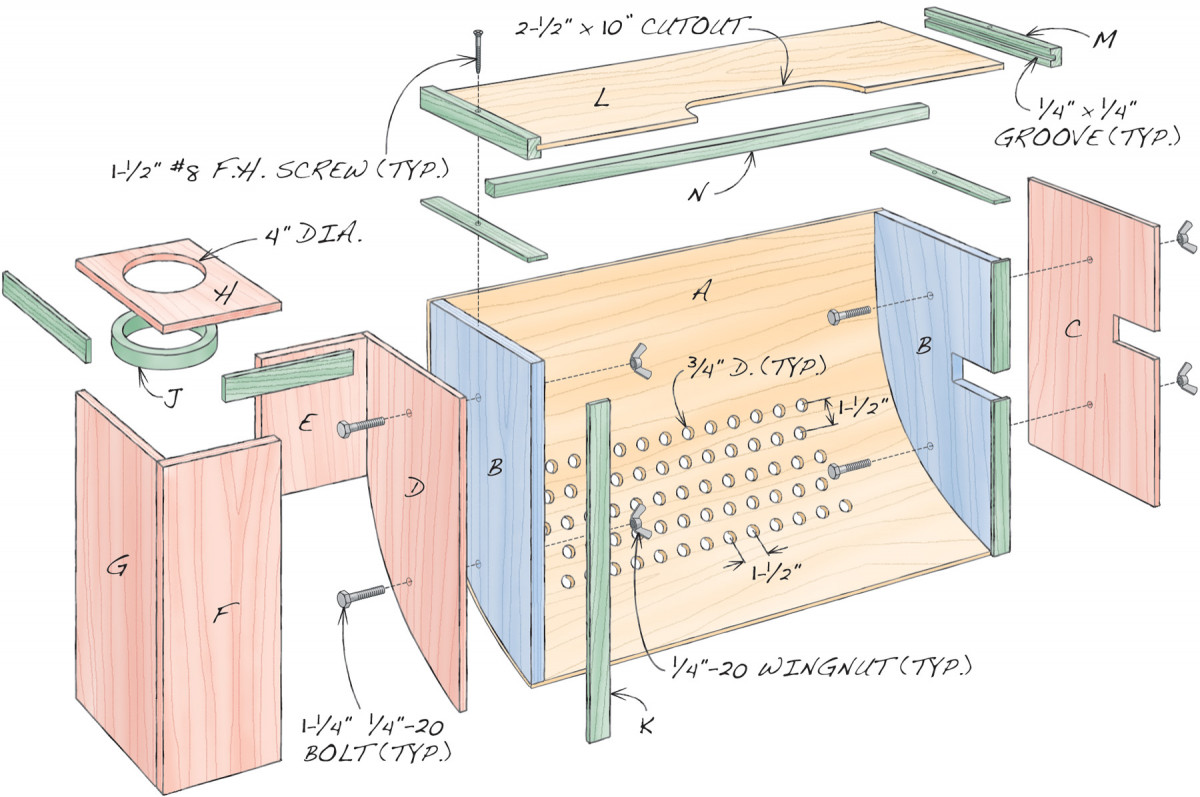
Fig. A) Exploded View
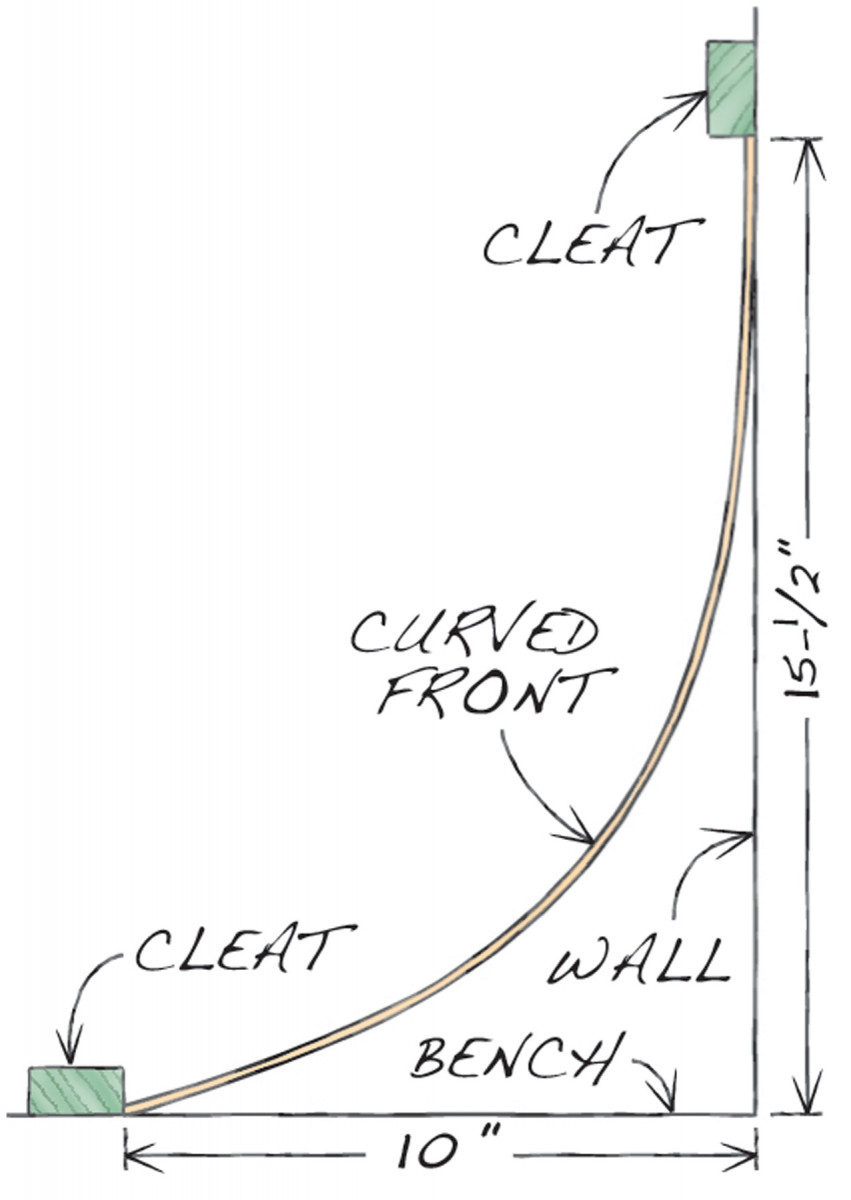
Fig. B) Curved Front Setup
Create the curved front

1. A curved front with air holes is the heart of my collection box. The wall behind the saw and the bench that it sits on act as the back and the bottom of the box.
I used a piece of door skin to make the curved front that forms the heart of the collection box (Photo 1 and Part A, Fig. A). Door skins are only 1/8″ thick, so they’re flexible. They’re available at home centers in x 3′ x 7′ sheets, and cost about $30.
To establish the overall size of the box and the front’s curved shape, mount one cleat on the wall behind the saw and another on the bench surface. Then flex the front piece and slide it between the cleats (Fig. B). For my installation, the wall cleat stood 15-1/2″ above the bench and the bench cleat stood 10″ away from the wall.
To create the ends (B), cut both pieces to size and place one next to the open end of the setup. Mark the front’s curve on this piece. Then use a bandsaw to cut the curves in both pieces. Drill rows of 3/4″ dia. holes in the curved front and then fasten it to both ends with glue and nails.
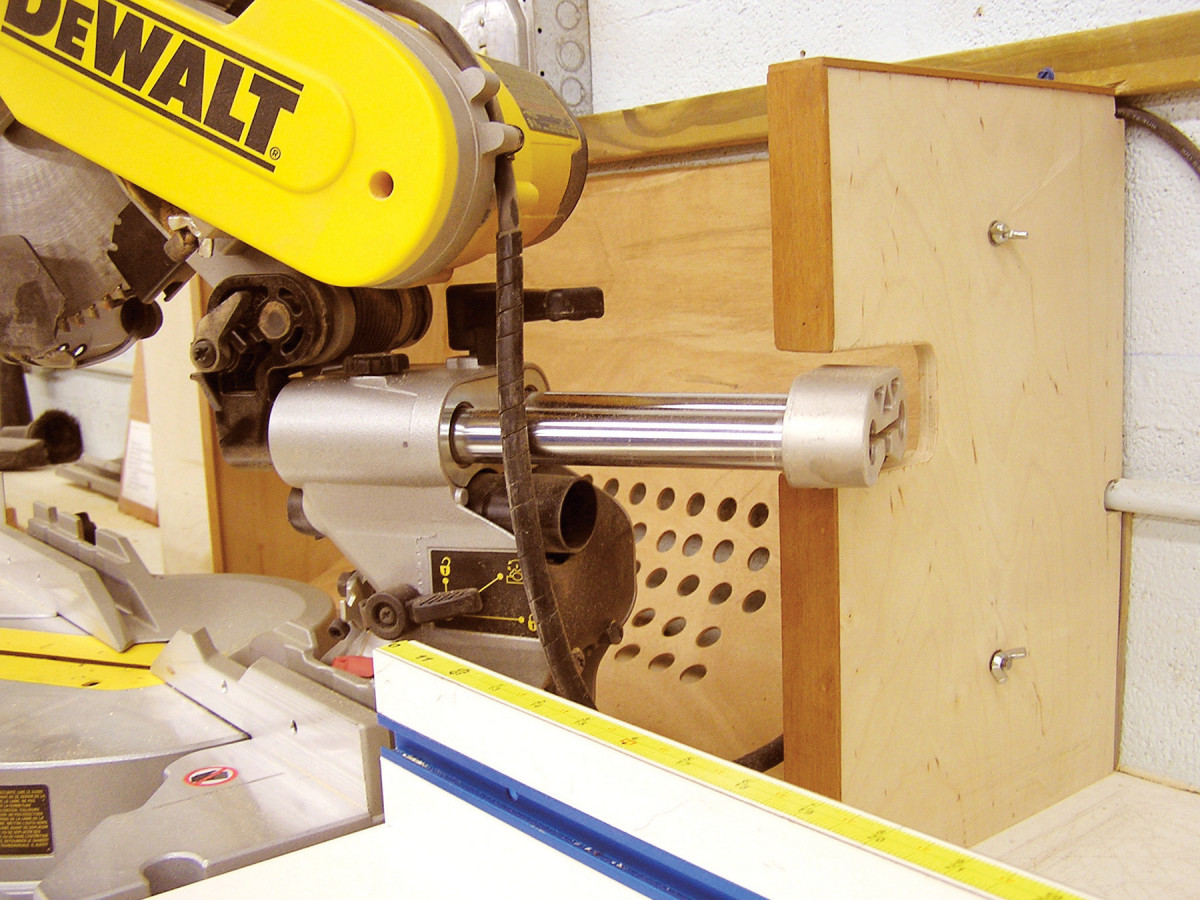
2. A notch in the right end of the box allows the saw’s full range of motion.
Test-fit the saw, to make sure the curved assembly will accommodate its full range of motion. I had to cut a notch in the right end of my assembly, to allow the saw’s 60˚ rotation to the left (Photo 2). As my saw doesn’t rotate as far to the right, I could position the box so that the left-hand end didn’t require a slot.
Assemble the box
Fasten the curved assembly to the wall and the bench. Cut the right end cover (C) to final size, including the notch for the saw, and attach it to close off the assembly’s right side, using nuts and bolts and spongy self-adhesive tape to minimize air leakage. This fastening method allows access to the space behind the curved front, should it become packed with debris or if something important falls through one of the holes.
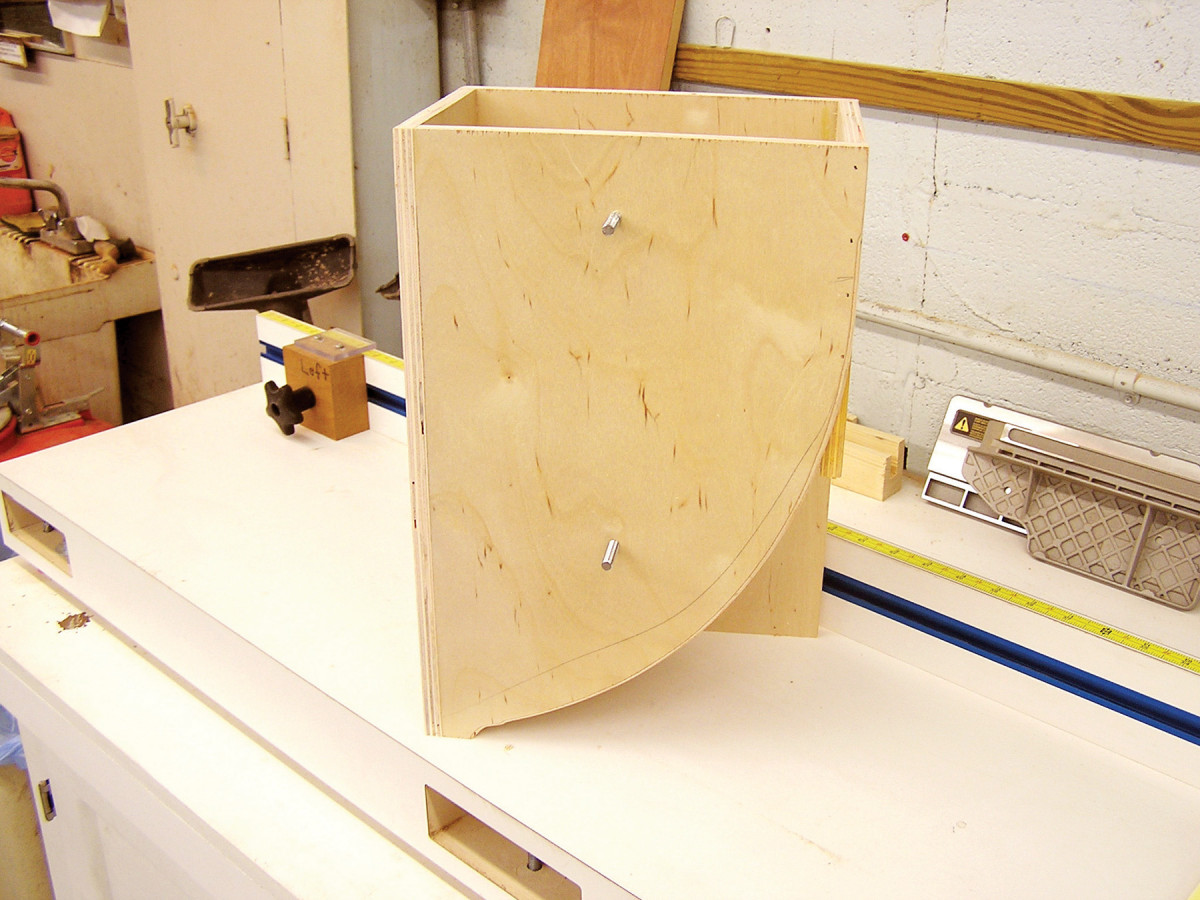
3. An opening in the side of the hose box allows the collection system to draw sawdust through the holes in the curved front.
A plywood box for the dust collection hose (D—G) closes off the assembly’s left side. An opening in the side of this box allows the collection system to draw air through the holes in the curved front (Photo 3). To create the opening, one side (D) is shaped to match the assembly’s curve and the back piece (E) is cut short. Fasten the assembled hose box with nuts, bolts and spongy tape.
Make a lid (H) to complete the hose box and a collar (J) to clamp the hose. Install the hose and then screw the lid to the box. Install trim pieces (K) to cover all the exposed plywood edges.
Fasten a plywood top (L) to complete the box. To accommodate my saw, I had to elevate the top with risers (M) and cut out the front. My 1/4″ top sagged a bit, so I glued on a beam (N) to stiffen it. –Bob Selkirk
Here are some supplies and tools we find essential in our everyday work around the shop. We may receive a commission from sales referred by our links; however, we have carefully selected these products for their usefulness and quality.


