


We may receive a commission when you use our affiliate links. However, this does not impact our recommendations.
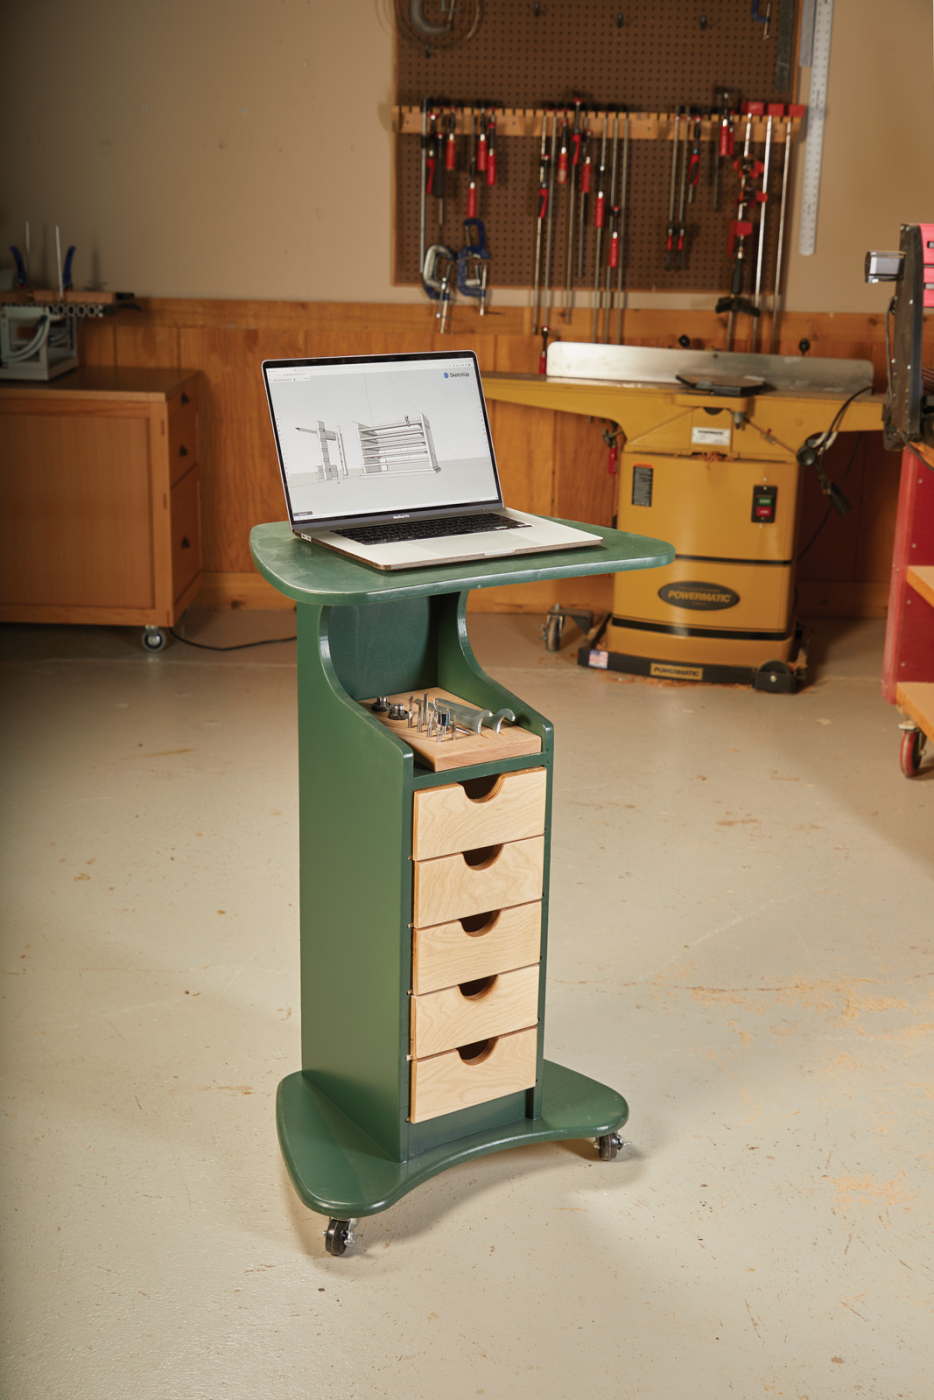
This rolling stand is the perfect mobile workstation. Use it for a computer in your shop or to mount a power tool.
Project #2303 • Skill Level: Beginner • Time: 2 Days • Cost: $120
Over the last few years, I have become interested in CNC. In fact, I recently decided to add a medium sized machine to my shop. While I’m (impatiently) waiting for it to arrive, I thought it would be a good idea to start arranging the shop to accommodate it. That includes setting up somewhere for my computer to sit while I’m working on the CNC. This rolling computer stand was originally designed by our Technology Editor, Chris Fitch. Chris designed this to be cut out on a large shop-made CNC, however, I thought that this would be a great project to build entirely with the Shaper Origin.
“But Danielle, I want to build one of these, but I don’t have Shaper Origin, or any kind of CNC.” Well, you could easily make this with a limited number of tools in your shop. I’ll point out alternatives as we go. Finally, before we start, I want to mention that even though this is designed as a rolling computer cart for a CNC, this would be a perfect computer cart for your shop, organization for a classroom, in a library, or even as a small power tool cart. In fact, I’m going to make a second one to mount my bench grinder to for sharpening turning tools.
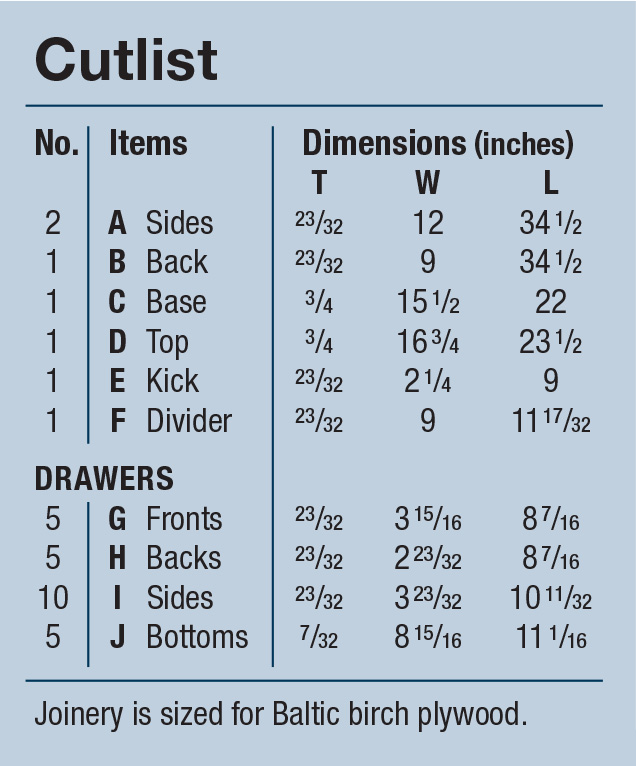
Cutlist
Have a Shaper Origin? You can use the exact files we used to make your own rolling stand at the bottom of this article.
 Setup the Workspace
Before the Shaper Origin can be plugged in, you first need to set up a workspace for Origin. What I mean by that is that you need to apply strips of domino tape to the material as you see in Photo 1. As you move the Origin around, it scans this tape and creates a virtual work surface. Because you’ll never be able to exactly replicate the layout of this domino tape, this sheet is now unique, and Origin will recognize it when you pull it out of the plywood rack, even years down the road.
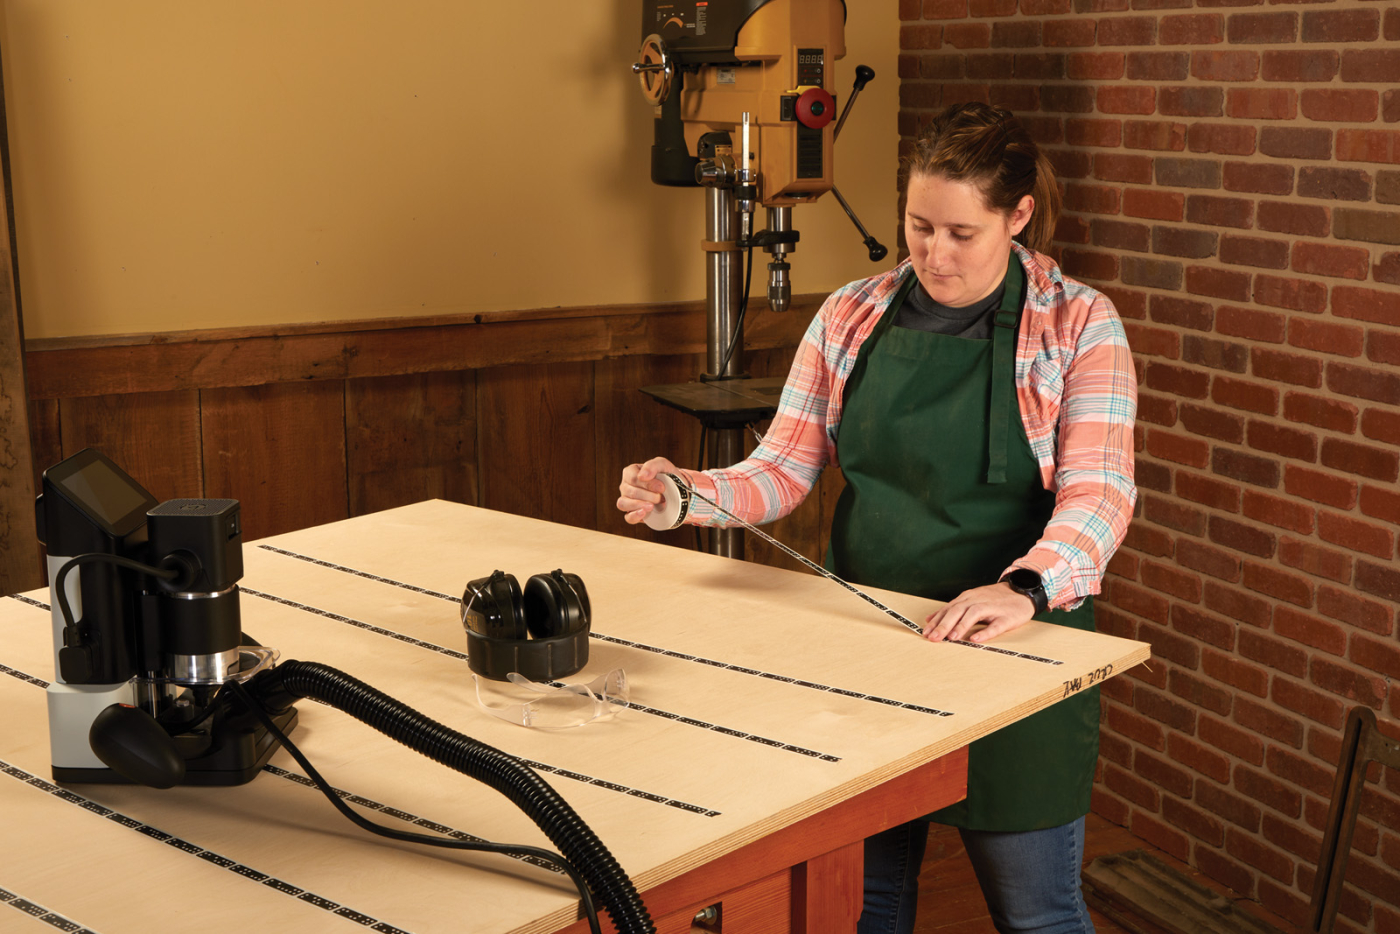
1 The Shaper Origin scans “Domino Tape,” using the dots along with the arrangement of the tape to position itself.
As you can see in the photos, I laid strips of domino tape every 8″ or so. (The flash from our camera would often wash out the tape, so I used more tape than is actually necessary. My problem, not yours!). The tape doesn’t need to be straight either. The Origin has a “tape meter” that will indicate how good the tape signal is as you’re working.
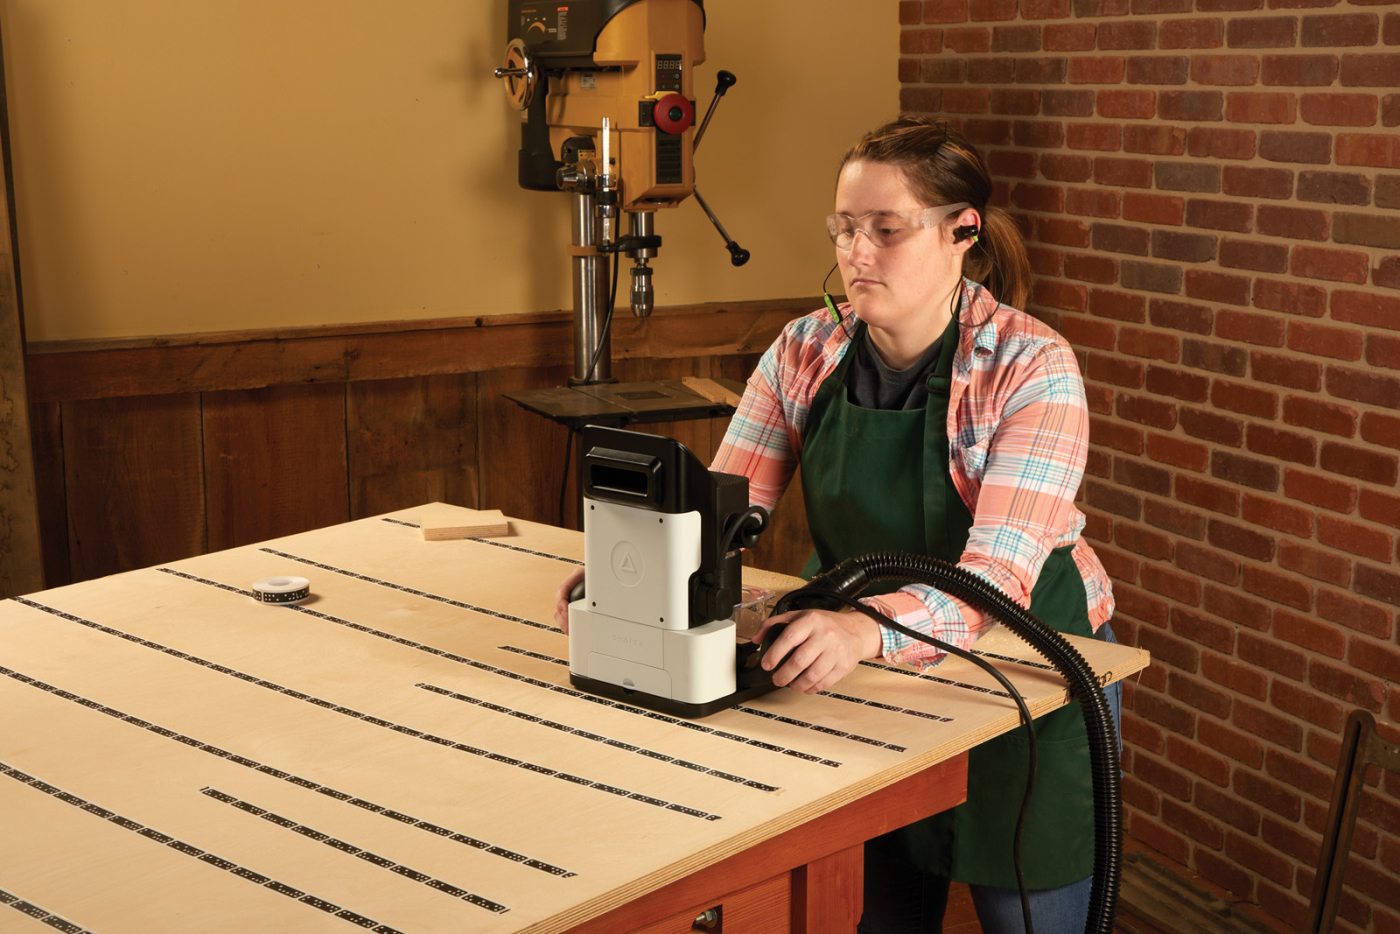
2 As you scan the tape, Origin creates a virtual work surface. This piece of plywood will always be saved now, as long as you don’t remove the tape.
 Rout the Joinery
Because Origin is WiFi connected, you can download your designs from the cloud to the tool. Don’t be concerned about designing for CNC with Origin. Origin takes simple files that you set to certain colors to mean different things. It’s simple to set up, and you can even design basic shapes and text on the tool.
What you do need to think about with Origin is your order of operations. You need to cut all joinery first, before cutting a part out of the plywood sheet. On Origin, you have a few different types of cuts you can make: inside line, outside line, on line, and pocket cuts.
But wait… before we start cutting we need to tell the Origin where the tip of the router bit touches the worksurface. To do this, you use the “z-touch” function found in Origin. This will lower the router spindle to the worksurface until it senses the bit tip has touched it. Once it feels resistance, it will set that as “zero”. One of the biggest things to not forget is to run the z-touch every time you change the router bit. However, when you manually change the router bit size in Origin, it will automatically prompt you to run a z-touch.

3 Start by routing the “pocket cut” for the back rabbet. In the file, this area is made slightly oversized (towards the waste) so there won’t be any nibs left after cutting it to shape.
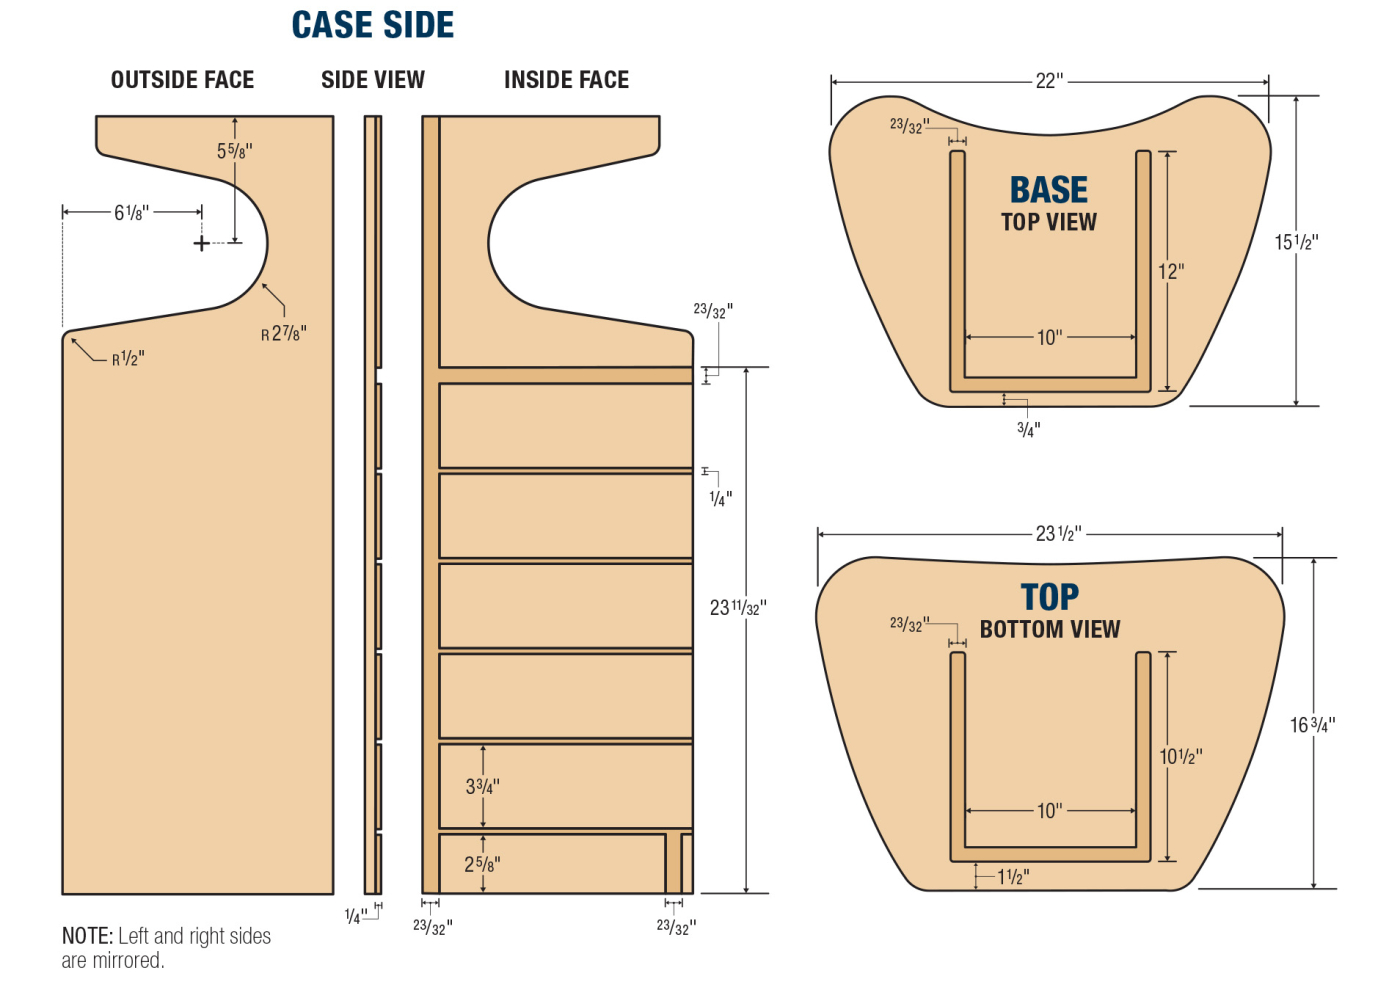
Back to the joinery. The first thing to cut is the joinery on the side panels. These are the rabbets, dadoes, and grooves that you see in the drawing on the left below. Cuts like these are made in two passes. First, an “inside line” cut is made to define the size of the rabbet/groove. Next, the “pocket” cut is made to clear away the rest of the material. I did this with a quarter inch bit in the Origin, and set the depth to be 1/4″ deep.
 Here’s the thing with Origin: because it sees the domino tape and (basically) GPS locates itself, as you rout, you’re just watching the screen and following the line. You can see, in real time, where you’re cutting in relation to your part shape. As you move, the Origin will make small corrective adjustments to the router motor to keep you on track. If you get too far off track, the motor will retract and stop you from cutting. It makes routing “free hand” more like routing with training wheels — laser-guided training wheels!
Once the larger, 3/4″ pockets (dadoes, grooves, and rabbets) are finished, it’s time to rout the narrower dadoes on the bottom half of the side. You could do these with the same 1/4″ bit, however with these being sized for plywood drawer bottoms, they are actually slightly undersized. So I swapped out to an 1/8″ router bit and changed the appropriate setting in Origin. Routing these follows the same path as before— beginning with an inside cut to define the edges of the dadoes followed by a pocket cut. You can see these in the drawing on right above.
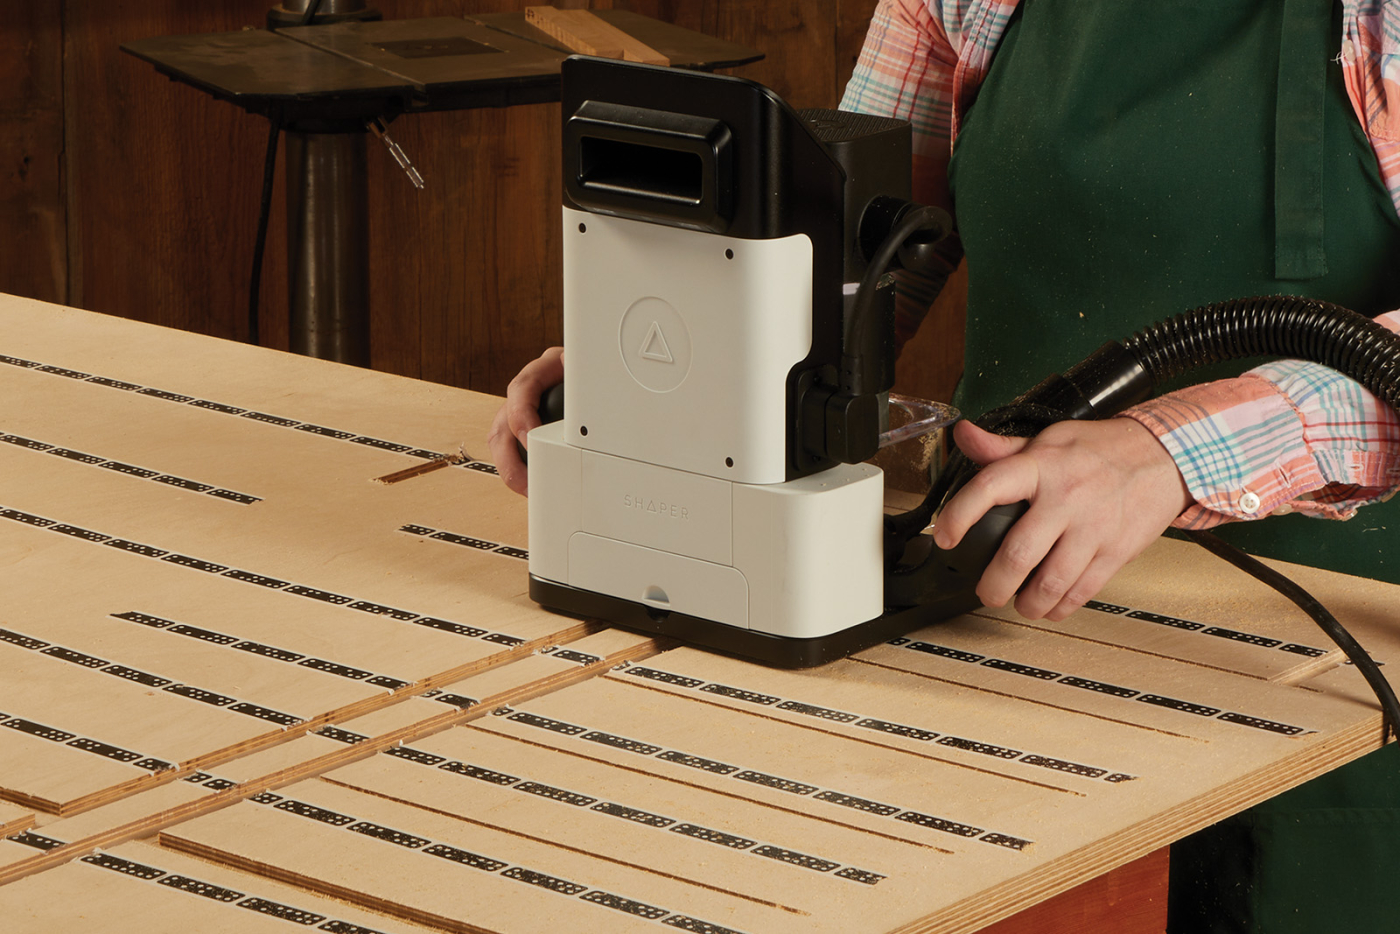
4 The dadoes for the drawer slides are made with a smaller bit.
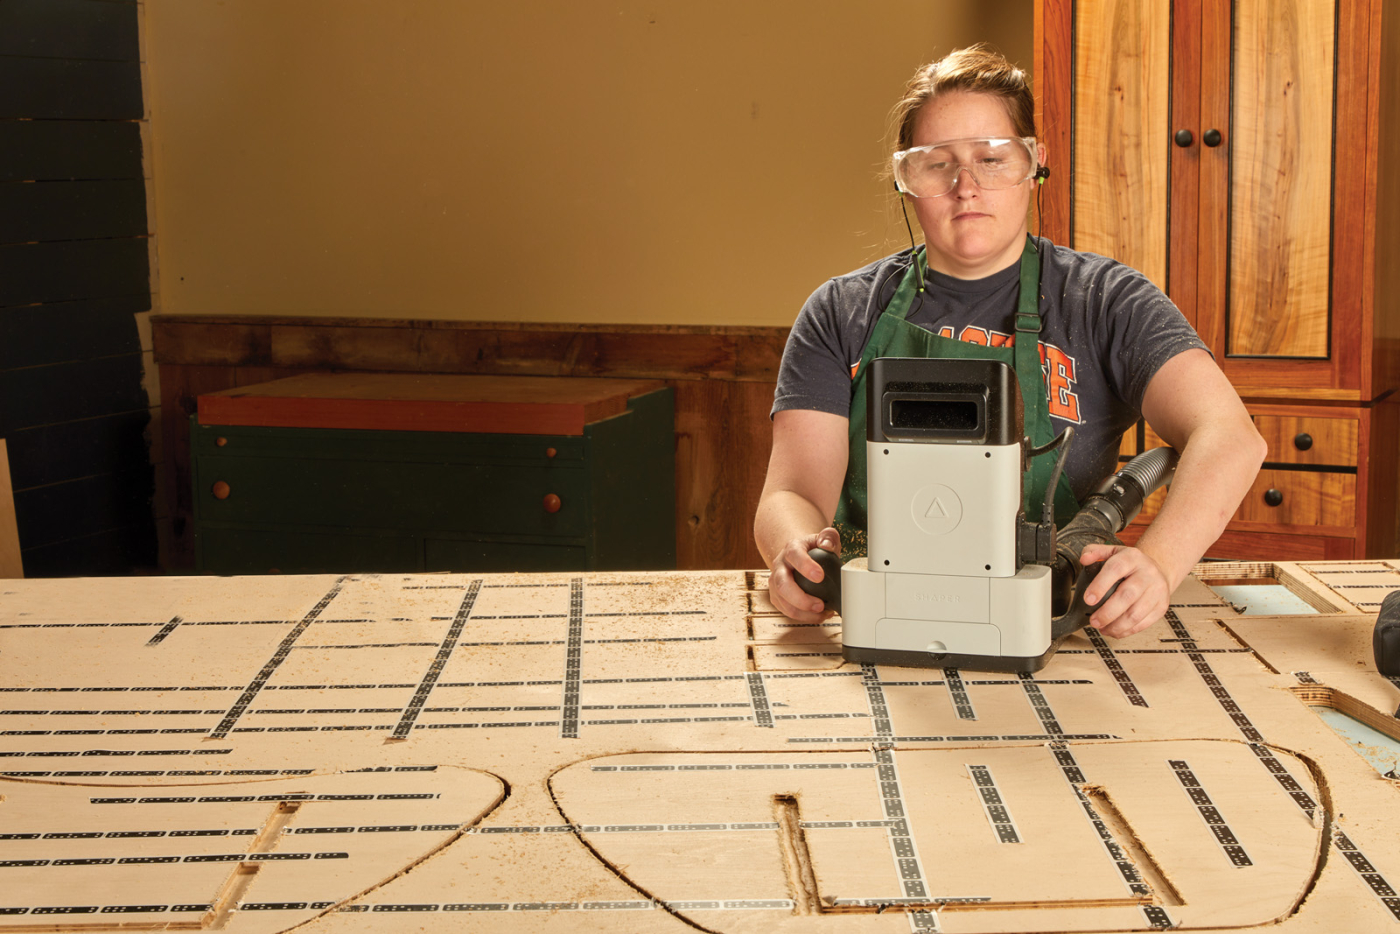
With the joinery cut on both sides of the cart, it’s time to cut them out. Switching back to the larger bit (1/4″) and running z-touch again, I switched Origin to make an outside cut. This means that the inside edge of the bit will be on the cut line. If you make an “outline” cut (where the center of the bit follows the line), it would actually reduce the size of the part by 1/4″ overall. That’s not what we want.

5 Making an “outside” cut means the bit will follow the line on the waste side of the cut. This produces an accurately sized part.
As you’re making this type of cut, standard cutting rules apply. Make multiple passes instead of trying to get through the sheet in one pass, and rout in the proper direction. (In fact, Origin will retract the bit if you try and move the wrong way, producing a “climb cut.”)
6 When your final pass is complete, you’ll be left with a part that needs the tape peeled off and a small amount of sanding to remove router fuzz.
The Traditional Way
As promised, here’s how I would cut these parts out traditionally, if you don’t have an Origin. Start with the side panels cut to size. Don’t worry about the scoop/shaped top yet. Cut the rabbet first. A dado blade in the table saw will cut this in short order. Use an auxiliary fence to bury the dado blade and cut this rabbet in both sides.

Detailed layout guide for traditional methods.
Now, set the dado blade up for the exact width of the plywood you’re using. Use a miter gauge to guide your side panel across the dado blade, forming the top dado. This same approach will be used to form the 1/4″ dadoes for the drawers, but the blade will be changed for the appropriate width. Use the rip fence in combination with the miter gauge to position the dadoes and keep them even on both sides.
Creating the stopped groove on the bottom, front edge (for a toe kick) is the trickiest part of this deal. However, it’s not too bad. Use a pair of scrap blocks held on the side with some double-sided tape to create “guides.” Then use a bearing-guided router bit to form the groove. Now you can shape the sides. These panels are a little large, but you should be able to manage these cuts at the band saw. Otherwise, a jigsaw can be used to cut them to shape.
The Other Parts
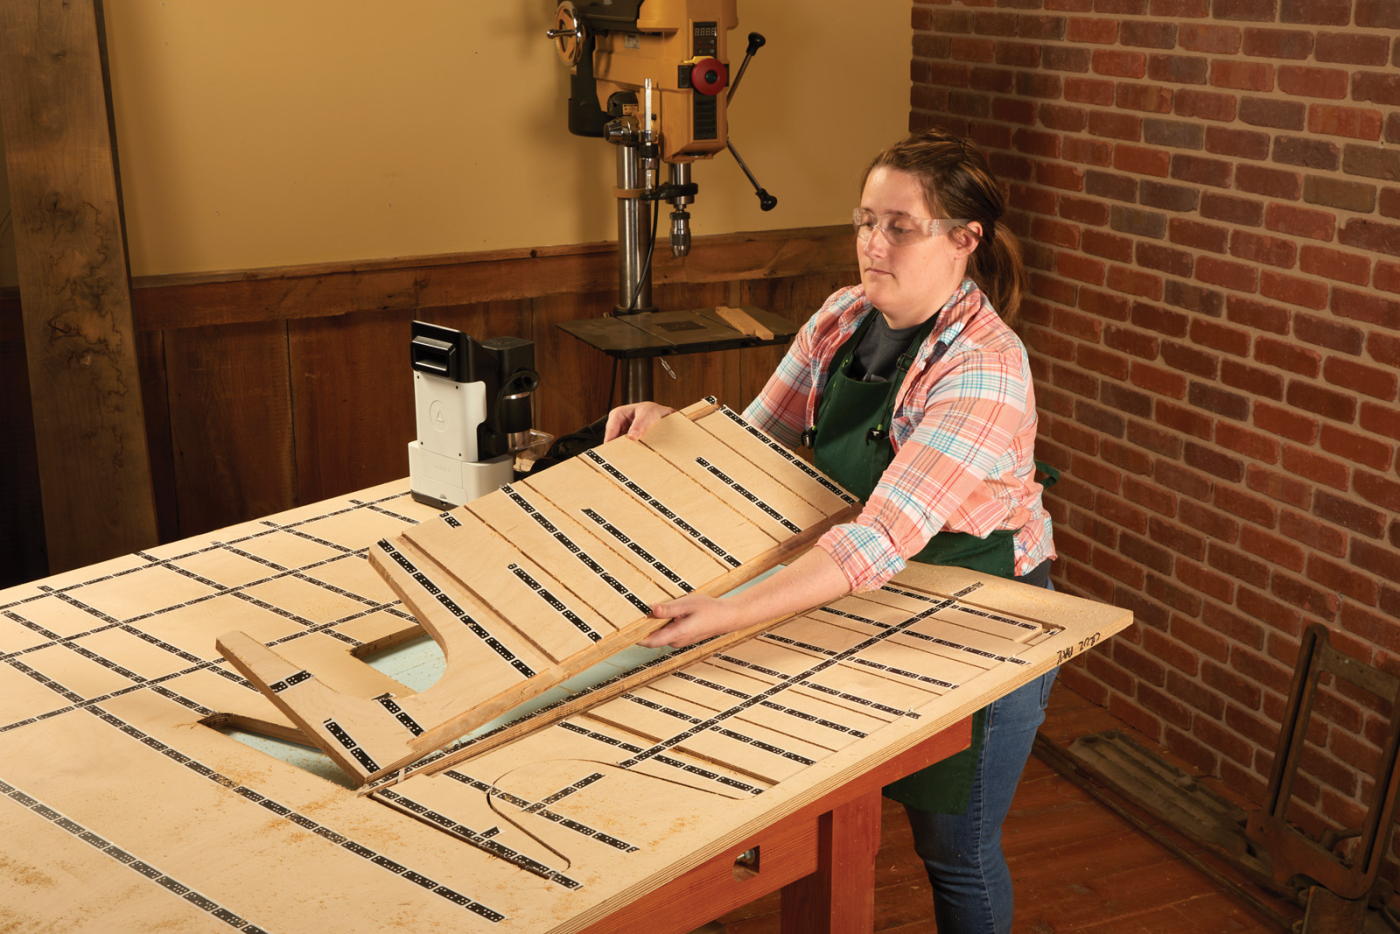
After understanding how inside, outside, and pocket cuts work within Origin, the shape and complexity of the part doesn’t really matter. All that matters is that you’re cutting the correct type of cut in the correct order. You don’t want to cut a part free before cutting joinery, as it will be harder to position the part. Harder, but not impossible.
7 Cutting the remainder of the parts is straight forward. Pocket cuts cut the joinery and outside cuts (in three depth steps) cut the parts to size.
So, now it’s on to cutting the remainder of the parts. The rest of the case consists of the base, top, back, and divider. The divider is just cut to shape using an outside cut. The back gets a dado (pocket cut), and the base and top have pockets routed in them to accept the top and bottom of the case assembly. You can see these in the drawing to the right. If you were to band saw these out, I would skip the pockets all together on the top and bottom—this would be a great place to pocket screw the sides to the top/bottom.
 At this point, you can also start to cut the drawer parts. Here, we’re going to break the earlier rule of “joinery first”. For most of these, I cut the parts to shape with the Origin first. The only exception is the front—there’s a rabbet along the bottom edge to hide the drawer bottom. I did cut this before I cut the fronts to shape.
 The reason for not cutting joinery before the parts is that the tongue and dado joint needs to be fine-tuned and test fit, so I figured it would be a great use for the Shaper Workstation. You can see this in Photo 8. The Workstation has a surface covered in dominoes, and has a front apron that allows you to clamp your work in place. The on-tool design feature made it possible click and drag a rectangular cut area on Origin to design the cut shape. The drawer front and back get a dado (photo 9) and the drawer sides get a rabbet to make a tongue (Photo 10). The joints can be fine-tuned using the cut offset in Origin. When everything was fitting perfect, I cut all of the drawer parts to size.
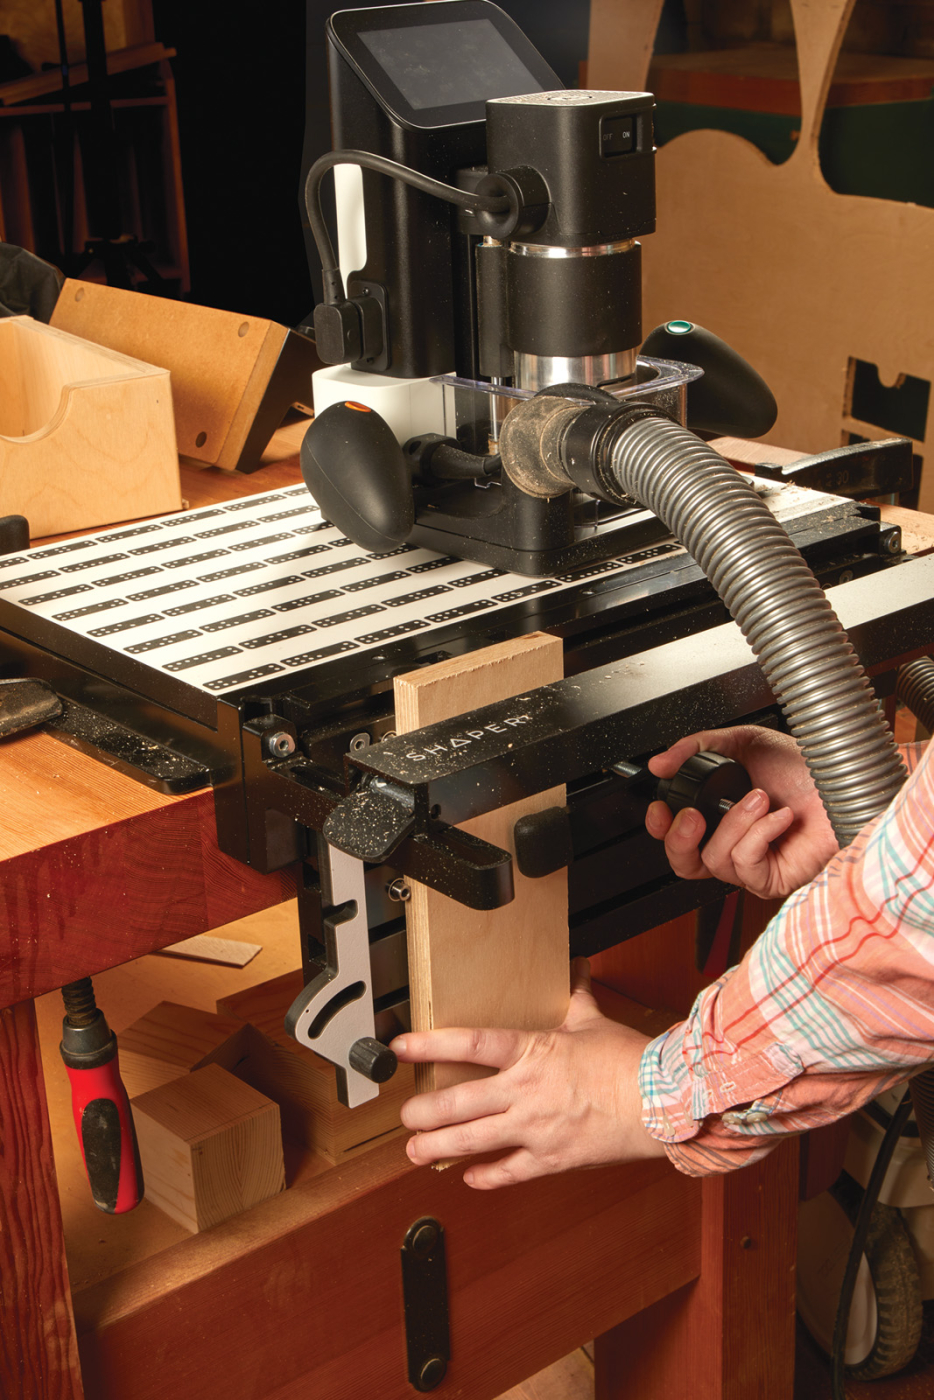
8 The Shaper Workstation has stops that you can use to register parts against and clamp them in place.
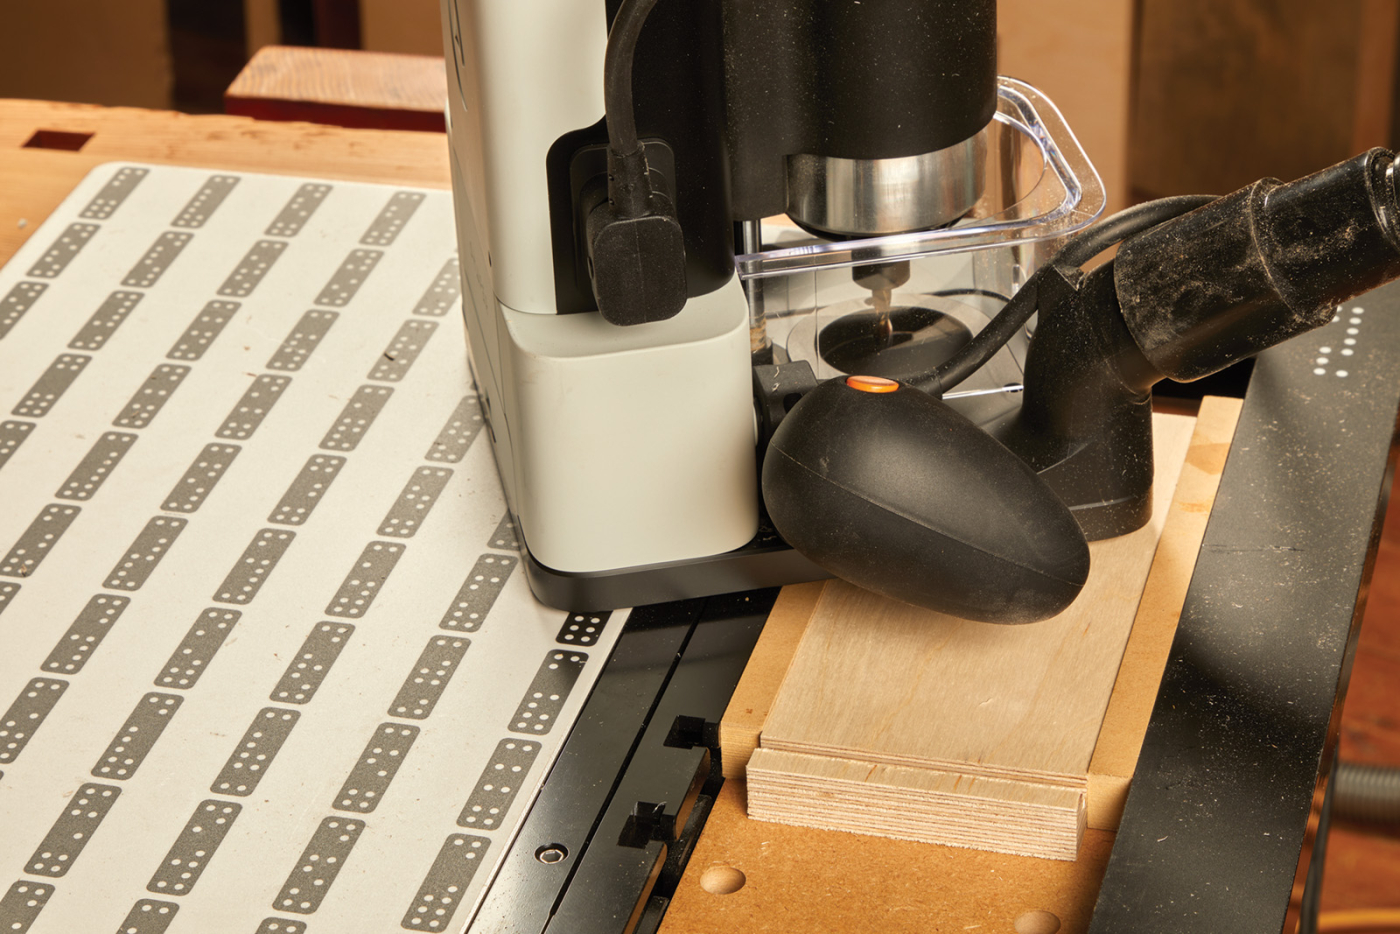
9 Spacer blocks give the bit a little room between the workstation and the workpiece.
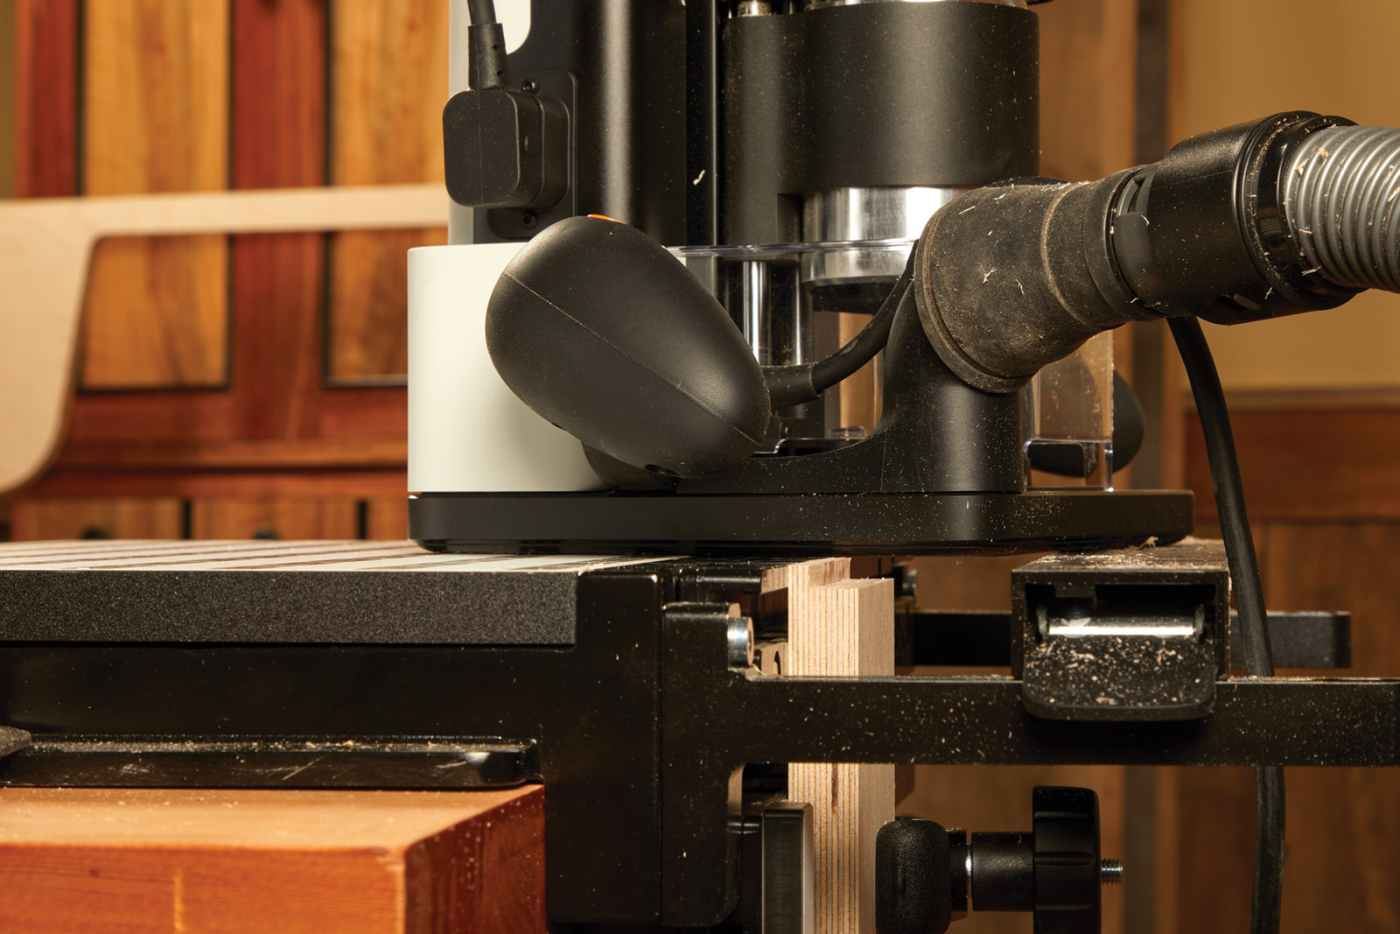
10 Standing the workpieces on end allows you to create the tongues on the sides.

11 The result is a tongue and dado joint that has a great fit, and is quick to make.
Final Assembly
With everything cut, you can add any edge treatments you’d like. I routed a heavy roundover on the base, and a small roundover on all of the other edges. Now, we can assemble everything.
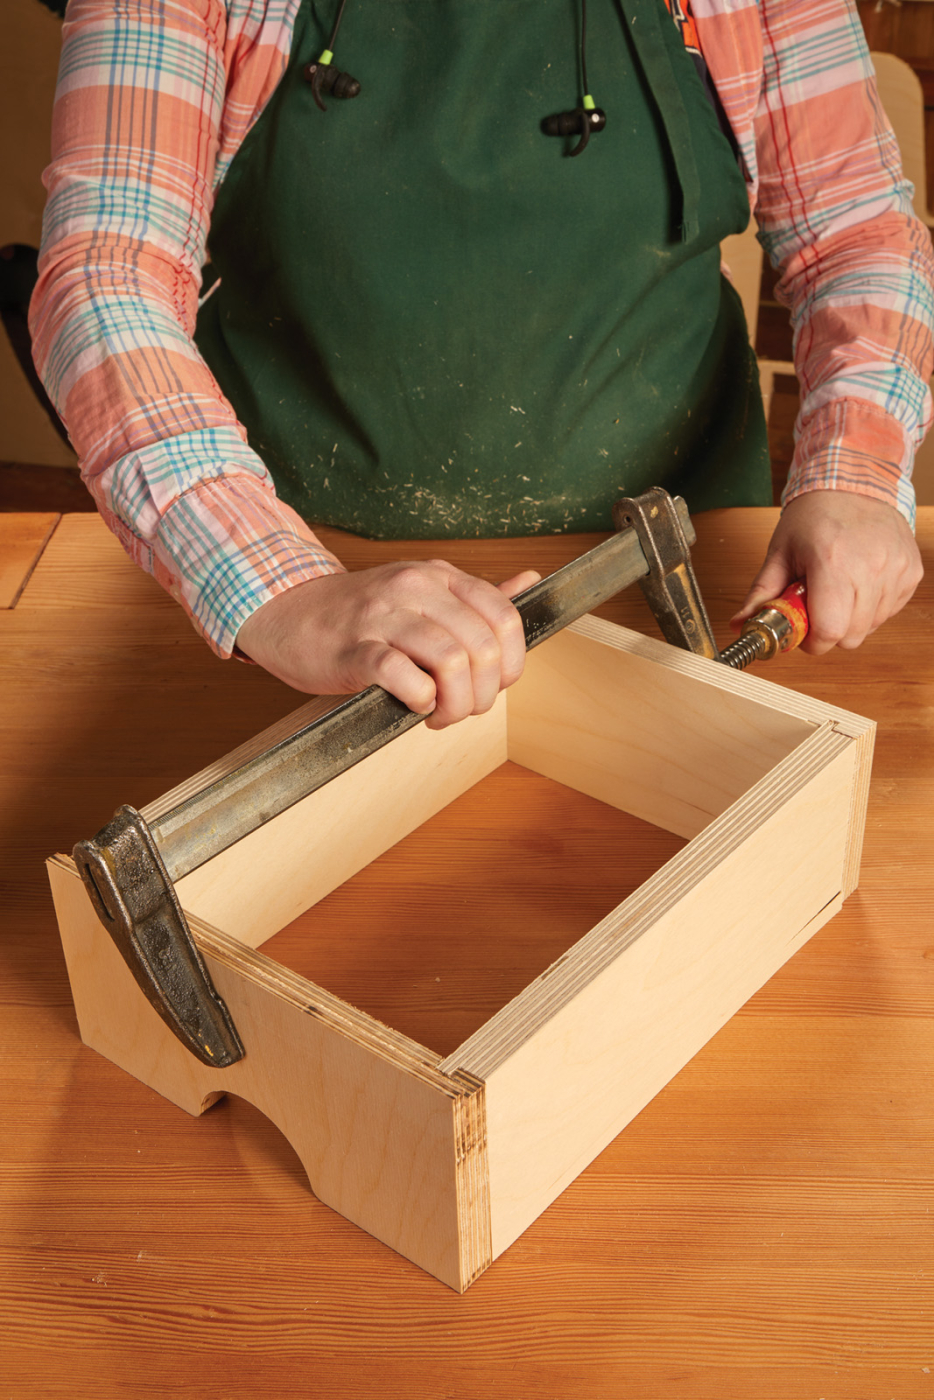
The stand gets glued together. Start by gluing the toe kick and divider in one of the sides. Slip the back into place (with glue), and add the other side. A couple of clamps hold everything together as you position the top and the bottom. A pair of long clamps will squeeze this stand-sandwich together.
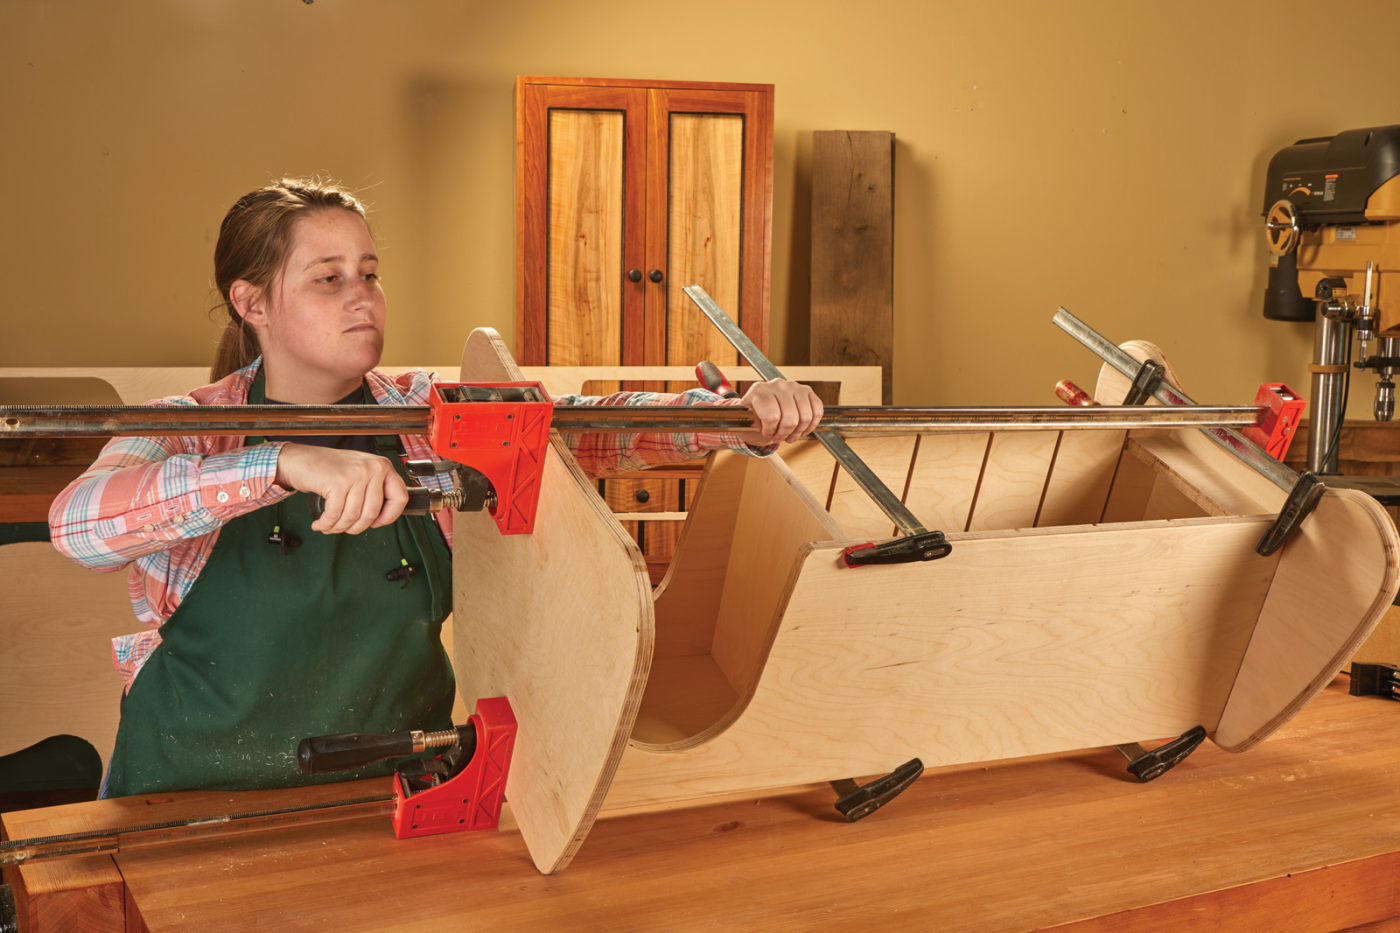
12 Get everything positioned and clamped in place before the glue starts to tack up.
The drawers go together even easier. A little bit of glue squeezed into the dadoes is pretty much all that’s needed. I glued the drawers together upside down so that the bench aligned the top of the parts. One clamp is enough to hold the drawer while the glue dries.
13 One clamp across the drawer is all that’s needed with this self-squaring joint.
Once the clamps come off the drawers, the bottoms can be nailed in place. I chose to paint the stand with a heavy-duty trim and door paint. Several inexpensive casters from the hardware store got screwed to the bottom to easily move it around the shop. For the drawers, I chose to lacquer them, giving the stand a two-tone look.
If you decide to build one of these to mount a tool on in your shop, I’d suggest adding a little extra weight in the bottom. The space between the lowest drawer and the bottom will hold about 55lbs of lead shot (available at sporting good stores), which would be more than plenty.
SVG Files:


Here are some supplies and tools we find essential in our everyday work around the shop. We may receive a commission from sales referred by our links; however, we have carefully selected these products for their usefulness and quality.


