We may receive a commission when you use our affiliate links. However, this does not impact our recommendations.
Even an ordinary kitchen tool can be beautiful.
If you’re looking for an easy-to-make gift for someone who loves to cook, here it is: a custom-made rolling pin. There’s something about this humble tool that really appeals to the imagination. Once I got started making rolling pins, I couldn’t stop. I took a dozen different ones to a charity auction, and guess what outsold everything else?
 While you could make a rolling pin from one long chunk of wood, my rolling pins have separate handles. When you grip the handles, the body of the rolling pin is free to rotate. Of course, that’s not a new design, but I’ve played around with handles quite a bit. Sometimes I make them from different species than the body or add ferrules just for show. I like to make the rolling pin’s body from a visually striking wood and the handles from wood with less figure or a more subdued color. All of my handles are made in the same, simple way. An ordinary carriage bolt passes all the way through them, and the carriage bolt is epoxied into the rolling pin’s body. You might ask, “How do you keep the epoxy from squeezing out and gluing the handle, too?” Well, I’ve got an elegant solution for that—as you’ll see later on.
Lesson in Centering Holes
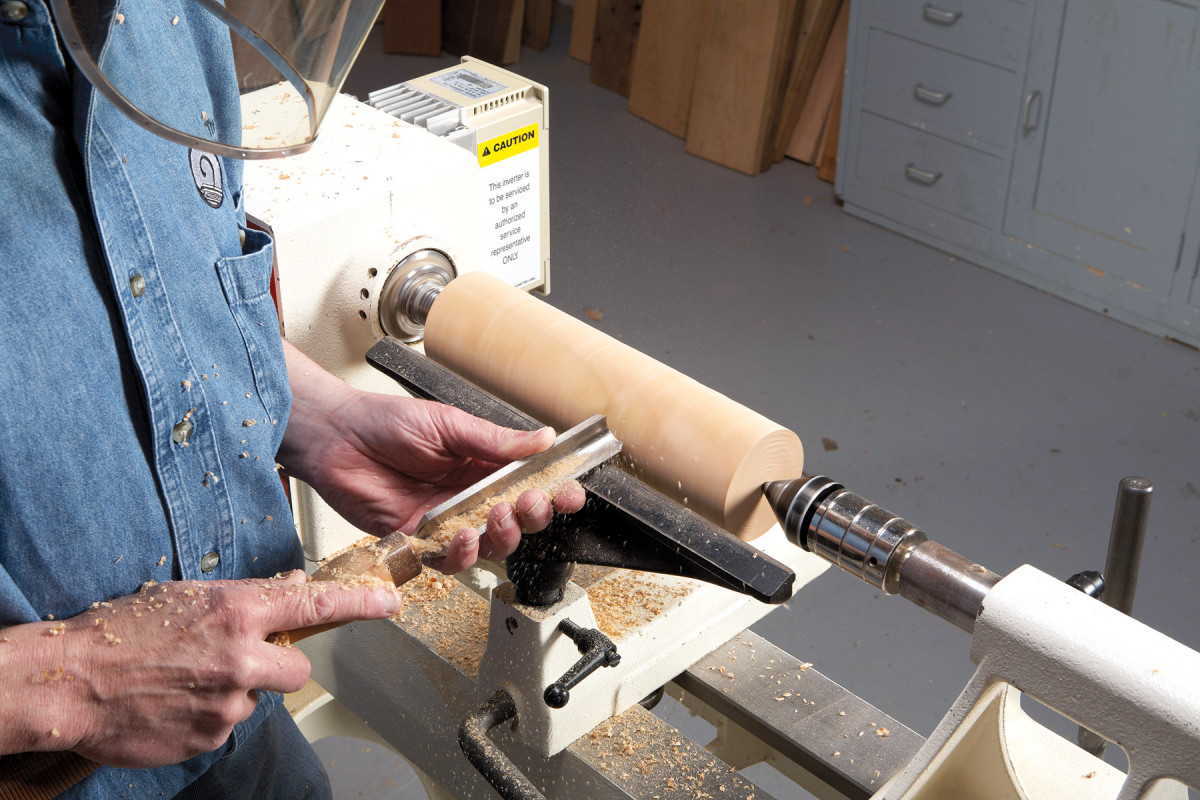
1. Begin by roughing out the body of the rolling pin, slightly oversize. Next, mount the blank in a scroll chunk and install a Jacobs chunk in the tailstock.
You don’t need advanced turning skills to make a rolling pin, but you may learn a valuable lesson: how to center a turning on a drilled hole.
If you’re new to turning, you might think that’s easy. You just turn a part, such as the handle, then drill a hole all the way through it. But that’s not the turner’s way.
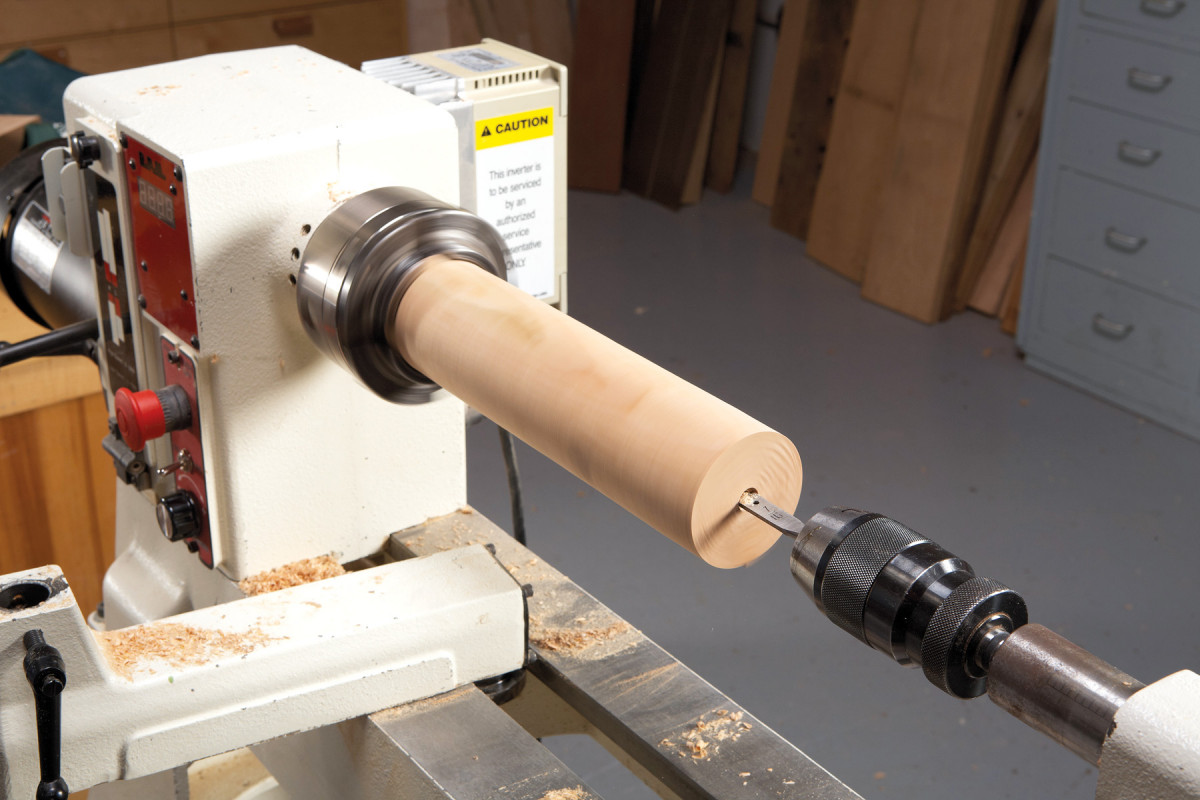
2. Drill a 7/16″ hole approximately 1/4″ deep into the end of the blank. I use a short spade bit for this operation.
A turner aims for precisely centered holes (in this case, to make a handle that doesn’t wobble). Here’s how it’s done. You turn the parts to rough size first, then drill the holes on the lathe—not a drill press. Then you insert conical centers in both holes and turn the part to completion. That’s how the holes end up being perfectly centered.
You’ll need three accessories to make perfectly centered holes: a scroll chuck, a Jacobs chuck and a live center with a large, conical tip. Many types of these items are available in wood-turning catalogs.
Make the Body
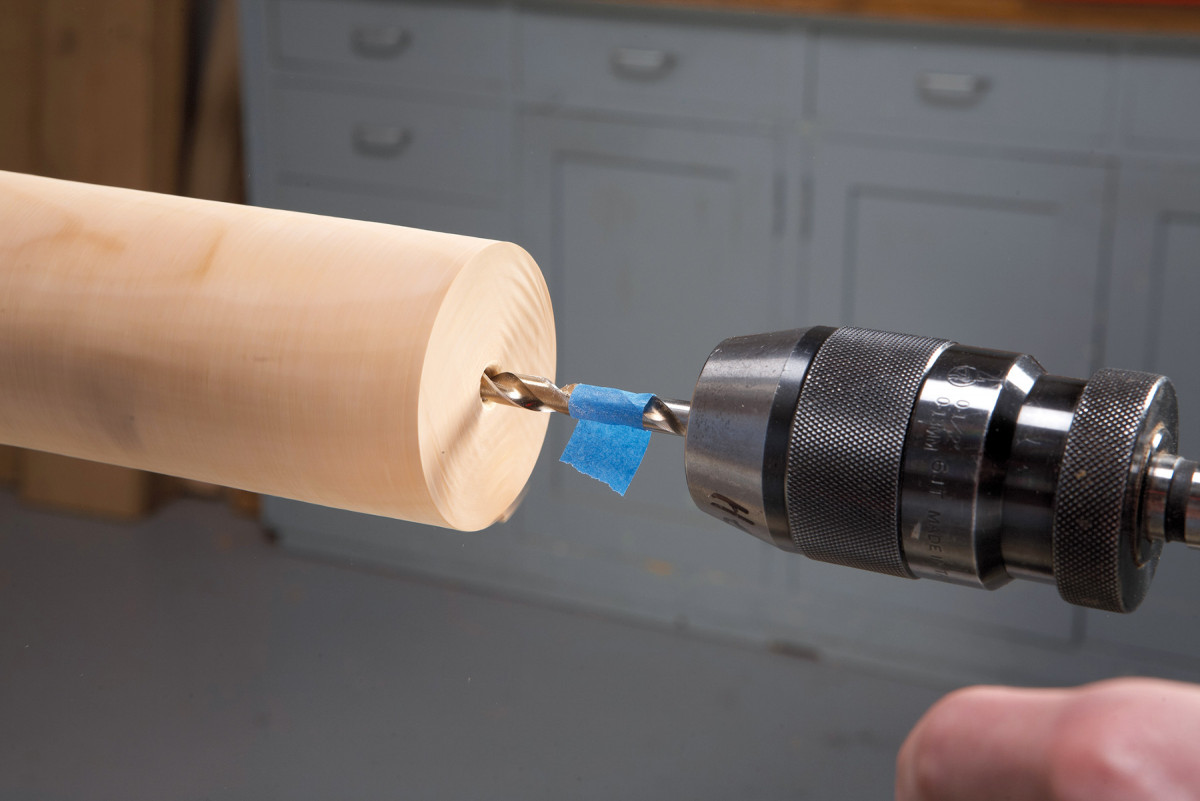
3. Drill a second hole precisely 2″ deep with a 5/16″ diameter bit. Mark this depth with a piece of tape on the bit. Repeat the same procedure on the opposite end of the blank.
Start by making the body of the rolling pin. You’ll need a chunk of wood that’s 10″ to 12″ long and at least 21/2” square. Turn it into a rough cylinder (Image 1).
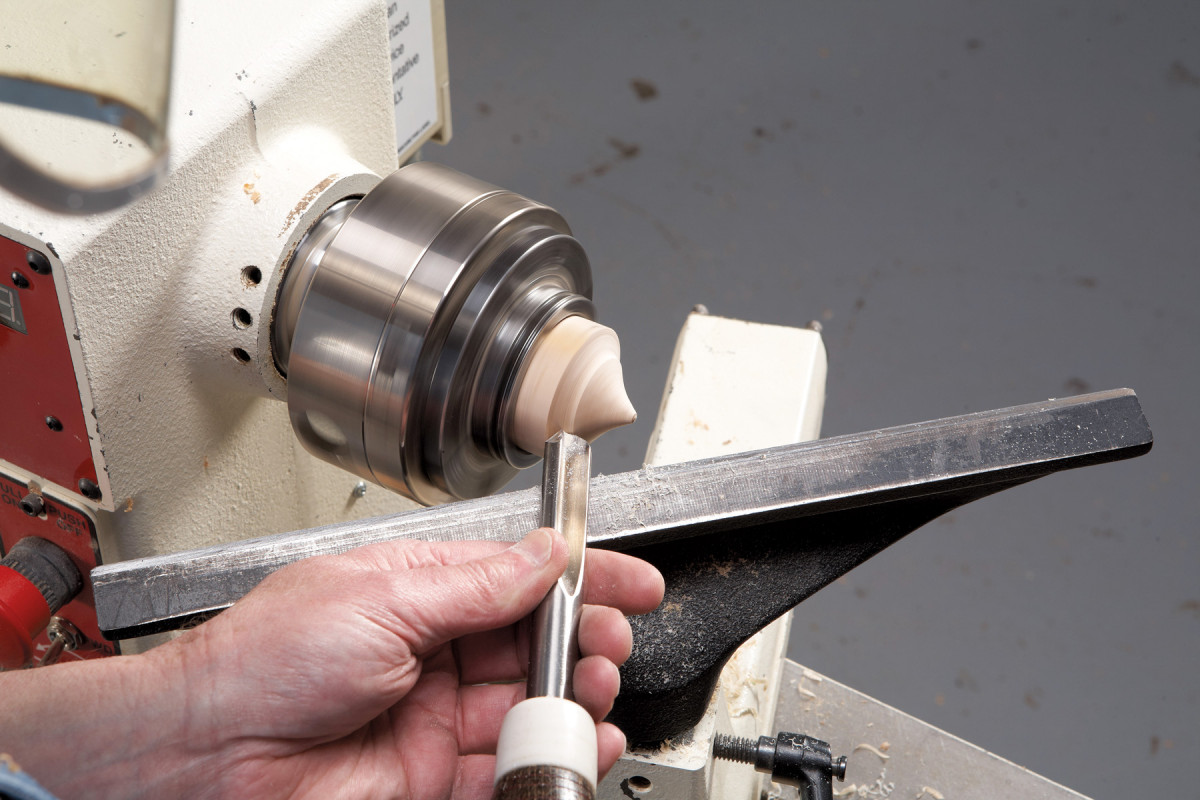
4. Turn a cone-shaped jam chunk larger in diameter than the 7/16″ hole you drilled in the end of the blank. Do not remove the jam chunk from the scroll chunk.
Mount one end of the body into the jaws of a scroll chuck and install a Jacobs chuck in your tailstock. Put a 7/16” dia. bit in the chuck (I use a spade bit and cut short its shank). Drill a hole about 1/4” deep (Image 2). Using a 5/16” bit, drill a second hole exactly 2″ deep (Image 3). Turn the wood around and drill the same holes in the other end of the body.
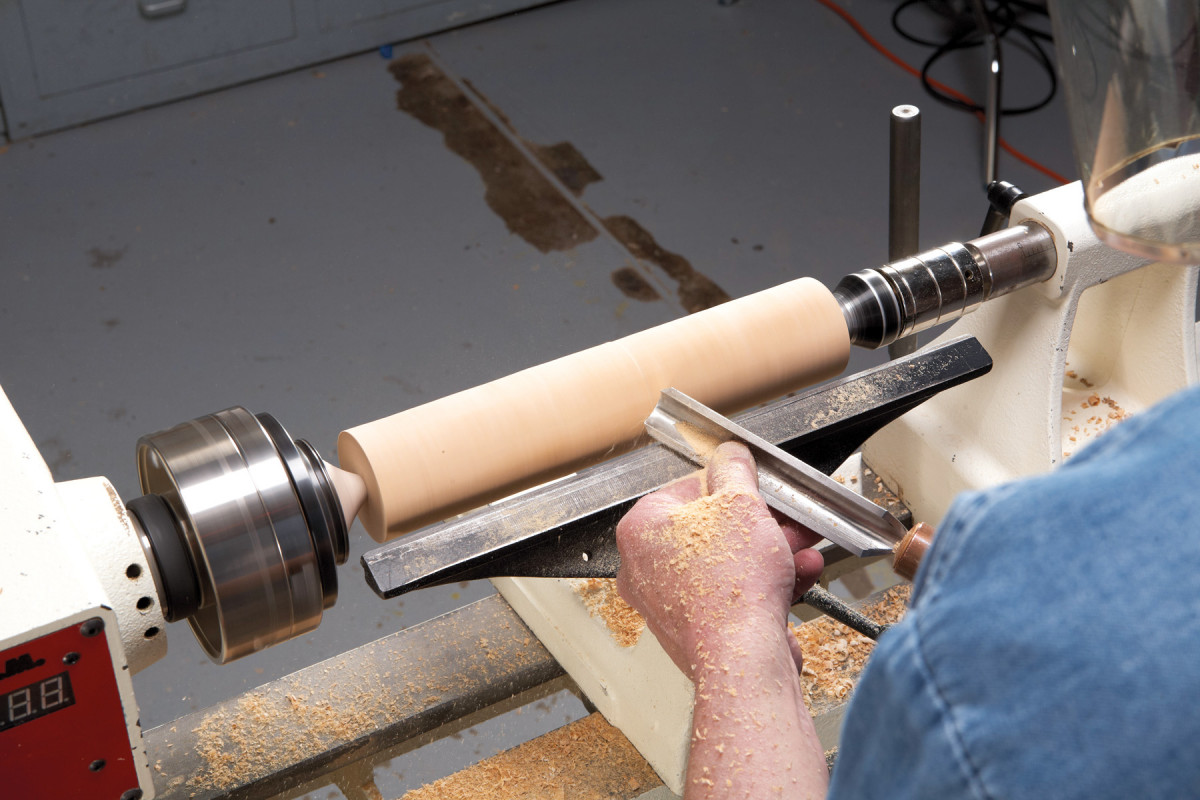
5. Mount the blank between the jam chunk and a cone-shaped live center, so it’s perfectly centered on the drilled holes. Turn the blank into a true cylinder.
Next, make a jam chuck (Image 4). This is simply a short, round piece of wood with a cone turned on one end. Use a hard wood, not a soft wood, so it won’t crush in use. Mount the rolling pin’s body between the jam chuck and a live center. Turn the body to final diameter—about 21/4” (Image 5). As the name implies, a jam chuck drives the wood by friction alone, so take light cuts.
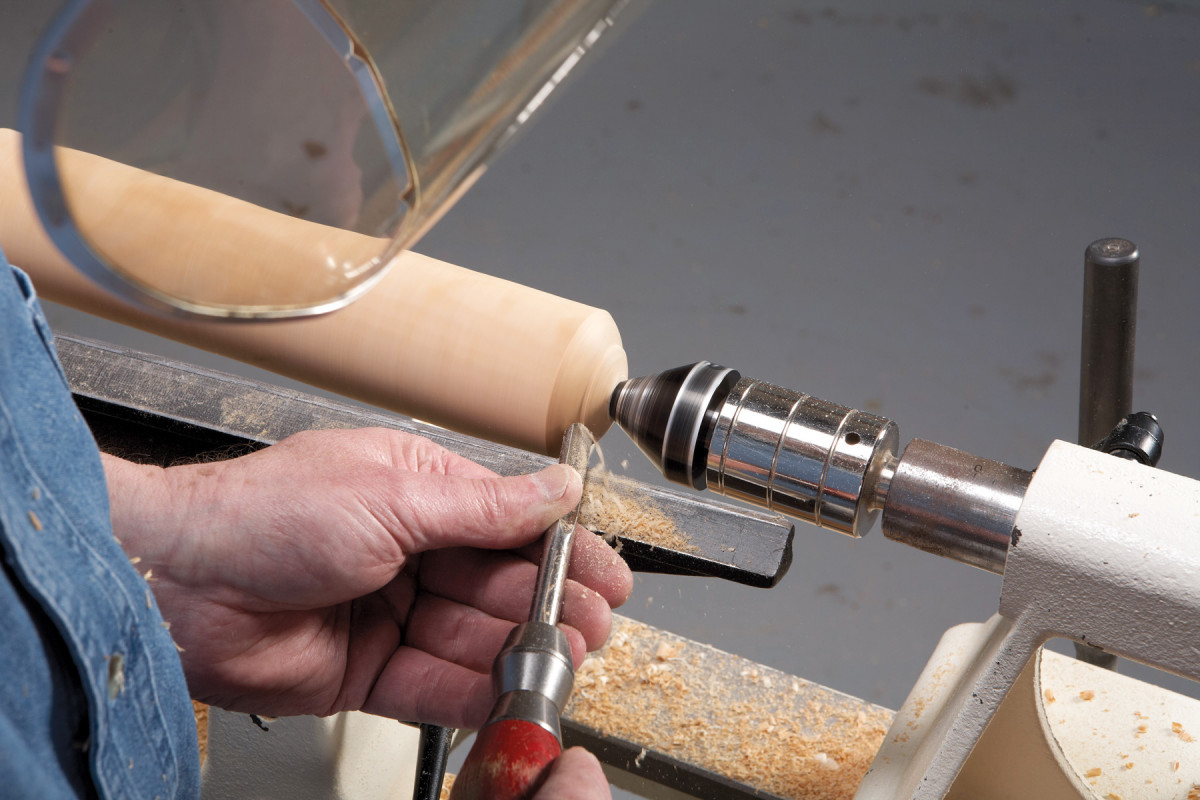
6. Form a dome on both ends of the cylinder. You’re done with this part of the rolling pin.
On the live center end, use a detail gouge to give the end of the body a dome shape (Image 6). Turn the wood around to shape the other end. Sand and you’re done.
Make & Glue the Handles
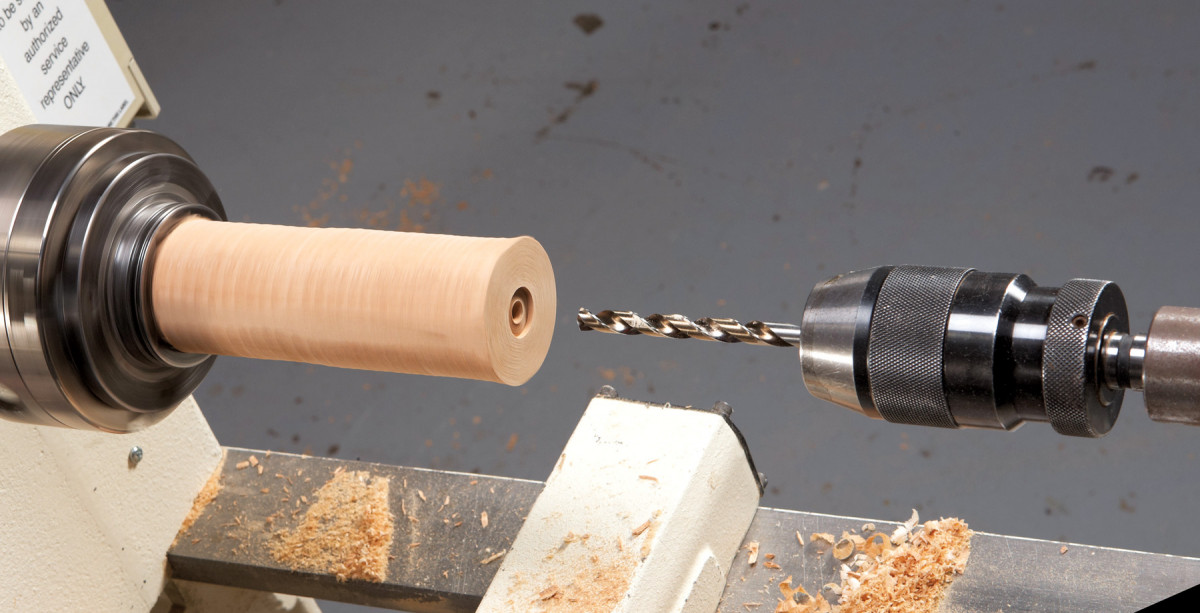
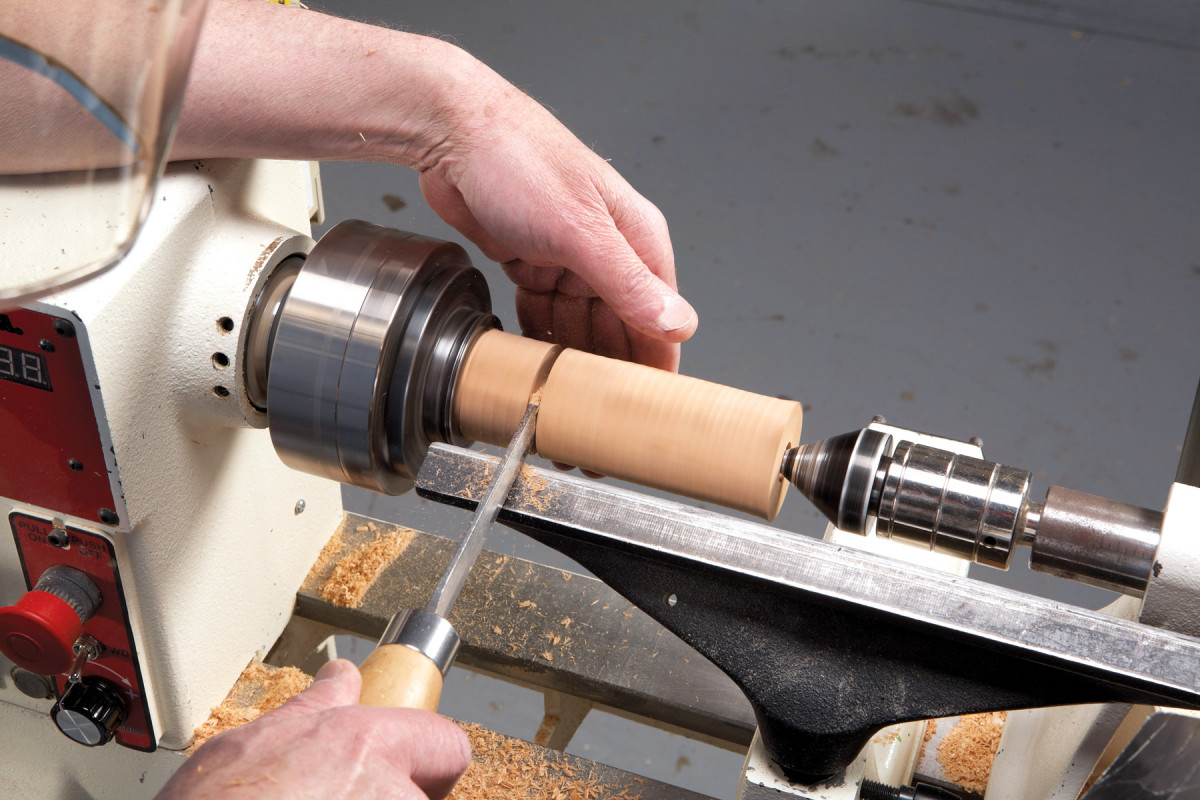
7. Rough out two blanks for the handles, then mount one in a scroll chuck. Drill a 5/8″ diameter hole about 1/4″ deep, then drill a 5/16″ diameter hole as deep as your bit will go.
Rough out two handles from blanks that are 6″ long and 11/2” square. Shoot for a diameter of about 13/8“. Mount one handle in the scroll chuck and drill a 5/8” dia. hole about 1/4” deep into its end.
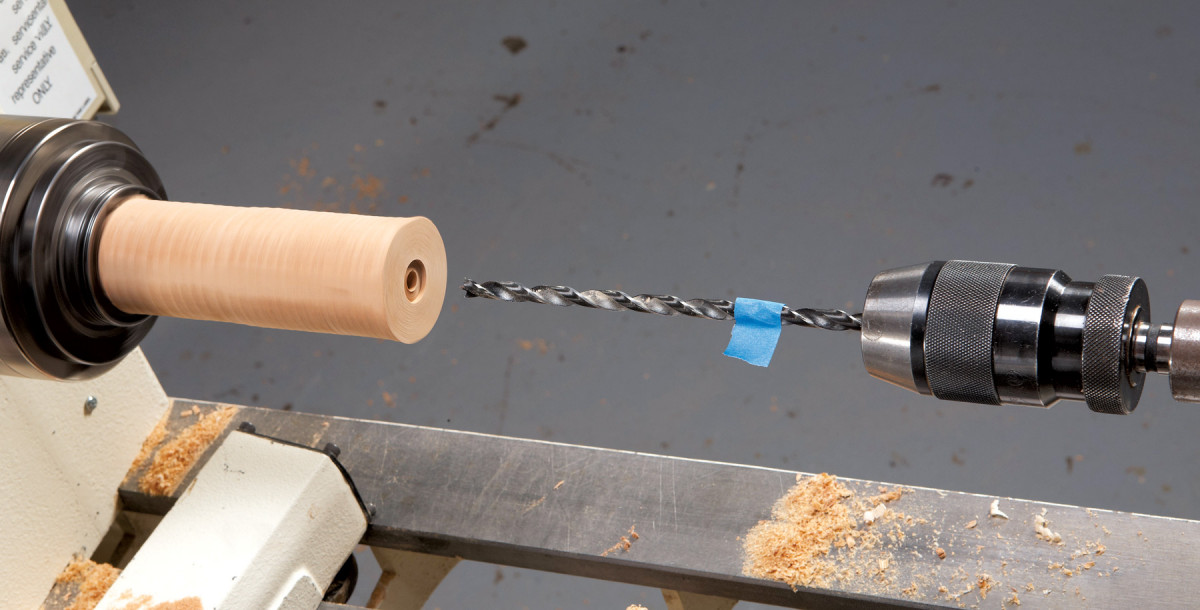
8. Continue drilling the hole with an extra-long 5/16″ bit. Make this hole at least 41/2″ deep.
Next, drill a 5/16” hole as deep as your bit will go (Image 7). Replace this bit with an extra-long one and continue drilling the hole at least 41/2” deep (Image 8).
9. Use a parting tool to cut the handle 4″ long. Repeat the same operations on the second handle.
Make a mark 4″ from the end of the handle, then part off the handle at the mark (Image 9). The deep hole you drilled should have passed all the way through the resulting piece. Repeat the same procedure with the second handle.
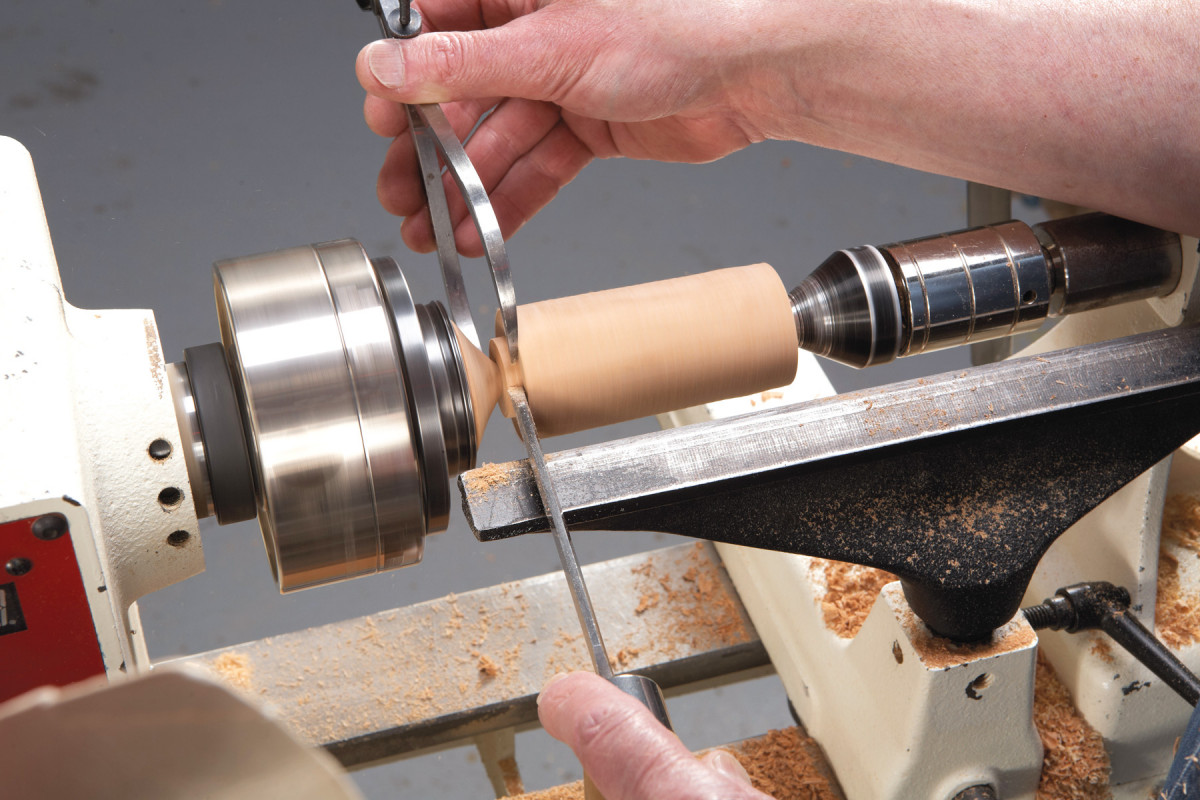
10. Mount each handle between the jam chuck and the live center. In order to make identical handles, lay out their end diameters with a caliper and a parting tool.
To true each handle, mount it between the jam chuck and live center. Both handles should be similar in shape and size, of course, so I use a story stick to mark major and minor diameters, then turn the handle down to these dimensions using a caliper (Image 10). Finish shaping the handle by eye (Image 11).
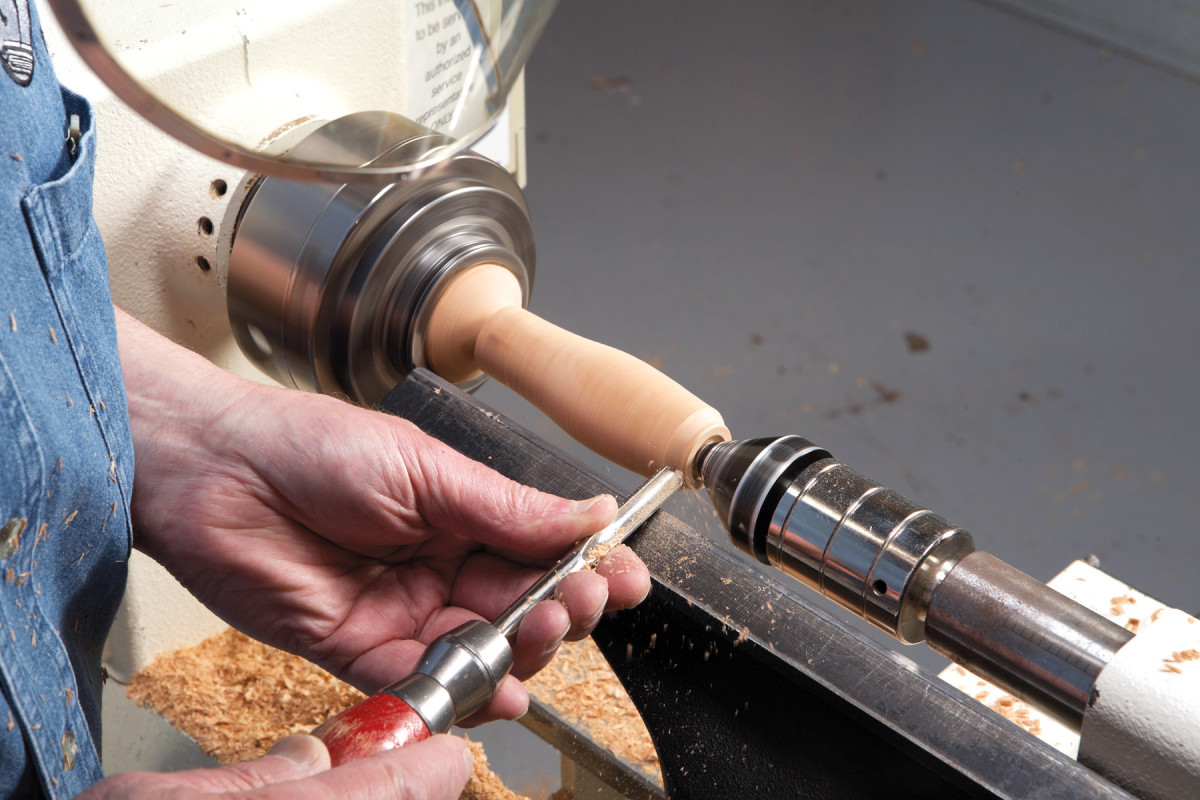
11. Shape the handles any way you want and sand them smooth.
Use 5-minute epoxy to glue the handles. You won’t need much. First, insert a carriage bolt through one handle, then fill the threads of the bolt with epoxy.
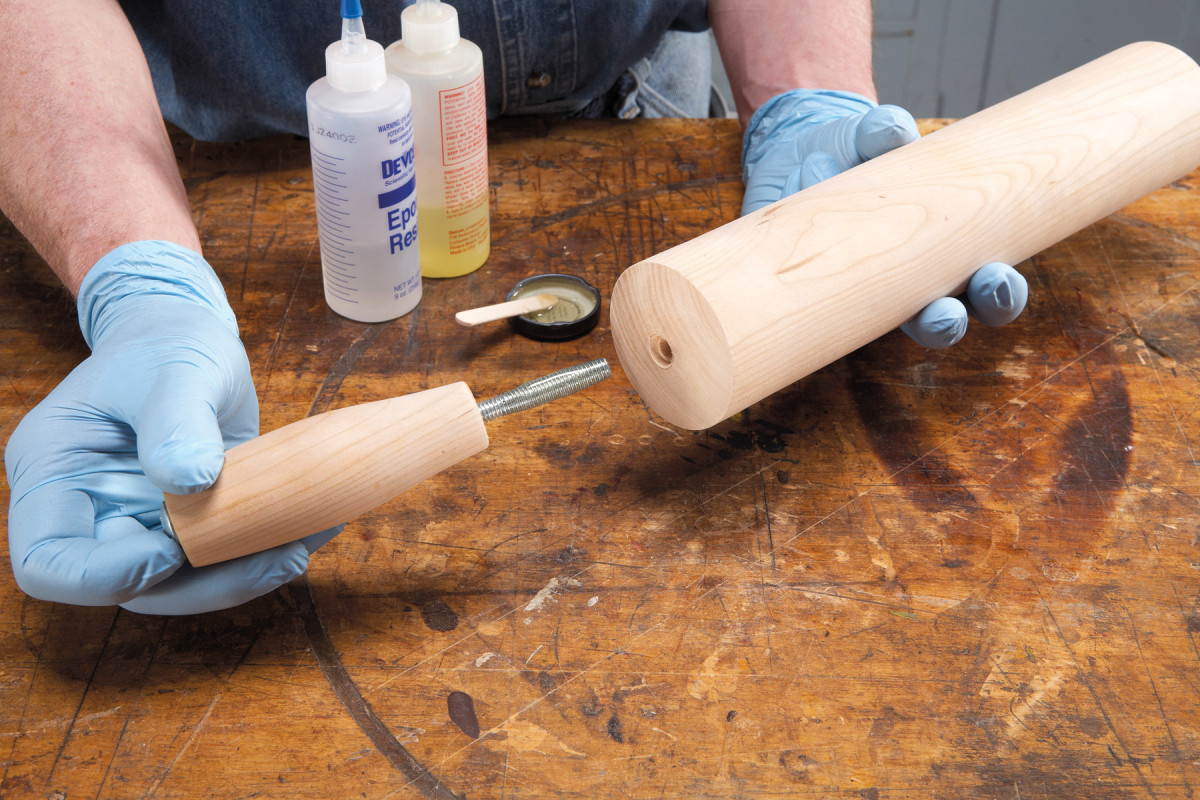
12. Slide a carriage bolt through a handle and coat its threads with epoxy. Push the bolt into the rolling pin. If any glue squeezes out, it will pool in the 7/16″ counterbored hole.
Push the bolt and handle into the rolling pin’s body (Image 12). If all goes well, you shouldn’t see any excess glue come out of the joint. If there is any excess, it should well up into the 7/16” hole and stay there.
Here are some supplies and tools we find essential in our everyday work around the shop. We may receive a commission from sales referred by our links; however, we have carefully selected these products for their usefulness and quality.


Beginning turner here. In the first picture the rolling pin on the right has different colors. Is that a certain species of wood or did you do something to get that affect. jerryminchin@gmail.com