We may receive a commission when you use our affiliate links. However, this does not impact our recommendations.
Whittled Peg Rack
It’s just you, your knife, and the wood.
Have you ever had one of those days (or weeks) when everything went wrong and you wondered why you decided to take up woodworking in the first place? It’s supposed to be fun, right?
Well, sometimes it helps to get back to basics. After all, the only things you really need to be a woodworker are: 1. wood; 2. something sharp. Whittling is just that. It’s relaxing and enjoyable. You can do it anywhere, anytime. A young person or beginning woodworker would enjoy this project just as much as an old codger.
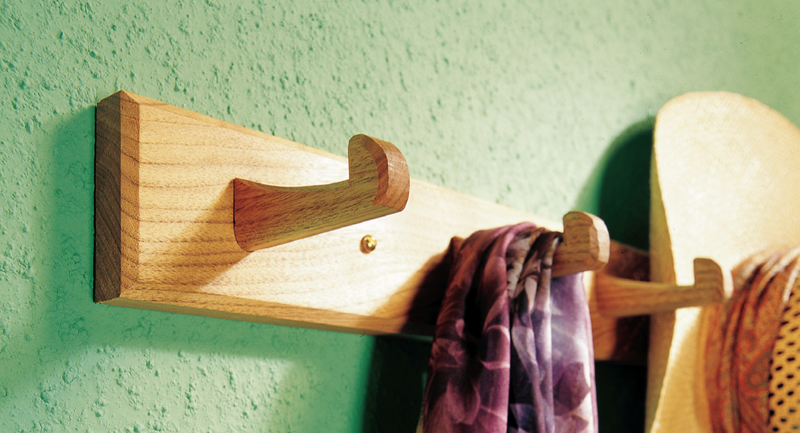
Historically, peg racks like this one were hidden. They were fastened to the back walls of wardrobes in the days before wire coat hangers were invented. But this one’s too nice to hide!
You can adjust the length of your peg rack to fit any wall, and you can mount as many or as few pegs as you like. Plan on making a few extra ones. They don’t all have to look alike, either. As your technique improves, the pegs will become more consistent.
Butternut is a good choice of wood. It’s pretty and cuts easily. White pine and basswood work just as well, but need to be painted. Walnut and cherry are harder to cut, but stronger and more durable.
The only tool you need for whittling is a knife. Choose one that’s comfortable. I prefer a big handle. Make sure the knife is sharp—you’ll be able to make controlled cuts that are clean and smooth. A dull knife won’t cut it.
Practice on an extra blank. Think of peeling a potato. Hold the piece of wood in your free hand, position the thumb of your whittling hand against the end of it, and draw the knife blade through the wood towards your thumb. Make deliberate, shallow cuts. Apply just enough pressure to let the knife do its job. Don’t make too deep a cut and don’t force the knife.
You’ll be able to tell which way the grain runs by how the knife cuts. Cutting with the grain is smooth and easy. So is cutting across the grain, as long as you cut from the outer edges toward the center. However, cutting against the grain is likely to result in slips and tear-out. When this happens, just turn the piece around so you can cut with the grain. Whittling is so easy that with just a little practice it will become second nature.
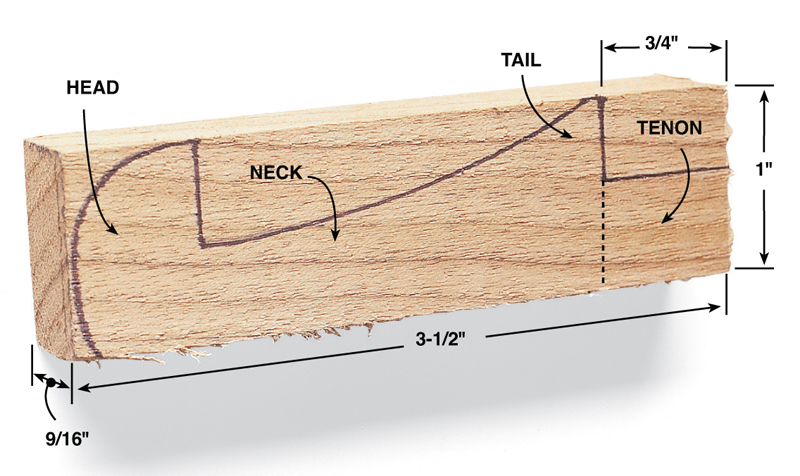
1. Transfer the peg’s profile onto both sides of a blank. Orient the grain so it runs roughly parallel to the bottom of the blank.
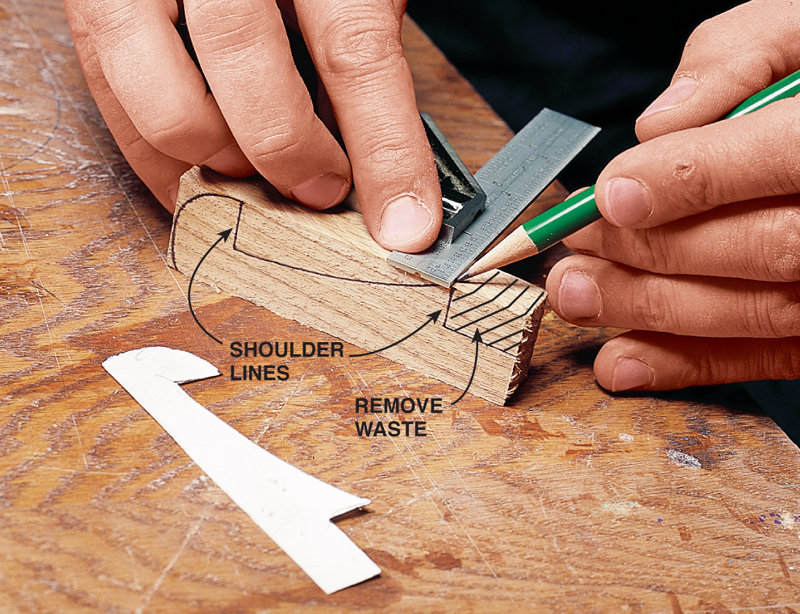
2. Extend the shoulder lines of the peg’s head and tail across the top of the blank, then cut squarely along them to establish the shoulders. Remove the waste above the tenon.
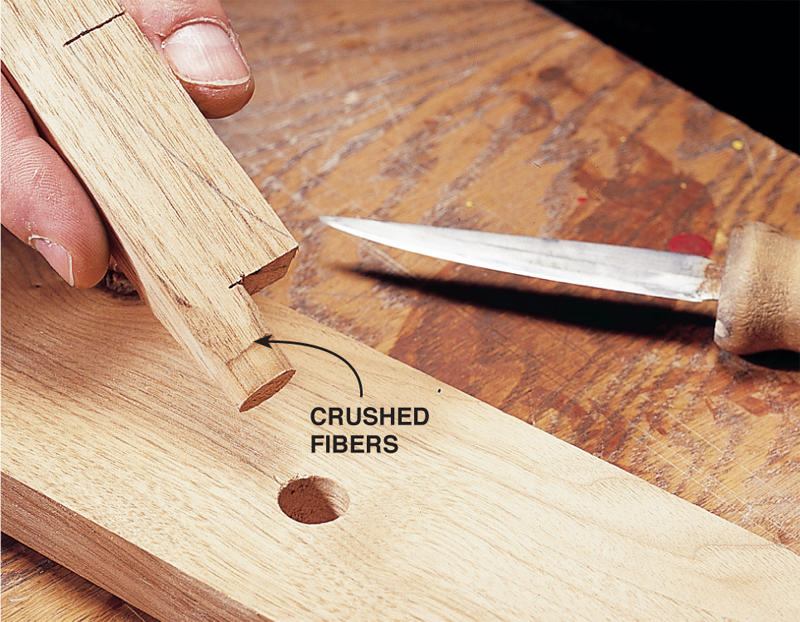
3. Round the back end of the tenon blank with short, paring cuts until it just starts to fit a 1/2″ hole drilled in a scrap piece of butternut. Apply a little pressure and spin it to slightly crush the fibers of the unfinished part of the tenon. Remove the peg and pare the rest of the tenon to this mark. Test and pare as necessary for a snug fit.
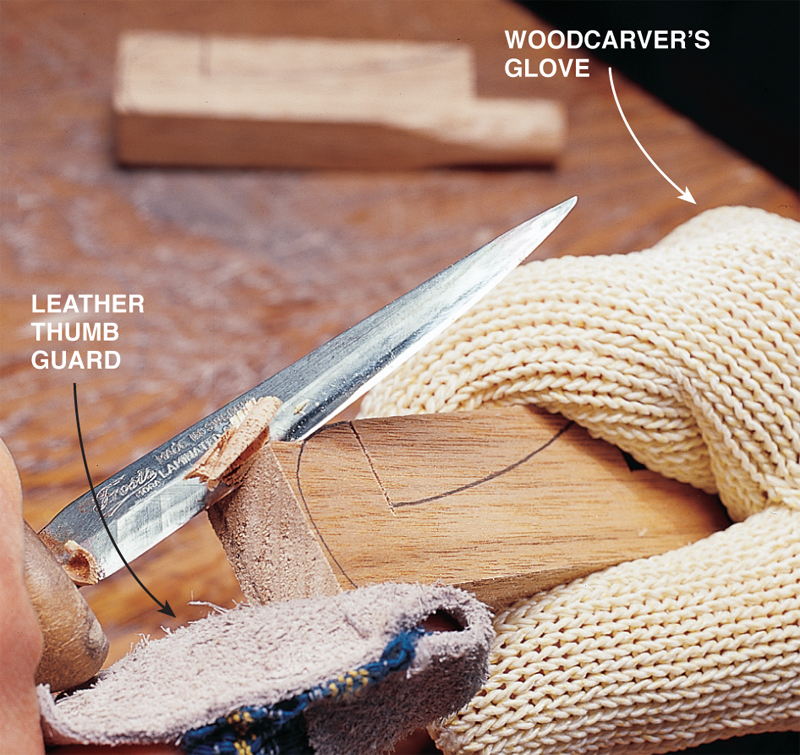
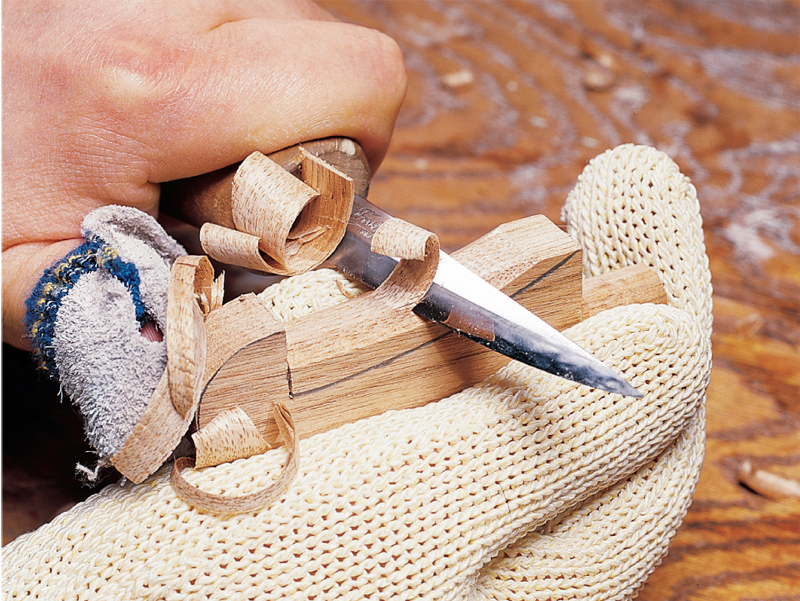
4. Create the convex curve of the head by making shallow, flat cuts across the end grain. Work down from the top and up from the bottom towards the middle. That knife is sharp! I prefer a long-blade knife, but a shorter blade is safer. Always wear a woodcarver’s glove and a leather thumb guard to protect yourself.
5. Cradle the blank in one hand and use a potato-peeling motion. Draw the knife through the wood to the stop cut at the shoulder. This is where a sharp, stiff blade is at its best. Work down by alternately chamfering the outer edges, then removing the center ridge until you reach the pattern lines. Finish the peg by chamfering all outer edges.
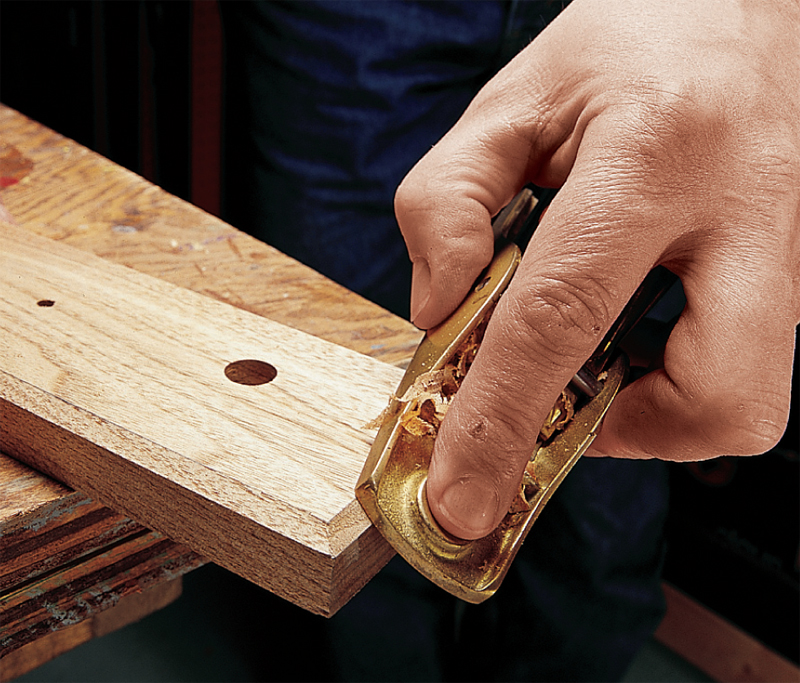
6. Chamfer the edges of a 2-3/4″ wide backboard. Make it as long as you want. Drill 1/2″ holes located 1-5/8″ from the top and spaced at least 5″ apart. Drill holes between the outer two pegs on each end for attaching to a wall.
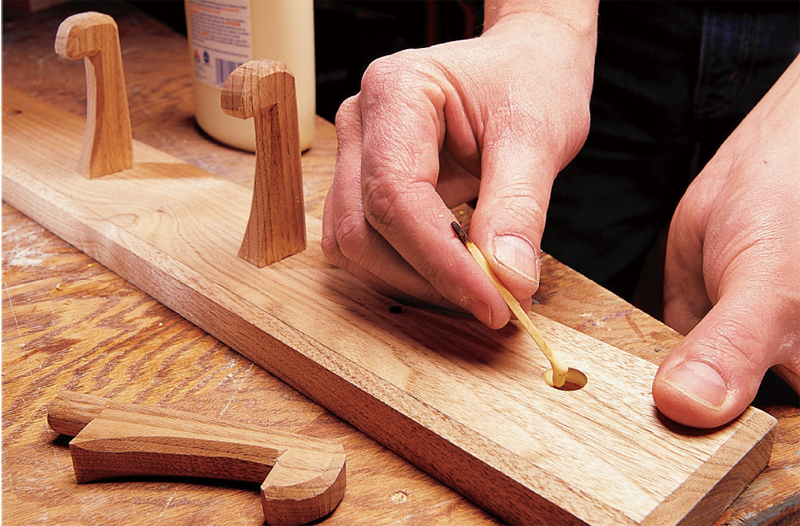
7. Apply glue around the insides of the holes with a wooden stick, then twist the pegs into place.
Here are some supplies and tools we find essential in our everyday work around the shop. We may receive a commission from sales referred by our links; however, we have carefully selected these products for their usefulness and quality.


