


We may receive a commission when you use our affiliate links. However, this does not impact our recommendations.
 Make your bench indispensable.
 Make your bench indispensable.
Editor’s note: This article originally appeared in the February 2004 issue of Popular Woodworking Magazine. Christopher Schwarz has published numerous articles on workbenches since then, and his thoughts have evolved on some of the topics discussed here. Still, this is a good guideline for anyone looking to upgrade the workbench in their shop.
I hate to say it, but no matter how much time and money you spent building or buying your workbench, it’s probably not as useful as it should be. Like adjustments to a new table saw or hand plane, there are a number of things everyone should do to tune up their bench. Also, there are several simple improvements that will make your bench perform feats you didn’t think were possible.
Most of these upgrades are quick and inexpensive. All of them will make your woodworking easier, more accurate or just plain tidier.
1 Improve Your Topography
Flattening your benchtop regularly is like changing the oil in your car. It’s a routine step that will save you headaches down the road. A flat top is essential to accurate work for three reasons:
• When planing, sanding or routing a board, you want your work to rest firmly against your bench; a flat benchtop helps keep your work in place.
• A flat top will divine whether your workpieces are cupped or bowed. If you ever want to remove the cup or twist from a door panel – a common malady – you must have a flat benchtop to know when your panel is finally flat.
• A flat top guides you as you assemble your projects. If you want your latest table, chair or cabinet to not rock, you have to make the legs or base all in the same plane. A flat bench will quickly point out your problems and the best solution.
So how do you flatten a benchtop? The simplest way is to run it through a big drum sander, which you can find in mid-sized cabinet shops. A couple woodworkers I know have paid about $50 for the privilege. The only downside is that you’ll have some sanding grit embedded in your bench when it’s all over, which can scratch your work in the future.
There is a way to flatten your bench at home by planing it with a router – once you build a somewhat complex carriage system that guides and holds the tool.
My way is faster. I flatten my benches with a No. 5 jack plane, an old No. 7 jointer plane, and a couple of sticks. The sticks are two pieces of plywood that measure 3⁄4” x 2″ x 36″. Traditionally called winding sticks, these will quickly determine if your bench is flat and where it’s out of whack.
Winding sticks are the key to making sure a benchtop or tabletop is indeed flat. Check the top by moving the light-colored stick to different positions across the length of the bench and comparing the top edge of each stick.
First place one of the winding sticks across one end of the bench. Then lay the other stick across the bench at various places along the length of the top. Crouch down so your eye is level with the sticks to see if their top edges are parallel. If they are, that area is flat. If they’re not, you’ll see where there are high spots.
Old-time winding sticks were made using a stable wood, such as mahogany, and were sometimes inlaid with ebony and holly on the edges (a black wood and a white wood) so you could easily see the difference. I prefer plywood because it’s dimensionally stable and cheap. If you need contrast between your sticks, I highly recommend “ebony in a can” (black spray paint).
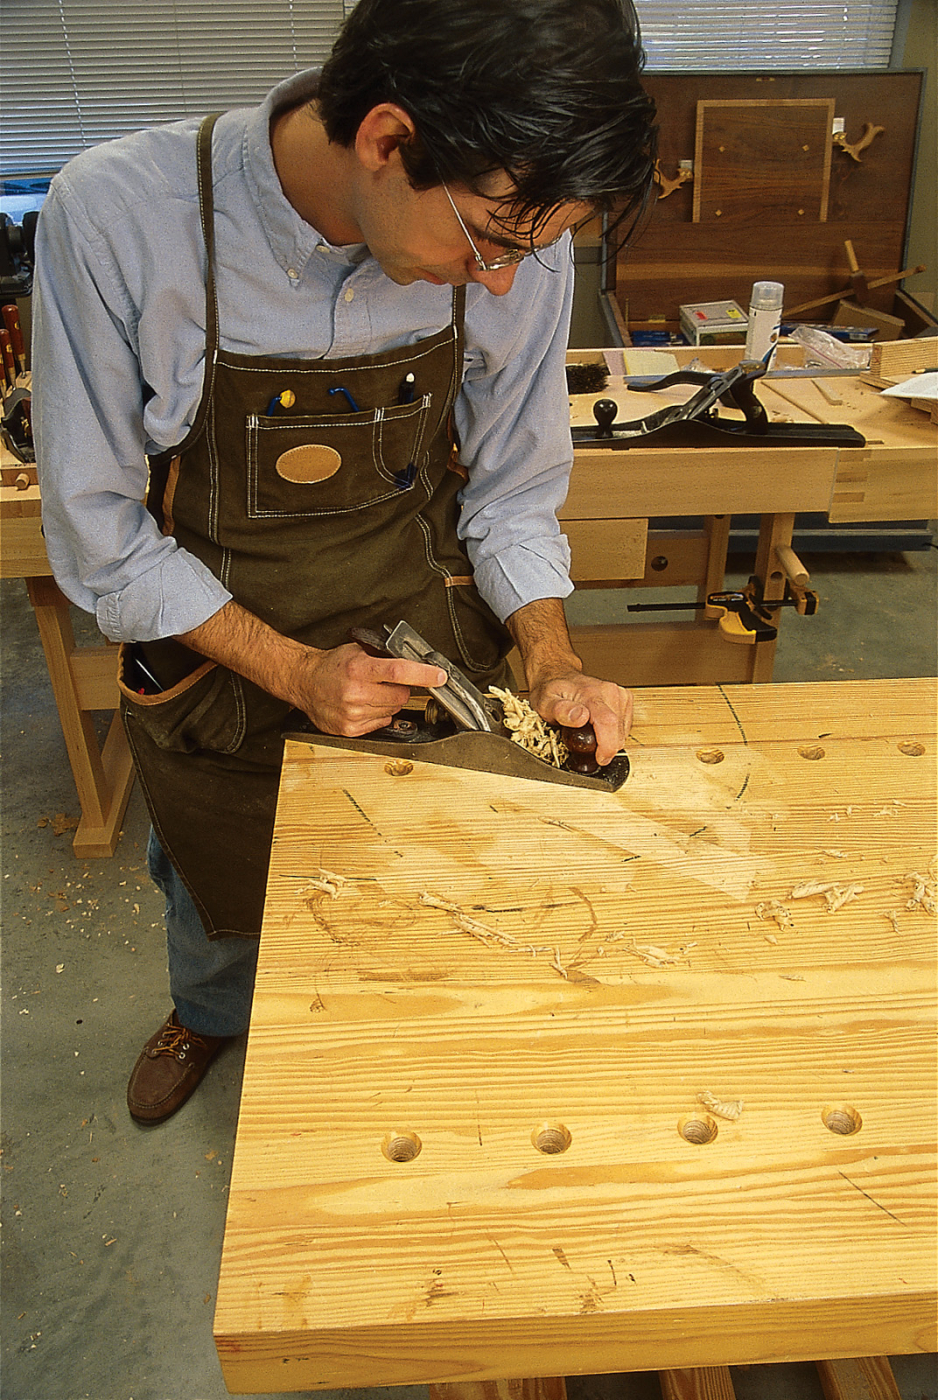
Most of the hard work when flattening your top is handled by the No. 5 jack plane, which can take down high spots quickly. My bench always seems to dish in the middle (similar to a waterstone), so I begin by taking
Mark all the high spots directly on your bench and start shaving them down with your jack plane. Continually check your work with your winding sticks. (For more on these sticks, see “Keep Your Winding Sticks in Focus”.)
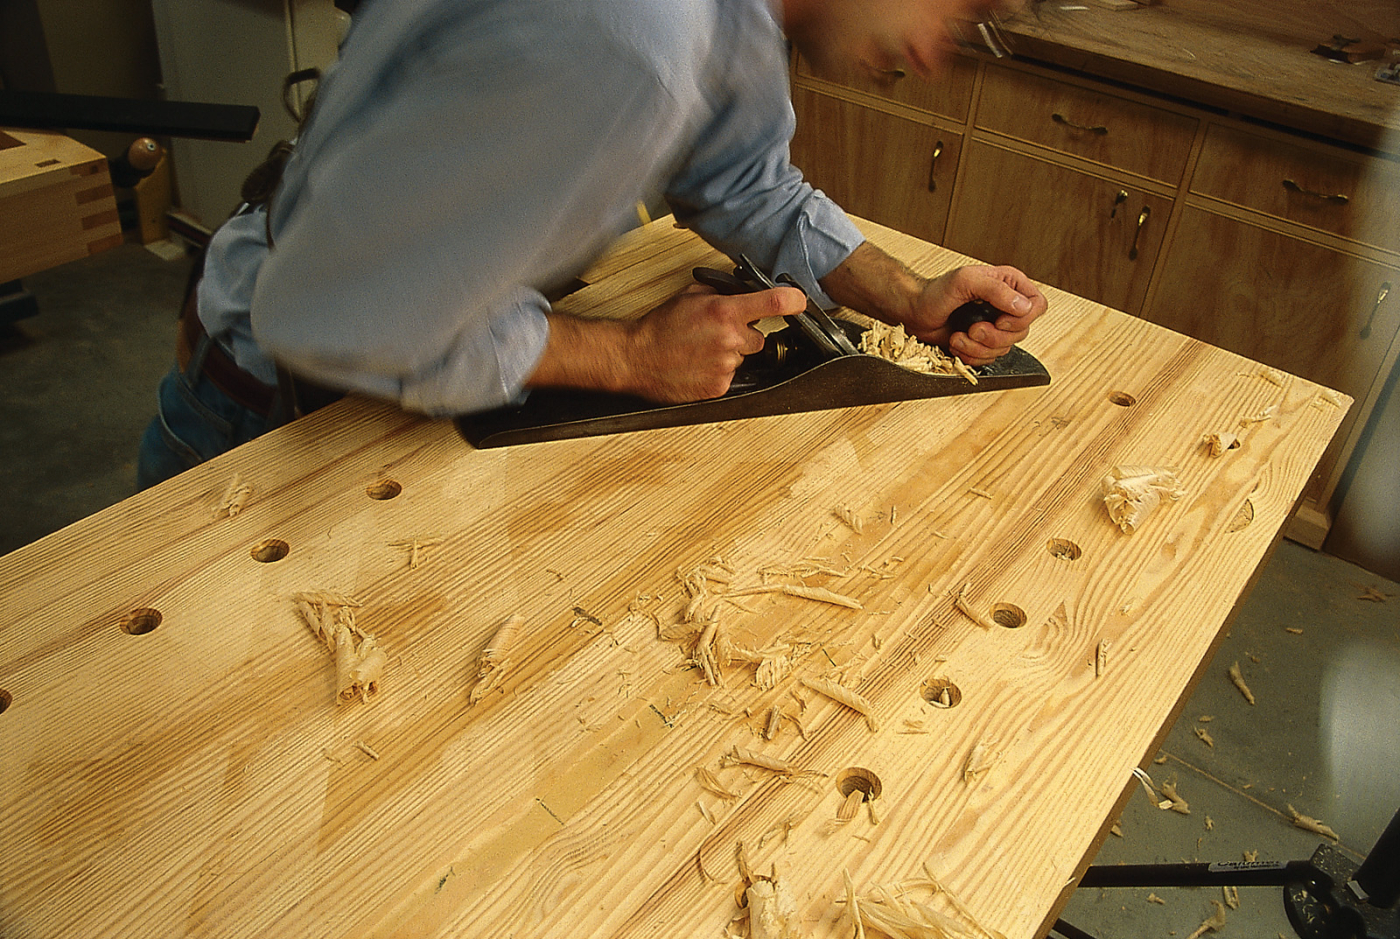
A No. 7 jointer planeʼs key asset is its length. Because of its length, the plane rides over the low spots and shears the high spots. Begin by working diagonally; donʼt worry about tear-out (above). When the top is flat from your diagonal passes, plane directly with the grain (below).
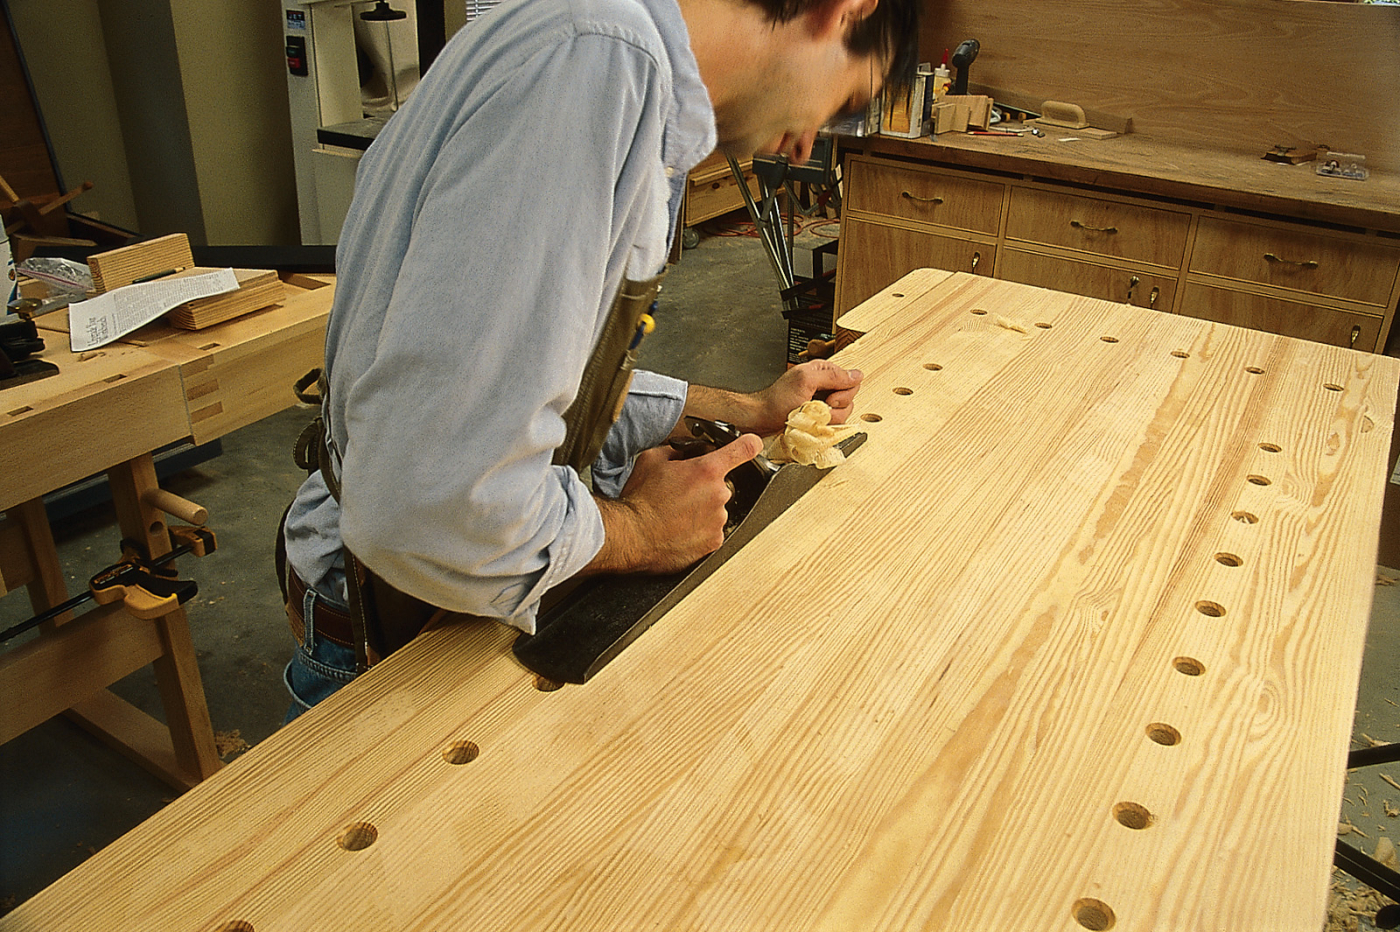
When the top is reasonably flat, fetch your No. 7 plane. First plane the top diagonally, moving from corner to corner. Then come back diagonally the other way. Do this a couple times until you’re taking shavings at all points across the top. Finally, plane the length of the bench. Start at the front edge and move to the back edge. When it looks good, check it with the winding sticks.
Tip: Keep Your Winding Sticks in Focus
When using winding sticks, one of the difficulties is trying to keep both sticks in focus when they are 6′ away from each other. If one of the sticks is blurry it’s difficult to tell if they are in line with each other.
The solution comes from the world of photography. Take a piece of thin cardboard – I use the stuff from the back of a notebook. With your brad awl, punch a small hole (1⁄32” or so) in the center of the cardboard. Crouch down in front of your winding sticks and look at them through the hole. They should both be in focus.
In a camera, when you close the aperture (also called the
F-stop), more of the picture is in focus. The same principle works with your eye. If you close the aperture that light passes through, more of what you see will be in focus.
As a practical matter when doing this, check both ends of the sticks by moving your eye left to right, not your head. It’s easier to get a reading on your sticks this way.
2 A Deadman Lends a Hand
One of the trickiest operations is working on the narrow edge of a board or door. Securing the work is the No. 1 problem. The traditional solution is what’s called a sliding deadman. I installed the one shown here in an afternoon and now I wonder how I ever got by without it.
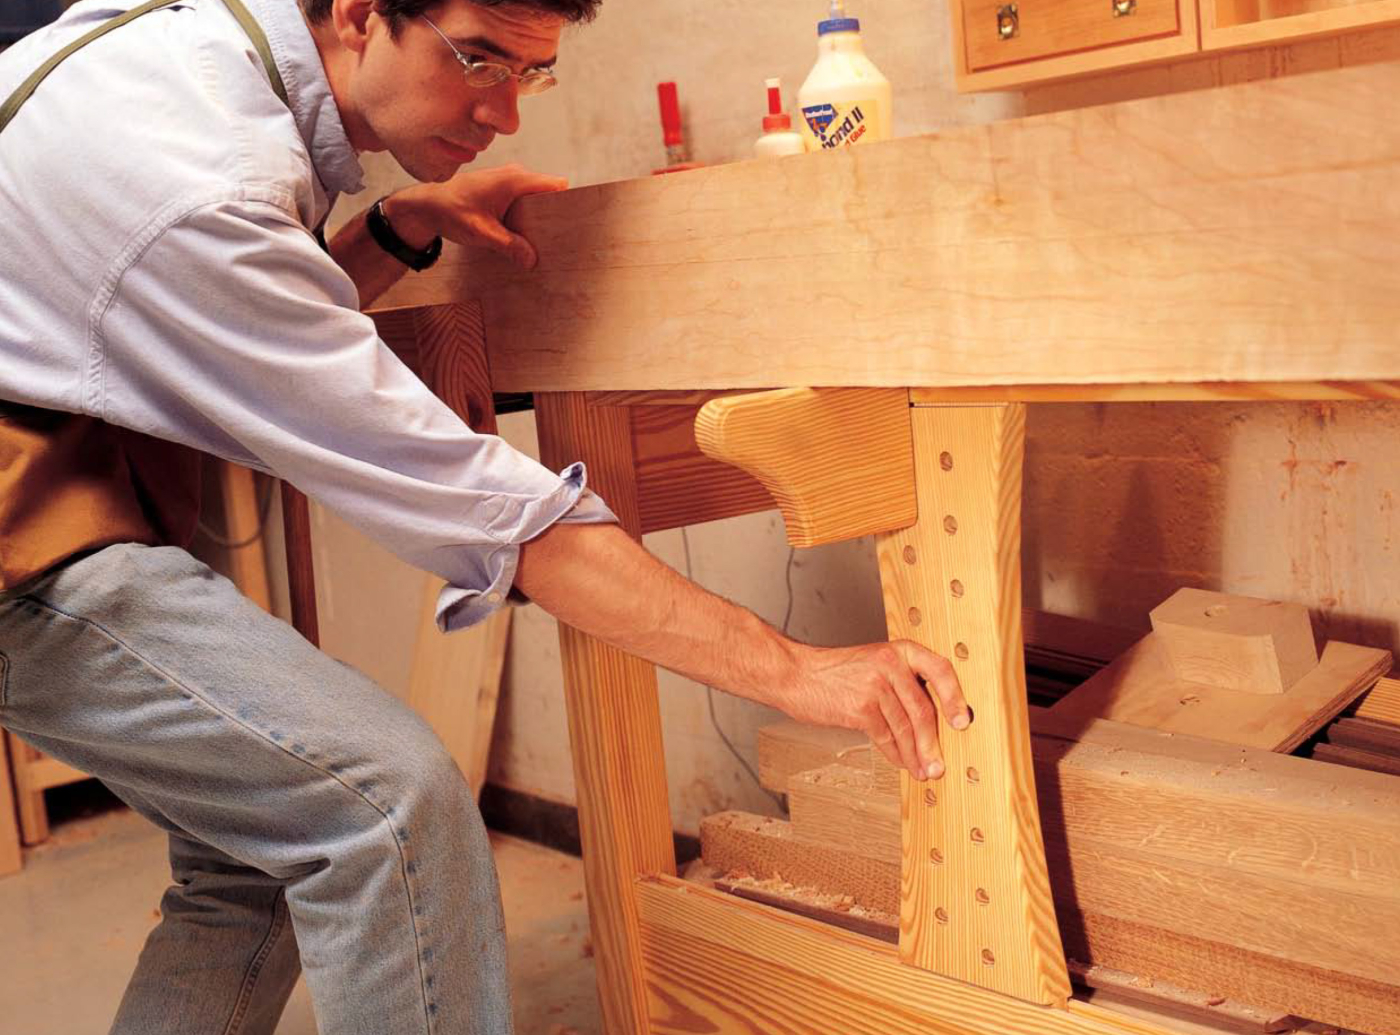
While flattening the top is the most important upgrade, a close second is the sliding deadman. This clever bit of engineering will allow you to immobilize doors easily.
Because the deadman slides across the front of the bench, you can accommodate all lengths of work. And because the ledge can be adjusted up and down, you can hold narrow boards or even entryway doors. With the help of your face vise, you can immobilize almost anything with this rig.
I added the deadman by screwing two rails to my bench that each have a groove milled in one long edge. The deadman itself has a slightly undersized tenon on each end that allows it to slide in the grooves. You can download a construction drawing for this project from our web site at popwood.com. Click on “Magazine Extras” to get to the drawing.
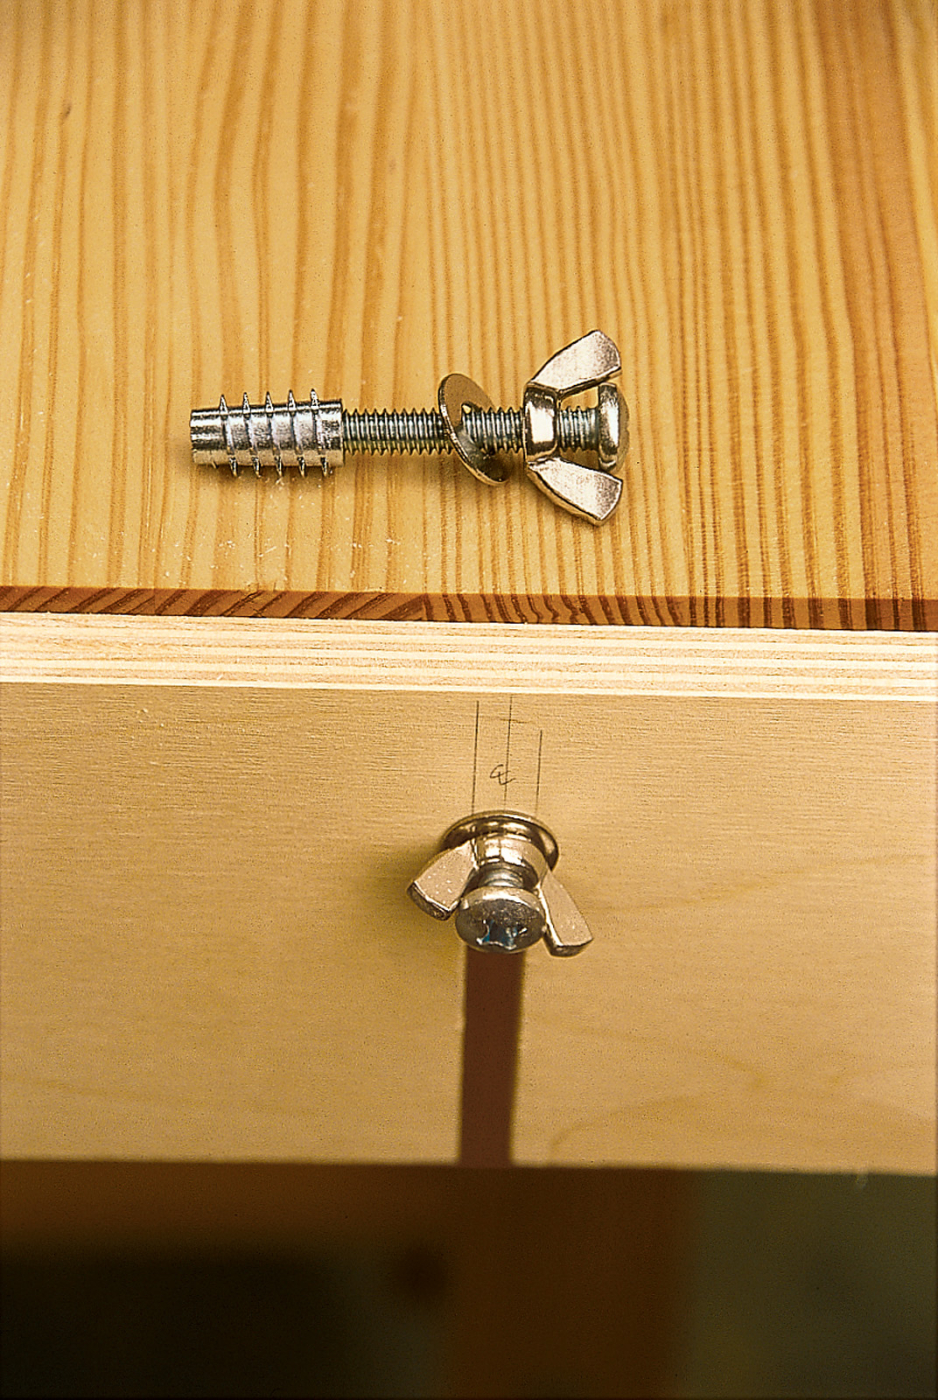
3 Add a Leg or Bench Jack
While I consider the sliding deadman to be the cat’s meow, there are simpler ways to support oversized work at your bench.
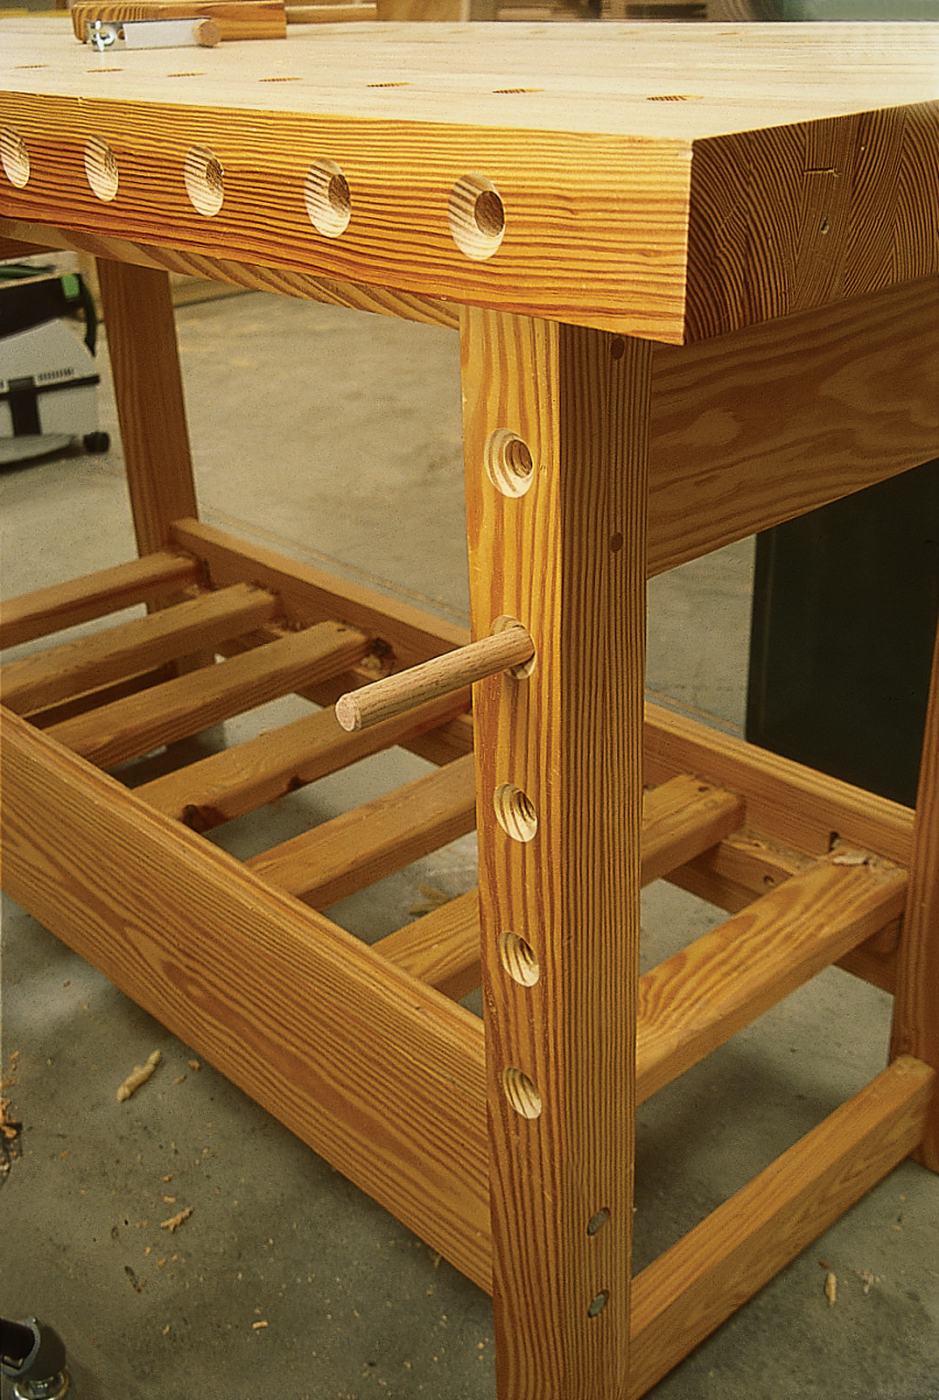
A leg jack is great for clamping long work, and it takes only about 20 minutes to add to your bench. There are fancier ways to do this, but none is more effective.
If you do a lot of work on big doors, a leg jack is probably the best bet for you. Basically you bore 3⁄4“-diameter holes every 4” up the front leg of your bench that’s opposite your face vise. (For example, if your vise is on the left side of your bench, bore the holes in the right leg.) Chamfer the holes (see the next section on dog holes for directions) then insert a 3⁄4“-diameter dowel in one of the holes. You’re in business.
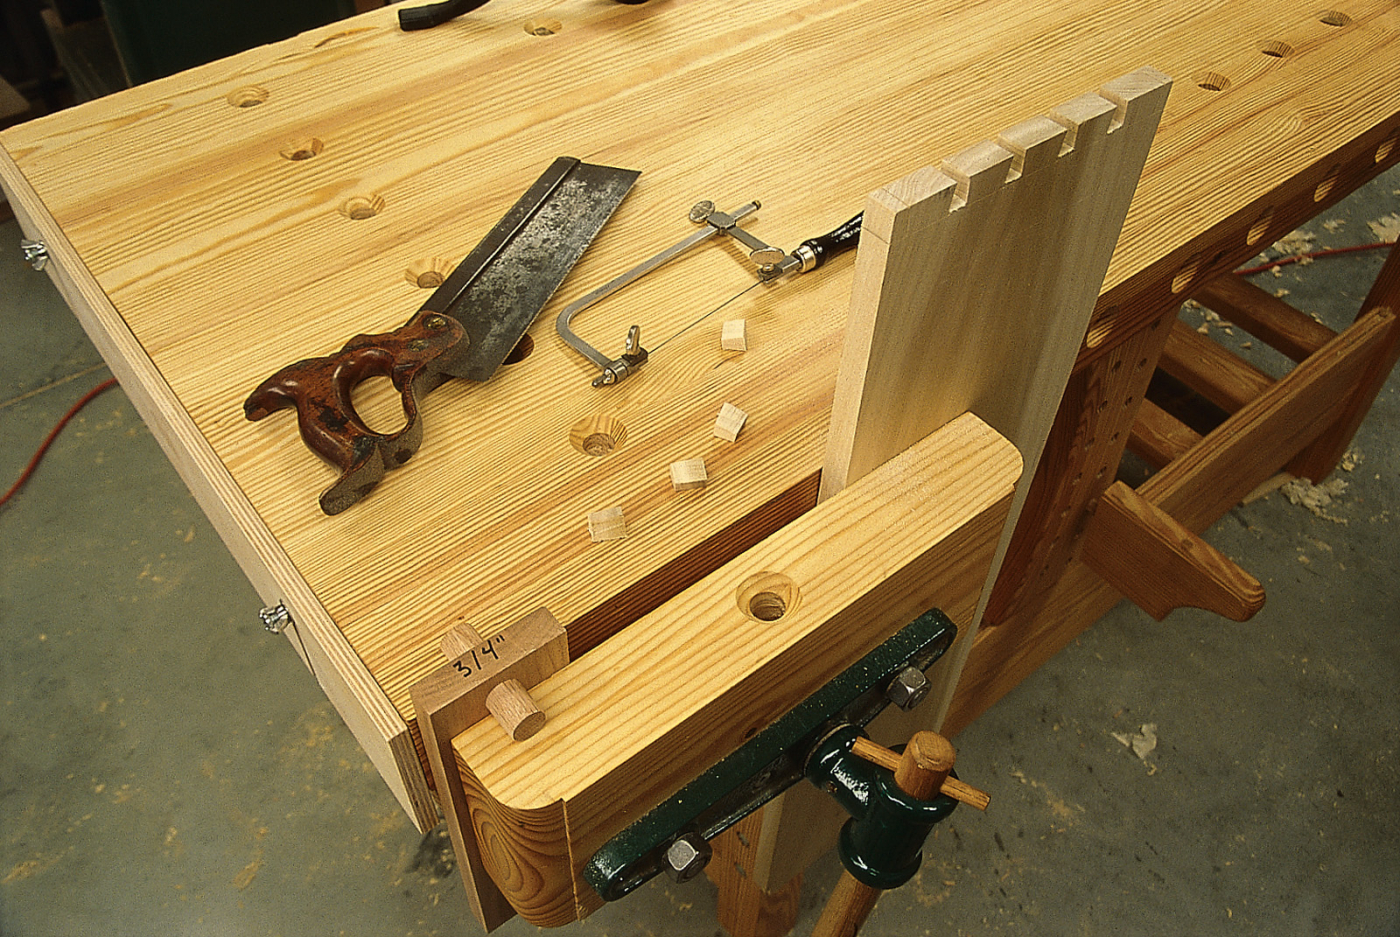
The disadvantage of this jack is that it supports only long work. To hold shorter work, you need to add a second kind of jack to your bench – a bench jack.
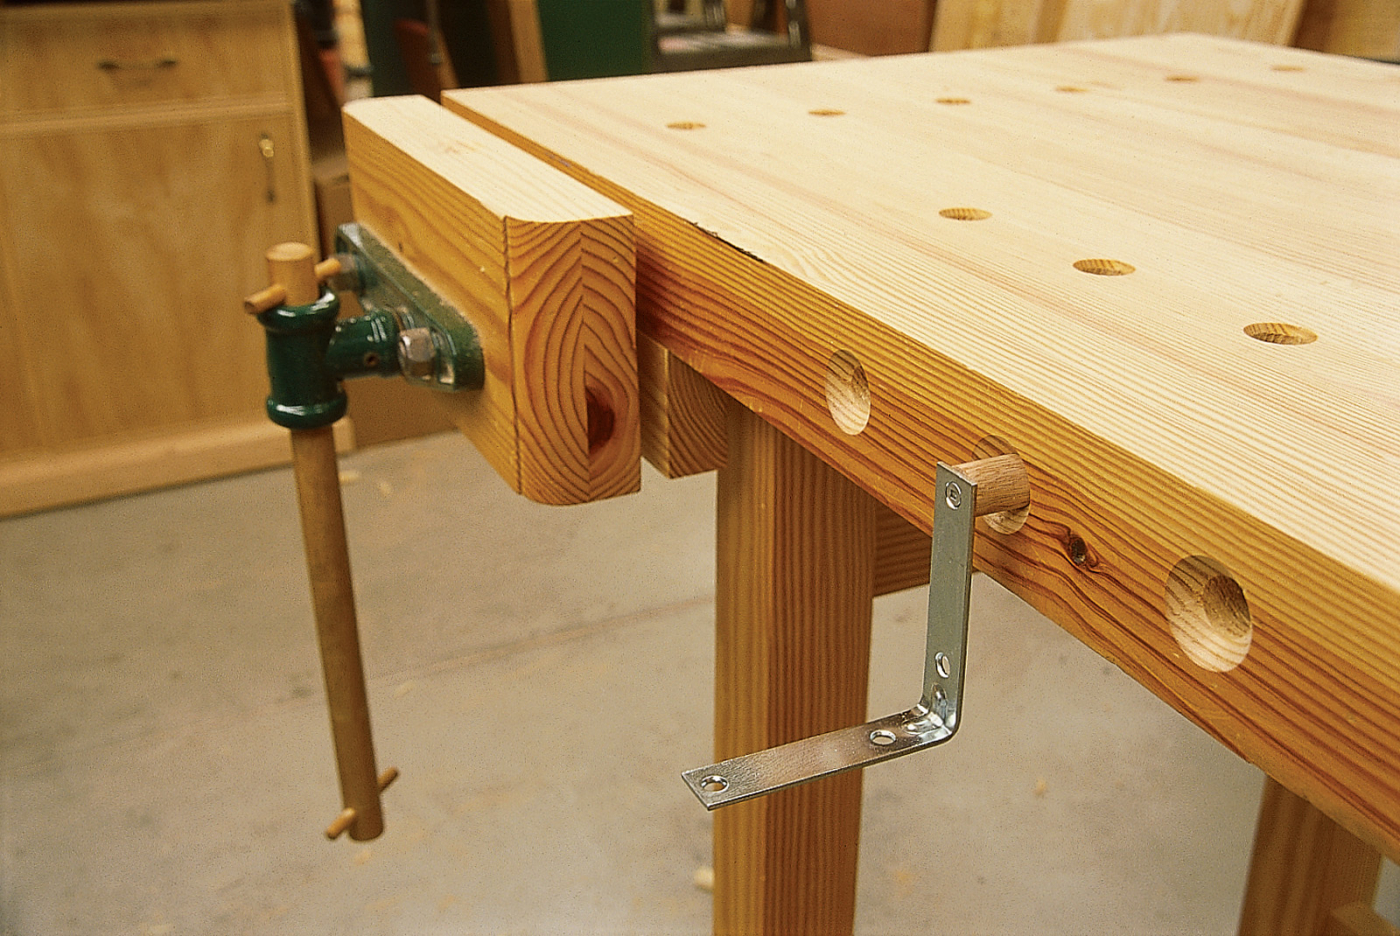
This simple bench jack excels at clamping boards that are 8″ wide or narrower. Like the leg jack, this is a quick upgrade.
For your bench jack, you’ll bore the 3⁄4“-diameter holes across the front edge of your workbench – every 4″ or so should be sufficient. Make the holes about 2” deep and chamfer their rims.
Next get a 2″ length of 3⁄4” dowel. To create a ledge for the board to rest on, your best bet is to buy an L-shaped piece of steel from your local hardware store. This $1 item usually has screw holes already bored in it and is used for reinforcing corners.
Screw this L-shaped steel to the end of the dowel (see photo above). This jig now will allow you to hold narrow boards of almost any length in place so you can work on the edge.
4 Add Bench Dogs
A good system of bench dogs and dog holes makes routine operations easier and impossible tasks a cake walk. And retrofitting a bench with round dog holes is quick and simple.
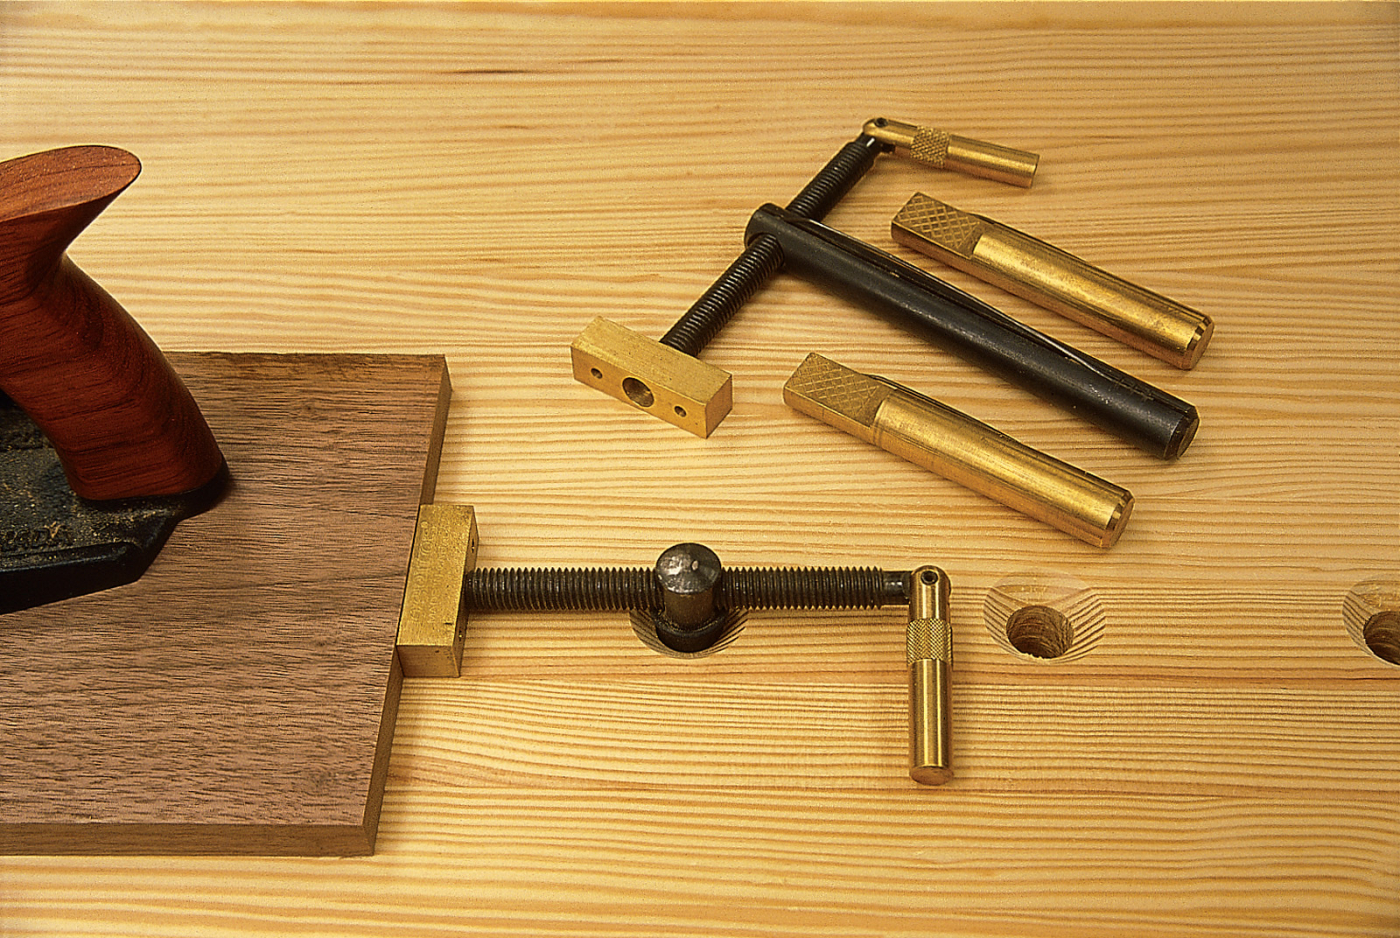
If you canʼt afford a tail vise, these Wonder dogs make many clamping chores easier. With two Wonder dogs and bench dogs you can clamp odd-shaped material.
I like to have at least two rows of dog holes running down my benchtop that are spaced 4″ apart. On some benches, I’ve had the dog holes line up with the dogs on my tail vise so that I can clamp things between my tail vise and any dog hole on the bench. But even if you don’t have a tail vise you can unlock the power of the dog hole with a product called the Wonder Dog from Lee Valley.
The Wonder Dog is essentially a mini-vise that slips into any 3⁄4“-diameter dog hole. It allows you to apply pressure in any direction, which is great for clamping round or other irregularly shaped pieces for sanding or planing.
To drill the dog holes, your best bet is to make a jig like the one shown below. Also grab a 3⁄4” auger bit and a drill.
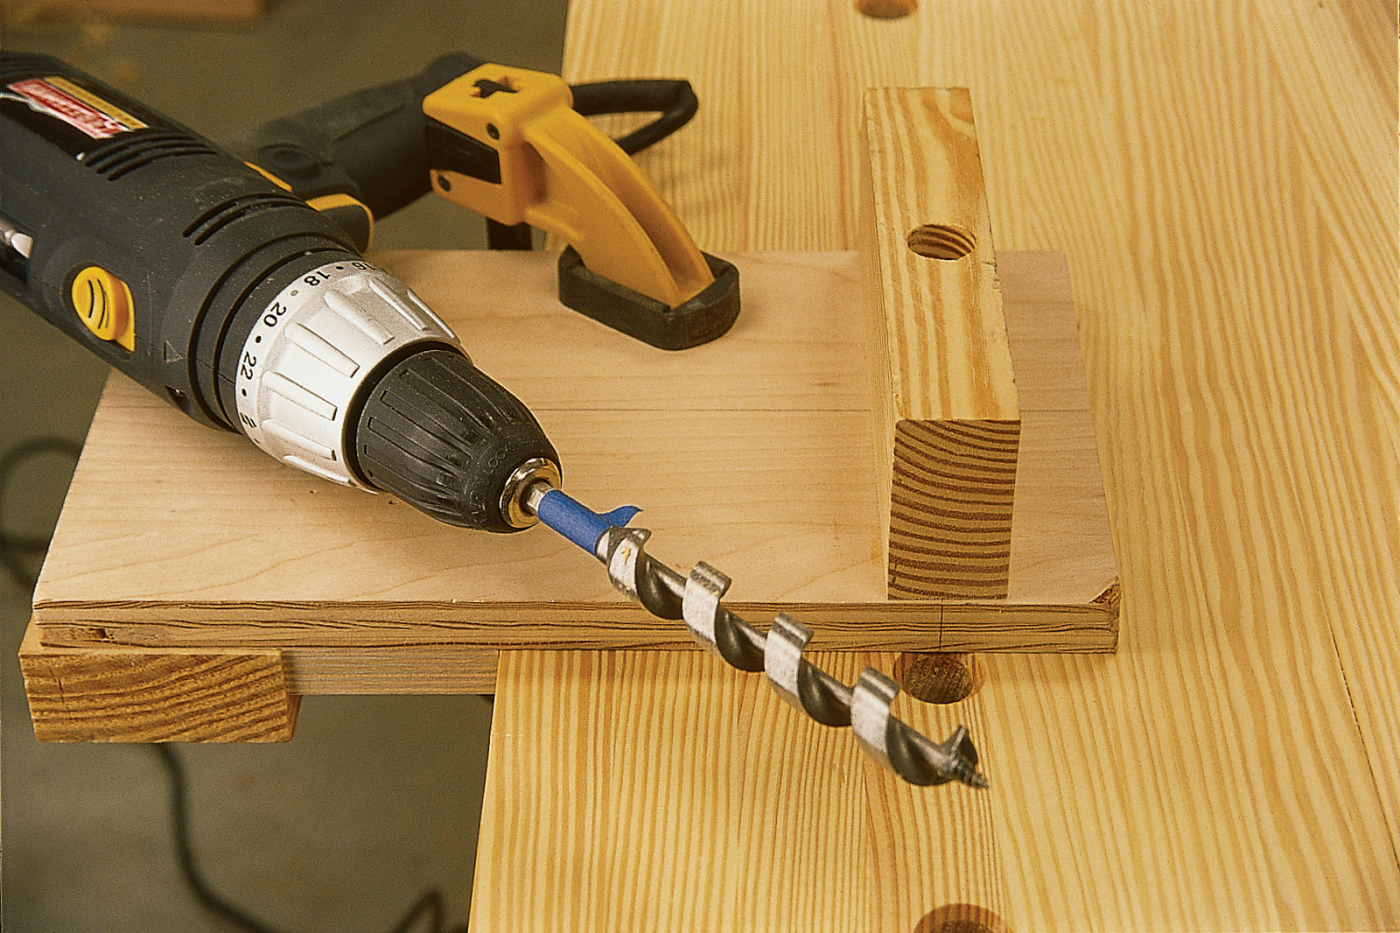
This gizmo works like a primitive doweling jig. Mark lines on your top where you want your dog holes. Clamp this jig to your bench and line it up with your marks.
Clamp the jig to your bench and drill the hole all the way through the benchtop. Use a slow speed. After you drill each hole you need to chamfer the rim to keep from ripping up your benchtop when you pull out a dog. The easiest way to do this is with a plunge router.
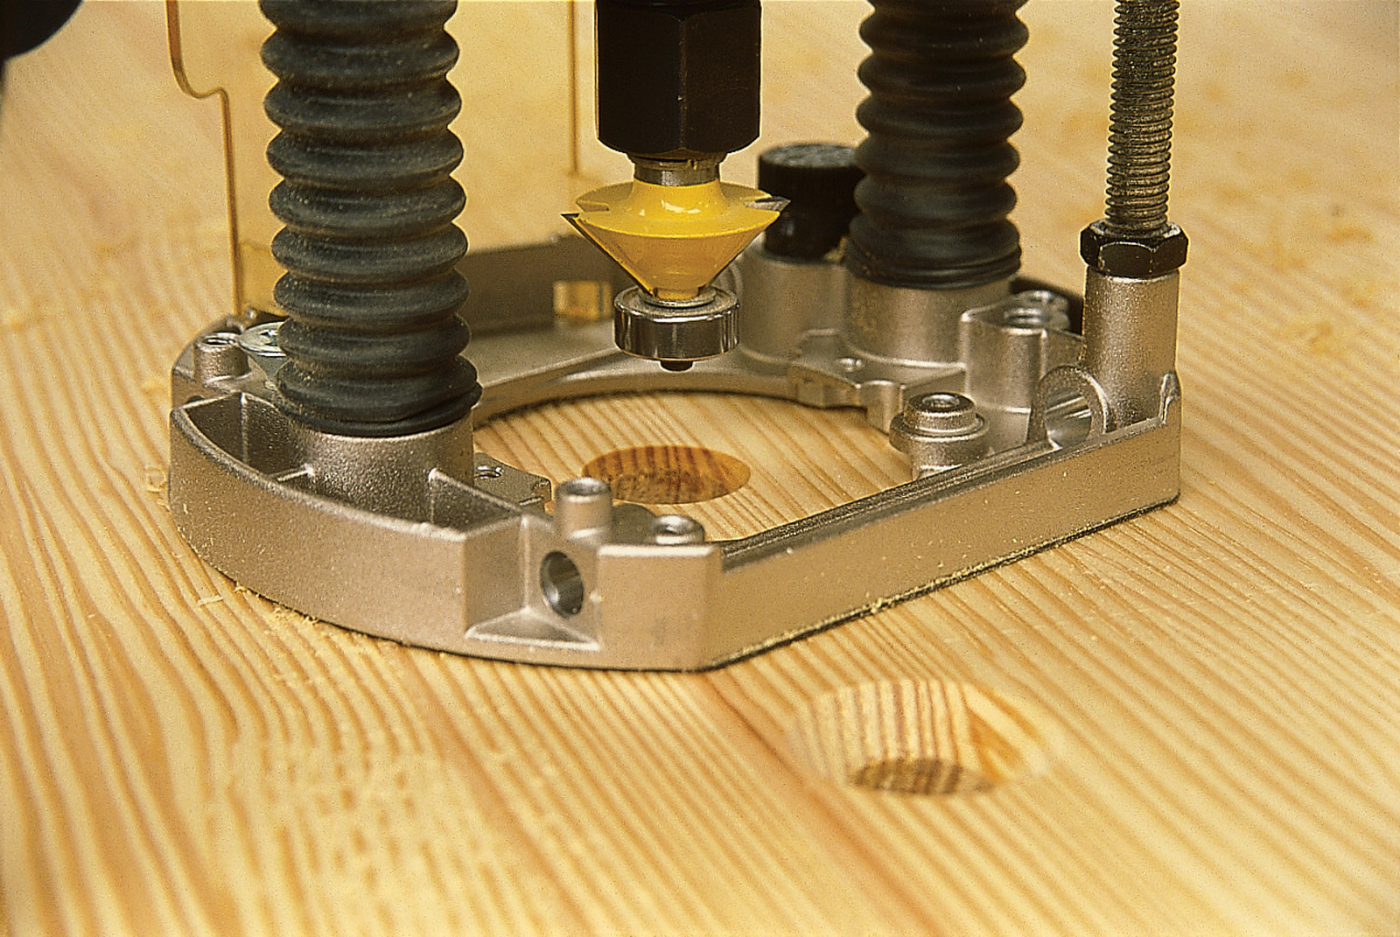
Chamfering your dog holes prevents you from tearing out the grain when you remove a stubborn dog.
Chuck a 45° chamfer bit that has a 3⁄4” bearing on its end in your plunge router. Insert the bearing into the dog hole, turn on the router and plunge straight down, making a 3⁄8“-deep cut.
5 Add a Tail Vise
If you’ve got just one vise it’s almost always on the front (sometimes called the face) of your bench. A tail vise (located on the end of the bench) is an extremely useful upgrade. The retractable metal dog on most vises allows you to clamp really long workpieces to your bench between the vise’s dog and a dog in the benchtop. It’s also just plain handy to have a second vise.
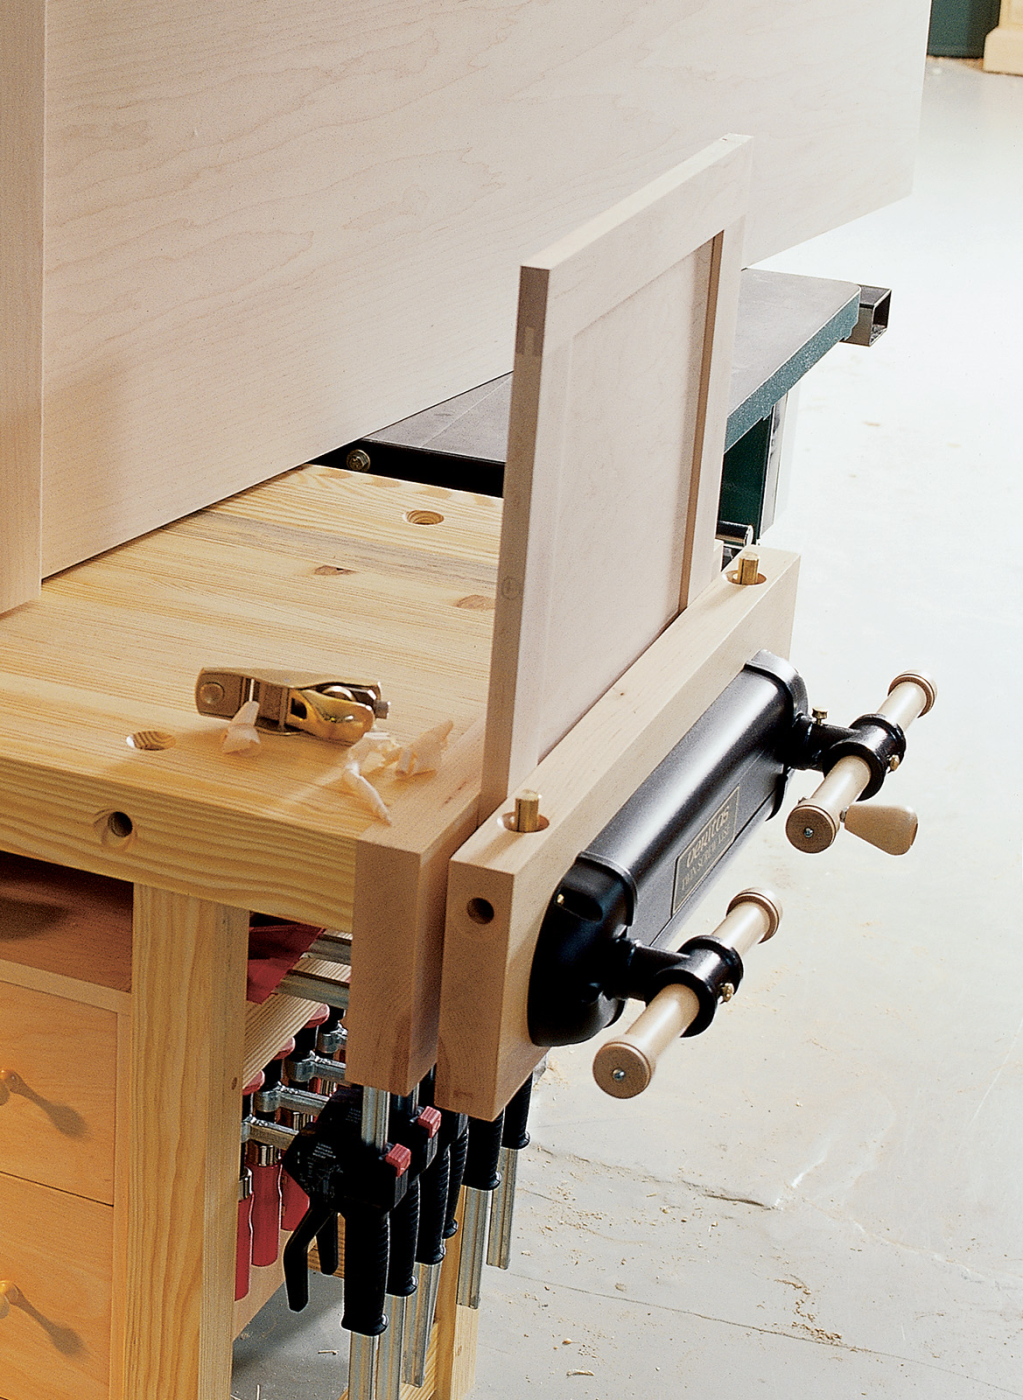
A tail vise, such as this Veritas, is a luxury we all deserve. Since adding one to my bench at home, shown here, I’ve found myself using it far more than a face vise.
When choosing a tail vise, you have three good options:
• You can buy a traditional quick-release metal vise with a retractable dog for between $65 and $150. It’s easy to install.
• You can buy a front-vise screw kit that you just add wooden jaws to. This option can be a bit cheaper but requires more labor. The advantage to this vise is that you can add dog holes to the top or front edge of the wooden vise faces.
• You can buy an expensive specialty vise that will do things your face vise won’t. The Veritas twin-screw vise gives you a huge tail vise that can be used for clamping or holding almost any flat work. Or you can buy a patternmaker’s vise that excels at holding irregular objects at any angle. Both of these are expensive, but worth it.
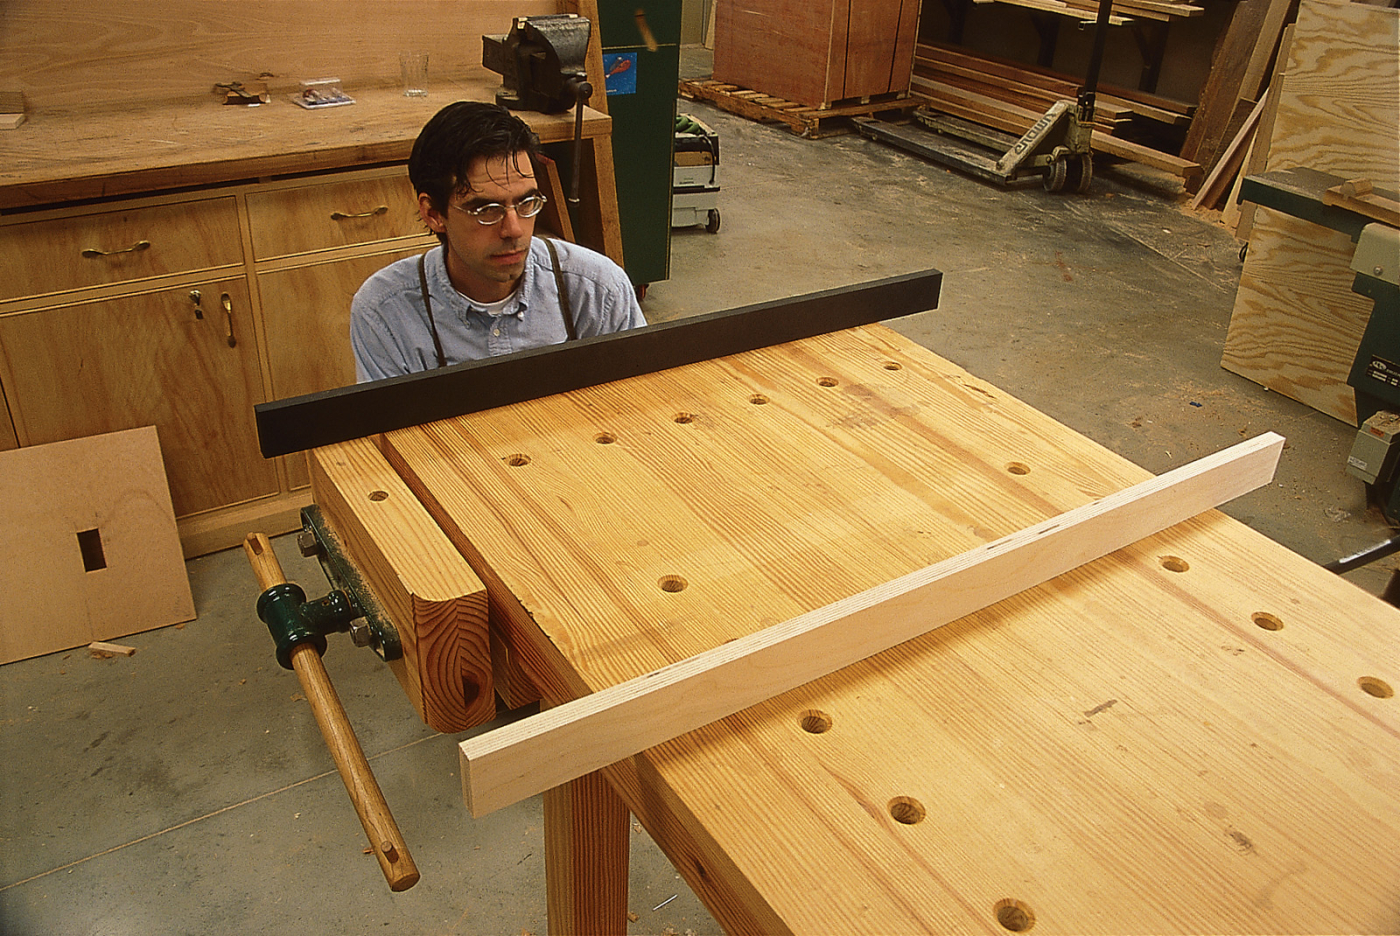
6 Add a Planing and Sanding Stop
Many woodworkers clamp their work down when they don’t have to. In many cases, gravity and the force of your tool will do the job.
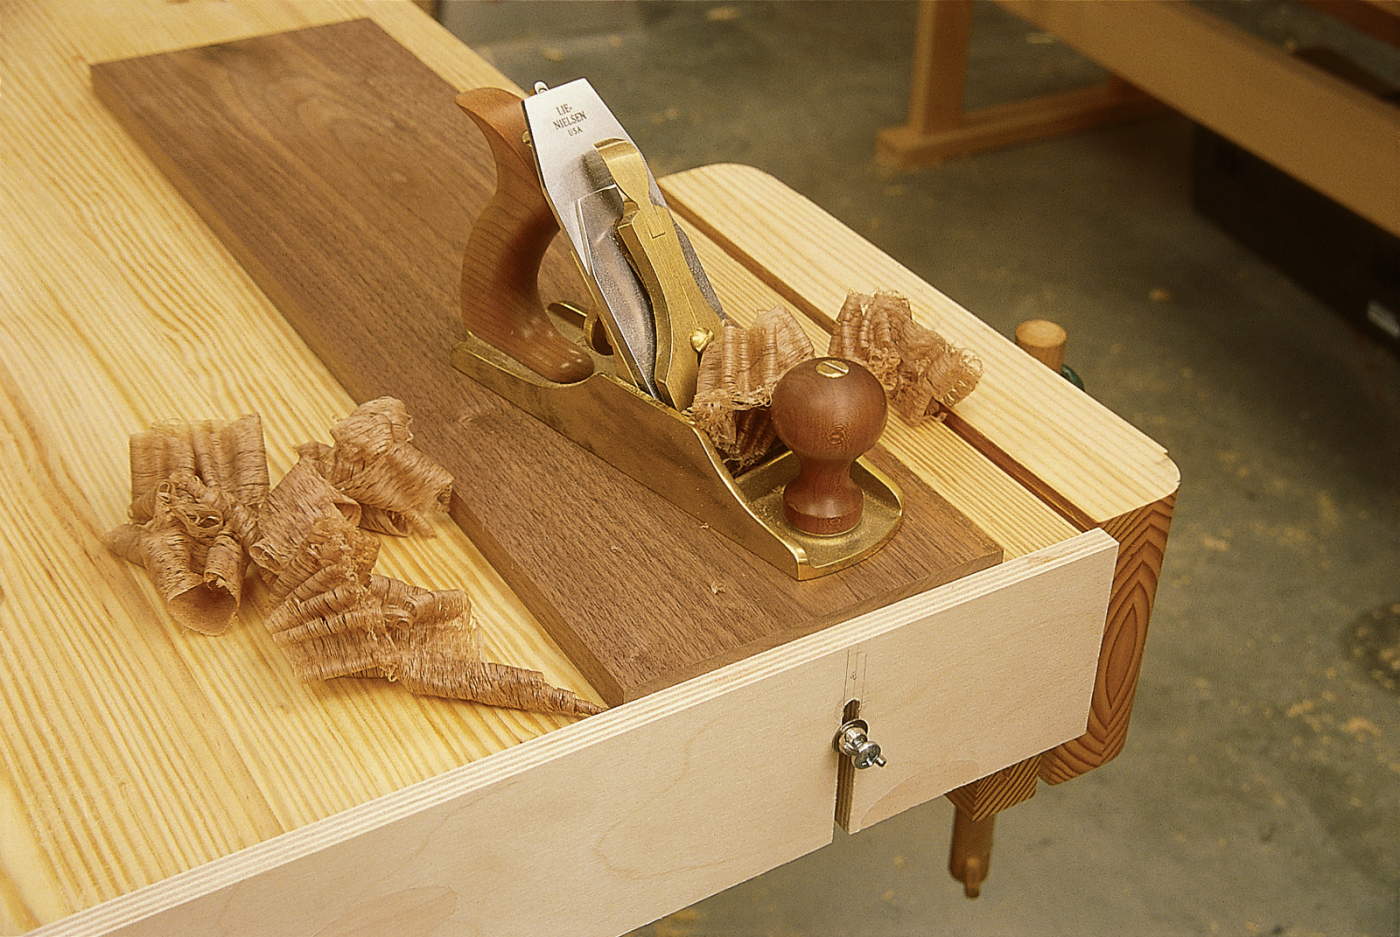
If you use a hand plane, you really should invest $10 and an hour of your time to make this planing stop. It is the most versatile stop Iʼve ever used and works great for thick or thin stock.
A planing stop is essentially a lip on the end of your bench that can be adjusted up and down. When you’re going to plane your work you merely put the wood against the stop and plane into it. The force of gravity plus the direction you are pushing your tool holds the work in place.
The same concept works for belt sanding. Just remember which way the sander spins. The front of the sander should point away from the stop. Otherwise the machine will shoot your work across the room, easily puncturing any styrofoam cooler in its path. Don’t ask me how I know this.
The most versatile planing stop is a piece of 1⁄2“-thick plywood that is as long as your bench is wide. A couple wing nuts, bolts and washers allow you to position and fix the stop up and down, depending on the thickness of your workpiece.
The hardware is readily available at any home center. The part that is driven into the bench is sold as a 1⁄4” x 20 screw-in insert nut. To install it, first drill a 3⁄8“-diameter hole in the end of your bench. Coat the hole with epoxy and drive the insert in slowly using a (usually metric) hex wrench. Then thread a 1-1⁄4“-long bolt through a 1⁄4” x 20 wing nut and a 1⁄4“-hole washer.
The key to the planing stop is the hardware. Here you can see how the 1⁄4″ x 20 screw-in insert nut, 11⁄4″-long bolt, 1⁄4″ x 20 wing nut and 1⁄4″-hole washer are assembled.
The stop itself is plywood with two stopped slots that measure 5⁄16“-wide. Make the slots long enough so your stop can go below the edge of your bench.
This stop allows you to plane wood of almost any thickness with ease. Unscrew the wing nuts, adjust the stop where you want it and tighten the wing nuts to hold the stop in place.
7 Add a Holdfast
Sometimes you need to hold a board on your bench so you can work on its end, such as when you’re chiseling out the waste between dovetails. Nothing is as quick or efficient at this job as a quality holdfast.
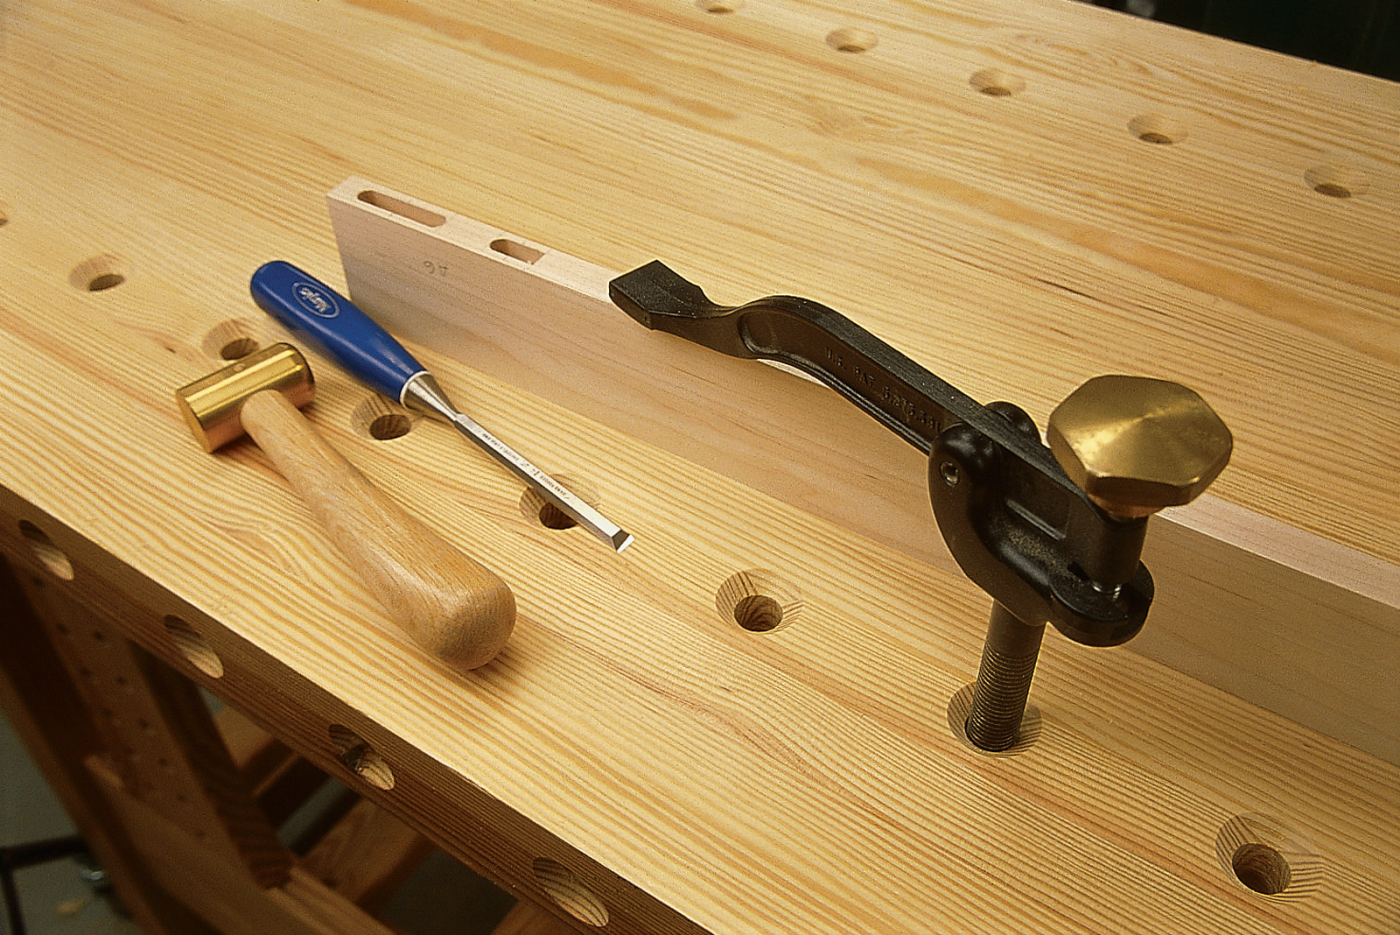
The Veritas Hold-down is a joy. Itʼs well-engineered and holds the work with astonishing pressure. I wonʼt cut dovetails without it.
A holdfast is essentially a hook that drops into a hole in your bench. You tighten it with a screw or rap it with a mallet to lock the work to your bench.
There are two major types that are worth purchasing. The Veritas Hold-down is the Cadillac of the bunch. It drops easily into any 3⁄4” hole in your bench and is tightened by turning a screw on the top. I’ve used this holdfast every day for five years and has never let me down.
The third type is a metal hook. Rap the top to tighten it and rap the back to release it. All of the versions I’ve seen in catalogs are cast metal and don’t work well for me. My fellow hand-tool enthusiasts recommend forged holdfasts, which are handmade by blacksmiths. It’s worth asking around in your area if there’s a blacksmith who will do this work for you. Expect to pay about $30, maybe a bit more.
Editor’s note: This is another area Chris has evolved his thinking on. He actually produces a holdfast currently that you can learn about and purchase here.
8 Add a Sharpening and Finishing Tray
While some people might accuse me of just being fastidious, there are sound reasons to protect your bench from sharpening slurry and finishing materials.
Sharpening slurry is made up of bits of metal and abrasive that will dig into your bench and later get embedded in your work. And finishing materials (dyes, stains and glazes in particular) can rub off on your work for weeks or years if they spill on your bench.
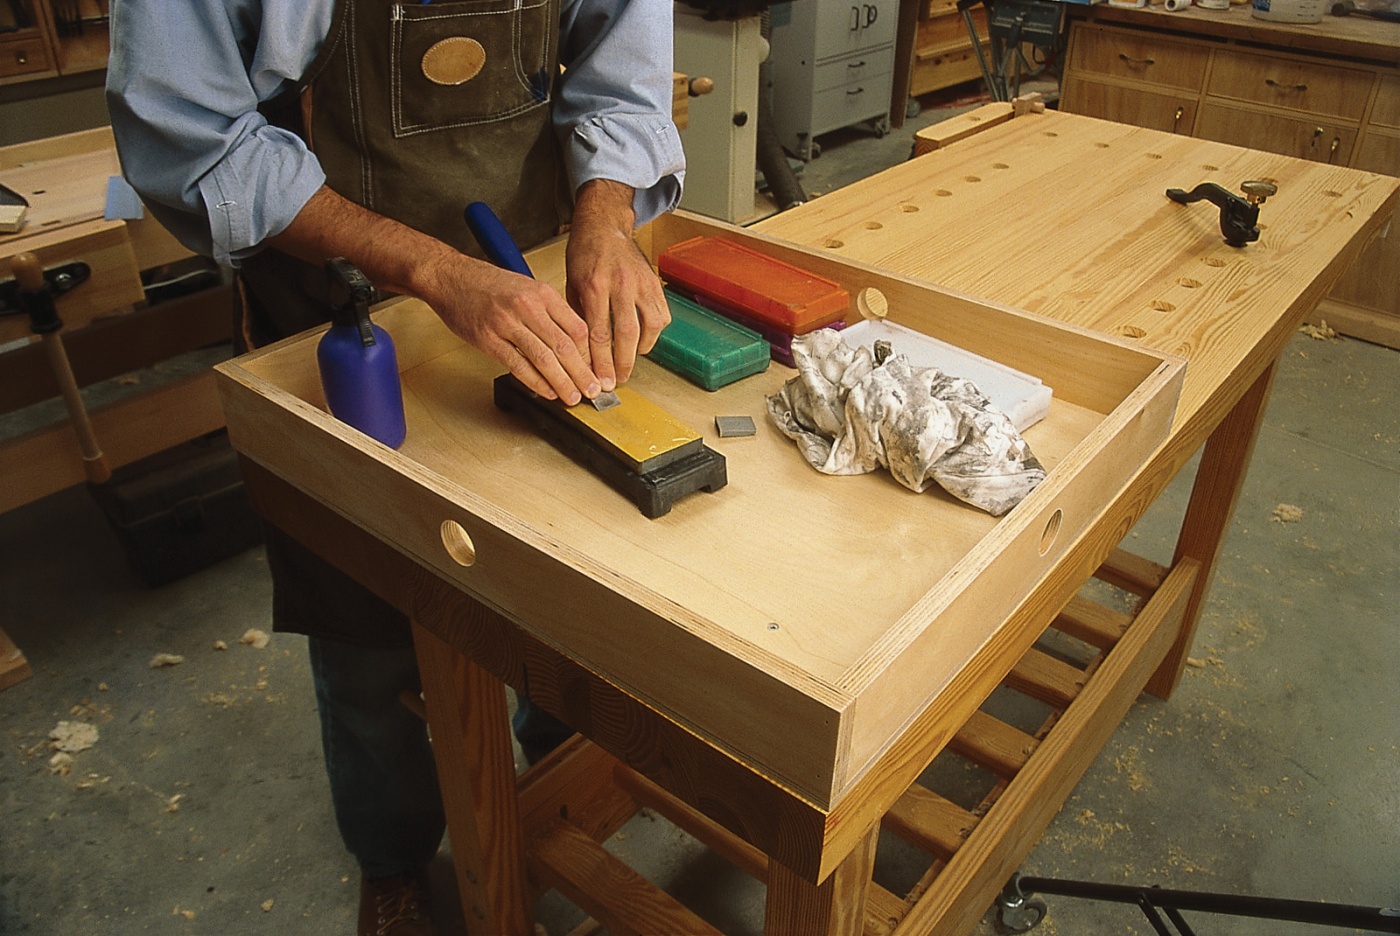
Never sharpen or finish on your bench without protecting the top. The slurry and stain will dig into your work and sully the wood you place on top of it. This simple tray drops into the dog holes in the top (no clamps) to contain your mess.
That’s why a tray with a low lip is ideal for typical sharpening and finishing jobs. I make my trays from inexpensive plywood with the lip made of 3⁄4“-thick scrap pieces – plus glue and screws. The best thing about the tray is that it drops into two dog holes, so there’s no need to clamp it in place. This makes the tray especially good for sharpening because the tray stays put as you work.
9 A Top Just for Gluing
Not all of us have the luxury of a separate bench for assembly, so I end up constructing most of my furniture right on my bench – both at work and at home.

Until I can afford my 3,000-square-foot dream shop, I have to assemble projects on my bench. This cover keeps my benchtop like new. Make sure the cleats that keep the top in place donʼt interfere with your vises.
Getting glue on the bench is a big problem most woodworkers face. Yellow glue, which is mostly water, isn’t good for your top because you’re introducing moisture in places where it has spilled. And dried glue can easily mar your work.
So I have a removable top that fits right over my benchtop for gluing chores. It’s made using 1⁄8“-thick hardboard (available at your local home center store) and four cleats that keep it securely in place on the benchtop.
Why not use newspaper or a blanket? Well, newspaper makes a lot of waste, and is slow and messy. Blankets, if not perfectly flat on your bench, can actually introduce a little twist in your glue-ups. If you don’t want to make a hardboard glue-up top, the next-best option is to buy a thin plastic tablecloth.
10 Vise Blocks Add Bite
One of the biggest complaints woodworkers have with their vise is that it doesn’t hold the work very well when they clamp using only one side of the jaw. The jaw bends a little bit – especially with wooden vises – and this weakens its grip on the work.
Vise blocks improve the holding power of any vise. The dowel prevents the block from dropping to the floor when you open the vise.
The solution is so simple I’m surprised that I don’t see this more often. Put a block of equal thickness on the other side of the jaw and your problem is solved. I have a set of “vise blocks” in the most common thicknesses I deal with (1⁄2“, 5⁄8“, 3⁄4“, 7⁄8” and 1″). To help me out even more, I drive a 3⁄4” dowel through each block to prevent it from dropping when I release the vise. This quick and simple fix will save you a lot of future frustration.
Here are some supplies and tools we find essential in our everyday work around the shop. We may receive a commission from sales referred by our links; however, we have carefully selected these products for their usefulness and quality.


