We may receive a commission when you use our affiliate links. However, this does not impact our recommendations.
 One of the reasons I prefer to plan projects from SketchUp models is how easy it is to extract information from the model. In my earlier days I prepared shop drawings with pencil and paper, and later on with a 2D CAD program. That type of drawing requires a great deal of care to ensure that all of the views agree with one another. It’s incredibly easy to make a change to a section view, answer the phone and forget to make the same change in all other relevant views.
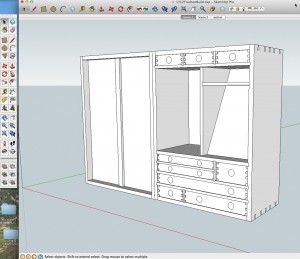
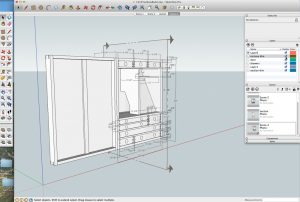
When I plan in SketchUp, I don’t think about what the finished views will look like until I’ve completed a model. If I change my mind about something, I only need to make changes one time, in one place – in the model. I can tell what things will look like from any angle and I can decide if I want to extract conventional plan and elevation views or if I want to take something better out to the shop. I use Scenes and Layers in SketchUp to hide or reveal different parts.  This view shows everything turned on, and it’s a confusing mess. The point is with one three-dimensional model I can generate any number of two-dimensional representations in a matter of minutes.
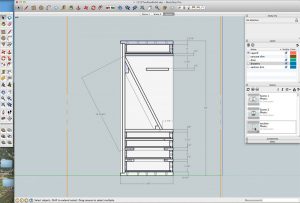
If I want something that looks like a conventional drawing, it’s easy to create a section view, print it out and take that to the shop or lumberyard. In Sketchup, I can insert a section plane and take a slice from the model in any direction and in any location, add dimensions and save that as a Scene. The dimensions in that Scene live on their own layer, and I can turn that layer on or off if I want to. Here’s what the section view looks like:
 This is the exact same model seen in the other images, so there isn’t any possible way that this view can contradict any of the other views. I didn’t have to recreate anything; I just pulled in a section plane, added dimensions and saved a specific point of view. I can print this point of view, or I can return to it by clicking the tab at the top of the screen, or double-clicking on the icon in the Scenes window. I have everything I expect to see from a standard drawing. The longer I use SketchUp, however, the more I realize that useful drawings for the shop aren’t always the expected views. Instead of making separate plan, side and front views, I now create views that contain what I need to know in one easy-to-understand (and easy-to-create) three-dimensional view.
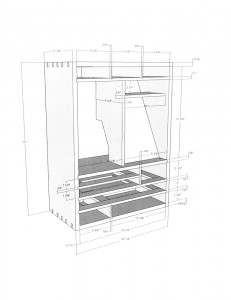
 Here is the kind of drawing I use these days. It is tailored to a specific step – building the carcase – and all the dimensions I need are on one page. In SketchUp I created a Scene for this point of view and a new Layer for the Dimensions. I also created a Layer for the drawers and another Layer for the door. I moved the drawers and door to their new Layers, then turned the visibility of those Layers off in this scene. I added the dimensions (on their distinct Layer), updated the Scene and printed this out. I’m ready to select lumber for this project, and this sheet lets me know the sizes of the parts and how they relate to each other. With conventional drawing this would take too much time to create. With SketchUp, this takes about 10 minutes after I have a completed model.
Want to learn how to use SketchUp? Check out these resources in our store, and there are still a few spots open in a week-long class I will be teaching at Marc Adams School of Woodworking August 5-9, 2013. Click Here for Class Details.
Here are some supplies and tools we find essential in our everyday work around the shop. We may receive a commission from sales referred by our links; however, we have carefully selected these products for their usefulness and quality.


Please tell me this model is available or is something that you’ll be building soon for the magazine? This is exactly the sort of thing I’m looking to build. Thanks for the great article and the cool new design.
Great article! I am always interested in making my workflow (from SketchUp to finished assembly) more efficient. Is the model you used in this article available for download to closely examine the points you made?