


We may receive a commission when you use our affiliate links. However, this does not impact our recommendations.
Dovetail marker. I’ve made dovetail markers in a range of ratios to suit the work I do most often.
These simple shop-made helpers will make marking less of a chore.
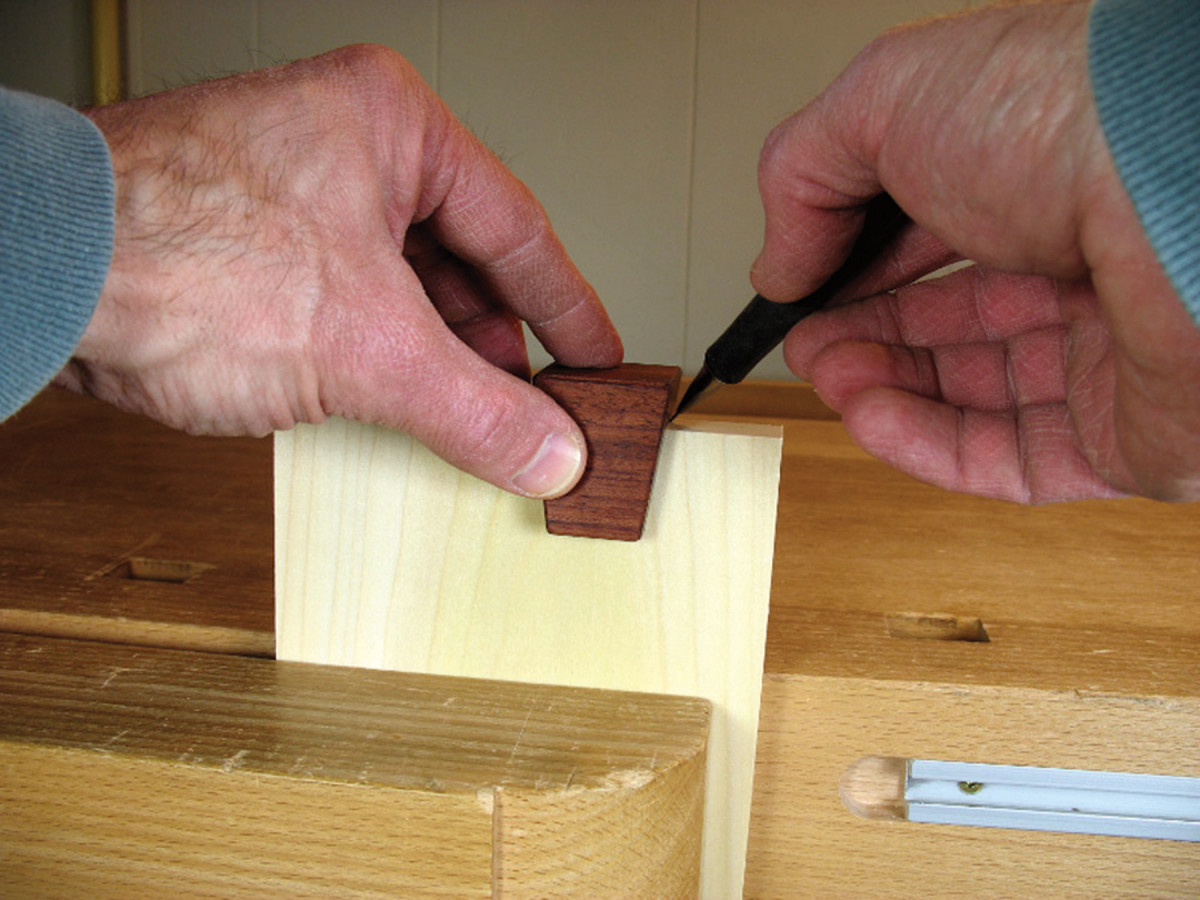
Marking out dovetails for hand cutting goes much easier with these helpers. Held in place while hooked over the end of a board, these markers allow you, with one placement, to pencil a squared line across the end grain and a tail-slope line down the face grain.
To cover a range of dovetail angles, it is easy to produce several markers, each with a unique slope. This helps reduce errors.
Select a Durable Wood
Use a dense, stable, fine-grained hardwood that will produce smooth, durable end-grain surfaces, such as the bubinga used here. Outside dimensions of the markers are 11⁄2” tall, 13⁄8” deep and about 11⁄4” wide. The rabbet extends 1″ from the inside corner in each direction, allowing use on boards up to 1″ thick. For most woodworkers, this will cover the vast majority of dovetailing.
On the edge of a dry four-squared board without internal stresses, 13⁄8” thick, at least 12″ long and about 4″ wide, make a 1“ x 1″ rabbet on the router table with a 1″ straight bit. Proceed in many small increments because this rabbet is far too large to make in one pass. For accuracy, make a final pass to remove just a sliver from each wall of the rabbet. At the table saw, rip away a 11⁄2” strip containing the rabbet.
Use the table saw to create the angled edges. Make sure the blade is square to the table. The chart below converts commonly used slope ratios to degrees.
There is no need for extreme accuracy in setting the miter gauge, but the angles on each side of the marker must be consistent. Please do not risk your fingers by holding a short piece against the miter fence and crosscutting it. Work by cutting short pieces off the original long piece, as you can see below.
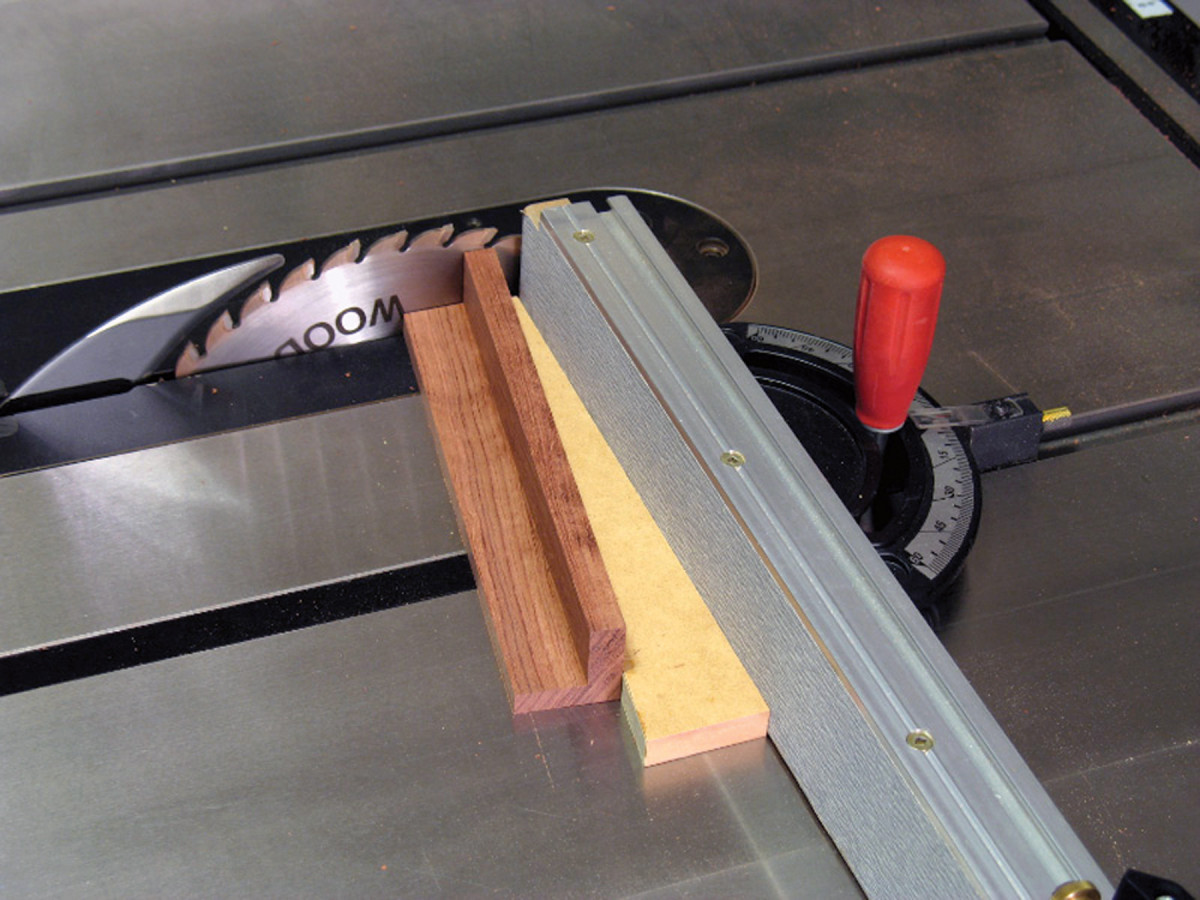
Table saw setup. With the miter gauge locked at 90°, the wedge serves as an auxiliary miter fence to create the desired angle on the bubinga.
Here’s the best method I’ve found:
Use the miter gauge to square the short edge of an approximately 10″ x 12″ piece of 3⁄4” MDF. Rotate the miter gauge clockwise and lock it at the desired dovetail angle. Holding the same edge as before against the miter fence, crosscut away a narrow wedge, about 2″ wide, tapering to about 1⁄2“. Glue sandpaper on the angled edge.
This wedge now serves as an auxiliary miter fence. Reset the miter gauge to 90° and place the wedge against the fence (mine has sandpaper on it) with the angled edge away from you, wide end to the left. Place the thick wall of the workpiece against the wedge with the rabbet up. Crosscut the first slope. Now simply flip the wedge end for end to set up the second angled crosscut, which converges toward the first, to produce a marker about 11⁄4” wide.
Note: These markers can be made more directly with a single miter gauge angle setting by rotating the workpiece after the first cut so the rabbet faces toward you. But this makes the workpiece less stable and it is difficult to avoid tear-out on the inside edges of the marker against which the pencil will bear in use. I do not recommend this method.
Check the accuracy of your markers with a square and sliding bevel. Chamfer the outside edges that do not contact the work. Be sure to mark the slope on each gauge prominently – it looks nice to carve the number with a “V” tool. Apply an oil finish.
*Click here to download the extended instructions for the dovetail markers.

Here are some supplies and tools we find essential in our everyday work around the shop. We may receive a commission from sales referred by our links; however, we have carefully selected these products for their usefulness and quality.


