We may receive a commission when you use our affiliate links. However, this does not impact our recommendations.
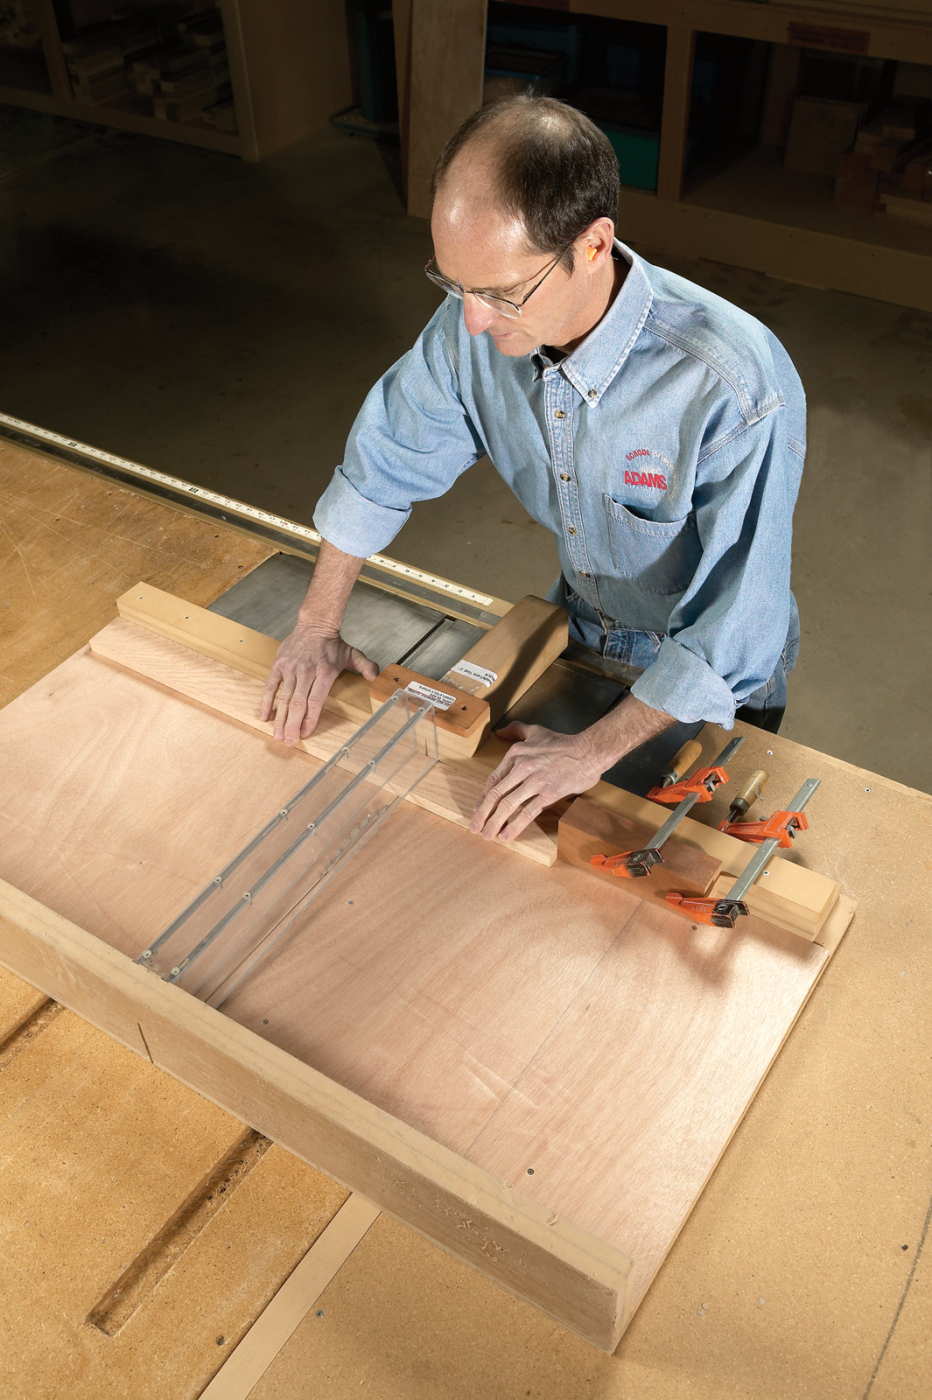
If you cannot do an operation without the stock guard or an effective shop-made one, you should use another machine.
It is estimated that nearly 80 percent of all woodworking requires some type of sawing. The power, accuracy and control of the table saw has made the process of sawing wood a lot more productive and a lot less physical. It’s arguable as to who first invented the circular saw, but one thing is certain – it has revolutionized our craft. I’ve often wondered if plywood as we know it today would have ever been invented if we didn’t have a way to productively cut it. I also think about the skill shifts of the traditional apprenticeships. At one time it took years of practice and great skill to handsaw wood accurately. The table saw changed that process to an almost rudimentary procedure.
Table saws can make myriad cuts including rip cuts, crosscuts, coves, mouldings, dados, kerfs, rabbets, miters and bevels. It is a precision-cutting tool that requires that the machine be set up accurately, maintained properly and be used competently. Small problems can have huge consequences. R.J. DeCristoforo summarized using a table saw better than anyone when he said, “measure twice, saw once” and “think twice before sawing.”
My goal with this article is not to review the different types of saws available today, or discuss their characteristics. I’m not going to explain the difference between blades or how to make fixtures to cut tapers or tips and tricks or troubleshooting or maintenance schedules, and I don’t want to compare European to American saws. All that information already exists in myriad books and articles.
I have decided to stay away from the topic of dust control because we all know the dangers of dust and the importance of controlling it and, again, there are volumes of books and magazine articles on the subject. My intentions with this article are to focus on the techniques, methods and mechanics of safely using the table saw. After all, it is very well documented that more accidents occur on table saws than any other machine in the shop.
In Ian Kirby’s book “The Accurate Table Saw,” there is a brief introduction written by Les Winter who is a forensic engineer. He explains the essence of danger by defining two components: hazard and exposure. A hazard has the potential to cause injury. Exposure is the likelihood of coming into contact with the hazard. It is the combination of hazard and exposure that make something dangerous. If you can reduce the exposure then the hazard becomes less dangerous.
Control
At the table saw, you must always be in control of the work. Control occurs through a combination of sequences and involves both managing the material and understanding how the machine is designed to give the user as much support as possible through the point of contact. The following is a list of six factors that are important to gaining better control at the saw.
First, you as the operator must have a firm stance at the machine. Your starting position will vary depending on the size of material and type of cut being made. I definitely recommend that you stand to the left of the blade with a pushing vector toward the fence and away from the back of the blade. I like to firm up my stance by placing my hip against the saw itself; this gives me better support.
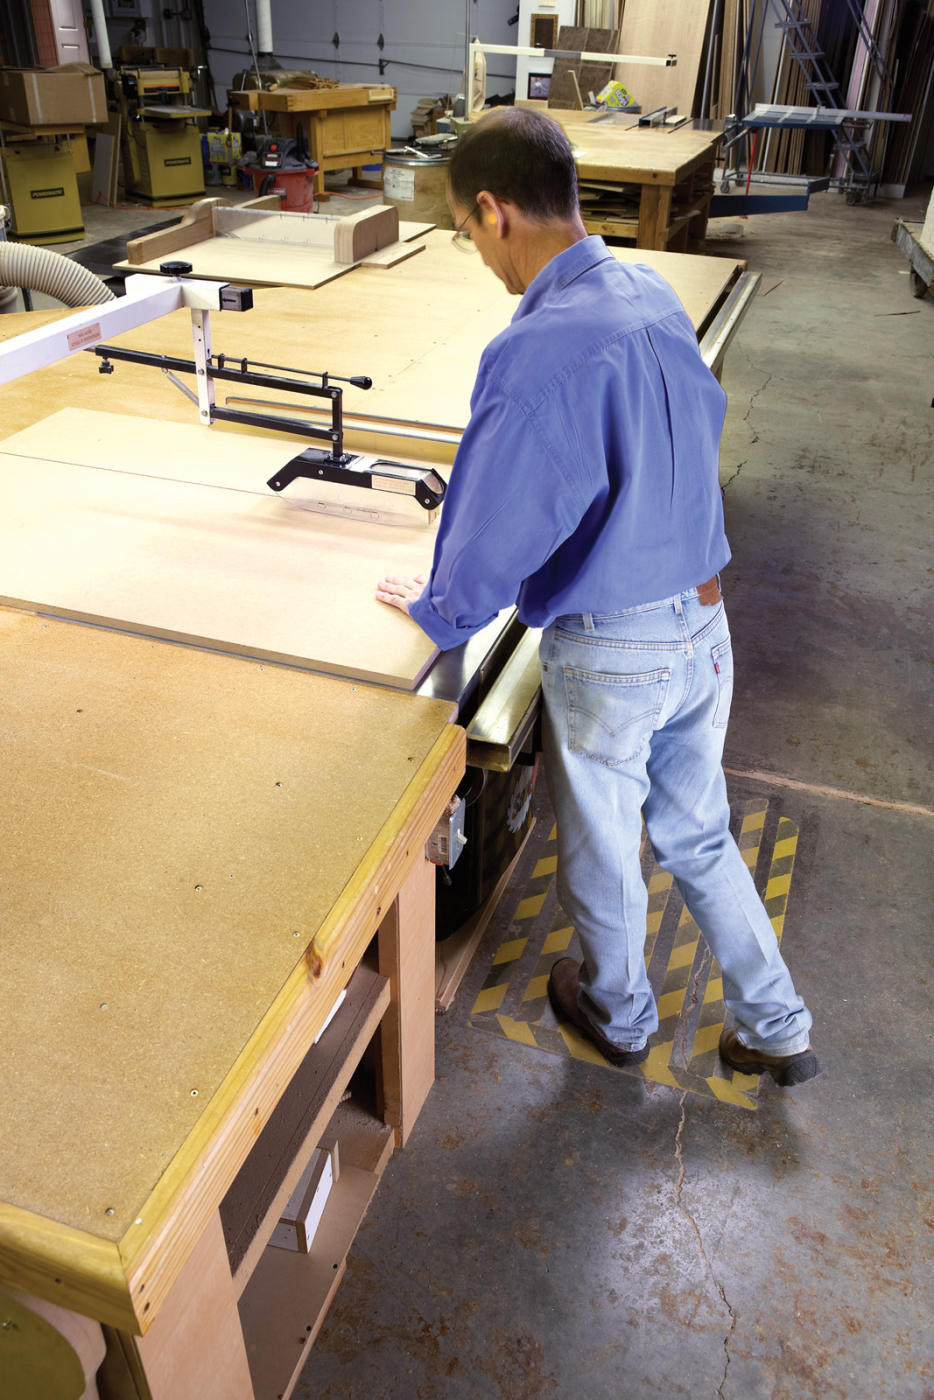
Good table saw technique begins with your stance. Always stand to the left of the blade and gain additional support by bracing yourself against the saw.
Never stand directly in front of the blade or in direct line of potential kickbacks. It is not uncommon to see both novice and experienced woodworkers standing to the right of the fence. Although this does protect you from being in the direct line of a kickback, it causes you to have to reach over the fence, which could put you off balance. The natural tendency when pushing wood is to push it in the direction that you are leaning. Leaning toward the blade from the fence side could cause the pushing motion to be directed more toward the back of the blade, and nothing good comes from the wood making contact with the back of the blade. Plus, your hand position for pushing from this side of the fence is awkward.
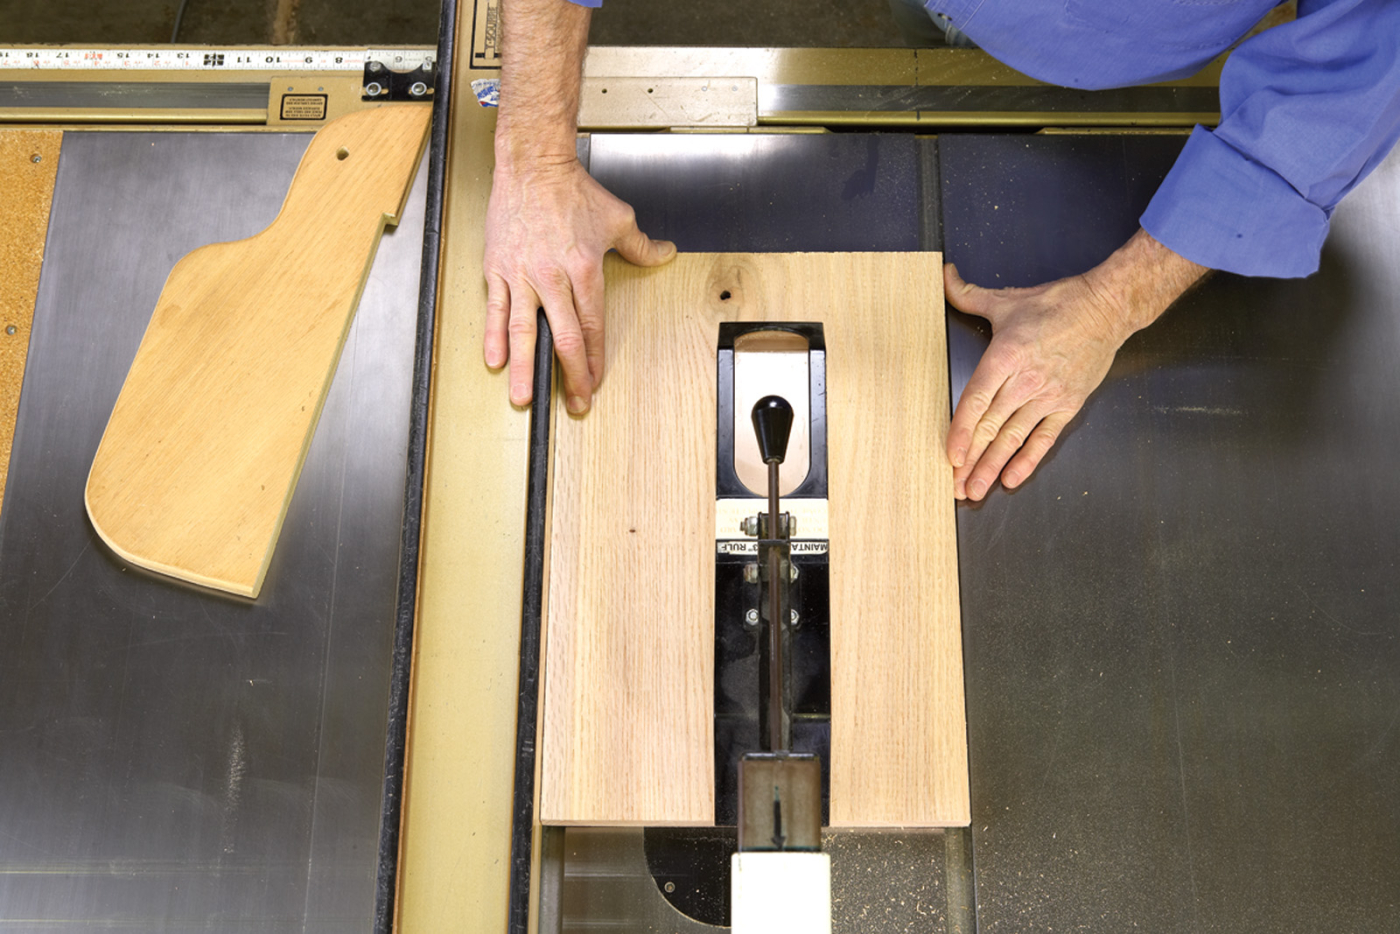
Notice how my right hand has fingers lipped onto the fence. This registers my hand in relation to the blade. Also notice the push stick positioned for use to finish my cut.
Second is how to maintain control while pushing the stock through the saw. Never cut freehand on a table saw. A freehand cut can deprive you of most of the protection a table saw affords. For most of us, pushing wood through a table saw is instinctive. However, there are real mechanics to the pushing process. The wood must remain flat on the table and tight against the control surfaces, such as the fence or miter gauge.
When ripping wood, I dedicate my hands so that my right hand provides the forward push and my left hand pushes the wood against the fence – make sure to maintain 3″ of clearance from the guard with both hands. When ripping wood, I also like to hook a finger or two on the top edge of the fence to keep my right hand from accidentally being thrust toward the guard. It is OK to stop feeding a board during the middle of the cut to reposition your right hand or to pick up a push stick – but you must never let go of the stock with your left hand during this transition. Once the cut is complete you need to make it a rule and habit to not reach over the saw blade to pick up and bring the stock back to the front of the saw – even with the guard in place. Never clear scraps away with your fingers while the blade is rotating; always let the blade come to a complete stop first. Make sure that you always push the stock that is between the blade and the fence so it is beyond the back of the blade; always use good follow-through after the cut.
Third is maintaining good eye contact. Learn to keep your eyes in tune with the fence and the guard (instead of the blade). Most people want to stare down the blade as it’s cutting the wood, but with the guard over the blade the cut is obscured and will tell you very little. As long as you keep pushing the wood the cut will take place. You must be aware of the entire work area; be alert and keep your eyes moving over the entire table but concentrate mostly on the control between the work and the fence. Visualize where the 3″ rule is and develop a good awareness of this zone. Be aware of where your hands are at all times; watch to make sure your fingers stay way beyond this zone.
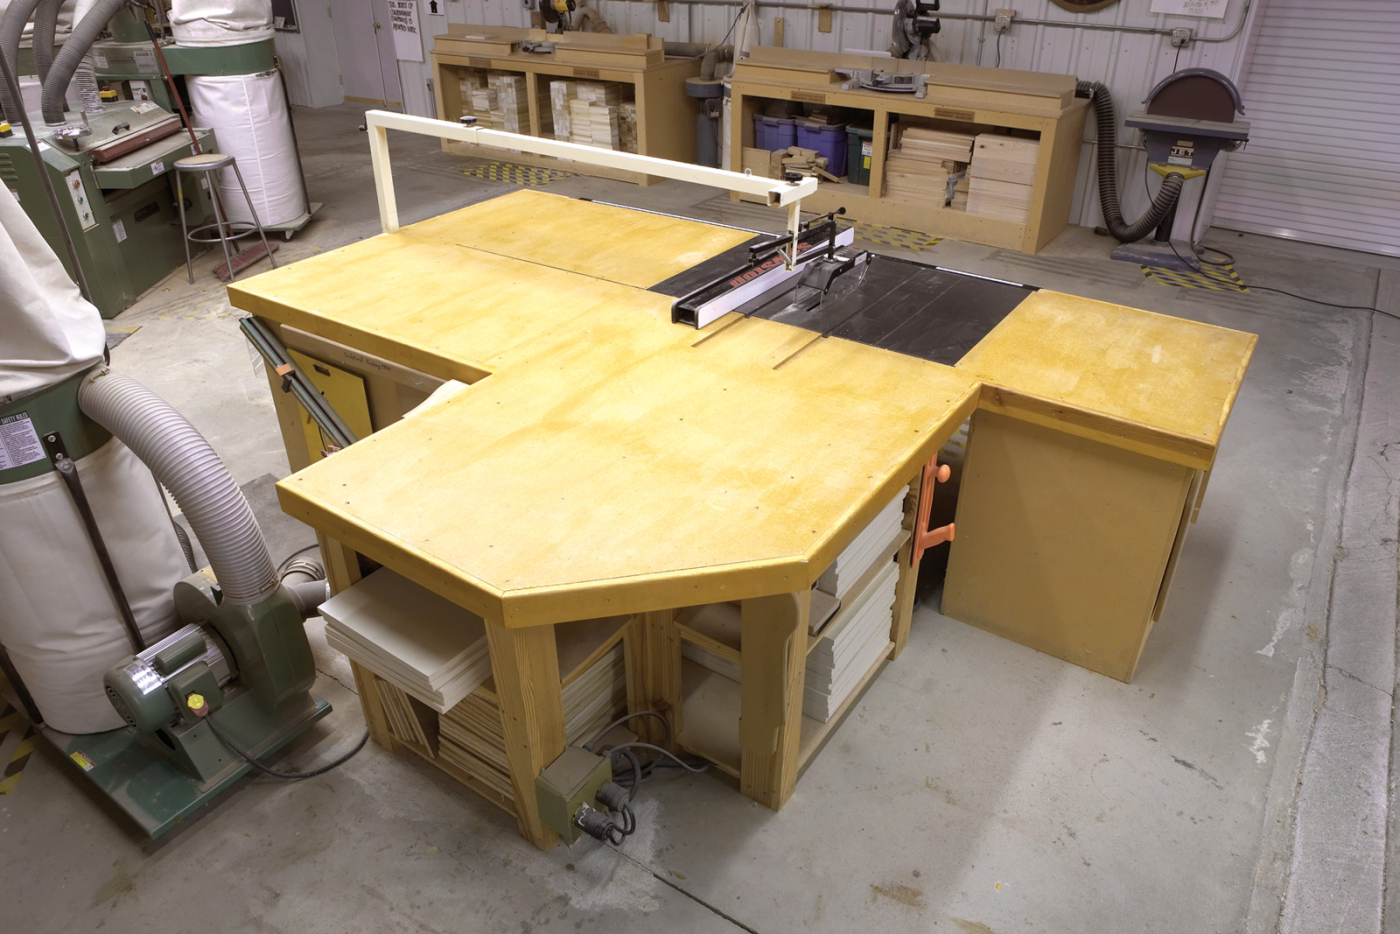
Stationary tables to both the left and right of my table saw make this area more user friendly, but nothing increases safety more than a proper outfeed table.
Fourth is how to control oversized material. Large and heavy wood can have a tendency to tip or fall off the machine. It’s very hard to control large and awkward stock. I know most shops are limited on space, but it sure is nice to have extra table surfaces around the sides and especially the back of the saw. If you have someone helping you with large stock, make sure you practice first and make sure you are in control of the cut. The helper should just act as a table extension. It does not work to have two people trying to steer a piece of wood through the saw at the same time. If a helper is not available, use a roller support to help support long stock as it is being ripped.
The fifth factor of control on a table saw is the feed rate. The rate you feed the stock in the cut can be affected by many factors including the differences between ripping and crosscutting, the type of blade being used and its sharpness, the type of material being cut, and the power of the saw. Sometimes just listening to the cut will tell you more than anything else. You should never force the cut to the point where the blade stalls. If you notice the edge of the board is burning, that’s a pretty good indication that you are feeding too slowly, that your blade is dull or that the fence is misaligned – or possibly all three. If the edges of your boards are showing signs of burning, try to speed up the feed rate a bit. If that doesn’t improve the burning then the blade is probably getting dull or needs a good cleaning. Verify that the fence is parallel to the blade.
And finally, the sixth factor of control is built into the saw itself. On a 10″ table saw the blade is rotating at approximately 4,000 rpm. As wood makes initial contact with the blade there is little kicking force because the cutting force is straight down toward the table, just like with a band saw. As the wood continues in the cut to a point where the stock is about halfway past the blade, the wood will start to encounter a forward vector of force that in turn will cause the wood to react by moving in the direction of the rotating blade or toward the operator (the action of kickback will be explained in my next article). To counter these forces, engineers have built in “control” as a way to manage the undesirable effects of the wood when it contacts the blade. The table itself, the fence, a miter gauge, standard guarding, specialty devices such as push sticks, featherboards and hold-down devices, are all great ways to control the stock as it meets the point of contact on a rotating blade. A well-designed machine provides or has available some type of “control” to counter the kicking and grabbing forces that naturally take place with rotating cutters and provides the user with a clear range of motion through the entire process.
Three Kinds of Exposure
Going back to Winters’ explanation of hazard and exposure, he says that by reducing the exposure, you will reduce the danger level. Less exposure means less danger; more exposure means more danger. It almost doesn’t get easier than that – and that should be the golden rule of operating all power equipment in the shop safely. Exposure at a table saw can have three meanings: blade height when there is no guard being used, blade height with the guard and repetitiveness. (For the sake of argument let’s just say that these rules apply to all blade types.)
Blade Height when No Guard is Used
Let’s face it: No matter what rules we establish for the table saw when it comes to using your guard, most woodworkers, both professional and novice, will at some time remove the guard(s) to make certain types of cuts. Nothing good comes by removing a guard. If you violate my rules about never running a table saw without a guard, then you must set some kind of rule as to how much blade exposure you will allow. With unguarded and exposed through cuts the best rule to use is “minimize, not maximize.” Like the late Dr. Roger Cliffe used to say, “How high the blade should be above your work is a definition of terms: the difference between amputation and laceration.” And if the blade is unguarded you might as well plan on both kickback and blade contact as a part of your future.
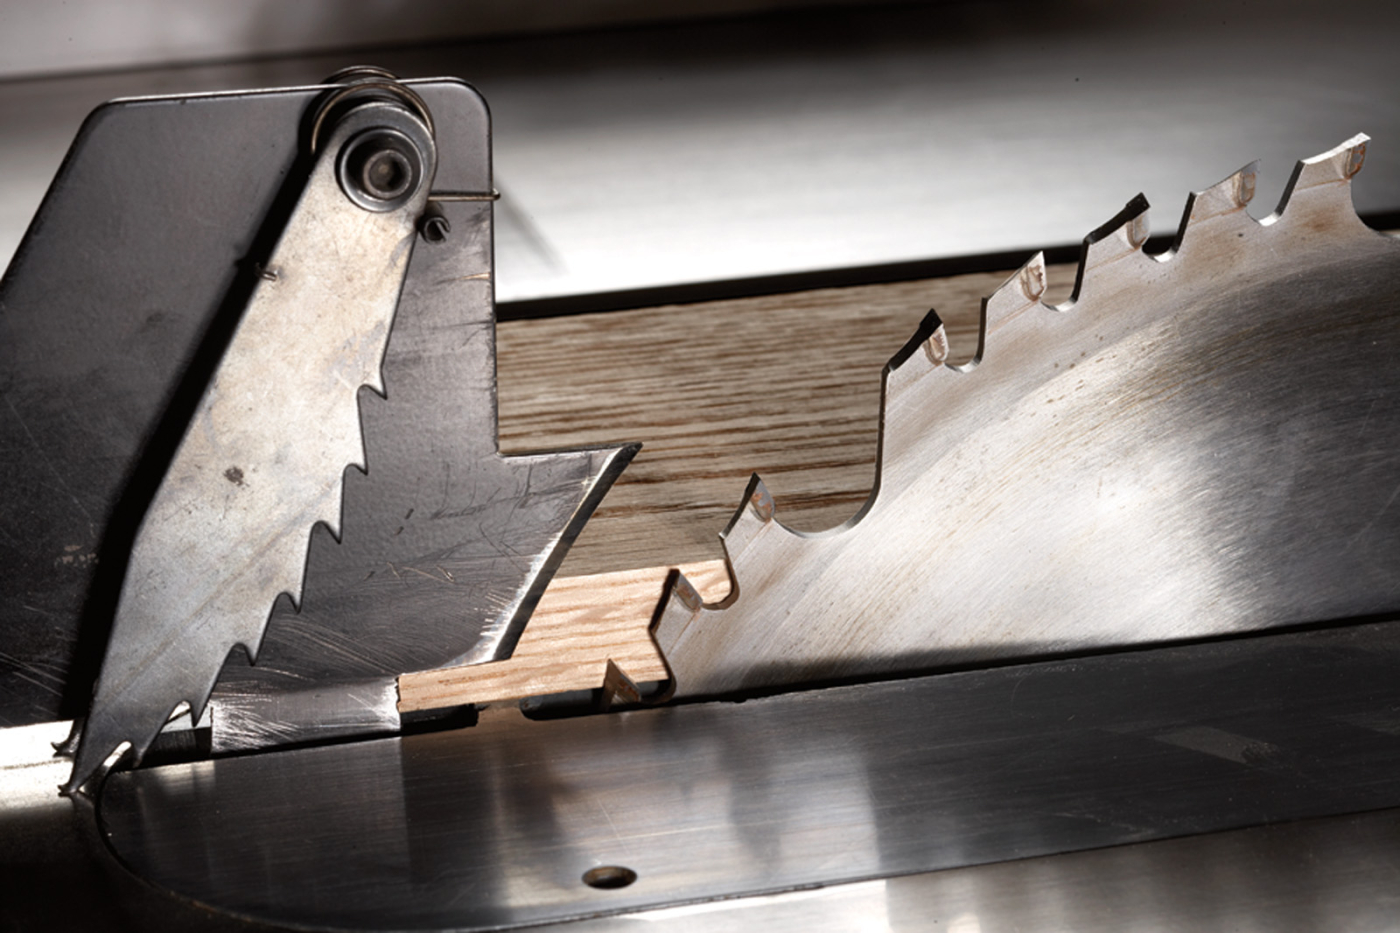
You can easily see the trajectory of the blade’s teeth and the closeness of the blade to the splitter.
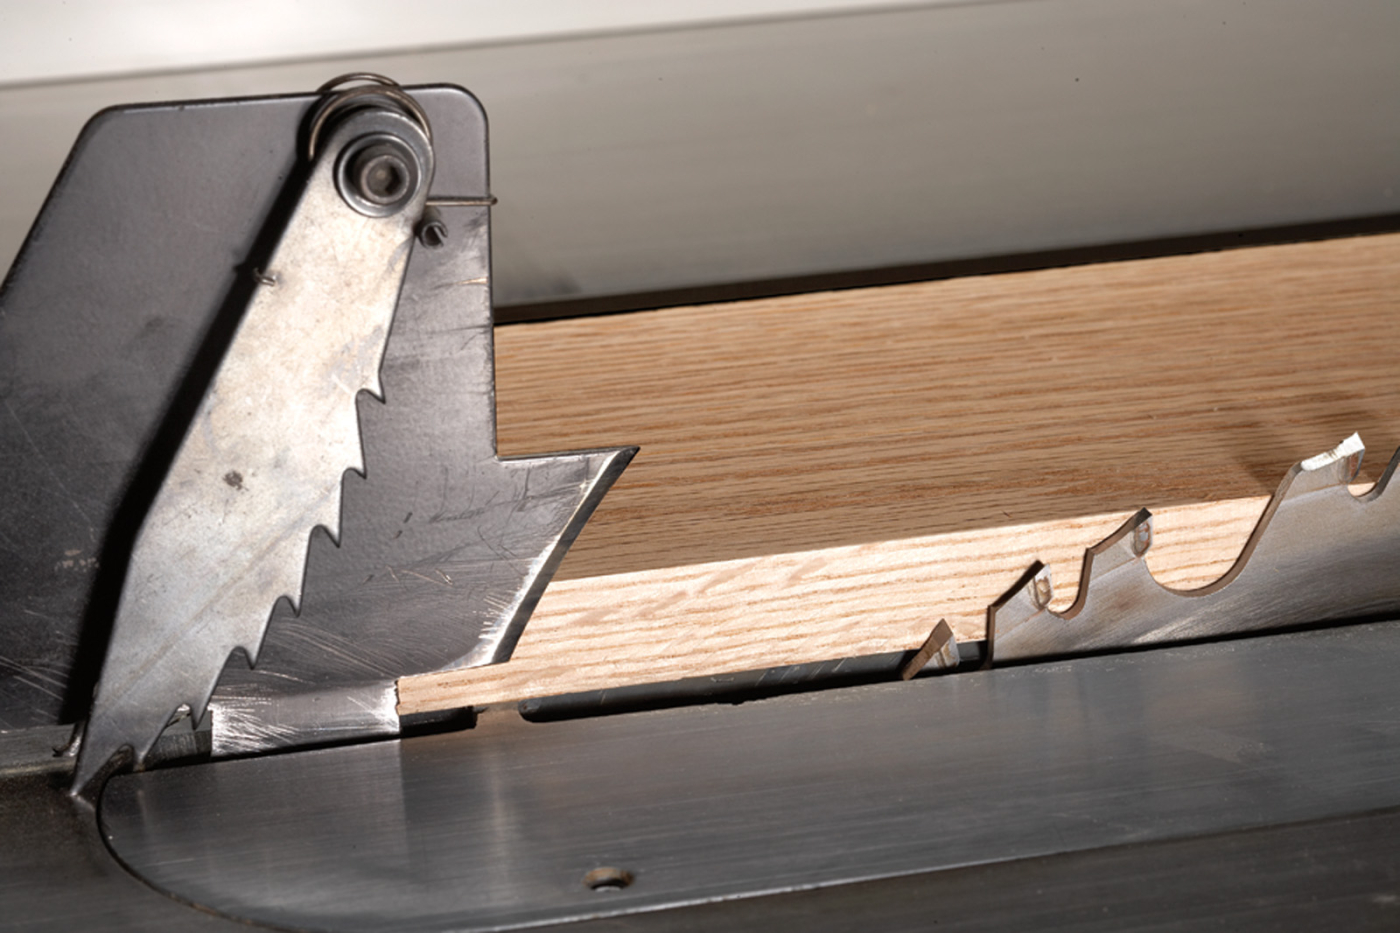
The teeth trajectory is forward, toward the operator and the distance between the blade and the splitter has widened.
It is recommended that when you are making unguarded through-cuts that the blade be set about 1⁄8“ to 1⁄4“ above the stock. However, keep this in mind: At a lower blade setting there are a considerable number of teeth in the cut that are moving in a substantially forward direction. Kickback forces can be transferred into the wood most efficiently with a low blade, and with a lower blade there is a greater distance between the rear of the blade and the splitter. Plus more teeth means more friction, which in turn heats the blade and increases the risk of burning the wood.
Let’s just make this whole issue simple: Always find a way to guard the blade; never use a table saw without the guard. The point of the two photos above right is to demonstrate that at the low blade exposure, the blade will have three teeth in the work at the rear of the blade. At full exposure, only two rear teeth are in the work. The trajectory at the low setting will have the teeth of the blade leaning 60° off vertical, directed at the operator while at full exposure, the trajectory of the teeth is only 30° off vertical.
Blade Height when Guard is Used
This may take you by surprise but a higher blade height helps the blade to run cooler. At the same time, it helps the motor to run more efficiently while using less power. I’ve been told that if the saw is adjusted just right, you will also get a cleaner cut with a higher blade. This is why at trade shows you always see the “pitch man” running the blade as high as possible when demonstrating his blades. Why don’t they use their guards – bunch of dummies!?!
Think of this as well: With fewer teeth in the cut, the transfer of forward energy is less efficient and a higher blade presents less of a gap between itself and the splitter. All of a sudden, it sounds like I’m recommending that you run your blade as high as possible, but that’s not the case. Keep in mind that a higher blade setting produces more exposure and a greater danger level – only if the guard is not in place. And this discussion is about blade height with the guards in place. With a guard acting like a barrier, the likelihood of the blade contacting your hand(s) from any direction, except straight in, is low. No pivoted or aftermarket guard can prevent you from sliding your hand straight into the blade. So what’s the answer? The answer is that a well-guarded blade can be set slightly higher than an unguarded blade.
Repetitiveness
The second type of exposure is in terms of repetitiveness. Each time you make multiple cuts or passes you could be putting yourself at more risk. For example, there is no sense in making several passes over a table saw blade to make a wide cut when you could have done it in one pass with a dado blade. As you present yourself to extra passes or multiple moves, you expose yourself to more risk.
Limtation
There are two types of limitations to consider. The first are common-sense items such as your physical limitations and the limitations of your shop space. Everyone has difficulties handling a sheet of plywood or cutting heavy or long wood. And small shop space can sometimes require a lot of planning and strategy before making a cut. As I mentioned earlier there is nothing wrong with asking for help.
The other type of limitation, which is definitely the most important factor in understanding any machine, is to know when that machine is not capable of safely performing an operation. At some point you have to determine when the table saw has reached its limits. My rule is simple: I use the guard as my determining factor. If the guard on my saw will not permit me to make the cut that I desire or if I can’t effectively make or obtain a guard that will work, then the table saw is not the machine for that operation. There is nothing wrong with walking away from the table saw when it’s the wrong machine. Actually, I find the challenge of figuring out a second approach to be a great learning experience and believe it has made me a better woodworker – not to mention it’s helped to keep me out of the emergency room.
Understanding Guarding and How it Relates to Through and Non-through Cuts
Guarding simply is the act of positioning barriers or other safety methods so that hazards are inaccessible to the user. I’m probably going to take a hit for this next statement, but I think that most table saw manufacturers make guards that are inefficient and not very user-friendly. Yes, they do meet the provisional requirements by OSHA (1917.151 (c) (1,2,3)) for having an enclosure, splitter and anti-kickback fingers, but they lack real design ingenuity.
What makes a table saw so versatile is it can make both through and non-through cuts. Standard “off-the-showroom-floor” guarding doesn’t make it easy to move between these two actions and worse yet, most manufacturers have attached all three guards together to act as one unit. If you remove one, then you’ve removed all three. It can be a lot of work to remove a guard – followed by a lot of work to put it back on. After doing this a time or two, frustration sets in and it won’t be long before it becomes a habit to just leave the guard off altogether.
Ask any woodworkers today if they still use their guard and watch how quickly they look at the top of their loafers and say, “… uh, no.” Then ask them if they even knows where their table saw guards are and they usually don’t know that either.
I truly believe that everyone who uses an American-made table saw today would use their guard system, no questions, if the guard systems were user-friendly. This is why aftermarket guarding is becoming so popular today. Aftermarket guards separate the enclosure from the splitter, which allows you to remove one and leave the other in place.
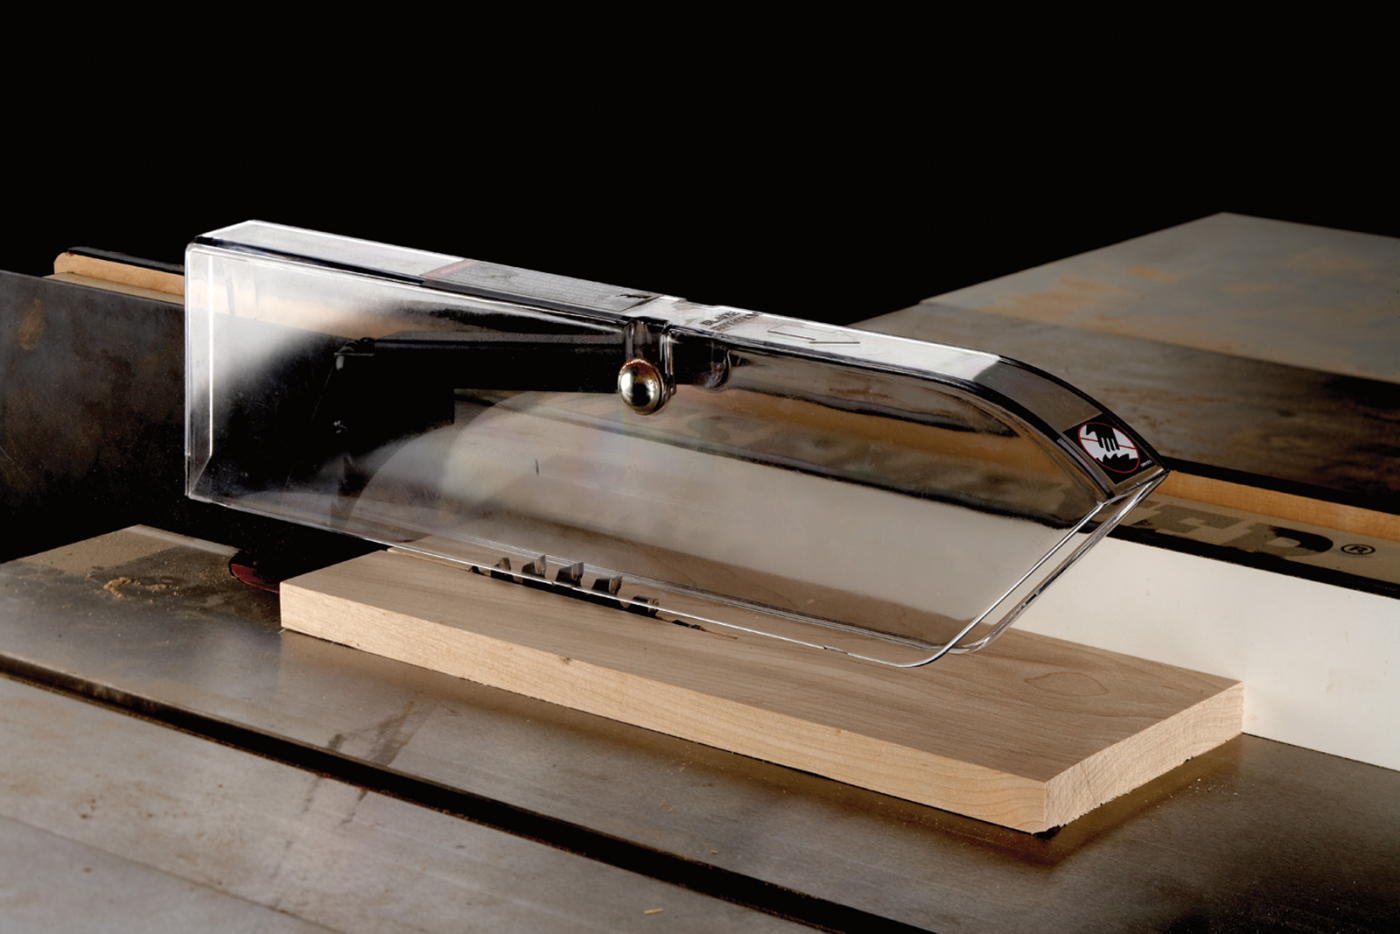
It’s important that a guard be clear and not distort the view of the blade as the cut is being completed.
Plus, most aftermarket guards have a degree of adjustability, which gives them a better range of protection and they can be taken off and put back on in a matter of a few seconds. But even with that, aftermarket guards can’t accommodate every possible cutting action on a table saw – but they sure are better, and I definitely recommend that you look at upgrading your standard guarding.
Every table saw that I’ve owned over the last 15 years has had the standard guard replaced by aftermarket guarding systems. Make sure the aftermarket guard you purchase has at least the blade enclosure and a splitter. More than likely the splitter will come with anti-kickback fingers attached to it.
In order to fully understand guarding on the table saw you have to understand the differences between the three guards, their purposes and how they function during through and non-through cuts.
Blade Enclosures
The blade enclosure, which is sometimes referred to as a shield, hood or top guard, is the most visible part of the guarding system on a table saw. A good enclosure should either rest on top of the wood or be set as close to the wood as possible. It should not allow your fingers to get between it and the wood or near the blade and should not have pinching forces. Enclosures that do not pivot act to a small degree as a way to help hold the wood in control and to limit any potential lifting of the stock just in case it grabs or catches on something. It should provide good coverage on all four sides of the blade.
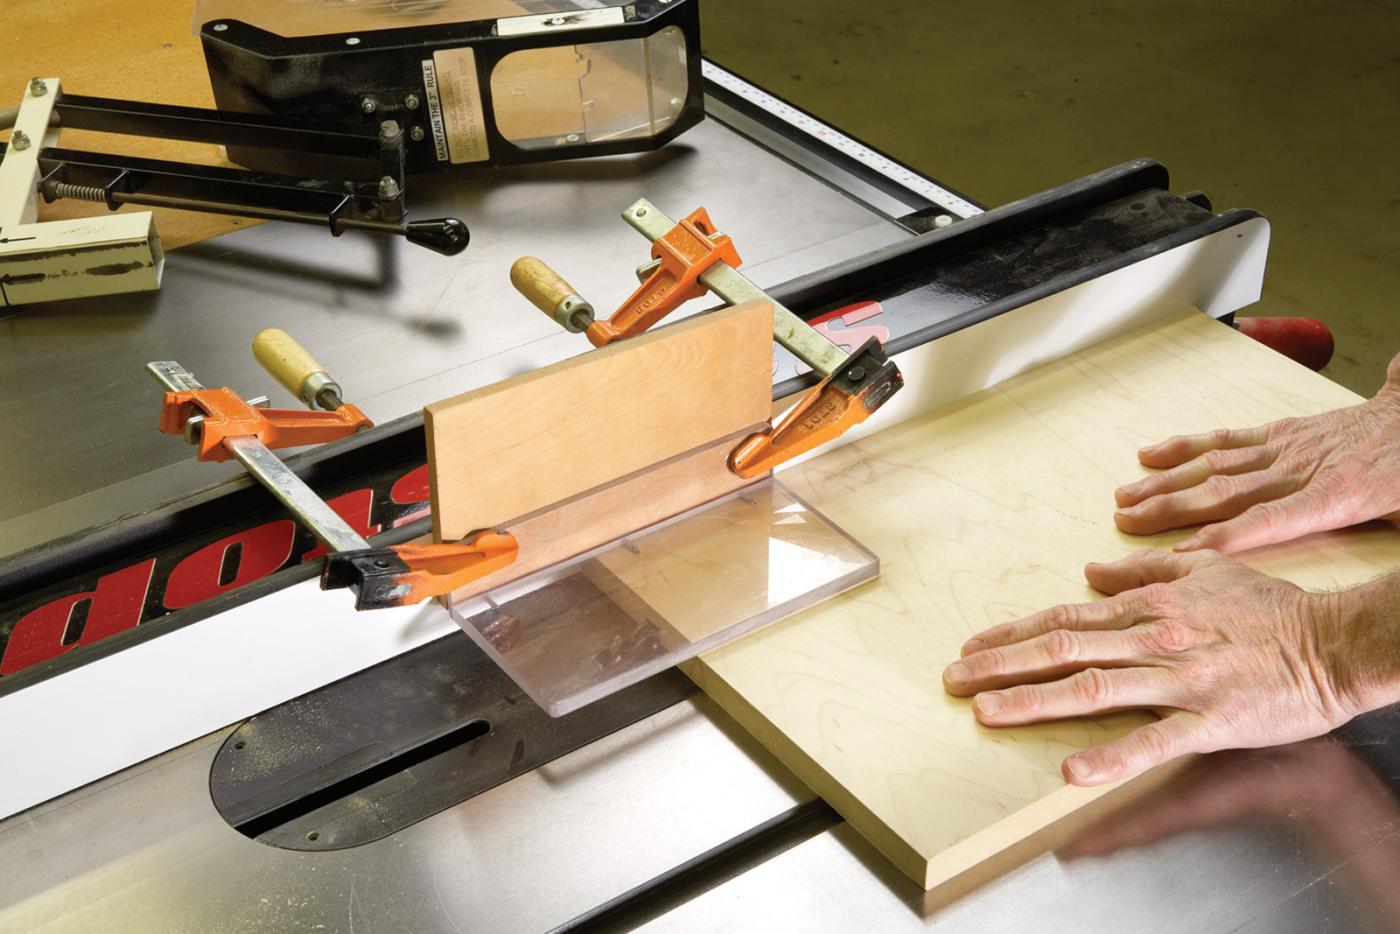
A blade guard can be as simple as a piece of Lexan attached to a scrap. When clamped to your fence, it provides safety by limiting potential contact with the blade.
A good enclosure should not obstruct your view through the point of contact and must aid in deflecting chips away from the user and direct them toward the dust collector, or at least down toward the table. One of the biggest drawbacks to conventional or standard enclosures is that they are not adjustable from side to side or front to back, which can cause problems when trying to rip narrow or short stock. Although aftermarket guards do allow some adjustability, they also have limits before the guard obstructs the path of motion. If the cut requires that the enclosure be removed, remember my simple rule: If the guard on my saw will not permit me to make the cut or if I can’t effectively make or obtain a guard that will work, then the table saw is not the right machine for that operation.
When making non-through cuts, enclosures or top guards can sometimes be more of a hindrance than asset. They can limit the motion, restrict control and create binding. Non-through cuts will require creative ways to protect yourself from unnecessary exposure to the blade.
Splitter
The second guard on a table saw is not quite as obvious as the enclosure or top guard but is the most important part of the guarding system. The splitter, sometimes referred to as a spreader or riving knife, is directly behind the blade and is used for through cuts. Splitters are most effective when they are the exact width as the kerf of the blade and are in perfect alignment with it. The splitter separates and prevents material that is being cut from coming in contact with the back of the blade. That minimizes the chance of pinching and kicking back. Typical American-made splitters will not work for non-through cuts, which will require that they be removed. It is important to realize that even with a splitter properly installed, kickback can occur if through some circumstance the wood should make contact with the back or top of the blade and just before the splitter. Be aware that the closer the splitter is to the blade, the more effective it will be. Splitters should be used for both ripping and crosscutting.
There are two types of splitters – static and dynamic. It used to be nearly all American-made contractor and cabinet saws had static splitters (though that is finally changing). These are the typical top guard/splitter/anti-kickback-finger combination-guard system that you’ve probably seen before. This combination guard system is attached just behind the blade arbor and just to the back of the saw table. They do not move once they are installed. Standard splitter/guard systems can vary in how close the splitter is located to the blade, but can be as far back as 2″ or more. The larger the gap between the splitter and the blade, the more potential there is for a piece of stock to come in contact with the back of the blade. Be mindful that with a static splitter, the gap will vary as the blade is raised and lowered. Static splitters must also be removed when making non-through cuts.
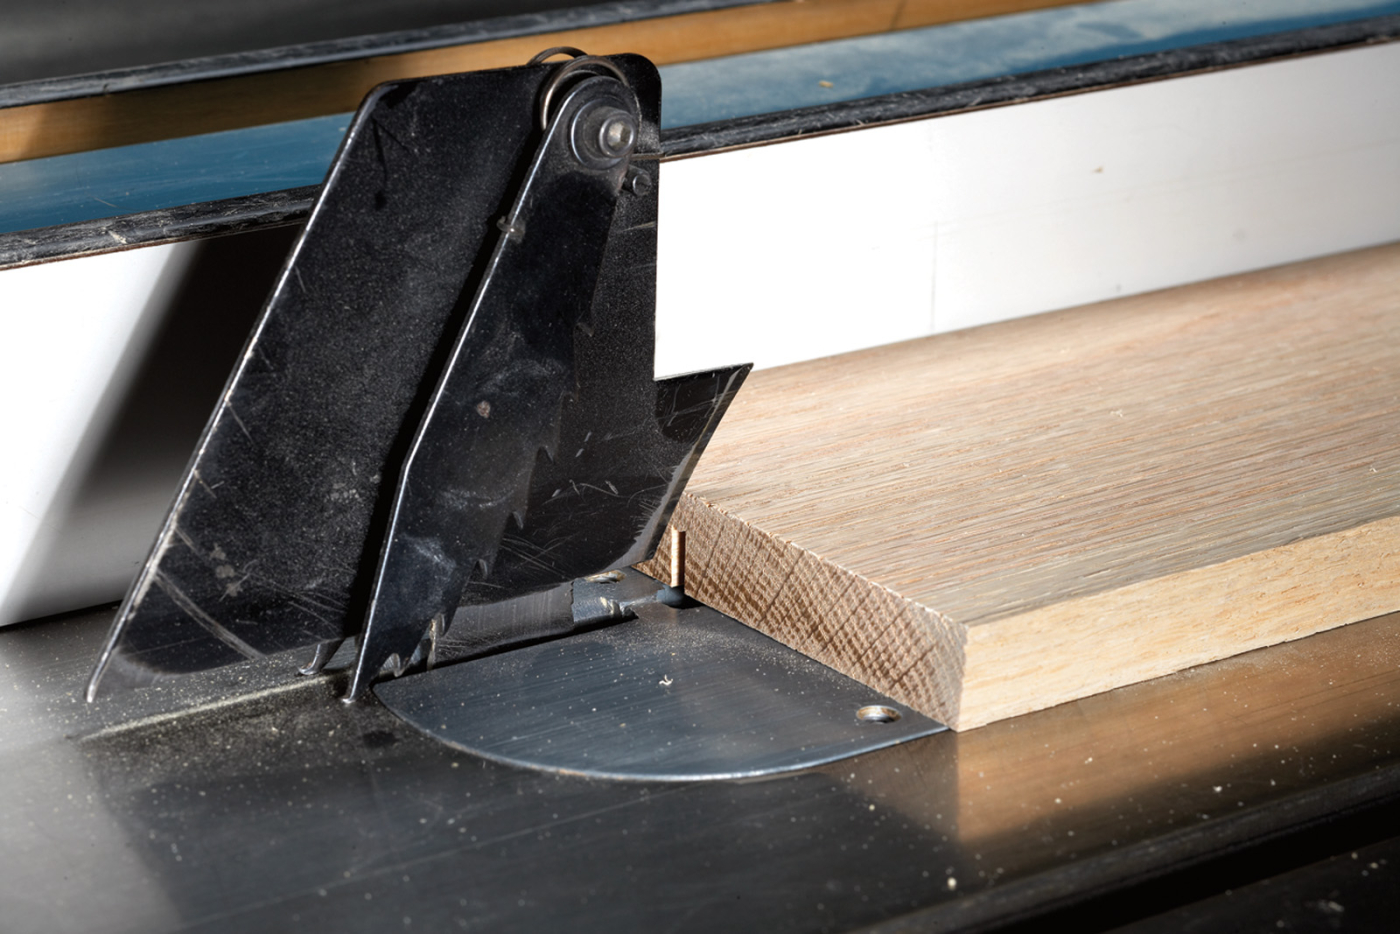
Due to American-style splitters extending above the top of the blade, making any cut except for a cut completely through your stock is not possible.
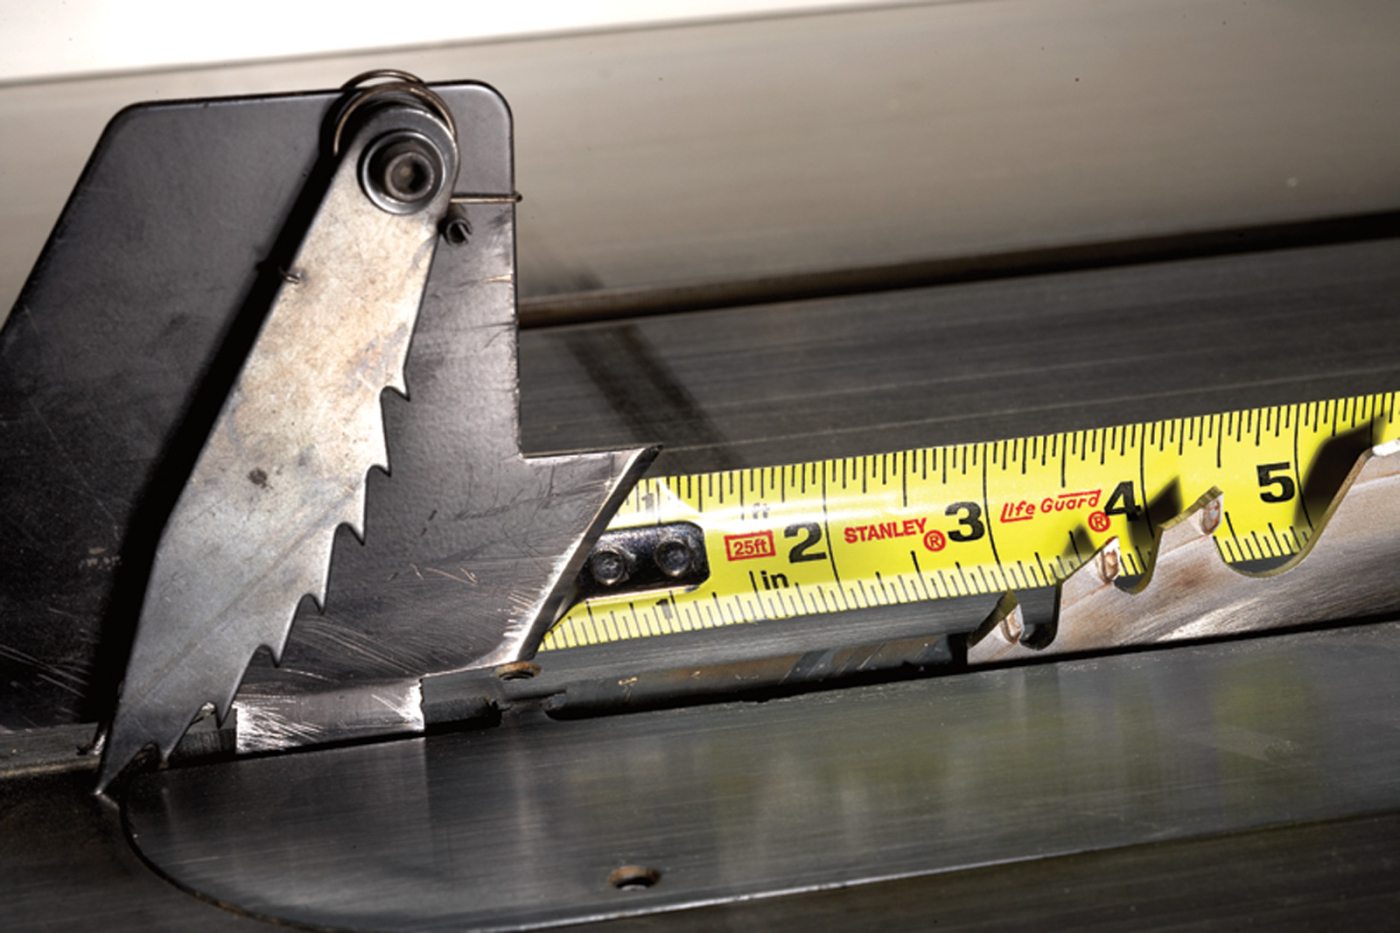
Standard splitters do not follow the blade as it raises or lowers. Therefore, the gap between the two can be wide. This opening is an area where pinching and kickback can develop.
A better type of splitter is one that is not connected to the enclosure or top guard, but is connected to the arbor casting itself. This type of splitter is called a riving knife. It is located just barely behind the blade and will raise and lower with the blade. The gap between the two never changes and is typically as close as 1⁄4“. A good riving knife is set just a little lower in height than the arc of the blade. This allows you to make both through and non-through cuts, which makes you safer and more productive. Riving knives should not be used with dado or moulding-head cutters. For the record, I would much rather have a riving-knife type of splitter on my saw.
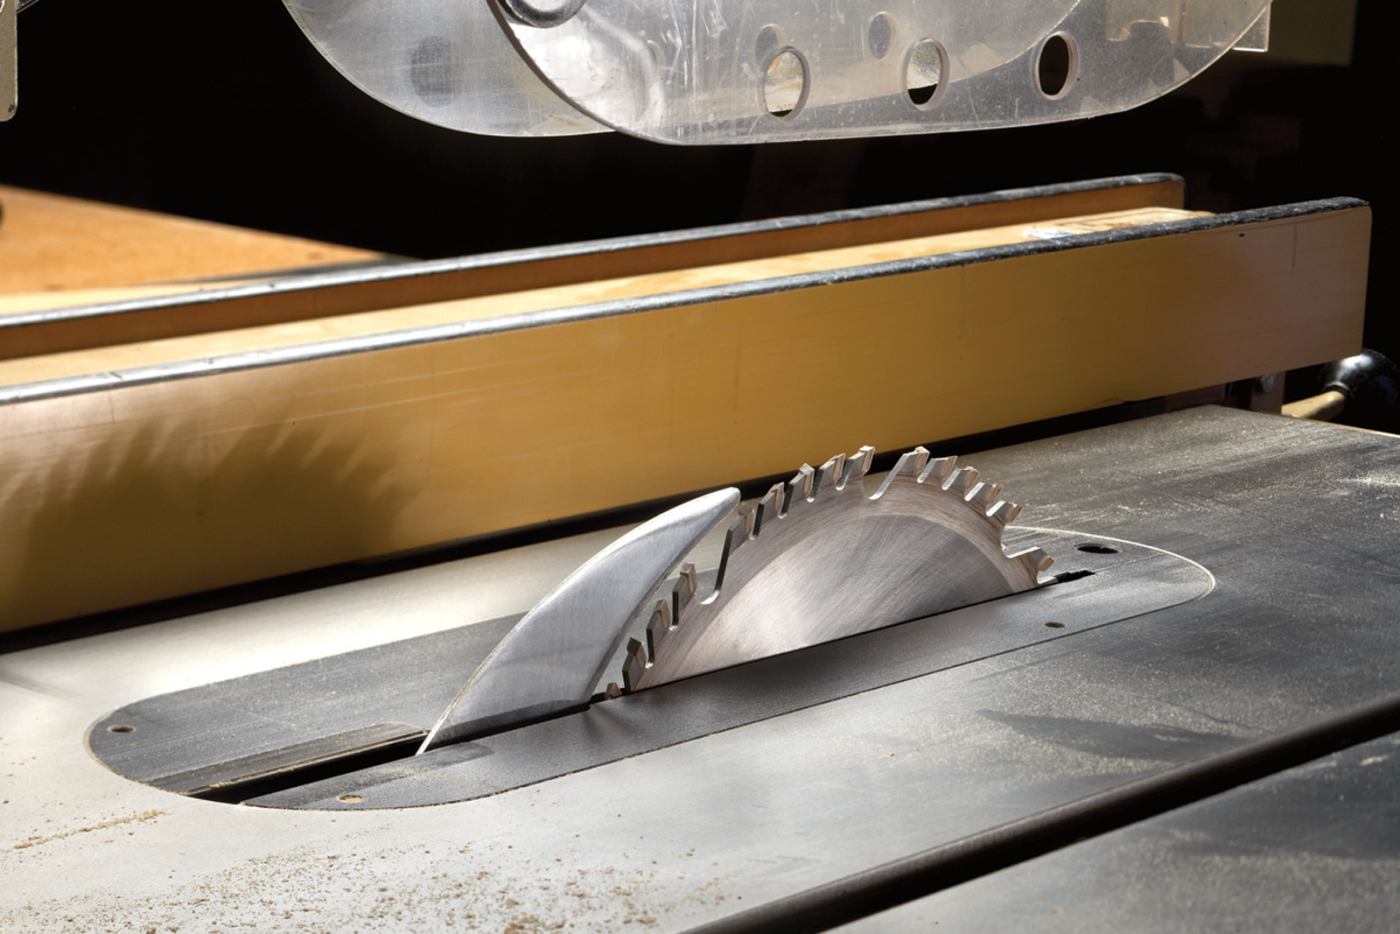
Riving knives add a great deal of safety to any standard blade cut. The knife travels with the blade to maintain a close fit to the blade and reduce the possibility of pinching.
Anti-kickback Fingers
Anti-kickback fingers are sometimes referred to as non-kickback fingers, dogs or pawls. Their job is to oppose the tendency of the saw to pick up material and throw it toward the operator. Overall, I’m all for any thing that can make a saw safer. From an engineering point of view, anti-kickback fingers seem to be a good concept but they come with quite a bit of controversy as to their effectiveness. European saw manufacturers don’t use them at all because they deem them to be virtually ineffective with little positive gain. As a matter of fact, European saws can’t have anti-kickback fingers because of the dynamics of a riving knife. Anti-kickback fingers can sometimes get in the way. For example they can limit and even interfere when ripping narrow stock. I’ve had on numerous occasions the anti-kickback finger limit the motion and even obstruct my push stick.

A cutoff of nearly 6˝ is not captured by a traditional splitter or anti-kick-back fingers, but a riving knife positioned close to the blade would keep the cutoff away from the back of the spinning blade.
A splitter is a nice safety addition to a crosscut sled. However, you will have to remove your anti-kickback fingers if you use a splitter with your crosscut sled because they will create a hang up when you pull the sled back after the cut. Although anti-kickback fingers do work when using a miter gauge for crosscutting, they are virtually useless with stock less than 6″ wide. Remember: A standard guard/splitter combination is set back from the blade, which causes the anti-kickback fingers to be positioned even farther from the back of the blade. When crosscutting, the cut is completed when the trailing edge of the board clears the front of the teeth. This will leave the unsupported cut-off board right next to the back portion of the blade and just before the anti-kickback fingers. Because anti-kickback fingers are attached to the splitter, they follow the same rule for through and non-through cut applications as the splitter.
Here are some supplies and tools we find essential in our everyday work around the shop. We may receive a commission from sales referred by our links; however, we have carefully selected these products for their usefulness and quality.


