We may receive a commission when you use our affiliate links. However, this does not impact our recommendations.

Knowing the techniques will help you, even if you aren’t doing the sewing yourself.
For a woodworker, upholstery can be intimidating. It’s hard to know what you want, until you can clearly explain the finer points. Even if you have no intention of doing the actual upholstery work yourself, it’s helpful to familiarize yourself with upholstery styles and terms so you can order precisely what you want from an upholsterer. We’ll use the bow-arm rocker as an example.
Frame and Foam
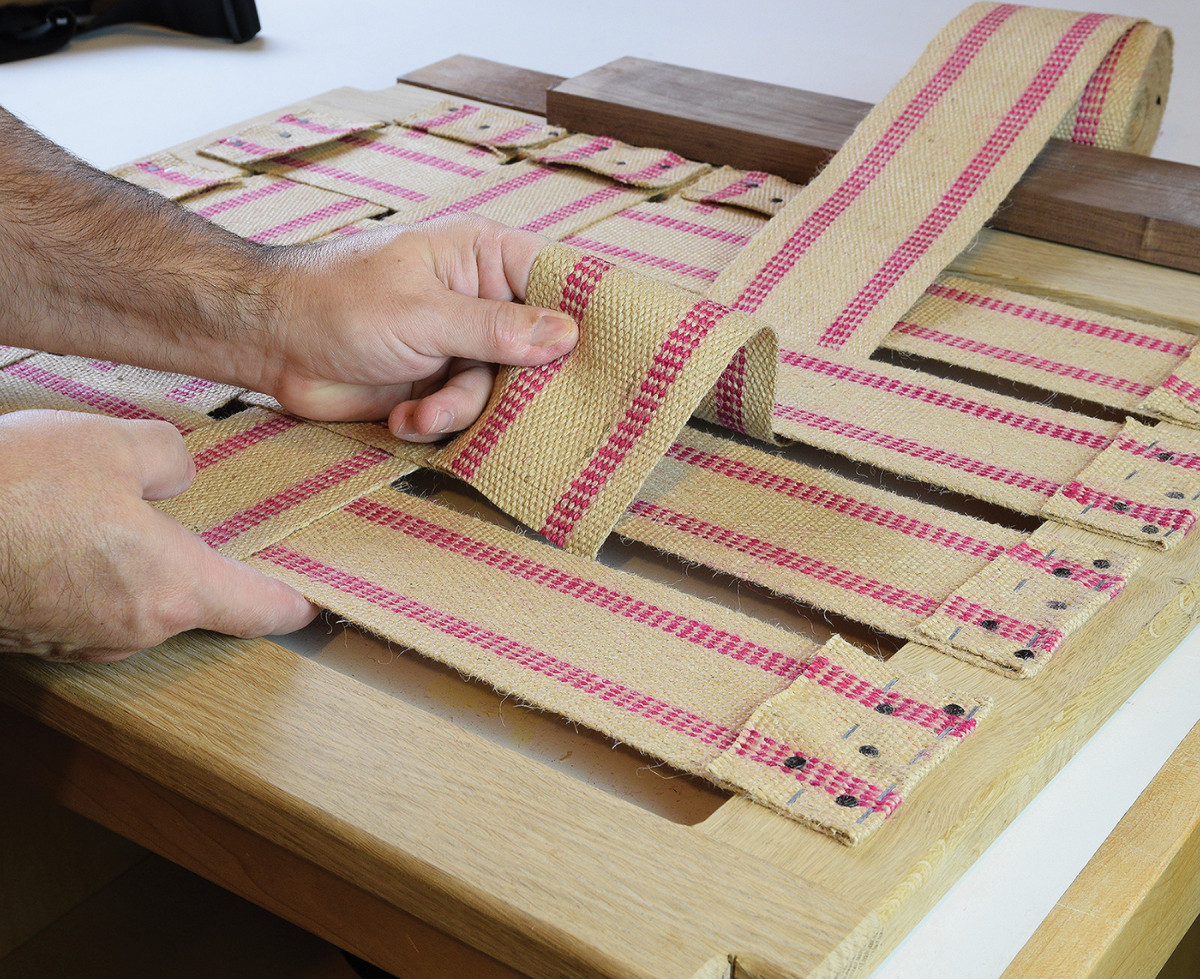
1. Weave jute webbing to form a solid, yet forgiving base for the seat cushion. Attach the far end of the webbing and draw it together with a webbing stretcher.
You’ll need a simple wooden seat frame, sized 1/4“ smaller in all directions that the chair opening. The frame is made from 2“ wide x 7/8“ thick hardwood and joined with half-laps. Round over the inside and outside edges of the seat frame with a 1/4“ router bit to protect the upholstery. Now add jute webbing to the seat frame. The only special tools you need for this step are a webbing stretcher, and magnetic tack hammer (or staple gun). Fix one end of the webbing and stretch it across the seat frame. Work from the roll of Jute webbing to minimize waste.
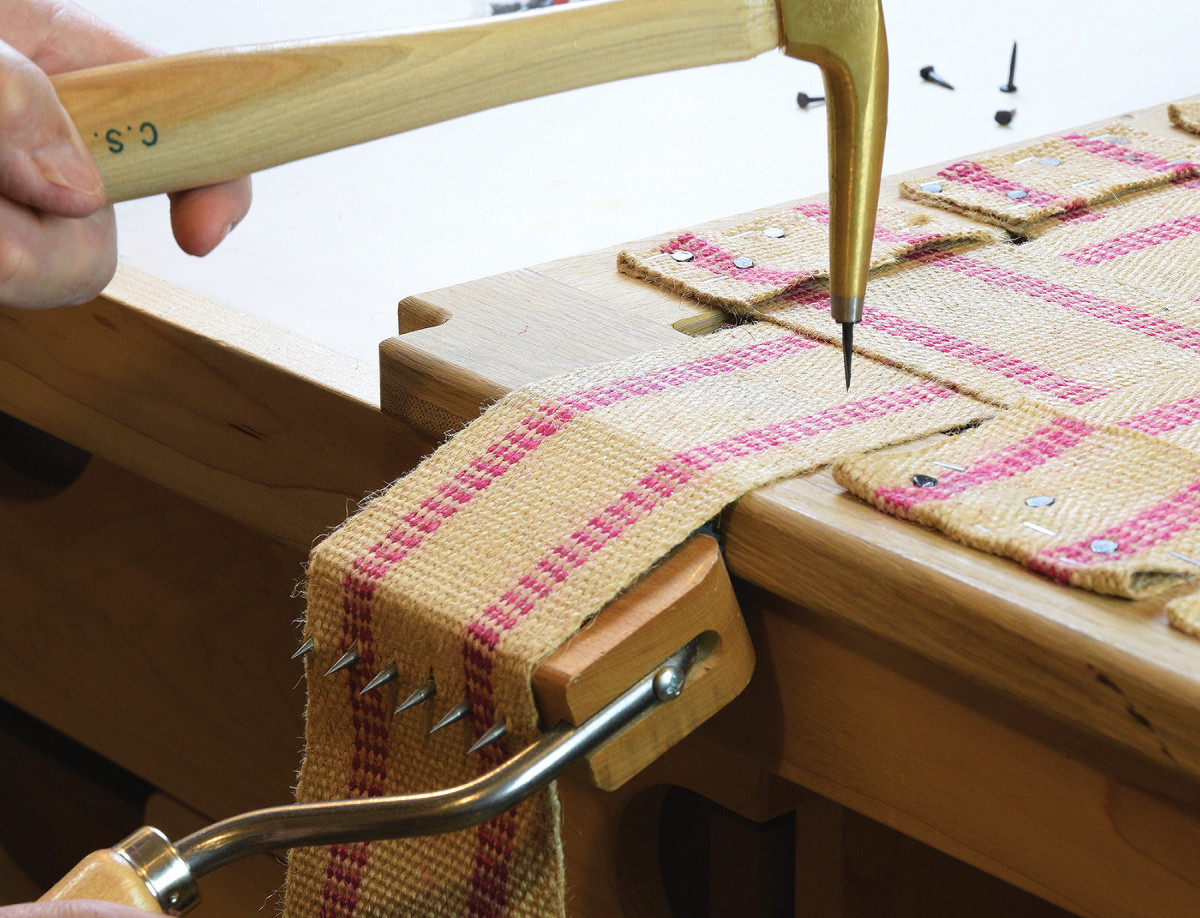
2. Attach webbing with #12 upholstery tacks. Stagger the position of the tacks to avoid splitting the wood.
For optimal comfort, the foam is a lamination of three different densities. The top layer of white foam is 2“ thick and medium soft. The white foam is sold by retailers and upholstery suppliers as 1834 foam. The first two numbers indicate the foam density, which is 1.8 lbs. per cubic foot in this case. The last two numbers are the indentation load deflection (I.L.D.) and indicate the firmness. The next layer is 3“ thick blue foam that is medium form. The blue foam is sold as 1845 upholstery foam. The bottom layer of seat cushion is 1“ thick, and the type of foam used here is less critical. I used 2955 pink foam for this thin bottom layer.
Batting and Seat Cover
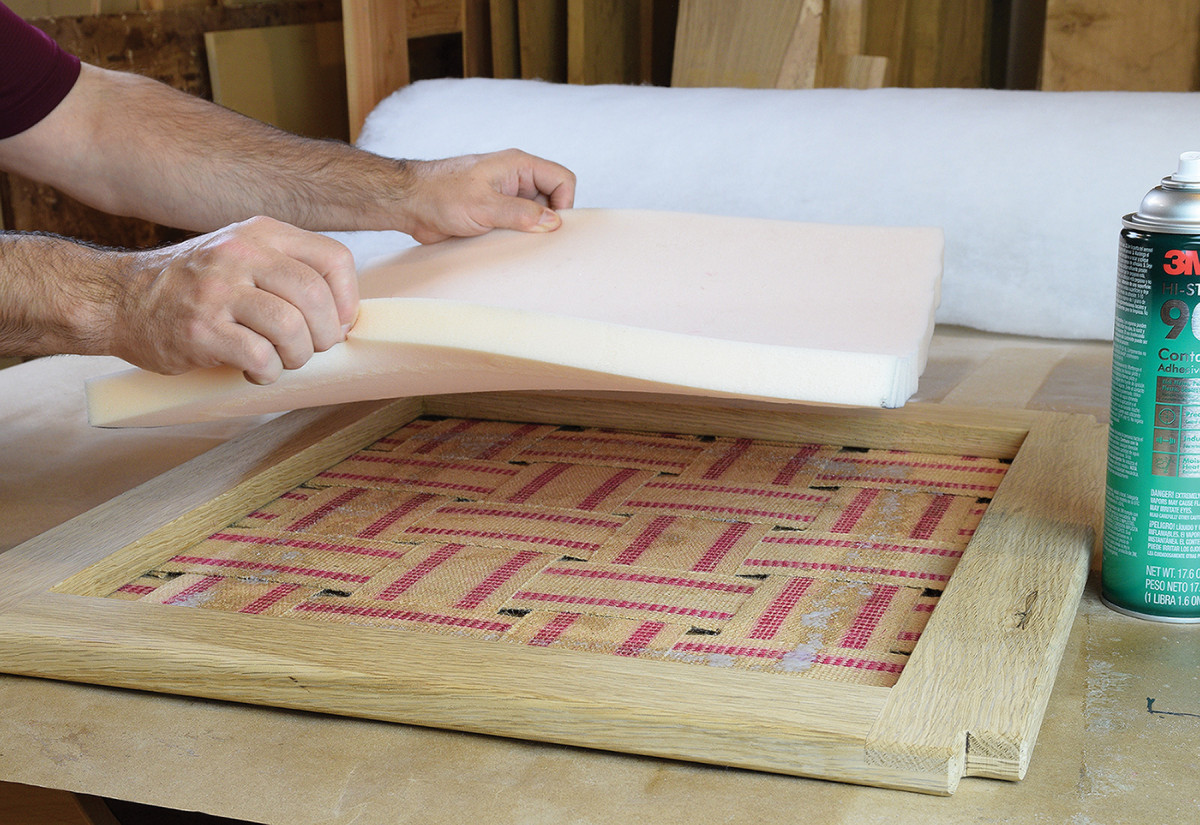
3. Orient the webbing face down and add a layer of 1″ thick, firm foam to fill the void. Glue the foam to the webbing with spray adhesive.
I use upholstery batting (Dacron) for two main reasons. The first is to soften square edges and begin to shape the foam. The second reason I like polyester batting is the subtle loft it adds to cushions.
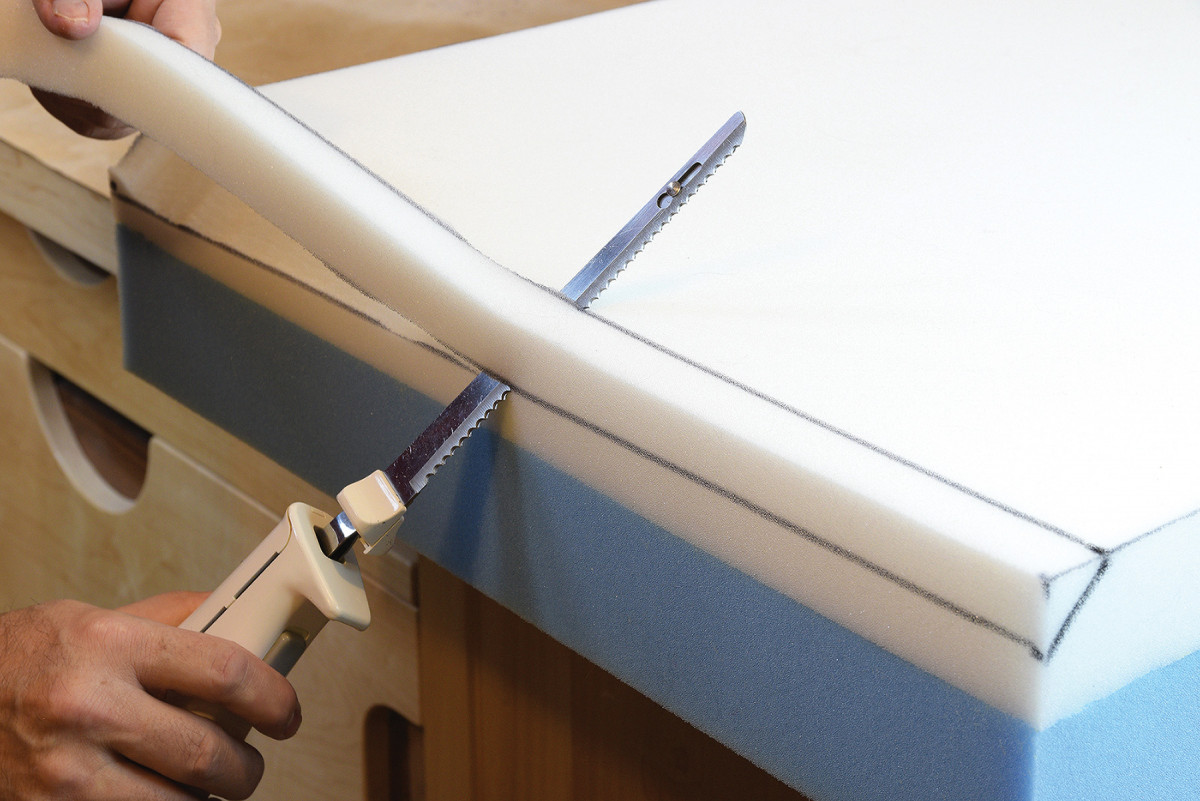
4. Trim the blue and white foam sandwich to the same size as your seat frame at the bandsaw. Then use an electric turkey knife to cut the bevel on the front edge of the cushion to help form a bull-nosed effect once the cover is installed. Finally, glue the foam to the seat frame with spray contact adhesive on both mating surfaces.
You can make the cushions however you want. Once you develop your formula, the next project gets a little easier.
Backrest Cushion
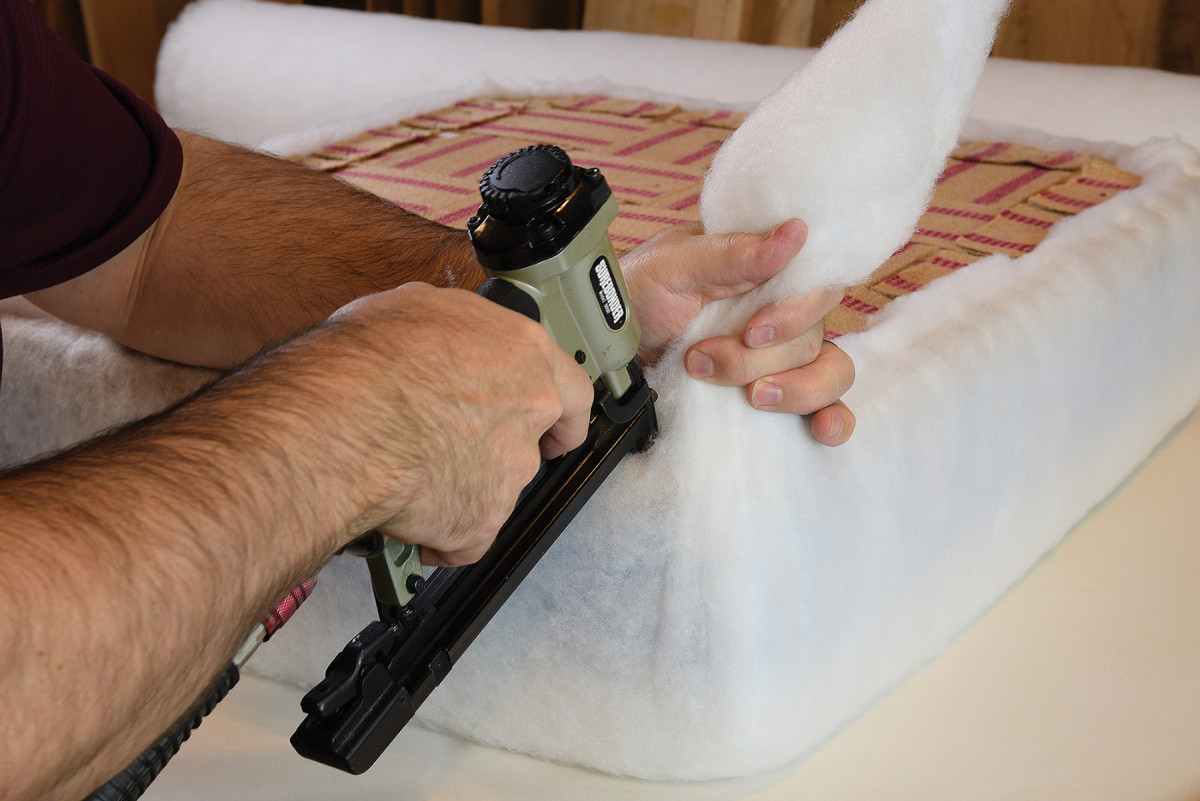
5. Add one layer of high-loft batting. Gently stretch the batting and attach it with a pneumatic staple gun.
The backrest cushion is very soft 1818 foam in a 3“ thickness. Cut the purple foam to a 26“ long x 21“ wide and wrap it with a single layer of high loft batting. The batting is attached to the foam with spray adhesive. This is a good starting point for the backrest stuffing.
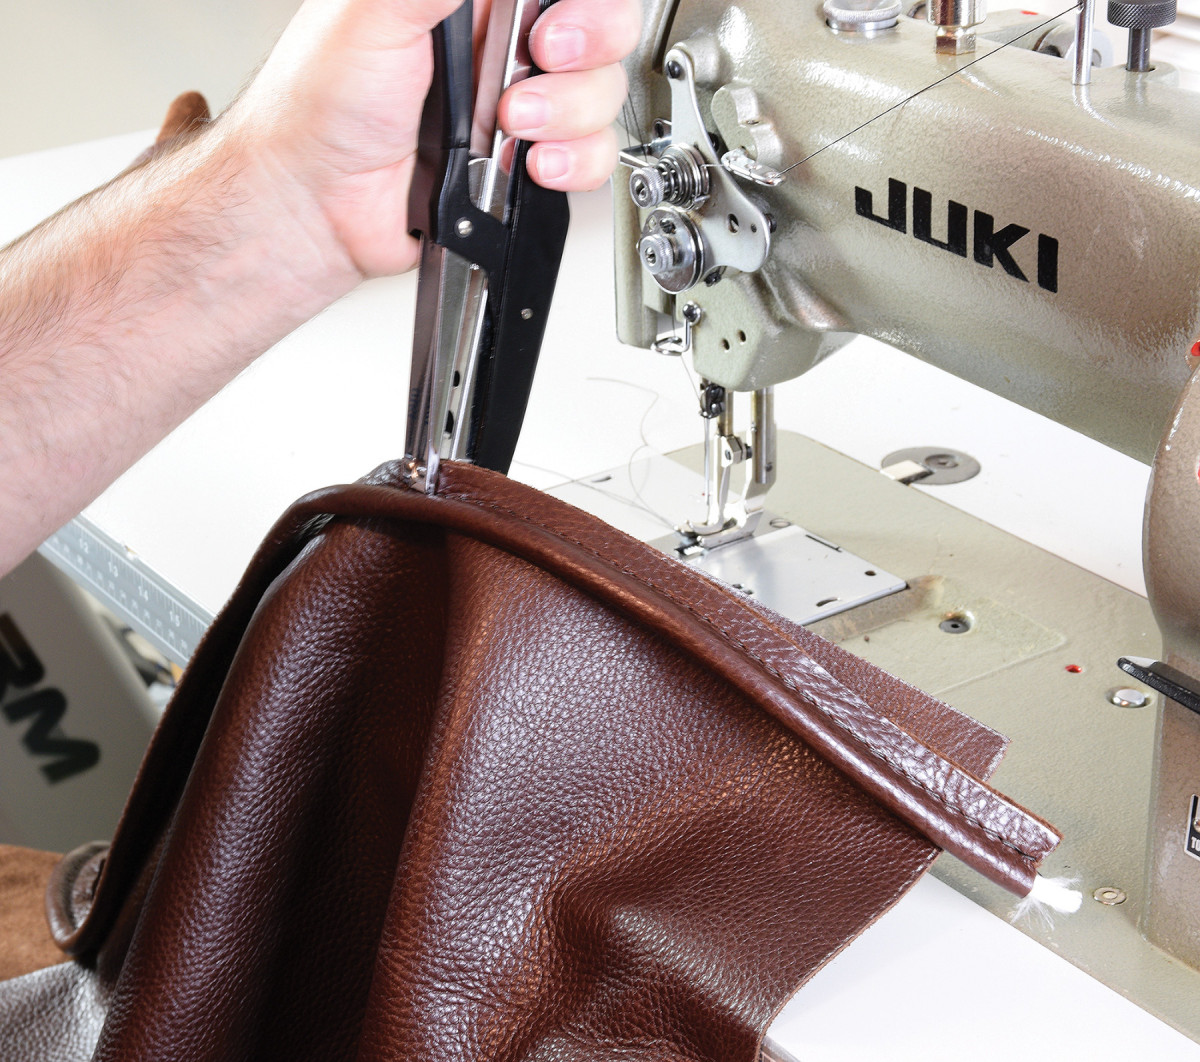
6. Sew strips of piping and staple it to the top plate of the seat. Then staple a side panel to the assembly you just built. The staples help hold the leather in place as you sew. (Remove them before installing the seat cover.)
If you want a fuller look to your cushion, simply add another layer of batting. Make a slip cover sized for the backrest foam plus batting. You don’t want the slip cover to compress the foam much, so measure for a somewhat loose fit.
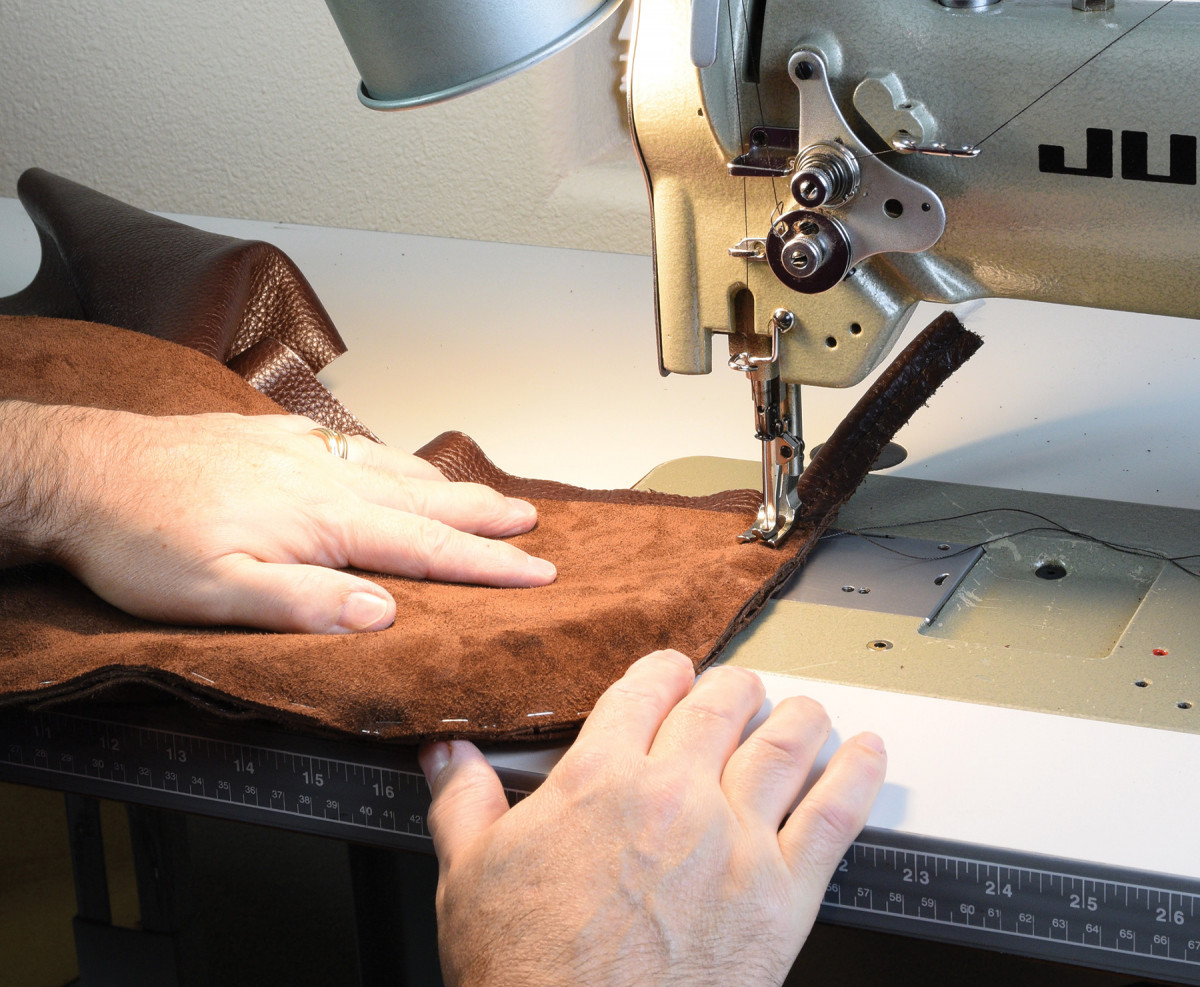
7. Position the side seat panel over the top plate, with a length of piping in between. Using a 1/4″ cording foot on the sewing machine, sew the seam. Back-tack to lock in your stitch and repeat the process on the other side. Once finished, pull it over the Dacron-wrapped cushion like a fitted sheet
Many material types work for slip covers, but my favorite is shiny black polyester fabric. One side has a slippery feel, and it’s this quality that makes it a great material for slip covers. Close the slip cover with an invisible zipper or light duty garment zipper, and set the cushion aside while you work on the leather backrest cover.
Leather Straps
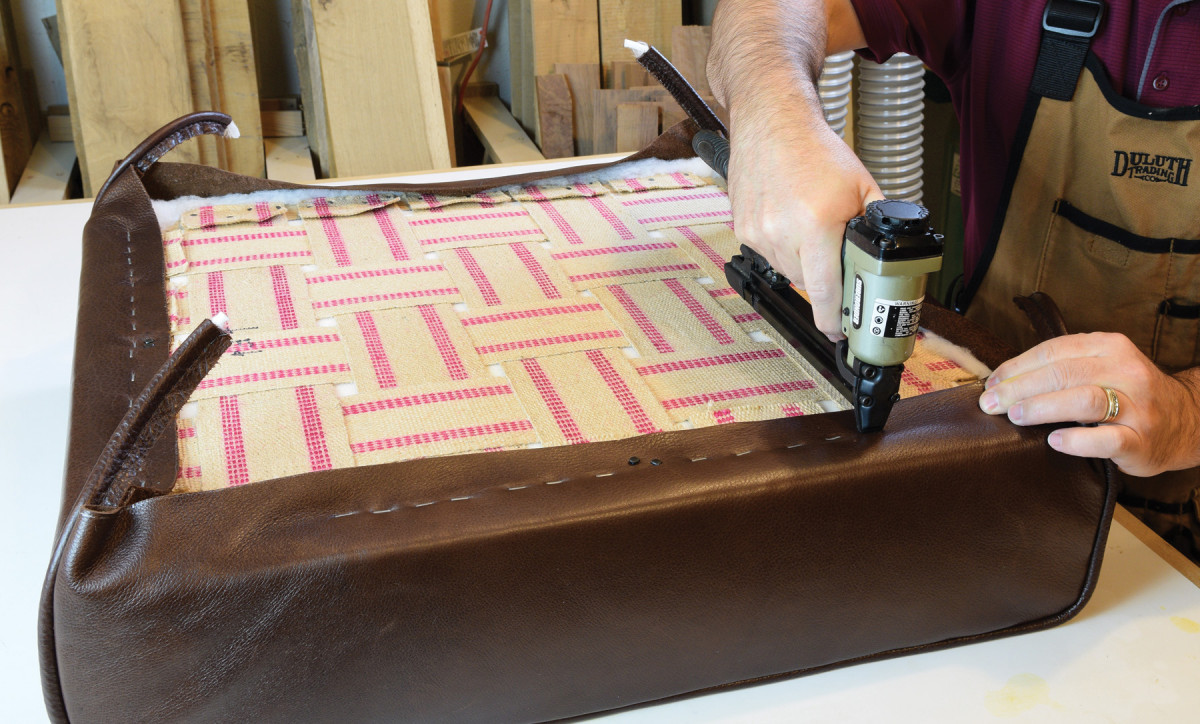
8. Starting at the center rear of the seat, place two temporary tacks. Then stretch the front to the inside of the wooden seat frame. Attach one side, then the other, always starting with two temporary tacks. Once you confirm that the cover is centered, permanently attach it with staples.
A pair of leather straps are used to hold the backrest cushion in place. These straps are optional, but they truly add a finishing touch to any Morris chair. Start with strips of leather 10“ long x 23/4“ wide. Since the straps will be folded four layers thick, the leather will need to be thinned first. A specialty skiving knife would work to thin the leather, but I used a woodworking approach. I simply held the strip of leather against an oscillating belt sander.
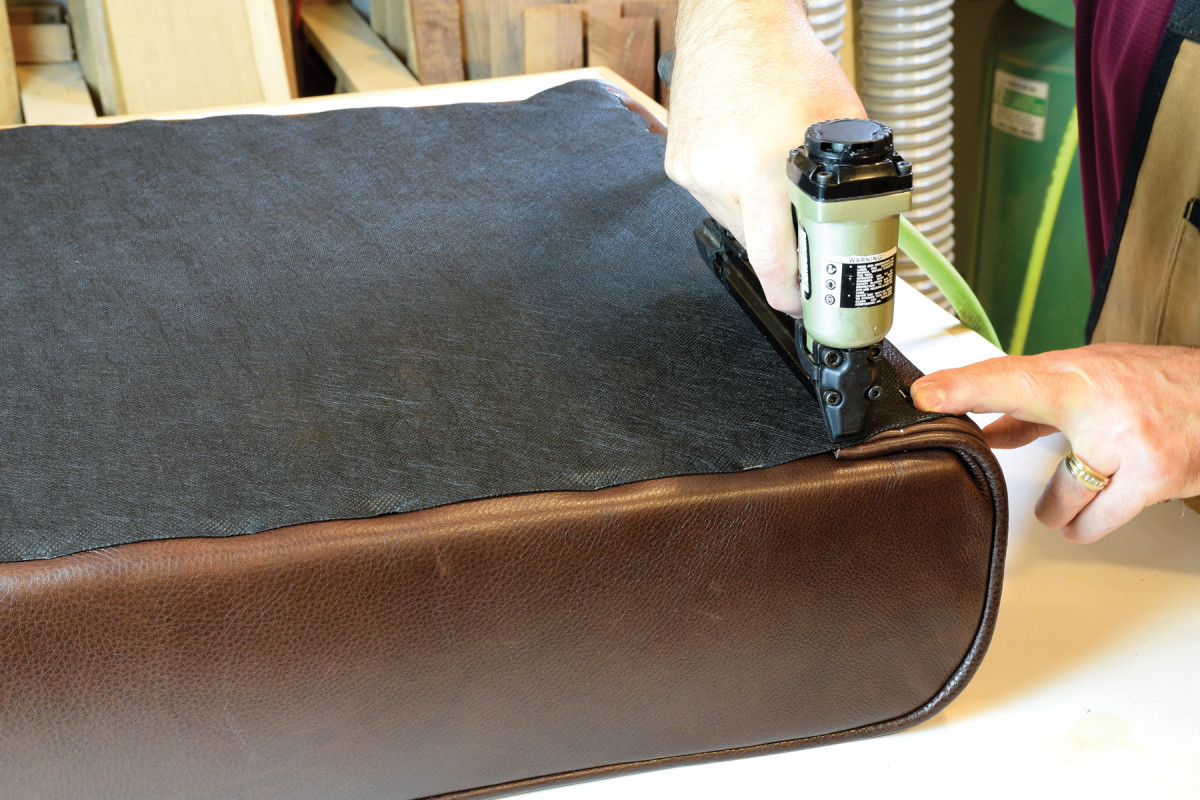
9. The last step for the seat cushion is to attach a non-woven cambric fabric as a dust cover. Fold the edges under and staple the dust cover to the bottom of the seat.
A length of dowel holds the strips of leather against the abrasive, while keeping your hands well clear of the belt. Thin the leather to about half its normal thickness and apply contact cement to the suede side of the leather. Let the glue tack up for a few minutes, then fold the leather in half. Pound the seams flat with a hammer and fold the strip in half once again. Sew down both edges to complete these sturdy and attractive straps with no exposed edges.
Backrest Zipper
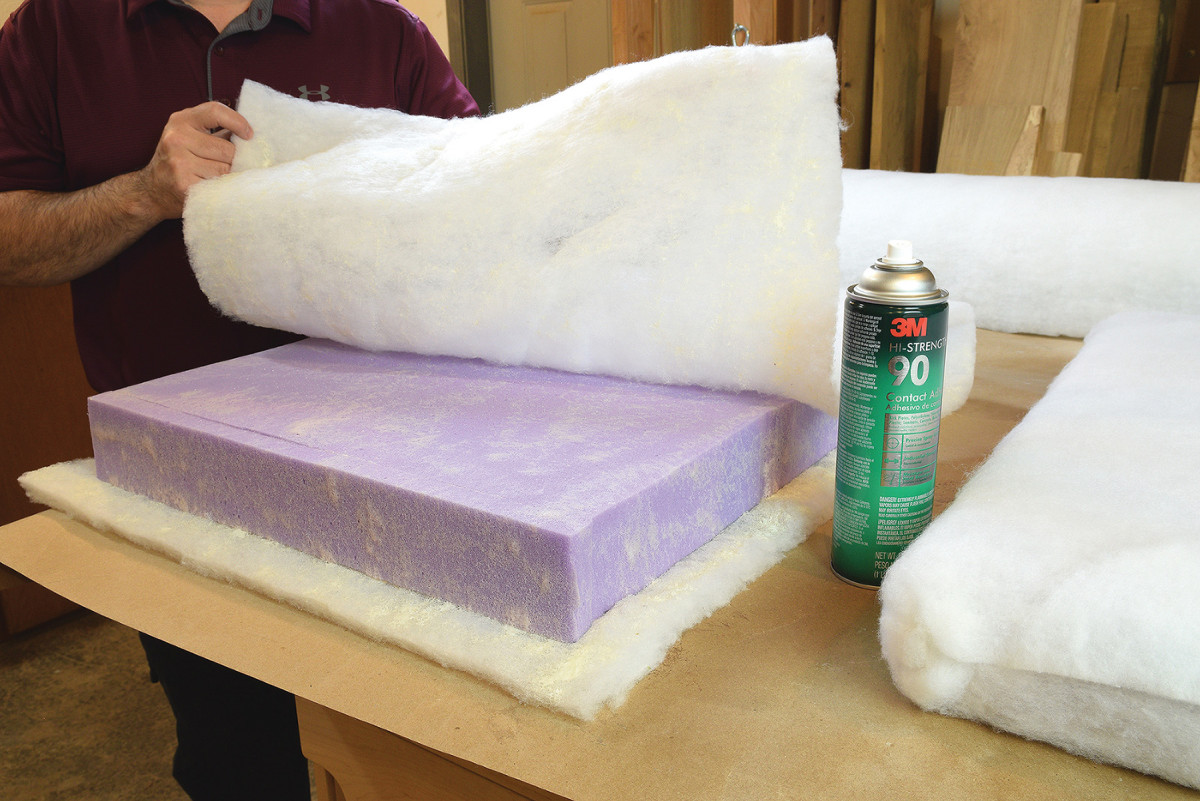
10. Wrap all sides of the backrest foam with a single layer of polyester batting. Attach with spray adhesive, and pinch the sides closed.
One of the first steps of the backrest cushion is to add a zipper tape. I use YKK brand zippers in the #4.5 size. It’s actually just zipper tape that your order by the yard. Remember to order some matching zipper pulls and cut the zipper tape extra-long for now.
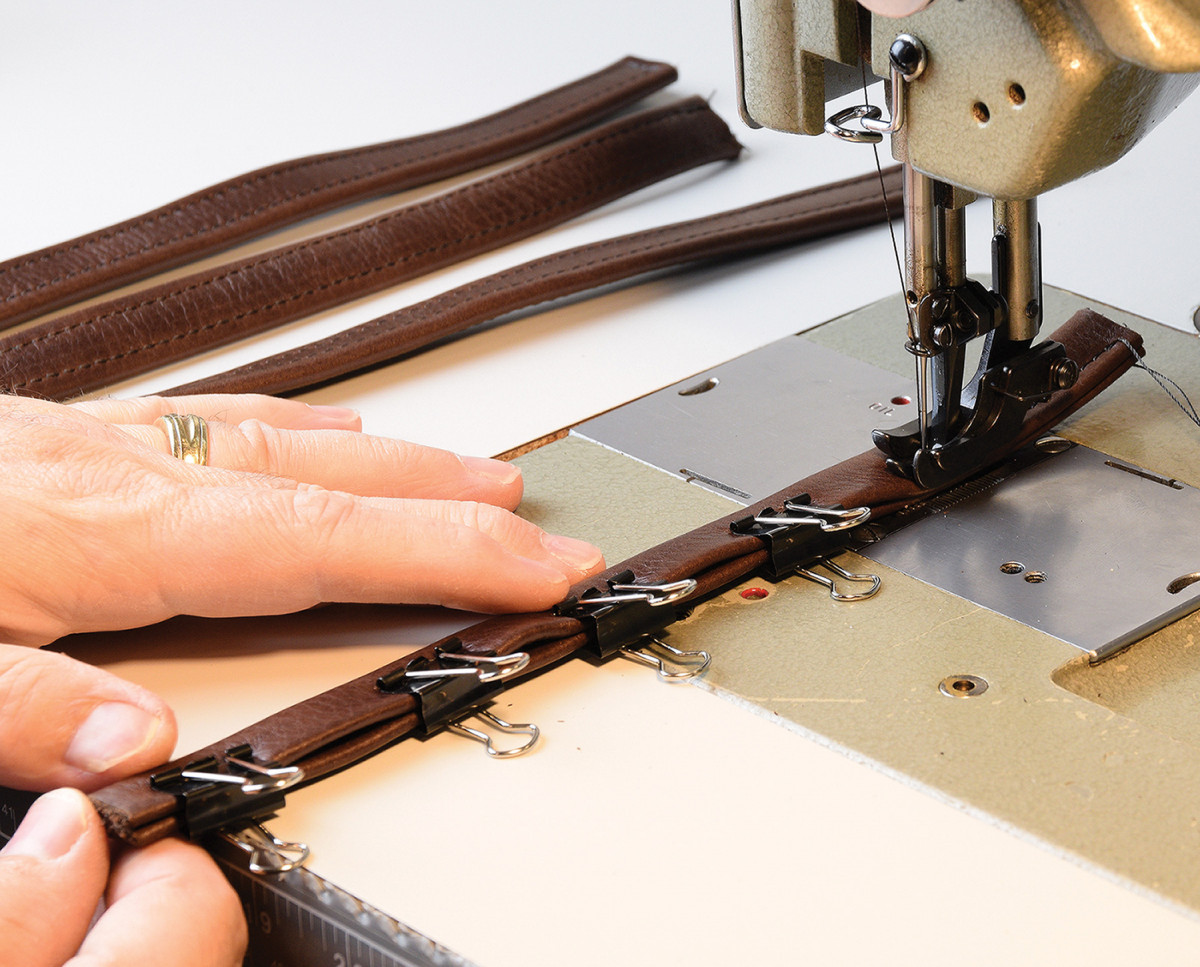
11. Start by applying contact cement to the suede side. Then fold the backrest strap in on itself. Hammer the edges flat, and fold the strap in half again. The strap is about 5/8″ wide and four layers thick. Align the edges flush with small office clips and sew down both strap edges.
Make center notches in your leather panels and zipper tape and center the zipper on the panel to sew it in place. Topstitch the zipper if desired, you’ll quickly proceed to the next step. Now close the 11/4“ x 11/4“ notches in all corners of the backrest panels. You’ll sew the notches closed with a simple blind seam and a 1/2“ seam allowance.
Piping the Backrest
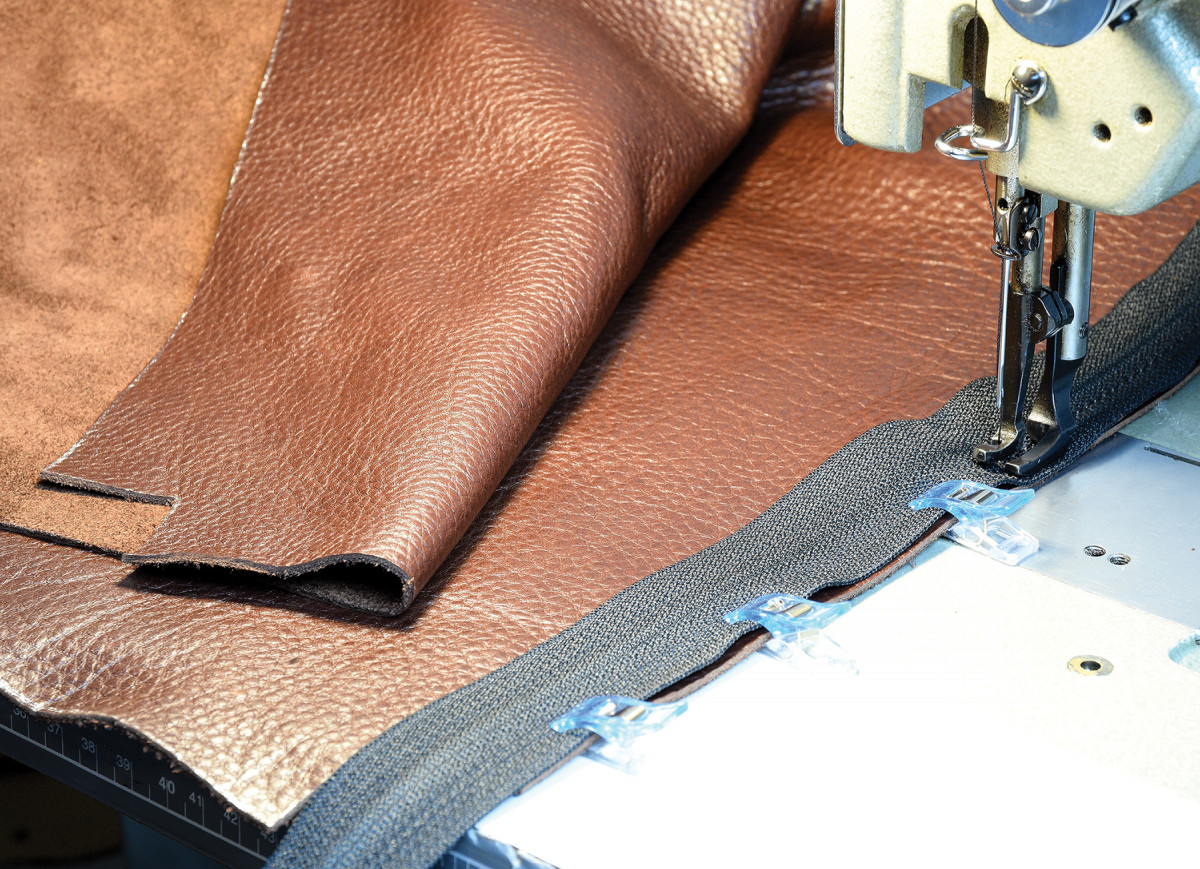
12. Center a zipper on the bottom of the cushion panels and hold it in place with sewing clips. Make sure the “show side” of the zipper is facing down and sew it to the leather.
Cut 13/4“ wide strips of leather to make the piping. Join strips together as needed to achieve the roughly 80“ of pipping required. Plan where the piping seams will land for the best look. Typically, you’ll have a piping seam on each side of the cushion, down near the armrests.

13. Topstitch the zipper. This step is optional, but ads strength and a finished appearance to the zippered cushion. Turn the zipper under the leather and topstitch with a zipper foot on your sewing machine.
Some people tackling their first leather upholstery project are overly concerned about seams in piping. They will look fine as long as the joints are symmetrical. In other words, you may have enough piping length for only one seam. However, it may look better to have two seams, with one on each side, just below the armrests.
Piping and Planning
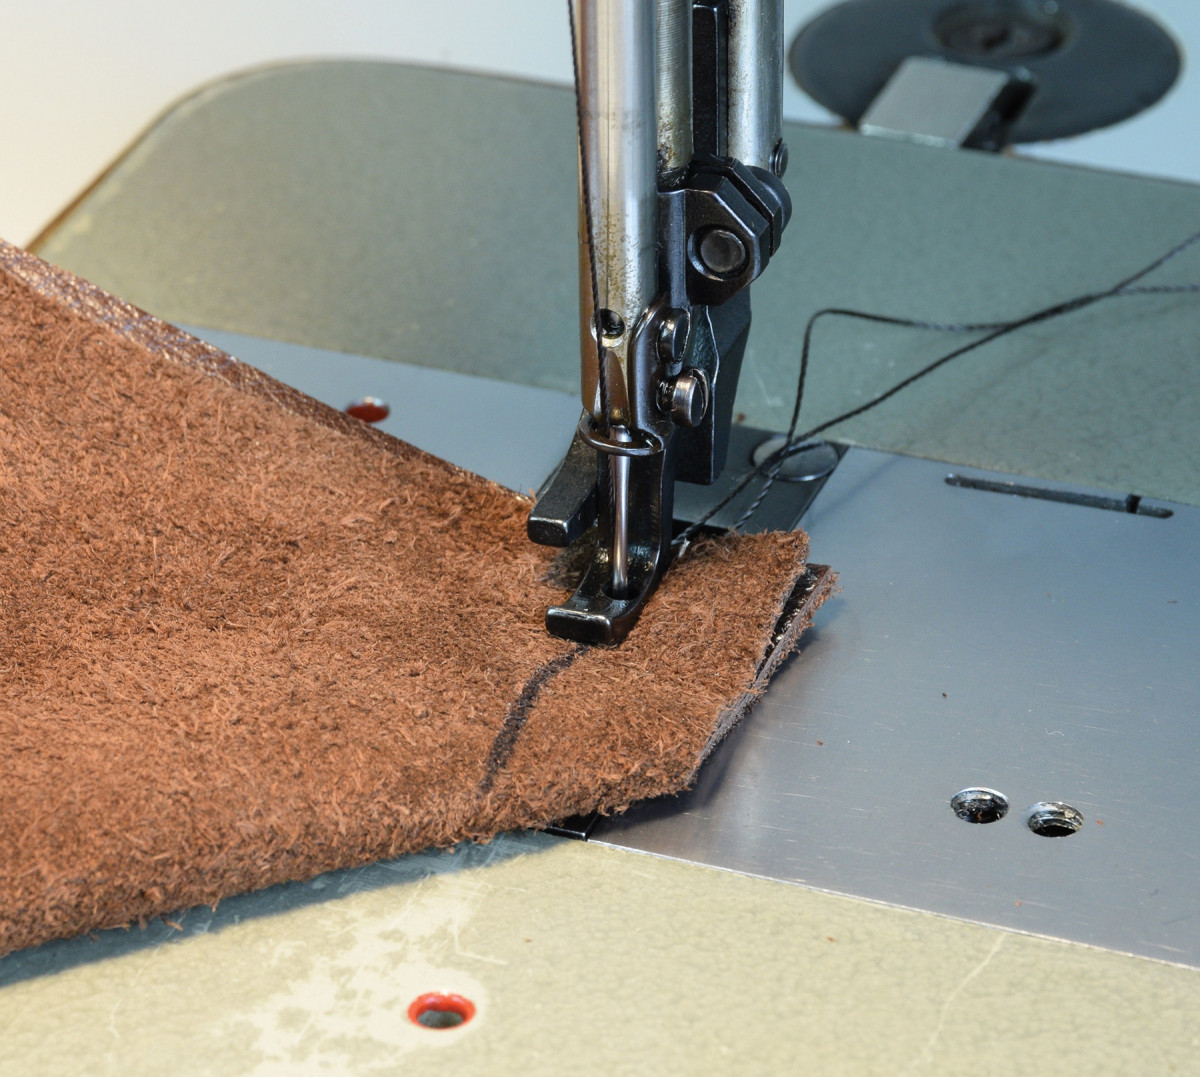
14. Cut 1 1/4″ square notches from all four corners of both backrest panels. Mark a 1/2″ seam allowance and sew up the short seam. Do plenty of back-tacking to lock in the stitch. You may need to trim the seam allowance near the end of the seam, to help it lay flat. Once sewn, these seams help the leather conform to the shape of the cushion.
To sew the welting cord into the leather strips initially, I prefer using a zipper foot. It may seem strange that a cording foot isn’t used to sew the cording, but I’ll try to explain my logic.
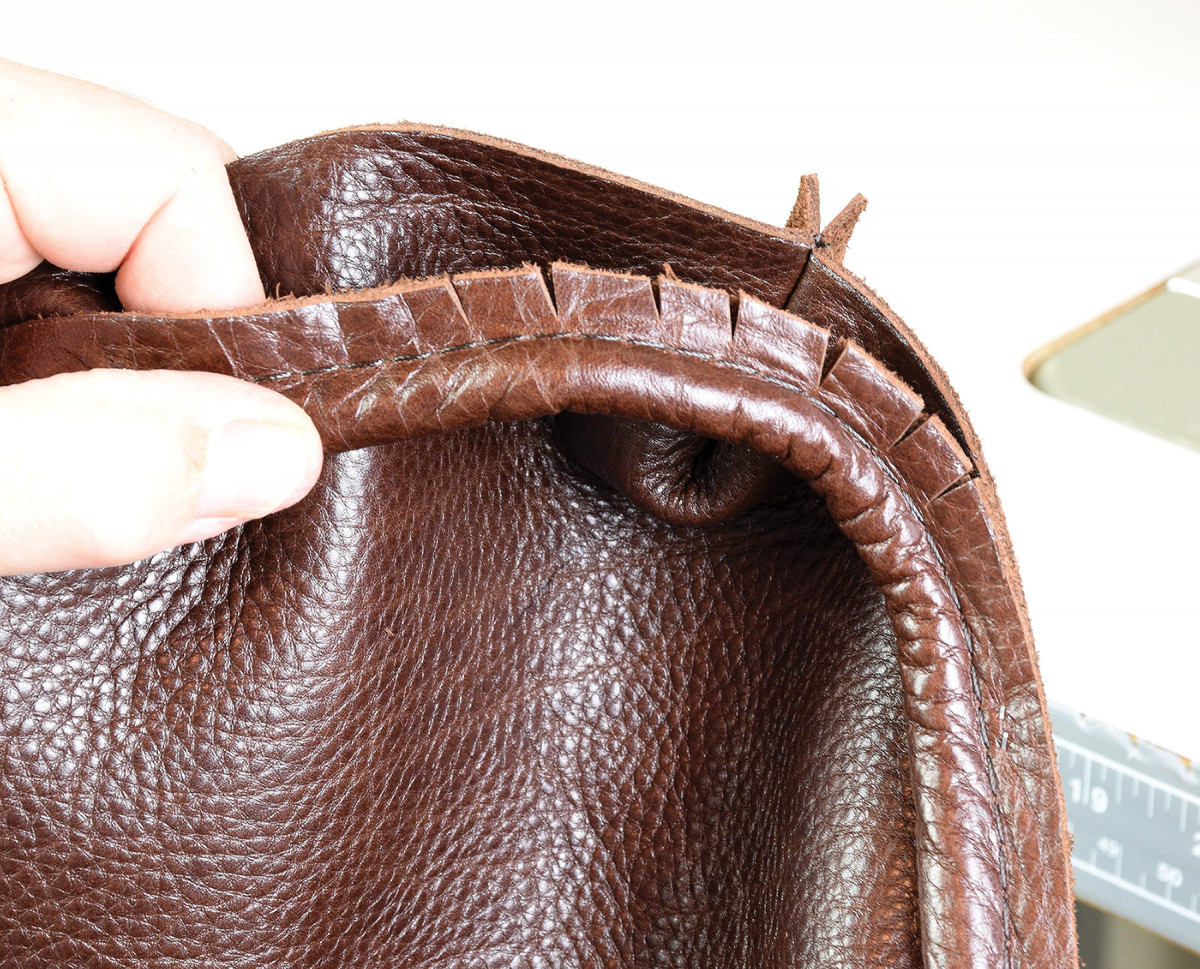
15. Cut a few nicks in the piping where it bends around the corners to make the cover bend smoothly. Use a “plier stapler” to temporarily attach the welt cord to the front panel. Keep the staples toward the edge of the seam allowance, well clear of the stitch line.
Imagine sewing the cording in the leather strips, then sewing the cording to the front panel, then sewing the front panel to the back panel. That’s a lot of perforation in the leather, and every series of holes potentially weakens the seam and may be visible in the finished product.
So instead I start with a zipper foot and set the machine for maximum stitch length. The cording is essentially sewn with a basting stitch to minimize perforations. Everything else is attached temporarily with staples, until the perimeter of the cushion is sewn.
Build Faux Box Cushion
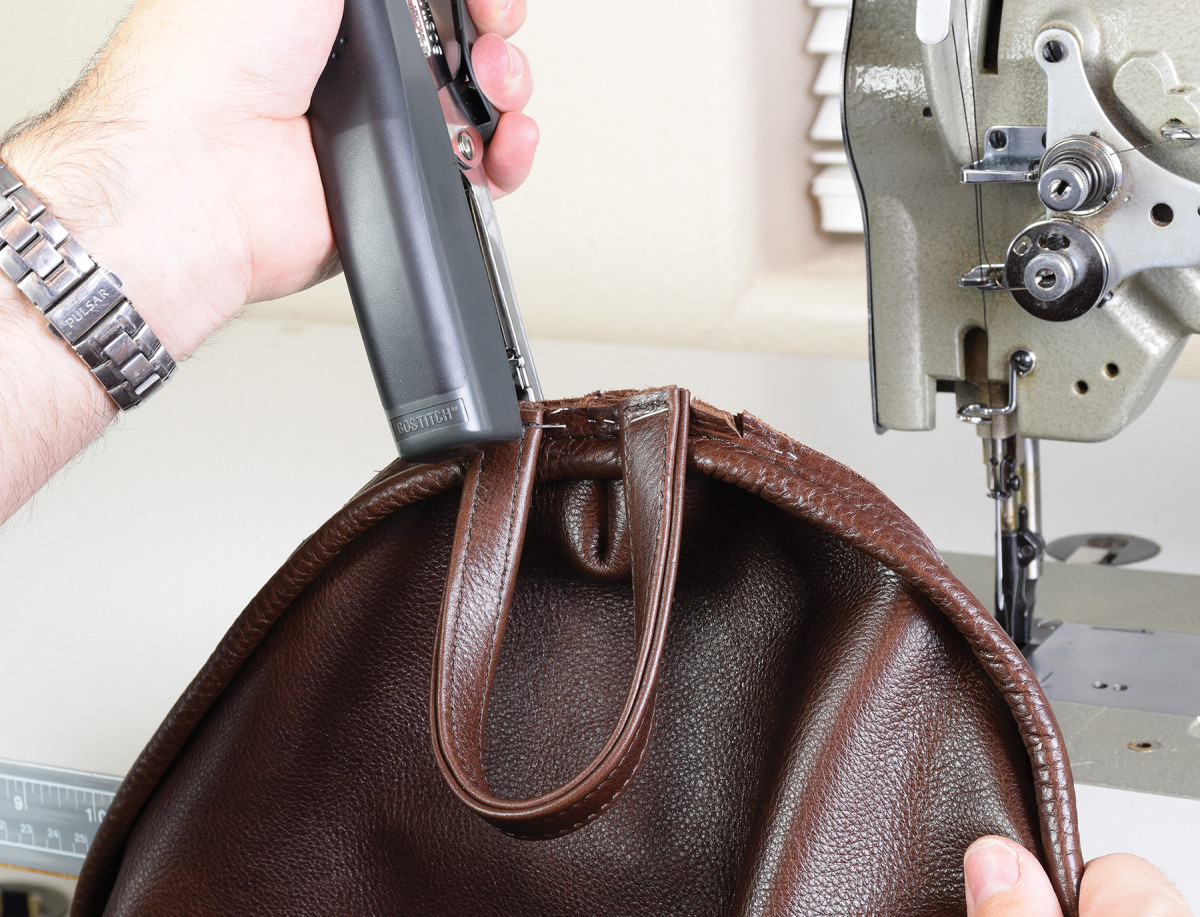
16. Position the strap on either side of the corner seams and align the edges even with the heavy-duty office stapler and 3/8″ staples.
This style of backrest cushion is a faux box cushion, because it fits the shape of the foam well, however, it only has one central seam. You’re close to the finish line now, as you staple the piping to the front panel. Next staple the straps in place on top of the piping. To avoid excessive thickness, the ends of the strap should straddle the corner seams. Even so, you’ll have a seam that is 4 layers thick, and increase to 6-7 layers briefly as you round the top corners. Make sure your sewing machine and needle can handle the thick leather by testing on scraps.
These techniques are not exclusive to the leather, and most of these processes can be applied to fabric as well. Of course, you would pin or clip fabric instead of stapling it. You may even be able to manage a fabric upholstery project with a domestic sewing machine. For sewing leather, it’s advisable to use an industrial walking foot sewing machine. They feed material with feed dogs below, as well as a walking foot from above. If you don’t have an industrial machine, try to borrow one or take a project-based class where equipment is provided. That’s what I did for my first foray into leather upholstery, and it was well worth the time invested.
Marking & Cutting Leather

17. Focus on aligning the corner seams and center marks as you staple the front and rear panels together. Complete the backrest cover by sewing the perimeter with a 1/4″ cording foot.
Accurate marking and cutting of the leather panels is important to get your project off on the right foot. Make drawing templates from large sheets of construction paper or other suitable material. Use the templates to layout the pieces on your leather hide for the best yield. I recommend using a special leather marking pen for tracing around the paper templates. A leather pen allow you to clearly mark on the show face of the leather, while still being easily removable.
On large pieces such as these, I use heavy duty 8“ leather shears. You’ll find household scissors aren’t up to the task and won’t cut a straight line in leather. For the smaller pieces such as the leather straps, you could use a rotary cutter.
Sewing leather projects may seem intimidating at first, but with a little practice, you’ll be tacking all sorts of upholstery projects.
Material List
- 1 hide of leather; 50-55 s.f. 2-3oz thickness (0.8-1.2mm)
- 5/32” Piping/welting cord
- 1834 foam for top layer of seat cushion:
2″T x 22″W x 25″L - 1845 foam for bottom layer of
seat cushion:
3″T x 22″W x 25″L - 2955 foam for base foam, sized to fit inside the seat frame
- 1818 foam for backrest cushion:
3″T x 20″W x 26″L - High loft polyester batting; approx. 2 yds.
- 92 weight bonded nylon thread
- Dust cambric: 27″W x 27″L
- Staples T50 x 3/8″L
- #10 and #12 upholstery tacks
- Red strip Jute webbing
Here are some supplies and tools we find essential in our everyday work around the shop. We may receive a commission from sales referred by our links; however, we have carefully selected these products for their usefulness and quality.


