We may receive a commission when you use our affiliate links. However, this does not impact our recommendations.
 Tools: A Visual Exploration of Implements & Devices in the Workshop
If there’s one thing to be said about woodworkers, it’s that we’re old school and prefer to pick up a book (or a magazine). With that in mind, I’m thankful for the community of master woodworkers that put forth a great effort to put some of their knowledge down into the pages of a book to share with all. Here is a small sample of a recently published book that I believe you will enjoy as much as we did.
Book: Tools: A Visual Exploration of Implements and Devices in the Workshop Shop Now
Author: Theodore Gray
Photographer: Nick Mann
Publisher: Hachette Book Group
What is a Tool?
The concept of a “tool” is one of the oldest, most universal, and most foundational of all ideas. It’s right up there with “language” and “chartered accountancy” in defining who we are as a species.
Depending on how broadly you define the terms, we use tools to do nearly everything in our lives, from getting out of the tool we use to sleep better (a bed), to using a small pressure washer on our teeth at night (a water flosser). I like this definition to separate tools in the broadest possible sense from things that are not tools:
A Tool is a Catalyst.
In chemistry a catalyst is a substance that makes a chemical reaction happen faster than it otherwise would, while itself remaining unchanged. Because it is not consumed by the reaction, a catalyst can keep working as long as you keep feeding it more reactants. Similarly, a tool can keep working as long as you keep giving it material to work on. Wood is a reactant, and the chisel is a catalyst that makes the carving go faster than if you used your teeth…
How this book is organized
To create this book I started with my own tools: the ones I grew up with, built my house and farm with, and use today. To those I added many more I found… I took a snapshot of each one with a ruler for scale, give it a catalog number, and recorded where it was, whether at home, at my farm, or, in most cases, in a numbered crate stacked on shelves in my studio. In all enumerated about twenty-five hundred tools, of which only about a quarter fit on the pages of this book…
You might notice that the table of contents of this book looks just like a periodic table. This may seen like a silly concept—and maybe it was when I first started toying with the idea of how to arrange the tools in this book… I wanted to highlight one type of tool on each two-page spread, and cover around a hundred types of tools, which coincidentally is about as many elements as there are (118)…
 In arranging this book, I have followed the basic properties of the table of elements. Within each column of the periodic table the elements share similar properties, and they get heavier the father down you go. So, in my periodic table of tools, each column contains related tools, which get bigger, stronger, and heavier as you go down the column… Just for fun I tried to make a few analogies between tool and element properties. For example, column 17 of the periodic table is the halogens, fiery dangerous elements that burn anything they touch. So column 17 of the table of tools contains those that use heat: welders, soldering irons, casting furnaces, and laser cutters.

Possibly the most useful measuring tool ever invented, the common pocket tape measure.
Measuring Tools: Tape Measures
Prior to the invention of steel measuring tapes, the most accurate way of measuring medium distances was with a tremendously inconvenient iron measuring chains. Flat steel tapes were revolutionary, but the real revolution came in 1922 with the invention of the automatic retracting, covex-concave pocket tape measure, surely one of the most useful inventions of all time. A pocket tape that literally fits in an average pocket can measure distances up to 30 feet (10m) quickly and easily with 1/32“, far longer than any practical chain.
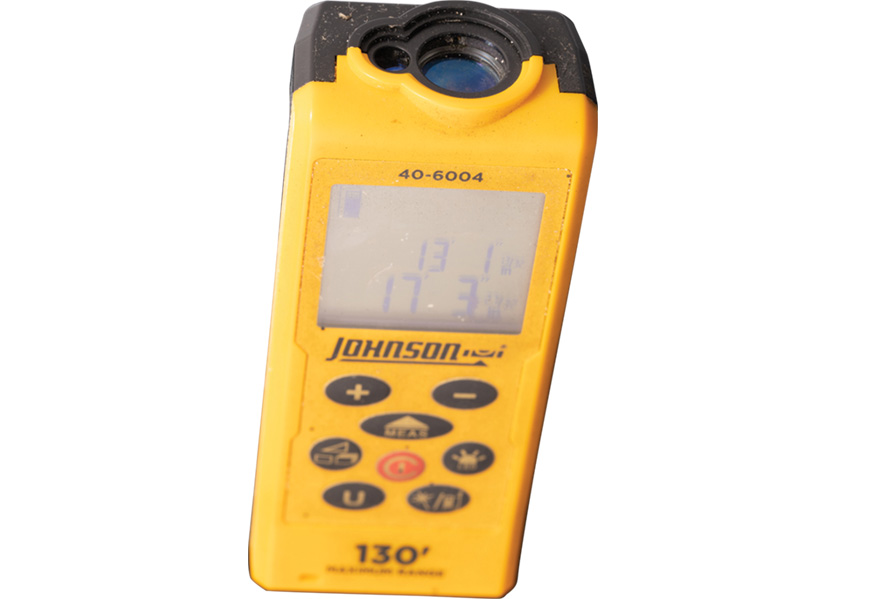
A laser rangefinder is a good tool for medium distances; up to 130 feet (40 m) for this one but much farther for fancy models.

Ultrasonic distance meters exist but aren’t as good as laser models, except underwater where lasers cannot penetrate. This depth finder told me how deep my lake is, more expensive than using a rope and a brick.
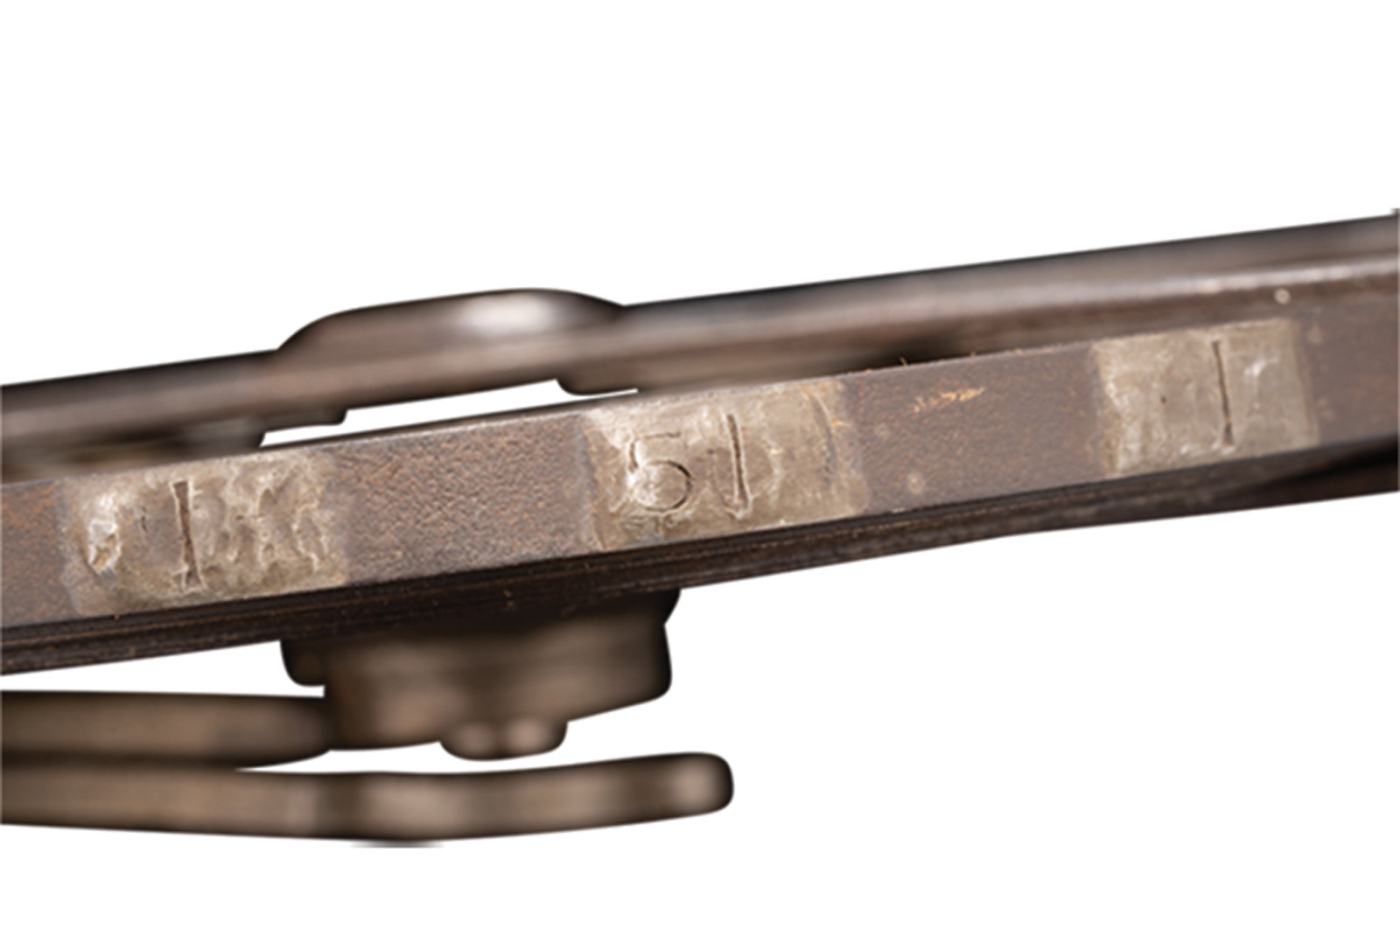
The distance marks on this beautiful old 100-foot (30m) steel tape are individual bits of engraved metal soldered onto the sturdy tape! It must have taken forever to make.
Among the multiple clever features in a modern tape measure is the clip on the end. It always feels like it’s loose, but this is not a flaw, it’s a feature! The amount by which the clip can slide is equal to the thickness of the bent-over tab of the clip. That way you can push the end up against a wall, or pull it against the end of a board, and either way the measurement will start in the right place.
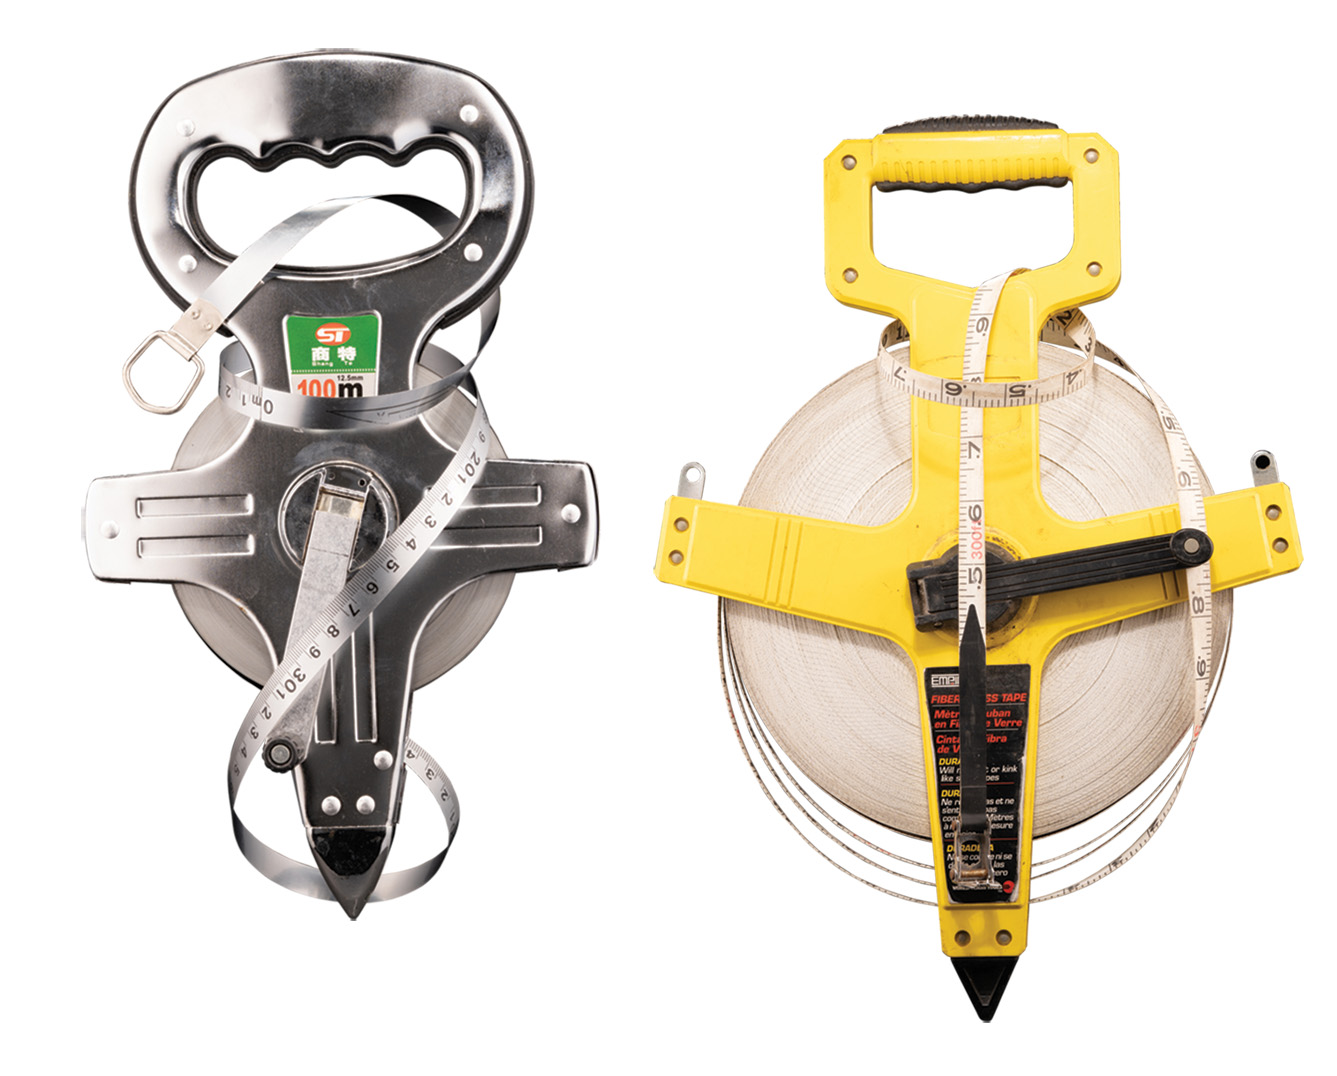
Both these tapes are about the same length (300 feet/100 m respectively). The stainless steel one at left is smaller and stiffer, but the tape is easy to kink and kind of sharp along the edges
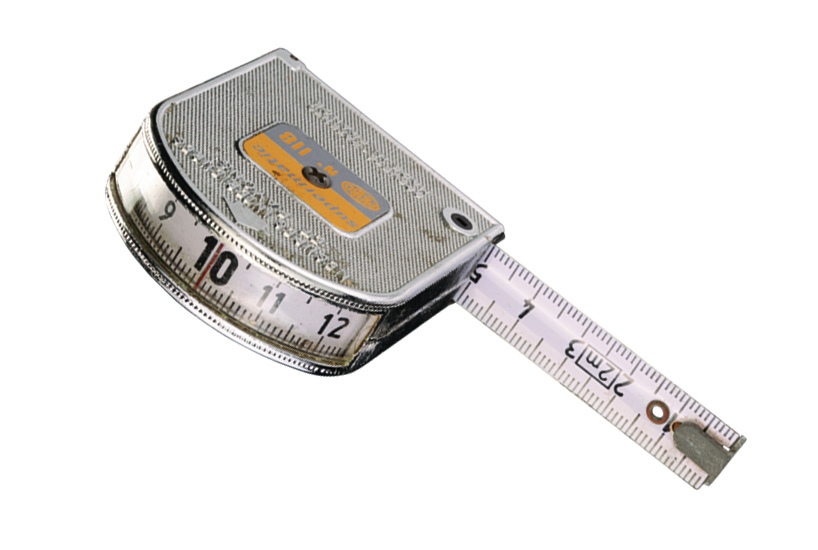
The mark in the window shows the measurement starting from the back of the case.
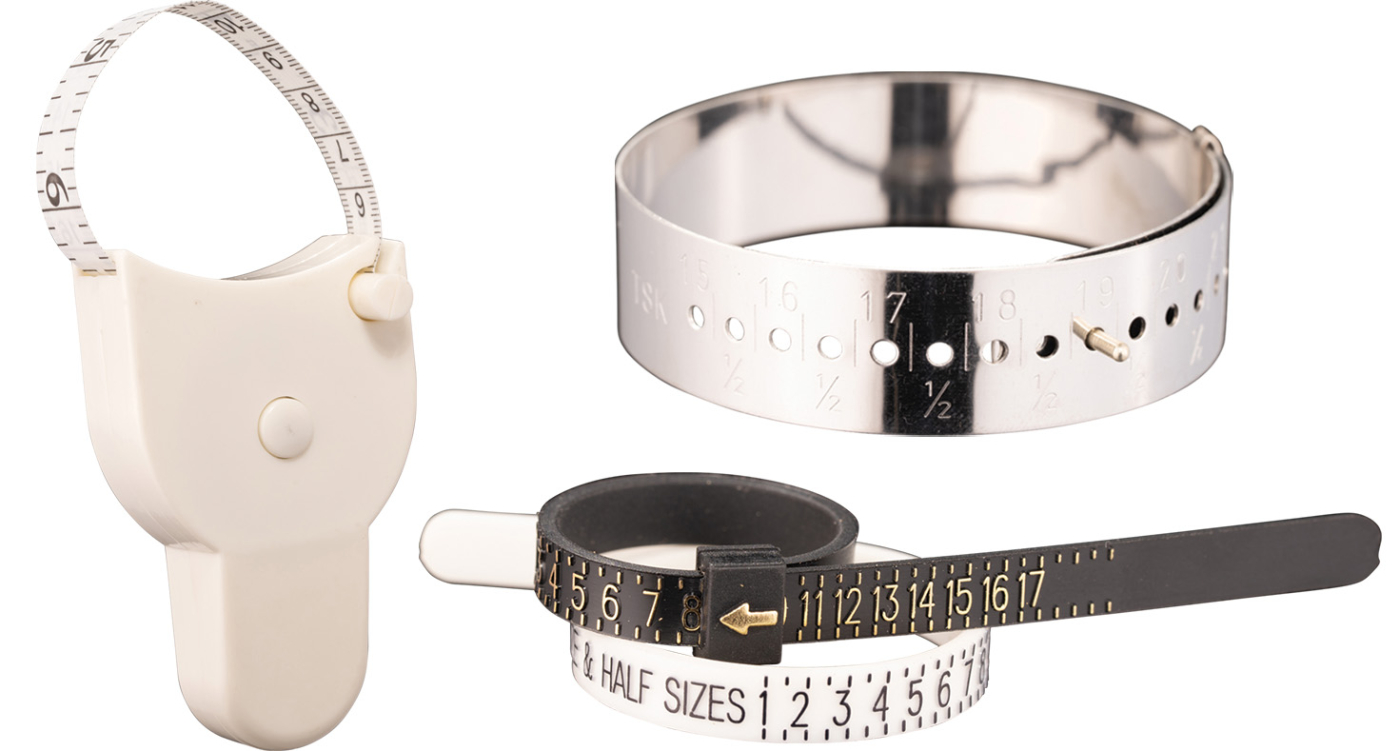
These specialized tape measures are used progressively farther out along a human arm, starting clockwise left with the upper arm (for fitness), wrist (for sizing bracelets), and finger (for fitting rings).

This is a modern reproduction of a Gunter’s chain similar to those used in the 1700s. The only measurement it can make is the full length between two marks at opposite ends of the chain. I have no idea why someone is making modern Gunter’s chains, but I appreciate the effort.
Steel is the superior material for tape measures because it’s nearly impossible to stretch, but fiberglass is lighter, softer, and more durable. I have a 300-foot (91m) fiberglass tape that I can stretch several inches over its whole length by pulling moderately hard, but that’s fine, I don’t expect it to be accurate beyond an inch or two. For nonlinear or curved measurements, like measuring on the body for tailoring, fiberglass or even cloth tapes are much preferred for their softness.
Cutting Tools: Scrapers
There are two kinds of scrapers: those you push and those you pull. Push-type scrapers are almost like chisels and are typically used to remove relatively soft material from a smoother and harder surface. For example, paint from metal, or burned-on food from a glass stove top. If you use a push scraper on a soft surface like wood, it just digs in, which is rarely what you want, and if it is, you should probably be using a chisel.

Both drawknifes and spokeshaves are pulled toward you. The difference is that the former have only a blade, while the latter have a sole plate that limits the depth of the cut, sort of like block plane.
Pull-type scrapers are used to smooth, shape, or fine-tune softer surfaces. The classic drawknife is used to cut away large amount of wood or bark each time you pull it toward you. A spokeshave is similar, but more refined because of its depth stop.

This looks like an awl, but it’s actually a scraper for clay or wax. It’s an artist’s carving tool. (Or at least that’s what I’ve used it for—it may have some other official purpose I’m unaware of.)

This is scraping tool for smoothing and refining the insides of holes and hard-to-reach areas in machine parts.

A nice old-cast iron wood scraper I got from the shop room of an abandoned high school.

Sometimes the job requires an intentionally soft scraper. This nylon version avoids scratching delicate surfaces.
Surprisingly, scrapers are also used to shave down metal surfaces, including steel. It might seem like you can’t possibly cut away much steel just scraping it by hand, and that’s true, you can’t. But with careful and repeated checking against a granite flat, you can hand-scrape a milled or ground surface to be flatter than by any other method except lapping.

Every one of the Mechanical GIFs model kits I sell comes with one of these plastic scrapers. It’s used to remove the protective film from acrylic parts without scratching the surface.
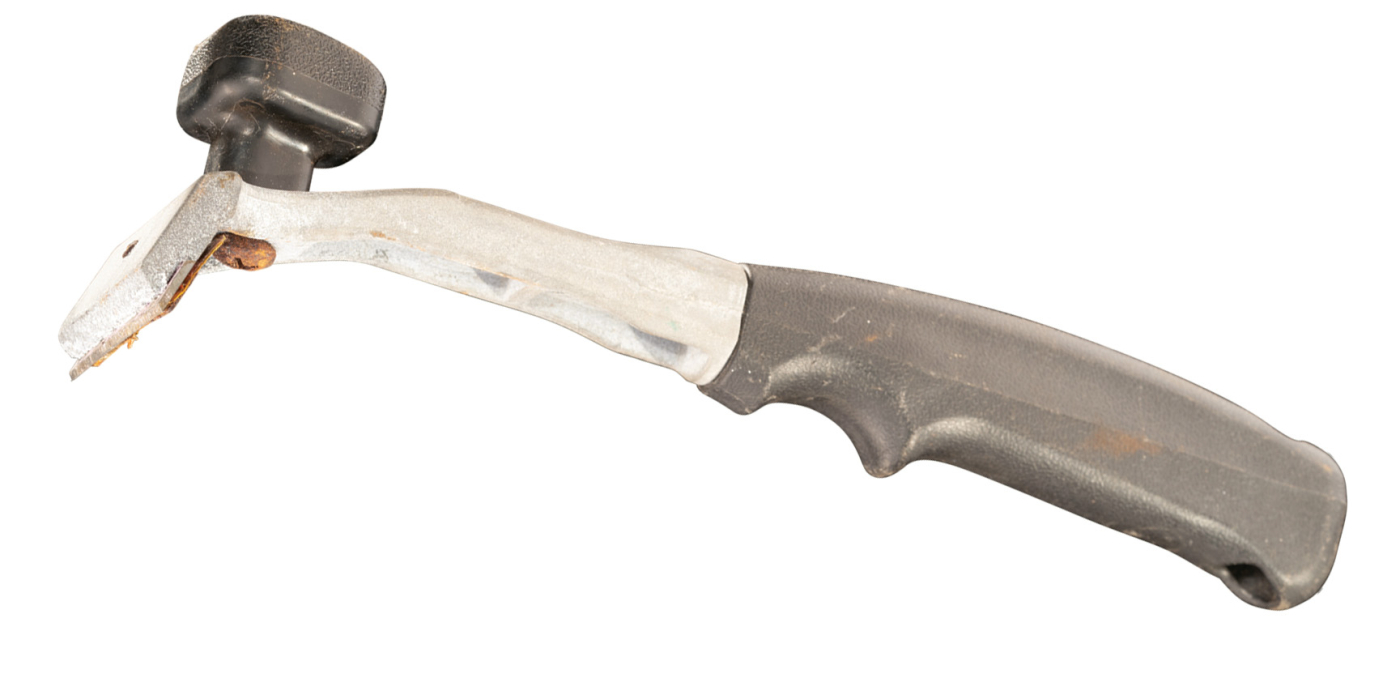
A tungsten carbide blade makes this scraper last nearly forever without needing to be sharpened.
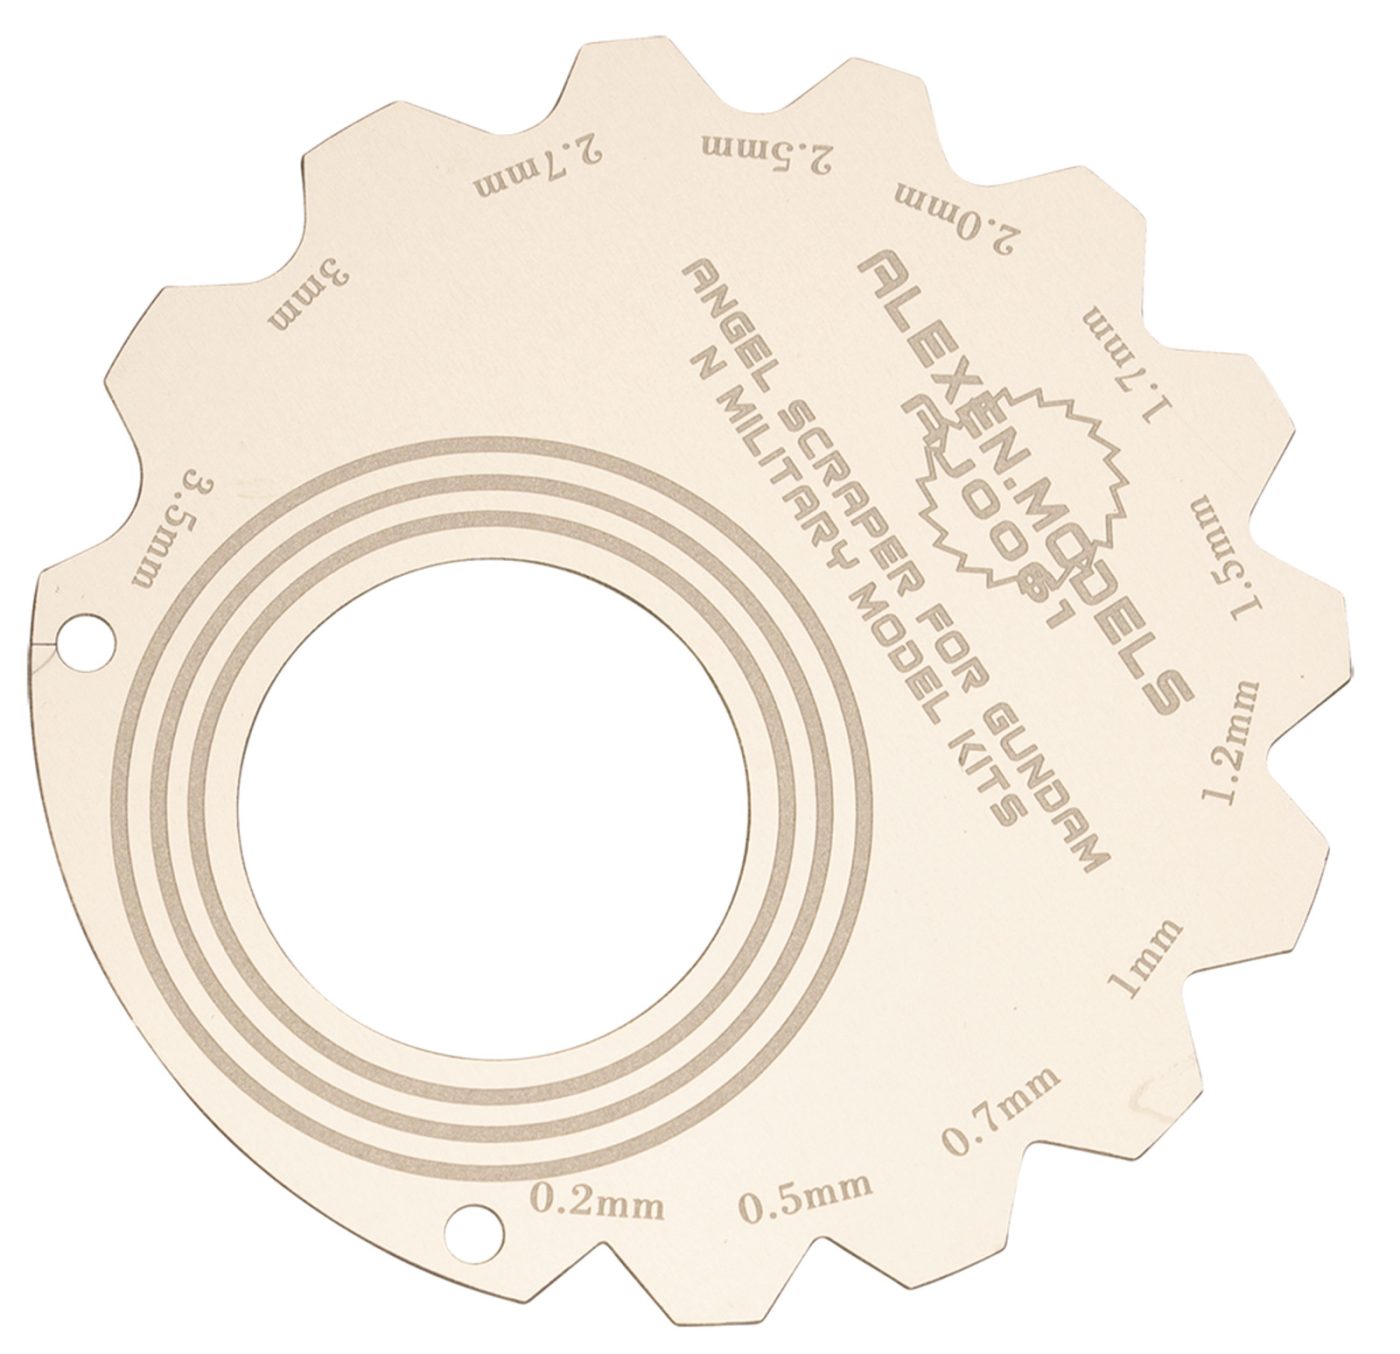
This delicate finger-worn scraper is used by model makers to round over the edges of tiny parts.
Scrapers have a single blade, but what if that’s not enough? What if the job calls for a hundred scraping blades all in a row? Read on.
Cutting Tools: Files
The coarsest files are called rasps and are used for free-form shaping of wood. They have large, sharp, triangular-teeth and leave a rough surface that must then be filed and sanded smooth. Files with smaller, more closely space teeth can be used on both wood and metal. Those with teeth cut in two or three directions cut faster but leave a rougher surface than those with a single straight row of teeth.

Wood rasps have big, widely space, aggressive teeth to rapidly shape wood.

A “float” is a type of file that can be used almost like a plane to smooth surfaces, round edges, or aggressively remove material.

These rasps are made a lot like cheese graters—and the same company sells those too.
Files are made by using a hardened steel chisel-like tool to cut or raise the teeth while the metal of the file itself is in an annealed (soft) state. The file is then hardened by heating it red-hot, then quenching (cooling) it rapidly to a lower temperature. (The details of exactly how hot to make it and how quickly to cool it are rich with history and differ depending on the alloy used to make the file.)

Flat and curved files are for filing outside edges.
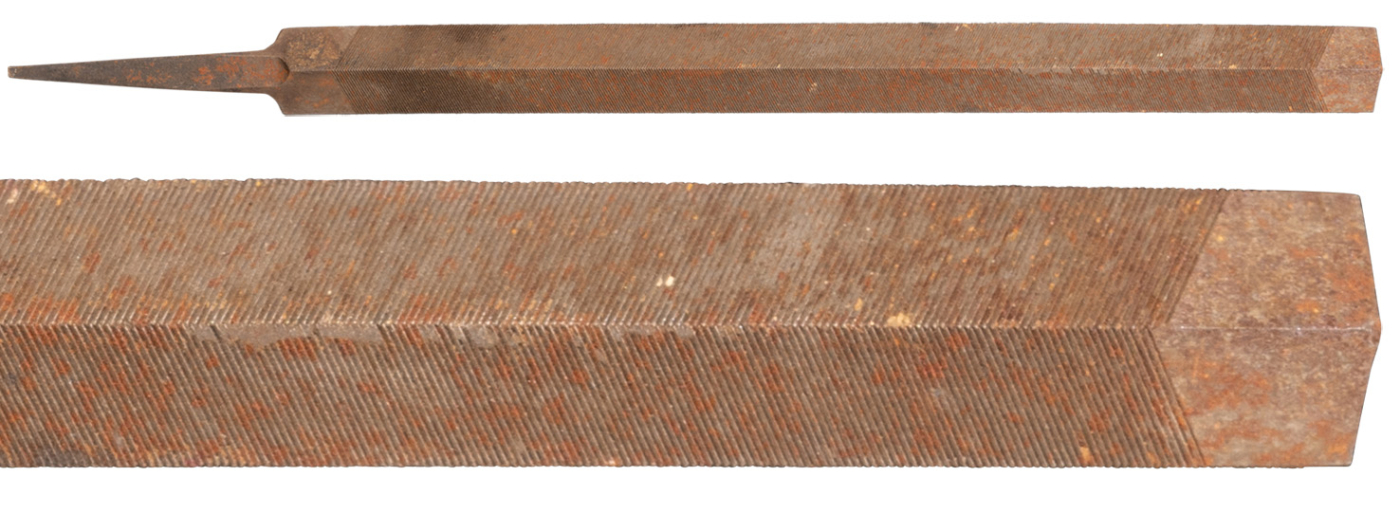
While round, square, and triangular files are for inside curves and holes.
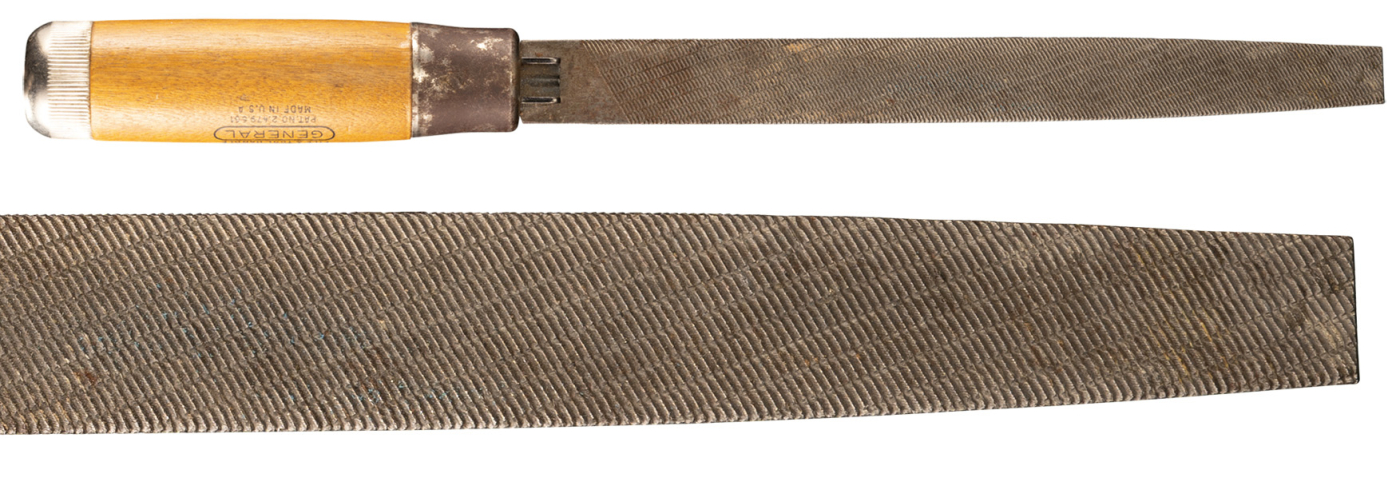
By cutting lines in two directions, this file is made more aggressive for either wood or metal filing.
Hardened steel files are among the hardest common tools. They can cut almost any other tool in the shop, including those made of lesser hardened steels. This of course means that they are brittle: a chisel made as hard as a file would soon have a ragged, chipped edge. Files can be so hard because they have a lot of sturdy thick teeth. Over time, if used on hard materials, some of the teeth will break off, but the file will keep working just fine with a fair number of broken teeth.
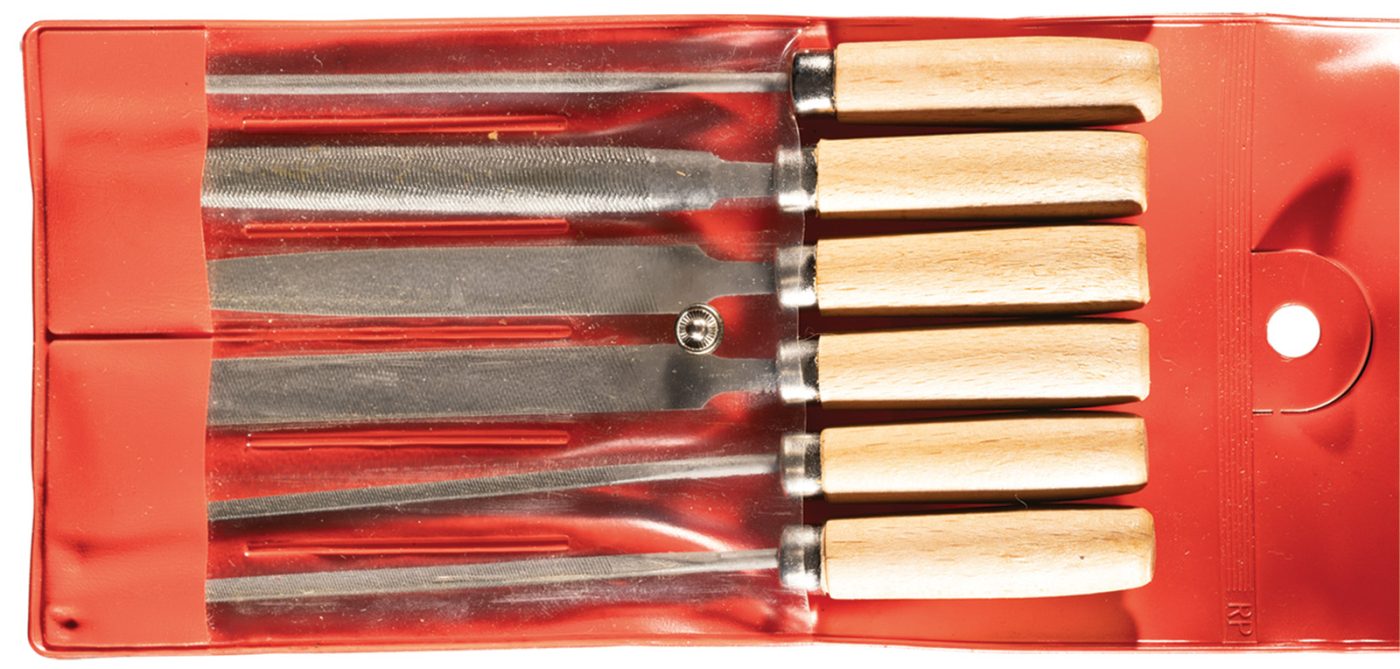
Mini Files sets are nice for detail work.

If you have a lot of filling to do on metal parts, a pneumatic power filer can save your arm.

Some files are a bit like permanent, reusable sandpaper, with a fine random pattern rather than defined teeth. This nail file, for example. (Human nails, not steel ones.)

You could use this rasp on wood or cheese, but it’s designed for feet.
Here are some supplies and tools we find essential in our everyday work around the shop. We may receive a commission from sales referred by our links; however, we have carefully selected these products for their usefulness and quality.


 Tools: A Visual Exploration of Implements & Devices in the Workshop


