


We may receive a commission when you use our affiliate links. However, this does not impact our recommendations.

This is my three-wheel Craftsman 10” band saw. Unlike most band saws, this saw’s blade is supported by three wheels. The blade is kept in place by four flanking set screws and two rear thrust bearings.
Ensuring your band saw’s blade runs square to the table and miter slot is crucial for accurate ripping and cross-cutting. A blade that cuts without any drift makes sawing along the grain, or ripping, a breeze and also makes sure your cross cuts will split the workpiece at the intended angle. In this and the following blog entries, I will show how I corrected the drift on a small Craftsman 10” table saw I received from a friend and discuss the course of action to tackle common issues with band saw tune-ups.
Notice the excessive drift to the right in the video below.
If you have experienced band saw drift, there are a few steps to take that will hopefully correct it. Many consider these steps rudimentary, and most band saw owners have practiced them at some point.
Fine-tuning a band saw for correct blade alignment requires these steps:
1. Use a Sharp Blade: To eliminate any issues of uneven teeth setting or dullness that may affect the tune-up, make sure to mount a new and sharp blade. Try to use the widest blade you can for straight cuts. 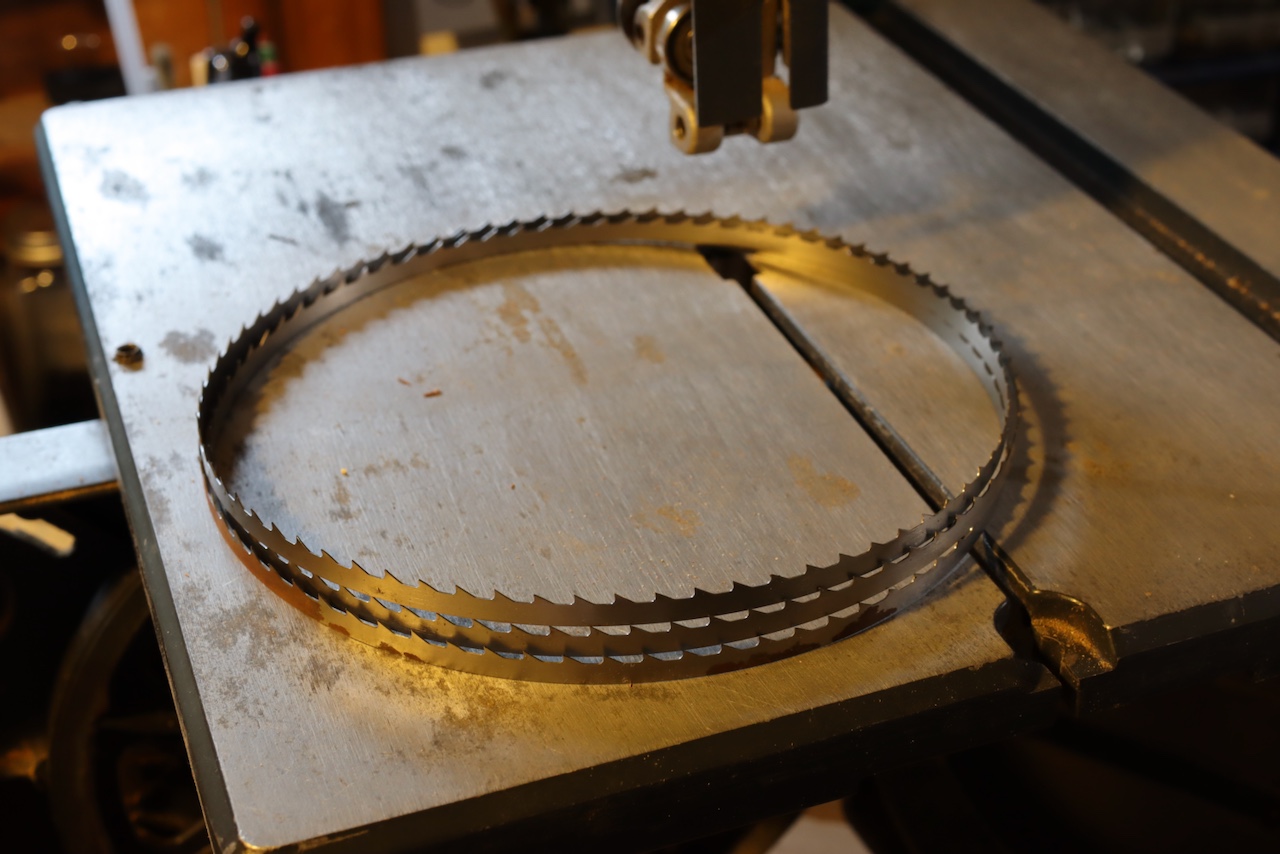
2. Adjust Cool Blocks or Bearings: Move them close to the blade and ensure they are spaced at a paper-thin distance from it.
3. Position the Blade Correctly: Adjust the blade to ride on the crown of the top wheel tire. As proposed by Alex Snodgrass, ensure that the deepest part of the teeth gullets ride on the center of the tire. Link to Alex Snodgrass’ video
4. Properly Tension the Blade: An under-tensioned blade will drift, while a blade that is too tight will have a shorter lifespan.
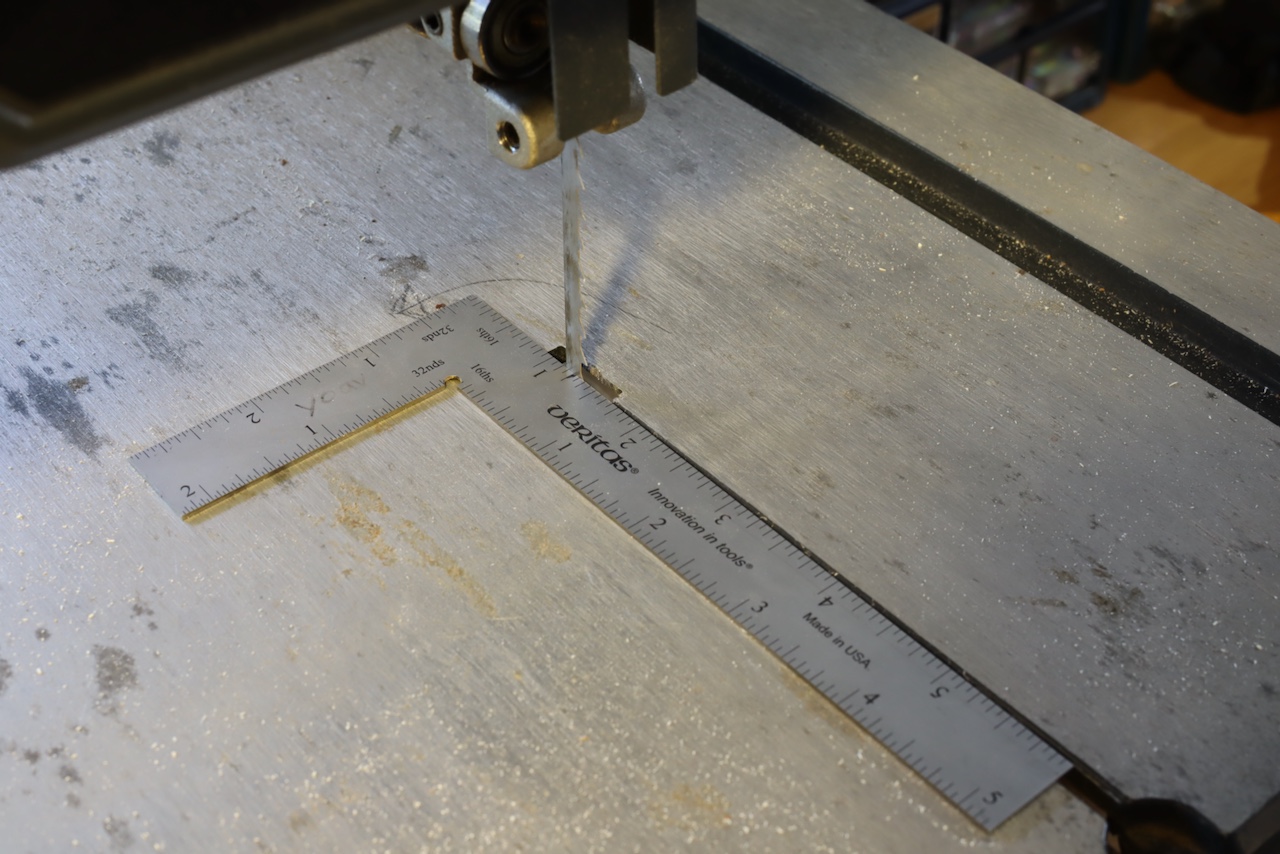
5. Check for Parallelism: Now, check for parallelism between the blade (A) and the table main groove or miter slot (B). Use a ruler and place it adjacent to the blade. Determine if the ruler is parallel to the groove. If it is, you are all set, and all that needs to be done is to set up the cool blocks and the bearings to close contact with the blade. However, if the ruler that is in contact with the blade is not parallel to the main groove, you’ll have to untighten the trunnion bolts (that connect the table to the trunnions) and rotate the blade until the groove and the blade/roller are parallel.

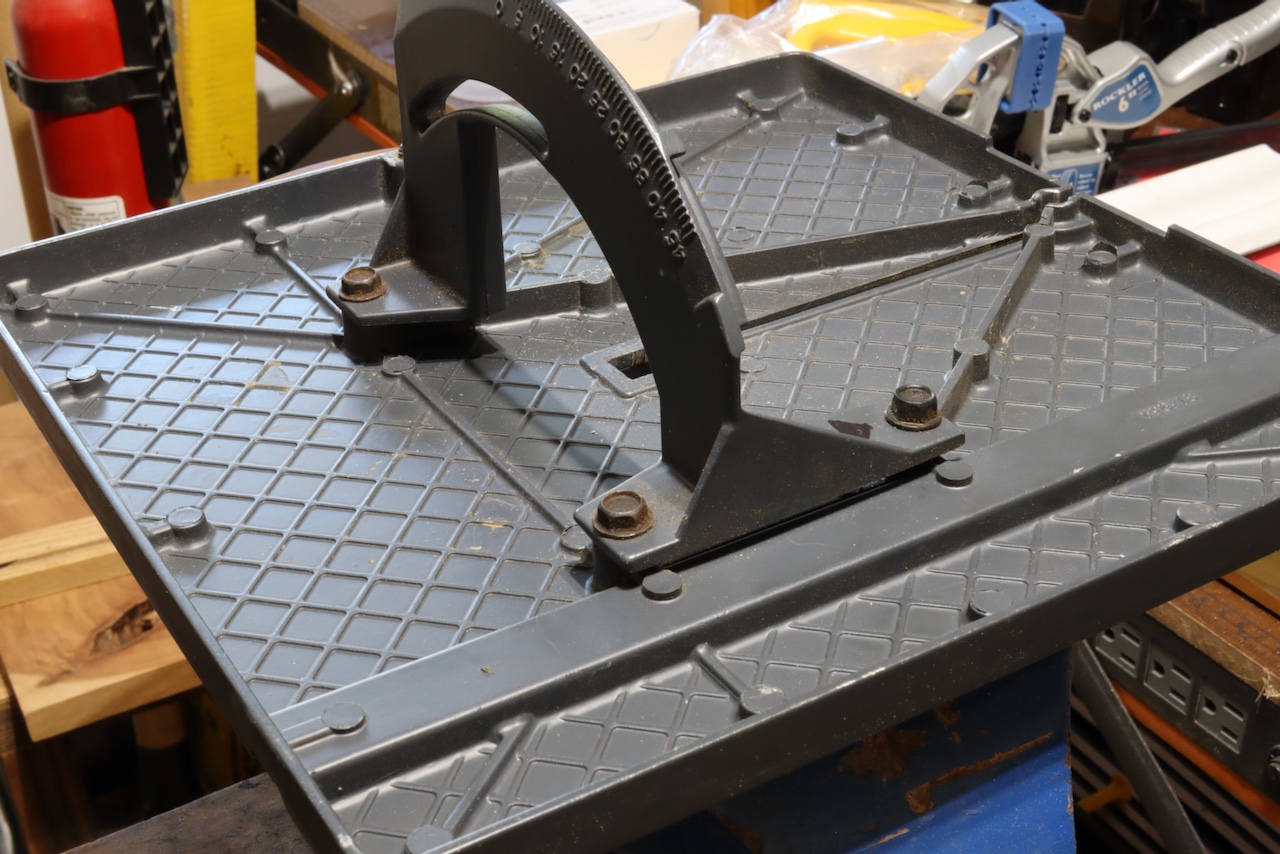
Notice the trunnion bolts. Often, in order to adjust the table for parallelism with the blade, you’ll have to readjust the mounting assembly of the trunnions.
In the next entry, I will show how I approached the trunnion issue on my band saw.
Here are some supplies and tools we find essential in our everyday work around the shop. We may receive a commission from sales referred by our links; however, we have carefully selected these products for their usefulness and quality.


