We may receive a commission when you use our affiliate links. However, this does not impact our recommendations.

In this entry and the one that will follow, I’ll try to decipher the various methods in which a wooden handle is fitted into the eye of tools. I cannot claim to be an expert in the field, as I have hung only ten or so tools in my lifetime, but I promise to be as transparent as I can and let you know what I have discovered during my basic research on the matter.
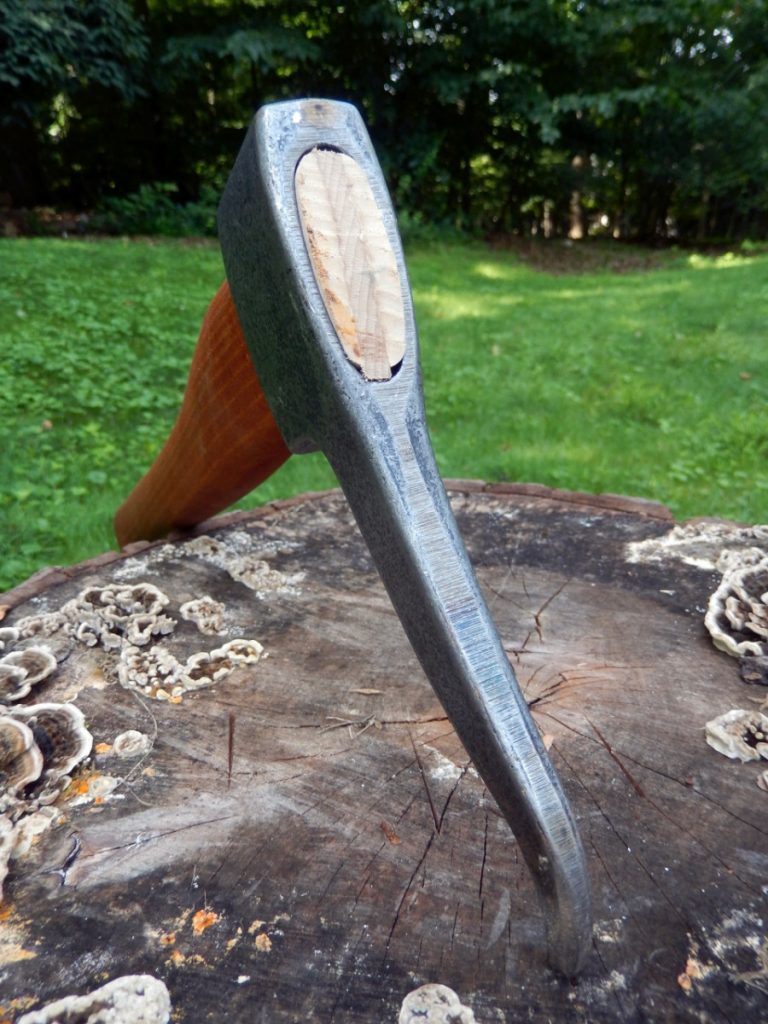
Hanging and wedging a wooden handle is one of those topics that are heavily discussed in woodworking forums, on youtube, and in blogs. Advice on how to hang, and in particular – how to wedge – an ax or a hammer appears in a few woodworking books and homestead literature. I have no doubt that the authors of these manuscripts knew a great deal on the subject, but like many woodworking techniques, the advice is stipulated (think about instructions on how to cut dovetails) by personal experience, tradition, mystique, subjectivity, and anecdotal evidence. But what about the tool manufacturers? Did they figure it out? Well, I guess they did (although a recent felling ax that I bought lost its grip on its handle within a few days of use).
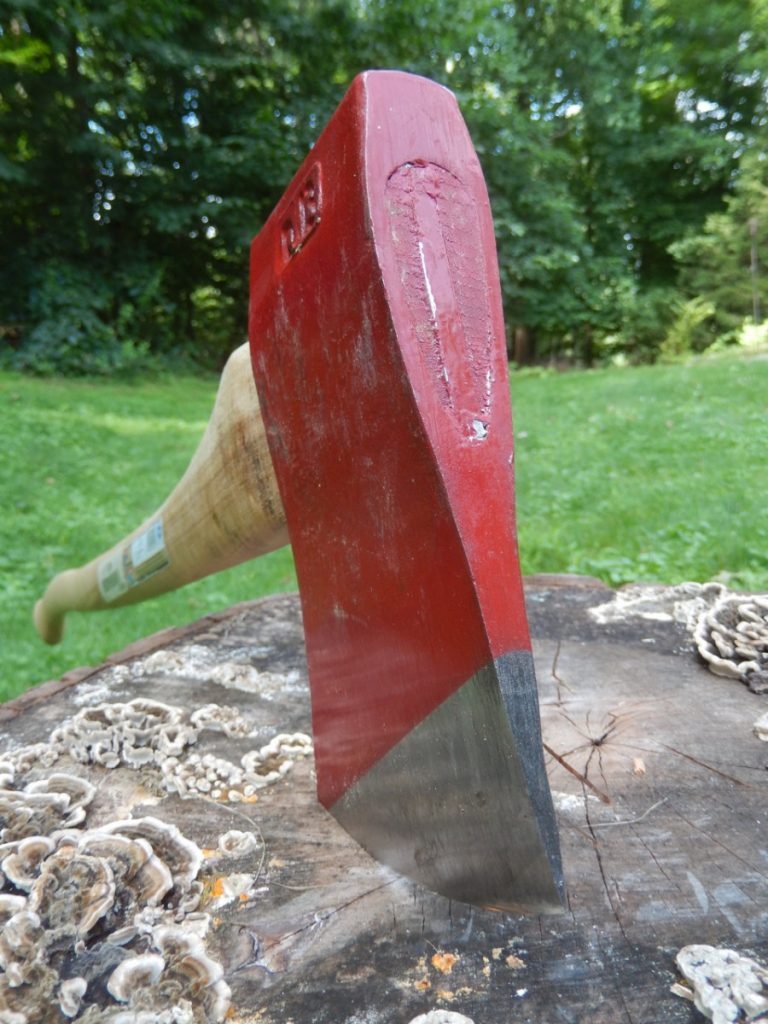
Council tools, one of the last remaining ax manufacturers in the USA, hung this felling ax head with what seems to be, one wide metal wedge. Unfortunately, the head began to loosen up after a few days of use.
So, if we wish to learn from the practices of the tool manufacturer and hope that at least they have some solid strategies, I can tell you and will back it up with pictures, that their approach is sometimes inconsistent and varies between different makers and countries. To sum it up, I feel that it is hard to find real empirical evidence to substantiate and guide us on the best method of wedging the handle. But let us at least give it a try.
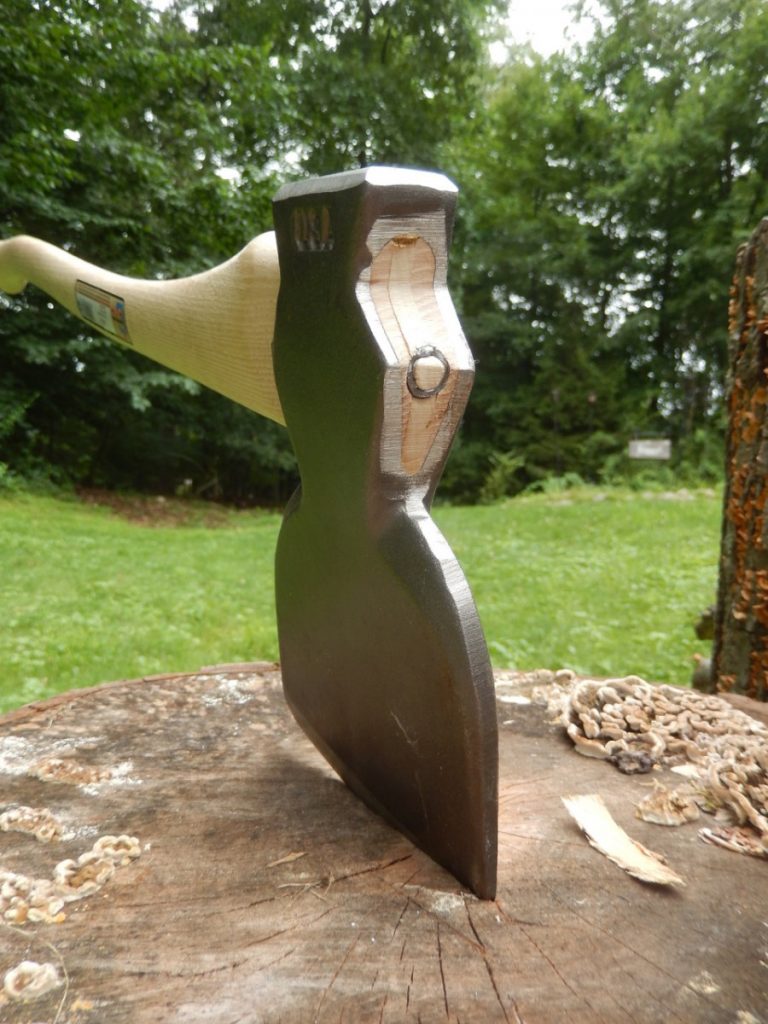
This premium Broad Hatchet by Council tools is hung correctly. On top of a wooden wedge, a round steel wedge was added for extra stability. Recently, more and more North American manufacturers are incorporating the round steel wedge.
Everybody whos written on the subject agrees that matching and fitting the neck of the handle as accurately as possible to the eye of the tool’s head, may it be an ax or hammer, is paramount. But as for wedging…there is so much arbitrary information it will spin your head. Yet because the correct wedging of the handle is so critical to the longevity of the fit and the trustworthiness of the integrated tool, that I went on a quest to find, or at least to lay out what is out there and what I feel would be a solid approach that will lead to success. I’m still learning and experimenting but I wanted to share with you what I have found so far in hope that this will help you when you decide to hang a handle on a restored ax head or a broken or loosened hammer handle.
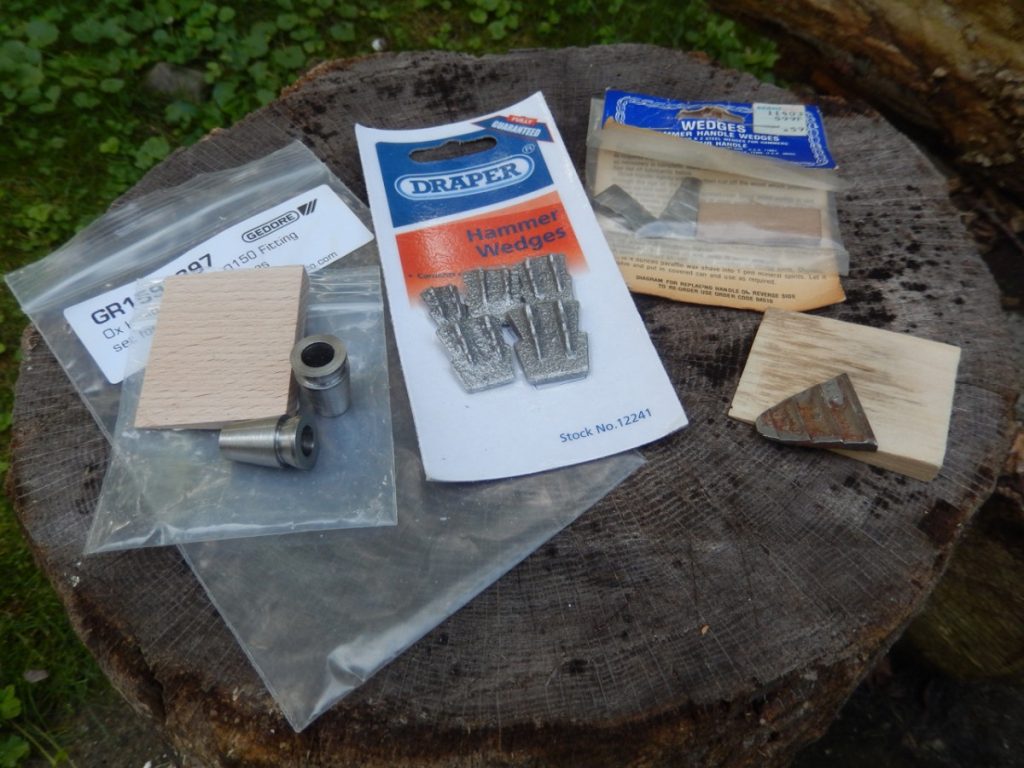
Replacement hanging wedges can be bought in a variety of shapes. From right to left: American, British, and German… (and no, this is not the beginning of a joke.)
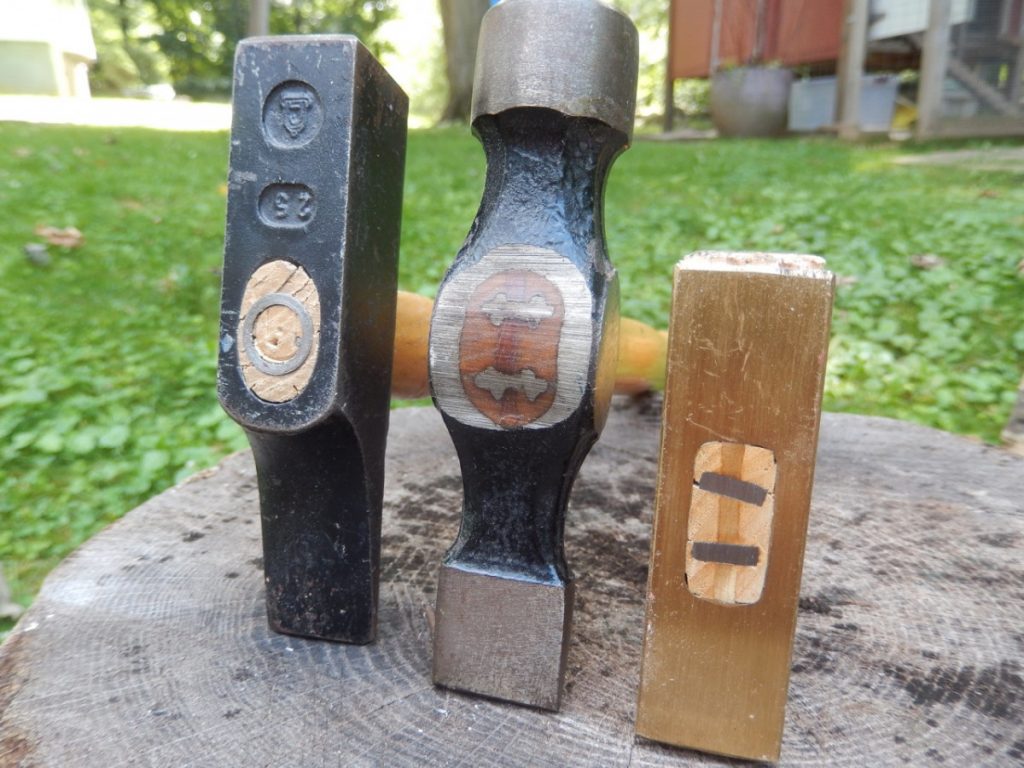
Three hammers and three different ways to hang the handle. From right to left: Veritas’ plane hammer with its traditional wide wooden wedge crossed by two steel wedges, the English Warrington hammer fitted with typical steel wedge unique to the UK, and a German woodworkers hammer fitted with only a round wedge.

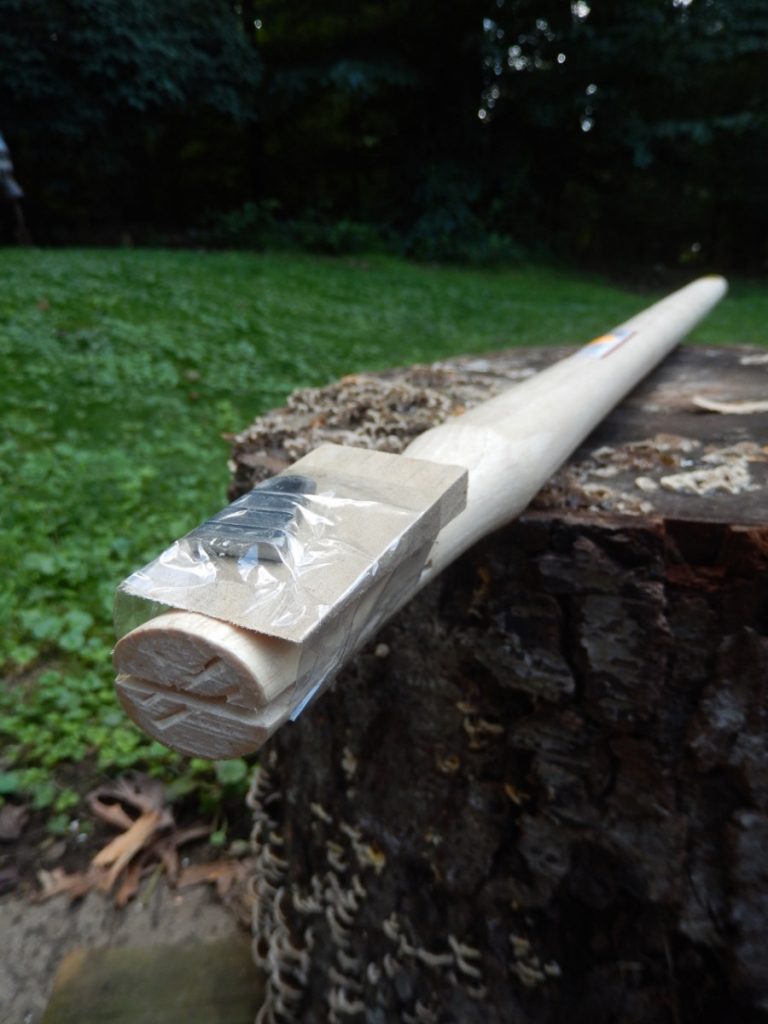
Avery hardware store in North America offers a few replacement handles for sale. The handle comes with a wooden wedge (mostly made of poplar wood) and an additional simple steel wedge.
The consensus viewpoint
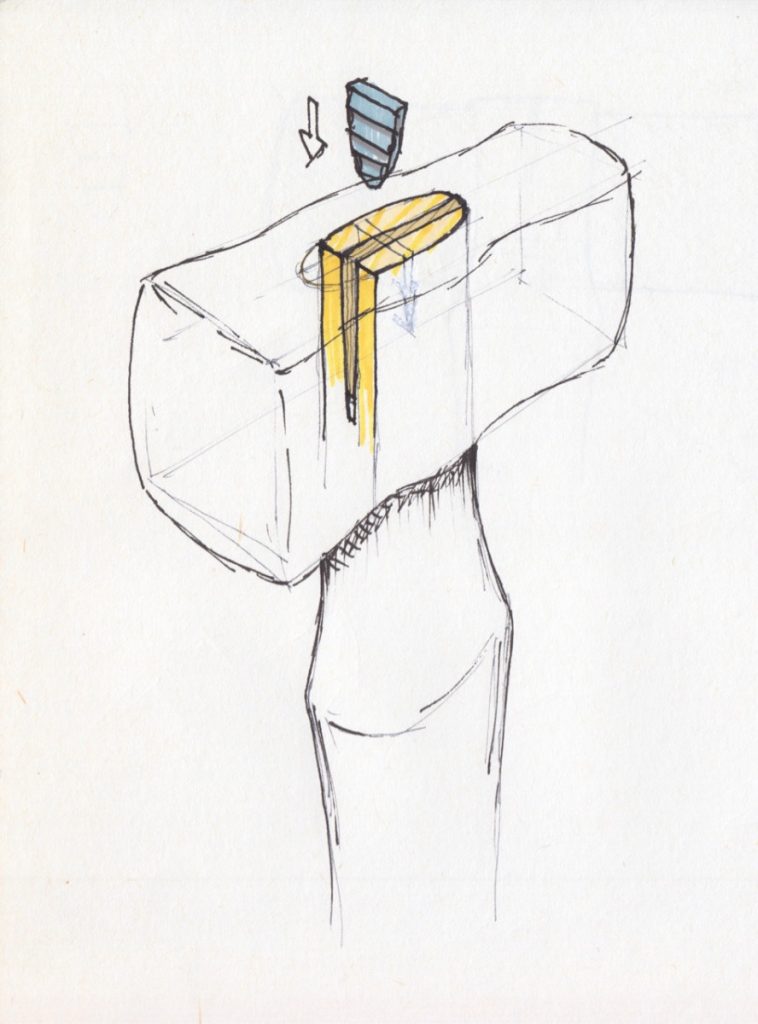
When you walk into a hardware store in the United States to buy a replacement handle for an ax, sledgehammer, or hammer, you’ll notice the typical hickory handle comes with two wedges: One is a wide, wood wedge, usually made of Poplar, and the other is a smaller corrugated steel wedge. You will also notice a wide kerf that was sawn into the handle head. This kerf should go down the neck to almost 2/3 or 3/4 of the tool’s eye depth (in this case a sledge hammerhead) and terminates near the shoulder where the base of the head suppose to butt against. After the handle is fitted correctly into the head (use a rasp and file to shape it) the wide wedge is driven tightly into the kerf. Some suggest applying linseed oil on the wedge while others advocate the use of glue (Chris Schwarz uses hide glue). Then, after the main wooden wedge is seated and sawn flush with the top of the handle, it’s time to hammer in the steel wedge. Some recommend inserting it in diagonal to the orientation of the primary wedge, while others say it should go across, at a right angle.
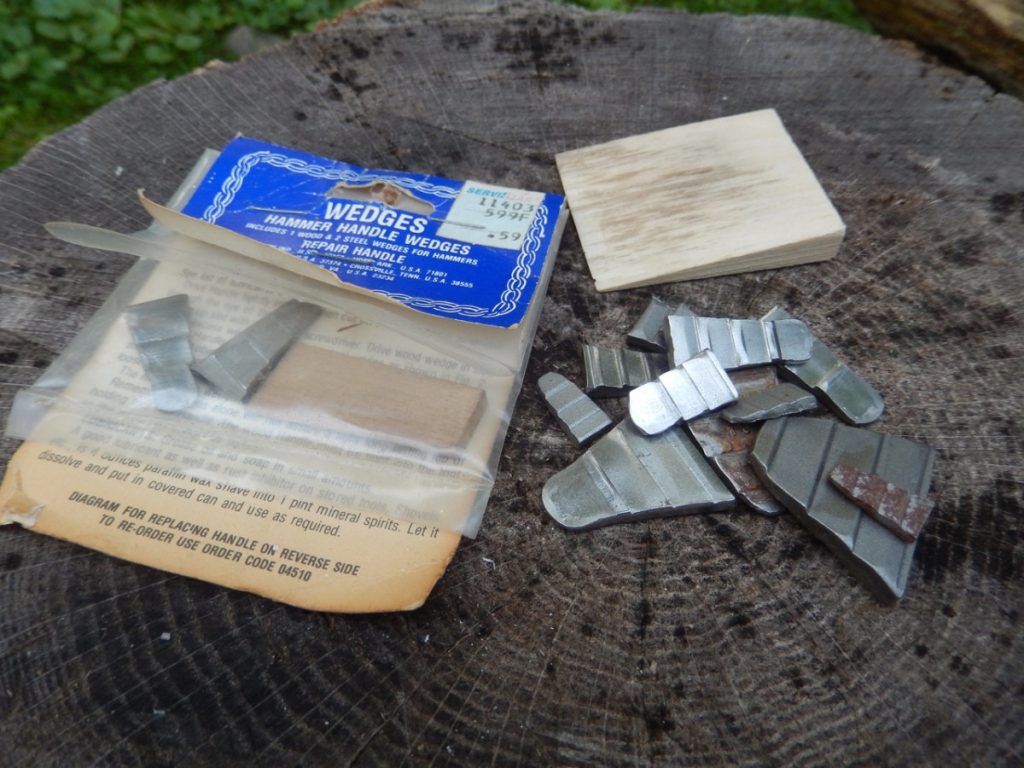
Most hardware stores in North America carry wedging kits that are comprised of a wooden wedge and two steel wedges.



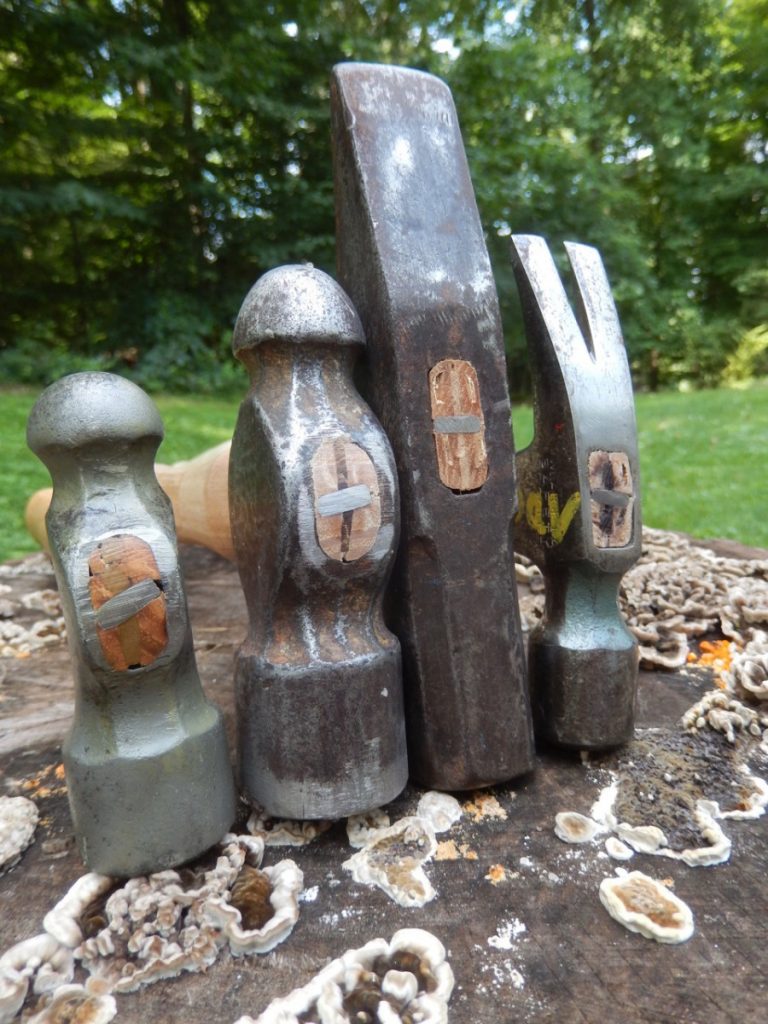
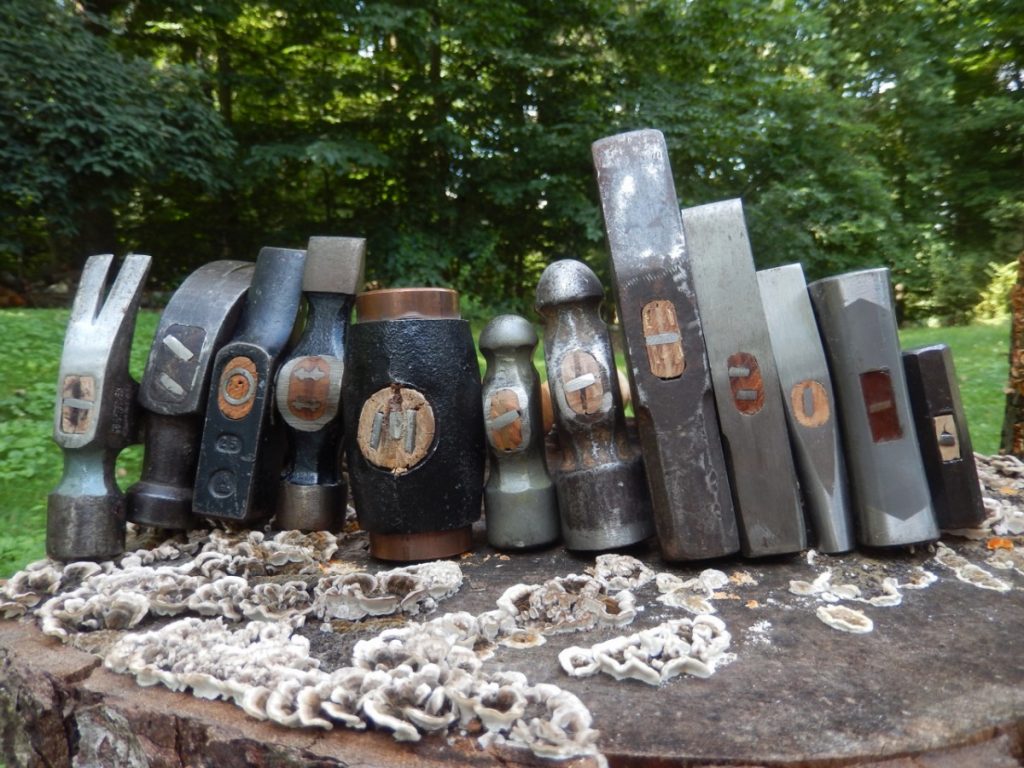
Here are a few of the hammers that I have restored over the years. When I hung their head on the new handle, I used the traditional method of a wide wooden wedge crossed by a short stepped steel one.
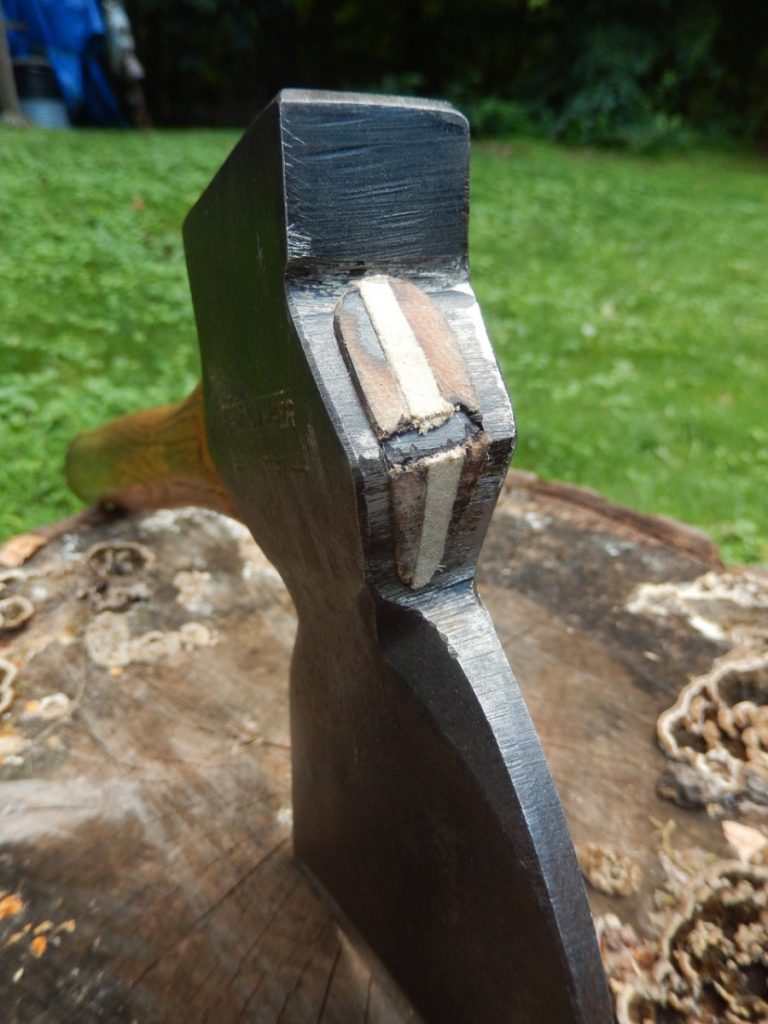
I hung the original handle on this hewing hatchet using a new wooden wedge and the original steel wedge.
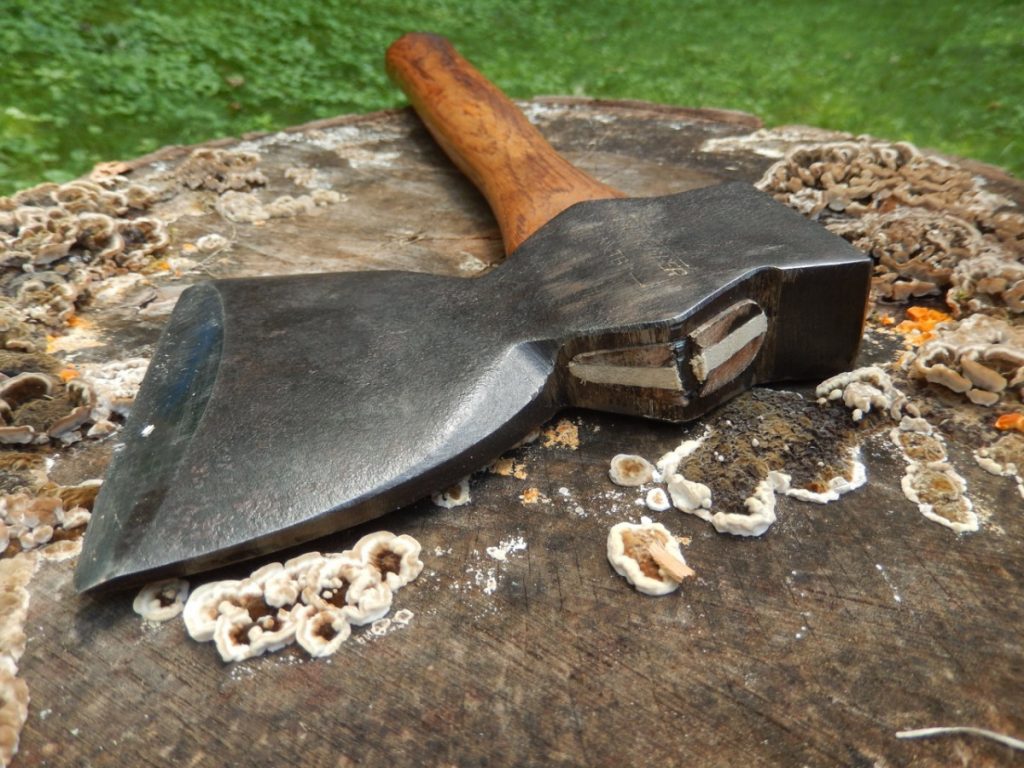

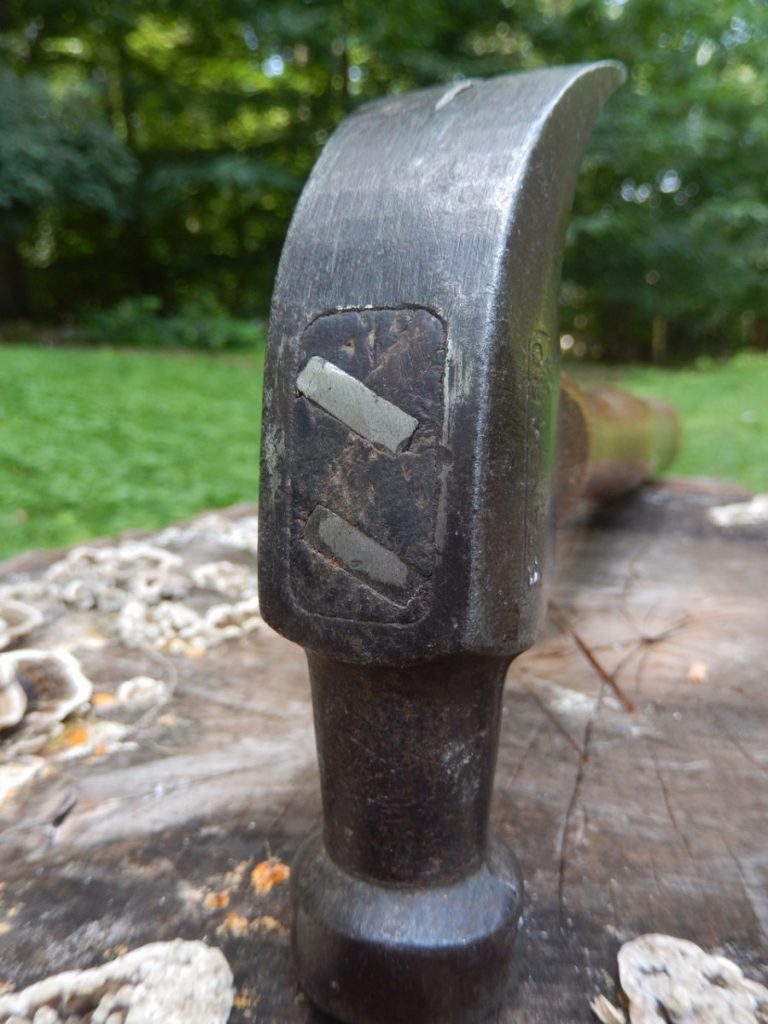
This old claw hammer was hung with a diagonal wooden wedge, crossed by two steel wedges.
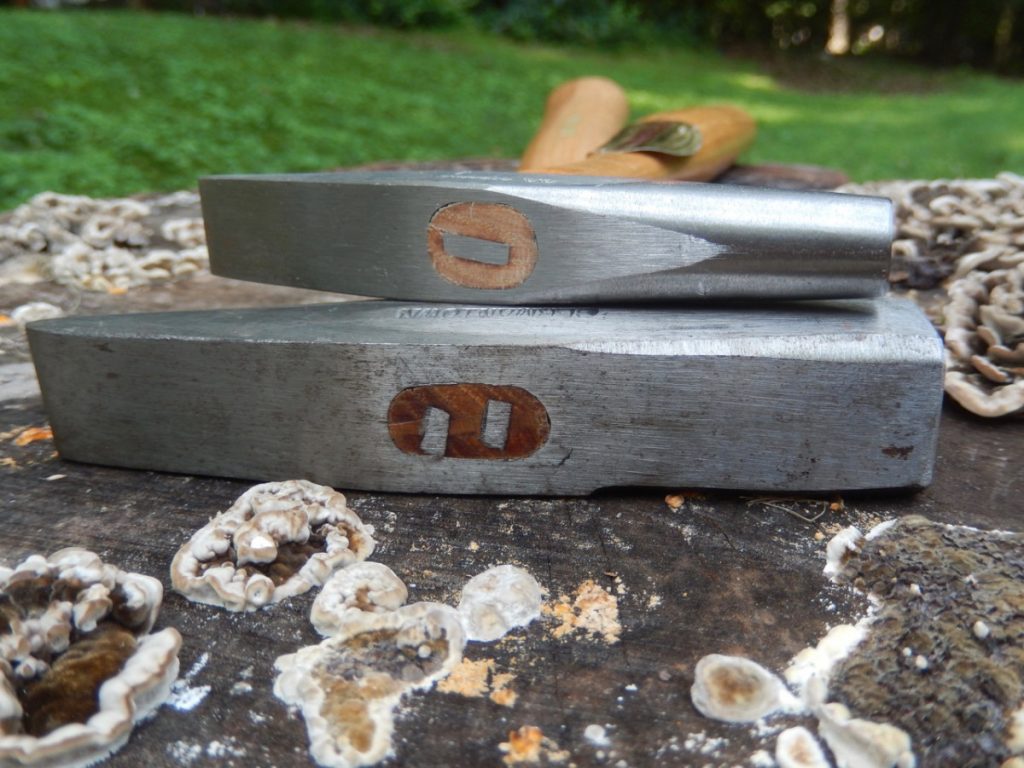
The smaller one among this pair of riveting hammers is fitted with only one steel wedge. The bigger and heavier version has one wooden wedge crossed by two steel wedges. Both are made by a reputable American manufacturer.
While this is the norm with North American tools, this is not the case in other parts of the world. Many of my Japanese tools are hung with only steel wedges, while most of my German, Austrian and Scandinavian tools have a primary wooden wedge and on top of it a round steel wedge in the shape of a stepped hollow cone.
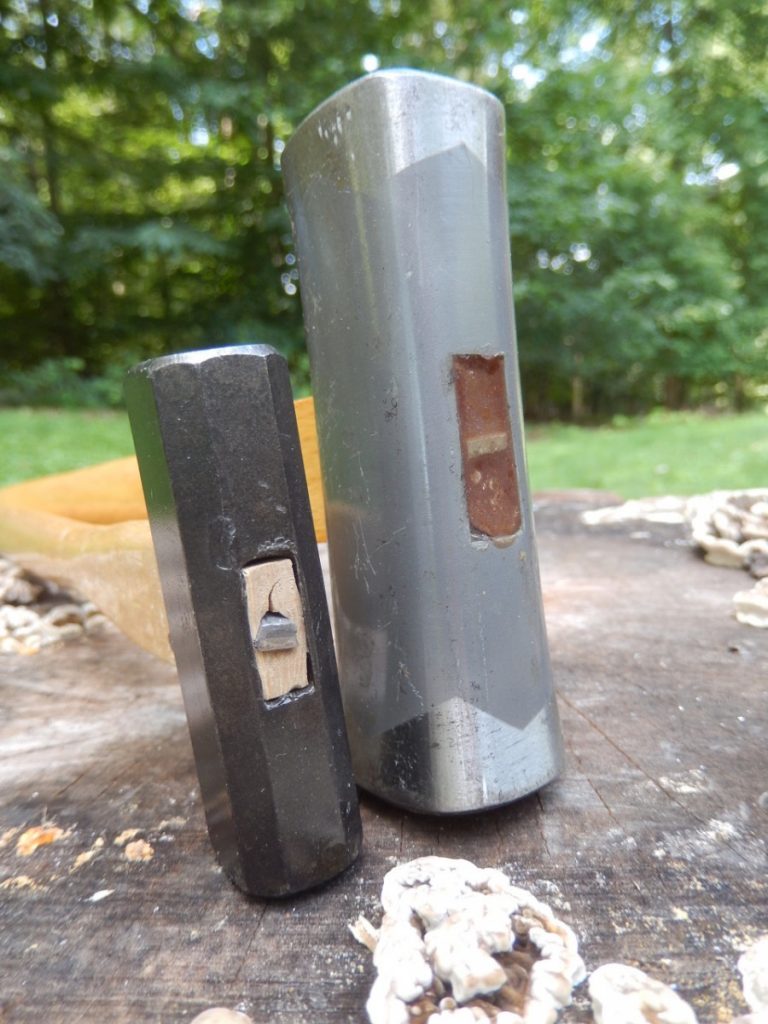
These Japanese hammers are fitted with one steel wedge.
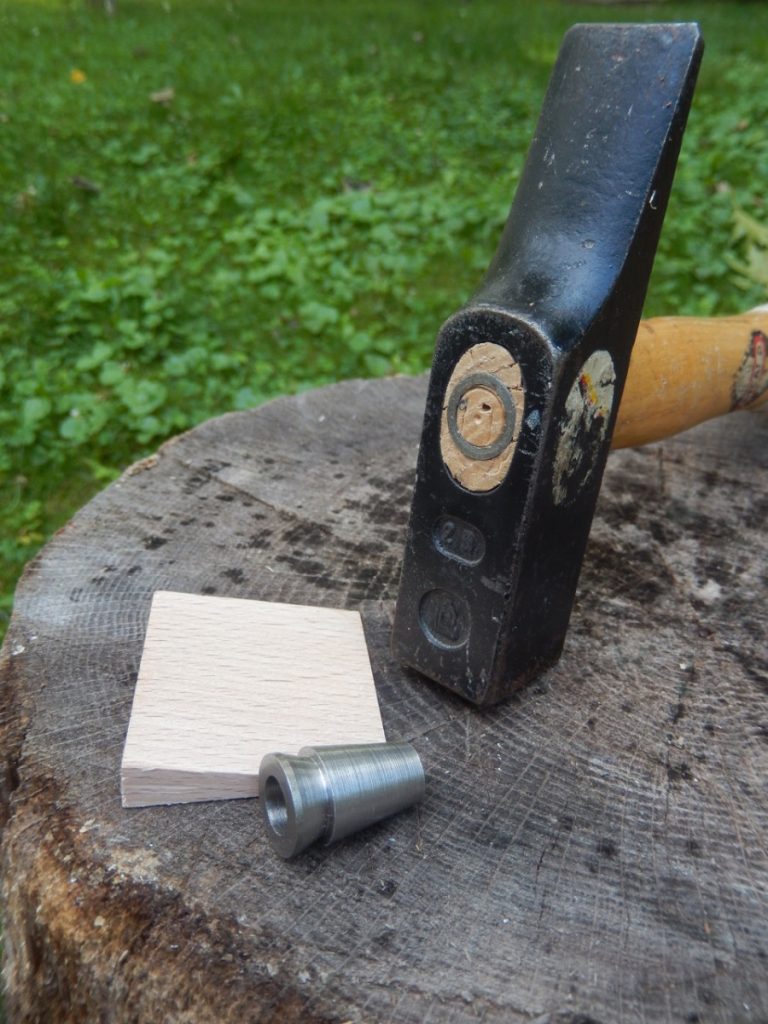
A typical German/french woodworker’s hammer made by Picard. Near it is a replacement beech wood and round steel wedge kit sold by Gedore.
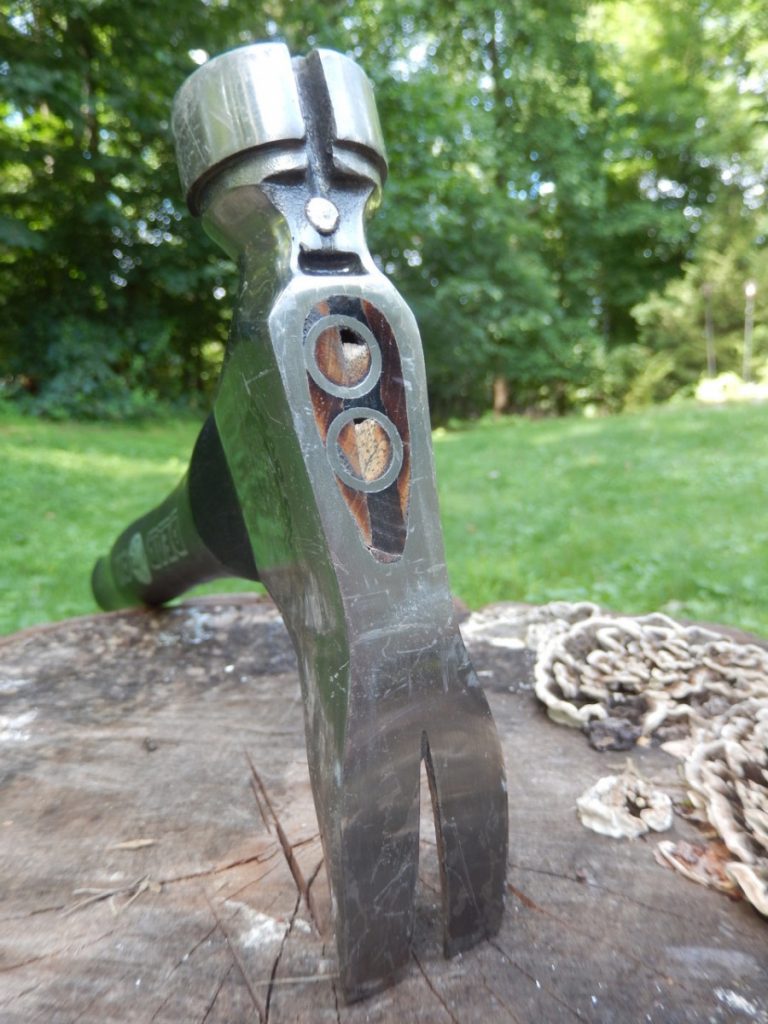
This claw hammer is fitted with a wide wooden wedge and two round steel wedges.
Across the pond, in the British Isles, toolmakers and woodworkers use yet another steel wedge to expand the wood in the eye. This wedge, loosely shaped like the letter “I” is perhaps the most interesting of them all.

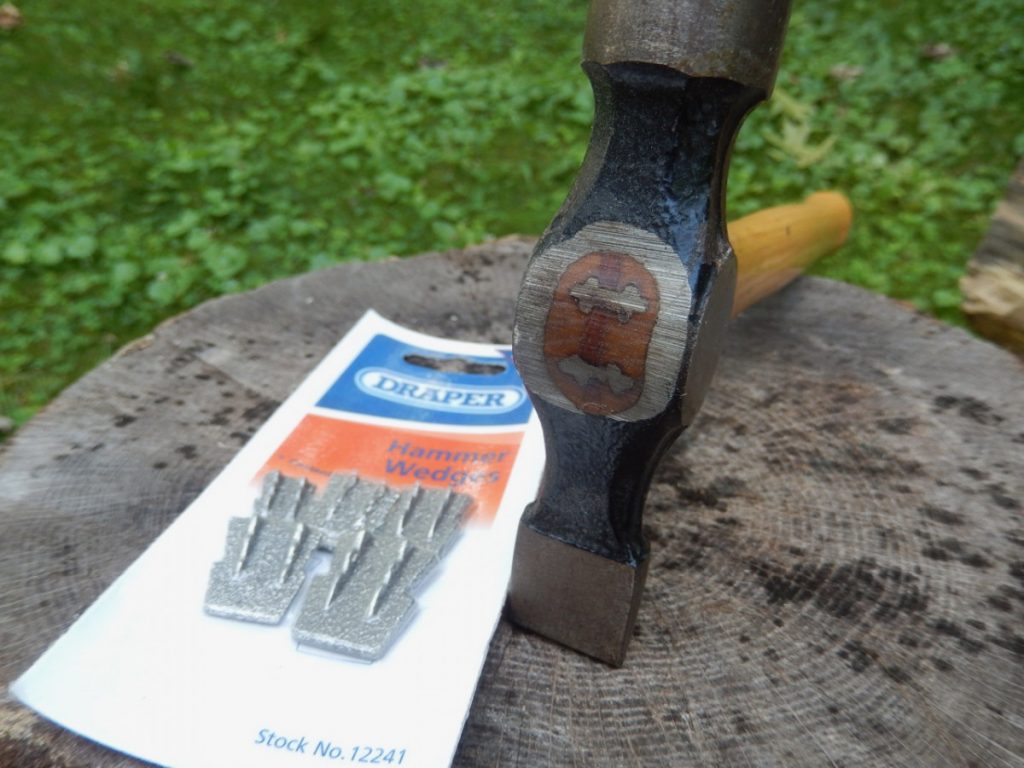
The British company Draper sells traditional steel wedges that are mainly used in the UK. These wedges have extra expansion fins that ensure that the wedge will stay put and push as much wood on both the X and Y-axis.
A wooden sandwich
In cases where the tool’s head is of light to intermediate weight, it is perfectly ok to wedge it with one wide wooden wedge. A recently purchased round Adze by S. Djarv Hantverk (a Swedish manufacturer), as well as a Pickaroon by Stubai (Austrian tool manufacture), are hung with the help of a single wooden wedge.


The geometry and wood species for wood wedges
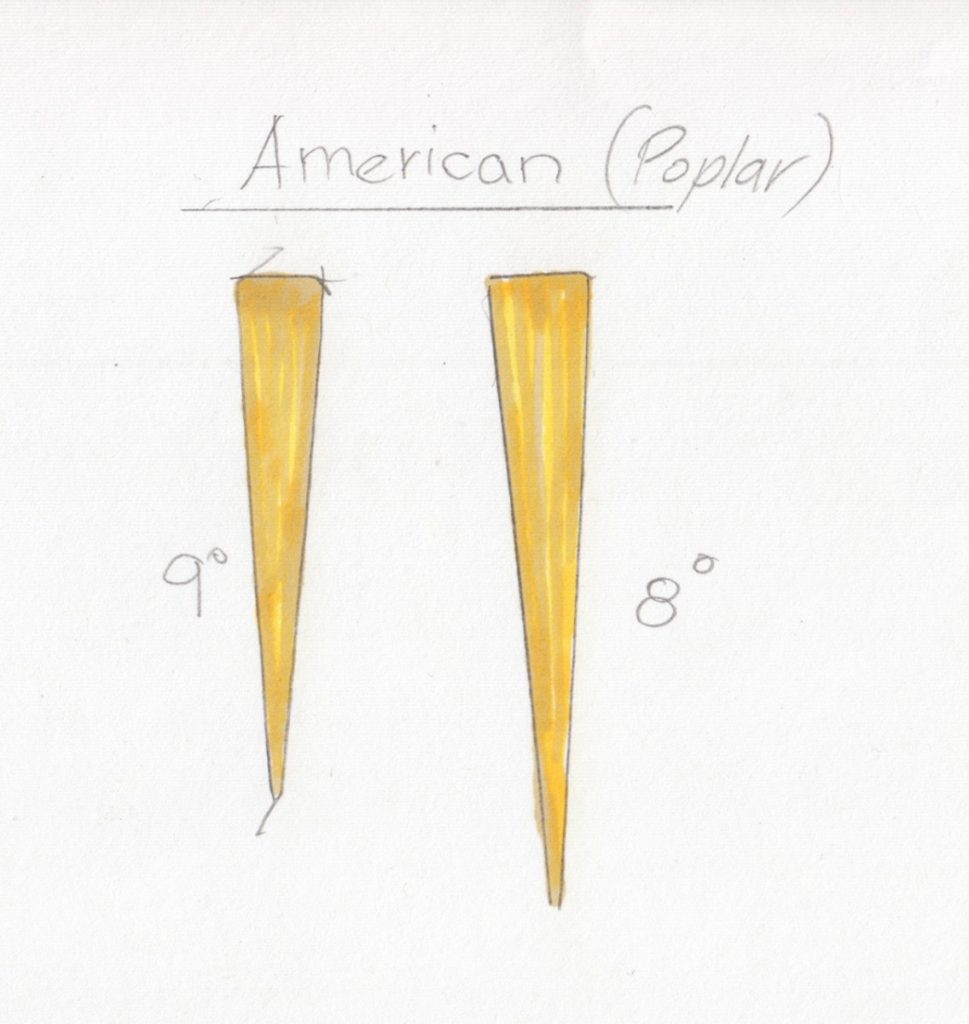
One of the leading manufacturers in Europe, Gedore, uses birch and shapes the wedges at 12-15 degrees. The leading US aftermarket handle makers are using poplar and provide a “sharper” wedge of 10-8 degrees. Often, when I create a wooden wedge, I follow the American tradition of making it narrow, but I prefer to use a harder wood than Poplar such as oak, ash, or hard maple. 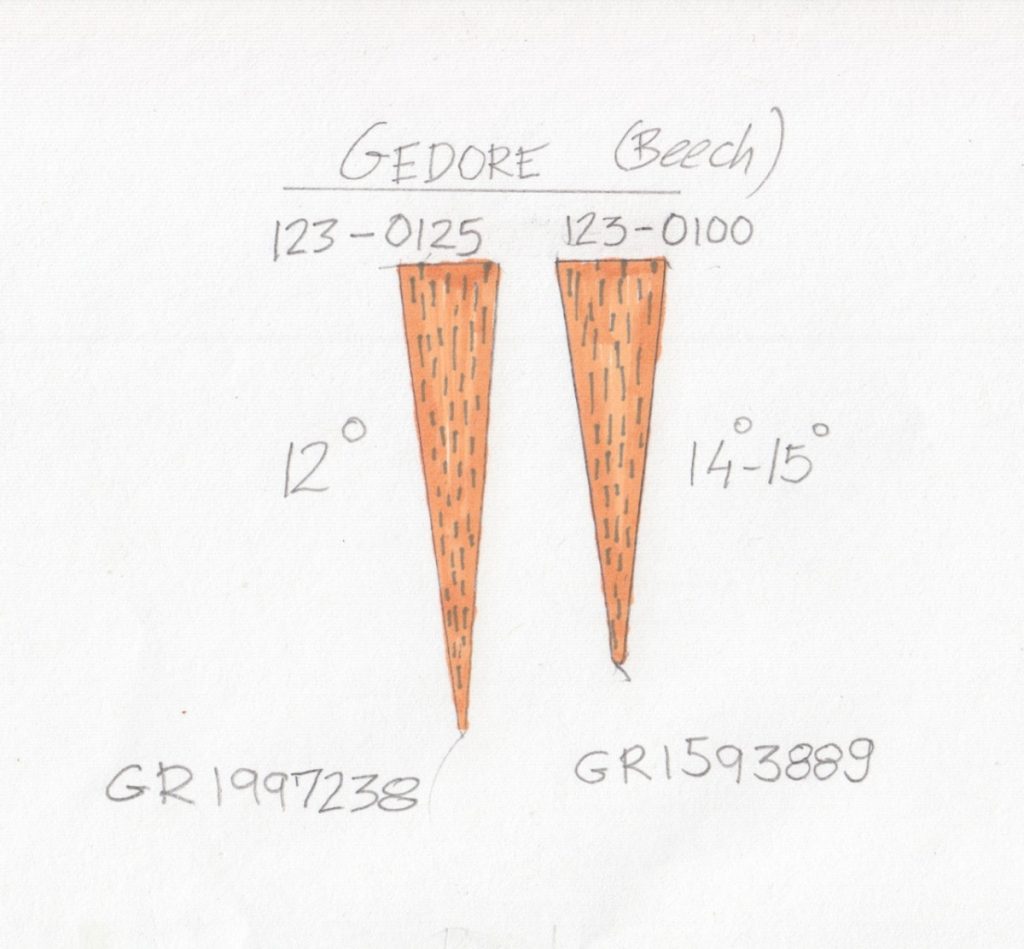


Stay tuned for my next blog entry where I will show how I hung a handle on a custom-made Adze that I bought from blacksmith Eric Dennis.
Below are links to some of the best “how to replace and hang a handle” videos, and at the bottom of this blog is a list of links to places where you can buy hanging wedge sets.
– Yoav Liberman
Youtube how-to videos:
How to replace a loose wooden wedge with a new one.
Here is a very entertaining video that will teach you a lot on how to fit a handle into the eye of the head.
And this one is great video on how to make and install a round wedge.
Wranglerstar, the homesteading youtube star is Hanging out with some tool handles.
Another great video by Wranglerstar on how to rehang an axe handle (Part 1)
(Part 2)
This is an informative video on how to hang a hammer head.
On the importance of notching the common steel wedge before you insert it.
Where to buy wedges:
Wooden wedge and round steel wedges (Amazon)
And here is another set of round wedges without the steps.
Ox Head (Gedore) Fitting set (wooden wedge and round steel wedges)
Typical American handle hanging wedges set (wooden wedge and flat steel wedges)
British steel wedges by Draper
The “Pitchfork” wedge, as seen in the Wranglerstar’s video (part 2)
And the “Pitchfork” wedge on ebay
Here are some supplies and tools we find essential in our everyday work around the shop. We may receive a commission from sales referred by our links; however, we have carefully selected these products for their usefulness and quality.


