We may receive a commission when you use our affiliate links. However, this does not impact our recommendations.
The cutters in my bench planes all have cambered irons. The jack has the most – a 10” radius curve – followed by the much slighter curves of my jointer and smoothing planes.
The curves do two things: They prevent the corners of the iron from digging into the work and creating “plane tracks,” tiny unsightly rabbets. And the cambered irons also allow me to remove material in certain areas to true up the edge or face of a board. When I have a high spot, I can put the camber over it to reduce it without affecting the surrounding wood.
But there are some woodworkers who work without a camber. They use irons that are sharpened straight across.
While this isn’t the way I work, the methods are helpful to know, even if you use a cambered iron. I use them at times in a jointer plane to make swift corrections to a wonky edge.
Here’s how it works.
First, Forget Tipping & Leaning
It’s tempting to think that you can easily control an edge by slightly tipping the plane or leaning hard on one edge. You can, but it takes practice and is not as predictable as other methods.
When you are trying to make things true, you want a predictable path and a guaranteed outcome. So my advice is to ignore advice to tip the plane (unless you are already an ace at it).
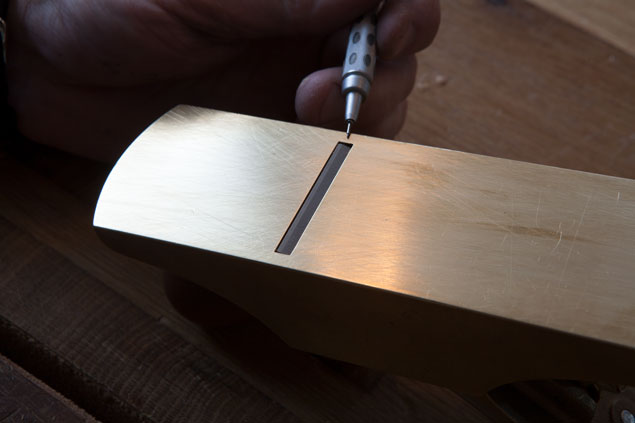
The corner of the mouth is a special place. It is right next to the cutter but it won’t cut. You can use this to your advantage.
Use the Mouth
The heart and soul of the method of using a straight iron is to use the tiny bit of plane sole that is next to the mouth opening. Does this part of the tool have a particular name? Probably, but I’ve never seen it called out. I call it “the corner of the mouth.”
What’s important about the corner of the mouth is that when you run it over wood, it won’t cut it. That sounds obvious, I know. But it can be a powerful technique.
So let’s take a simple example to show how the corner of the mouth works when it’s at its best – dealing with the edge of a board. Let’s say you are planing the edge of a board and the edge isn’t square to the face of the board – a typical problem. How do you correct the edge so it’s square?
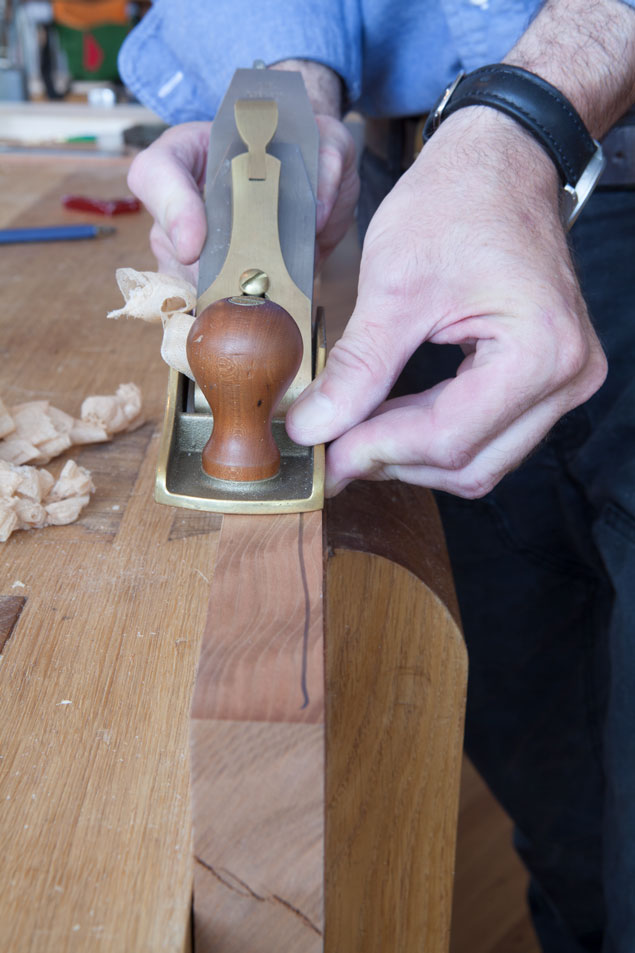
Put the corner of the mouth over the low spot. The low spot is marked in pencil on the edge. This procedure will reduce the high corner without affecting the low area.
If you have a straight iron in the tool, place the corner of the mouth over the low side of the edge. That way the plane won’t cut anything away from the low side and will cut only on the high side.
Take a couple passes and check your work. When you get close to square (about one shaving away) shift the tool laterally so the entire cutter sees the entire edge and can give you a square and true edge.
Planing Faces
Planing faces with a straight iron is dang tricky if you want the face clear of plane tracks. I’ve done it. You can do it. But I have to be honest here. In my opinion it’s far more difficult than sharpening a simple camber on the edge of your smoothing plane.
Here’s the best way to explain the straight-iron method: Let’s say you are mowing the lawn. The wheels of the lawnmower represent the corners of the plane’s mouth. And the blade of the lawnmower represents the blade of the tool.
And for the sake of example, let’s say this grass is stiff. Really stiff. As stiff as wood.
So you push the lawnmower across the grass along your street and make what is essentially a super-shallow rabbet. Now you go to make the second pass on the lawn. You put two of the wheels of the mower on top of the stiff grass. The cutter is now tilted slightly.
If you are taking a shallow cut, then you will leave a surface without harsh corners or plane tracks. The wheels on the already-cut grass will hold the cutter above the grass. The stiff, uncut grass will hold the cutter at an angle so there are no harsh corners.
The trick is to overlap your passes with care so that the corners won’t dig in. And you need to take a shallow cut – less than .002” is enough.
One More Method
There’s a third hybrid method: Clip the corners of the iron but sharpen the middle part straight across.
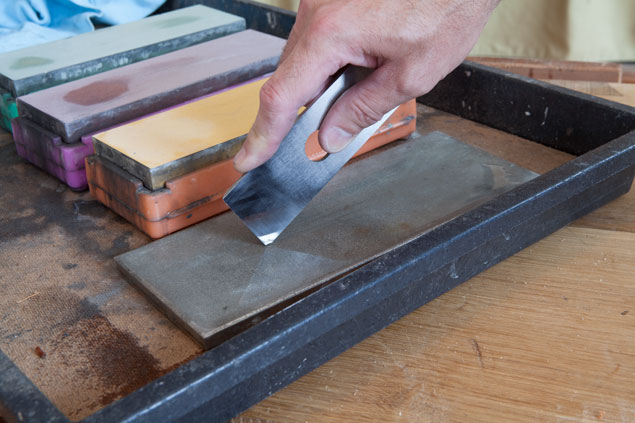
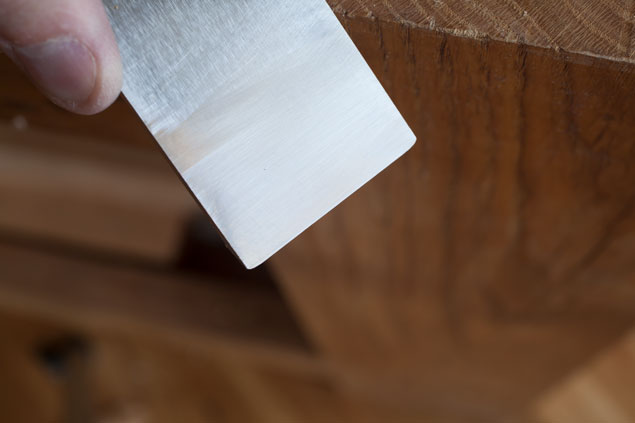
Here I’m rounding over the corners of the iron on a coarse diamond stone. A few strokes on each corner do the trick.
This method works much like cambering the iron – it tucks the corners up into the mouth of the plane. What I don’t like about this shape of this cutter is that it will tend to scrape the wood at the corners of the mouth. The surface looks OK and will look just fine when you put a film finish on it.
Bottom Line
A straight iron works best in a jointer plane. You can straighten an edge easily with a jointer plane with a straight iron. And when you work faces, the plane tracks from the jointer plane are fairly irrelevant.
However, a straight iron in a jack plane will give you trouble if you use the tool in a traditional manner (taking off huge slivers of wood). And a straight iron in a smoothing plane is (I think) a fussy proposition.
— Christopher Schwarz
Here are some supplies and tools we find essential in our everyday work around the shop. We may receive a commission from sales referred by our links; however, we have carefully selected these products for their usefulness and quality.




I worked out a system to help decide how much camber to put on an iron of any width that seems to be working for me. I use an 8″ radius on 2″ wide irons, 13″ radius on 2-3/8″ irons. With the same calculations a scrub plane with a 1.45 inch iron would be a 3″ radius, although I have not tried this (I don’t own a scrub plane but this is exactly how LN sells their scrub). All of these scoop out the same volume of wood with a single pass which seems to determine whether I can push the plane or not.
I used a 2″ iron with an 8″ radius as the starting point. I assumed that with that much of the blade sticking out I would still be able to push the plane through the wood with most of the width of the blade exposed. In practice his works really well for softer woods like pine, fir, and poplar. It works on white oak too if it’s sharp and I dial the blade back a tiny bit.
The problem I had is that I like to use a #6 with a 2-3/8″ iron for heavy stock removal–I just like that it’s wider and longer–the weight doesn’t bother me. If I had put an 8″ radius on it and dialed it out so that the entire width were exposed it would be so deep I couldn’t push it. I did some math to figure out the total area of the cutting surface sticking below the mouth, and then tried to keep it equal for irons of various widths.
Using the same math, if you prefer the feel of a 10″ radius on your jack (2″ iron) you would need a 16 or 17″ radius for a wide 2-3/8″ iron like on my #6 to get the same feel. I have not tried this.
This seems like allot of math but it isn’t too bad. I don’t have a power thickness-planer and rely on my #6 so it is worth it to me to get this right. Time with a pencil was easier than time at the grinder to get this answer.
Chris,
Do you have any low angle planes with a chambered iron? I have a Veritas low angle jack and have sharpened one iron with a chamber and have a little trouble getting it to cut.
How much do chamber low angle planes? The geometry says a smaller radius would be required for a low angle compared to a plane bedded at 45 degrees. Right?
Tom
Nice article. I camber my jack irons, but use straight irons with rounded corners in my jointers and smoothers. There’s certainly an element of control that I admire in using my jack plane. Although I haven’t noticed problems with the straight irons, I’m interested in giving the cambered irons a try in all my planes. I assume there would be no difference whether we’re talking about metal planes or wooden bodied planes…
I keep a straight iron in my bevel up planes, the only exception being my 164. I want that straight reference when attacking end grain or shooting. My bevel up jack has the softened corners to allow for some smoothing tasks. All of my bevel down planes have some level of camber with the 605 having the most.
As to using the camber to level an edge I’ll use one of three different techniques. I can use the camber to attack the high spots, shift the angle of the iron for a full length pass or rotate the plane(a skew cut) to one side so that the blade is only on a portion of the board. Angling the blade is the least common of the three. I don’t like messing with the geometry after a plane is set.
When I took my first woodshop class in public school 48 years ago we were taught that when jointing the edges of boards to take advantage of the lateral adjuster and cock a straight iron so that the plane took a thicker cut on the high side rather than trying to compensate by tipping the plane. We were also taught to free hand sharpen our irons. At 14 I wasn’t that skilled at holding the iron square to the stone, especially honing the iron in a figure 8 pattern per instruction. As I sharpened I found that the best I could do was to produce a slight camber no matter how hard I tried to keep the iron square to the stone. The next year under a new instructor he made a point of telling the whole class I was the only one who knew how to plane the faces of boards without leaving plane tracks. At the time, neither he nor I knew the reason I could “plane so well” was that I didn’t have the skill to produce a freshly sharpened iron that was straight and square across like all of my classmates.
I too put a camber on all but one of the irons for my planes. I usually keep two per so I can put-off honing. I’m lazy like that. Recently I found a type 2 #8 and was elated to find it in perfect condition including the original iron with the solid cast lever cap. Woohoo, I said, figuring I could flip it for a tidy profit till I discovered MY INITIALS stamped low on the side at the sole. What are the odds?
So, I stowed the original iron, chip breaker and lever cap away and replaced them with a new Veritas blade, cap iron and a newer [more ubiquitous] lever cap. I clipped the corners as you describe in the latter example and use it almost exclusively on edges.
The big plane is also useful on its back. Long ago, I cobbled up simple device that holds either a #7 or #8 sole up so I can push small work pieces across the upturned blade. The mass of the plane keeps it in the jig and rather than put in a vise, it sits pretty on the bench against a dog or batten and the added height is kinder to my back.
How much does a cambered iron cost if I may ask?
I notice you used a Pentel 1000 Graphgear mechanical pencil to point to the corner of the mouth. I use these to run a standard 0.3 mm lead along a cut marking line, I find these are more robust than others, particularly when used with the Ain Stein refill as these are tougher and smoothers than standard leads.
These are first class pencils as the vulnerable tubes at the tip are protected by retracting into the body when the clip is raised. I use a 0.3 and a 0.5 for all my marking out and all five sizes when I make old style drawings..