|
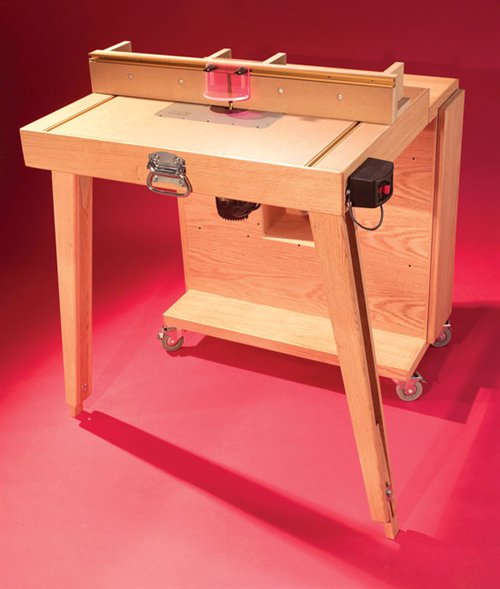
A router table is one of the most versatile tools you can
add to any shop. Whether you’re making doors or moldings,
router tables are do-it-all tools. This shop-made unit is a
fully featured router table with portability, versatility and
compactness. It’s perfect for any shop in which floor space is
precious. The top has as much real estate as a full-size router
table but, like a benchtop unit, the router center can easily
be stowed when you’re done.
The key to a flat, rigid table is the torsion-box design.
A torsion box is nothing more than a crisscross frame
captured in a top and bottom. It’s easy to build, dead flat
and solid as a rock.
Build the top
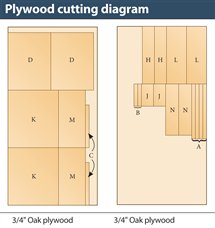
Crosscut both sheets of plywood required for this project into
32" long slabs (see the plywood cutting diagram, below).
1. Cut to size the ribs (A and B, Fig. A, below), ends (C)
and top and bottom skins (D). Cut the hardboard top (E) 1"
larger than the top skin.
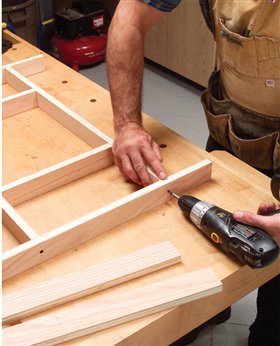
2. Glue and screw the torsion-box ribs together (Photo 1).
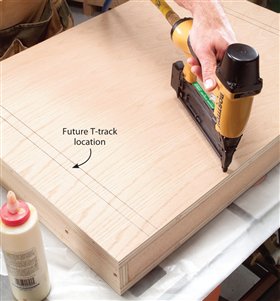
Pin the top and bottom skins to the torsion box (Photo 2).
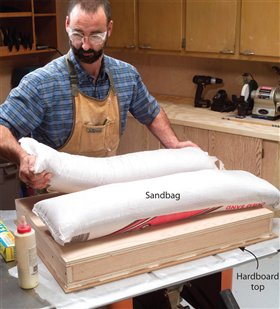
Assemble the torsion box on your tablesaw (Photo 3).
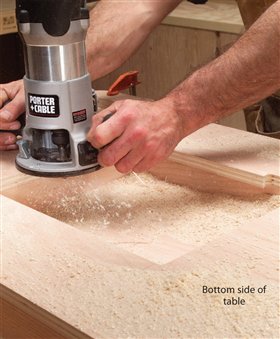
3. After the glue is dry, rough out the cavity in the
bottom of the torsion box and trim it flush with a router
(Photo 4). Use a 1/4" round-over bit to ease the sharp
corners. Flip the torsion box and flush-trim the hardboard
top to match the box’s top skin (D).
Build the case
The assembly of the case is very similar to that of the torsionbox
top, with internal ribs that create the compartments in
the case.
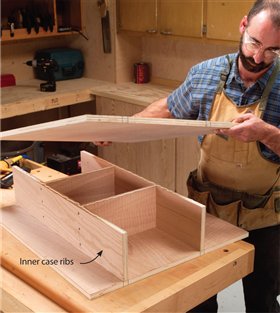
4. Assemble the case ribs (H, J).
5. Glue and screw the case skins (K) to the ribs
(Photo 5).
6. Rough-out and flush-trim the router cavity on the inside
of the case. Use a 1/4" round-over bit to ease the corners.
7. Screw and glue the top (L) and bottom (M) to the case.
Attach one layer first. Then add the second piece of plywood
by screwing from below so no screws show on the top side
of the double panels.
8. Cut the door panels (N) to size.
Add edge banding
Make all the edge banding 1/32" oversize in width. After you
glue it on, sand it flush to the plywood.
9. Make the banding for the case and door (Q), the
double-thickness top and bottom (P) and the torsion-box
top (F, G).
10. Cut, fit and glue the narrow banding to the
remaining edges of the case and the doors and the wide
banding to the top and bottom of the case.
11. Cut, fit and glue the extra-wide banding to the
torsion box’s sides and long back edge. You don’t band the
long front edge until after you install the T-track (see Step 13).
Finish the top
12. Use your router to cut the dado for the T-track (Y)
in the top. Cut the T-track to length, file the sawn edges to
remove burrs and screw it in place.
13. Cut, fit and glue the final edge banding to the
front of the top.
14. Round all the edge-banded corners by handsanding
or using an 1/8" round-over bit.
15. Center the router plate on the top and rout the
recess for it according to the manufacturer’s instructions.
Make the legs
16. Prepare the leg material from solid wood. Cut the
parts to final length with a 10° angle on the top ends of
the box parts (R, S) and the bottom end of the adjustable
foot (T).
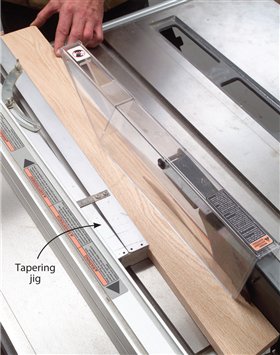
17. Cut the leg tapers (Photo 6).
18. Cut the slot in the adjustable foot.
19. Install the T-nut in the leg. Glue and clamp the leg
boxes together.
20. Bolt the adjustable foot to the leg box.
Put it all together
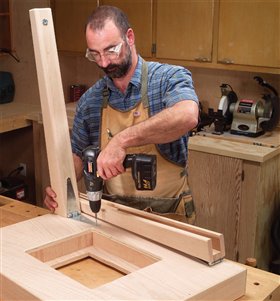
21. First, screw the hinges to the legs. Then, with the
legs in place, screw the hinges to the bottom of the top
(Photo 7).
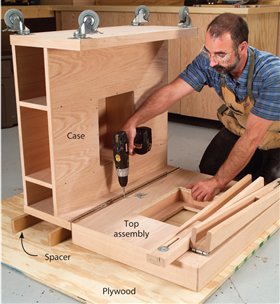
22. Flip the case upside down onto a pair of spacers
and install the casters and continuous hinge (Photo 8).
The casters we’ve specified are double locking, so they
don’t roll or swivel when locked.
23. Fold the top and case together, get some help and
flip the case and top assembly upright.
24. Open the top and level it using the adjustable feet.
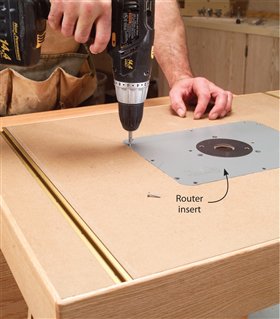
25. Drill and countersink the table insert and screw it
to the opening in the top (Photo 9).
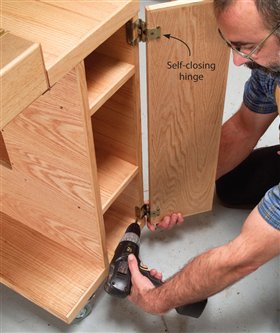
26. Screw the hinges to the door, and fasten the door
to the case (Photo 10).
27. Attach the router table switch and chest handle to
the folding top.
28. Using the same screws that hold the switch,
fasten a bungee cord to the top. This acts as a retainer
for one leg when you’re folding and unfolding the table.
The other leg swings free so it drops into place when you
unfold the table.
Make the fence
29. Cut all the fence pieces (U, V, W, X, AA, BB) to size.
Tip: Make a handful of subfences so you have extras.
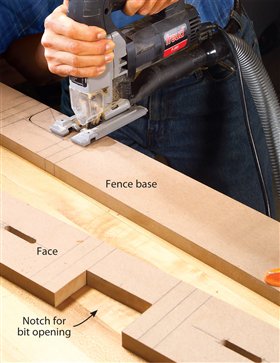
30. Rout the slots in the fence base and face and cut
out the bit clearance notches (Photo 11). Long slots in
the base allow the fence to skew on the table as you’re
making adjustments. Slots in the face allow you to slide the
subfences for the adjustable opening in the fence.
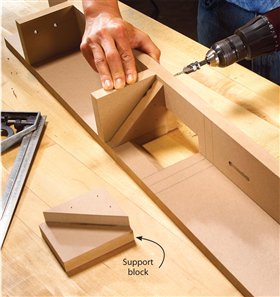
31. Glue and screw the face to the base and attach the
support blocks and dust port (AA, Photo 12).
32. Cut the T-track and spacer (BB) to length and screw it
into the face.
Finish it
33. There’s plenty of plywood and hardboard left to
make drawers, trays, hooks and racks. Outfit your table to
hold all your goodies.
34. Most routers can remain fastened to the top when
the table is folded, and they’ll swing right into the cavity in
the case. If your router bumps the back of the cavity, just cut
that side out, as in Step 6, to provide clearance.
35. Apply a coat of finish to all the wooden parts. It’s not
a must to seal the hardboard top, but a coat of paste wax will help your material slide across it better.
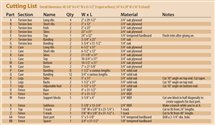
Project requirements at a glance

Cutting List

Fig. A: Exploded View

Plywood cutting diagram

Sources
(Note: Product availability and costs are subject to change since original publication date.)
Woodworker’s Supply,
woodworker.com,
800-645-9292,
Taper jig, #825-014.
Peachtree Woodworking Supply,
ptreeusa.com,
888-512-9069,
Small Router Bit Guard, #1049;
24" T-track with one knob and bolt,
#1018;
48" T-Track with two knobs and
bolts, #1019.
Highland Hardware,
highlandwoodworking.com,
800-241-6748,
Four casters, #084050;
Router table switch, #104903.
Home Center, two sheets 3/4" x 48" x 96" oak ply
wood; one sheet of 1/4" x 48" x 96"
tempered hardboard; two pair 1/2" overlay self-closing
hinges; one 48" continuous hinge; one 3-1/2" chest handle; two 6" strap hinges; miscellaneous hardware.
Amazon,
amazon.com,
JessEm 03100 Rout-R-Plate.
This story originally appeared in American Woodworker March 2005, issue #113.

March 2005, issue #113
Purchase this back issue.
|

1. The router table top is a torsion box, which guarantees a stiff,
flat surface. Assemble it with glue and screws, holding the
edges flush. Brad-nail the parts first to hold them in place while
you drill and drive the screws.

2. Pin the top and bottom skins to the torsion box so they don’t shift during
clamping. Avoid the T-track locations so you don’t rout into a brad later. It
only takes a few brads to hold the parts in place.

3. Glue the torsion-box on your tablesaw. The surface of the saw virtually
guarantees a flat top. Place the hardboard face down on the saw, spread
a uniform film of glue on the hardboard and lay the torsion box on it.
Weight the sandwich with sandbags.

4. Flush-trim the cavity in the bottom of the torsion-box
assembly. Use a jigsaw to remove most of the waste first.

5. Assemble the case using glue and screws. Use layout lines to correctly
locate the skins on the ribs.

6. Taper the sides of the legs using a taper jig on the tablesaw.
The leg sides must be cut to final length before you taper them.

7. Screw the leg hinges to the bottom of the router table top.
The legs should bypass each other when they’re folded.

8. Attach the top assembly to the case using a continuous hinge. Use a pair
of 2-1/4" spacers under the case to make it level with the top.

9. Drill and countersink eight holes through the table insert, and fasten
it to the top with flat-head sheet-metal screws. This ensures your router
won’t tumble out when you fold the table top down.

10. Screw the self-closing hinges to the door and fasten the door to the
case. It’s easier to drive the screws if you first *** the plywood using
a scratch awl.

11. Cut notches in the fence using a jigsaw. After the fence is
assembled, the notches provide clearance for router bits.

12. Assemble the fence with glue and screws. Make sure the face
and base are dead square to each other.
|


