We may receive a commission when you use our affiliate links. However, this does not impact our recommendations.
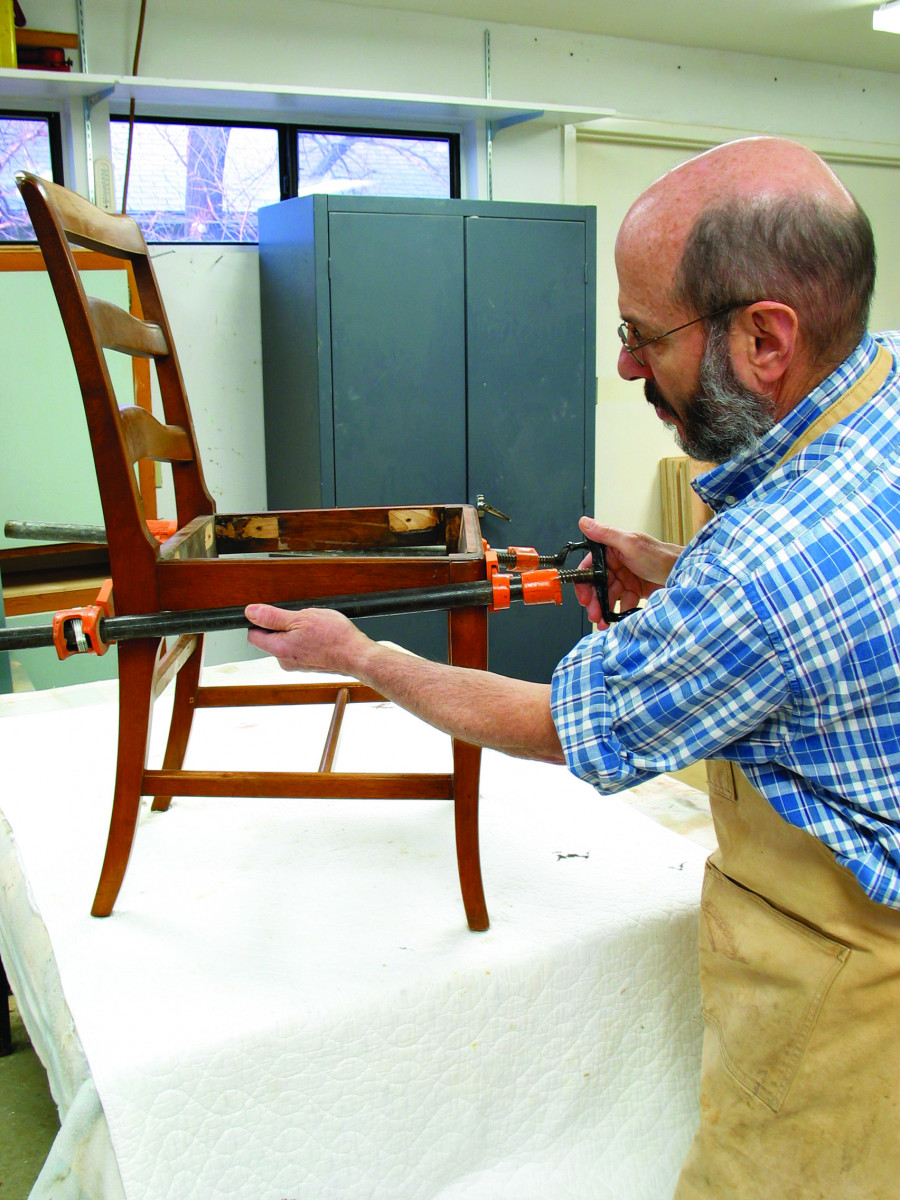
The chair I’m regluing is factory-made, glued with animal hide glue and finished with shellac. The dowels are spiral-grooved and the nails used in the stretchers are wire, not “square.” So the chair is probably from the 1920s or early 1930s. Once you have cleaned all the joints and replaced dowels as explained in the article, apply glue and clamp the chair together.
Practical methods to fix the common wobbly chair.
As a woodworker, you must be asked now and then to reglue loose chair joints. Chairs are the most abused of all furniture and also among the most complex. The subject of chair regluing is huge and, to my knowledge, has never been covered well in the woodworking literature.
I love regluing chairs. Call me weird, but I get really deep into the subtle construction differences. Even with a set of six or eight factory-made chairs, I can get lost in the minutest variations. I don’t know how many chairs I’ve reglued during the last three decades, but it must be in the thousands.
There are two primary types of joinery used in straight-backed chair construction: mortise-and-tenon or dowels. Mortise-and-tenon joinery is pre-industrial, though many woodworkers and very few factories still use it to join legs and rails. Dowels are machine age because the dowels themselves are machined.

Dowel joinery is much easier and faster to cut than mortise and tenon. But doweled joints don’t have nearly as much glue surface, side-grain-to-side-grain, so these joints don’t hold up as well.
Because most chairs made since the mid-19th century are doweled, and because dowel chairs don’t hold up as well as mortise-and-tenon joinery, the chairs you are asked to reglue will most likely be dowelled. So this article is about doweled chairs.
For illustration purposes, I’ve chosen a simple doweled chair from the 1920s or ’30s with problems typical of factory chairs.
Philosophy of Regluing
Unfortunately, it has become common to reglue, or “tighten,” chairs by inserting some sort of adhesive into the joints in order to avoid having to take them apart. Sometimes it’s done using a syringe held right to the joint, hoping the adhesive wicks inside. Sometimes tiny holes are drilled at an angle into the joint and the adhesive inserted with a syringe. Sometimes “magic” swelling products are wicked into the joints to cause the wood to swell and produce temporary tightening.
None of these methods works for long. Wicked adhesive bonds only to the old glue that has already given way. It doesn’t bond to the wood, which it can’t get to through the old glue. Swelled wood compresses again with seasonal humidity changes, and when the chair is racked in use.
The only way to restore the original strength to joints is to disassemble the chair, clean off the old glue, apply new glue, then clamp the chair back together. In the case of doweled joints, it’s often best to replace the dowels.
You’ll sometimes find joints that resist separation. You then have to decide whether to leave them attached, betting they will hold their strength as long as the other joints you’re regluing, or figure out a way to get them apart.
If you have determined the glue is animal hide glue (it becomes sticky when you rub it with water or saliva), you can usually get the joints apart by inserting denatured alcohol. If the joints are held together with a modern adhesive, such as white or yellow glue, epoxy, polyurethane or urea-formaldehyde (plastic-resin), you may not be able to get them loose if they aren’t already. You may have to work around them.
Speaking as a repairman, I hate all glues other than animal hide glue because they are so difficult to work with.
Knocking Apart
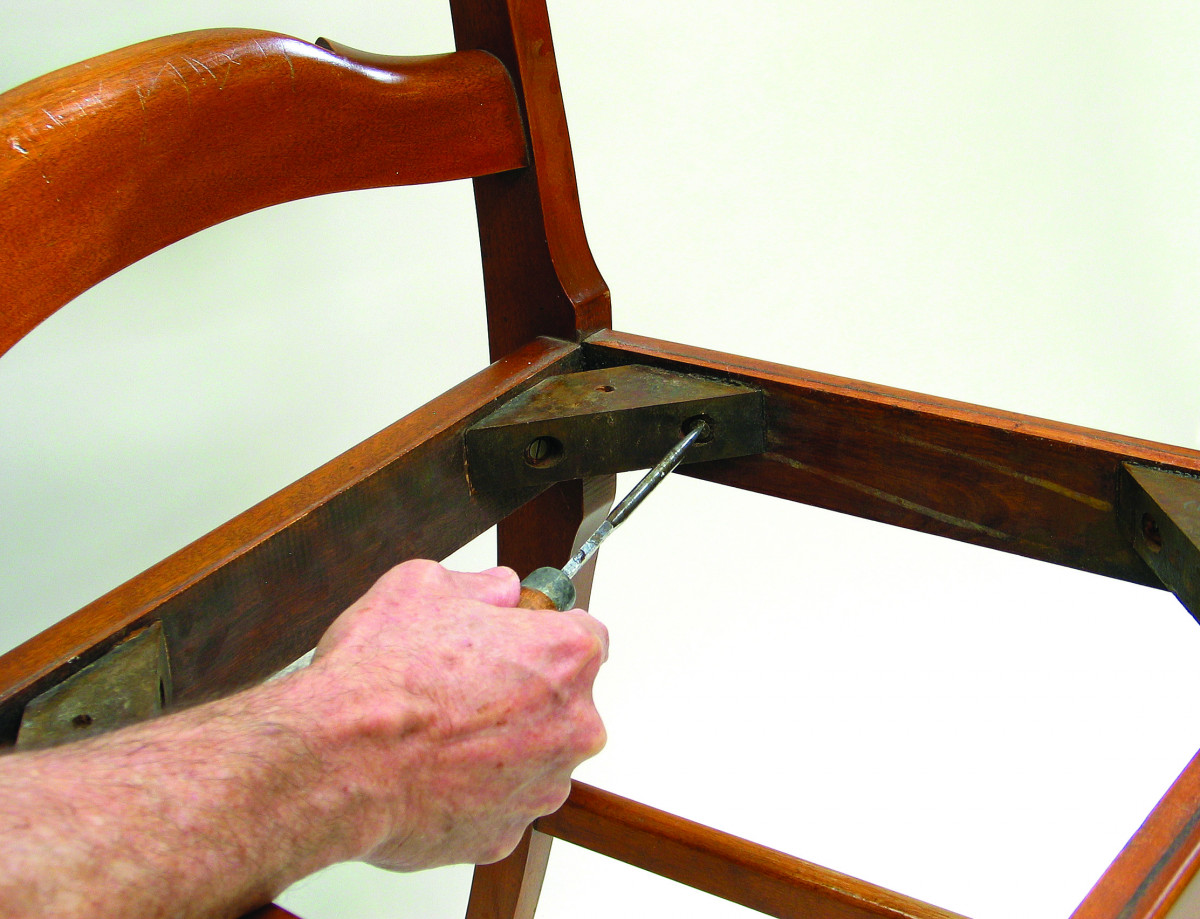
The first step in regluing a chair is to remove corner blocks inserted to support the seat. Remove the screws and then the blocks using a deadblow hammer. If the blocks resist, try wicking denatured alcohol into the bond using a syringe. If these blocks were attached with animal hide glue, the alcohol will crystallize the glue, making it easy to knock them loose.
The first step in regluing a loose chair is knocking it apart. Before you can do this, however, you need to remove the corner blocks and any nails or other restraining devices that have been inserted.
It’s glue that holds chair joints tight, not corner blocks, nails (wire, square or “wooden”), screws or metal brackets applied during manufacture or restoration. This is basic woodworking, but many people seem not to understand it. These devices might keep joints from coming apart but they don’t keep joints from becoming loose.
This is an important point because so often chair repair is done by adding metal devices that do little good but make the eventual regluing more difficult because they have to be removed. In many cases, the devices cause serious damage, including splits and breaks that are sometimes difficult to repair.
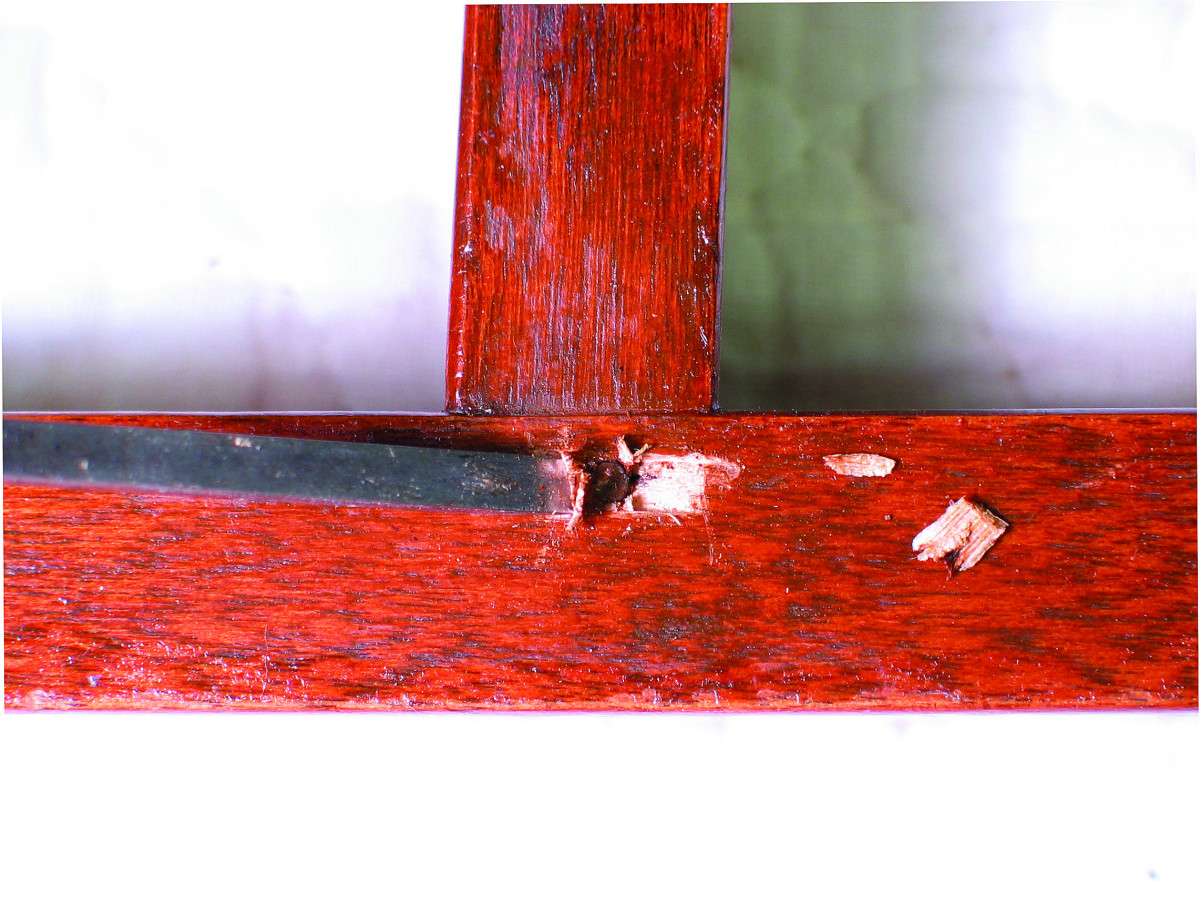
Nails are often inserted into stretchers in factory-made chairs. To remove the nails, first dig out some of the wood on two sides of each using a 1⁄8″ chisel.
In this chair, the corner blocks were inserted during manufacture to support the chair seat. Nails were also inserted in all the stretcher joints. This is typical on factory-made chairs, but I’ve never understood the reasoning. The nails don’t prevent the glue from giving way and they are a pain to remove, which they have to be to get the chair apart.
To remove the corner blocks, first take out the screws. Then try knocking the blocks loose with a hammer. My favorite is a deadblow hammer made of plastic with a hollow chamber containing shot. I find this widely available hammer far more effective for disassembling furniture than rubber or leather mallets. (If you use a metal carpenter’s hammer, be sure to cushion the blows with leather or softwood blocks so you don’t put dents in the wood.)
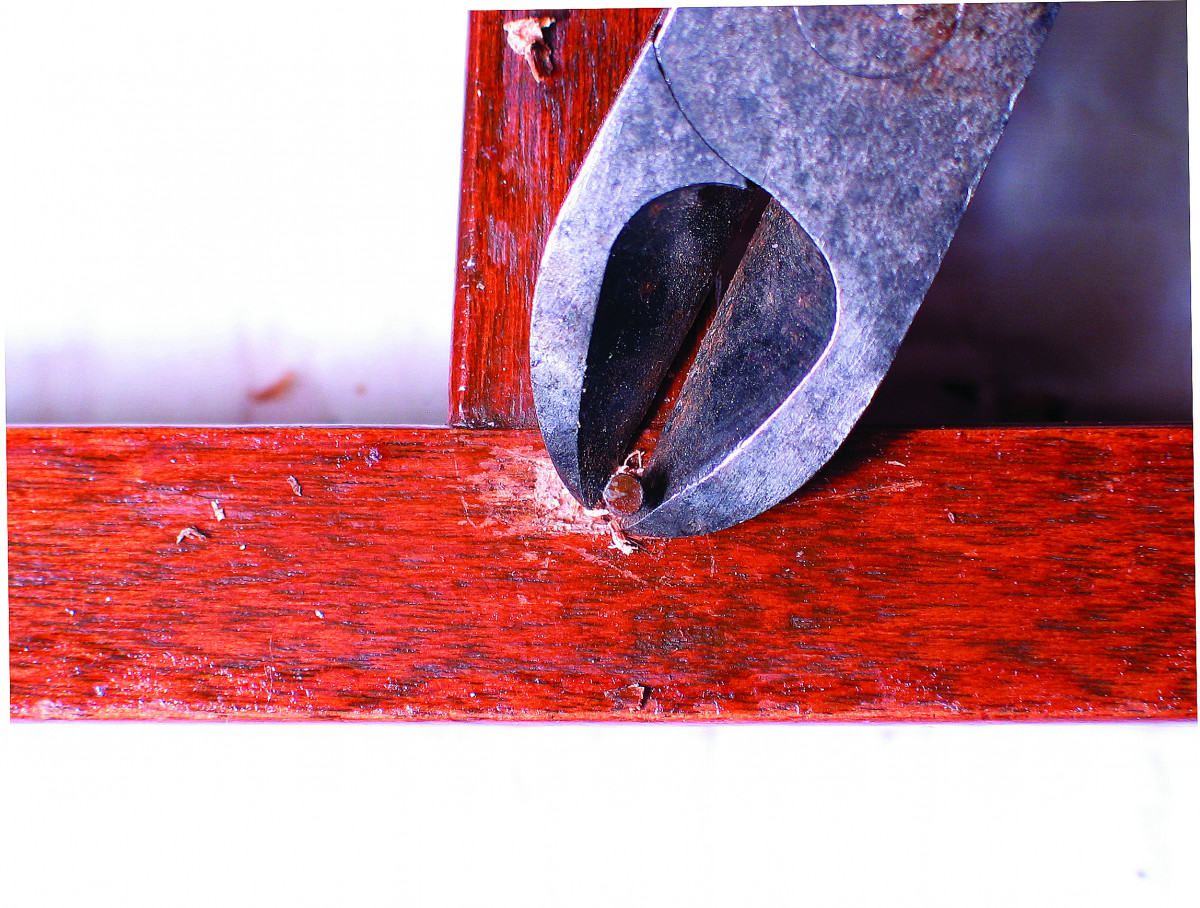
With enough wood removed so you can grab each nail with a pair of electrician’s side-cutting pliers, pry them out of the wood. Fill the damage with wood putty if you are refinishing, or with a matching colored wax crayon after the chair has been reassembled if you aren’t.
Corner blocks will usually have separated from one of the rails, so you can also wait until the chair is disassembled to remove them.
Removing nails is a problem. I don’t like damaging the wood and finish, but I’ve given up with nails. The only efficient method of removing them is to dig them out. I first cut away some of the wood on two sides of the nail using a 1⁄8” chisel, which I don’t keep sharp and which I dedicate to this operation. Then I pry out the nail with some sort of tool. My favorite is a pair of electrician’s pliers.
Sometimes you can knock the joints apart with just the right amount of force to cause the nails to bend. But you always risk breaking or splitting something. In most cases, I remove the nails first. It’s easy enough to fill the damage with a colored wax crayon after the chair has been reassembled. (I don’t put the nails back in unless I can see a purpose for doing so.)
With all devices removed, it’s usually easy to disassemble a loose chair with a few whacks of a deadblow hammer. To reduce the risk of breaking something, lift the part you are hitting a fraction of an inch above the table or workbench surface and hit the wood as close to the joint as possible. You should place blankets or other soft materials on the surface to avoid causing damage when the part bangs against it.
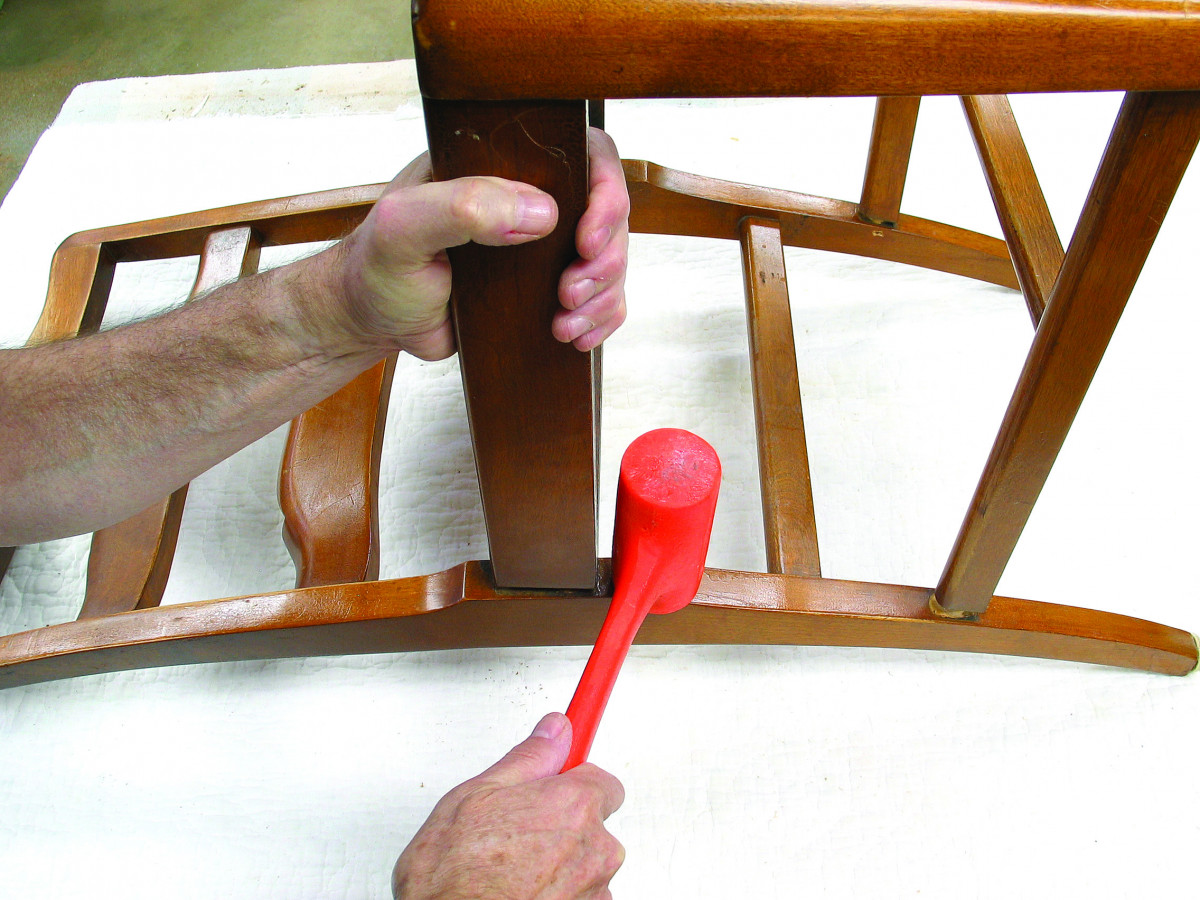
With all restraining devices removed, knock the chair apart. The most efficient tool to use is a deadblow hammer. Hold the parts a fraction of an inch above a soft surface and strike them as close to the joint as possible to avoid breaking or splitting something.
If you hit the part far from the joint, leverage increases the risk of breaking something. If you hold the parts well above a surface, something may break when they separate out of control.
If the joints resist and they are glued with hide glue (almost all furniture made or restored before the 1950s), you can cause the glue to crystallize, making it easier to separate, by wicking in some denatured alcohol. A syringe is a handy tool to use because it concentrates the alcohol where you want it.
Alcohol may cause the finish to turn white. If you aren’t refinishing, you can easily remove this “blushing” by rubbing with #0000 steel wool. In almost all cases, it’s best to do the regluing before stripping and refinishing, not after. You don’t want to get glue on bare wood or damage a newly applied finish.
As you disassemble the parts, keep track of them so you don’t reassemble them incorrectly. There are two easy methods. Number or letter them either directly on the part or on a piece of tape attached to each part. Or lay the parts out on a table in the order they will be reassembled.
I prefer the second method because it’s faster. But I have done this many times, so I have a system I can trust. You should probably do both to begin with. Eventually, you will gain trust that your system for laying out is foolproof.
Preparing the Joints
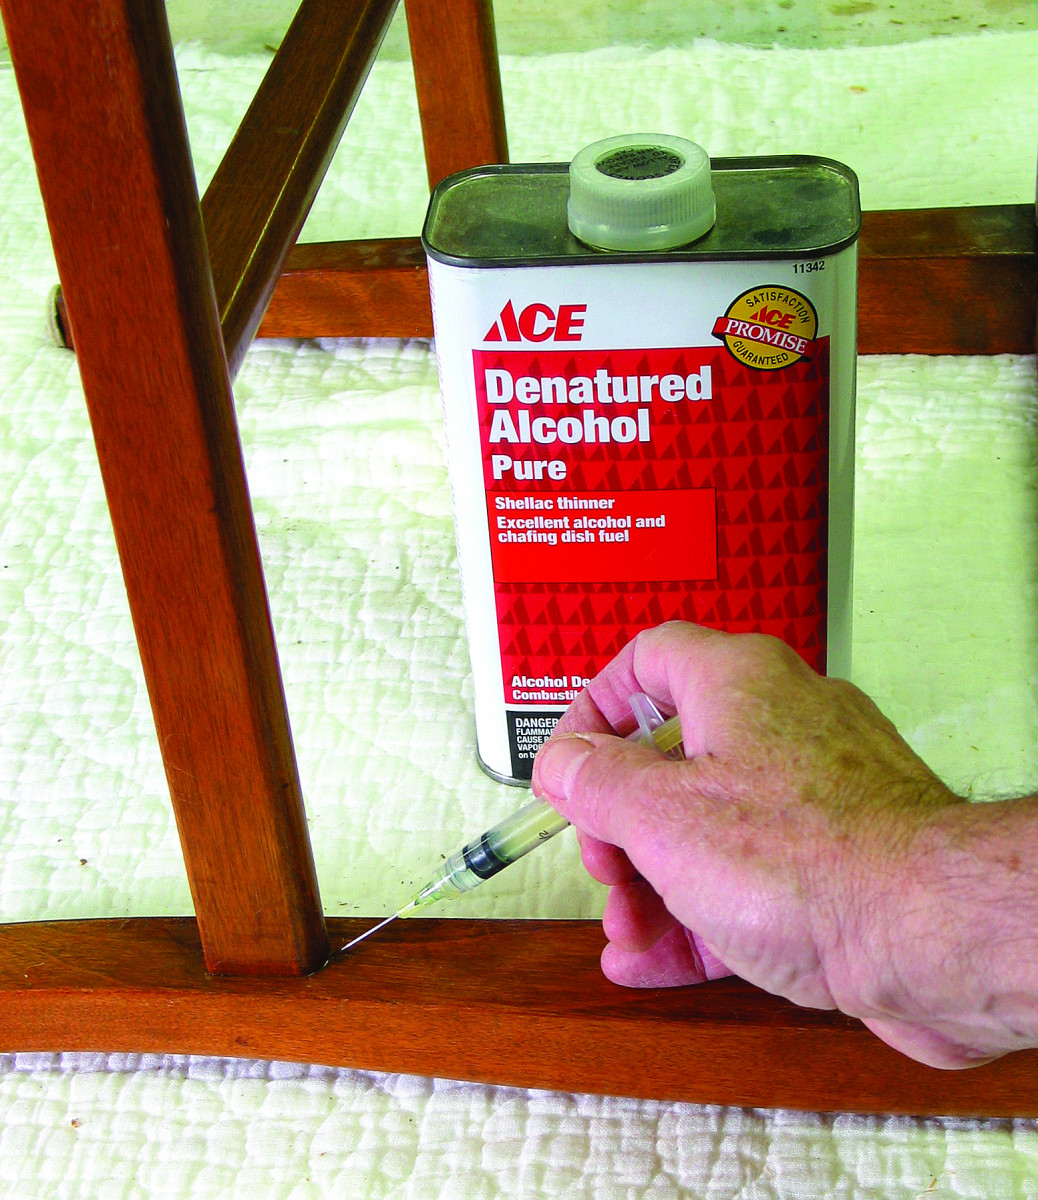
If a joint resists separating, try wicking denatured alcohol into the joint using a syringe. If the glue is animal hide glue, the alcohol will cause it to crystallize making separation easy. If alcohol doesn’t work, try white vinegar (white so as not to cause staining). It will soften white and yellow glue, if it can get to the glue.
With the parts separated, you can prepare each joint for regluing. To achieve success gluing wood parts together, each part must be clean and you must achieve tight wood-to-wood contact. When gluing new wood, cleanliness is not an issue because the parts are newly machined or cut. To reglue, you must remove the old glue first.
The exception is when using hot animal hide glue over old hide glue. Because of the heat and wetness, the new glue dissolves the old and the two become one. I love using hot hide glue because of this time-saving advantage; in most situations, I don’t have to clean off the old glue.
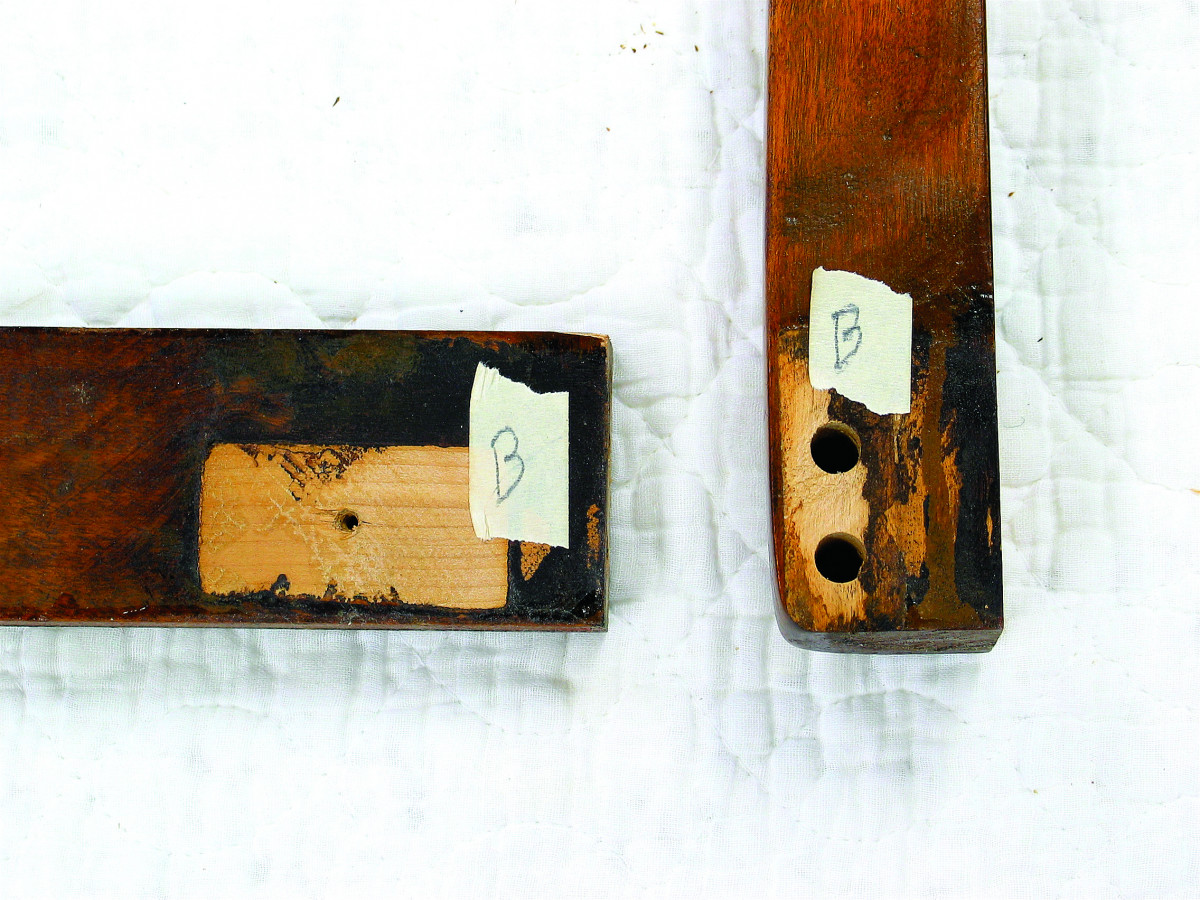
As you separate the chair parts, label them so you don’t get them mixed up.
But hot hide glue requires effort to prepare and takes practice to learn to use, so for the purpose of this article I’m assuming you will use white or yellow glue. Therefore, you will need to remove the old glue. (White glue provides more working time and still creates a bond stronger than the wood itself; I’ve never understood the rationale for exterior adhesives on indoor projects.)
You may also have to replace some or all of the dowels.
A basic rule of joinery is that wood bonds well side-grain-to-side-grain and poorly end-grain-to-end-grain or side-grain-to-end-grain. (One reason corner blocks can’t be counted on to strengthen joints is that the blocks are cut on a 45° angle.)
Notice that dowels inserted parallel in rails are 100 percent side-grain-to-side-grain while dowels inserted perpendicularly into legs are in contact with end grain on two sides, top and bottom. The leg side of the dowel is therefore weaker than the rail side, and dowels usually separate from the leg long before the rail.
Assuming this happens with a chair you’re regluing, you can choose to leave the dowels attached to the rails and hope they remain strong for as long as they do in the reglued legs. Or you can avoid taking chances and replace them. I usually remove all dowels and replace them. But I’m an exception in the professional restoration trade.
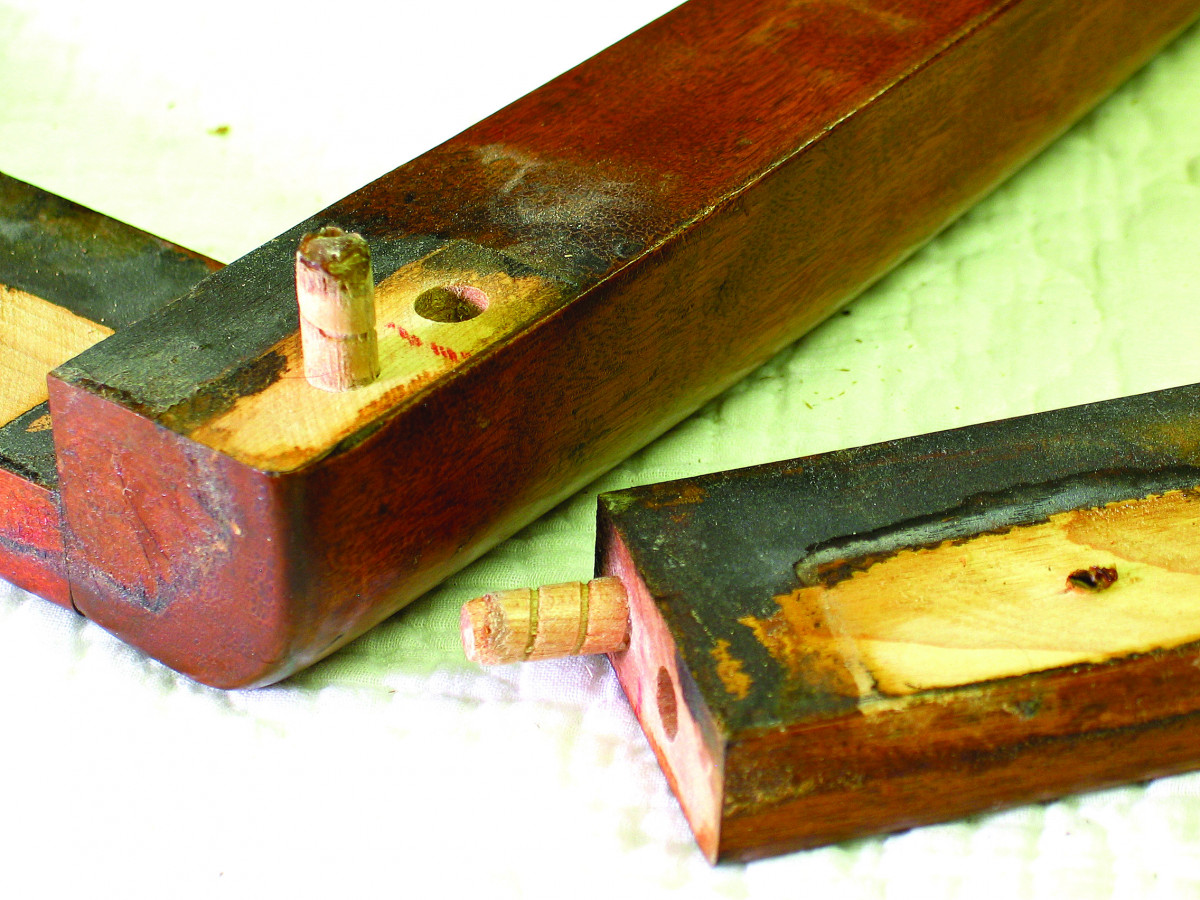
If any dowels separate from rails with their theoretically stronger side-grain-to-side-grain bonds, it’s best to replace all the dowels because you can’t trust any of the bonds to hold. If the dowels separate only from the perpendicular legs, you can choose to clean the dowels and the holes and avoid having to replace them.
Sometimes, as with the chair I’m using for illustration, the chair will tell you which path is best. Notice (above) that some of the dowels separated from the rail rather than the leg. This indicates the bond on the rail side can’t be trusted. I always choose to replace all dowels in this situation.
Whatever you decide, the one thing you can’t compromise on is cleaning off the old glue, including from the holes, before regluing the chair. There are two ways to do this: scrape the glue off or dissolve and wash it off.
If the old glue is hide glue, it’s easy to wash off using hot water. This is the best method because scraping removes some of the wood, which may reduce wood-to-wood contact.
You can also break down white and yellow glue by soaking in hot water. You can add vinegar to the water to accelerate the process a little. Other adhesives will have to be scraped. Do the best you can to remove as much of the glue and as little of the wood as possible.
Replacing Dowels: First, Out With the Old
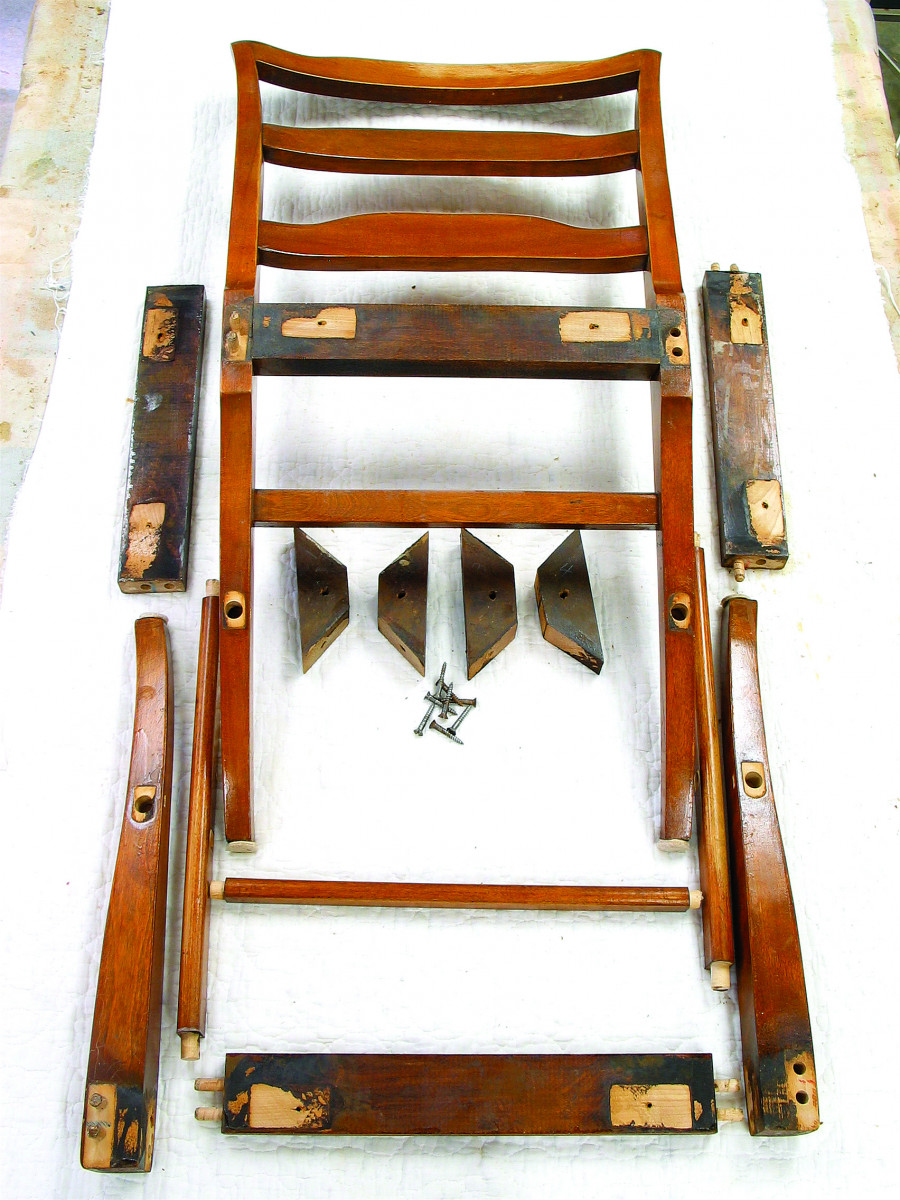
Along with, or instead of, labeling the parts, you can lay them out in an order you understand to keep track of how they will go back together.
Replacing dowels requires removing the old dowels from the joints first. Sometimes you can strike the ends of the dowels with a metal hammer or twist them with pliers to break glue bonds. With the dowels loose, twist and pull them out using pliers.
If the dowels won’t break loose and you still want to remove them, follow this procedure.
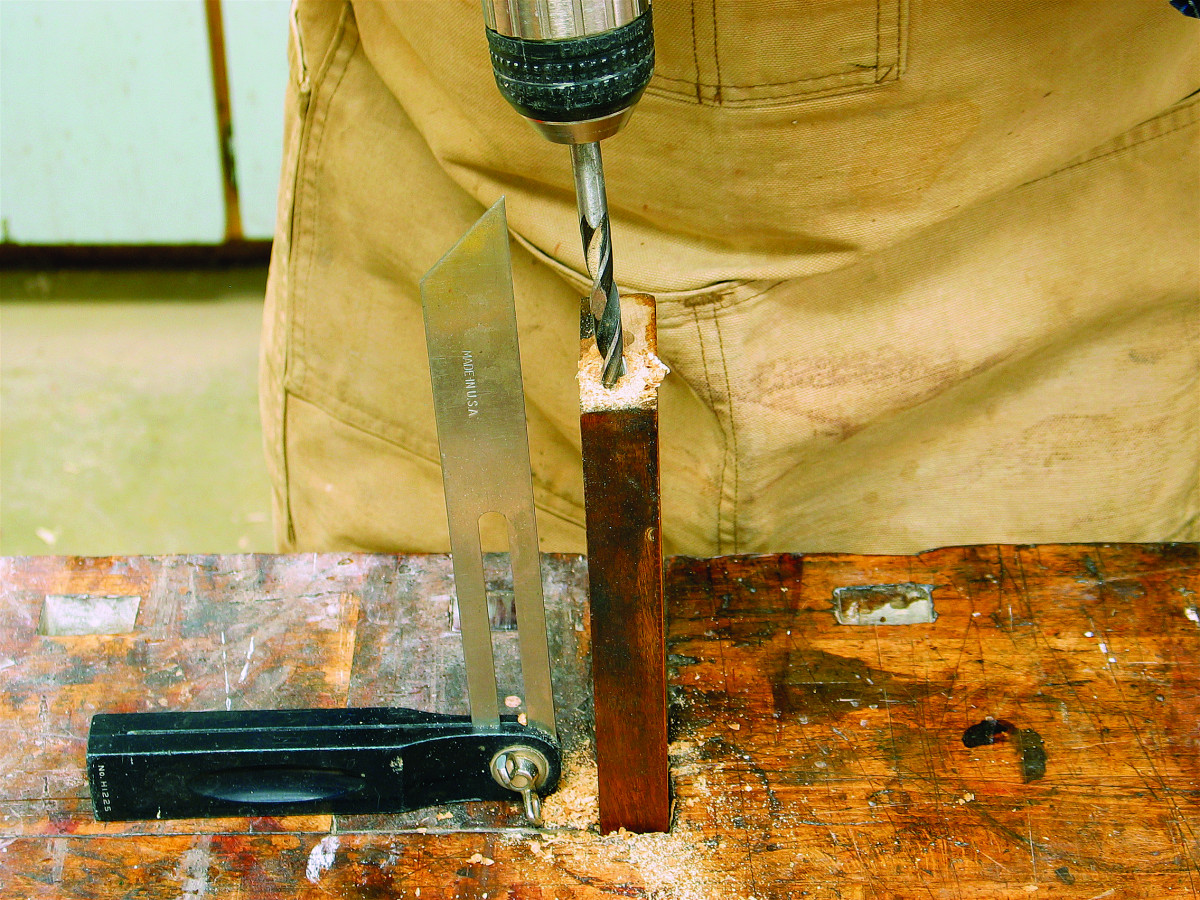
With the part clamped in a vise, saw off the dowel about 1⁄16” above the surface. Then, using a brad-point drill bit 1⁄16” smaller in diameter than that of the dowel, drill down the center of the dowel until you reach the air pocket at the bottom. You will feel a slight give when you hit it.
It’s usually easy to separate the remaining part of the dowel from the original drilled hole using a 1⁄8” chisel with a relatively dull edge; you don’t want to cut into the sides. (I use the same dedicated chisel I use to remove nails.)
Remove the dowel pieces and clean the hole by drilling out any remaining dowel parts using a twist drill bit the diameter of the hole. You can then scrub the hole with hot water or scrape using a needle-nose rasp. I almost always use the rasp because rasping is faster and new spiral-grooved dowels are usually a little thicker than necessary anyway.
Assembling
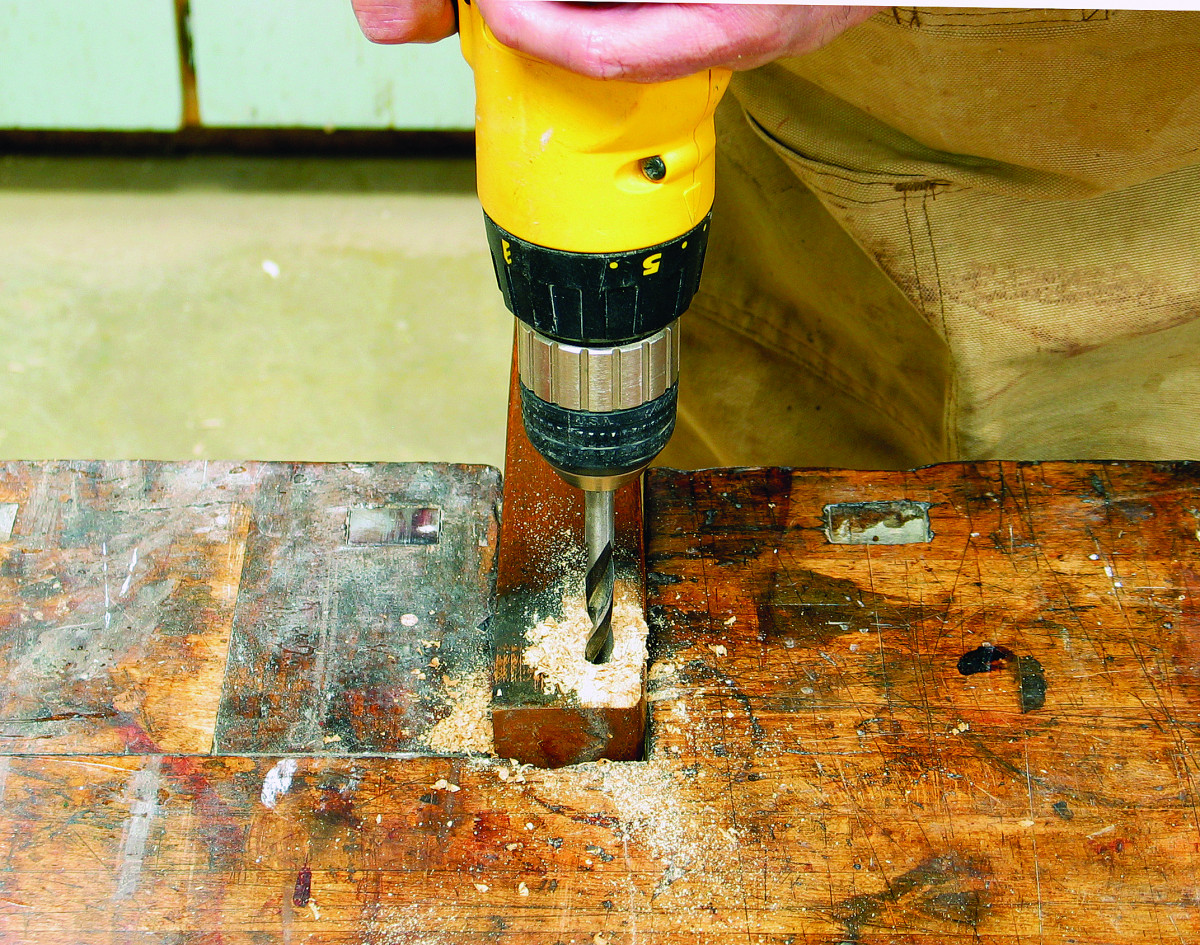
The first step in replacing dowels is to remove them. If you can’t knock or twist them loose and pull them out, saw them off about 1⁄16″ above the rail or leg and drill down through the center of each dowel (it’s not necessary to be exactly centered) using a brad-point drill bit 1⁄16″ smaller in diameter than the thickness of the dowel. Drill to the bottom of the dowel where you will feel a slight give when you hit the air pocket.
With the joints cleaned, you’re ready to reglue. This is the easy step; it’s the same process as gluing up a new chair.
In many cases, this one included, the backs of chairs are tight and don’t need regluing (they’re rarely racked). The order for regluing most doweled chair designs is as follows: First the back (if necessary), then the front legs and rail, and finally join these together simultaneously with the side rails and stretchers.
When replacing dowels, it’s critical that the new dowels not be too long. You can use calipers or simply a matchstick or other thin object to determine the depth of the holes. Add the lengths of the two corresponding holes and either trim the dowels to size or drill the holes in the rail deeper to accommodate the length.
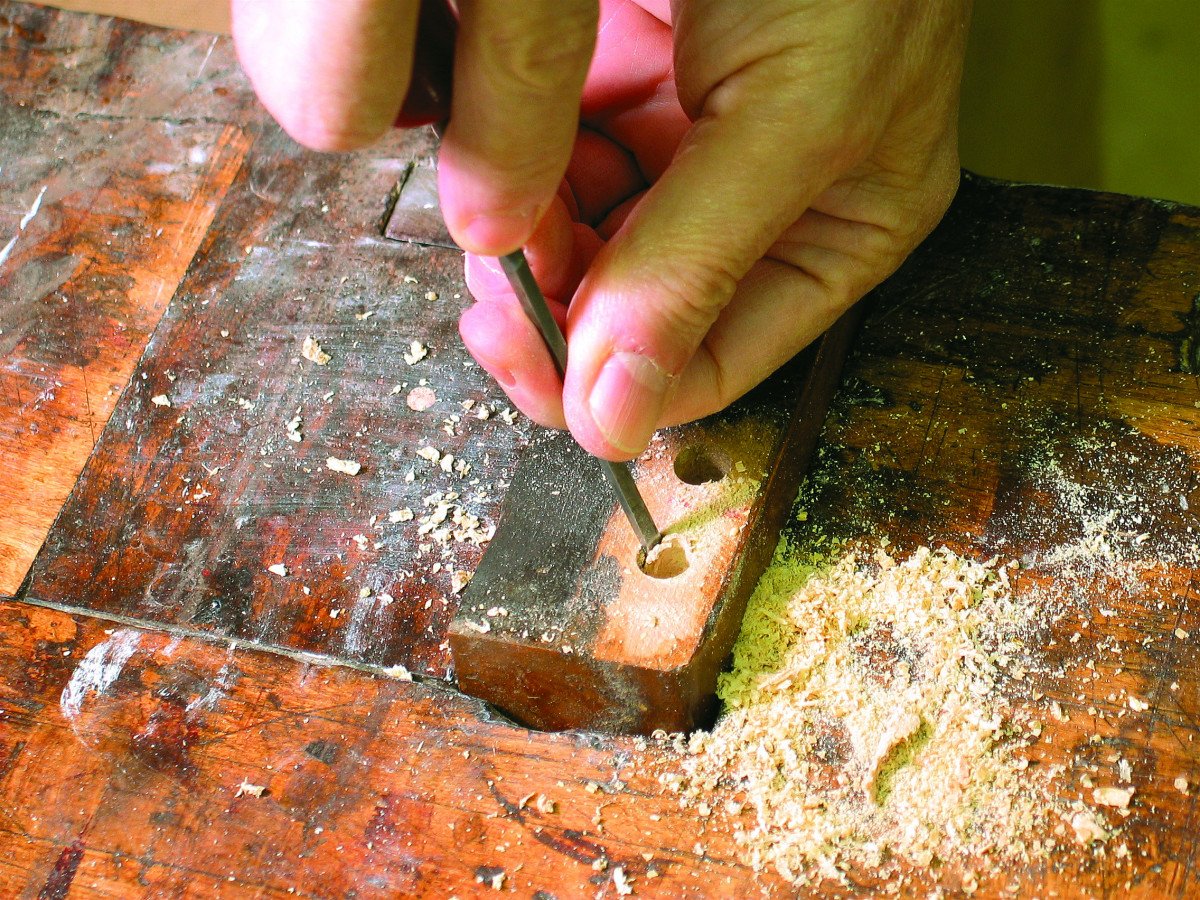
With a hole drilled through the center of the dowel, pick the remainder away from the sides using a 1⁄8″ chisel.
The best dowels are spiral-grooved, available from most woodworking suppliers. Straight-grooved dowels have very little wood surface actually contacting the wood in the hole, so they don’t hold as well.
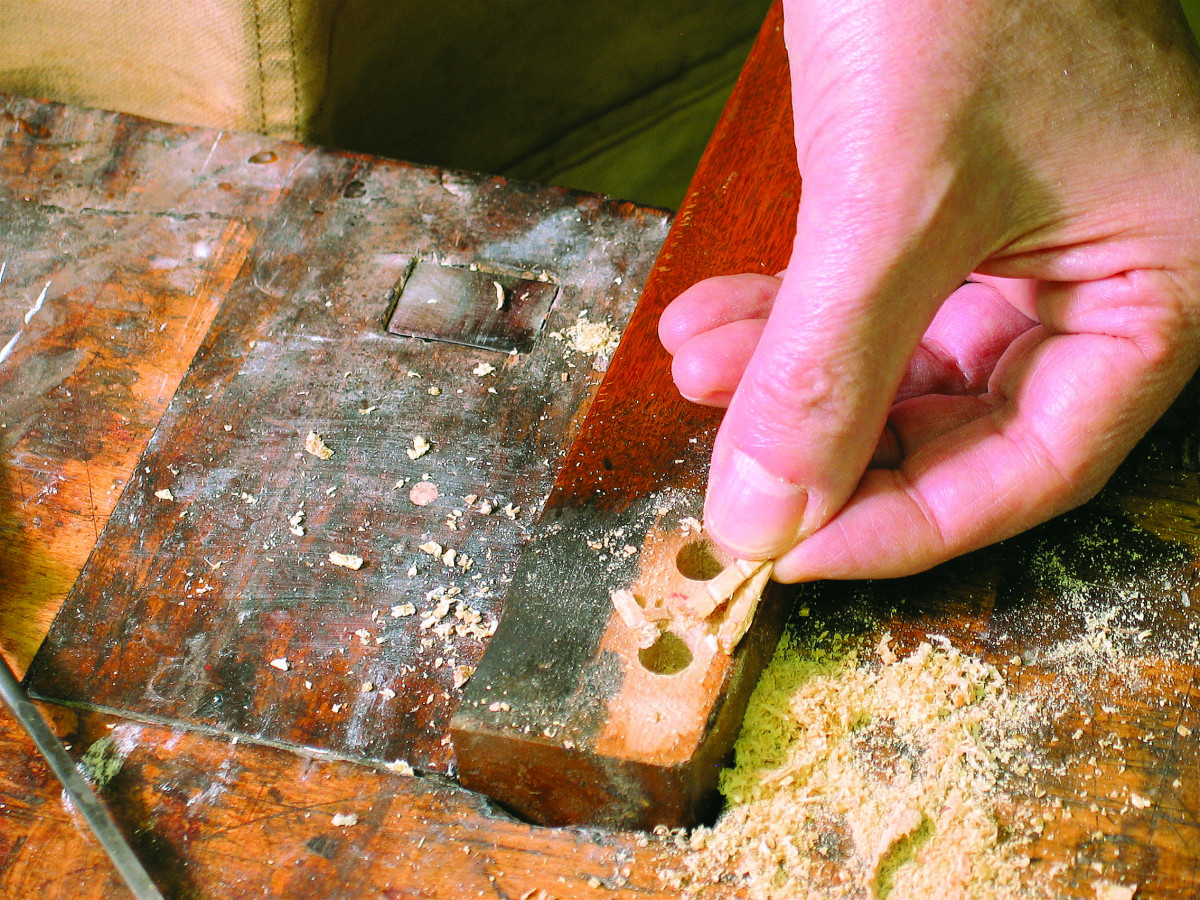
When you have separated the remaining dowel from the sides of the holes, pick out the pieces.
Dowels cut from longer rods have two problems. First, the rods most commonly available are no longer cut from maple and don’t fill out their listed dimensions. They are too thin, so they don’t succeed in producing tight wood-to-wood contact. Second, even when cut from maple they aren’t grooved, so they don’t allow excess glue to escape during clamping. If you put excess glue into the hole, the dowel won’t penetrate as deep as you expected and the joint may not pull fully together.
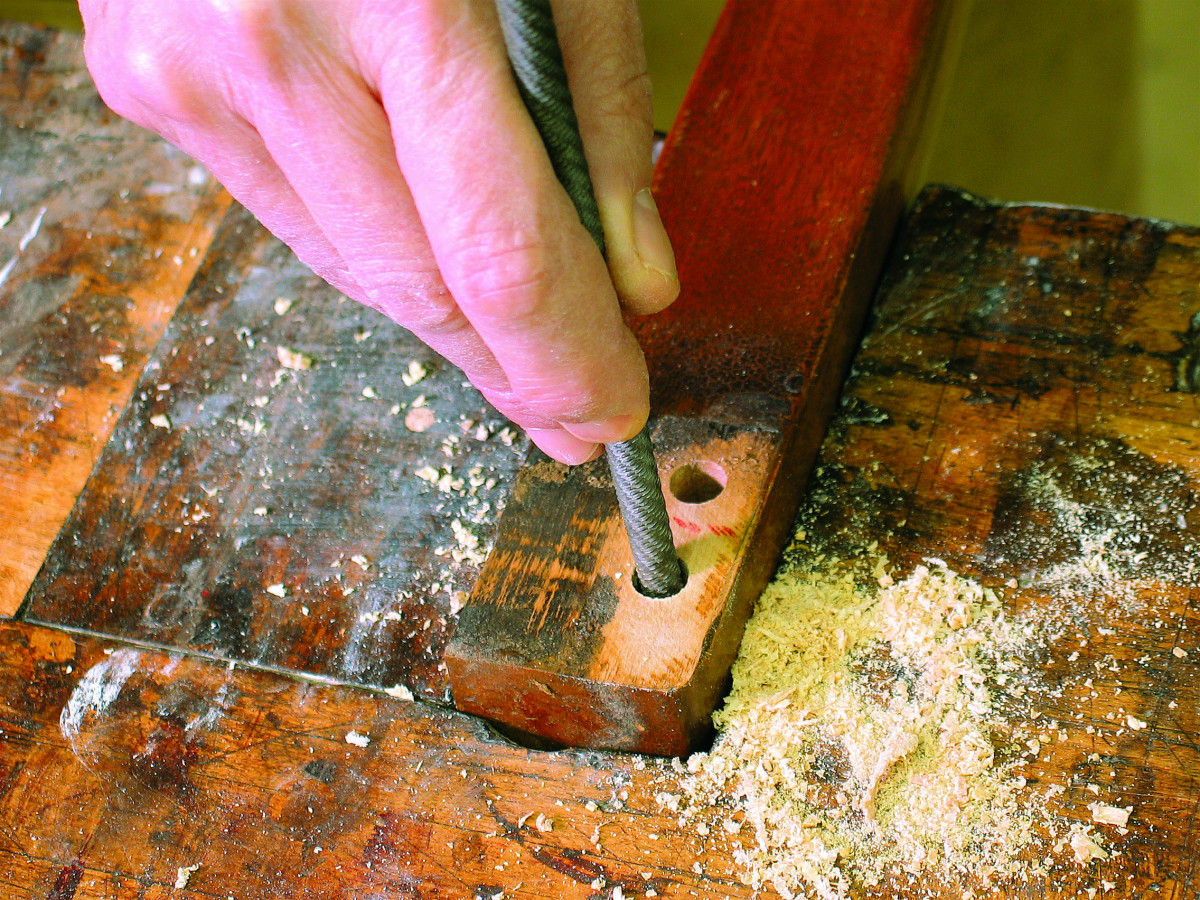
To clean the glue and any remaining small parts of the dowel out of the hole and get it ready for regluing, first drill it using the correct size twist drill bit, usually 3⁄8″ or 7⁄16″. Then scrape the sides of the hole using a needle-nose rasp. You can feel and hear the difference between scraping glue and scraping wood.
To add grooves to a maple rod of the proper dimension, scrape with the 90° corner of a chisel or make a jig to add them. Drill a hole slightly larger than the diameter of the dowel (I use metric bits) through a small block of wood and insert a screw from the side so it protrudes about 1⁄32” into the hole. Then drive the ungrooved dowels through the hole several times each so several grooves are scraped into them by the screw.
To clean the glue and any remaining small parts of the dowel out of the hole and get it ready for regluing, first drill it using the correct size twist drill bit, usually 3⁄8″ or 7⁄16″. Then scrape the sides of the hole using a needle-nose rasp. You can feel and hear the difference between scraping glue and scraping wood.
In all cases, the dowels should be chamfered on the ends so they line up quickly in the holes as you are inserting them. You can chamfer cut dowels using a rasp, chisel, large pencil sharpener or sandpaper, ideally attached to some type of sanding machine.
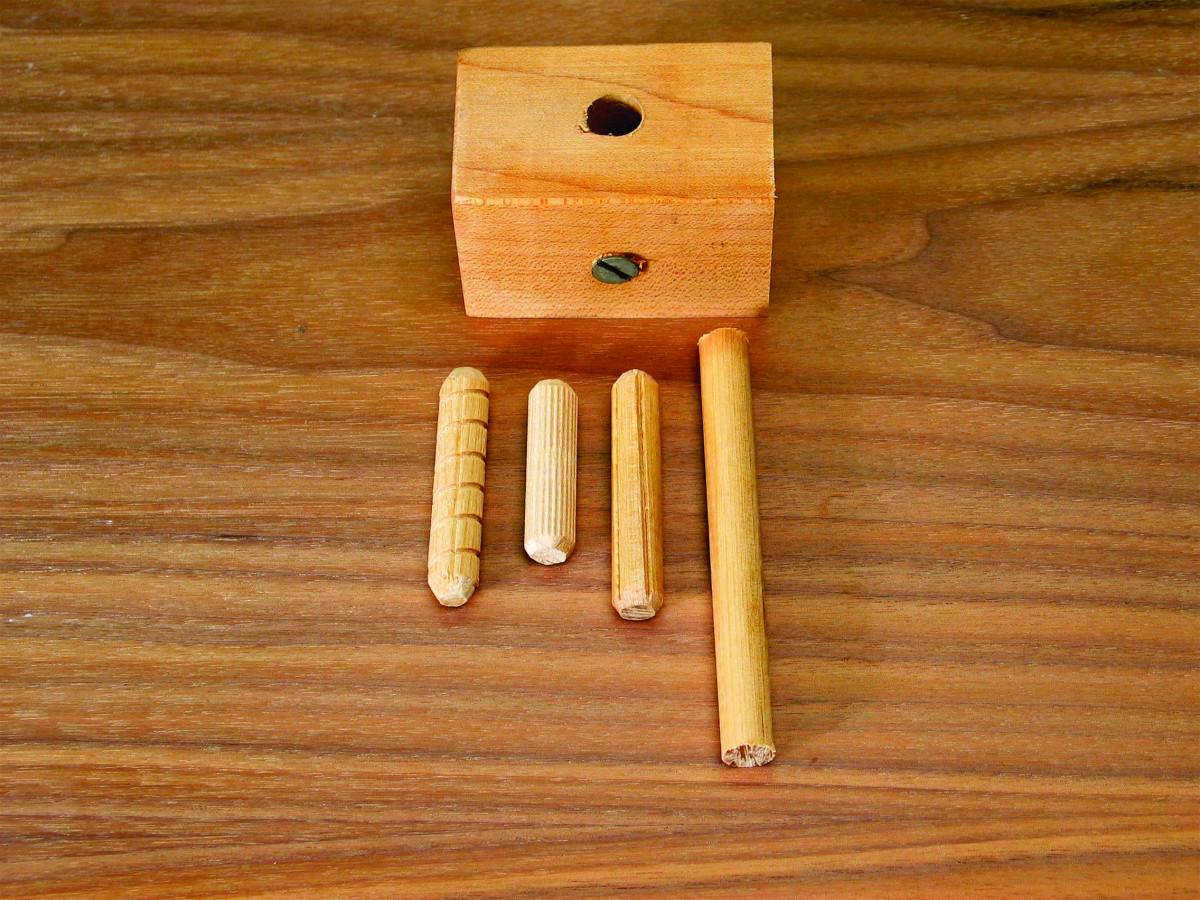
From the left are a spiral-grooved dowel, a straight-grooved dowel, a dowel pin cut from a maple dowel rod and a smooth surface maple dowel rod. Spiral-grooved dowels are the best because they provide plenty of glue surface together with grooves that allow excess glue to escape from the hole. Straight-grooved dowels are weak because they don’t provide enough glue surface. To groove dowel pins cut from a dowel rod, drive the pins through a hole drilled in a hardwood block with a screw inserted so it protrudes about 1⁄32″ into the hole. Be aware that machined dowels and holes often differ slightly in dimension so you may need to make some adjustments.
It’s usually best to insert new dowels into the rails first. In other words, into the parallel part before the perpendicular. It won’t matter if the dowel taps out at the bottom of the parallel hole, but you want to leave at least 1⁄32” at the bottom of the perpendicular hole to allow for cross-grain shrinkage. If you don’t, the leg might split.
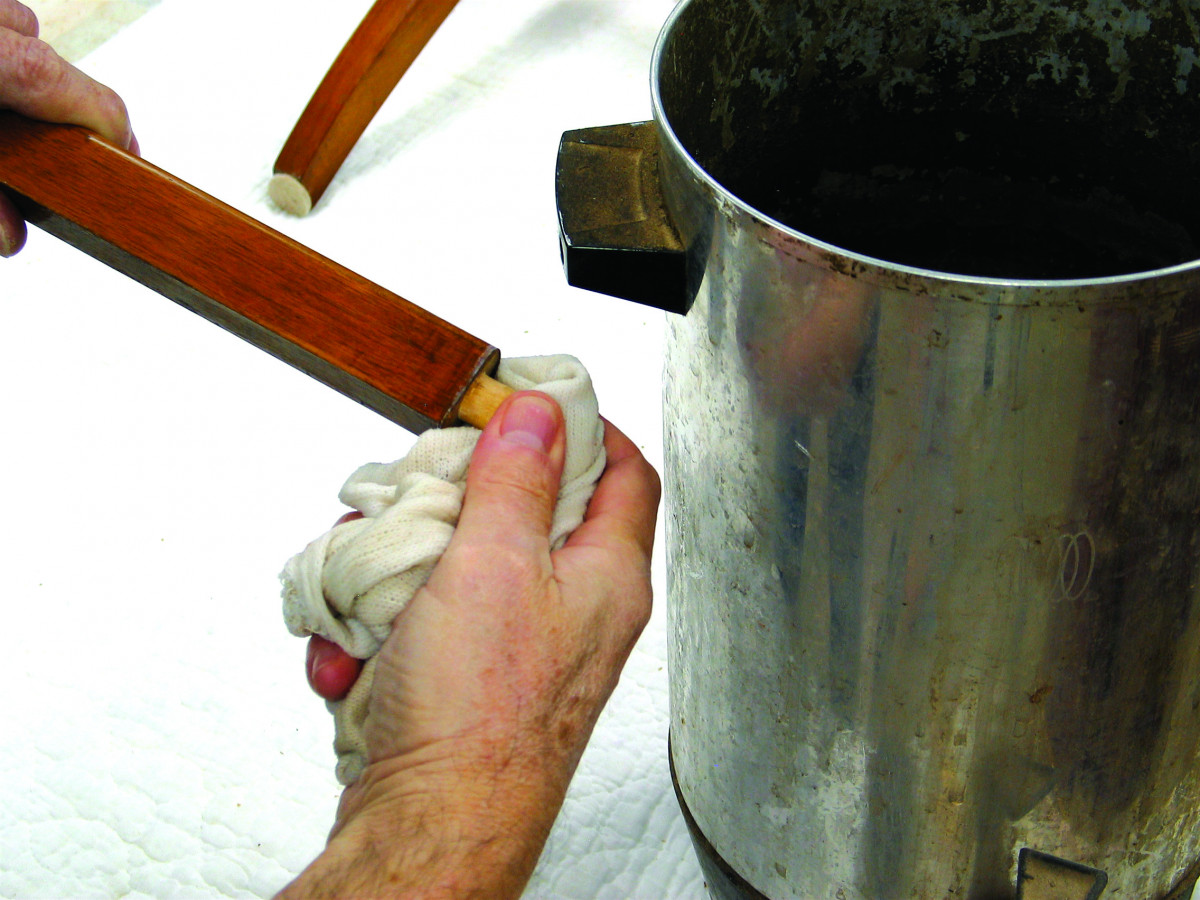
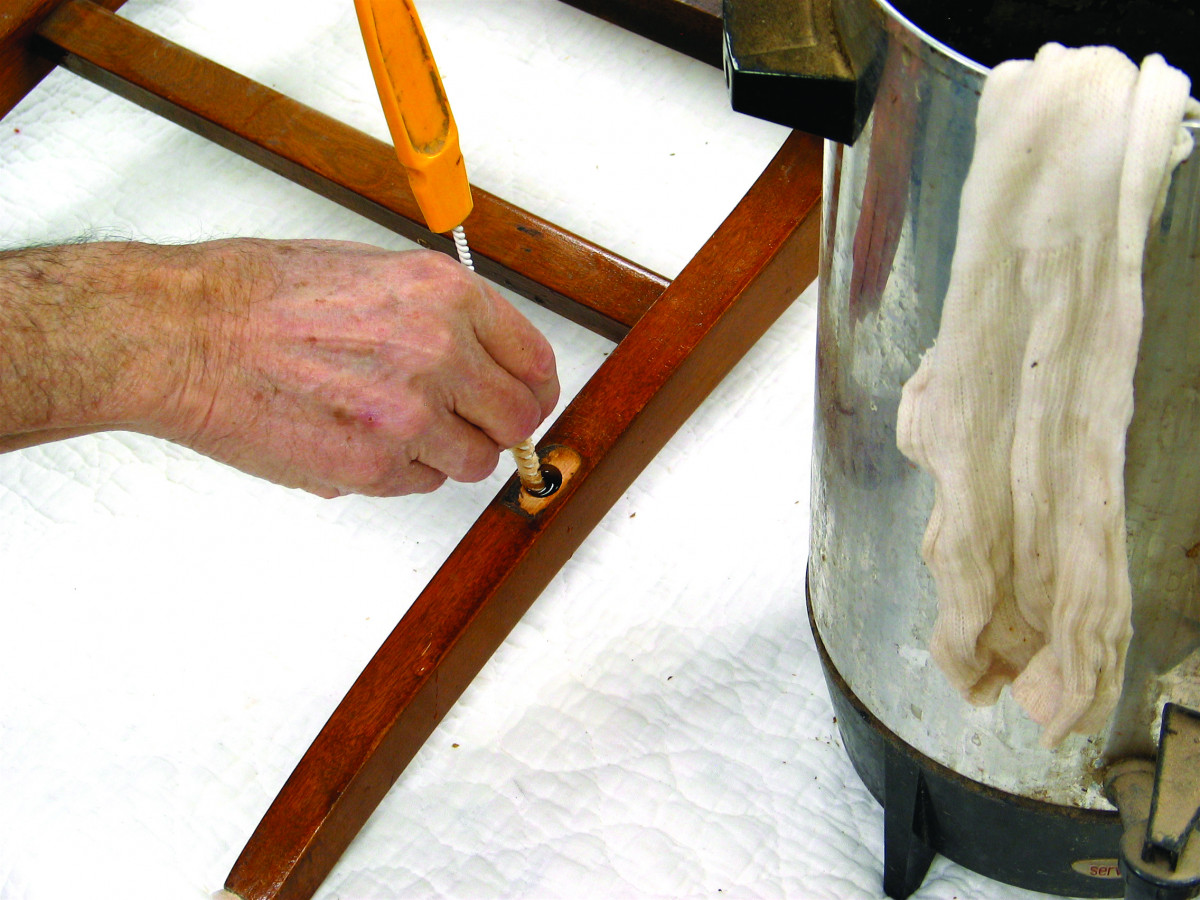
Hide glue is easy to clean from joints. Simply wash or scrub it off with hot water. For hot water in my shop, I use a commercial coffee maker I bought used at a yard sale. To clean white or yellow glue, you may need to scrub using hot water and a stainless-steel scrubbing pad from the supermarket. For adhesives that don’t soften in water, you will need to scrape or rasp them off the wood.
 You may need to trim dowels to the proper length before inserting them into the legs.
All surfaces should be coated with glue. This means the sides of both the holes and the dowels. It’s easiest to do this with a narrow brush, working out of a glass or plastic container.
When clamping the chair back and chair front, it’s important that the parts be square. You can check this by measuring the diagonals – that is, from the top of one leg to the bottom of the other. The two diagonals should be the same. If they aren’t, adjust your clamps at angles to make them so. Look at the photo on the first page of this article to see an example. I’m lowering the front leg by raising the clamp on it and lowering the clamp on the back leg. I’ve done the opposite on the far side. I have exaggerated the angles so you can see them better.
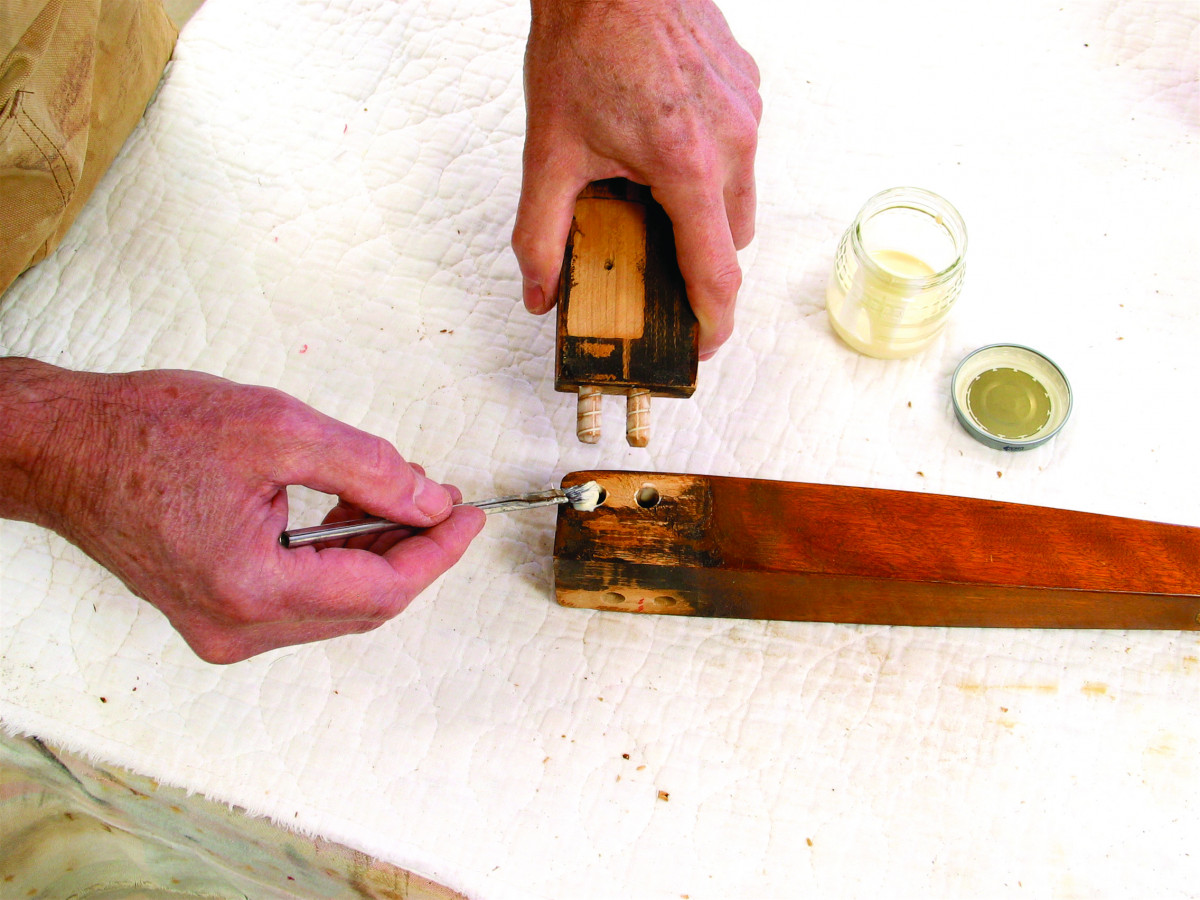
Apply glue to both the dowels and the holes before putting them together. The only way to do this efficiently is with a brush.
When clamping the front to the back, it’s important that all four legs touch a flat surface so the chair doesn’t rock. With the clamps on the chair, place it on a flat surface such as a table, floor or table saw. Adjust the clamps if necessary by raising and lowering opposite sides until the chair doesn’t rock. .
Here are some supplies and tools we find essential in our everyday work around the shop. We may receive a commission from sales referred by our links; however, we have carefully selected these products for their usefulness and quality.


